
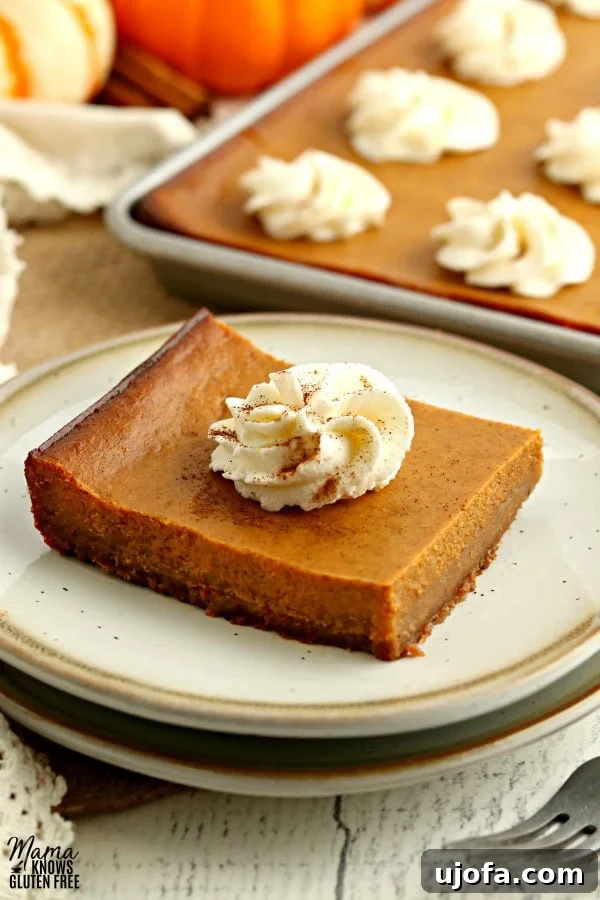
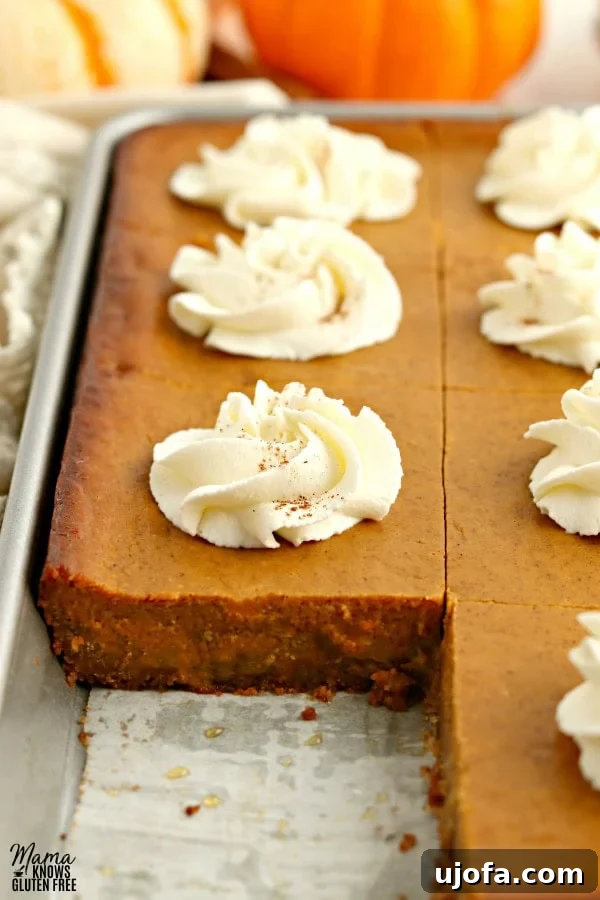
Embrace the flavors of autumn with these delightful Gluten-Free Pumpkin Pie Bars, a convenient and crowd-pleasing twist on the classic pumpkin pie. Featuring a buttery, crunchy gluten-free graham cracker crust and a luscious, spiced pumpkin filling, these bars capture all the beloved tastes of the season in an easy-to-serve format. Whether you’re navigating dietary restrictions or simply looking for a simplified baking experience, this recipe also thoughtfully includes a dairy-free option, ensuring everyone can enjoy a slice of fall bliss.
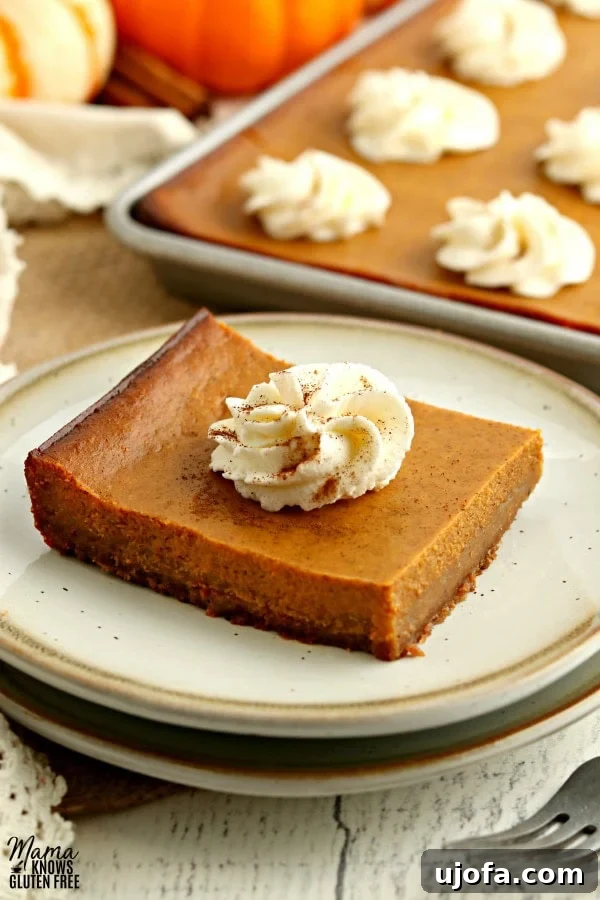
Indulge in the Best Gluten-Free Pumpkin Pie Bars This Season
Thanksgiving gatherings and festive holiday parties often call for a show-stopping dessert, and traditional pumpkin pie has long held its place as a perennial favorite. However, when catering to various dietary needs, preparing a classic pie can sometimes present a challenge. That’s why these Gluten-Free Pumpkin Pie Bars are an absolute game-changer. They embody all the rich, comforting flavors of your favorite Gluten-Free Pumpkin Pie but in an incredibly versatile and effortless bar form.
Unlike my traditional pumpkin pie, which often features a crust made with gluten-free Chex cereal, this recipe elevates the experience with a simple yet utterly irresistible gluten-free graham cracker crust. The sweet, buttery crunch of the graham crackers perfectly complements the smooth, creamy pumpkin filling, creating a harmonious blend of textures and tastes that’s ideal for any celebration. These bars are designed for convenience, making them your go-to dessert for potlucks, family dinners, or simply a cozy evening at home.
The beauty of a graham cracker crust lies in its simplicity. No rolling, no intricate crimping, just a few ingredients pulsed together and pressed into a pan. This ease significantly cuts down on prep time, allowing you to focus on creating the rich pumpkin filling. The result is a dessert that looks impressive, tastes incredible, and requires minimal fuss – a true holiday hero!
Mastering Gluten-Free Pumpkin Pie Bars: A Step-by-Step Guide
Crafting Your Flawless Gluten-Free Graham Cracker Crust
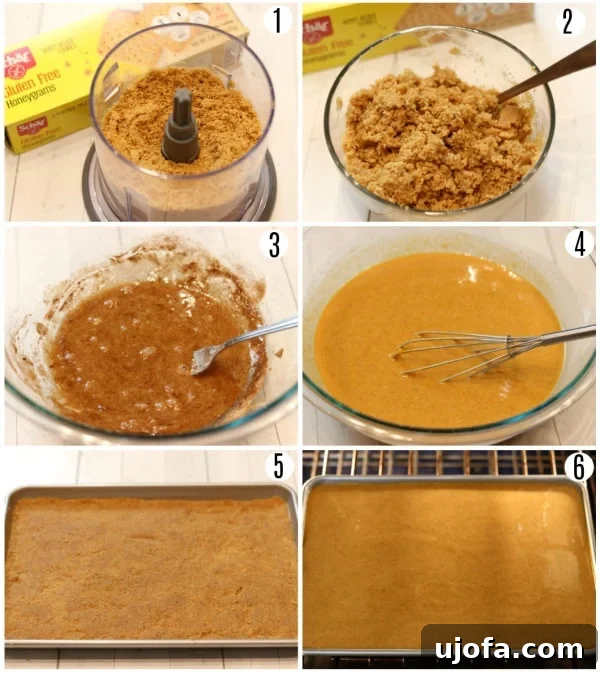
A great dessert bar begins with a phenomenal crust, and our gluten-free graham cracker crust provides the perfect foundation for these pumpkin delights. Its slightly sweet, crunchy texture is the ideal contrast to the soft filling. Here’s how to create it:
- Begin by preheating your oven to 375°F (190°C). This ensures your crust bakes evenly and becomes perfectly golden.
- For the crumbs, take two boxes of gluten-free graham crackers, such as Schär Honeygrams, and place them into a food processor. Pulse them until they are transformed into fine, uniform crumbs. You should aim for approximately 2 ½ cups of crumbs. This fine consistency helps the crust hold together beautifully.
- Transfer the graham cracker crumbs into a medium-sized mixing bowl. Add the granulated sugar and the melted butter (or your chosen dairy-free butter alternative). Stir the mixture thoroughly until all the crumbs are evenly coated and the mixture begins to resemble wet sand or coarse crumbs.
- Prepare a 9×13-inch baking sheet (often called a quarter sheet pan) by lining it with parchment paper. This crucial step prevents sticking and makes lifting the cooled bars out of the pan incredibly easy. Pour the graham cracker mixture into the bottom of the prepared pan.
- Using the bottom of a flat-bottomed glass or your clean hands, firmly press the crumbs into an even layer across the entire bottom of the pan. Ensure it’s compact and uniform, as this will create a sturdy base.
- Place the pan on the middle rack of your preheated oven and bake for 10 minutes at 375°F (190°C). This brief bake helps to set the crust, making it crisp and flavorful before the filling is added.
Whipping Up the Creamy Gluten-Free Pumpkin Pie Filling
The heart of these bars is a rich, creamy pumpkin filling, infused with warm spices that evoke the true essence of autumn. Achieving the perfect consistency and flavor is simpler than you think:
- In a large mixing bowl, beat the eggs and sugar together until the mixture is light, fluffy, and well combined. This aeration helps create a smoother, more tender filling.
- Next, incorporate the cinnamon, pumpkin pie spice, and pure vanilla extract. Mix until these fragrant spices and vanilla are fully distributed, ensuring every bite is bursting with flavor.
- Add the canned pumpkin puree (make sure it’s 100% pumpkin, not pumpkin pie filling, which contains added spices and sugar). Mix thoroughly until the pumpkin is smoothly integrated into the egg and spice mixture.
- Stir in the evaporated milk. Mix gently until the entire filling is homogenous and creamy. For a dairy-free option, substitute 1 cup of full-fat canned coconut milk (not light coconut milk) in place of the evaporated milk. The full-fat variety provides the necessary richness and creaminess.
- Once the crust is out of the oven and slightly cooled, carefully pour the prepared pumpkin pie filling evenly over the warm graham cracker crust. Spread it gently with a spatula to ensure an even layer.
- Return the pan to the middle rack of your oven and bake for 40 to 50 minutes. The bars are ready when the center is mostly set and no longer visibly jiggles when the pan is gently shaken. A knife inserted near the center should come out clean.
- Allow the pumpkin pie bars to cool completely on a wire rack at room temperature before attempting to slice them. Cooling is crucial for the bars to set properly. Once cooled, you can slice them into individual portions and top with a dollop of whipped cream (dairy or dairy-free) before serving. Enjoy!
- Store any leftover bars in an airtight container or cover the pan tightly with plastic wrap and refrigerate. They taste even better the next day!
Choosing the Best Pan for Your Pumpkin Bars
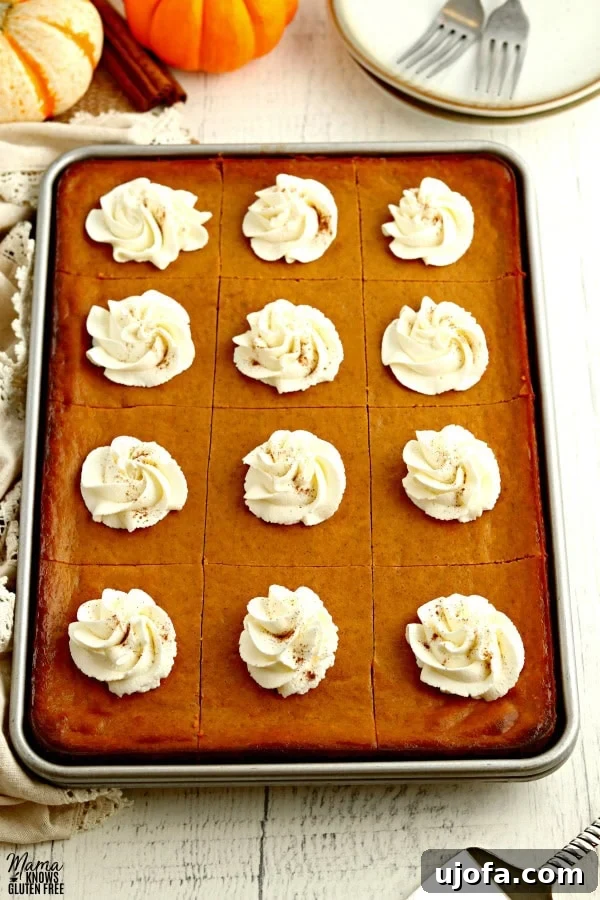
The right baking vessel can make all the difference in the success and ease of serving your pumpkin pie bars. For this recipe, I highly recommend using a standard 9×13-inch baking pan, commonly referred to as a quarter sheet pan. This size is perfect for creating a moderate thickness in the bars, ensuring a good crust-to-filling ratio, and yields a generous quantity ideal for sharing.
Using a baking sheet with low sides is particularly advantageous because it makes cutting and serving the bars incredibly simple. Once the bars are completely cooled, you can easily lift the entire slab out by the parchment paper, transfer it to a cutting board, and slice it into neat, uniform pieces. If you don’t have a baking sheet, a traditional 9×13-inch baking dish will also work beautifully. Just be sure to line the baking dish with parchment paper as well, extending it over the sides to create “handles” for easy removal.
Can I Make These Gluten-Free Pumpkin Pie Bars Ahead of Time?
Absolutely! These gluten-free pumpkin pie bars are a fantastic make-ahead dessert, which makes them perfect for busy holiday preparations. In fact, many people find that the flavors deepen and meld beautifully after a day or two in the refrigerator, making them taste even better.
To prepare them in advance, simply bake the bars according to the instructions and allow them to cool completely at room temperature. Once cooled, cover the entire pan tightly with plastic wrap or aluminum foil. Do not slice the bars before refrigerating, as this helps to maintain their moisture and freshness. Store them in the refrigerator for up to 3-4 days. When you’re ready to serve, simply remove the pan from the refrigerator, slice the bars into your desired portions, and enjoy!
Freezing Your Gluten-Free Pumpkin Pie Bars for Future Enjoyment
One of the best features of these gluten-free pumpkin bars is how wonderfully they freeze, allowing you to enjoy a taste of fall anytime inspiration strikes. Freezing them is a simple process, perfect for meal prepping desserts or saving leftovers.
Once the baked bars have cooled completely, you can choose to freeze them as an entire slab or individual portions. For individual servings, slice the bars first. Wrap each bar (or the entire slab) tightly in plastic wrap, then an additional layer of aluminum foil. This double wrapping helps to prevent freezer burn and keeps them fresh. Place the wrapped bars into a freezer-safe bag or an airtight container.
When you’re ready to enjoy them, transfer the frozen pumpkin bars to the refrigerator and allow them to defrost overnight. This slow thawing process ensures they maintain their texture and flavor. Once thawed, they’re ready to be served, perhaps with a fresh dollop of whipped cream or a sprinkle of cinnamon. They will keep well in the freezer for up to 1-2 months.
Making Your Pumpkin Pie Bars Gluten-Free and Dairy-Free
In today’s diverse culinary landscape, accommodating various dietary needs is more important than ever. I understand this firsthand, as my husband, youngest son, and I all follow a dairy-free diet. This personal experience drives me to ensure that my recipes are inclusive, offering delicious options for everyone. These Gluten-Free Pumpkin Pie Bars are no exception, featuring a simple and effective dairy-free adaptation.
The key to the dairy-free pumpkin pie filling lies in the choice of milk. Instead of traditional evaporated milk, we use full-fat canned coconut milk. It’s crucial to select full-fat coconut milk (often found in the international foods aisle, not the refrigerated beverage section) as its rich, creamy consistency is essential for replicating the luxurious texture of conventional pumpkin pie filling. Light coconut milk simply won’t yield the same luscious results.
For the crust, the choice of gluten-free graham crackers is paramount. Brands like Schär’s Honeygrams are an excellent option not only because they are certified gluten-free but also because they are lactose-free, making them suitable for many with dairy sensitivities. When it comes to the butter in the crust, Smart Balance butter substitute or any other high-quality dairy-free butter alternative works perfectly to bind the crumbs and provide that classic buttery flavor without the dairy. Always remember to check labels for all ingredients to ensure they meet your specific dietary requirements.
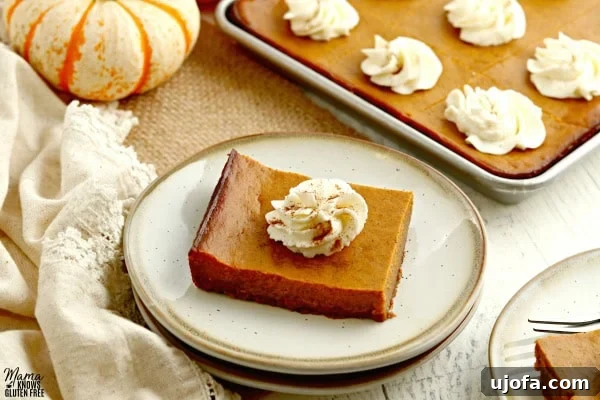
You are going to absolutely adore how incredibly easy and satisfying these gluten-free pumpkin pie bars are to create! They are the epitome of convenience and flavor, making them the perfect dessert for feeding a crowd during the bustling holiday season or simply for treating your family to a taste of autumnal comfort.
Imagine everything you cherish about a traditional pumpkin pie—the warm spices, the creamy texture, the sweet crust—all transformed into an approachable, elegant, and easy-to-handle gluten-free dessert bar. They truly offer the best of both worlds: classic flavor with modern ease.
More Delicious Gluten-Free Pumpkin Recipes to Explore!
If you’ve fallen in love with the comforting flavors of pumpkin, there’s a whole world of gluten-free pumpkin recipes waiting for you to discover. Expand your autumnal baking repertoire with these fantastic ideas:
- Gluten-Free Pumpkin Pancakes: Start your day with a festive, fluffy breakfast treat.
- Gluten-Free Pumpkin Roll: An impressive yet manageable dessert, perfect for special occasions.
- Gluten-Free Pumpkin Bread: A moist and flavorful quick bread that’s ideal for snacking or gifting.
- Almond Flour Pumpkin Bread: A delightful, grain-free option for those looking for an alternative flour.
Gluten-Free Pumpkin Pie Bars {Dairy-Free Option}
Gluten-Free Pumpkin Pie bars offer all your favorite pumpkin pie flavors, made easy with a gluten-free graham cracker crust. This versatile recipe also includes a dairy-free option, perfect for all your holiday gatherings.
Ingredients
Crust
- 2 1/2 cups gluten-free graham cracker crumbs (I like Schär Honeygrams)
- 1/2 cup granulated sugar
- 3/4 cup unsalted butter, melted (for dairy-free, use Smart Balance butter or other dairy-free butter)
Filling
- 1 15-ounce can pumpkin puree (not pumpkin pie filling)
- 2 large eggs
- 1 12 oz. can evaporated milk (for dairy-free, use 1 1/2 cups of full-fat canned coconut milk)
- 3/4 cup sugar
- 1 tablespoon pumpkin pie spice
- 1 teaspoon ground cinnamon
- 1 teaspoon pure vanilla extract
Instructions
Crust
- Preheat the oven to 375°F (190°C).
- To prepare the graham cracker crust, place 2 packages of Schär Honeygrams into a food processor and pulse until they become fine crumbs.
- Pour the graham cracker crumbs into a medium-sized bowl. Add the granulated sugar and melted butter (or dairy-free butter) to the crumbs and stir until the mixture is well combined and crumbly.
- Line a 9×13-inch baking sheet (or quarter sheet pan) with parchment paper, allowing it to hang over the edges for easy removal. Press the graham cracker mixture firmly and evenly into the bottom of the pan to form the crust.
- Place the pan on the middle rack of the preheated oven and bake for 10 minutes at 375°F (190°C).
Filling
- In a large mixing bowl, beat the eggs and sugar together until light and fluffy.
- Add the cinnamon, pumpkin pie spice, and vanilla extract. Mix until all ingredients are fully combined.
- Stir in the canned pumpkin puree and mix again until smoothly incorporated.
- Add the evaporated milk (or 1 1/2 cups of full-fat canned coconut milk for dairy-free) and mix until the filling is homogenous and creamy.
- Remove the partially baked crust from the oven and carefully pour the pumpkin pie filling evenly over it.
- Return the pan to the middle rack of the oven and bake for 40 to 50 minutes, or until the center of the pie filling no longer jiggles when gently shaken.
- Allow the bars to cool completely at room temperature before slicing and serving. For best results, chill in the refrigerator for at least 2 hours before cutting. Top with whipped cream (dairy or dairy-free) and enjoy!
- Store any leftover bars in an airtight container or cover them tightly with plastic wrap and refrigerate for up to 3-4 days.
Baker’s Notes for Optimal Results
- For the dairy-free option, ensure you use full-fat canned coconut milk (not light) for the filling to achieve the desired richness and consistency. Schär Honeygrams are a great choice for the crust as they are gluten-free and lactose-free.
- Always check all ingredient labels to ensure they meet your gluten-free and/or dairy-free dietary requirements.
- Proper cooling is essential for neat slices. If you’re in a hurry, you can place the cooled bars in the refrigerator for a couple of hours to help them firm up before cutting.
Nutrition Information (Approximate)
Serving: 1 bar
- Calories: 326.11 kcal
- Carbohydrates: 40.91 g
- Protein: 5.07 g
- Fat: 16.5 g
- Saturated Fat: 9.26 g
- Cholesterol: 74.16 mg
- Sodium: 165.24 mg
- Potassium: 221.62 mg
- Fiber: 1.85 g
- Sugar: 29.28 g
- Vitamin A: 6357 IU
- Vitamin C: 2.29 mg
- Calcium: 117.54 mg
- Iron: 1.57 mg
Nutrition information is automatically calculated and should only be used as an approximation. Individual results may vary based on specific ingredients and preparation methods.
Additional Info
Course: Dessert
Cuisine: American