
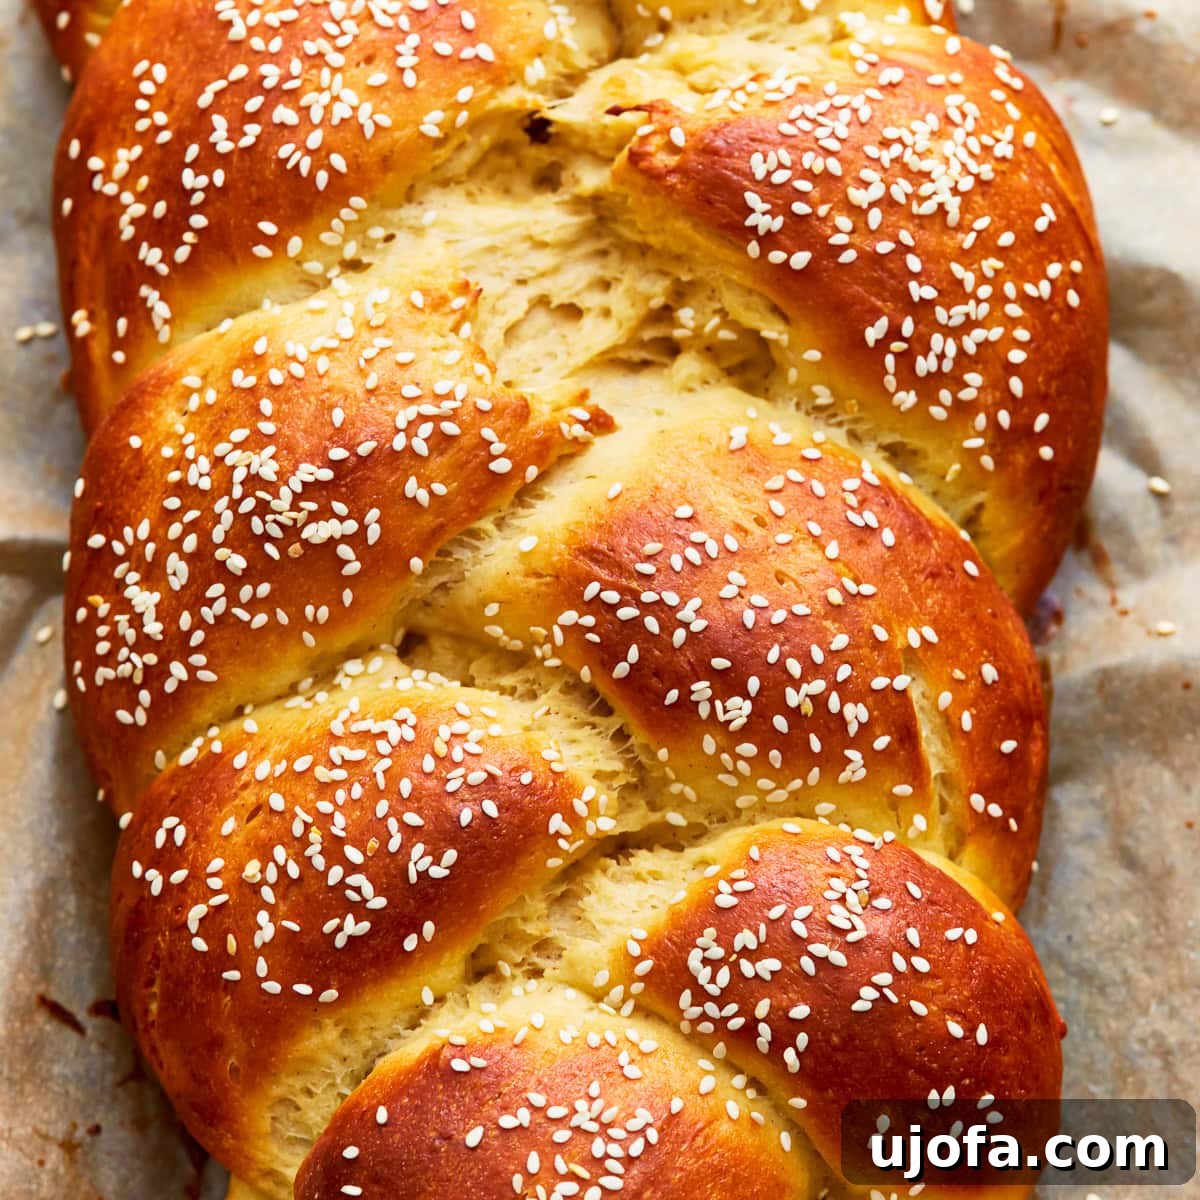
Discover the joy of freshly baked challah, now made accessible for everyone with our incredible gluten-free and dairy-free challah bread recipe. This easy-to-follow guide ensures you can create a loaf that is beautifully soft, remarkably easy to braid, and boasts that signature golden, slightly sweet crust you adore in traditional challah. No need for special molded loaf pans; we’ll show you how to effortlessly braid this magnificent dough right on a regular baking sheet. It holds its shape perfectly and bakes to golden perfection. Crafted with simple, readily available ingredients, this recipe is designed for bakers of all skill levels, ensuring a rewarding baking experience every time. Plus, it’s completely dairy-free and effortlessly adaptable for kosher diets, making it a versatile staple for any occasion, from holiday feasts to everyday enjoyment.
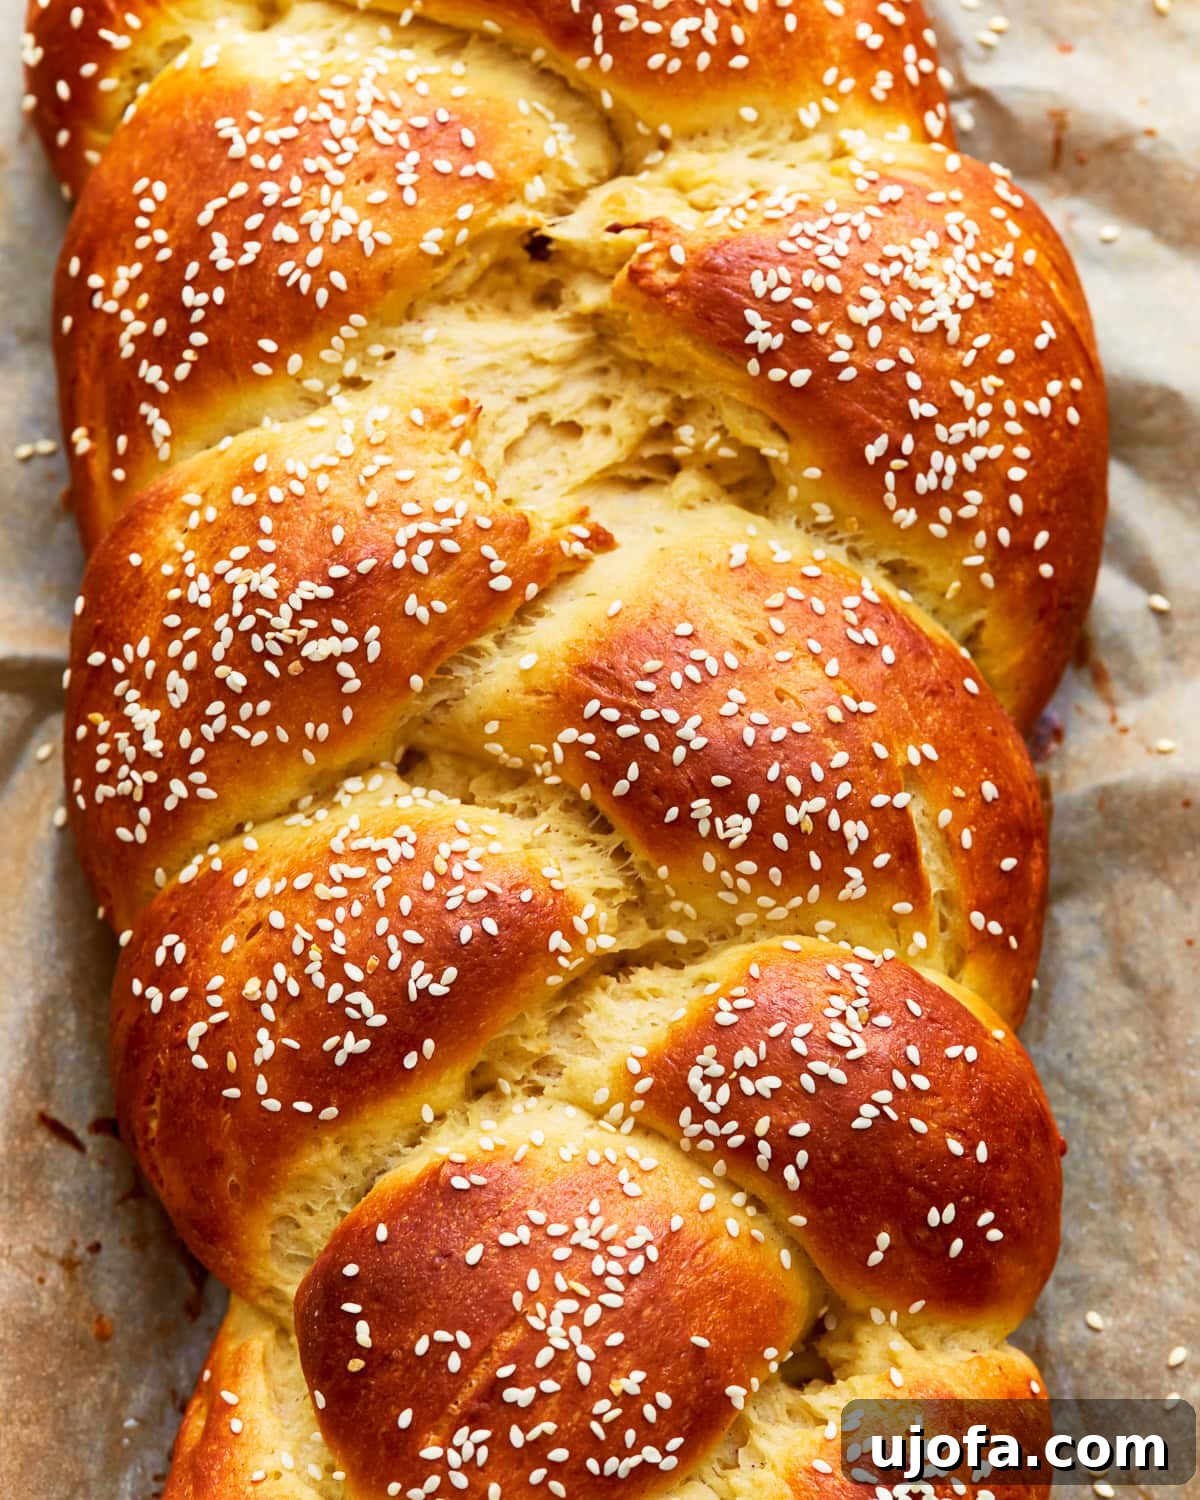
Ultimate Gluten-Free Challah Bread: Soft, Braided & Dairy-Free!
What is Challah Bread? A Culinary Tradition
Challah, pronounced ‘Hah-lah,’ is an iconic braided bread deeply rooted in Jewish culinary tradition. Traditionally savored on Shabbat and Jewish holidays, its rich, egg-based dough and often sweet flavor have made it a beloved staple far beyond its cultural origins. While classic challah typically relies on wheat flour for its characteristic texture and elasticity, this recipe revolutionizes the classic by offering a truly delightful gluten-free version. Our unique blend of gluten-free flour and tapioca starch expertly mimics the structure and chewiness of traditional challah, ensuring no one misses out on this exquisite bread. Unlike some other enriched breads, such as a rich gluten-free brioche, our recipe also maintains a completely dairy-free profile, making it suitable for a wider range of dietary needs and kosher observance when paired with meat dishes.
Why You’ll Love This Gluten-Free Challah Recipe
Crafting gluten-free bread can sometimes be challenging, but this challah recipe is designed for success. We’ve perfected a method that yields a dough that’s pliable enough for intricate braiding, yet robust enough to maintain its beautiful shape during baking. You don’t need to be an expert baker to achieve a show-stopping loaf. Here’s why this recipe will become your go-to:
- Effortless Braiding: Our dough is formulated to be cooperative, making the braiding process simple and enjoyable, even for beginners.
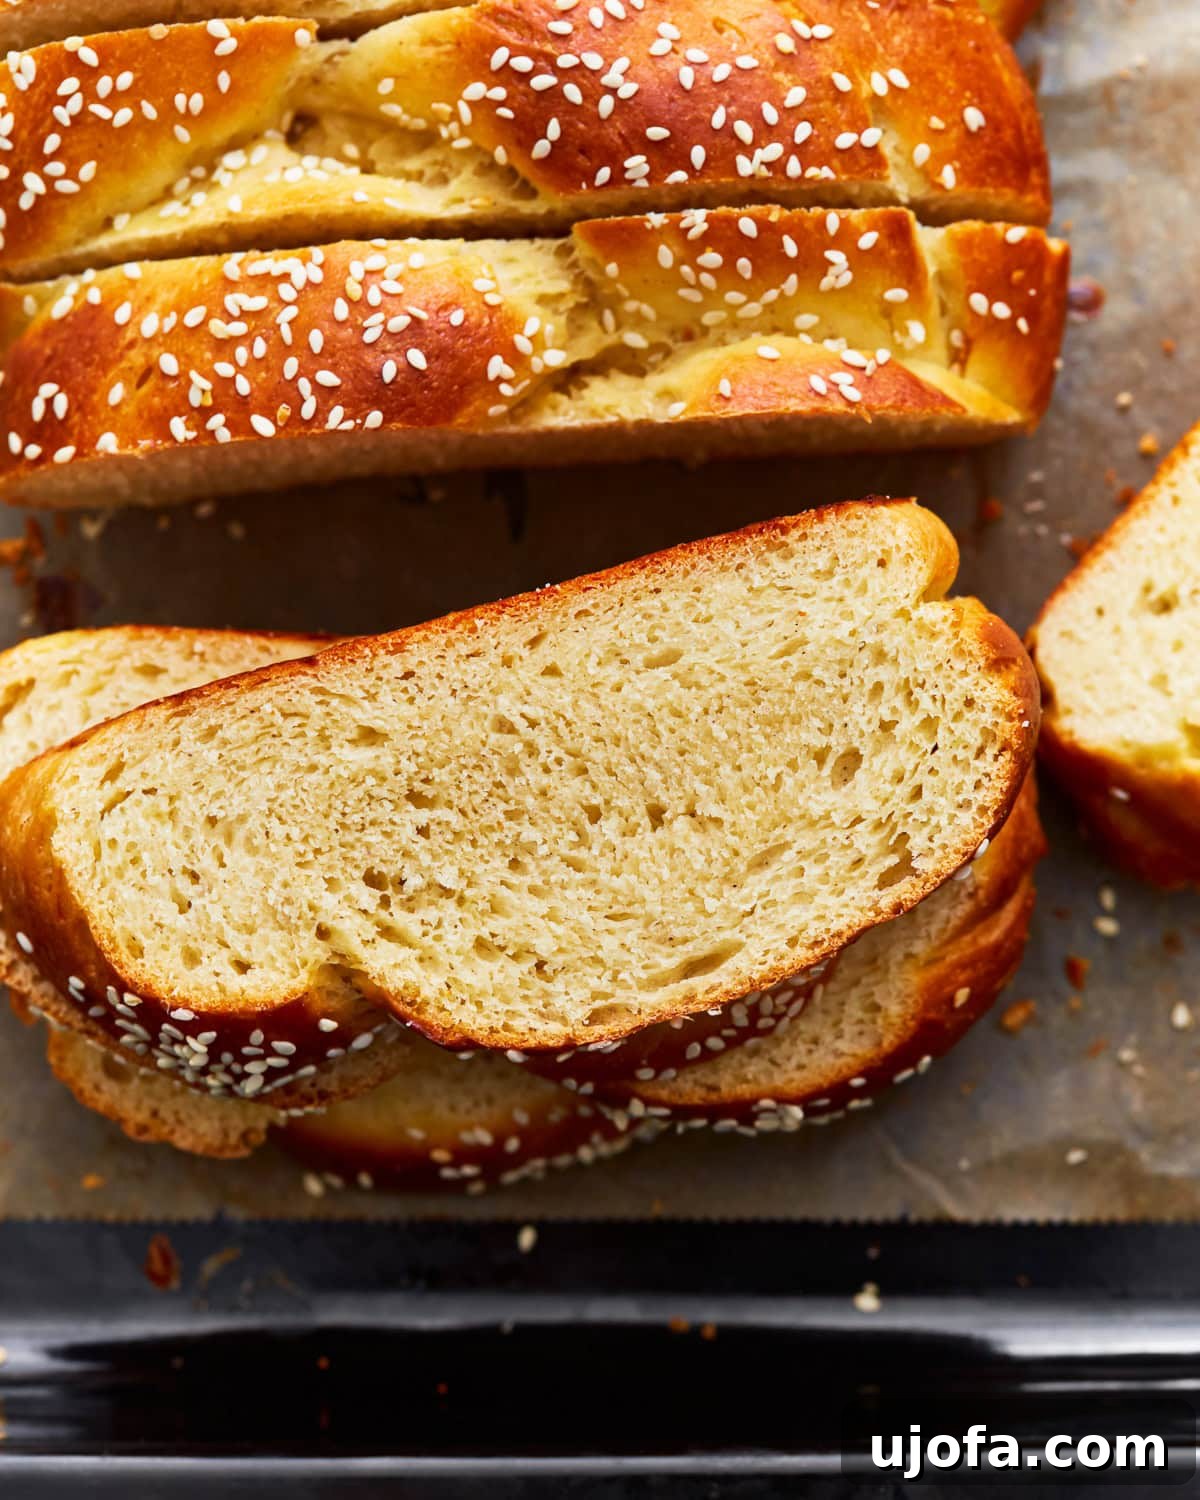
- Perfect Texture Every Time: Expect a remarkably soft interior with a delightful chew, complemented by a gorgeous, slightly sweet golden crust.
- Dairy-Free & Kosher-Friendly: Ideal for those with dairy sensitivities or following kosher dietary laws, this challah is versatile for any meal.
- Simple, Accessible Ingredients: You won’t need to hunt for exotic items; all ingredients are commonly found in most grocery stores.
- No Special Equipment Needed: Forget fancy molded pans; a standard baking sheet is all you need to bake this masterpiece.
Key Ingredients for Gluten-Free Challah Perfection
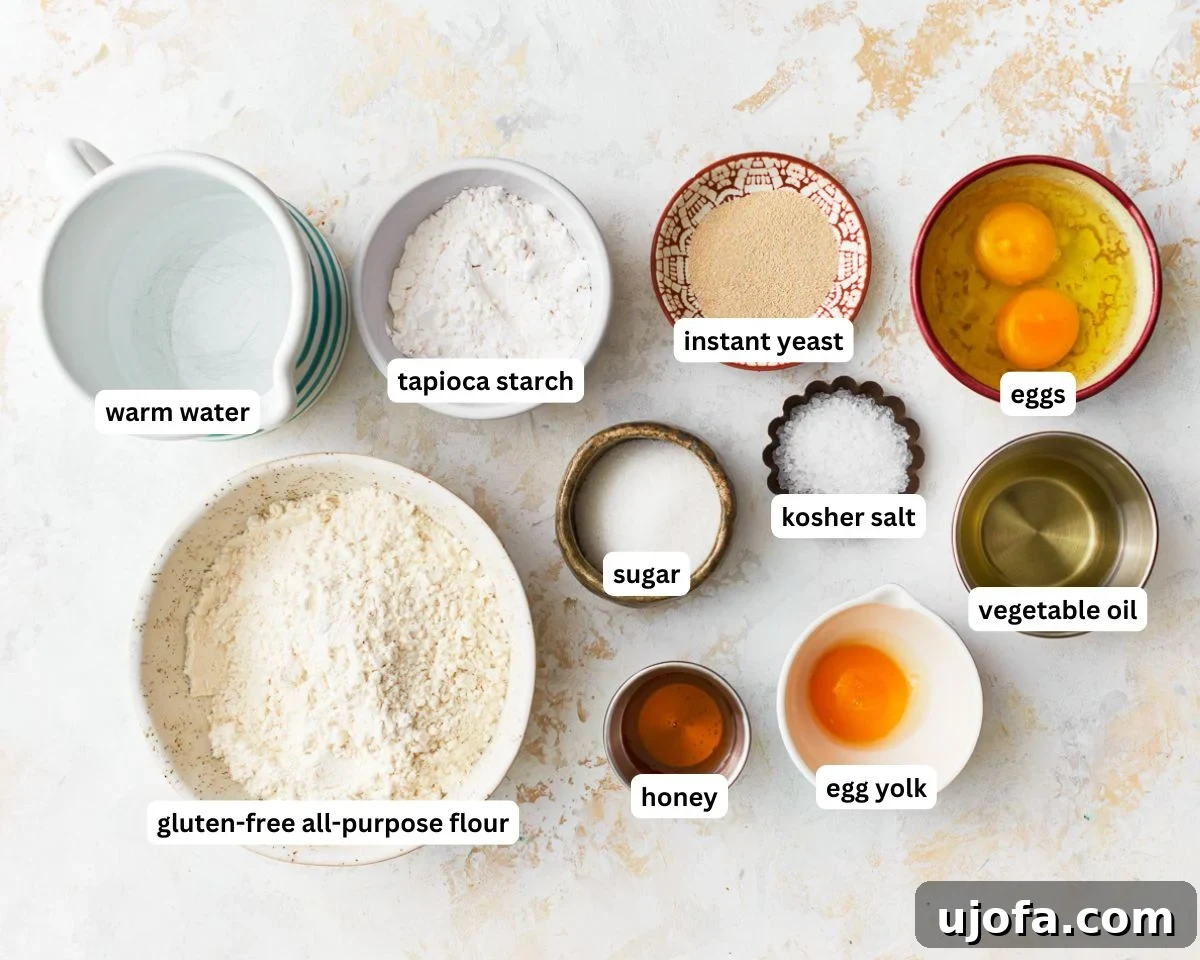
Each ingredient in this recipe plays a crucial role in achieving the perfect gluten-free challah. Understanding their functions will help you master this delicious bread.
- Gluten-Free All-Purpose Flour with Xanthan Gum: Choosing the right gluten-free flour blend is paramount. Opt for an all-purpose blend specifically designed for yeast baking, as these often contain a balanced mix of starches and flours. Ensure your blend includes xanthan gum, which is crucial for providing structure and elasticity in gluten-free baking, compensating for the lack of gluten. If your chosen blend doesn’t contain xanthan gum, add 1 teaspoon as directed in the recipe to achieve the desired texture and prevent crumbling.
- Tapioca Starch: This essential starch plays a vital role in gluten-free baking, contributing to the bread’s characteristic chewiness and helping to bind the dough, resulting in a lighter, airier crumb that’s not dense or gummy.
- Sugar: Beyond adding a gentle sweetness that enhances challah’s flavor, sugar acts as a crucial food source for the yeast, helping it activate and produce the carbon dioxide necessary for a good rise.
- Instant Yeast: For convenience and consistent results, instant yeast is our preference as it can be directly mixed with dry ingredients without prior activation. If you opt for active dry yeast, remember to ‘proof’ it first: dissolve it in lukewarm water with a pinch of sugar and let it sit for about 10 minutes until a foamy layer forms, indicating it’s active and ready to use.
- Kosher Salt: A touch of kosher salt is vital for balancing the sweetness and enhancing the overall depth of flavor in the bread. It also helps regulate yeast activity.
- Eggs: Challah is an enriched bread, and eggs are central to its identity. They provide rich flavor, contribute to the golden color, and add significant structure and moisture to the dough. Using two large eggs and an additional egg yolk in the dough ensures richness and a beautiful crumb. Furthermore, an egg wash (one large egg mixed with water) brushed on top before baking creates that iconic shiny, golden-brown crust.
- Warm Water: The temperature of the water is key to waking up the yeast. It needs to be warm, not hot (around 105-115°F or 40-46°C), to properly activate the yeast without killing it, allowing the dough to rise effectively.
- Vegetable Oil: To keep this challah dairy-free while maintaining a moist and tender crumb, vegetable oil is used instead of butter. It adds richness and helps keep the bread from drying out, contributing to its soft texture.
- Honey: Incorporating honey adds a nuanced, natural sweetness and a subtle depth of flavor that complements the other ingredients beautifully, contributing to a truly delicious loaf with a unique aroma.
- Sesame or Poppy Seeds (optional): These traditional toppings not only add visual appeal but also introduce a delightful nutty flavor and a slight textural contrast to the crust, making each bite even more enjoyable. They are a classic finish for challah.
Essential Tips for Gluten-Free Challah Success
Achieving a perfect gluten-free challah is simpler with these insights and techniques, ensuring your loaf turns out beautifully every time:
- Measure Flour Accurately: Always use the spoon and level method when measuring your gluten-free flour. Lightly spoon the flour into your measuring cup until overflowing, then use the straight edge of a knife to level it off. This precise method prevents over-packing, which can lead to a dry, dense, and crumbly loaf.
- Embrace Stickiness: Gluten-free dough is inherently stickier and wetter than traditional wheat dough. Don’t be alarmed; this is perfectly normal! Lightly oiling your hands before handling the dough will make it much easier to work with and prevent excessive sticking. A bench scraper can also be helpful for managing the dough.
- Don’t Skip the Chill: The refrigeration step after the first rise is non-negotiable. Chilling the dough solidifies the fats and starches, making the otherwise soft gluten-free dough firm enough to handle and braid without tearing or losing its shape. This step is a game-changer for gluten-free enriched doughs.
- Room Temperature Eggs Are Key: Ensure your eggs are at room temperature before adding them to the dough. Room temperature eggs incorporate more evenly into the mixture, leading to a smoother dough and a finer, more consistent bread texture. The extra egg yolk also significantly contributes to a richer flavor, a softer crumb, and enhanced browning.
- Parchment Paper is Your Friend: To avoid frustration with a sticky dough, lay a piece of parchment paper on your work surface before dividing and braiding. This not only prevents sticking to your countertop but also makes it incredibly easy to transfer the braided loaf directly to your baking sheet without disturbing its delicate shape.
- Patience with Rising Times: Gluten-free dough can sometimes take a little longer to rise compared to wheat dough, as yeast works differently without gluten structure. Be patient and allow both rises to complete fully. The dough should clearly double in size after the first rise and appear visibly puffed after the second. Rushing this process will result in a denser bread.
- The Power of Egg Wash: For that undeniably beautiful, shiny, golden crust, always brush your loaf generously with an egg wash before baking. It creates a professional-looking finish and adds a subtle richness to the exterior.
- Customize Your Loaf: Feel free to get creative! Incorporate delightful mix-ins like plump raisins, sweet chocolate chips, dried cranberries, or a hint of aromatic spices like cinnamon or nutmeg into the dough for a personalized touch. For toppings, consider toasted sunflower seeds, crunchy coarse sugar, or even everything bagel seasoning for a savory twist.
- Check Labels for Dietary Needs: If you’re adhering to strict gluten-free, dairy-free, or kosher dietary guidelines, always double-check the labels of all your ingredients to ensure they meet your specific requirements. Ingredients can vary by brand.
Can I Make This Recipe Without Eggs?
Replacing the eggs in this challah recipe is quite tricky, as it is an enriched dough where eggs provide crucial structure, moisture, and richness. While you could attempt using a flax egg (1 tablespoon flaxseed meal + 3 tablespoons water per egg) or a commercial egg replacer, please be aware that the texture, rise, and overall flavor of the challah may not be the same. Eggs are fundamental to challah’s characteristic softness and golden hue.
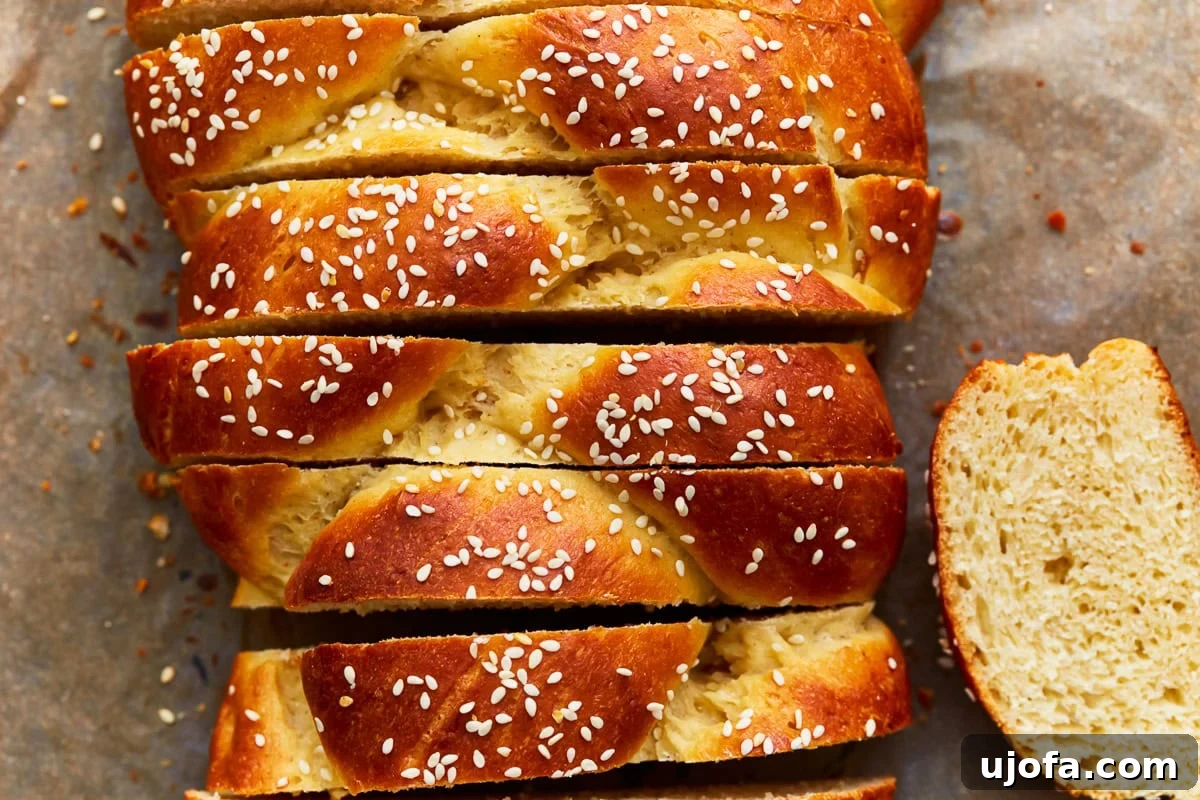
Can I Braid My Gluten-Free Challah in a Different Style?
Absolutely, you can! While a simple 3-strand braid offers classic elegance, the pliable nature of this gluten-free challah dough allows for various braiding styles. Feel free to experiment with more intricate 4, 5, or even 6-strand braids to create a visually stunning loaf. For holidays like Rosh Hashanah, you might even consider shaping the dough into a beautiful round challah, symbolizing the cycle of the year. Just keep in mind that more complex braiding methods or different shapes might slightly alter the baking time, so keep an eye on your oven.
Versatile Serving Suggestions for Your Challah
Your homemade gluten-free challah is incredibly versatile and can be enjoyed in countless ways, transforming simple meals into special moments. Its delicate sweetness and soft texture make it perfect for both sweet and savory applications.
- Sweet & Simple: Slice a warm piece and drizzle with local honey, rich maple syrup, or spread with your favorite fruit jam or marmalade.
- Savory Pairings: Its slightly sweet profile makes it an excellent accompaniment to savory dishes. Serve it alongside creamy hummus, a hearty lentil soup, a slow-cooked pot roast, or a flavorful vegetable stew.
- Kosher Meal Compatibility: Being dairy-free, this challah is perfectly suited to be served with meat dishes in a kosher meal, adhering to Jewish dietary laws without needing a separate pareve bread.
- Breakfast & Brunch Delights:
- Avocado Toast: Toast thick slices and top with mashed avocado, a sprinkle of red pepper flakes, and a squeeze of lime for an elevated, satisfying breakfast.
- French Toast or Bread Pudding: The rich, eggy texture of challah makes it the absolute best bread for making decadent gluten-free French toast or a comforting gluten-free bread pudding.
- Sweet Spreads: Enjoy toasted slices with peanut butter, almond butter, or your favorite gluten-free chocolate-hazelnut spread.
- Sandwich Base: While challah is typically a standalone bread, its tender crumb and subtle sweetness can make for a unique and delicious base for light sandwiches, especially with fresh vegetables, cream cheese (dairy or non-dairy), or cold cuts.
Storing Your Homemade Gluten-Free Challah
To keep your exquisite gluten-free challah fresh and flavorful for as long as possible, proper storage is essential. Gluten-free breads can sometimes dry out faster than traditional breads, so follow these tips:
- Room Temperature: Once completely cooled, store your challah in an airtight container or a tightly sealed bread bag at room temperature for up to 2 days. While still delicious, its texture will begin to dry out after this period, so it’s best enjoyed fresh.
- Freezing for Longevity: For longer storage, challah freezes exceptionally well. Once completely cooled, wrap the entire loaf or individual slices tightly in plastic wrap, ensuring no air exposure. Then, place them in a freezer-safe bag or aluminum foil. It can be stored in the freezer for up to 3 months without compromising quality or flavor.
- Thawing: When ready to enjoy, simply thaw the challah at room temperature. For a delightful, fresh-from-the-oven experience, you can gently reheat thawed slices in a toaster, a microwave, or a preheated oven (at 300°F/150°C for about 10 minutes) until warmed through.
Explore More Gluten-Free Bread Recipes
If you loved baking this challah, be sure to explore more of our delicious gluten-free bread creations!
- Homemade Gluten-Free Bread
- Gluten-Free Bread Machine Bread
- Gluten-Free Sweet Cornbread
- Gluten-Free Sourdough Bread
- Gluten-Free Dinner Rolls
Gluten-Free Challah Bread Recipe
By: Sabine Venier
Servings: 1 loaf
Prep Time: 20 mins
Cook Time: 35 mins
Rise & Chill Time: 2 hrs 45 mins
Total Time: 3 hrs 40 mins
Share by Email
Print Recipe
This easy gluten-free challah bread recipe is soft, easy to braid, and has a perfectly golden, slightly sweet crust. It’s also dairy-free!
Ingredients
- 2 ½ cups gluten-free all-purpose flour with xanthan gum (use a blend suitable for yeast baking)
- ½ cup tapioca starch
- 3 tablespoons sugar
- 2 teaspoons instant yeast
- 2 teaspoons kosher salt
- 2 large eggs, at room temperature
- 1 large egg yolk, at room temperature
- 1 cup water, lukewarm
- ¼ cup vegetable oil
- 2 tablespoons honey
- 1-2 tablespoons sesame or poppy seeds (optional)
Egg Wash
- 1 large egg
- 1 tablespoon water
Instructions
- In a large mixing bowl, whisk together the gluten-free all-purpose flour, tapioca starch, sugar, instant yeast, and kosher salt.
- Add the eggs, egg yolk, warm water, vegetable oil, and honey and mix using a stand mixer with a paddle attachment on medium speed until a sticky dough forms, about 5 minutes.
- Cover the bowl and let rise for about 45 minutes or until doubled. Then transfer to the fridge for 30 minutes.
- Lightly oil your hands and divide the dough into 3 equal portions. Roll each portion into a long strand, about 12-14 inches in length.
- Lay the three strands side by side on a parchment-lined baking sheet. Pinch the ends together at one end and braid the strands, tucking the other end underneath to secure.
- Cover the braided dough loosely with plastic wrap or a damp cloth, and let it rise in a warm place for 1 to 1 ½ hours, or until it has visibly puffed up.
- Preheat your oven to 350°F (175°C).
- In a small bowl, whisk together the egg and water for the egg wash. Gently brush the top of the risen dough with the egg wash. If desired, sprinkle sesame or poppy seeds over the top.
- Bake in the preheated oven for 20-25 minutes, or until the bread is golden brown and sounds hollow when tapped on the bottom.
- Let it cool on a wire rack before slicing and serving. Enjoy.
Notes
- Add 1 teaspoon of xanthan gum if your gluten-free flour blend doesn’t contain it. Mix it in with the other dry ingredients in step 1.
- Use the spoon & level method to measure your gluten-free flour. Spoon the flour into your measuring cups and level it off with a knife.
- To Store: Keep in an airtight container at room temperature for up to 2 days.
- To Freeze: Wrap the whole loaf or individual slices in plastic wrap and freeze for up to 3 months. Thaw at room temperature.
- Always ensure all ingredients are certified gluten-free, dairy-free, and kosher if needed.
- The nutritional information includes 2 tablespoons of sesame seeds (optional).
Nutrition Information
- Serving: 1 loaf
- Calories: 2386 kcal
- Carbohydrates: 356 g
- Protein: 65 g
- Fat: 93 g
- Saturated Fat: 16 g
- Polyunsaturated Fat: 40 g
- Monounsaturated Fat: 26 g
- Trans Fat: 0.4 g
- Cholesterol: 742 mg
- Sodium: 4901 mg
- Potassium: 565 mg
- Fiber: 39 g
- Sugar: 81 g
- Vitamin A: 1057 IU
- Vitamin C: 0.3 mg
- Calcium: 482 mg
- Iron: 18 mg
Nutrition information is automatically calculated, so should only be used as an approximation.
Additional Information
- Course: Baking, Side Dish
- Cuisine: Jewish
How to Make Gluten-Free Challah Bread Step-by-Step (Visual Guide)
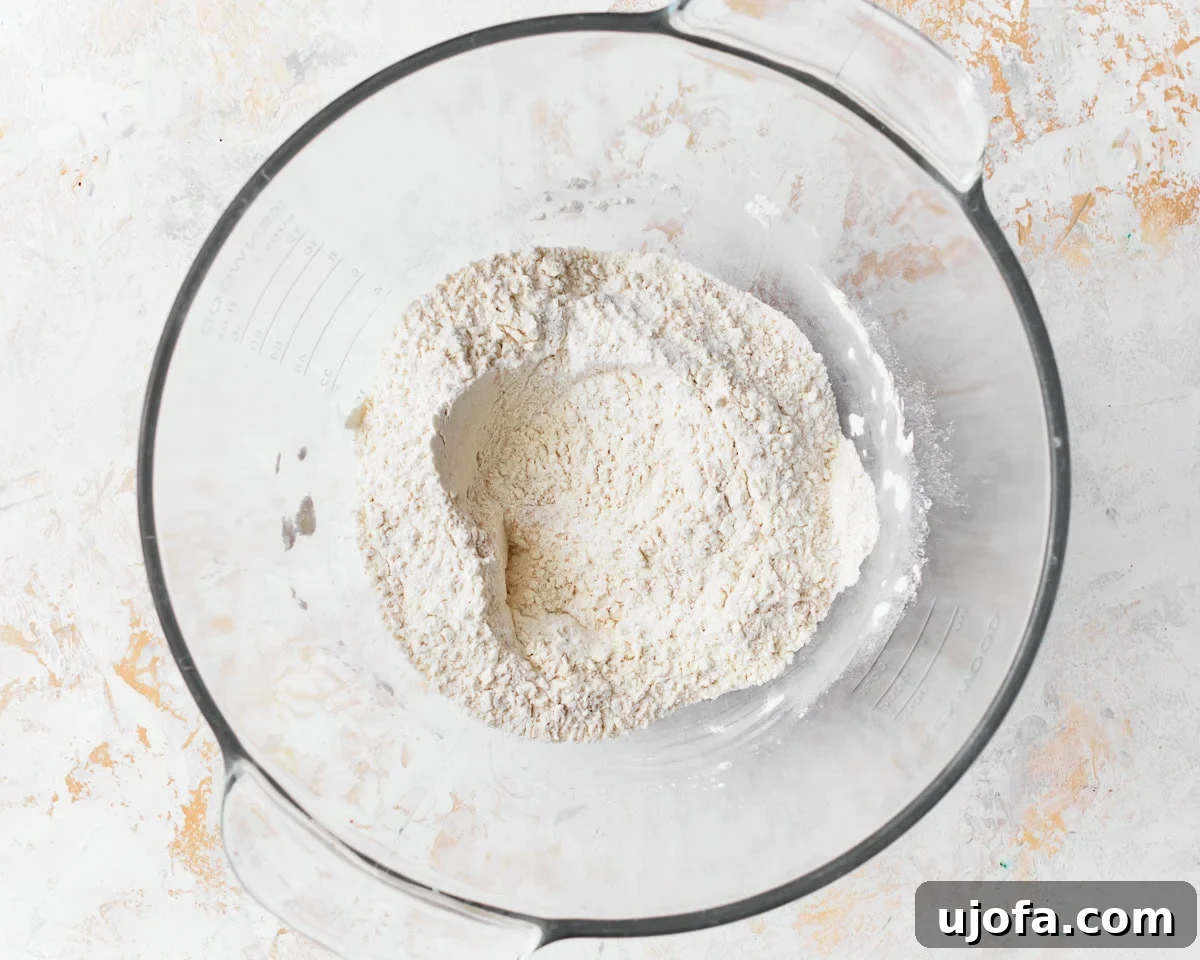
In a large mixing bowl, whisk together 2 ½ cups gluten-free all-purpose flour, ½ cup tapioca starch, 3 tablespoons sugar, 2 teaspoons instant yeast, and 2 teaspoons kosher salt.
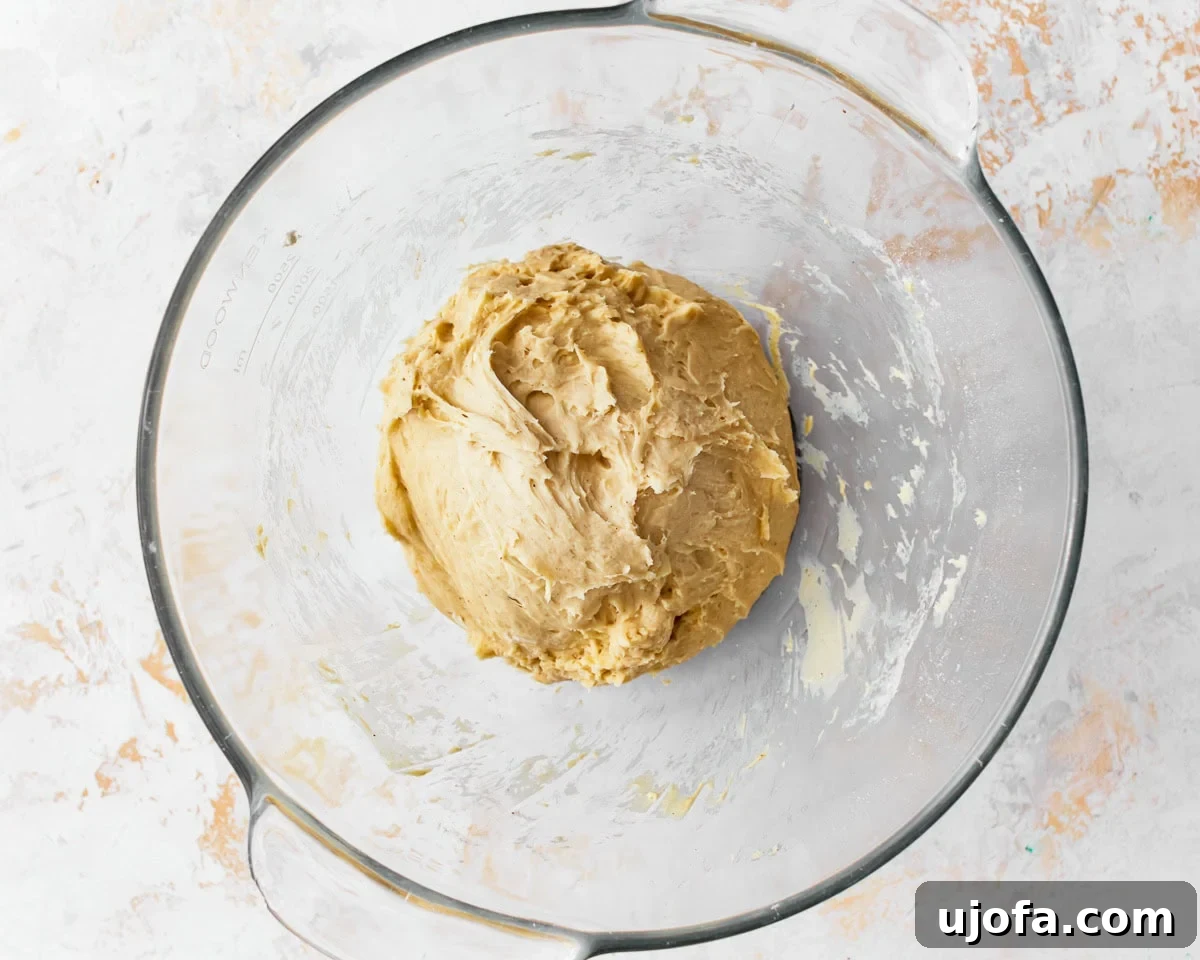
Add 2 large eggs, 1 large egg yolk, 1 cup warm water, ¼ cup vegetable oil, and 2 tablespoons honey and mix using a stand mixer with a paddle attachment on medium speed until a sticky dough forms, about 5 minutes.
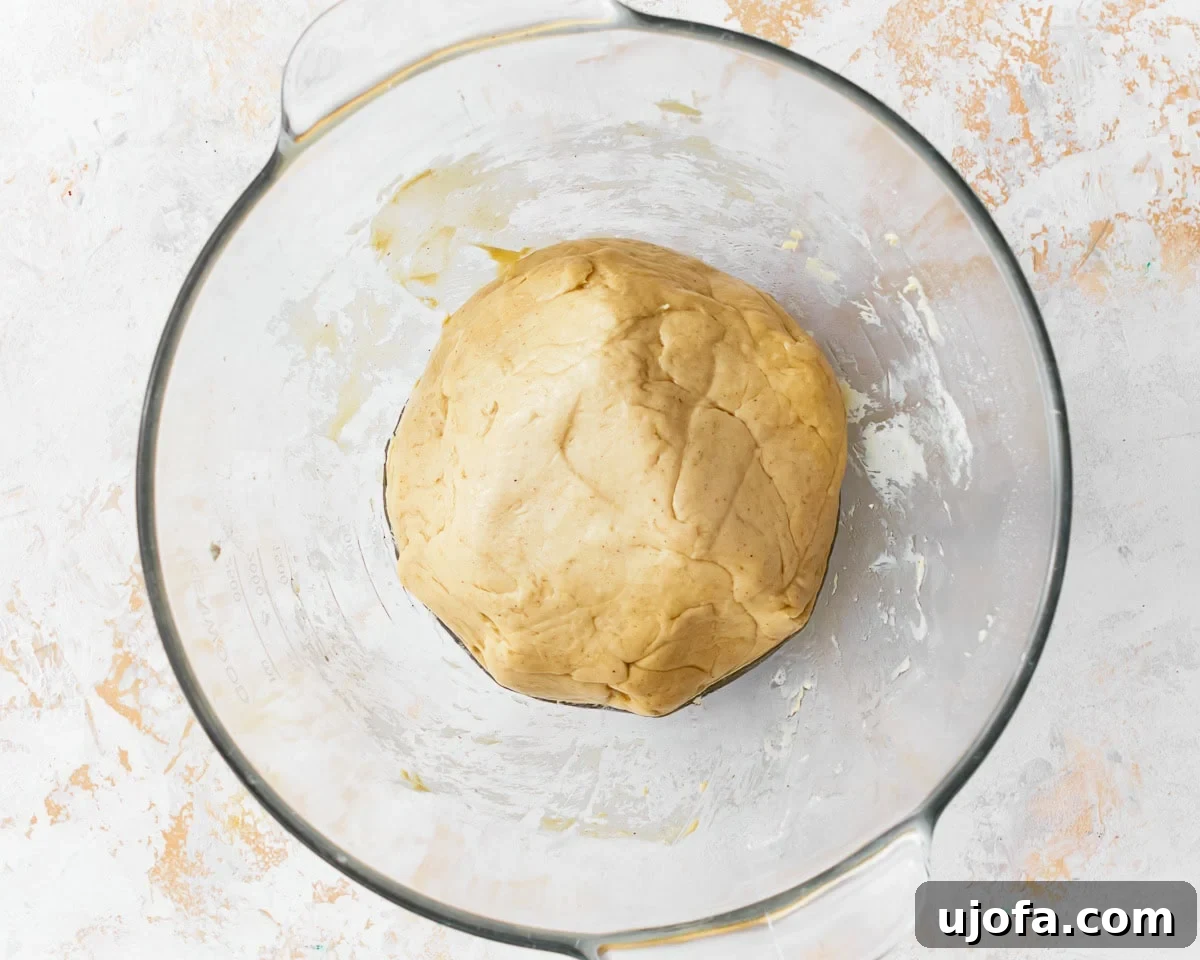
Cover the bowl and let rise for about 45 minutes or until doubled. Then transfer to the fridge for 30 minutes.
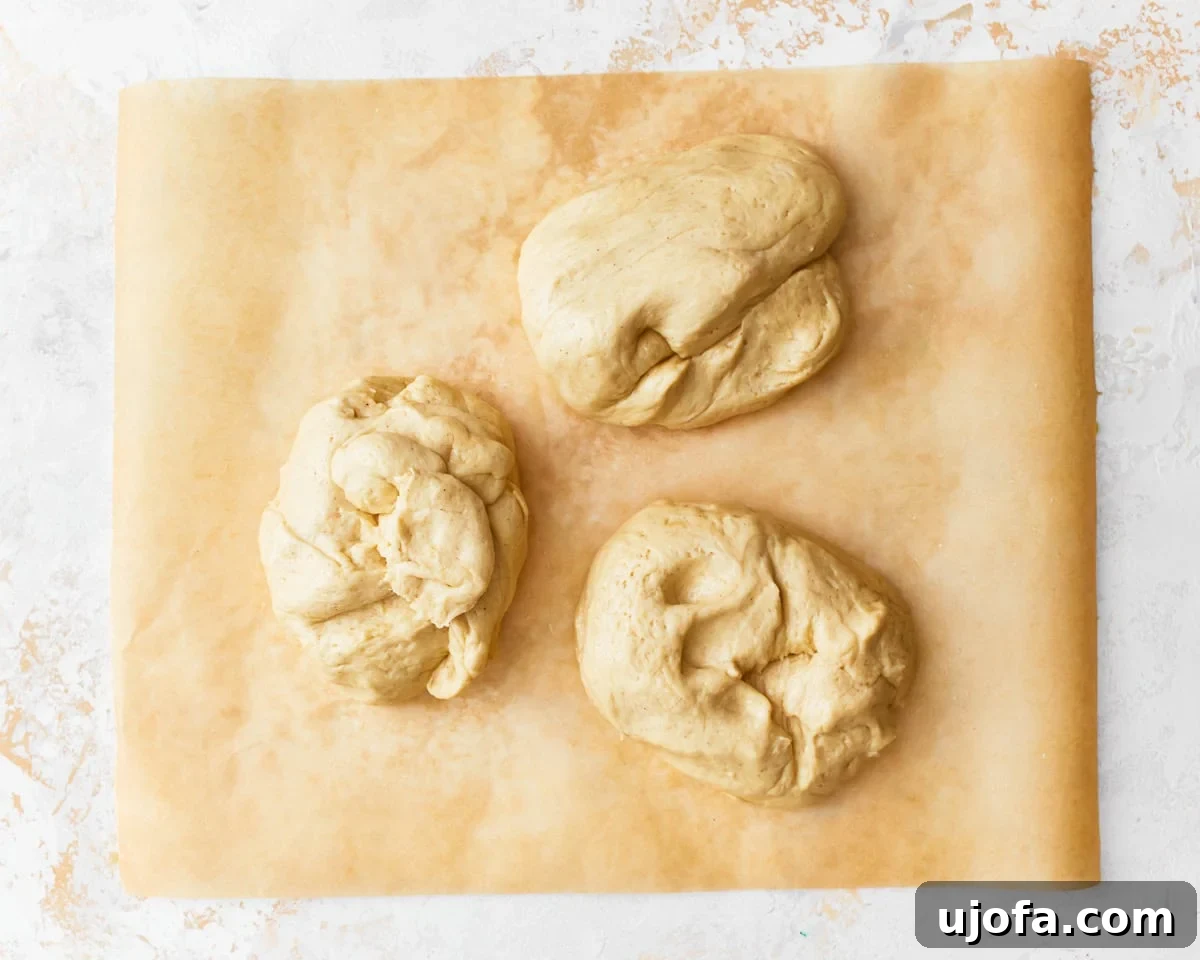
Lightly oil your hands and divide the dough into 3 equal portions. Roll each portion into a long strand, about 12-14 inches in length.
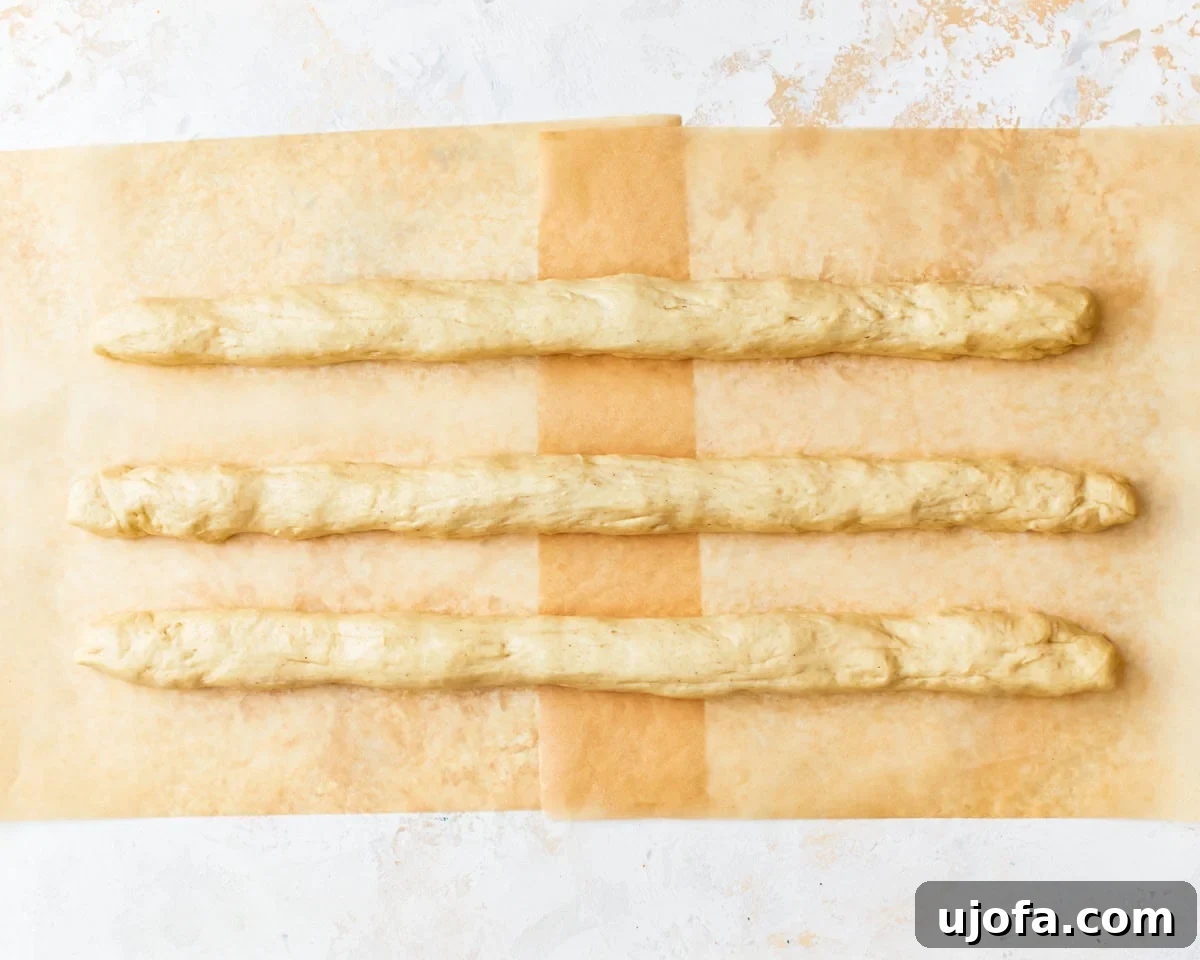
Lay the three strands side by side on a parchment-lined baking sheet.
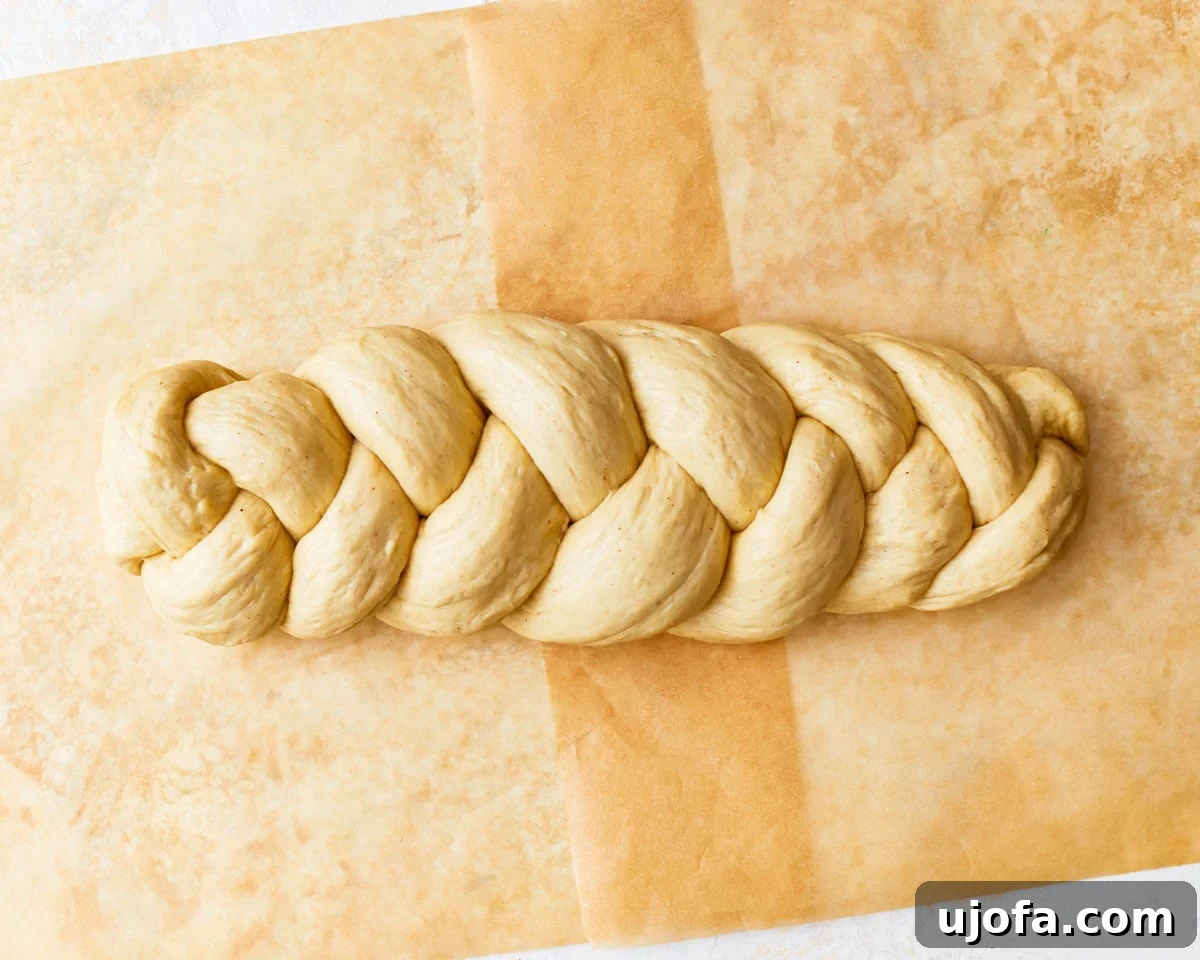
Pinch the ends together at one end and braid the strands, tucking the other end underneath to secure.
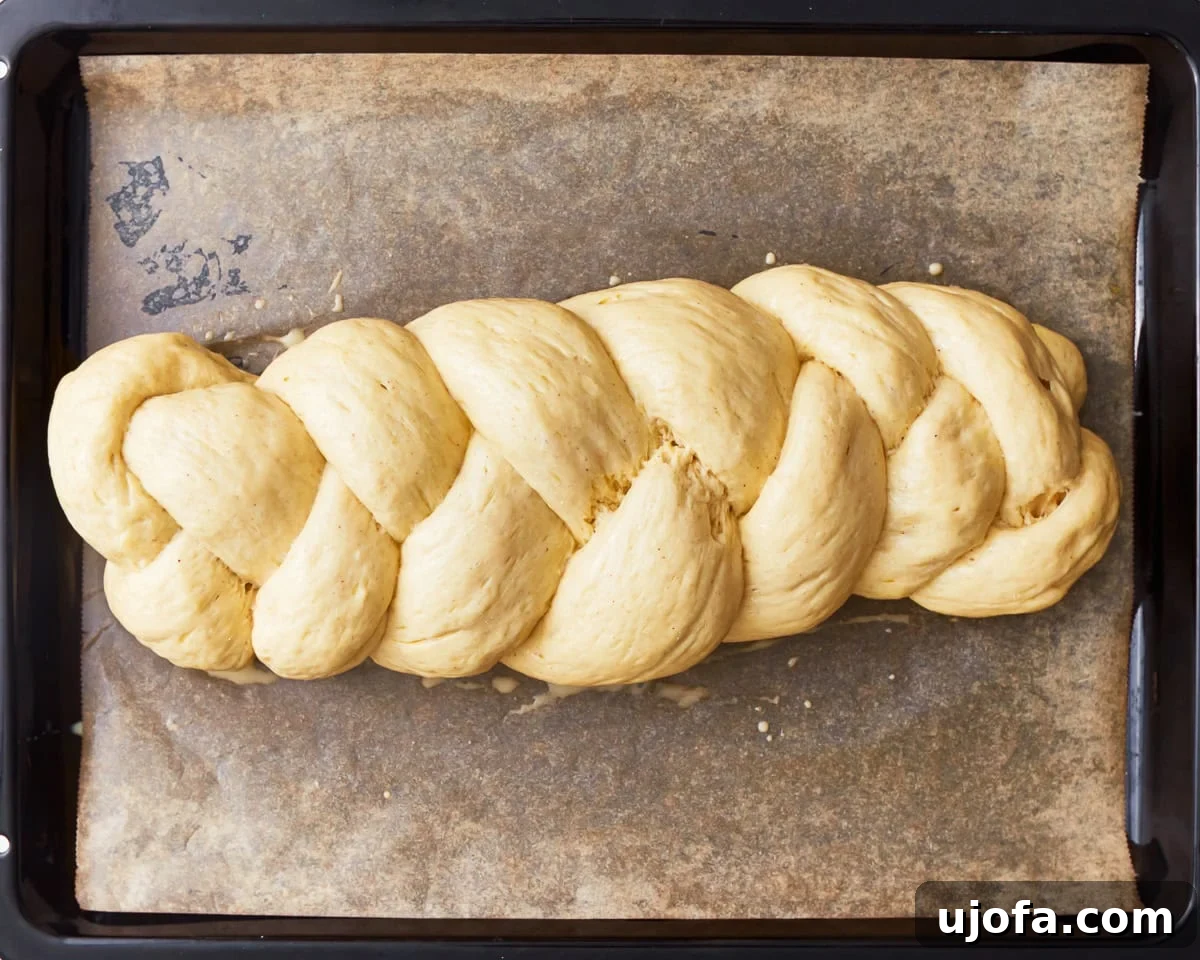
Cover the braided dough loosely with plastic wrap or a damp cloth, and let it rise in a warm place for 1 to 1 ½ hours, or until it has visibly puffed up.
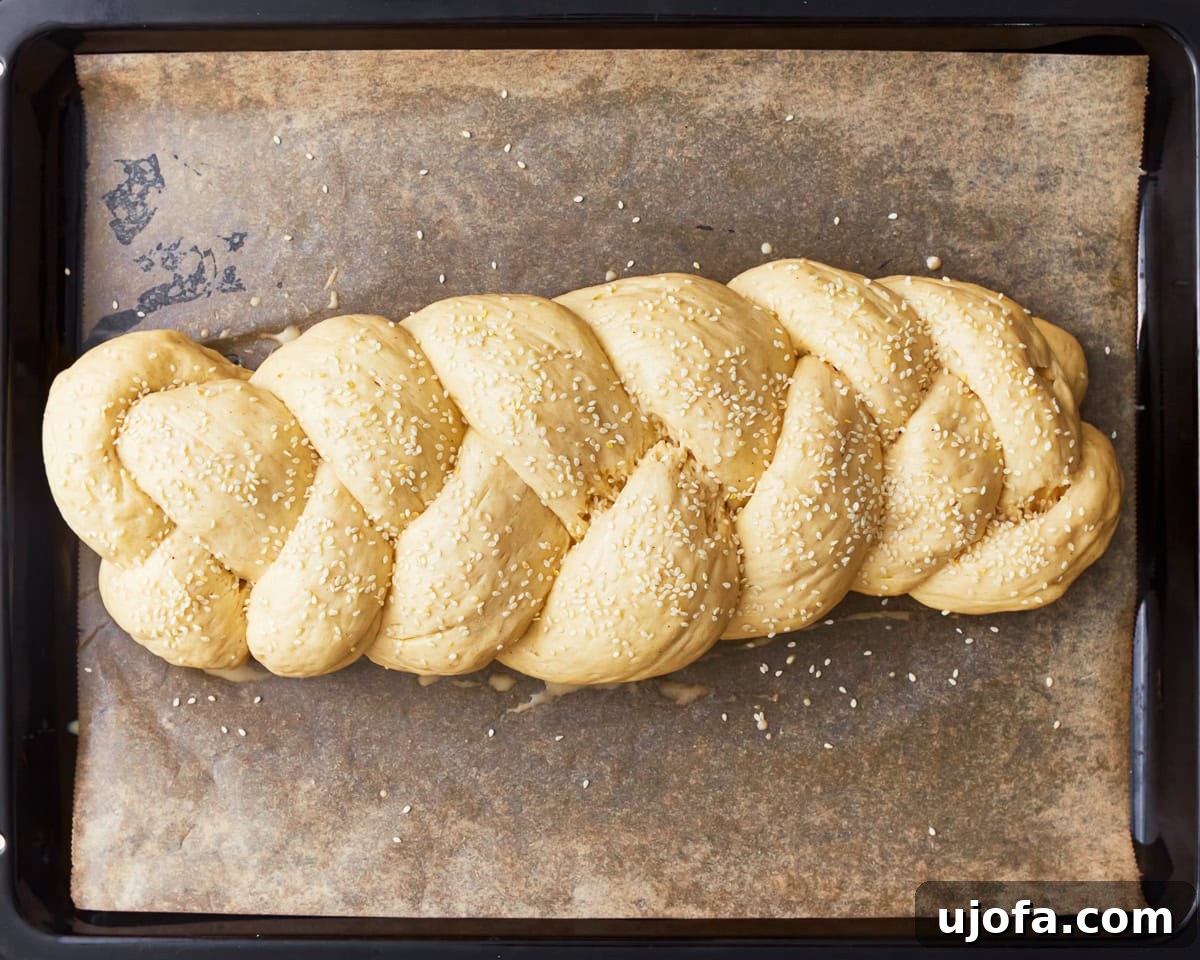
Preheat your oven to 350°F (175°C). In a small bowl, whisk together 1 large egg and 1 tablespoon water for the egg wash. Gently brush the top of the risen dough with the egg wash. If desired, sprinkle 1-2 tablespoons sesame or poppy seeds over the top.
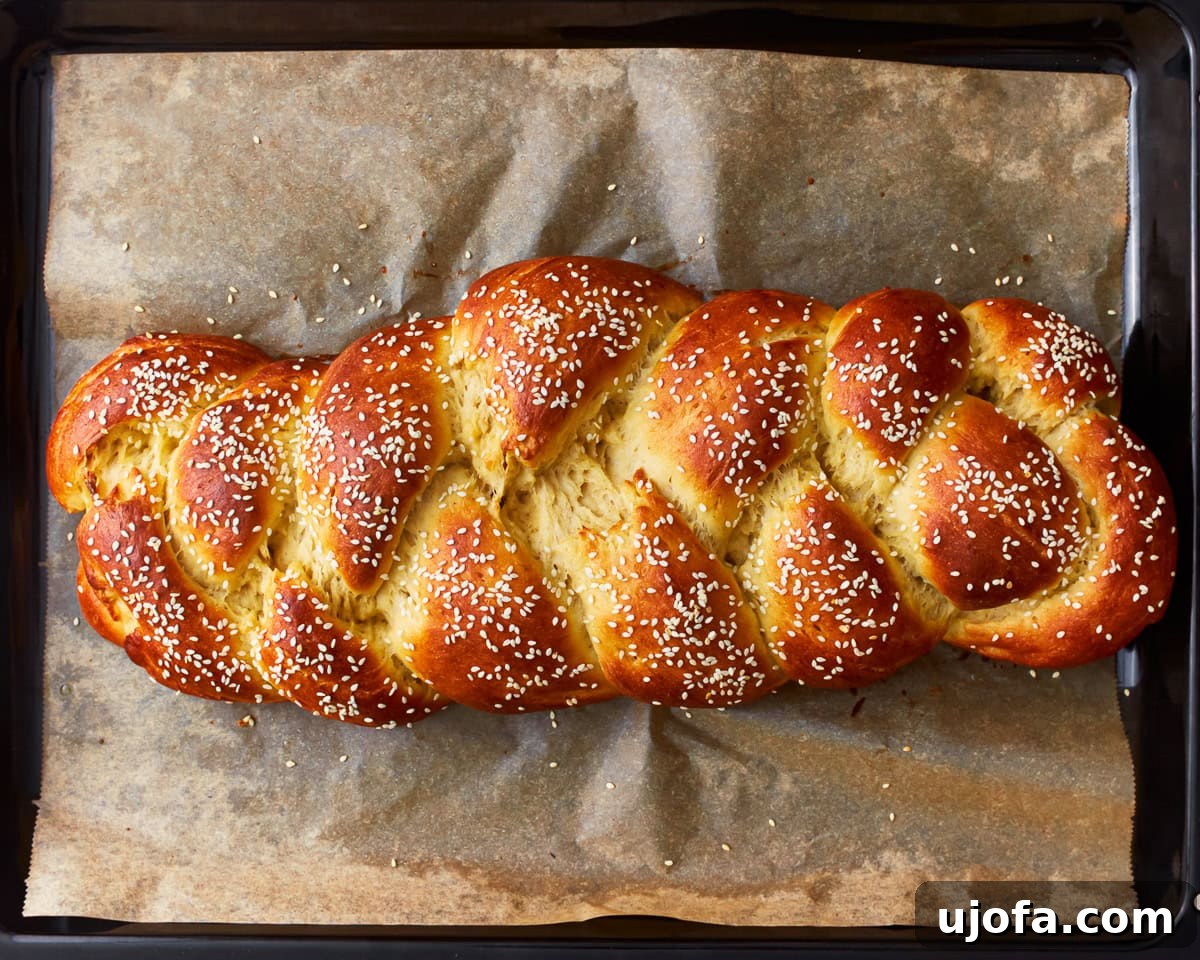
Bake in the preheated oven for 20-25 minutes, or until the bread is golden brown and sounds hollow when tapped on the bottom. Let it cool on a wire rack before slicing and serving. Enjoy.