
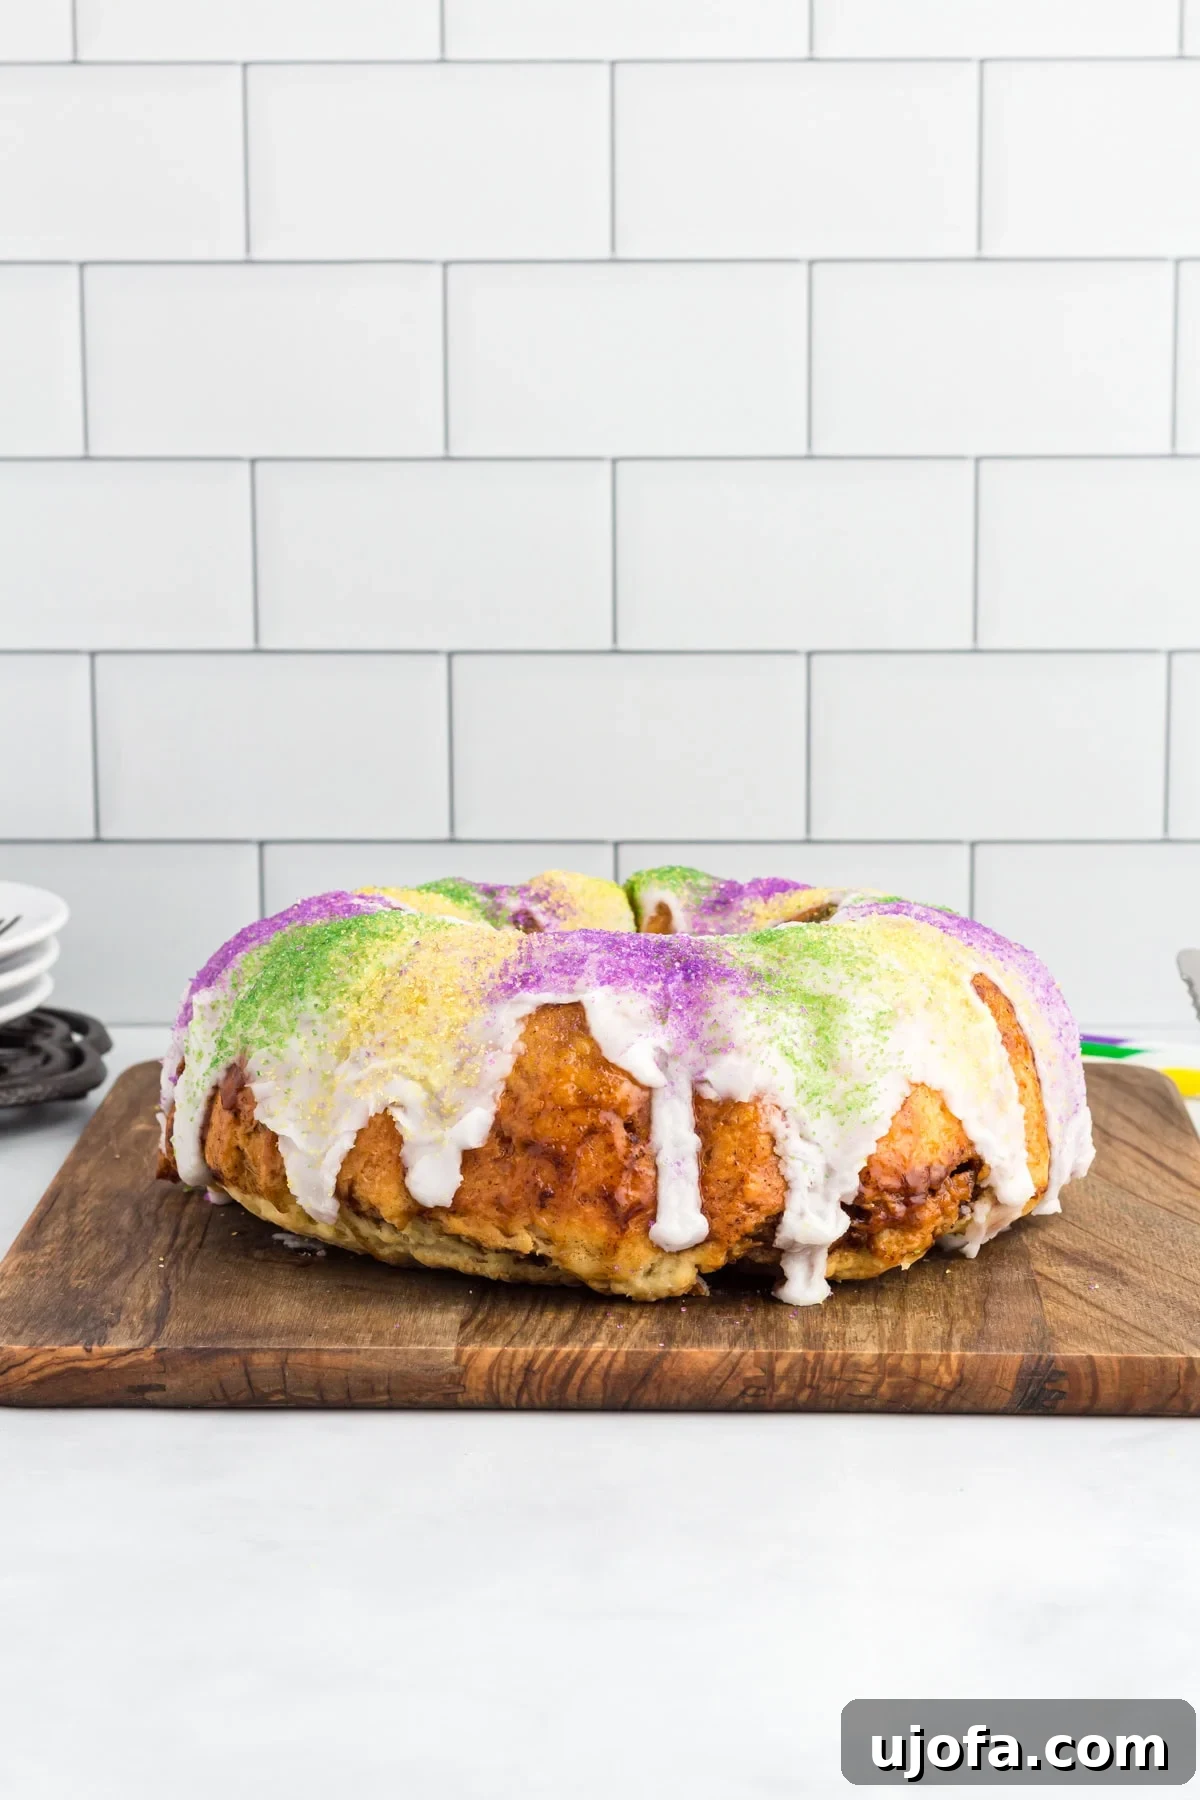
Welcome to the ultimate guide for creating a delightful Gluten-Free King Cake! This recipe delivers a wonderfully buttery, soft, and sweet bread, perfectly capturing the festive spirit of the traditional New Orleans Mardi Gras celebration. Each bite features a warm, aromatic cinnamon sugar swirl, baked to tender perfection, and adorned with a smooth vanilla glaze, all finished with the iconic purple, green, and gold sanding sugars. This vibrant dessert is an instant showstopper, making it truly special for any gathering.
My goal in developing this recipe was to craft a gluten-free king cake that is every bit as special, tender, and joyous as the traditional versions I fondly remember from every Mardi Gras season of my youth. Beyond its delicious taste, a significant part of the King Cake’s charm lies in its playful tradition: a small plastic baby is carefully tucked inside the cake after baking. The lucky individual who discovers this figurine in their slice is believed to receive good fortune and often assumes the delightful responsibility of hosting the next King Cake party. This ritual adds an element of surprise and communal joy, making each slice a potential moment of celebration.
While commonly referred to as a “cake,” it’s important to clarify that this delight is, in fact, a rich and delectable sweet yeast bread. Unlike typical cakes, which are known for their dense, moist crumb, our gluten-free king cake boasts a light, fluffy, and unmistakably bread-like texture. As it bakes, the cinnamon sugar filling beautifully melts into the dough, creating pockets of spiced sweetness throughout. Once out of the oven, a luscious vanilla glaze provides the perfect, smooth finish. This recipe has become a cherished staple in my kitchen, perfect for elevating brunch gatherings and making holiday mornings feel extra special. I genuinely look forward to hearing about your experience baking this festive treat!
Essential Tips from Our Test Kitchen for Gluten-Free King Cake Perfection
Achieving a perfectly risen, soft, and flavorful gluten-free king cake requires attention to a few key details. Based on extensive testing, these insights will help you master this festive sweet bread:
- Ensure you use instant yeast. This recipe is specifically formulated for instant yeast, which can be directly mixed with dry ingredients without prior proofing. Active dry yeast behaves differently and would necessitate a different preparation method, typically requiring activation in warm liquid before combining with other ingredients. Using the wrong type of yeast can significantly impact the dough’s rise and texture.
- Always test your yeast if uncertain about its freshness. Yeast is a living organism, and its activity is crucial for a successful rise. To test, simply mix 1 teaspoon of yeast with ½ teaspoon of granulated sugar and ¼ cup of warm water (ensure the water temperature is between 110–115°F). If the mixture foams and bubbles within 5–10 minutes, your yeast is active and ready to bring your dough to life. If there’s no activity, it’s best to discard it and use a fresh packet.
- The temperature of your liquids is paramount. Yeast thrives within a specific temperature range. Warming the buttermilk and melted butter to the precise temperature of 110–115°F is critical for activating the yeast without killing it or leaving it dormant. If your liquids are too cold, the yeast won’t activate, leading to a flat dough. If they are too hot, the high temperature will kill the yeast, preventing any rise. Using a reliable kitchen thermometer is highly recommended for accuracy.
- Measure your gluten-free flour by weight for accuracy. Gluten-free flour blends can vary significantly in density, and measuring by volume (cups) can often be inconsistent, leading to errors. Too much flour will result in a dry, crumbly dough that is difficult to work with, while too little will make the dough excessively sticky and challenging to handle. For the most precise and consistent results, always use a kitchen scale to weigh your gluten-free flour.
- Selecting the right gluten-free all-purpose flour blend is crucial. Not all gluten-free flour blends are created equal, especially when it comes to yeast-based baking. Through testing, I’ve found that gluten-free all-purpose flour yields superior results compared to gluten-free bread flour for this specific recipe, offering a better texture and rise. My personal recommendation and go-to choice for this King Cake is Cup4Cup gluten-free flour blend, known for its excellent performance in replacing traditional wheat flour.
- Allow the dough to rise in a consistently warm, but not hot, environment. The ideal setting for dough rising is slightly above room temperature. Excessive heat, such as direct sunlight or proximity to a hot stove, can overheat and kill the yeast, halting the rising process. For a controlled and optimal environment, I often place the covered bowl in an oven that is turned off, with just the oven light on. The gentle warmth from the light creates a perfect microclimate for the yeast to work its magic.
- Always use full-fat buttermilk. The higher fat content in full-fat buttermilk is essential for this recipe. It contributes significantly to the much-needed moisture and richness of the dough, which in turn helps create the incredibly soft, tender texture that defines a truly exceptional sweet bread like our King Cake. Do not substitute with low-fat versions, as this will compromise the final texture and flavor.
Gluten-Free King Cake: A Mardi Gras Delight
Cheryl Johnson
12 servings
20 mins
30 mins
1 hr 30 mins
2 hrs 20 mins
Equipment
- 1 Bundt Pan
- Large mixing bowl
- Electric mixer with dough hook
- Kitchen thermometer
- Rolling pin
- Silicone mat or lightly floured counter
- Plastic wrap
Ingredients
For the Cake
- 3½ cups (480g) gluten-free all-purpose flour (I use Cup4Cup for best results)
- ⅓ cup (67g) granulated sugar
- 1 packet (8g) instant yeast
- 1 cup (237ml) full-fat buttermilk, warmed to 110-115°F
- 5 tbsp (72g) unsalted butter, warmed to 110-115°F
- 3 large eggs, at room temperature
- ½ tsp salt
- 1 tsp xanthan gum (only if your flour blend does not already contain it)
For the Cinnamon Sugar Filling
- ½ cup (100g) light brown sugar, packed
- ⅓ cup (67g) granulated sugar
- ⅓ cup (75g) unsalted butter, melted but cooled
- 1 tbsp (8g) ground cinnamon
For the Glaze Topping
- 2 cups (240g) confectioners’ sugar
- 1 tbsp (15ml) milk (dairy or non-dairy)
- ½ tbsp (7ml) fresh lemon juice (optional, for a subtle tang)
- ½ tsp vanilla extract
- Colored sanding sugar sprinkles (in traditional green, purple, and gold or yellow)
Instructions
-
In a large mixing bowl, combine the gluten-free all-purpose flour, granulated sugar, and instant yeast. Whisk these dry ingredients thoroughly until they are well combined. If your chosen gluten-free flour blend does not already contain xanthan gum, add 1 teaspoon of xanthan gum to this dry mixture and whisk again.
-
Ensure both your full-fat buttermilk and unsalted butter are warmed to the precise temperature range of 110°F to 115°F. This specific temperature is crucial for proper yeast activation. Pour the warmed buttermilk and melted butter into the flour mixture. Using an electric mixer fitted with a dough hook attachment, beat on slow speed for approximately 30 seconds, just until the ingredients start to come together into a shaggy, slightly sticky dough.
-
Add the room-temperature eggs and salt to the dough mixture. Continue beating on low speed for 3 full minutes. Periodically use a spatula to scrape down the sides of the bowl, ensuring all ingredients are thoroughly incorporated. The resulting dough will be noticeably soft and slightly sticky, yet manageable with lightly damp hands. It will be thicker than a cake batter but looser than a traditional gluten-containing bread dough.
-
Gently transfer the dough into a clean bowl that has been lightly greased to prevent sticking. Cover the bowl securely with food-safe plastic wrap. Place this covered bowl in a slightly warm environment (ideally just above room temperature, around 75-80°F) and allow the dough to rise for 1 hour. This initial rise is fundamental for developing the light, fluffy, and characteristic bread-like texture of your King Cake.
-
After the 1-hour rise, gently punch down the dough in the bowl using lightly damp hands to release the air. Then, carefully transfer the dough onto a silicone mat or a clean countertop that has been lightly dusted with gluten-free flour to prevent sticking.
-
Lightly spray a 9-inch bundt pan thoroughly with non-stick baking spray, ensuring all crevices are coated. Set this prepared pan aside for later use.
-
Using a rolling pin lightly dusted with gluten-free flour, roll the dough out into a rectangular shape, approximately 10 inches by 14 inches, with a uniform thickness of about ¼-inch. Work gently, as gluten-free dough can be more delicate than traditional dough.
Cinnamon Sugar Filling
-
In a separate small bowl, combine the light brown sugar (packed), granulated sugar, cooled melted butter, and ground cinnamon. Stir these ingredients together until they are thoroughly mixed and form a thick, spreadable paste.
-
Carefully spread the prepared cinnamon sugar filling evenly over the entire surface of the rolled-out dough rectangle, extending it all the way to the edges.
-
Starting from one of the wider sides of the rectangle (if viewed horizontally), gently and carefully roll up the dough into a log shape. Once rolled, form this log into a circular ring, creating a space in the middle to resemble a king’s crown. Using lightly damp fingers, carefully pinch the seams of the dough together to seal the edges securely.
-
Gently transfer the shaped circular dough into the prepared bundt pan, ensuring it sits evenly within the pan’s mold.
-
Cover the bundt pan loosely with food-safe plastic wrap and set it aside in a warm environment for an additional 30 minutes. This second rise allows the dough to slightly puff up again, though it will not double in size as significantly as the first rise.
-
Preheat your oven to 350°F (175°C).
-
Once the oven is preheated, remove the plastic wrap from the bundt pan and place the king cake into the oven. Bake for 30-32 minutes, or until the top is golden brown and a thermometer inserted into the thickest part of the bread (avoiding the filling) reaches an internal temperature of 190°F (88°C). Be careful not to over-bake, as this can lead to a dry cake.
-
Allow the king cake to cool in the bundt pan for a few minutes after baking. Then, carefully invert it onto a serving tray or wire rack and gently remove the cake pan.
Glaze Topping
-
In a medium bowl, whisk together the confectioners’ sugar, milk, optional fresh lemon juice, and vanilla extract until the mixture is completely smooth and free of lumps. The glaze should be thick but still pourable. If you prefer a thinner consistency, add a small amount of extra milk, a teaspoon at a time, until desired thickness is achieved.
-
If you are incorporating the traditional small plastic baby into your King Cake, now is the time to do so. Gently press the baby into the bottom of the warm bread (which will become the top once flipped), ensuring it is well hidden within a slice.
-
While the cake is still warm, generously spread the prepared glaze evenly over the top surface. Immediately after glazing, decorate the cake with the vibrant green, purple, and gold (or yellow) sanding sugar sprinkles to achieve the classic Mardi Gras look.
-
Serve your freshly baked Gluten-Free King Cake warm for the absolute best flavor and softest texture. Enjoy this festive and delicious treat!
Notes
- For a truly gluten-free experience and to avoid any cross-contamination, always double-check that all your ingredients, especially yeast and flour blends, are certified gluten-free. Read labels carefully for any warnings regarding shared facilities or potential allergens.
- A bundt pan is highly recommended for baking this King Cake. Its unique shape helps the dough rise optimally and creates the beautiful, traditional crown-like form. While you can bake it on a sheet pan, be aware that the filling may tend to ooze out, and the cake may not achieve the same impressive puffiness or structure.
- The addition of fresh lemon juice in the glaze is entirely optional. It provides a subtle brightness and a traditional citrusy tang that is often found in many authentic New Orleans King Cake recipes, balancing the sweetness beautifully. Feel free to adjust based on your preference.
Nutrition
Calories: 391kcal
Carbohydrates: 67g
Protein: 6g
Fat: 13g
Saturated Fat: 7g
Polyunsaturated Fat: 1g
Monounsaturated Fat: 3g
Trans Fat: 0.4g
Cholesterol: 69mg
Sodium: 146mg
Potassium: 65mg
Fiber: 4g
Sugar: 42g
Vitamin A: 400IU
Vitamin C: 0.3mg
Calcium: 72mg
Iron: 2mg
Nutrition information is automatically calculated and should only be used as an approximation.
Additional Info
Baking, Dessert, Brunch
American, New Orleans
How to Make Gluten-Free King Cake: A Detailed Step-by-Step Guide
Follow these detailed instructions to create your perfect gluten-free King Cake, complete with visual guidance.
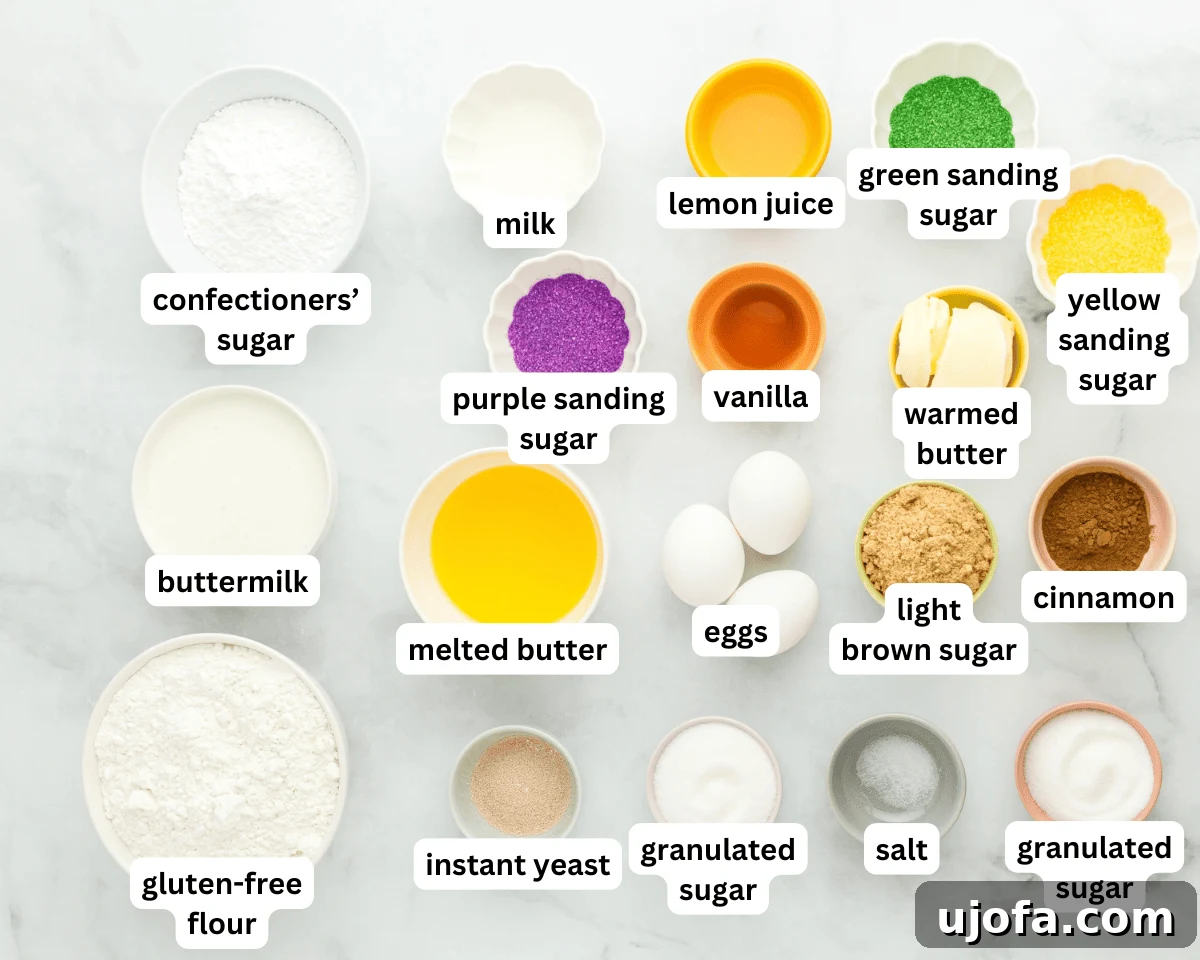
Step 1: Gather and Prepare Ingredients. Before you begin, ensure all your ingredients are measured and at the correct temperatures (room temperature for eggs, warm for buttermilk and butter). This mise en place approach makes the baking process smoother and more successful.
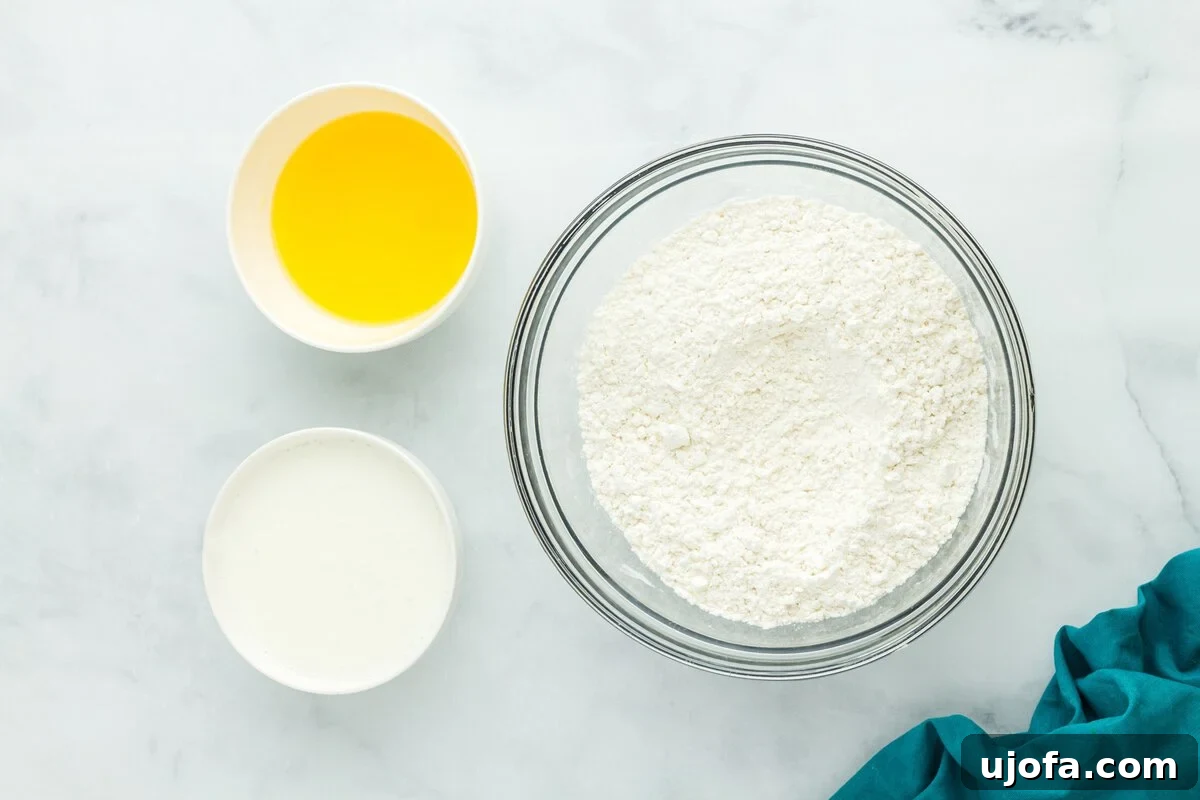
Step 2: Mix Dry Ingredients. In a spacious mixing bowl, combine 3½ cups (480g) of your preferred gluten-free all-purpose flour (Cup4Cup is recommended for its reliability), ⅓ cup (67g) of granulated sugar, 1 packet (8g) of instant yeast, and 1 teaspoon of xanthan gum (if your flour blend doesn’t already include it). Whisk these components thoroughly to ensure an even distribution.
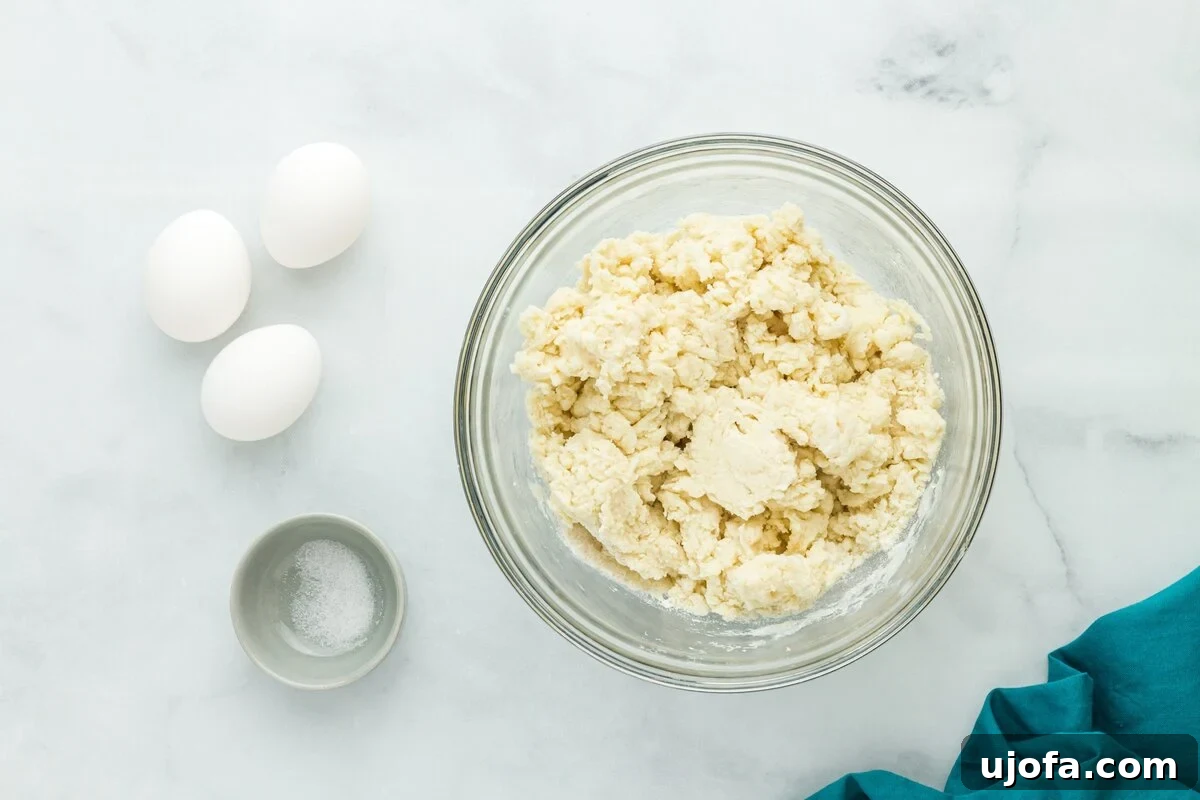
Step 3: Incorporate Warm Liquids. Verify that 1 cup (237 ml) of full-fat buttermilk and 5 tablespoons (72g) of unsalted butter are both precisely warmed to 110–115°F. Pour these warm liquids into the dry flour mixture. Using an electric mixer equipped with a dough hook, mix on low speed for about 30 seconds. The mixture will just begin to come together, forming a somewhat shaggy and sticky dough, as shown.
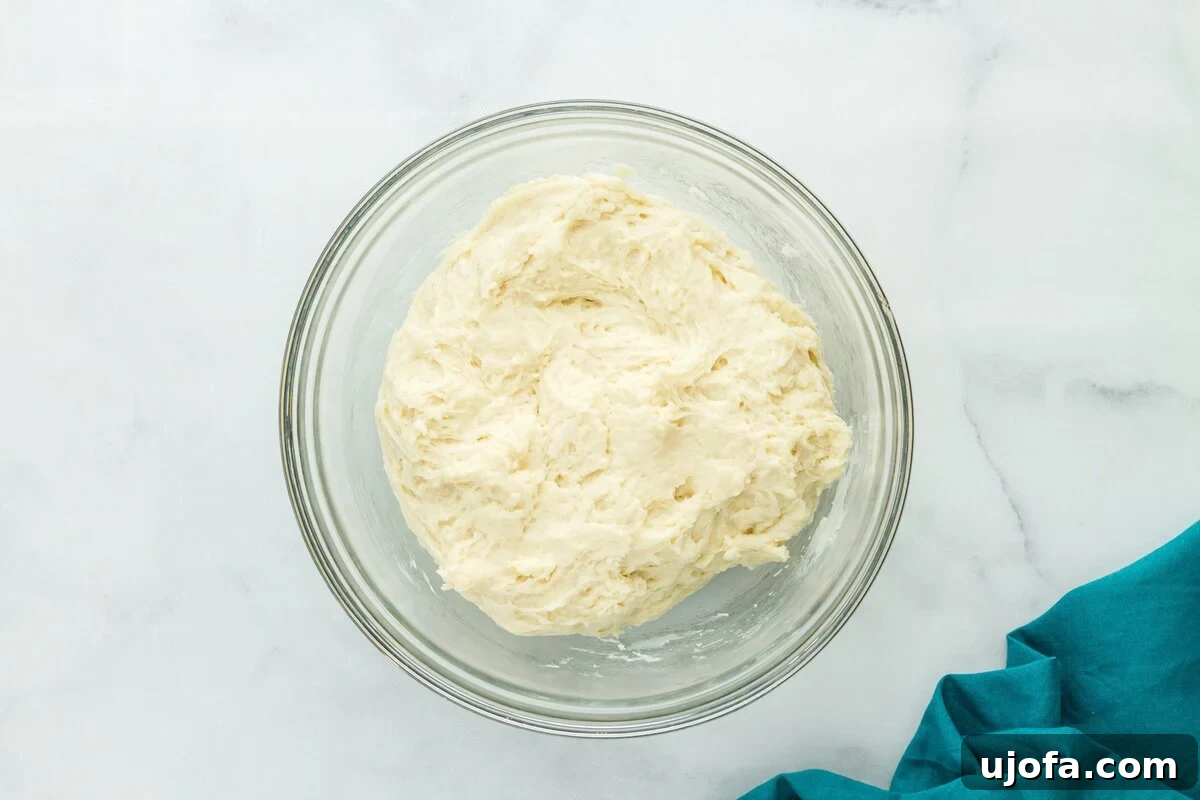
Step 4: Add Eggs and Final Mix. Introduce 3 room-temperature large eggs and ½ teaspoon of salt to the dough. Continue mixing on low speed for 3 minutes. Throughout this mixing process, use a spatula to periodically scrape down the sides of the bowl, ensuring all ingredients are fully incorporated. The final dough will be notably soft, slightly sticky, and possess a consistency thicker than typical batter but looser than conventional wheat bread dough. It should be pliable and workable with lightly damp hands, hinting at its eventual fluffy texture.
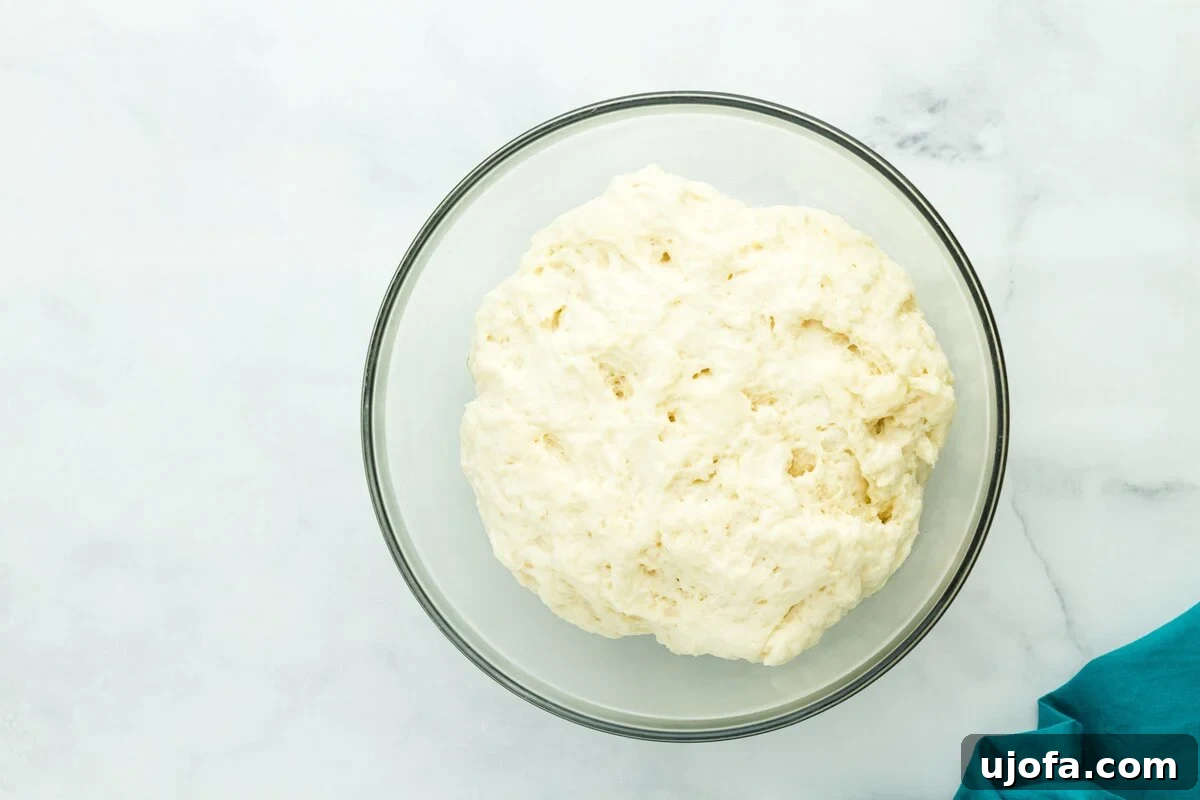
Step 5: First Rise. Transfer the soft dough to a lightly greased bowl. Cover it securely with plastic wrap. Allow the dough to rise in a gently warm area (slightly warmer than standard room temperature, around 75-80°F) for 1 full hour. During this time, the dough should noticeably puff up and visibly increase in size, indicating active yeast. While the dough is rising, prepare your 9-inch bundt pan by spraying it thoroughly with nonstick baking spray, then set it aside. This crucial first rise is what develops the wonderful airy, bread-like structure of the King Cake.
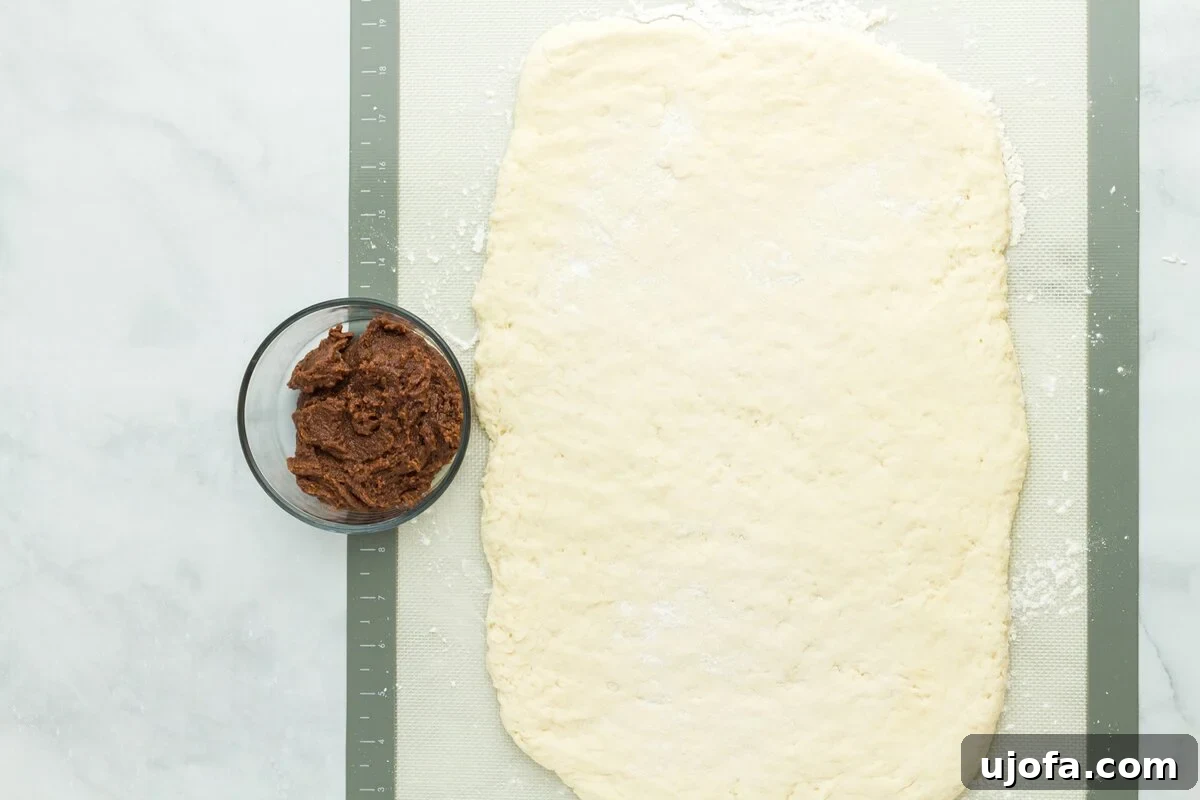
Step 6: Roll Out the Dough. After the first rise, gently “punch down” the dough with damp hands to release the accumulated gases. Carefully transfer the dough to either a silicone mat or a clean countertop that has been lightly dusted with gluten-free flour. Using a rolling pin (also lightly dusted with gluten-free flour), roll the dough out into a uniform 10×14-inch rectangle, aiming for a thickness of about ¼-inch. The dough will feel soft and might be slightly tacky, but it should not stick excessively to your surface or rolling pin.
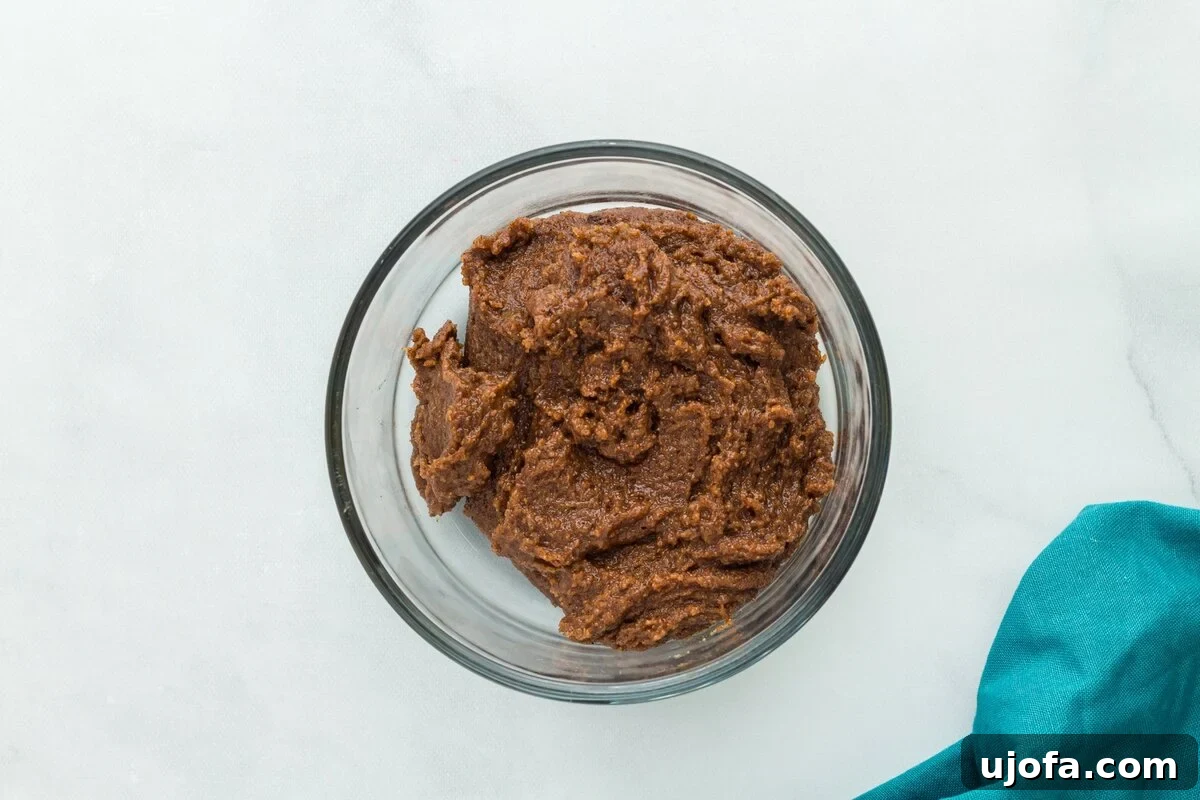
Step 7: Prepare the Cinnamon Sugar Filling. In a small, separate bowl, combine ½ cup (100g) of packed light brown sugar, ⅓ cup (67g) of granulated sugar, ⅓ cup (75g) of unsalted butter (melted and then cooled to prevent cooking the dough), and 1 tablespoon (8g) of ground cinnamon. Stir these ingredients thoroughly until they form a thick, uniform, and easily spreadable paste.
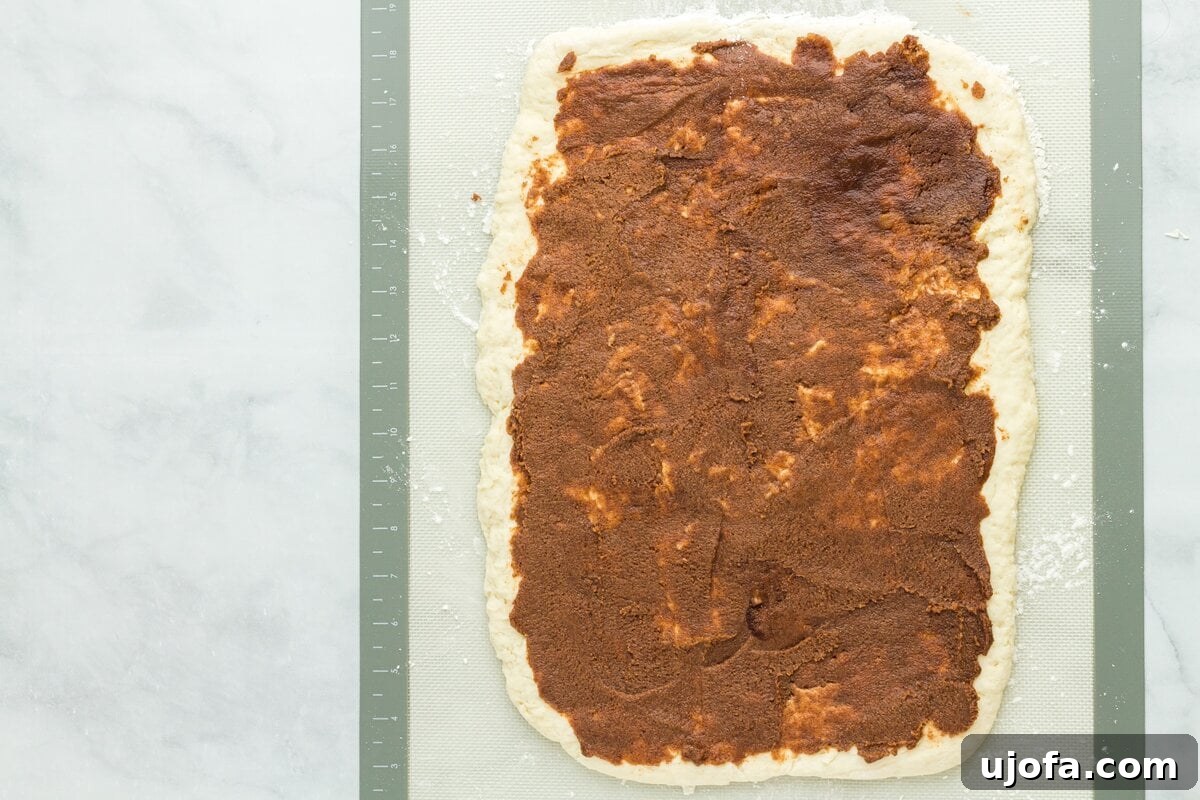
Step 8: Spread the Filling. With a spatula or the back of a spoon, carefully and evenly spread the prepared cinnamon sugar filling over the entire surface of the rolled-out dough rectangle. Ensure the filling reaches all edges in a thin, consistent layer, maximizing the flavor in every bite.
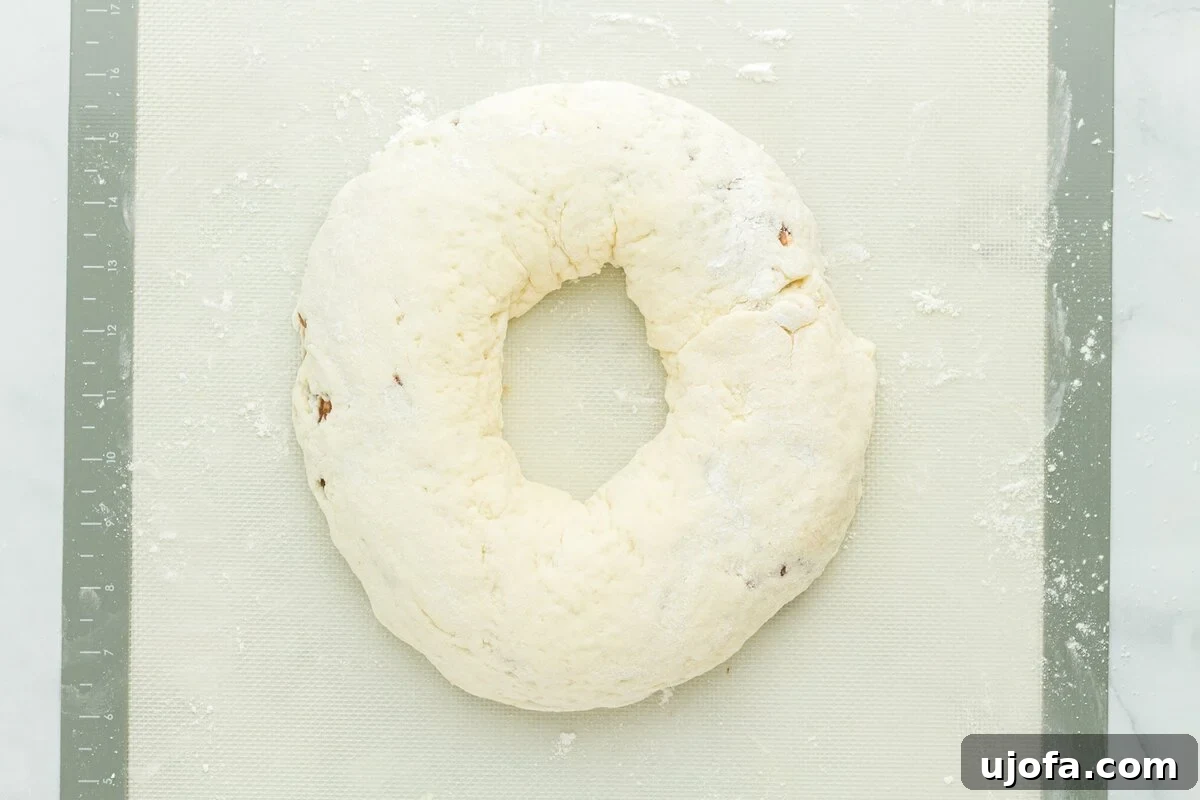
Step 9: Roll and Shape the Dough. Beginning from one of the long sides of the rectangle, gently and carefully roll the dough into a snug log. The gluten-free dough should roll easily without cracking or tearing. Once you have a log, shape it into a circular ring, creating an opening in the center, much like a traditional crown. Use lightly damp fingers to firmly pinch and seal the seams of the dough together, ensuring the filling remains encased during baking.
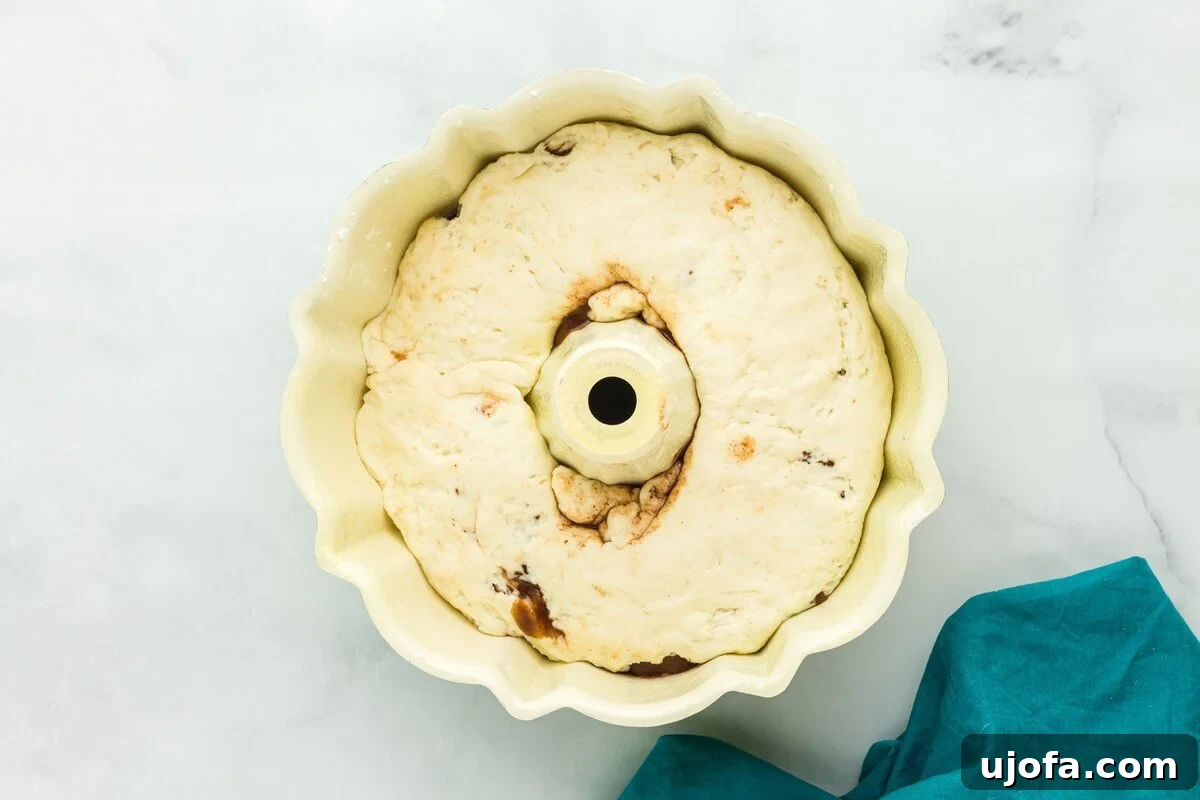
Step 10: Place in Pan. Carefully lift the shaped dough ring and gently place it into the prepared bundt pan. Adjust it to ensure it sits evenly within the pan’s mold, ready for its final rise.
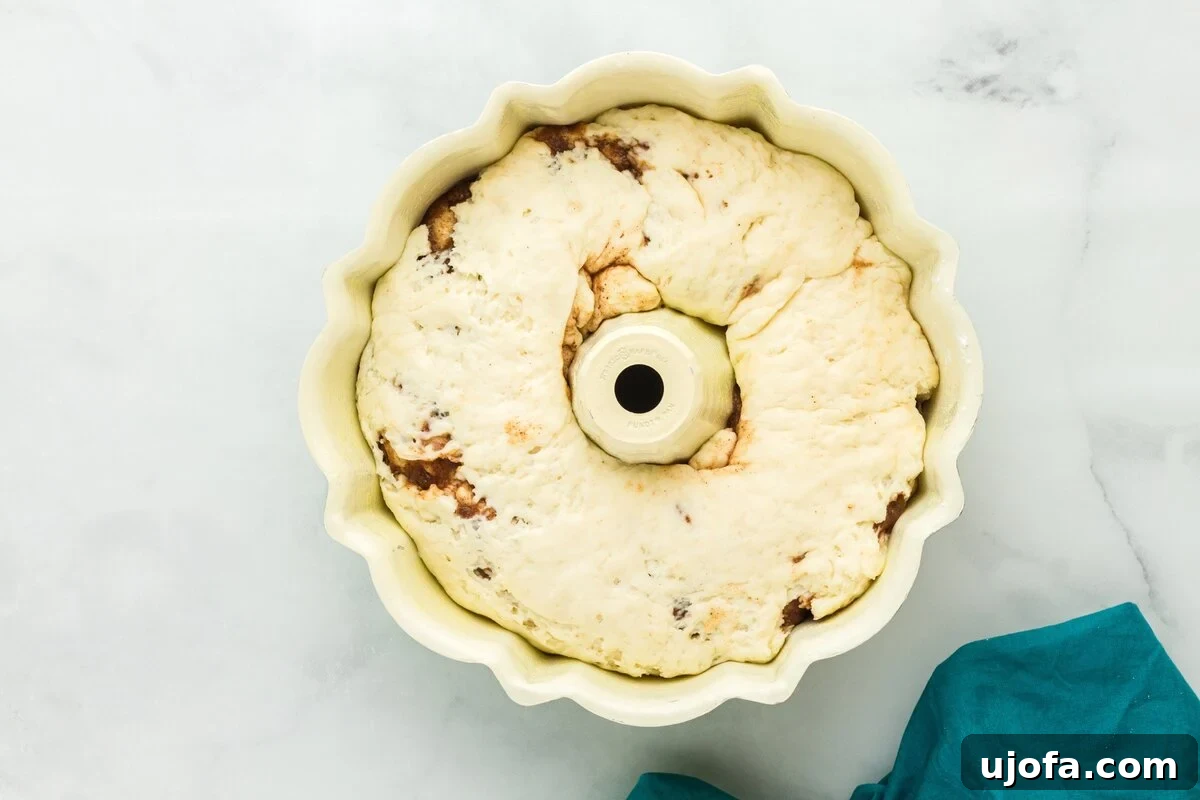
Step 11: Second Rise. Loosely cover the bundt pan with plastic wrap and return it to a warm spot for another 30-minute rise. During this stage, the dough will become slightly puffier, though it will not double in size as dramatically as it did during the first rise. This brief second rise helps to achieve the ideal final texture.
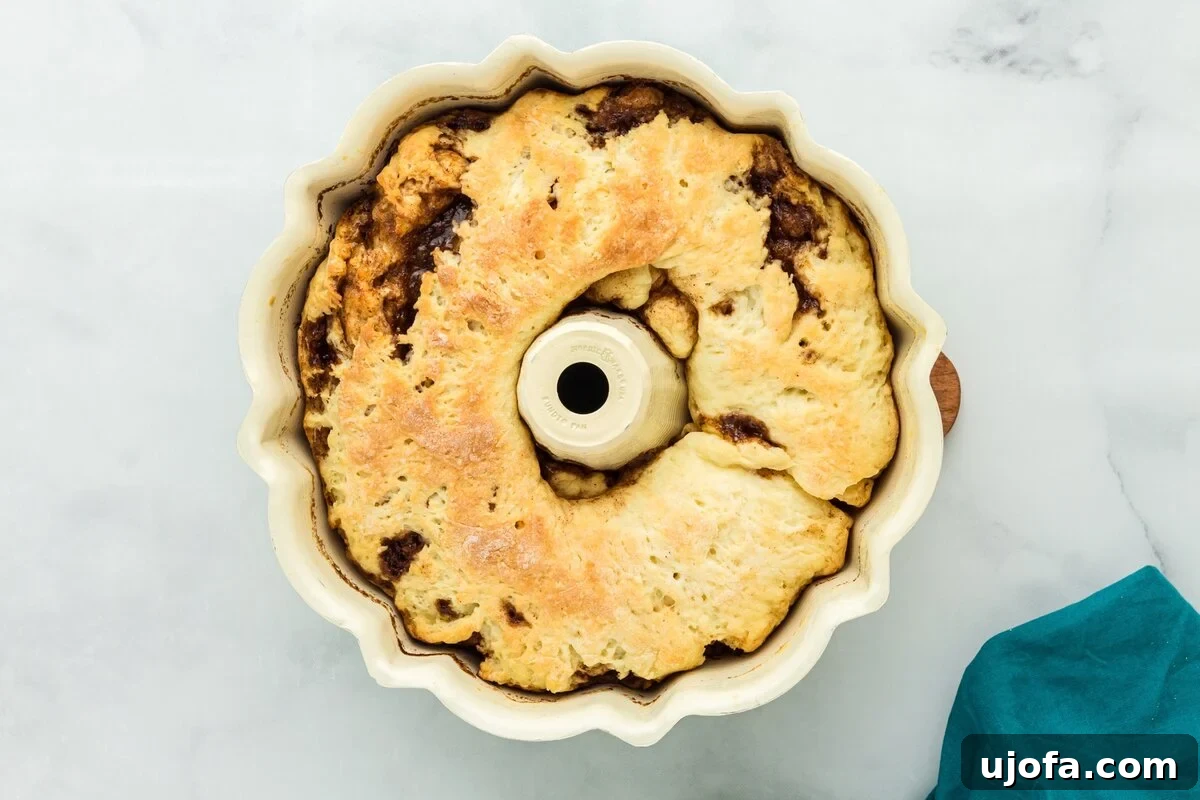
Step 12: Bake the King Cake. Preheat your oven to 350°F (175°C). Once preheated, remove the plastic wrap from the bundt pan and carefully place the cake into the oven. Bake for approximately 30–32 minutes, or until the top of the cake achieves a beautiful light golden brown hue and a reliable kitchen thermometer inserted into the thickest part (avoiding the cinnamon swirl) registers an internal temperature of 190°F (88°C). It is crucial to monitor baking time closely and avoid overbaking, as this can result in a dry texture.
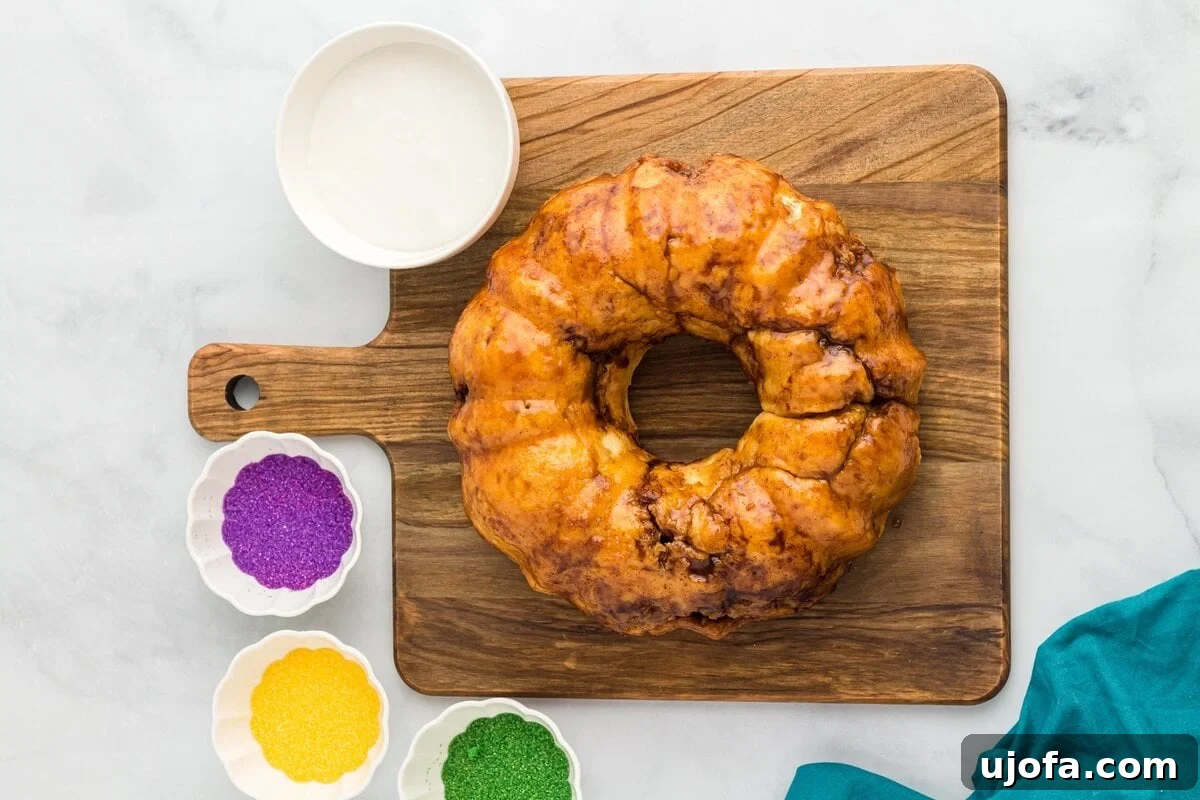
Step 13: Cool and Prepare Glaze. Allow the baked King Cake to cool in its bundt pan for a few minutes. Then, carefully invert it onto a serving platter or wire rack and gently remove the pan. If you’re upholding the tradition, now is the moment to hide the small plastic baby figurine: turn the cake over and delicately press the baby into the bottom of the bread so it’s completely concealed. Next, prepare the vibrant glaze. In a bowl, whisk together 2 cups (240g) of confectioners’ sugar, 1 tablespoon (15 ml) of milk, ½ tablespoon (7 ml) of fresh lemon juice (if using), and ½ teaspoon of vanilla extract until you achieve a smooth, pourable consistency. If you desire a thinner glaze, add a small splash more milk until perfect.
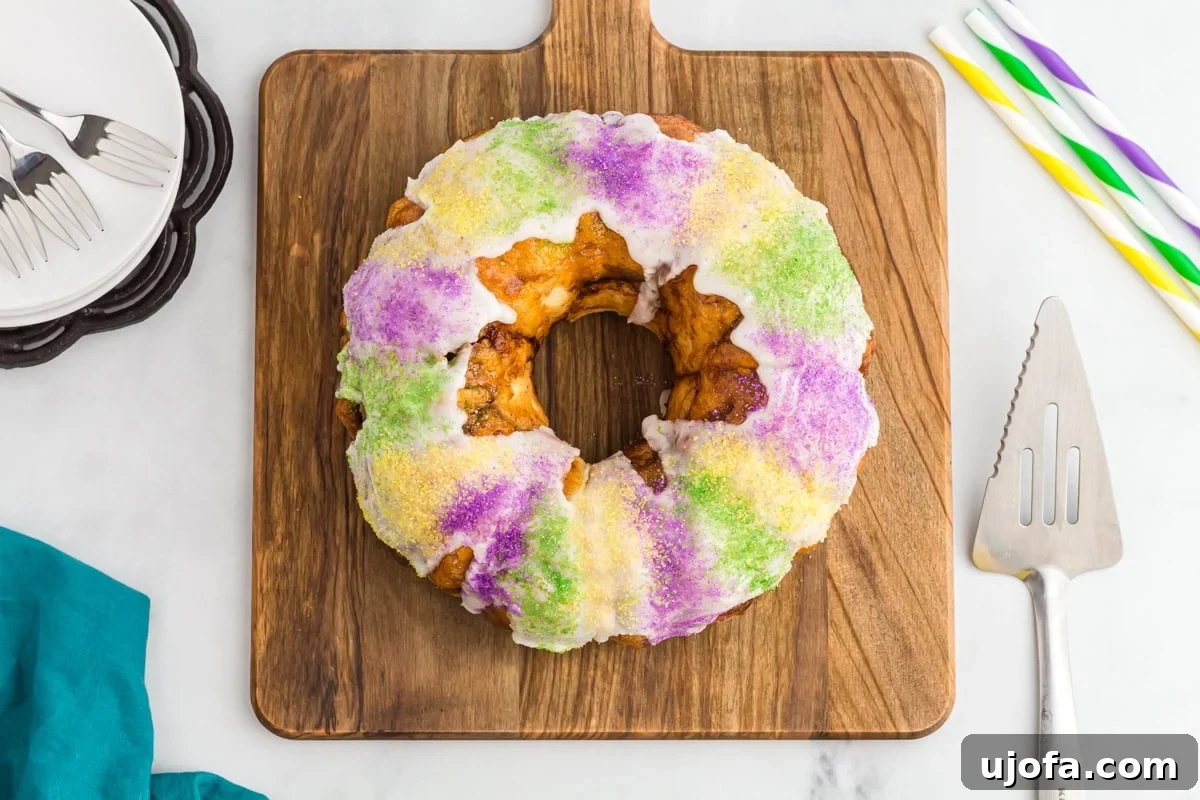
Step 14: Glaze and Decorate. While the King Cake is still slightly warm, generously pour the prepared vanilla glaze over the top. Immediately, before the glaze sets, decorate the cake with the festive green, purple, and gold sanding sugars. Arrange the colors in strips or sections for a classic Mardi Gras aesthetic.
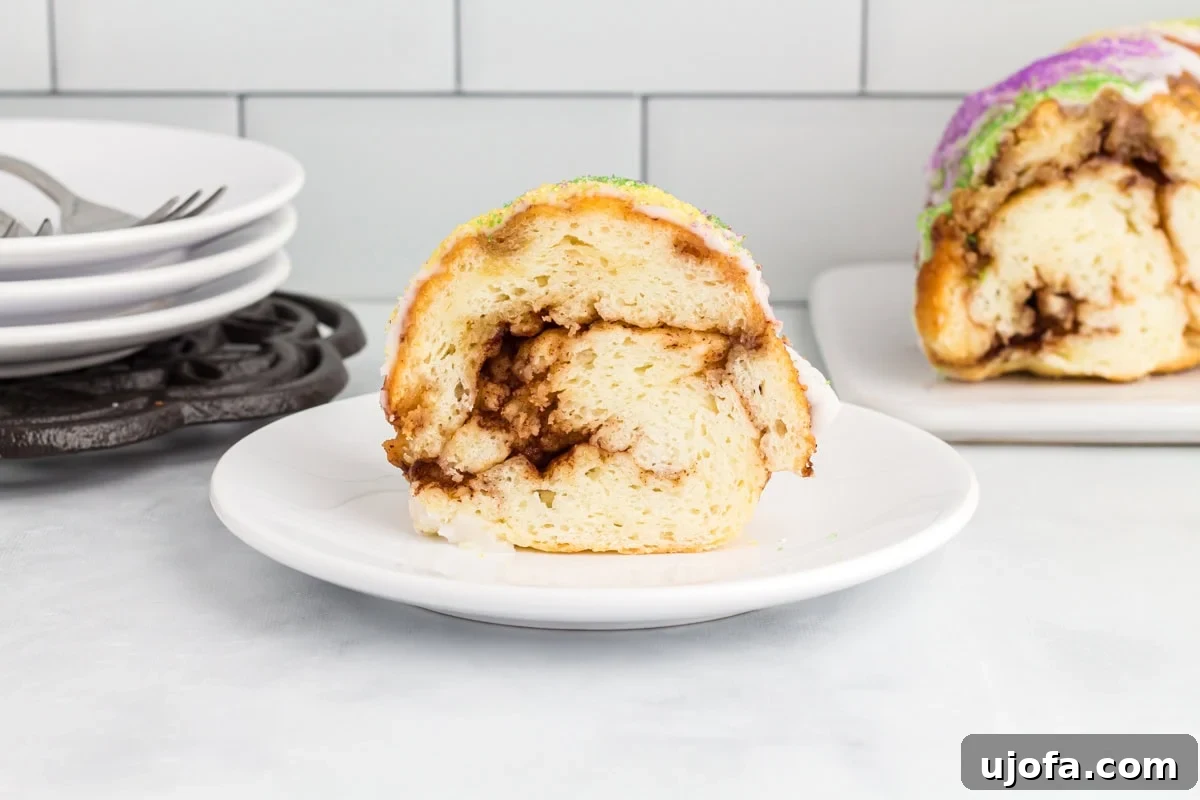
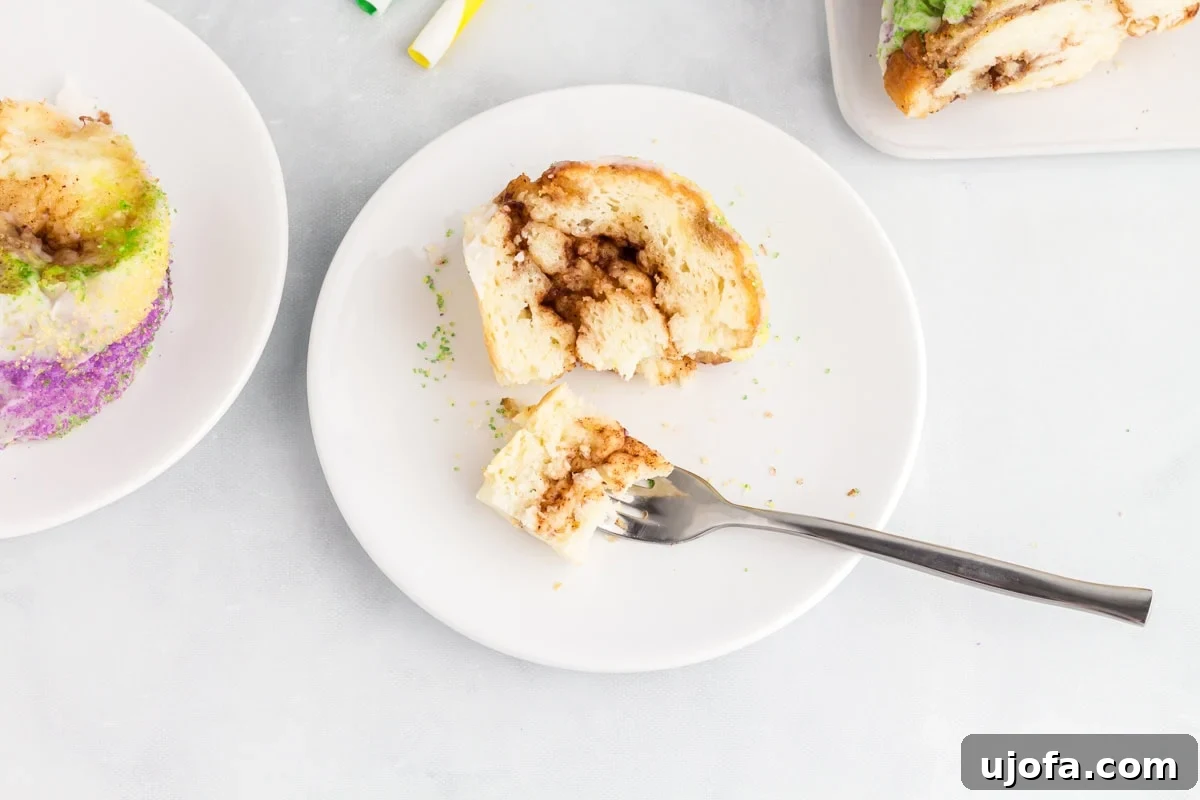
Step 15: Slice and Serve. To serve your magnificent King Cake, use a sharp serrated knife to cut it into even slices. For the cleanest cuts, wipe the blade between each slice if the glaze becomes sticky. Serve the cake slightly warm to fully appreciate its soft, tender texture and melted cinnamon-sugar goodness. Enjoy the festive flavors!
Creative Variations for Your Gluten-Free King Cake
King cake offers a wonderful canvas for culinary creativity, with numerous traditional and modern variations depending on regional preferences, family recipes, or even a baker’s whimsical touch. While our cinnamon sugar swirl is a classic, here are a few other delightful variations you can explore to personalize your gluten-free King Cake:
- Cream Cheese Delight: For a richer, tangier filling, consider swapping the cinnamon sugar for a sweetened cream cheese layer. A simple mix of softened cream cheese, confectioners’ sugar, and a hint of vanilla makes a wonderfully creamy contrast to the tender bread.
- Fruity Accents: Introduce a burst of fruitiness by using your favorite fruit preserves—such as raspberry, strawberry, or even apricot—as a vibrant center layer. The fruit will melt slightly into the dough, creating a luscious, sweet pocket.
- Pecan Praline Perfection: Elevate the indulgence with a pecan praline-style filling. This typically involves a buttery, brown sugar, and pecan mixture, offering a rich, nutty, and slightly chewy twist that’s highly popular in some Southern bakeries.
- Citrus Zest Infusion: For a brighter, more authentically New Orleans flavor profile, incorporate finely grated citrus zest (from oranges or lemons) directly into the dough or the vanilla glaze. This adds a fragrant, zesty note that complements the sweetness beautifully.
- Alternative Icings: Instead of the vanilla glaze, you can opt for a thicker royal icing or a simple dusting of powdered sugar over the cake before generously applying the signature colored sanding sugars. A simpler approach can sometimes highlight the bread’s flavor more directly.
- Adjust Sweetness: If you prefer a less sweet King Cake, you can easily reduce the amount of sugar in the filling, or even skip the glaze entirely, allowing the natural sweetness of the bread and the subtle cinnamon notes to shine through.
Perfect Pairings: Serving Suggestions for Your King Cake
This magnificent gluten-free King Cake is designed to be the dazzling centerpiece of any festive spread, perfect for Mardi Gras parties or elegant holiday brunches where guests can help themselves to a delicious slice. To create a well-rounded offering, I love pairing it with both savory and sweet accompaniments. For appetizers, consider serving small bites like savory gluten-free pigs in a blanket or a classic chips and dip spread. For a heartier meal, it complements rich Southern dishes such as a crustless ham and cheese quiche, a hearty gumbo, or a flavorful jambalaya, offering a sweet counterpoint to the robust flavors. As part of a larger dessert selection, it shines alongside other comforting treats like gluten-free banana pudding, or even served warm with a scoop of creamy almond milk ice cream. For an extra special touch, present each slice with a hot cup of coffee, a spiced tea, a dollop of fresh whipped cream, or a spoonful of mascarpone cheese, making every bite an indulgent and festive experience.
Storing Your Gluten-Free King Cake for Optimal Freshness
To ensure your gluten-free King Cake remains as delicious as possible, proper storage is key. Store the cake at room temperature in an airtight container. This method will keep it fresh and tender for up to 3 days. For the absolute best texture, especially on subsequent days, I highly recommend warming individual slices slightly before serving. A quick warm-up in the microwave or a few minutes in a low oven will soften the bread and allow the glaze to become beautifully smooth and slightly gooey again, replicating that fresh-baked experience.
Freezing a fully glazed and decorated King Cake is generally not recommended. The delicate texture of the icing can break down, and the bread itself might become slightly dry or crumbly upon thawing, compromising its overall quality. However, if you need to prepare components ahead or have unglazed leftovers to freeze, it’s certainly possible. For freezing, wrap the unglazed cake tightly in several layers of plastic wrap and then in aluminum foil to prevent freezer burn. When you’re ready to enjoy it, defrost the cake completely at room temperature, then prepare and add the fresh glaze and sprinkles as directed in the recipe.
For those who love to plan ahead, this recipe is perfect for making in advance. You can prepare the dough through its first rise (Step 5), then cover the bowl tightly with plastic wrap and refrigerate it overnight. The next day, remove the dough from the refrigerator and let it come back to room temperature on your counter for about 30-60 minutes before proceeding with shaping, allowing for the second rise, and baking as instructed. This flexibility makes it ideal for holiday entertaining or busy Mardi Gras celebrations.
Frequently Asked Questions About Gluten-Free King Cake
Here are some common questions about King Cake and its gluten-free version to help you master this festive treat.
- What is King Cake? King Cake is a traditional sweet bread, often enriched with butter and sugar, typically consumed during the Carnival season, especially in regions celebrating Mardi Gras. It’s known for its brioche-like texture, a sweet filling (often cinnamon-sugar), a vibrant glaze, and signature purple, green, and gold decorations.
- Why is it called King Cake? The name “King Cake” or “galette des rois” (in French tradition) is derived from the Biblical story of the Three Kings (Magi) who visited the Christ Child. The cake’s oval shape and festive colors symbolize a crown and jewels.
- What do the colors of King Cake mean? The traditional colors of King Cake hold symbolic meaning: purple represents justice, green signifies faith, and gold (or yellow) symbolizes power. These colors are prominently featured in Mardi Gras celebrations.
- Can I make this King Cake dairy-free? Yes, you can adapt this recipe to be dairy-free. Simply substitute the full-fat buttermilk with a dairy-free buttermilk alternative (e.g., mixing dairy-free milk with a teaspoon of lemon juice or vinegar and letting it sit for 5 minutes). Replace unsalted butter with a high-quality dairy-free butter alternative. Ensure your gluten-free flour blend is also dairy-free.
- What if my dough isn’t rising? If your dough isn’t rising, the most common culprit is inactive yeast. Refer to the “Notes from the Test Kitchen” section on how to test your yeast. Also, ensure your liquids were within the 110-115°F temperature range, as temperatures outside this range can kill or inhibit the yeast. The rising environment should also be warm, not hot.
- Where can I find the plastic baby for King Cake? Small plastic babies for King Cake can often be found at party supply stores, specialty baking stores, or online retailers, especially during the Carnival season.
More Gluten-Free Sweet Bread & Festive Bakes to Explore
If you’ve enjoyed baking this Gluten-Free King Cake, you’ll love these other delightful gluten-free sweet bread and festive bake recipes:
Gluten-Free Monkey Bread: Indulge in this irresistible gluten-free monkey bread, featuring a crunchy, caramelized exterior and a wonderfully soft, sweet, sticky center. Each individual dough ball is generously rolled in cinnamon sugar and layered with a rich, salty caramel sauce, creating the perfect balance of flavors.
Gluten-Free Olive Oil Cakes: Discover the elegance of this gluten-free olive oil cake, a perfect choice when you crave a dessert that is light, bright, and not overly sweet. The addition of lemon zest imparts a refreshing citrusy note, while the olive oil ensures the cake remains incredibly moist and tender.
Gluten-Free Challah Bread: Experience the joy of baking this gluten-free challah bread, which is remarkably soft, easy to braid, and captures all the beloved qualities of traditional challah, but without the gluten. There’s no need for a special molded loaf pan; simply braid the dough (it’s easier than it looks!) and bake it directly on a standard baking sheet for a beautiful result.