
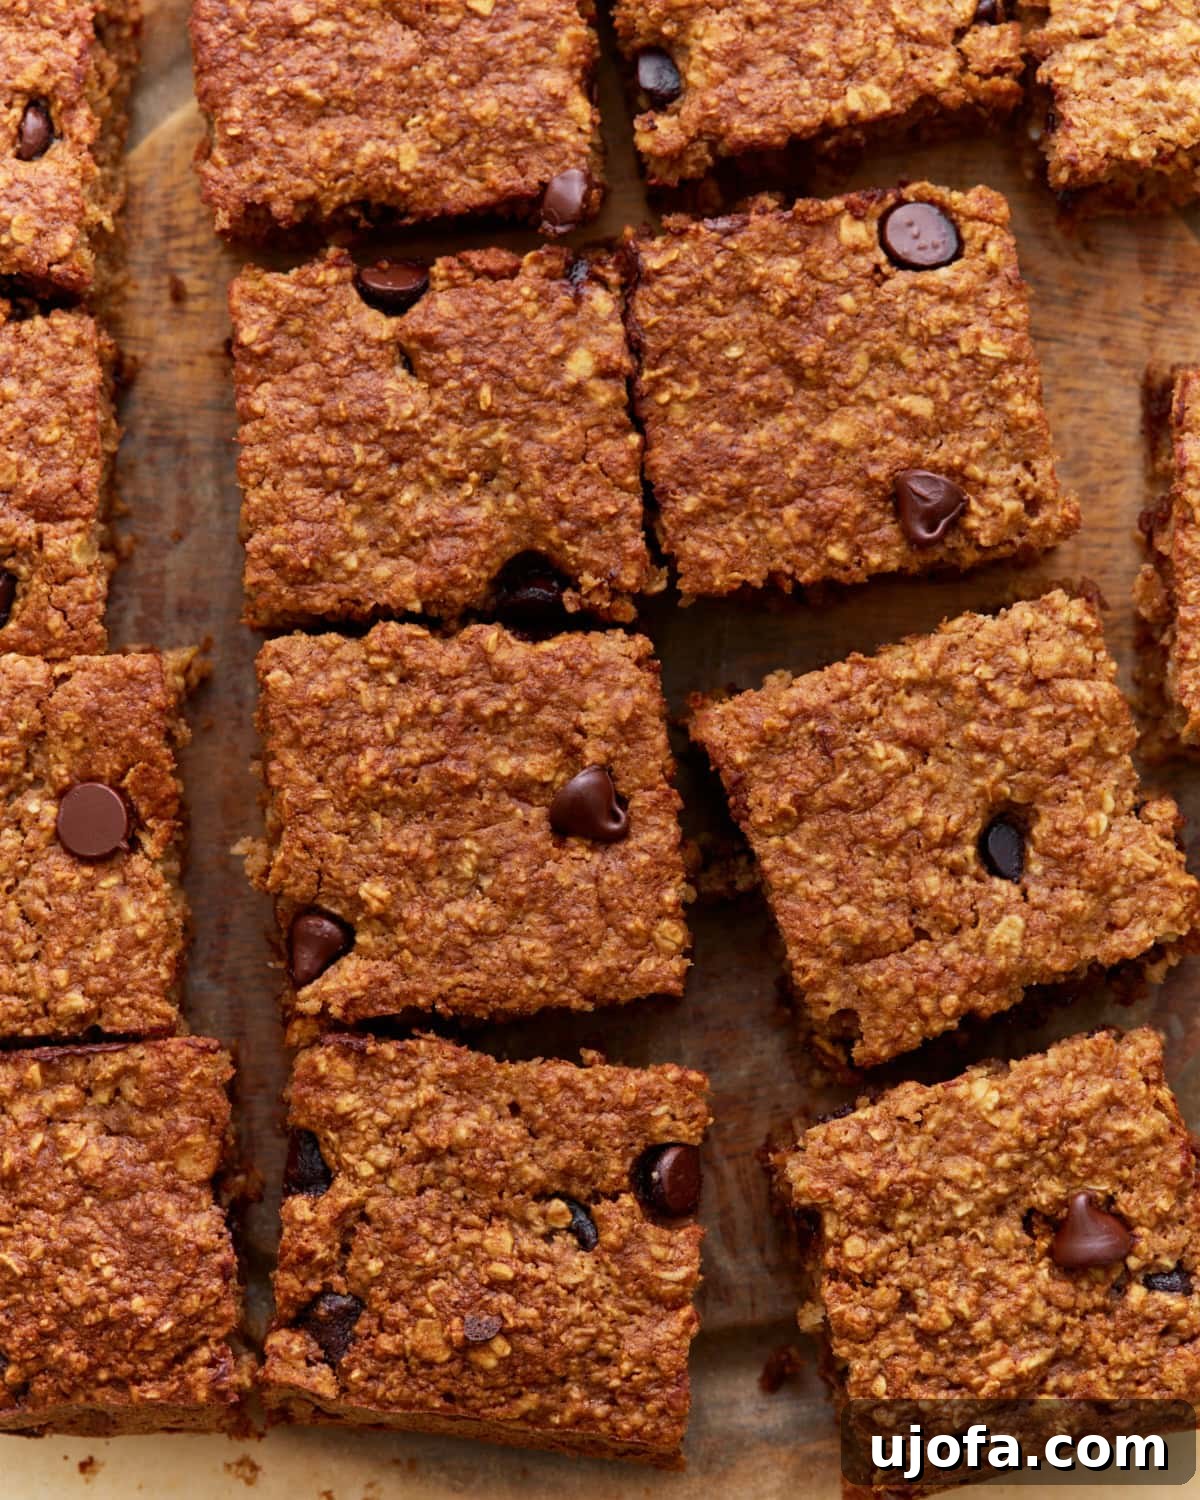
Welcome to your new favorite go-to snack: these incredibly delicious Gluten-Free Oatmeal Bars! Soft, perfectly sweet, and naturally dairy-free, they’re the ultimate wholesome treat that satisfies cravings without any guilt. I love baking a big batch at the start of the week because they’re perfect for everything – from quick grab-and-go breakfasts and energizing afternoon pick-me-ups to healthy additions for lunchboxes. With just a few pantry staples and about 30 minutes of your time, you can whip up these chewy, flavorful bars that both kids and adults will adore. Get ready to transform your snacking routine with a recipe that’s as simple as it is satisfying.
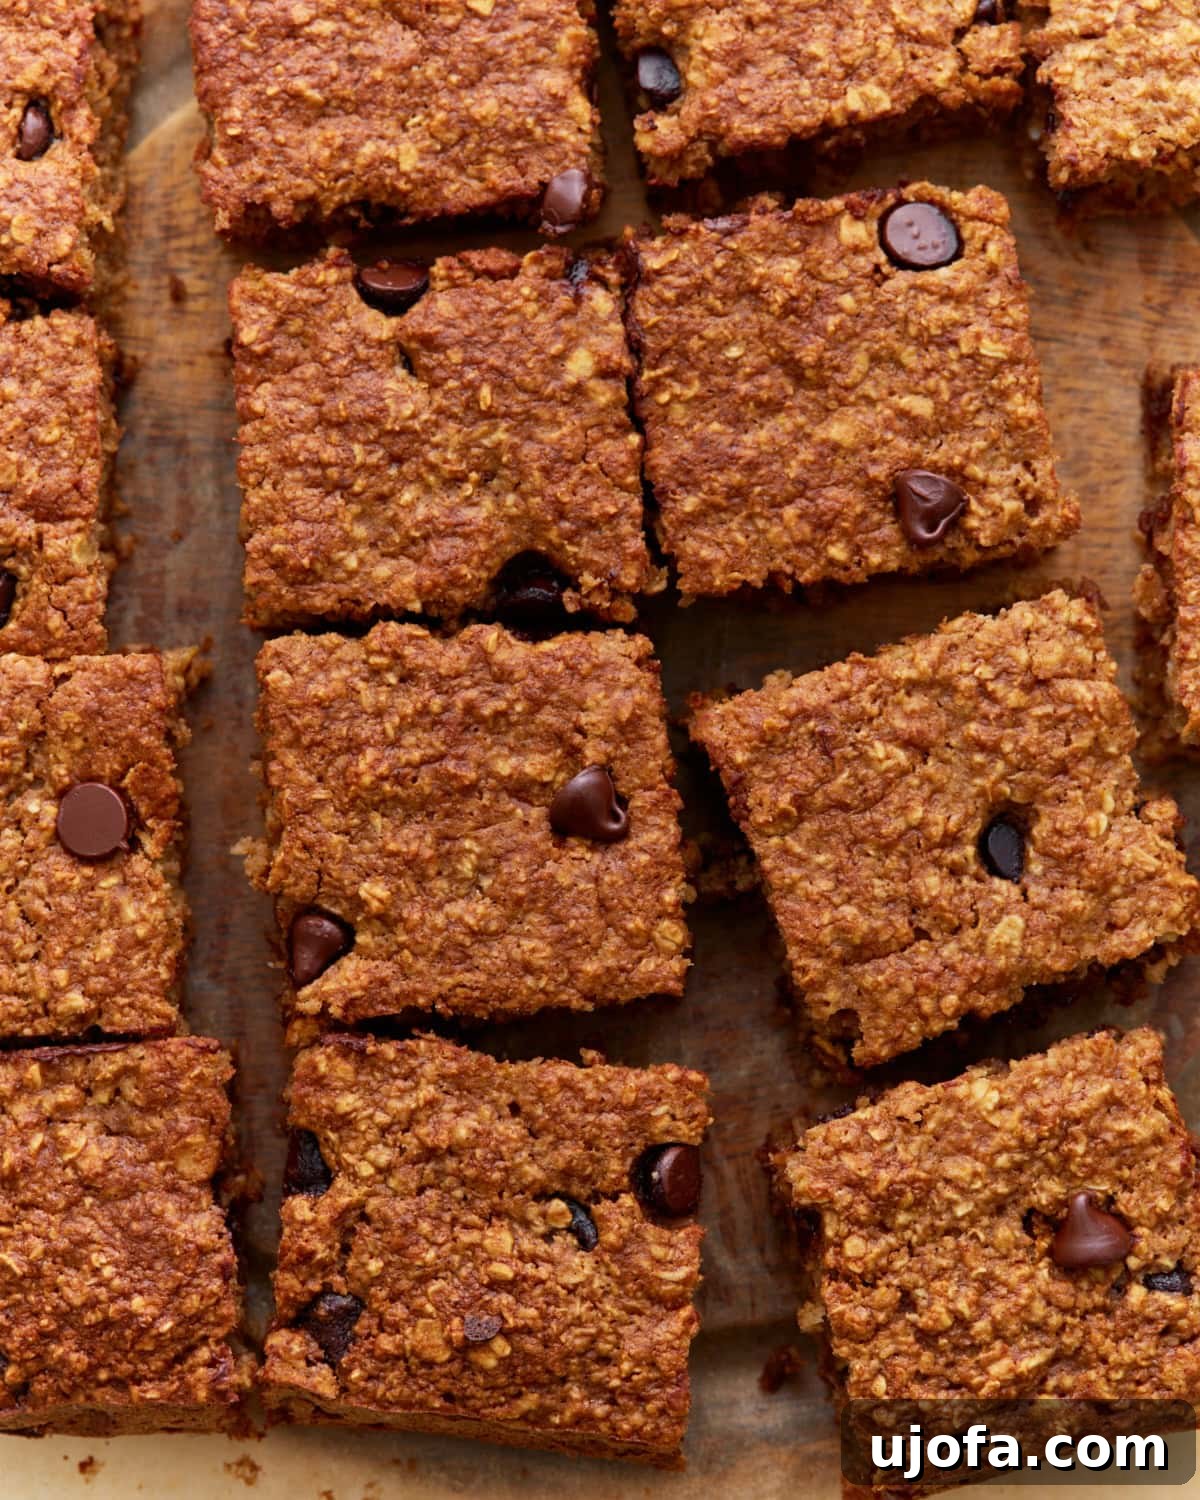
“Made them for a GF friend when she came for a play date. We all enjoyed them, including the kids. Thank you!”
– Kristina
Irresistible Gluten-Free Oatmeal Bars: Your New Favorite Healthy Snack
These baked oatmeal bars are more than just a recipe; they’re a simple, healthy breakfast or snack solution I rely on constantly. Much like my banana oatmeal bars, this recipe is a family favorite, beloved by everyone for its delicious taste and incredible versatility. They come together remarkably quickly, using common pantry staples, making them ideal for those hectic mornings or as a nourishing after-school snack. The star ingredient, oats, makes these bars incredibly hearty and satisfying, delivering a powerful punch of fiber and plant-based protein to keep you feeling full and energized throughout your day.
What truly sets these oatmeal bars apart is their ease of customization. Whether you’re navigating dietary restrictions or simply looking to tailor them to your preference, this recipe is incredibly forgiving. Ensure you use certified gluten-free oats for a truly gluten-free treat. For those who are dairy-free or vegan, simply swap in your favorite non-dairy milk and use a flax egg or a commercial gluten-free egg replacer. This adaptability means everyone can enjoy these wholesome, baked delights!
Why You’ll Love These Gluten-Free Oatmeal Bars
There are countless reasons to fall in love with these easy oatmeal bars:
- Effortlessly Delicious: Despite their simple ingredients, these bars boast a comforting, sweet, and perfectly chewy texture that’s hard to resist.
- Naturally Gluten-Free & Dairy-Free: With easy substitutions, this recipe caters beautifully to various dietary needs without compromising on flavor.
- Quick & Easy Preparation: From mixing bowl to oven, these bars are ready in under 45 minutes, making them perfect for busy schedules.
- Wholesome & Hearty: Packed with the goodness of oats, they’re rich in fiber and plant-based protein, providing sustained energy.
- Perfect for Meal Prep: Bake a batch, and you’ll have healthy, convenient breakfasts and snacks ready for days.
- Highly Customizable: The base recipe is a blank canvas for your favorite mix-ins, from fruits and nuts to different spices.
- Kid-Friendly Approved: Their soft texture and gentle sweetness make them a hit with children, a healthy alternative to processed snacks.
Delicious Gluten-Free Oatmeal Bars Recipe
Yields: 16 servings
Cook Time: 20-25 minutes
Total Time: 35-40 minutes
Email Recipe
Print Recipe
A delightful and easy recipe for wholesome oatmeal bars. These healthy, baked gluten-free oatmeal bars are ideal for a quick grab-and-go breakfast or a satisfying snack for the entire family. Find detailed step-by-step photos below the recipe card!
Ingredients
- 2 large eggs (for vegan, use flax eggs: 2 tbsp ground flaxseed + 5 tbsp water, let sit 5 mins; or Bob’s Red Mill gluten-free egg replacer; for low-fat, use ⅔ cup egg whites)
- ½ cup unsweetened applesauce (convenient 1/2 cup snack cups work perfectly)
- ½ cup packed brown sugar (light or dark, adjust to taste)
- 1 tsp pure vanilla extract (enhances all flavors)
- ¾ cup milk (unsweetened almond milk, oat milk, or soy milk are excellent dairy-free and vegan options)
- 2½ cups certified gluten-free quick oats (ensure oats are certified GF for strict diets)
- 1½ tsp baking powder (for light and fluffy texture)
- ½ tsp baking soda (reacts with applesauce/brown sugar for rise)
- ½ tsp salt (balances sweetness and enhances flavor)
- 1 tsp ground cinnamon (adds warmth and spice)
- ½ cup chocolate chips (dairy-free chocolate chips for vegan/dairy-free, or your favorite mix-in like raisins, nuts, or dried fruit)
Equipment Needed
- 9×9 inch square baking pan
- Large mixing bowl
- Whisk
- Spatula or spoon
- Parchment paper (optional, for easy removal)
Instructions
- **Prepare Oven and Pan:** Preheat your oven to 350°F (175°C). Lightly grease a 9×9-inch (23×23 cm) square baking pan with cooking spray or line it with parchment paper, leaving an overhang on the sides for easy lifting after baking.
- **Combine Wet Ingredients:** In a large mixing bowl, whisk together the large eggs, milk (or chosen dairy-free alternative), unsweetened applesauce, brown sugar, and pure vanilla extract until the mixture is smooth and well combined.
- **Incorporate Dry Ingredients:** Add the certified gluten-free quick oats, baking powder, baking soda, salt, and ground cinnamon to the wet ingredients. Stir gently with a spatula or spoon until all the dry ingredients are just incorporated into the wet mixture. Be careful not to overmix.
- **Stir in Mix-ins:** Gently fold in your chosen mix-ins, such as chocolate chips, raisins, or chopped nuts, distributing them evenly throughout the batter.
- **Fill Baking Pan:** Pour the oatmeal bar batter into the prepared baking pan. Use the back of your spoon or a spatula to spread the batter evenly into all corners of the pan. This promotes even baking.
- **Bake to Golden Perfection:** Place the baking pan on the center rack of your preheated oven. Bake for 20-25 minutes, or until the edges are beautifully golden brown and the center of the bars is set and springs back lightly when touched.
- **Cool and Slice:** Remove the pan from the oven and allow the oatmeal bars to cool completely in the pan for at least 5-10 minutes before slicing. For cleaner cuts, you can even chill them in the refrigerator for 30 minutes to an hour. Once cooled, use the parchment paper overhang (if used) to lift the entire slab out of the pan. Cut into 16 evenly sized bars.
Expert Tips for the Best Oatmeal Bars
- **Certified Gluten-Free Oats:** While oats are naturally gluten-free, cross-contamination can occur during processing. Always look for oats explicitly labeled as “certified gluten-free” to ensure they are safe for those with celiac disease or gluten sensitivity.
- **Don’t Overbake:** For deliciously chewy oatmeal bars, avoid overbaking. Take them out of the oven when the edges are lightly golden, even if the center still seems slightly soft. They will continue to set as they cool.
- **Achieve Clean Slices:** If you prefer perfectly neat, firm bars, chill the baked and cooled slab in the refrigerator for at least 30 minutes before cutting. This will help the bars firm up and make slicing much easier.
- **Customize Your Mix-ins:** Feel free to get creative! Beyond chocolate chips, consider adding dried cranberries, raisins, chopped nuts (pecans, walnuts), shredded coconut, or even a swirl of nut butter before baking.
- **Perfect Texture:** Using quick oats helps achieve a softer, more uniform texture. If you only have rolled oats, you can pulse them briefly in a food processor a few times to break them down slightly, mimicking quick oats.
- **Flavor Boost:** A pinch of nutmeg or allspice can complement the cinnamon beautifully for an even warmer flavor profile.
Nutrition Information
Serving: 1 bar
Calories: 95kcal
Carbohydrates: 18g
Protein: 3g
Fat: 2g
Saturated Fat: 1g
Polyunsaturated Fat: 0.4g
Monounsaturated Fat: 1g
Trans Fat: 0.003g
Cholesterol: 24mg
Sodium: 122mg
Potassium: 154mg
Fiber: 2g
Sugar: 7g
Vitamin A: 46IU
Vitamin C: 0.003mg
Calcium: 46mg
Iron: 1mg
Nutrition information is an approximation based on standard calculations and may vary depending on ingredients and preparation methods.
How to Make Easy Gluten-Free Oatmeal Bars: A Visual Guide
Follow these simple steps with detailed photos to bake your perfect batch of healthy oatmeal bars. Each image clarifies the process, making it incredibly easy for even novice bakers to achieve delicious results every time.
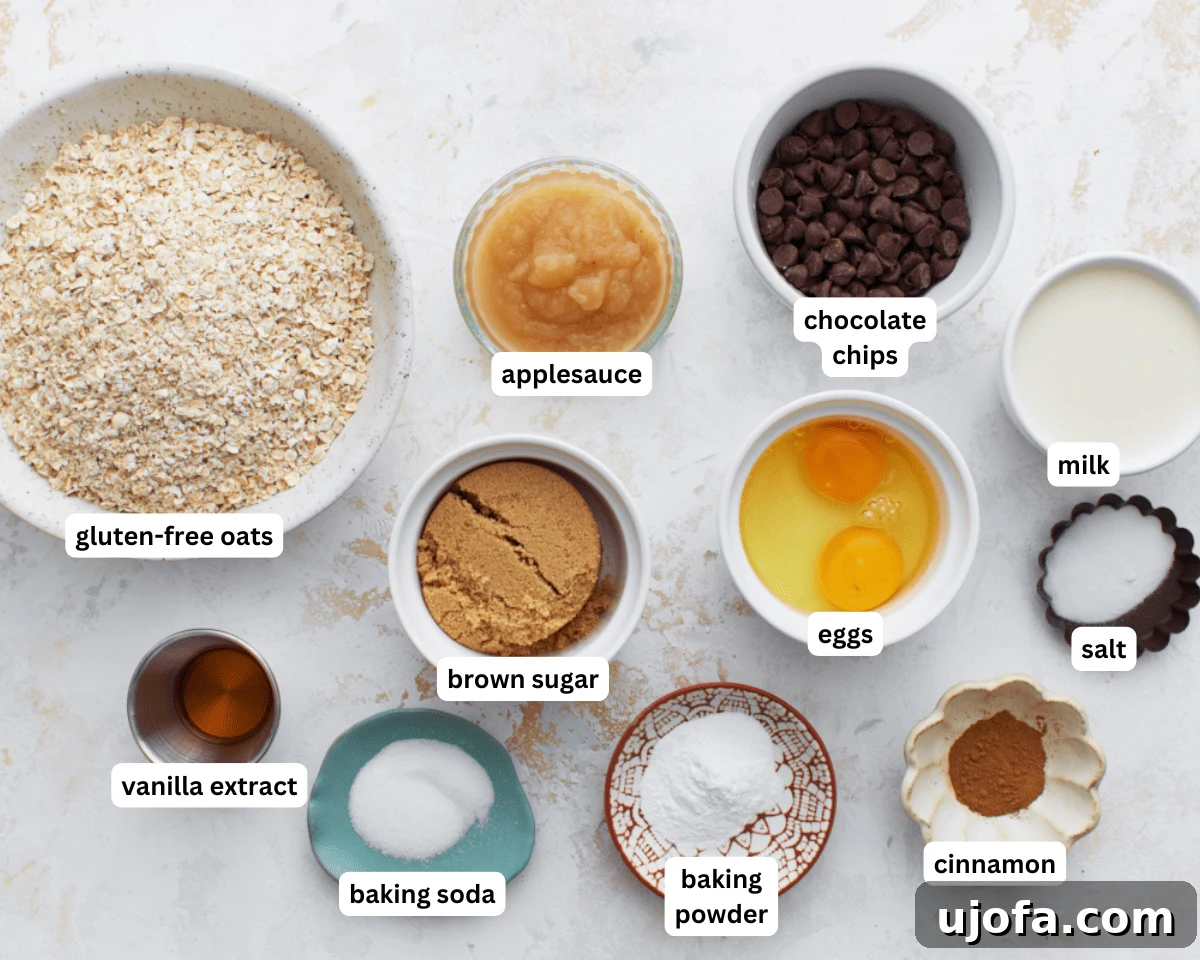
1. Gather the Ingredients: Your baking journey begins with preparation! Lay out all the necessary ingredients on your counter. Preheat your oven to 350°F (175°C) and prepare a 9×9-inch (23×23 cm) square baking pan. Lightly grease it with cooking spray for a non-stick finish, or line it with parchment paper, leaving a slight overhang on the sides. This thoughtful step ensures your delicious bars lift out effortlessly once baked and cooled.
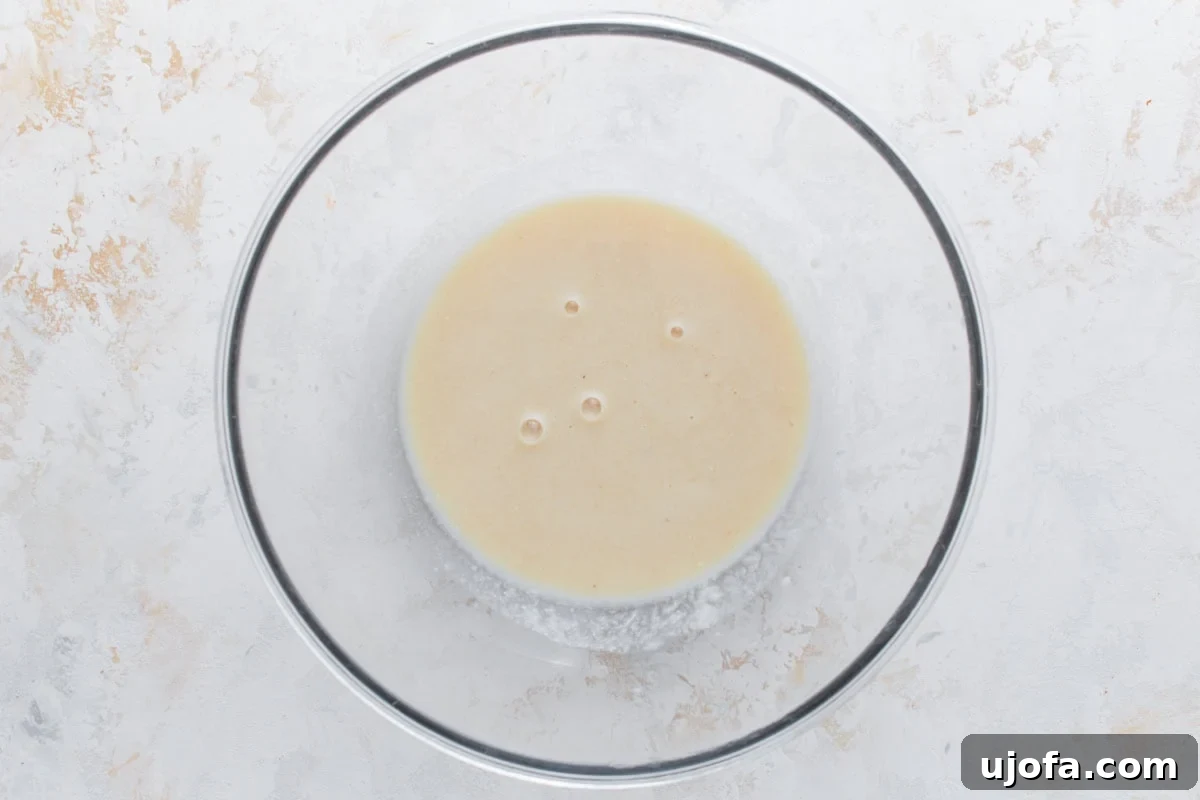
2. Mix the Wet Ingredients: In a spacious mixing bowl, combine the two large eggs, ¾ cup of your chosen milk (dairy or non-dairy works beautifully), ½ cup of unsweetened applesauce, ½ cup of packed brown sugar, and 1 teaspoon of pure vanilla extract. Using a whisk, beat these wet ingredients together until the mixture is completely smooth and cohesive. This forms the essential moist foundation for your chewy oatmeal bars, ensuring they are rich and tender.
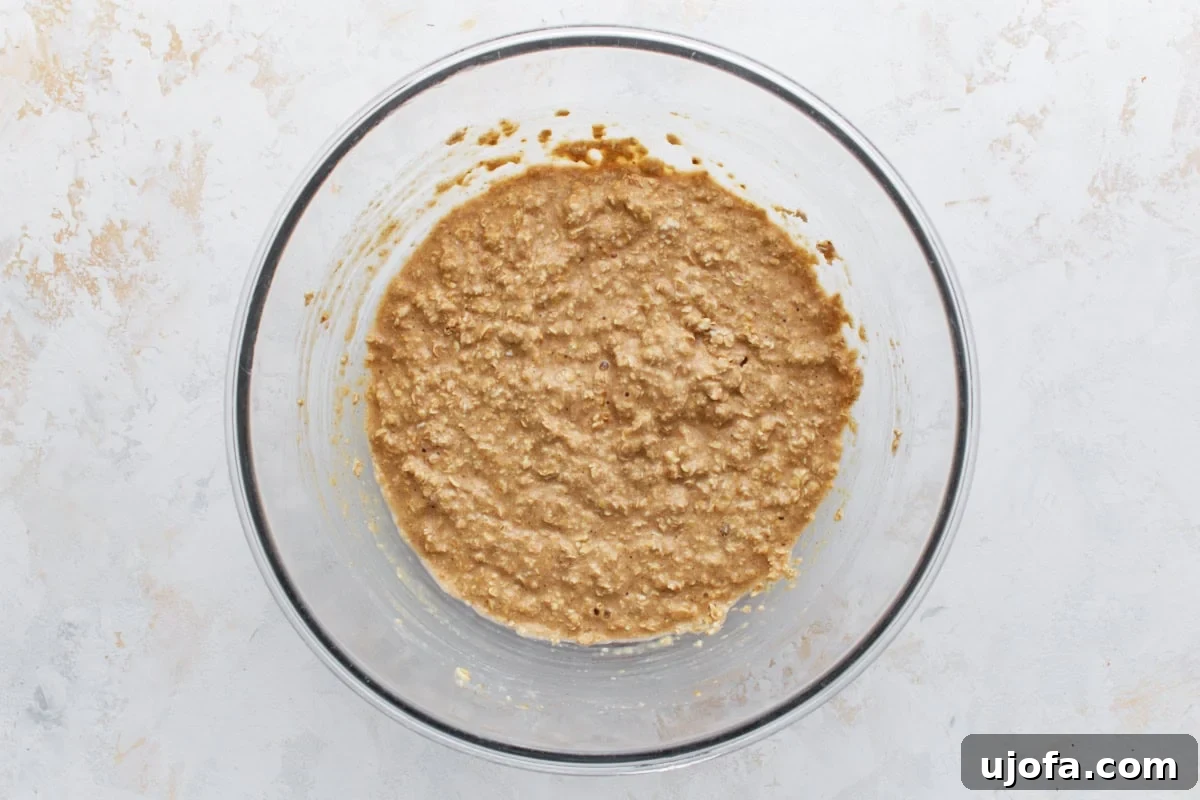
3. Incorporate Dry Ingredients: It’s time to bring in the texture and spice! To the wet mixture, add 2½ cups of certified gluten-free quick oats, 1½ teaspoons of baking powder, ½ teaspoon of baking soda, ½ teaspoon of salt, and 1 teaspoon of ground cinnamon. With a spatula or large spoon, stir the ingredients gently until the dry components are just incorporated into the wet batter. The key here is to avoid overmixing, which can result in tougher bars; stop once no dry streaks remain.
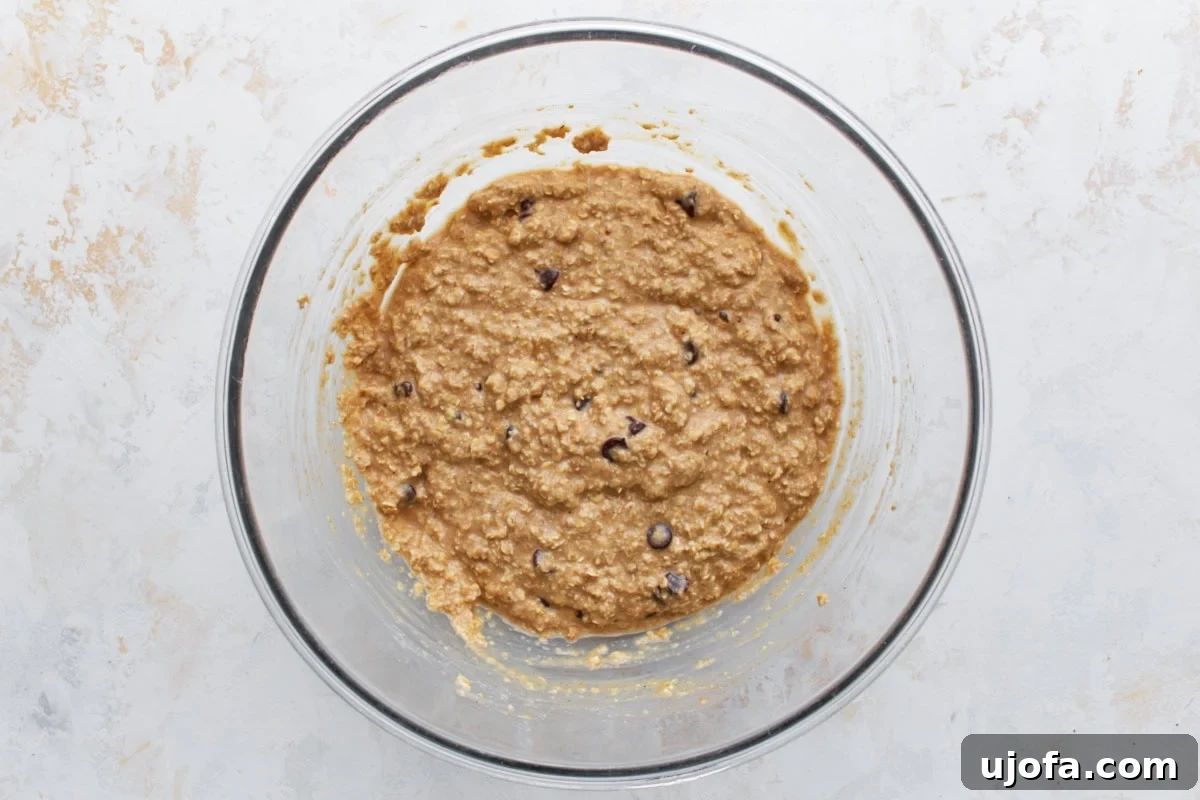
4. Fold in the Chocolate Chips: Now for the fun part – customization! Gently fold in ½ cup of chocolate chips (choose dairy-free for a vegan option) or any other delightful mix-ins you desire, such as dried cranberries, raisins, or chopped nuts. Ensure they are evenly distributed throughout the batter, so every bite offers a delightful surprise of flavor and texture.
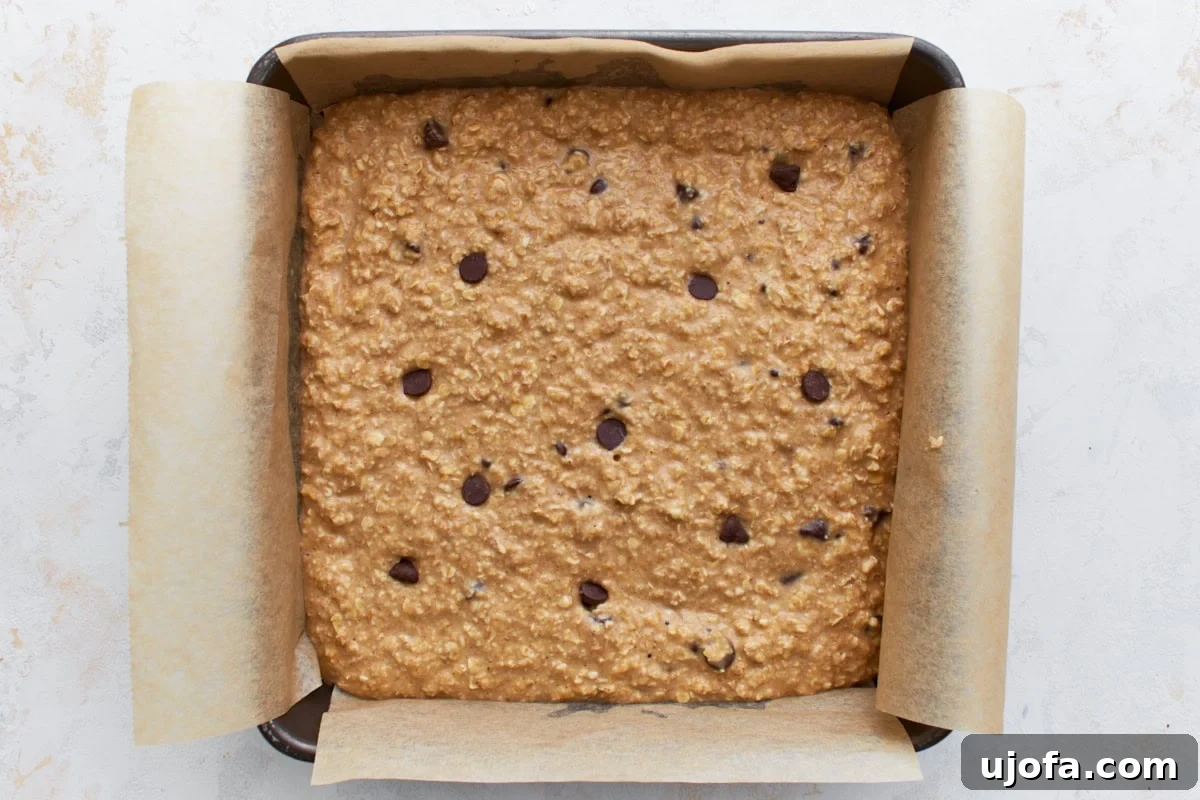
5. Fill the Baking Pan: Carefully pour the oatmeal bar batter into your prepared 9×9-inch baking pan. Use the back of your spoon or a spatula to spread the batter out evenly across the pan, reaching all corners. This crucial step ensures uniform thickness, leading to an even bake and beautifully shaped bars. A smooth top also contributes to a professional finish.
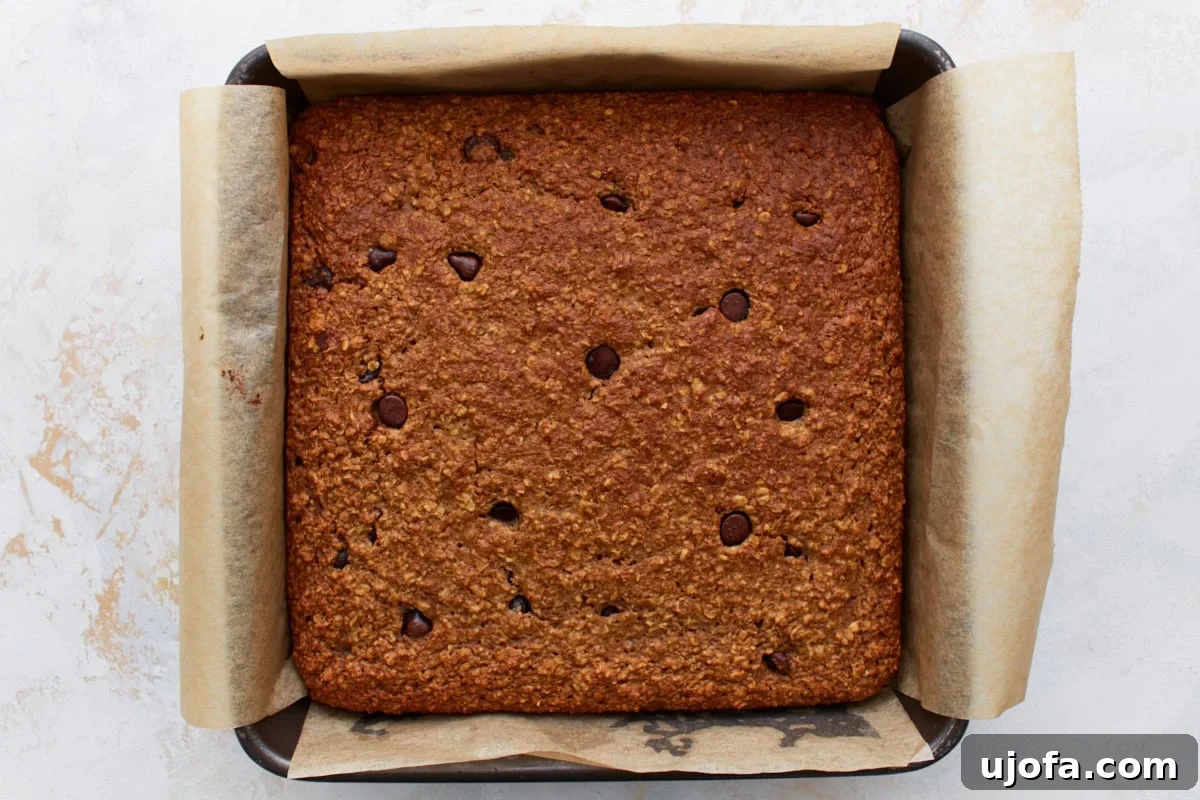
6. Bake the Bars: Place the baking pan on the center rack of your preheated oven. Bake for approximately 20-25 minutes. Keep a close watch; you’ll know they’re perfectly baked when the edges turn a lovely golden brown and the center feels set to the touch. A toothpick inserted into the center should come out clean or with moist crumbs, not wet batter. Remember, slightly underbaked bars are often chewier and more delicious!
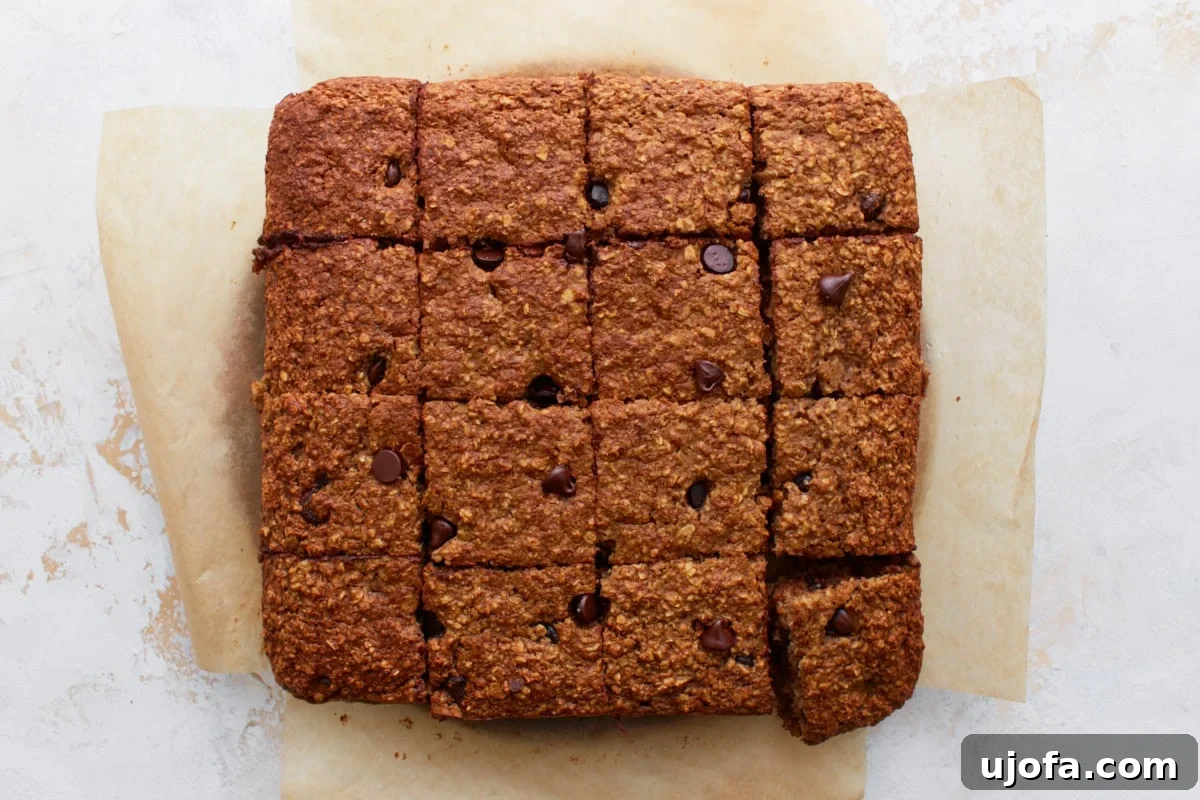
7. Cool and Serve: Once baked, remove the pan from the oven. This next step requires a bit of patience, but it’s essential for perfect bars: allow them to cool completely in the pan for at least 5-10 minutes. For even cleaner, firmer slices, you can let them cool completely on a wire rack, or even pop them into the refrigerator for 30 minutes to an hour. Once cooled, use the parchment paper overhang (if used) to lift the entire baked slab, then cut it into 16 uniform bars. Now, they are ready to be savored!
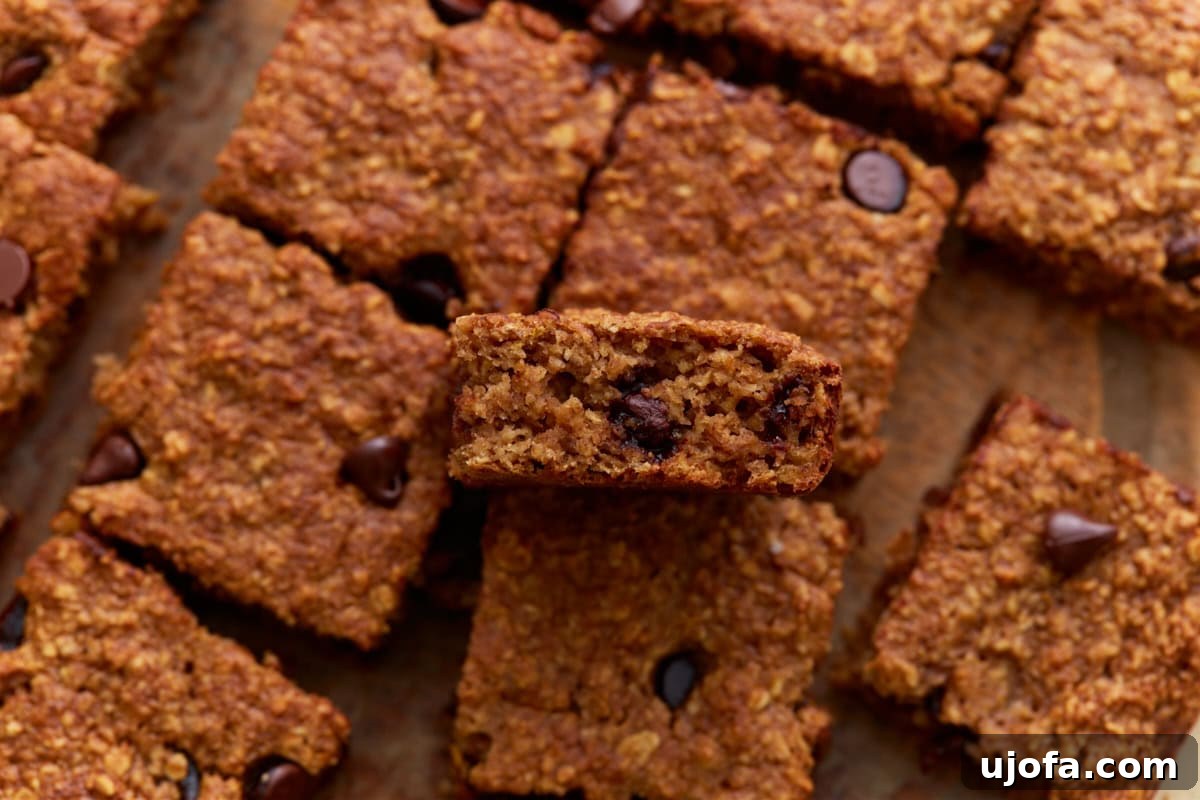
Creative Serving Suggestions for Your Oatmeal Bars
These versatile gluten-free oatmeal bars are fantastic on their own, but they also pair beautifully with a variety of additions to elevate your snack or breakfast experience. For a cozy afternoon treat, I love them alongside a steaming cup of coffee or herbal tea. They are an absolute lifesaver for busy mornings – simply grab one (or two!) and you’re good to go. Pack them in lunchboxes for a wholesome school or office snack, or keep them in meal prep containers for healthy treats throughout the week.
Want to make them a heartier breakfast? Serve them with a side of fresh fruit, a dollop of Greek yogurt, or a sprinkle of granola for added crunch. For those who enjoy a little extra richness, a drizzle of creamy peanut butter, almond butter, or cashew butter takes these bars to the next level. You can also warm them slightly in the microwave for a few seconds to bring out the gooey chocolate chips and a softer texture, making them feel like a fresh-baked dessert. A sprinkle of sea salt on top of warm chocolate chip bars is also a delightful touch, enhancing both the sweet and savory notes!
Endless Customization: Make These Bars Your Own!
The beauty of this oatmeal bar recipe lies in its adaptability. While chocolate chips are a classic favorite, don’t hesitate to experiment with different mix-ins to suit your taste or what you have on hand. The possibilities are truly endless:
- **Dried Fruits:** Boost natural sweetness and chewiness by adding raisins, dried cranberries (craisins), chopped apricots, or even finely diced dried figs or dates.
- **Fresh or Frozen Fruit:** For a burst of freshness, incorporate small diced apples, mashed banana, or a handful of frozen blueberries. No need to thaw the frozen berries; they’ll bake beautifully into the bars.
- **Nuts & Seeds:** Enhance the nutritional value and add a satisfying crunch with chopped pecans, walnuts, sliced almonds, pumpkin seeds, or sunflower seeds. Lightly toasting them beforehand can deepen their flavor profile.
- **Spices:** Amp up the warmth with a dash of other comforting spices like nutmeg, allspice, or a pinch of ground ginger, especially delightful during the cooler months.
- **Coconut:** Shredded coconut (sweetened or unsweetened) offers a tropical flair and a unique, soft texture that complements the oats perfectly.
- **Nut Butters:** For added richness and a boost of protein, swirl in a tablespoon or two of creamy peanut butter, almond butter, or sunbutter directly into the batter before baking.
Storing Your Gluten-Free Oatmeal Bars for Optimal Freshness
Proper storage is essential to keep your delicious gluten-free oatmeal bars fresh, chewy, and enjoyable for as long as possible. Whether you plan to savor them throughout the week or freeze them for future cravings, here’s how to do it right:
Refrigerator Storage:
Once your baked oatmeal bars have completely cooled to room temperature, transfer them to an airtight container. To prevent them from sticking together, especially if they contain melty chocolate chips, you can layer them between pieces of parchment paper. Store the container in the refrigerator for up to five days. Chilling them not only extends their shelf life but also helps maintain their firm, appealing texture.
Freezing Instructions:
These oatmeal bars are wonderfully freezer-friendly, making them an excellent candidate for meal prepping in larger batches. This way, you always have a healthy snack or quick breakfast on hand. To freeze them effectively:
- **Cool Completely:** It is paramount that the baked and sliced bars are entirely cooled to room temperature before freezing. Any residual warmth can lead to condensation, which will form ice crystals and result in a soggy texture upon thawing.
- **Pre-Freeze (Optional but Recommended):** For the best results and to prevent the bars from sticking together in a block, arrange the individual bars in a single layer on a baking sheet lined with parchment paper. Place the baking sheet in the freezer for about 1-2 hours, or until the bars are firm and solid.
- **Store in Freezer-Safe Container:** Once the bars are pre-frozen, transfer them to a plastic freezer bag or a freezer-safe airtight container. You can stack them, optionally separating layers with parchment paper for extra protection.
- **Label and Freeze:** Don’t forget to label the container with the date. The oatmeal bars can be kept frozen for up to three months, maintaining their delicious quality.
Thawing and Reheating:
When you’re ready to enjoy a frozen oatmeal bar, you have a few convenient options for thawing and reheating:
- **Refrigerator Thaw:** The easiest method is to transfer a bar (or several) from the freezer to the refrigerator overnight. By morning, they will be perfectly thawed and ready to eat cold or at room temperature.
- **Room Temperature Thaw:** For a quicker thaw, simply leave a frozen bar out at room temperature for 30-60 minutes. This is ideal if you need a speedy snack.
- **Microwave:** For a warm, soft, and slightly gooey bar – especially delightful if they contain chocolate chips – place a single bar on a microwave-safe plate and microwave for 15-30 seconds, or until warmed through. Be cautious not to overheat, as this can make them tough.
Frequently Asked Questions (FAQ) About Oatmeal Bars
- Q: Are oats truly gluten-free?
- A: Yes, oats are naturally gluten-free. However, they are often processed in facilities that also handle wheat, barley, and rye. This can lead to cross-contamination, making them unsafe for individuals with celiac disease or severe gluten sensitivity. For a truly gluten-free product, it is crucial to purchase oats specifically labeled as “certified gluten-free,” ensuring they have been processed in dedicated gluten-free facilities.
- Q: Can I use steel-cut oats or rolled oats instead of quick oats?
- A: This recipe is specifically formulated and optimized for quick oats, which contribute to the bars’ softer, chewier, and more uniform texture, and absorb liquids efficiently. While rolled oats (old-fashioned oats) can be used, they will result in a chewier bar and might require a slightly longer baking time due to their larger size and denser texture. Steel-cut oats, however, are not recommended for this recipe. They have a very different cooking time and will remain too tough and gritty, not softening adequately within the baking parameters.
- Q: How can I make these oatmeal bars completely vegan?
- A: Adapting these bars to be entirely vegan is very straightforward with a few simple substitutions:
- **Eggs:** Replace the 2 large eggs with either flax eggs (prepare by mixing 2 tablespoons of ground flaxseed with 5 tablespoons of water and letting it sit for 5 minutes until it forms a gel-like consistency) or use a commercial gluten-free egg replacer, such as those made by Bob’s Red Mill, according to package directions.
- **Milk:** Substitute the regular milk with any unsweetened non-dairy milk of your choice. Excellent options include almond milk, oat milk, or soy milk.
- **Chocolate Chips:** If using chocolate chips, ensure they are specifically labeled as dairy-free and vegan-friendly.
- Q: My bars are too crumbly, what might have gone wrong?
- A: Crumbly oatmeal bars can be a common issue, often resulting from one or a combination of factors:
- **Overmixing:** Vigorously overmixing the batter can develop any minimal gluten in the oats and potentially dry out the mixture, leading to a crumbly texture.
- **Incorrect Ingredient Ratios:** Double-check your measurements, especially for the wet ingredients like milk and applesauce. Too much dry ingredient or not enough liquid can make the batter brittle.
- **Insufficient Binder:** Ensure your eggs (or flax eggs) were correctly measured and thoroughly incorporated, as they are crucial for binding the ingredients together.
- **Underbaking:** While overbaking leads to dryness, slight underbaking can also make bars too soft and unable to hold their shape, causing them to fall apart. Ensure the center is set.
- **Insufficient Cooling:** Patience is key! Bars need to cool completely to firm up. Trying to cut them while warm will almost certainly lead to crumbling. Chilling them in the refrigerator significantly helps them set.
- Q: How can I reduce the sugar content in these bars?
- A: This recipe already uses unsweetened applesauce to naturally sweeten the bars and reduce reliance on added sugars. However, if you wish to further lower the sugar content, you can:
- **Reduce Brown Sugar:** Slightly decrease the amount of brown sugar. Start by reducing it by ¼ cup and adjust to your taste in future batches.
- **Substitute Sweeteners:** You could try substituting a portion of the brown sugar with a natural liquid sweetener like maple syrup or honey, though you might need to slightly reduce other liquids in the recipe to maintain consistency.
- **Add More Fruit:** Incorporating more naturally sweet dried fruits like raisins or dates, or fresh fruits like mashed banana, can increase sweetness without adding refined sugar.
More Delicious Gluten-Free Oatmeal Bakes to Try
If you’ve fallen in love with the versatility and wholesome goodness of oats, then you’re in for a treat! Be sure to explore these other fantastic gluten-free oatmeal recipes from our collection, perfect for any time of day:
- Gluten-Free Oatmeal Cookies: A classic, comforting treat that’s perfectly chewy and satisfying, just like grandma used to make.
- Fluffy Oatmeal Pancakes: Start your day with these hearty, tender, and incredibly satisfying pancakes, a wholesome alternative to traditional flour pancakes.
- Banana Oatmeal Cookies: A delightful blend of ripe, sweet bananas and wholesome oats, these cookies are a healthier indulgence.
- Wholesome Banana Oatmeal Muffins: Perfect for breakfast, a grab-and-go snack, or even a light dessert, these muffins are moist and flavorful.
- Gluten-Free Banana Oatmeal Bread: A moist, tender, and incredibly flavorful bread that’s wonderful for sharing or enjoying slice by slice with your favorite spread.
Tried this recipe? We’d love to see it!
Share your creations with us on social media! Mention @mamaknowsglutenfree or tag #mamaknowsglutenfree so we can celebrate your baking success!
Our Gluten-Free Oatmeal Bars recipe was originally published on August 26, 2022. It underwent meticulous retesting, reworking, and was republished on August 13, 2025, to ensure it’s better than ever, offering you the most delightful, easy, and foolproof baking experience.