
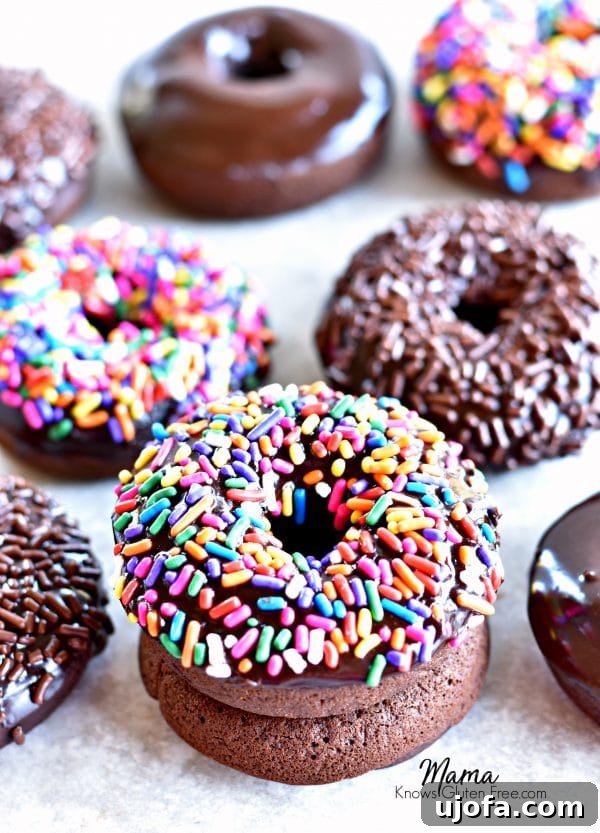
Discover the joy of baking with this effortless recipe for gluten-free chocolate cake donuts. These delectable treats are wonderfully soft, exquisitely cakey, and generously enrobed in a luscious chocolate glaze. Perfect for kickstarting your day, indulging in a sweet dessert, or celebrating a special moment, these gluten-free donuts are a must-try. This comprehensive recipe also features a convenient dairy-free option, ensuring everyone can savor their rich, chocolatey goodness.
This post may contain Amazon affiliate links. As an Amazon Associate, I earn from qualifying purchases, helping to support this blog at no extra cost to you.
Recipe originally published in January 2018, thoughtfully updated and expanded in January 2020 and now further refined for an even better baking experience.
Baking Bliss: The World of Gluten-Free Donuts
There’s a special kind of comfort and joy that comes with freshly baked goods, and for me, gluten-free donuts sit right at the top of that list. Imagine the irresistible aroma of chocolate filling your kitchen, knowing that in just about 20 minutes, you can have a batch of warm, soft, and utterly delicious donuts ready to enjoy. Being gluten-free doesn’t mean you have to miss out on these simple pleasures; in fact, it opens up a world of creative baking possibilities.
This recipe for gluten-free chocolate cake donuts proves just how easy and rewarding it can be. You don’t need fancy equipment or extensive baking experience. With a standard full-sized donut pan and a few pantry staples, you’ll be well on your way to creating bakery-quality treats right in your own home. Say goodbye to the days of searching for specialized gluten-free bakeries; with this recipe, “it’s time to make the donuts” whenever the craving strikes!
If you’re a fan of baked cake donuts, you’re in for a treat. I’ve developed several other fantastic gluten-free donut recipes that you might also love:
- Gluten-Free Vanilla Cake Donuts {Dairy-Free Option}
- Baked Apple Cinnamon Donuts {Gluten-Free, Dairy-Free Option}
- Gluten-Free Baked Pumpkin Donuts {Dairy-Free Option}
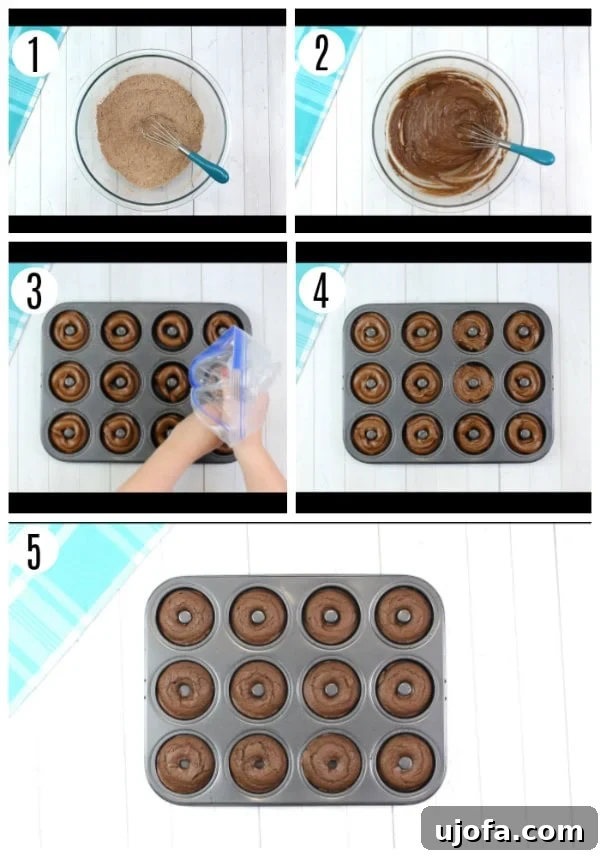
How to Master Homemade Gluten-Free Chocolate Donuts
Crafting these delicious gluten-free chocolate donuts is surprisingly straightforward. Follow these simple steps for a perfect batch every time:
- Preheat your oven to 350º F (175ºC). This ensures a consistent baking temperature for perfectly risen donuts.
- Lightly spray your donut pan with a gluten-free cooking spray. Coconut oil spray works wonderfully and helps prevent sticking.
- In a medium-sized bowl, whisk together your dry ingredients: the gluten-free all-purpose flour blend, baking powder, baking soda, salt, and cocoa powder. Ensure they are well combined to distribute leavening agents evenly.
- In a separate large mixing bowl, combine the wet ingredients: brown sugar, egg, melted butter (or dairy-free alternative), milk (or dairy-free milk), and pure vanilla extract. Mix until smooth and fully integrated.
- Gradually add the dry ingredient mixture into the wet ingredients. Mix until just combined. Be careful not to overmix, as this can lead to tougher donuts. The batter will be noticeably thick.
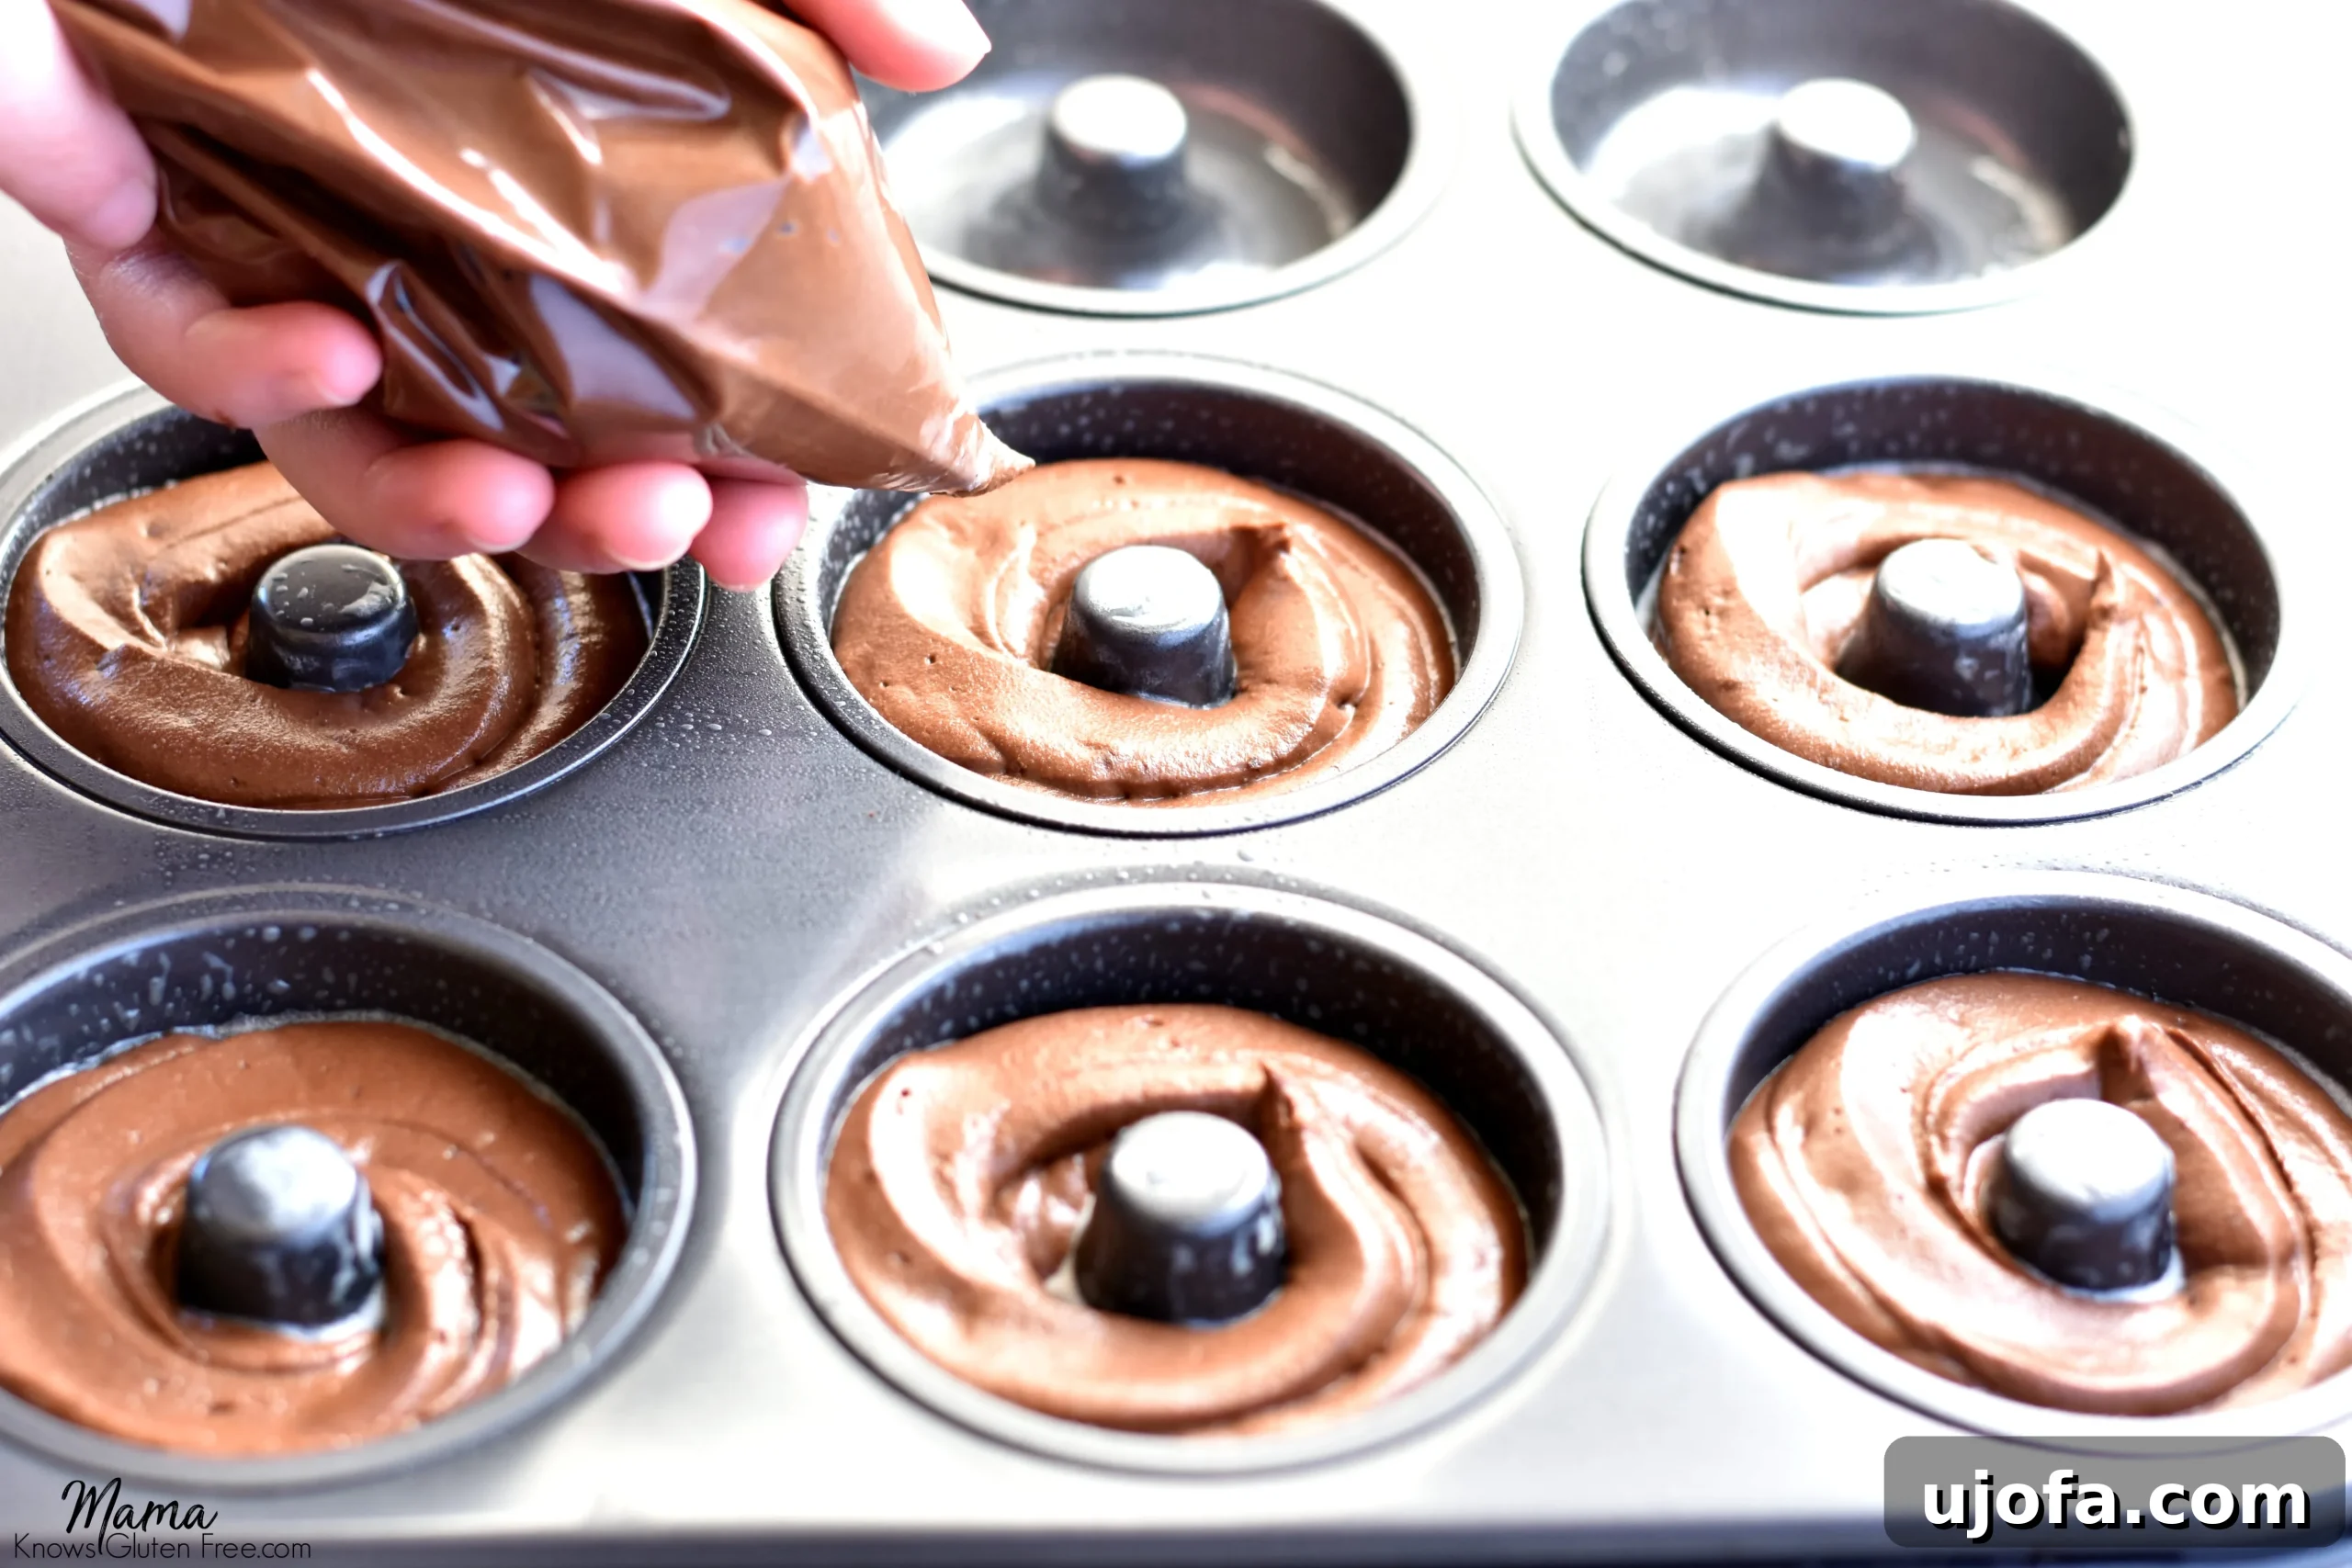
- Transfer the thick donut batter into a large plastic storage bag or a piping bag. For easier filling, place the bag inside a tall glass or cup, folding the excess bag over the rim. This creates a stable holder for the batter.
- Once the bag is filled, seal it and snip off a corner of the bag’s tip (about 1/2 inch) to create an opening for piping.
- Carefully squeeze the bag, piping the batter evenly into each donut cavity in your prepared pan. Aim for about two-thirds full to allow for rising.
- Bake for 10-12 minutes. The donuts are done when they spring back lightly to the touch and a toothpick inserted comes out clean.
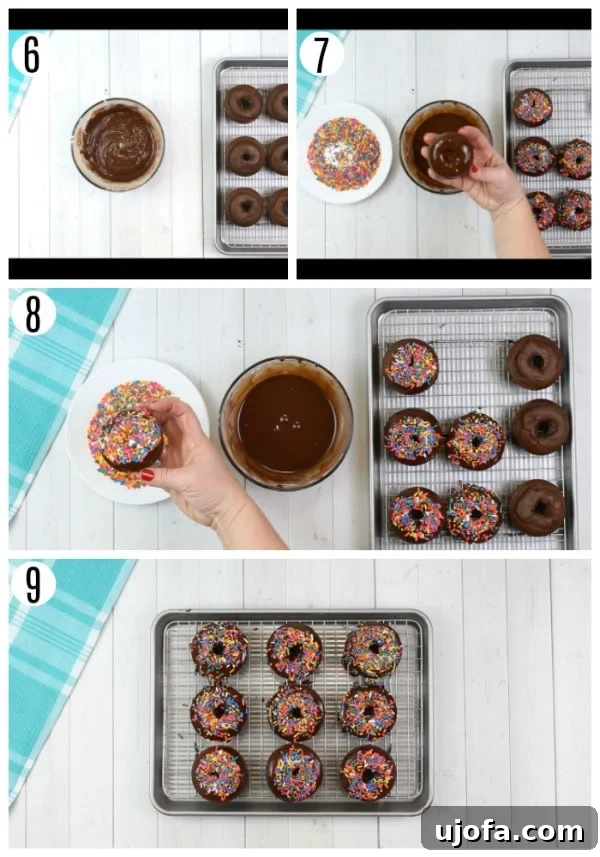
Once baked, let the donuts cool in the pan for a few minutes before transferring them to a wire rack to cool completely. While they are cooling, prepare your rich chocolate glaze:
- In a small bowl, whisk together the powdered sugar, pure vanilla extract, cocoa powder, and milk (or dairy-free milk) for the chocolate glaze until smooth and free of lumps. Adjust milk quantity for desired thickness. A dash of cinnamon can add an extra layer of flavor if you like!
- Dip each warm donut into the prepared glaze, allowing excess to drip off. For an extra festive touch, immediately dip the glazed donut into a bowl of your favorite gluten-free sprinkles.
- Place the glazed and sprinkled donuts back on the wire rack or a plate to allow the glaze to set.
- Serve immediately and enjoy the delightful taste of homemade gluten-free chocolate cake donuts!
- Store any leftover donuts in an air-tight container at room temperature for up to 2-3 days to maintain their freshness.
Pro Tips for Perfectly Baked Gluten-Free Donuts
Achieving consistently perfect gluten-free donuts is all about a few clever techniques. Here are my favorite tips to make your baking experience smooth and successful:
The Piping Bag Method for a Clean Finish
My absolute favorite trick for making baked donuts, especially gluten-free ones, is to use a large plastic storage bag or a dedicated piping bag. This method eliminates messy spoons and ensures your donut cavities are filled neatly and evenly. To make filling the bag a breeze, simply place it inside a tall cup or glass, with one corner pointed downwards. Fold the top edges of the bag over the rim of the cup. This creates a stable and wide opening, allowing you to easily spoon the thick donut batter into the bag without making a mess. Once filled, snip off about a 1/2-inch from the corner, and you’re ready to pipe! This technique not only makes the process cleaner but also results in beautifully shaped donuts every time.
Choosing the Right Cooking Spray
When it comes to greasing your donut pan, not all cooking sprays are created equal, especially in gluten-free baking. I highly recommend using a high-quality gluten-free cooking spray. My personal preference is a gluten-free coconut oil cooking spray. It provides excellent non-stick properties, ensuring your donuts release effortlessly from the pan, and imparts a subtle, pleasant aroma without affecting the chocolate flavor.
Do I Need a Donut Pan? Alternatives and Baking Adjustments
While a donut pan is ideal for achieving the classic baked donut shape, don’t let its absence deter you from making this recipe! Baked donuts truly shine when made in a dedicated donut pan, which allows them to cook evenly and develop that perfect cakey texture. You can easily find donut pans online through retailers like Amazon, or at local stores such as Target, Walmart, and craft stores in their baking aisles.
However, if you don’t have a donut pan on hand, you can certainly adapt this recipe. A muffin pan or even a mini muffin pan makes an excellent substitute. Keep in mind that the baking time will need to be adjusted. If using a standard muffin pan, I recommend starting with an additional 2 minutes of baking time beyond the recipe’s suggestion. Check for doneness with a toothpick, and add another 2 minutes if needed, continuing until the toothpick comes out clean. For mini muffin pans, the baking time might be slightly less, so keep a close eye on them after about 8-10 minutes. The resulting treats will be more like donut holes or donut muffins, but they’ll still be wonderfully soft, chocolatey, and ready for glazing!
Freezing Gluten-Free Donuts for Future Enjoyment
Batch baking is a fantastic way to ensure you always have a delightful treat on hand, and these gluten-free baked donuts freeze exceptionally well. Freezing them means you can enjoy a fresh-tasting donut whenever a craving strikes, with minimal effort.
How to Freeze Glazed Donuts:
If you plan to freeze your donuts with their delicious chocolate glaze already applied, make sure they are completely cooled first. Place the fully cooled, glazed donuts in a single layer on a baking sheet. Pop the baking sheet into the freezer for several hours until the donuts are firm and frozen solid. This step prevents them from sticking together. Once frozen, carefully transfer the donuts from the baking sheet into a freezer-safe plastic bag or an airtight container, layering them with parchment paper if needed. Glazed donuts can be stored in the freezer for up to three months. To enjoy, simply thaw them overnight in the refrigerator or at room temperature for a few hours. The glaze may soften slightly upon thawing but will still be delicious.
How to Freeze Unglazed Donuts:
For unglazed donuts, the process is even simpler. Once the donuts have completely cooled after baking, place them directly into a freezer-safe plastic bag or an airtight container. They can be frozen for up to three months. When you’re ready for a treat, you can defrost them overnight in the refrigerator, or for a quicker option, gently warm them in the microwave for 15-30 seconds until soft. Once thawed, you can prepare the fresh glaze and decorate them as desired, giving you the experience of freshly made donuts!
Choosing the Right Gluten-Free All-Purpose Flour
The foundation of any successful gluten-free baked good lies in the flour blend you choose. For this recipe, the type of gluten-free all-purpose flour is crucial to achieving that perfect soft, cakey texture. My absolute favorite brand for consistent results is **Pillsbury gluten-free flour**. It’s a reliable cup-for-cup blend that simplifies gluten-free baking.
It’s important to understand that not all gluten-free flours are created equal. Different brands formulate their blends with varying ratios of rice flour, potato starch, tapioca starch, and other ingredients. This can significantly impact the final texture and density of your baked goods. For best results with this recipe, I recommend using a rice flour blend that is specifically designed as a “cup-for-cup” or “1:1” substitute for traditional wheat flour. These blends typically already contain xanthan gum.
Xanthan gum is a vital ingredient in gluten-free baking. It acts as a binder, mimicking the elasticity and structure that gluten provides in wheat-based flours. It helps prevent crumbling and gives baked goods a more cohesive, appealing texture. If your chosen gluten-free flour blend already includes xanthan gum (as most cup-for-cup blends do), **do not add any extra**. Adding too much xanthan gum can lead to an undesirable gummy texture in your donuts, so always check your flour blend’s ingredient list.
Please note that this particular recipe has been carefully developed and tested using a rice flour blend, such as Pillsbury gluten-free. It will **not yield the same successful results** if you attempt to use alternative flours like almond flour or coconut flour, as their absorbency and structural properties are vastly different. Sticking to a recommended all-purpose gluten-free blend will ensure your chocolate donuts turn out perfectly every time.
Tips for Measuring Gluten-Free Flour Accurately
Accurate measurement of gluten-free flour is just as critical as choosing the right blend. Unlike wheat flour, which can compact easily, gluten-free flours tend to be lighter and can be easily over-measured if not handled correctly. The best way to measure gluten-free flour for this recipe, and indeed for most gluten-free baking, is by using the “spoon and level” method.
Here’s how to do it:
- Gently fluff up the flour in its bag or container with a spoon.
- Using a spoon, lightly scoop the flour from the bag and gently deposit it into your measuring cup. Avoid pressing it down.
- Once the measuring cup is overflowing with flour, use the flat back of a knife or a straight edge to level off the top, scraping away any excess flour.
It is crucial **not to scoop the measuring cup directly into the flour bag**. This action compacts the flour into the cup, resulting in significantly more flour than the recipe calls for. Excess flour can lead to dry, dense, and crumbly donuts, which is the opposite of the soft, cakey texture we’re aiming for. Taking this small extra step in measuring will make a big difference in the success of your gluten-free chocolate donuts.
As mentioned before, this recipe is specifically formulated for a rice-based gluten-free all-purpose blend and will not work with almond or coconut flour, which require different liquid-to-dry ratios and binding agents.
Which Brands of Gluten-Free Sprinkles Do You Recommend?
A common question I receive is about finding reliable gluten-free sprinkles. Adding a burst of color and fun with sprinkles is a non-negotiable in our house, and I completely agree—they make everything better! For safe and delicious options, I typically use Walmart’s own brand, Great Value, or sprinkles from the Wilton brand. Both are widely available and generally safe for gluten-free diets.
However, it is paramount to **always double-check the label of any sprinkles you purchase**. Food manufacturers frequently update their ingredient lists and processing methods. What was gluten-free last month might not be today, so a quick check ensures your treats remain safe for everyone to enjoy.
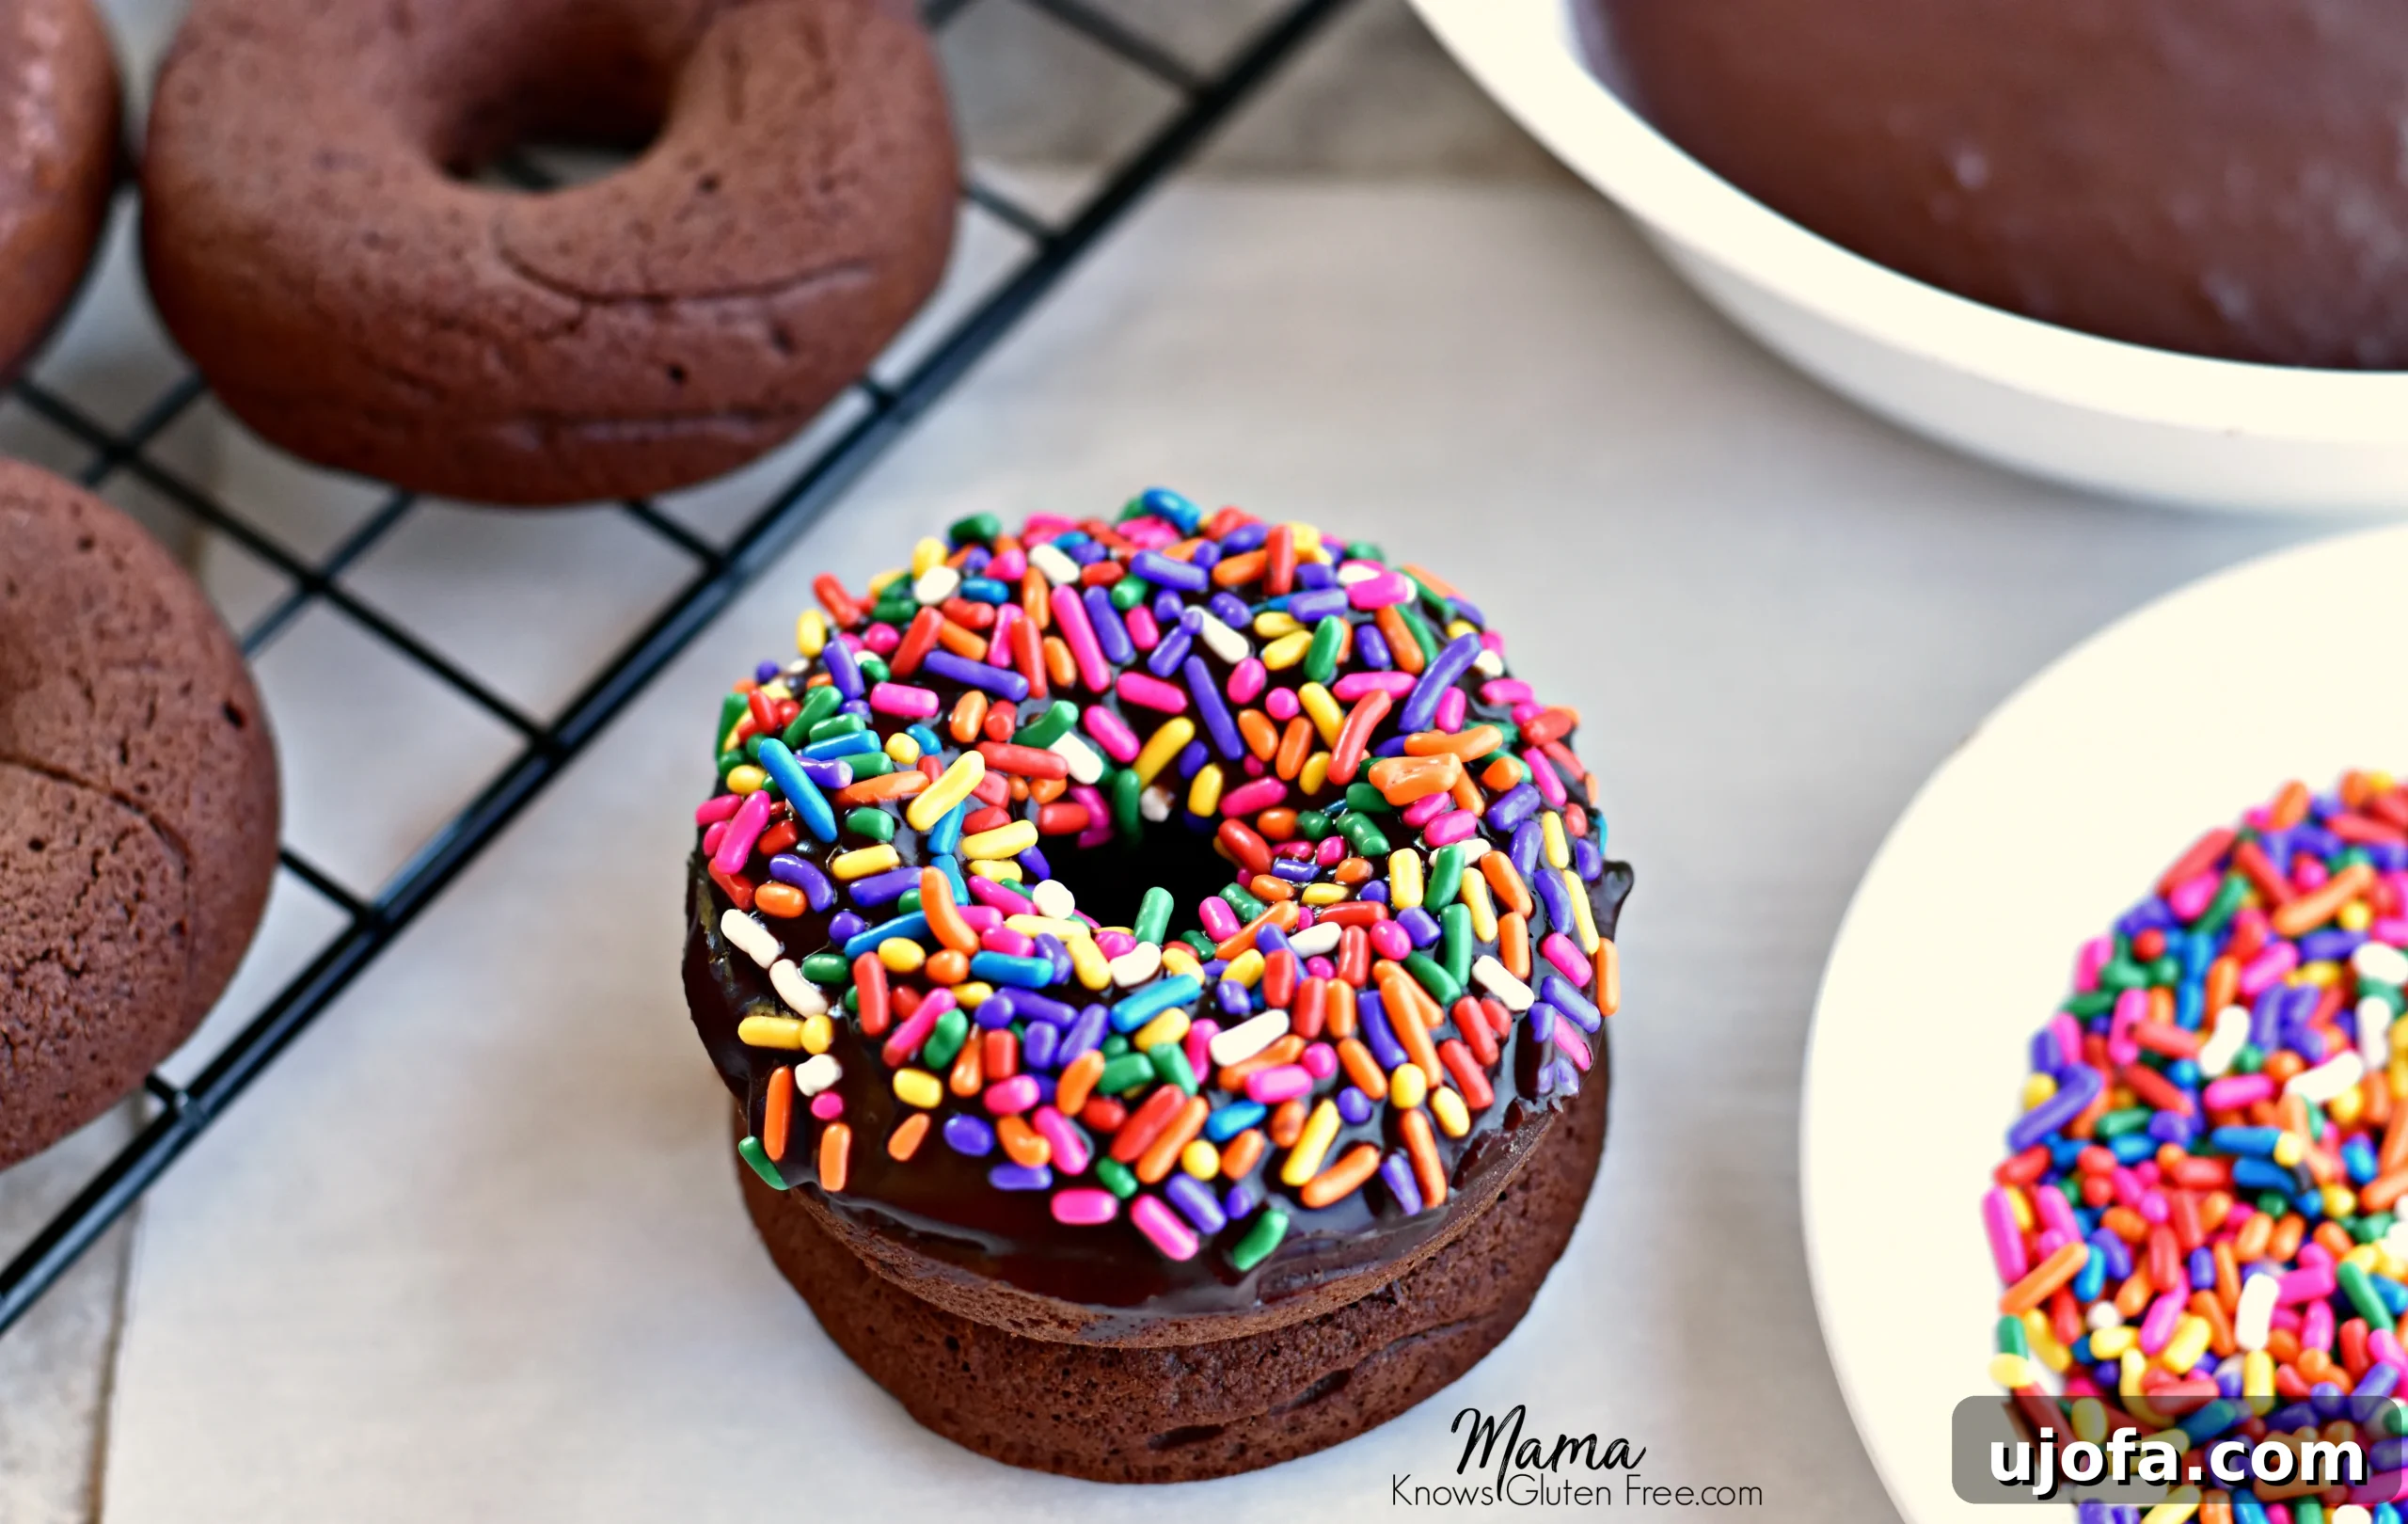
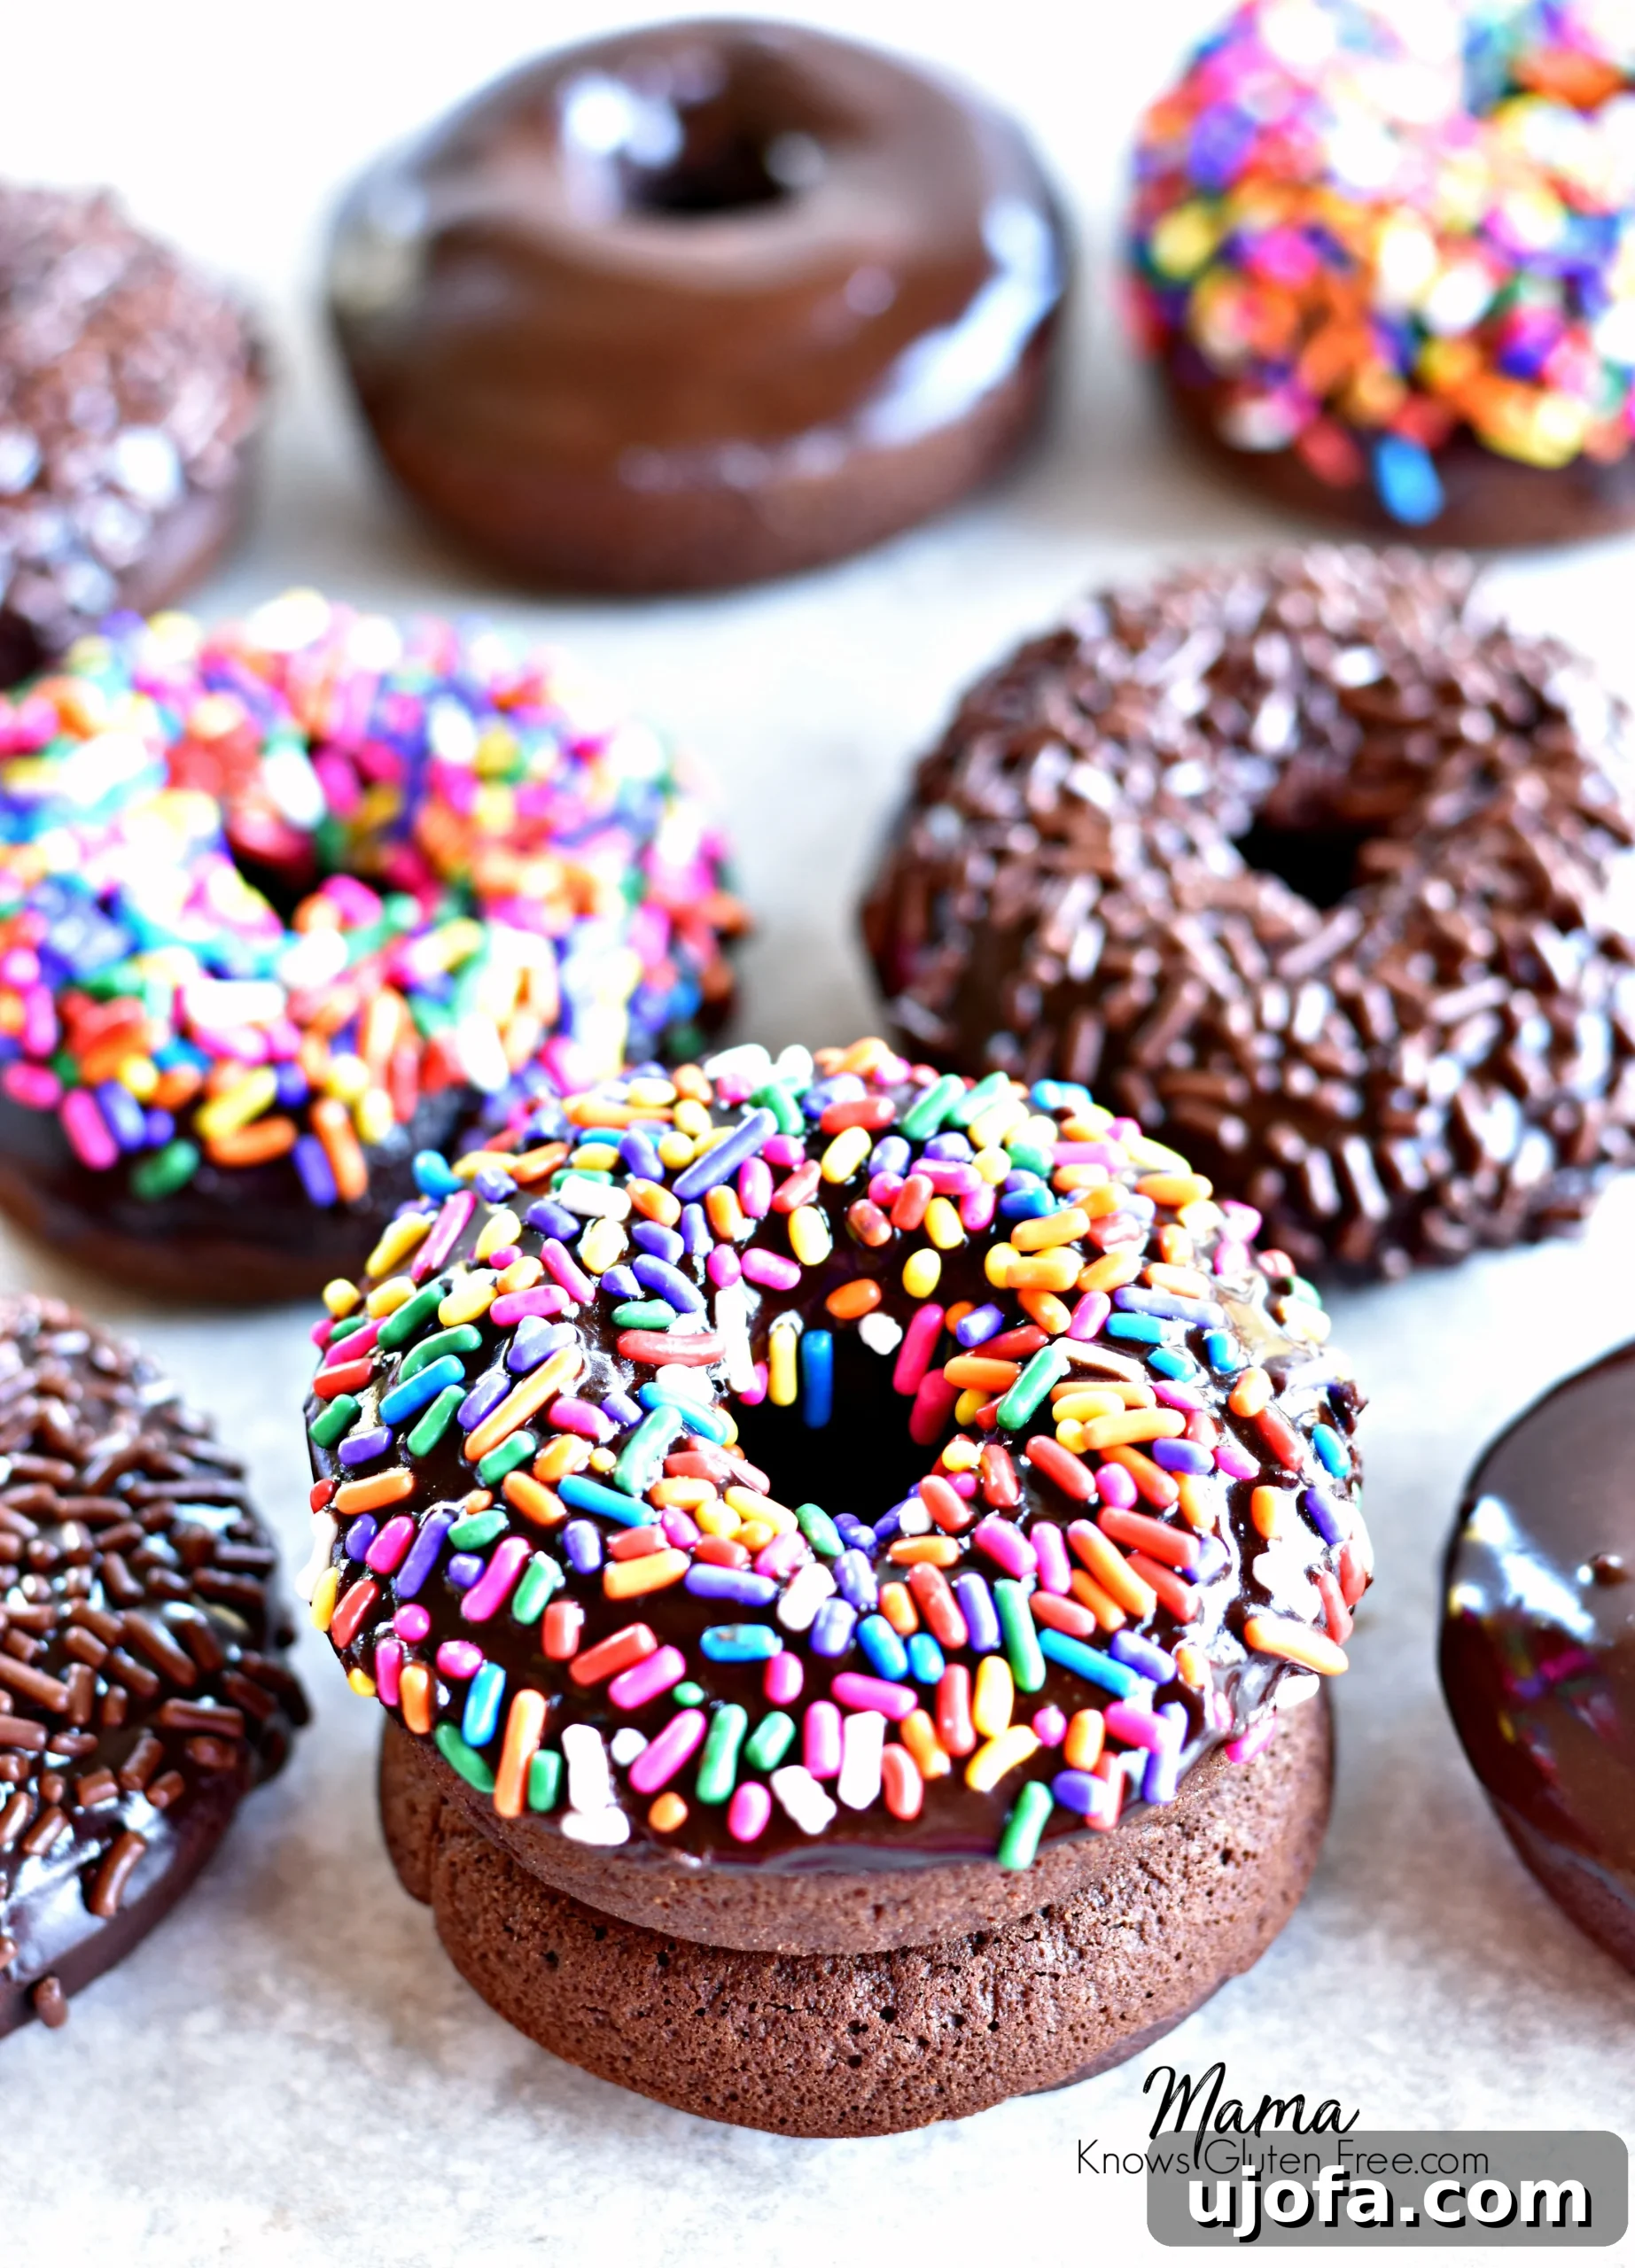
After baking, the simple act of dipping each warm donut into that rich chocolate glaze transforms it into a decadent delight. Then, a generous dunk into a vibrant medley of gluten-free sprinkles adds not just visual appeal, but an extra layer of sweetness and texture. While sprinkles are technically optional, for my kids and me, they are an essential part of the donut experience. The more sprinkles, the merrier!
Delightfully Dairy-Free: Gluten-Free Chocolate Donuts for Everyone
One of my core principles in developing recipes is inclusivity, which is why I always strive to include a dairy-free option. Many members of my family, myself included, navigate both gluten-free and dairy-free dietary needs. It’s incredibly important to me that everyone can enjoy these homemade treats without compromise.
For the dairy-free version of this gluten-free chocolate donut recipe, I’ve had fantastic success using Smart Balance butter alternative and unsweetened almond milk. These substitutions integrate seamlessly into the recipe, maintaining the moist, tender crumb and rich chocolate flavor you expect. I can confidently promise that the dairy-free donuts are just as delicious and satisfying as their traditional dairy counterparts. You won’t taste a difference, only pure chocolatey bliss!
Beyond Smart Balance and almond milk, there are several other excellent dairy-free alternatives that perform beautifully in baking. My favorites include coconut oil as a butter substitute (ensure it’s refined if you don’t want a coconut flavor), and other unsweetened plant-based milks like cashew milk or coconut milk (from a carton, not canned full-fat coconut milk). If nut allergies are a concern, unsweetened soy milk is another reliable option that works wonderfully in this recipe, ensuring that these delectable donuts can be enjoyed by almost anyone.
Embracing these dairy-free alternatives means you can cater to various dietary preferences without sacrificing taste or texture, making these chocolate cake donuts a truly versatile and beloved recipe.
Easy Gluten-Free Chocolate Donuts: A Quick and Rewarding Indulgence
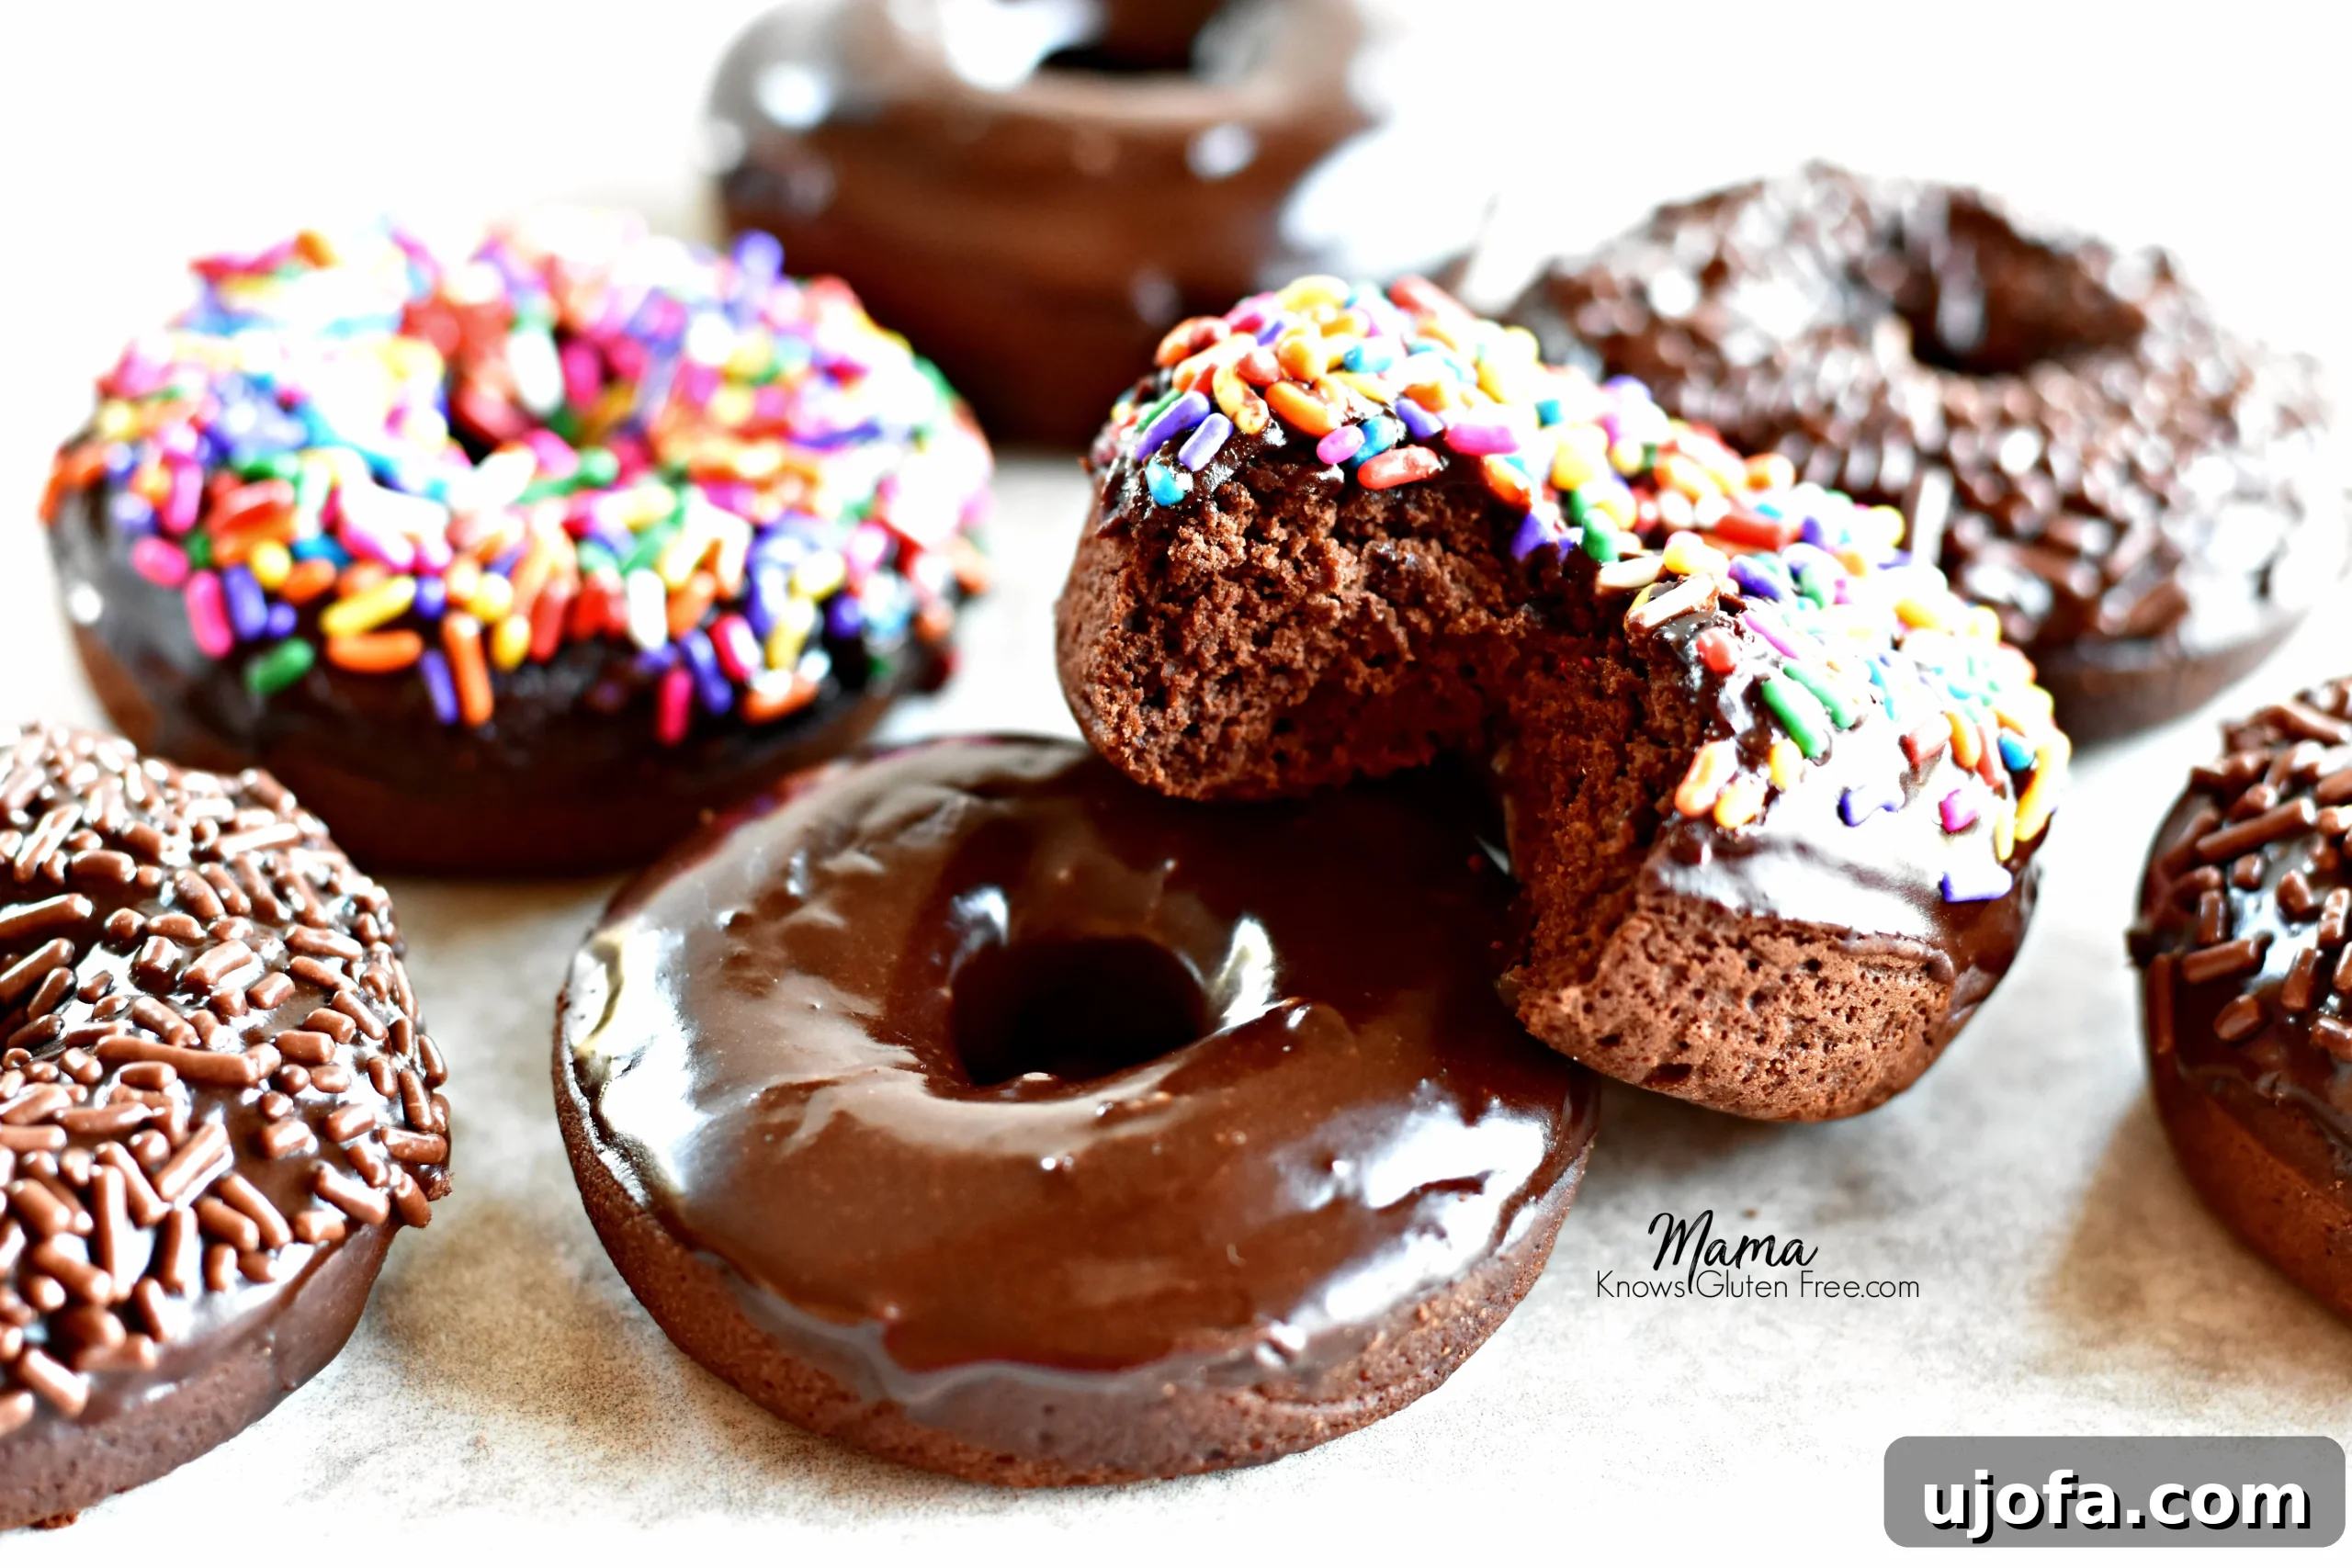
There’s nothing quite like the satisfaction of creating something wonderful from scratch, especially when it’s as quick and delightful as these easy gluten-free chocolate donuts. In just about 20 minutes from start to finish, you can transform simple ingredients into a batch of bakery-worthy treats. These donuts are the epitome of homemade perfection: incredibly soft, wonderfully cakey, and generously adorned with a rich, glossy chocolate glaze and a shower of colorful sprinkles.
Whether you’re looking for a special breakfast to brighten your morning, a comforting dessert to cap off a meal, or simply a sweet indulgence to treat yourself and your loved ones, these chocolate cake donuts fit the bill perfectly. Their ease of preparation and utterly delicious flavor make them a go-to recipe for any occasion, ensuring that even with dietary restrictions, you never have to miss out on the simple joys of a perfectly crafted donut.
More Gluten-Free Breakfast Recipes to Savor!
If you’ve enjoyed these gluten-free chocolate cake donuts, you’re sure to love some of my other popular gluten-free breakfast recipes. Each one is crafted with care to ensure delicious results for everyone, often including dairy-free options:
- Easy Gluten-Free Pancakes {Dairy-Free & Vegan Option}: Fluffy and light, perfect for a leisurely weekend breakfast.
- Gluten-Free Buttermilk Biscuits {Dairy-Free Option}: Tender and flaky, ideal for savory or sweet pairings.
- Gluten-Free Banana Bread {Dairy-Free Option}: A moist and flavorful classic, great for meal prep or a quick snack.
Let’s Connect! You can FOLLOW ME on Facebook, Instagram, Pinterest or YouTube!
★Did you make this recipe? Please give it a star rating below in the comments!★
Gluten-Free Chocolate Cake Donuts {Dairy-Free Option}
Pin Recipe
Share by Email
Print Recipe

Ingredients
Donuts:
- 1 cup gluten-free all-purpose rice flour blend with xanthan gum, (I like Pillsbury gluten-free. Note: Not all gluten-free flours are created equal. You may experience different baking results depending on the gluten-free flour blend you choose.)
- 1 teaspoon gluten-free baking powder
- 1/4 teaspoon baking soda
- 1/4 cup cocoa powder
- 1/4 teaspoon salt
- 1/2 cup packed brown sugar
- 1 large egg
- 3/4 cup milk, (for dairy-free, use coconut, almond, or cashew milk)
- 3 tablespoons unsalted butter, melted, (for dairy-free, use melted Smart Balance butter alternative or coconut oil)
- 1 teaspoon pure vanilla extract
- gluten-free sprinkles, optional
Glaze:
- 1 cup powdered sugar
- 1 teaspoon pure vanilla extract
- 4 tablespoons cocoa powder
- 2 to 3 tablespoons milk, (depending on how thick you want your glaze; for dairy-free, use unsweetened almond, cashew, or coconut milk.)
- dash of cinnamon, optional
You can find a video demonstration for this recipe on platforms like YouTube, searching for “Gluten-Free Chocolate Cake Donuts”.
Instructions
-
Preheat oven to 350º F (175ºC).
-
Spray donut pan with gluten-free cooking spray.
-
In a large bowl, combine gluten-free flour, baking powder, baking soda, salt, cocoa powder, and brown sugar. Whisk thoroughly.
-
Add the egg, melted butter (or dairy-free alternative), milk (or dairy-free alternative), and pure vanilla extract to the dry ingredients. Mix until fully combined into a thick batter.
-
Transfer batter to a large plastic storage bag or piping bag. For ease, place the bag inside a tall cup to fill. Seal the bag and cut a 1/2-inch tip off one corner.
-
Squeeze the bag carefully, filling each donut cavity about two-thirds full.
-
Bake for 10-12 minutes, or until a toothpick inserted comes out clean.
-
While donuts cool slightly, whisk together all ingredients for the chocolate glaze in a small bowl until smooth.
-
Dip each warm donut into the glaze, then immediately into sprinkles (if using). Place on a plate or wire rack to set. Enjoy!
-
Store any remaining donuts in an airtight container at room temperature.
Notes
- I recommend Pillsbury gluten-free flour. Remember, not all gluten-free flours are created equal; baking results may vary depending on the blend you choose.
- For the dairy-free option, I successfully used Smart Balance butter alternative and unsweetened almond milk.
- Refer to the section above in the main post for detailed freezing instructions for both glazed and unglazed donuts.
- Mama says, “Always check all your ingredient labels for hidden gluten or dairy!”
Nutrition
Nutrition information is automatically calculated and should be used as an approximation only.
Additional Info