
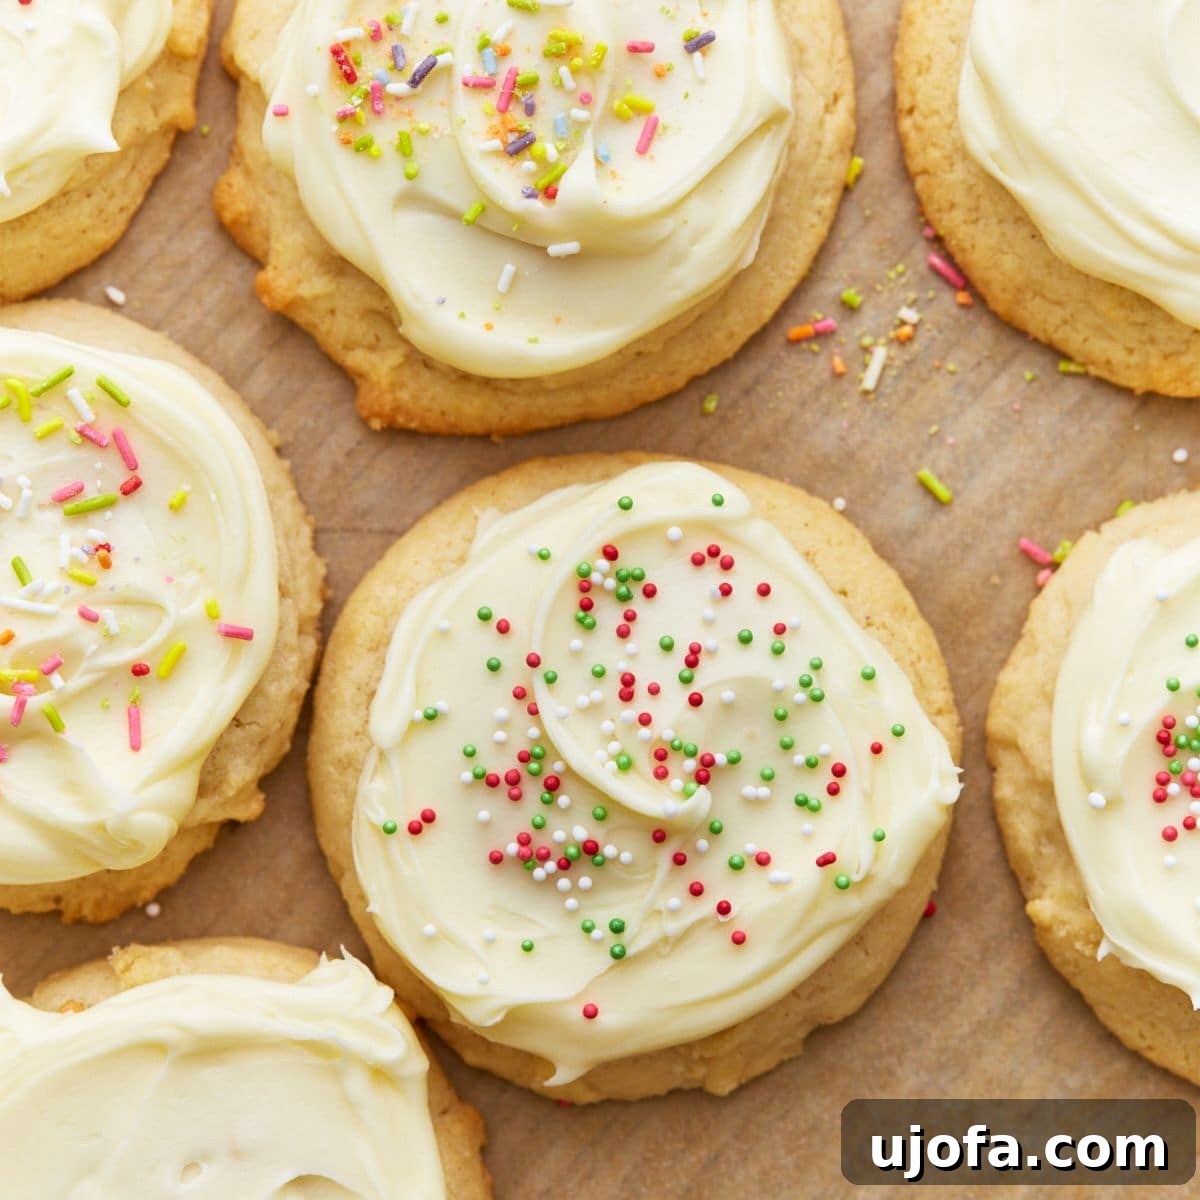
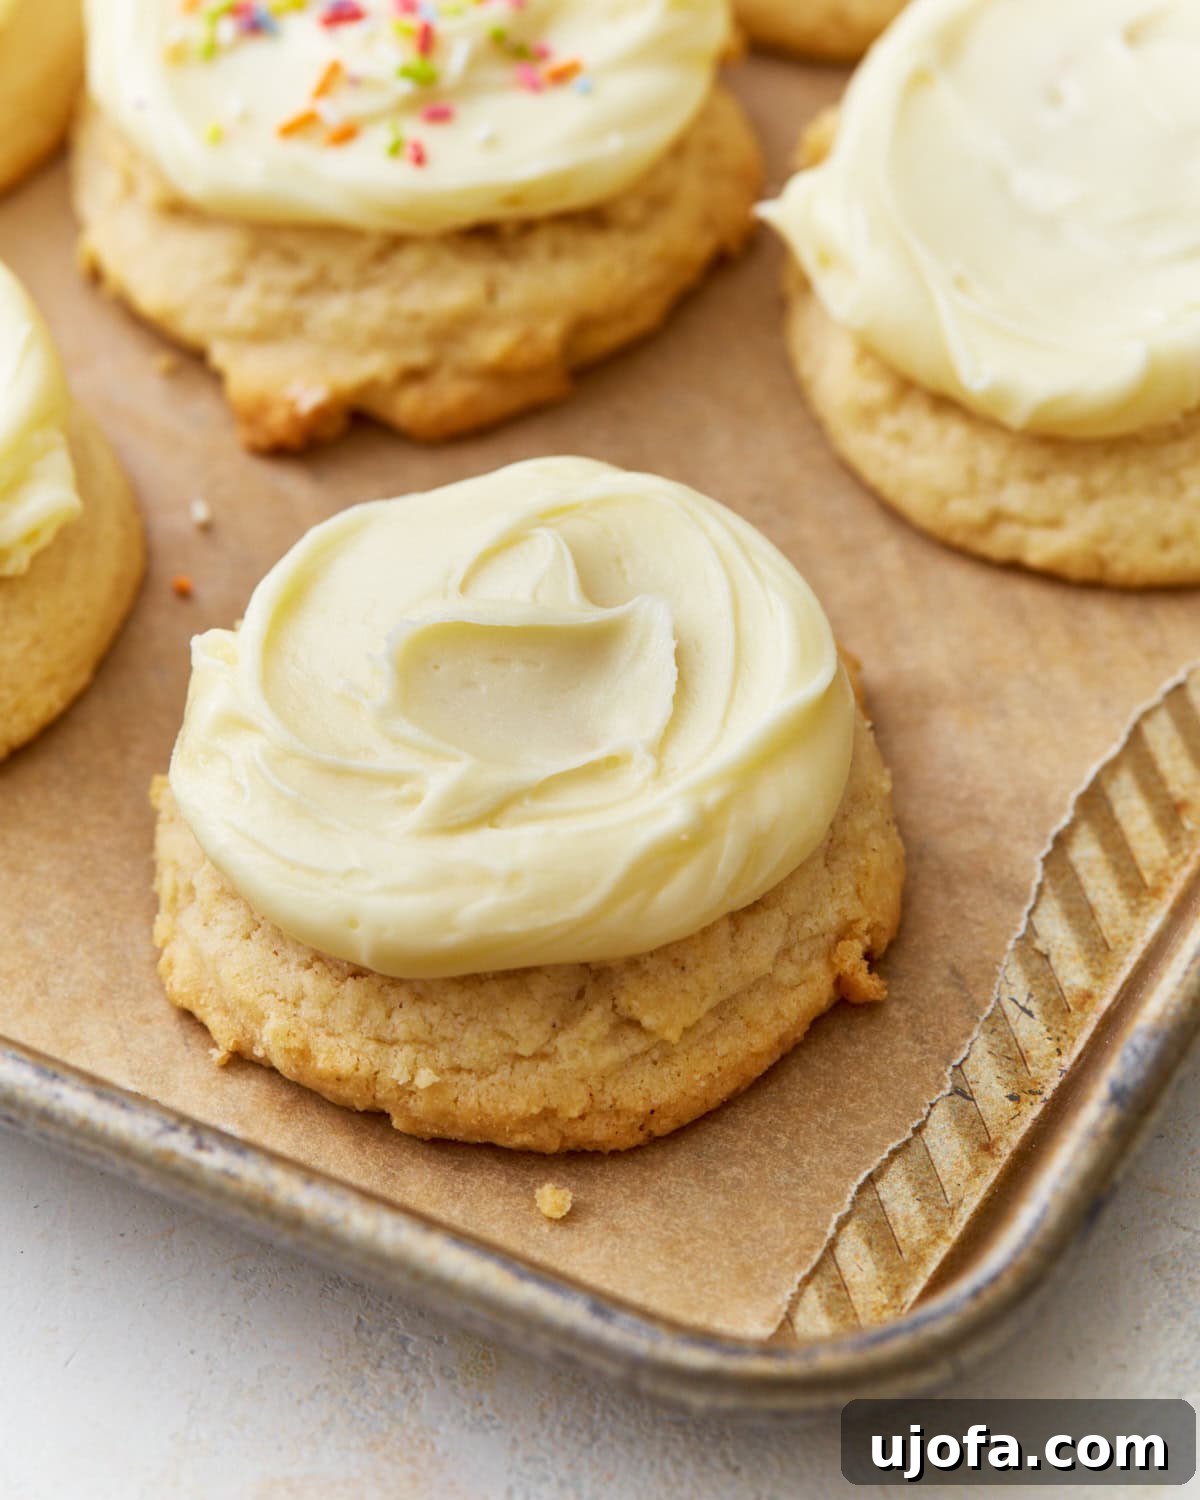
Welcome to your new favorite recipe for irresistible gluten-free sugar cookies! These delightful treats are a cherished staple in my home, especially loved by my daughter. Imagine light, fluffy, and perfectly buttery cookies, infused with the classic warmth of vanilla and a hint of almond for that extra special flavor. What makes this recipe truly stand out is its incredible simplicity and speed: you can go from mixing bowl to freshly baked cookies in just about 20 minutes, with absolutely no chill time required. While I adore them plain, my children, like many, revel in the joy of decorating them with a generous swirl of frosting and a shower of colorful sprinkles. Plus, I’ve included a dairy-free option so everyone can enjoy these sweet sensations.
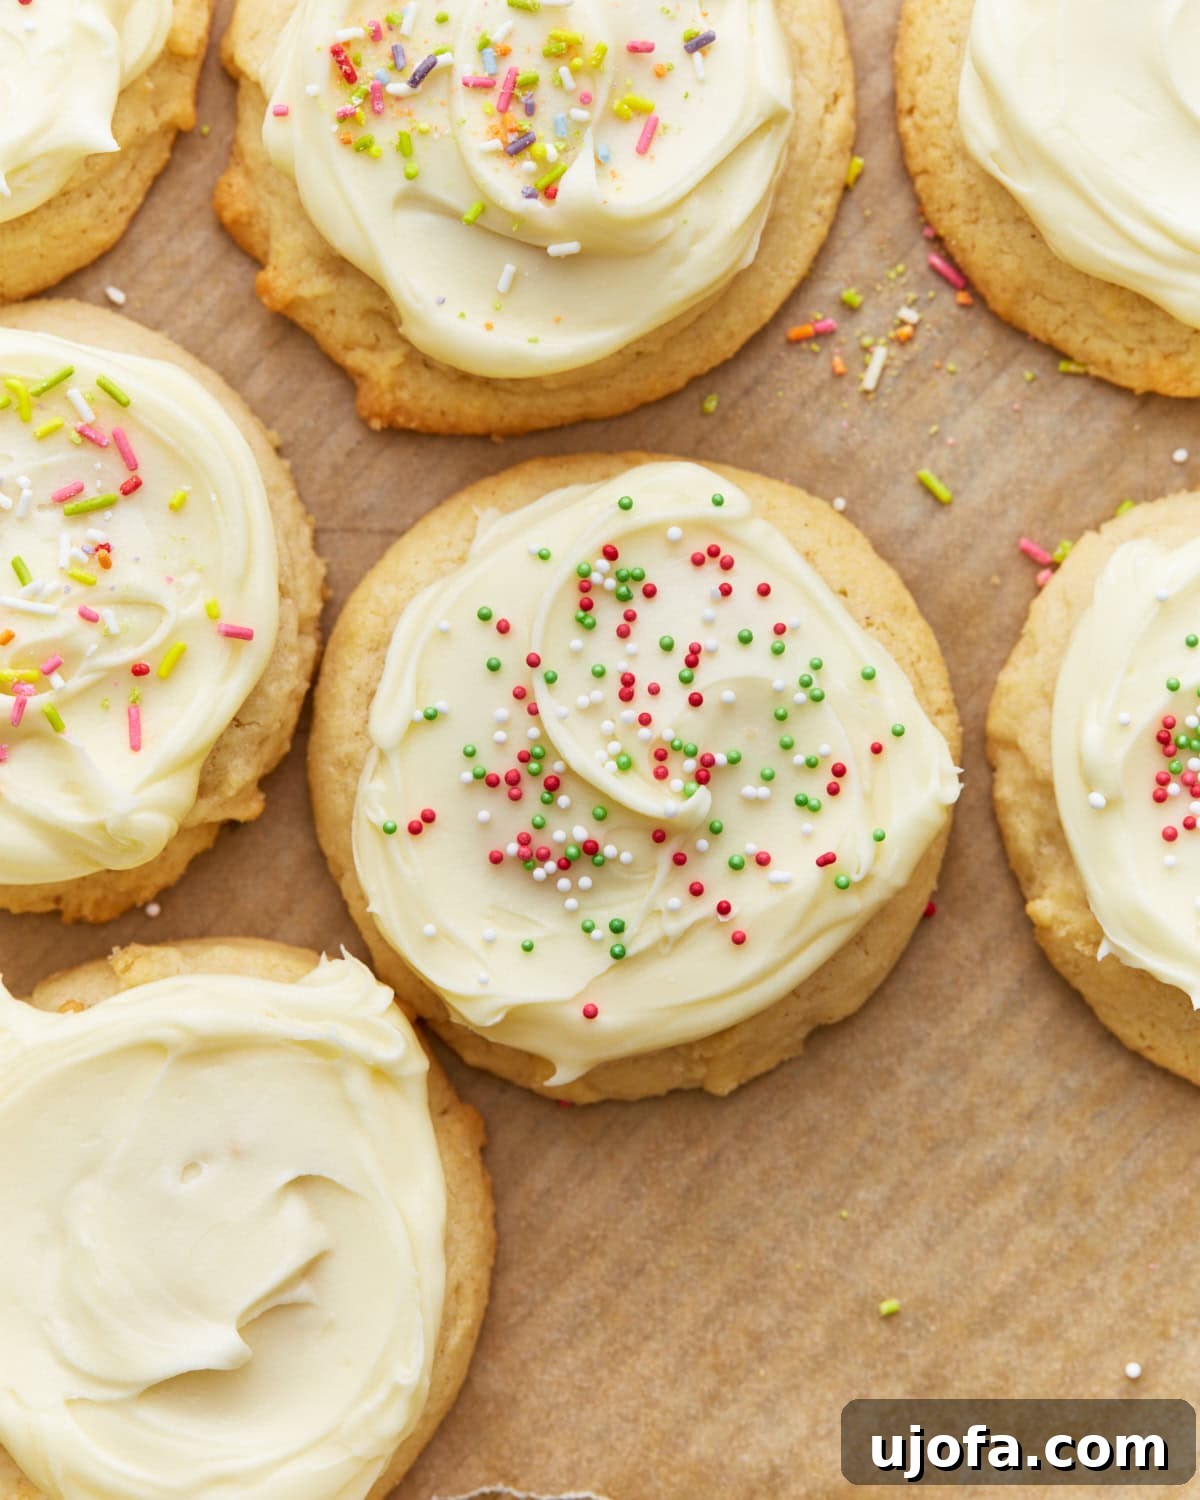
The Ultimate Easy Gluten-Free Sugar Cookie Recipe
When I describe this recipe as effortlessly easy, I truly mean it! You won’t need any exotic ingredients or specialized equipment. Just a few everyday gluten-free pantry staples, some basic kitchen tools, and your trusty oven are all it takes to create these culinary masterpieces. These particular gluten-free sugar cookies are known as “drop” cookies, which simplifies the baking process immensely. Instead of the usual rolling out and meticulously cutting dough into shapes, you simply drop spoonfuls onto your baking sheet. This makes them an ideal choice for beginner bakers or for inviting little hands to assist in the kitchen, fostering wonderful memories and a love for baking. Each cookie bakes up beautifully soft with an irresistible, melt-in-your-mouth texture that rivals your favorite bakery’s finest.
It’s important to note that due to its soft and pliable nature, this specific dough is not recommended for cut-out cookies. The consistency is intentionally designed for the ease and soft texture of drop cookies. However, if you are planning to make intricately shaped cookies for holidays or special occasions, I do offer a dedicated recipe for gluten-free cut-out cookies that provides a firmer, more manageable dough perfect for your cookie cutters.
Why You’ll Love These Gluten-Free Sugar Cookies
Beyond their incredible taste, these gluten-free sugar cookies offer a multitude of reasons to become a regular in your baking repertoire. They are inherently versatile, serving as a blank canvas for any decorating whim, from simple dusting of powdered sugar to elaborate frosting designs. Their quick preparation time means you can whip up a batch for unexpected guests, a last-minute school treat, or simply to satisfy a sudden sweet craving without hours of effort. For those with dietary considerations, the dairy-free option ensures that these delightful cookies can be enjoyed by almost everyone. The combination of easy ingredients, minimal fuss, and outstanding results makes this recipe a true winner for any occasion.
The gentle sweetness and tender crumb make them a perfect accompaniment to a cup of coffee or tea, a delightful dessert after dinner, or a charming gift for friends and family. They store well, and the dough can even be prepared in advance, making your baking schedule stress-free, especially during busy holiday seasons. These aren’t just cookies; they’re an experience – simple, satisfying, and utterly delicious.
Essential Ingredients for Your Gluten-Free Sugar Cookies
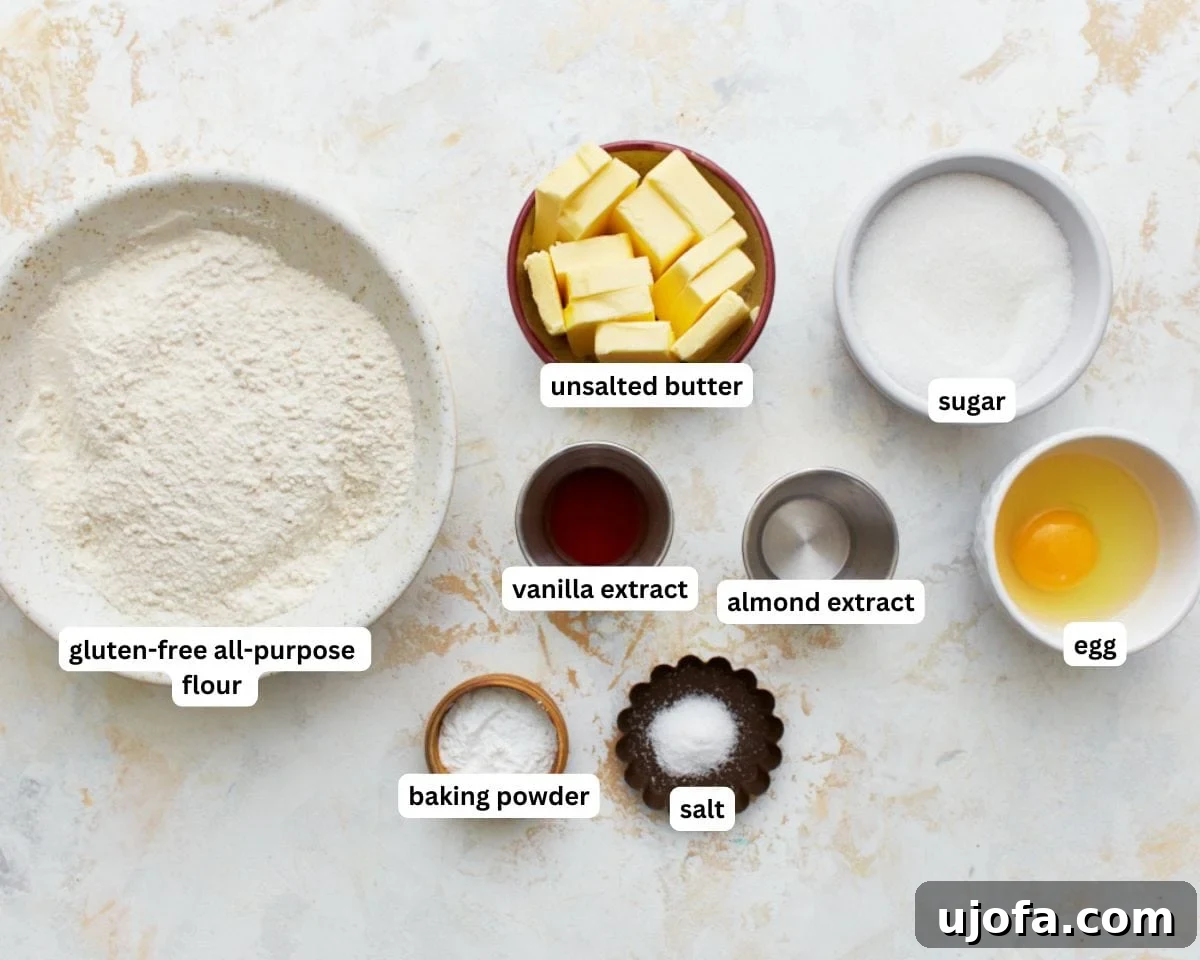
Creating these scrumptious gluten-free sugar cookies requires a handful of common ingredients, each playing a vital role in achieving their signature taste and texture. Always opt for high-quality ingredients to ensure the best possible results.
- Unsalted Butter: This is the foundation of our cookies, providing richness and that classic buttery flavor. Be sure it’s softened to room temperature for optimal creaming with the sugar, which creates a light and airy base. For those seeking a dairy-free alternative, Smart Balance butter sticks work wonderfully, ensuring your gluten-free dairy-free sugar cookies are just as delicious.
- Granulated Sugar: As the name suggests, sugar is paramount in sugar cookies! It provides the essential sweetness and contributes significantly to the cookie’s texture, giving it a delicate crispness around the edges and a tender chewiness in the center.
- Egg: One large egg acts as a binder, holding all the ingredients together and adding moisture to the dough. It also contributes to the cookie’s structure and helps achieve that lovely soft interior.
- Pure Vanilla Extract & Almond Extract: This flavor combination is truly magical! Pure vanilla extract provides a warm, comforting baseline, while a touch of almond extract elevates the profile with a sophisticated, slightly nutty note. This duo makes these cookies uniquely flavorful and memorable at any gathering.
- Gluten-Free All-Purpose Flour with Xanthan Gum: The choice of gluten-free flour is critical. My go-to and the one used for developing this recipe is Pillsbury gluten-free flour blend, which already includes xanthan gum. Xanthan gum is essential in gluten-free baking as it mimics the elasticity and binding properties of gluten, preventing your cookies from being crumbly. Using a different brand of gluten-free flour blend might yield varying results, as not all blends are formulated equally.
- Baking Powder: This leavening agent is key to achieving that soft, slightly puffy, and inviting texture. It helps the cookies rise just enough to be tender without becoming cake-like.
- Salt: A small amount of salt is a secret weapon in baking! It doesn’t make the cookies salty but rather balances and enhances all the other flavors, particularly the sweetness, making the vanilla and almond truly shine.
Expert Tips for Perfect Gluten-Free Sugar Cookies Every Time
Achieving bakery-quality gluten-free sugar cookies is simple with a few helpful tips:
- Accurate Flour Measurement is Key: Unlike traditional baking, gluten-free flours can be very absorbent. Always use a dry measuring cup and employ the “spoon and level” method. To do this, lightly spoon the gluten-free flour into your measuring cup until it overflows, then use a straight edge (like the back of a knife) to level off the excess. This prevents over-packing the flour, which can lead to dense, dry cookies.
- Flour Blend Matters: This recipe specifically calls for a gluten-free all-purpose flour blend that contains xanthan gum. Substituting with single-grain gluten-free flours like coconut flour or almond flour will drastically alter the texture and moisture content, and this recipe will not yield the same results. Stick to a tested all-purpose blend for success.
- Invest in a Cookie Scoop: For consistently sized and perfectly round cookies, a greased cookie scoop is invaluable. I find a 1 ½-tablespoon scoop to be the ideal size for these drop cookies, ensuring even baking and a beautiful presentation.
- Parchment Paper is Your Friend: For effortless cleanup and to prevent sticking, I highly recommend using Reynolds Kitchens Cookie Baking Sheets. These pre-cut sheets often come with a smart grid, making it incredibly easy to space your cookies evenly, ensuring proper airflow and uniform baking. You can usually find these at major grocery stores or retailers like Walmart.
- Separate Wet and Dry Ingredients: Gluten-free flour blends can be prone to clumping. To ensure a smooth, lump-free batter, always mix your dry ingredients (flour, baking powder, salt) in one bowl and your wet ingredients (butter, sugar, egg, extracts) in another. Then, gradually add the dry mixture to the wet mixture, mixing until just combined. Overmixing gluten-free dough can make cookies tough.
- Don’t Overbake: The key to soft, tender sugar cookies with a slightly crispy edge is knowing when to pull them from the oven. Bake your gluten-free sugar cookies until the edges are just very lightly golden brown. The centers may still look slightly soft, but they will set as they cool. Overbaking will result in dry, hard, or overly crispy cookies, so keep a close eye on them during the last few minutes of baking.
Unleash Your Creativity: How to Decorate Gluten-Free Sugar Cookies
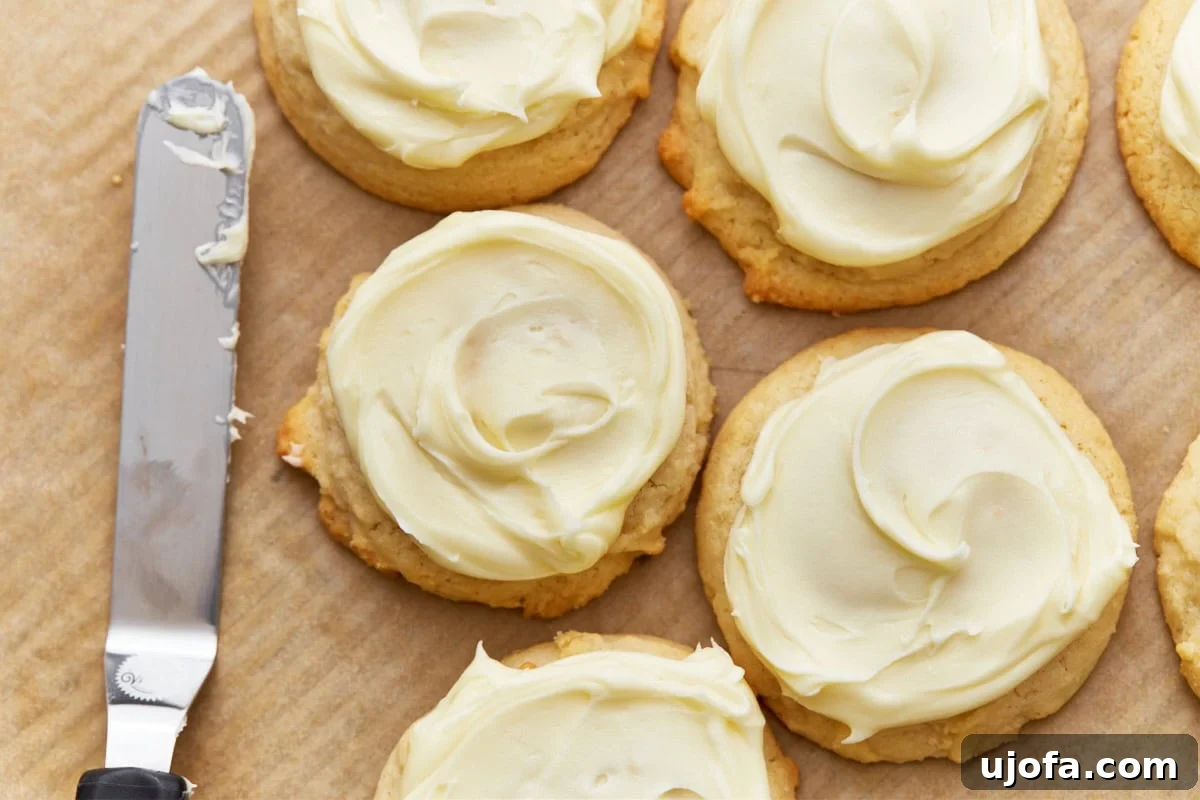
This is arguably the most exciting part for my kids whenever we make these easy gluten-free sugar cookies – the decorating! There’s no single “right” way to decorate; it’s all about personal preference and having fun. My go-to method is to apply a generous layer of creamy frosting and then cascade them with vibrant sprinkles. For consistent quality and gluten-free assurance, I often use Wilton cookie icing and sprinkles. However, remember to always double-check product labels, as ingredients and formulations can change over time.
If you’re looking for more frosting inspiration, here are some fantastic gluten-free options:
- Classic Gluten-Free Vanilla Buttercream Frosting: A versatile and delicious choice that pairs perfectly with any sugar cookie.
- Gluten-Free Royal Icing: Ideal for intricate designs and achieving a smooth, hard finish that’s great for stacking or gifting.
- Delightful Strawberry Frosting: Adds a lovely fruity twist and a beautiful pink hue.
- Rich Chocolate Buttercream Frosting: Adapted from my easy gluten-free chocolate cake recipe, this offers a decadent contrast to the sweet sugar cookie.
For a different approach, I’ve also had success adding sprinkles to my homemade GF sugar cookies before baking. To do this effectively, simply press the sprinkles gently into the dough balls before they go into the oven to ensure they adhere well and don’t fall off during baking. A small word of caution: some sprinkles, particularly certain colors, can “bleed” or fade during the baking process, so be mindful when choosing your sprinkle varieties for pre-bake application.
Make-Ahead and Freezing for Convenience
Life can be busy, and sometimes the best way to enjoy freshly baked cookies is to prepare the dough in advance. These gluten-free sugar cookies are perfect for make-ahead convenience!
To Make the Dough in Advance: Simply prepare the cookie dough as directed in the recipe. Once mixed, transfer the dough to an airtight container and refrigerate it for up to 3 days. When you’re ready to bake, just let the dough sit at room temperature for about 10-15 minutes to soften slightly, then scoop and bake as usual. This is a fantastic time-saver, especially during holidays or when you’re entertaining.
Freezing the Dough for Later: I frequently keep a stash of this dough in my freezer for those spontaneous moments, like last-minute bake sales or an unexpected craving. To freeze the dough effectively, first scoop individual dough balls onto a parchment-lined baking sheet. Place the baking sheet in the freezer for about an hour, allowing the dough balls to flash-freeze until firm. This step prevents them from sticking together. Once firm, transfer the frozen dough balls into a freezer-safe bag or an airtight container. They can be stored in the freezer for up to 3 months. When you’re ready to bake, there’s no need to thaw! Simply preheat your oven to 375°F, place the frozen dough balls on a prepared baking sheet, and bake for 12-14 minutes – approximately 2 minutes longer than the original baking instructions for fresh dough. This ensures perfectly baked cookies with minimal fuss.
Storing Your Gluten-Free Sugar Cookies
Proper storage ensures your delicious gluten-free sugar cookies remain fresh and enjoyable for as long as possible:
Undecorated Cookies: Any cookies that are not yet frosted or decorated can be stored in an airtight container at room temperature. They will remain fresh for about a week, though I find they are at their absolute best when enjoyed within 2-3 days of baking for optimal softness and flavor. For longer storage, undecorated cookies can also be frozen for up to 3 months. To enjoy them again, simply let them thaw at room temperature until soft.
Decorated (Frosted) Cookies: Once your cookies are adorned with frosting and sprinkles, their storage requirements change slightly due to the frosting. I prefer to store frosted cookies in the refrigerator. Arrange them in a single layer in an airtight container to prevent the frosting from smudging or sticking. If you need to stack them, place a piece of parchment paper between layers. They will stay fresh in the refrigerator for 3-5 days. Allow them to come to room temperature for about 10-15 minutes before serving for the best texture.
Frequently Asked Questions About Gluten-Free Sugar Cookies
Can I make these cookies dairy-free?
Absolutely! This recipe includes a fantastic dairy-free option. Simply substitute the unsalted butter with a high-quality dairy-free butter alternative like Smart Balance butter sticks. Ensure all other ingredients, especially your frosting and sprinkles, are also dairy-free if you need to maintain a strict dairy-free diet.
What if my gluten-free flour blend doesn’t have xanthan gum?
If your chosen gluten-free all-purpose flour blend does not contain xanthan gum, you will need to add it separately. As a general rule, for every cup of gluten-free flour, add about ¼ to ½ teaspoon of xanthan gum. For this recipe, which uses 1 ½ cups of flour, you would add approximately ½ to ¾ teaspoon of xanthan gum directly to your dry ingredients. Xanthan gum is crucial for providing structure and preventing crumbling in gluten-free baked goods.
Why are my gluten-free cookies dry or crumbly?
There are a few common culprits for dry or crumbly gluten-free cookies:
- Over-measuring flour: Using too much flour, often due to scooping directly from the bag instead of spooning and leveling, can make cookies dry.
- Lack of xanthan gum: If your flour blend doesn’t have it, or you didn’t add enough, your cookies may lack structure.
- Overbaking: Even a minute or two too long in the oven can dry out gluten-free cookies. Always look for lightly golden edges and a slightly soft center.
- Not enough fat: Ensure your butter is at room temperature and accurately measured.
Can I roll out this dough for cut-out shapes?
This particular dough is designed to be soft and easy to drop, yielding a tender, chewy cookie. It is too soft for rolling and cutting into shapes. If you desire gluten-free cut-out cookies, I recommend using a specific recipe formulated for that purpose, which typically has a higher ratio of flour or a different fat content to create a firmer dough. You can find my separate recipe for gluten-free cut-out cookies here.
How do I prevent my sprinkles from bleeding color during baking?
Some sprinkles, especially those with bright, artificial colors, can bleed when exposed to heat and moisture during baking. If you want to add sprinkles before baking, look for “nonpareils” or “jimmie” type sprinkles that are specifically labeled as “bake-stable” or “non-bleeding.” Alternatively, to avoid any color bleed entirely, simply add your sprinkles to the frosting after the cookies have cooled completely.
More Irresistible Gluten-Free Cookie Recipes To Try!
If you’ve enjoyed these easy gluten-free sugar cookies, you’ll love exploring other delicious gluten-free cookie options from my collection:
- Classic Gluten-Free Chocolate Chip Cookies
- Festive Gluten-Free Gingerbread Cookies
- Charming Gluten-Free Thumbprint Cookies
- Hearty Gluten-Free Oatmeal Cookies
- Or discover all of my cherished gluten-free cookie recipes here!
This sugar cookie recipe is a thoughtful adaptation from Betty Crocker’s 40th Anniversary Cookbook, lovingly adjusted for gluten-free baking.
Gluten-Free Sugar Cookies Recipe
Share by Email
Print Recipe

Ingredients
- ¾ cup unsalted butter, dairy-free use Smart Balance butter
- ¾ cup granulated sugar
- 1 large egg
- 1 tablespoon pure vanilla extract
- ⅛ teaspoon pure almond extract
- 1 ½ cups gluten-free all-purpose flour with xanthan gum, I like Pillsbury gluten-free flour. Not all gluten-free flours are created equal. You may experience different baking results depending on the gluten-free flour blend you choose.
- 1 teaspoon gluten-free baking powder
- ⅛ teaspoon salt
Unit system: US Customary – Metric
If you’d like to see a video demonstration, please visit the original blog post or check our video channel for “Gluten-Free Sugar Cookies.”
Instructions
- Preheat oven to 375°F (190°C) and line two baking sheets with parchment paper.
- In a large bowl, beat the butter and sugar together on medium speed until smooth.
- Beat in the egg, pure vanilla extract, and pure almond extract.
- In a small bowl, stir together gluten-free flour, baking powder, and salt.
- Slowly pour the flour mixture into the batter and mix until fully combined.
- Scoop batter with a greased cookie scoop (1 ½-tablespoons) and place cookies 2-inches apart on a prepared baking sheet. Bake for 10–12 minutes, or until the edges are very lightly browned.
- Allow cookies to cool for 2–3 minutes before moving to a cooling rack. Store in an airtight container at room temperature. Enjoy!
Notes
- My favorite gluten-free flour is Pillsbury gluten-free flour. Not all gluten-free flours are created equal. You may experience different baking results depending on the gluten-free flour blend you choose.
- Always measure your gluten-free flour using the spoon and level method.
- Dairy-Free Option: Use Smart Balance butter for a dairy-free alternative.
- To Store: Keep unfrosted cookies in an airtight container for up to a week at room temperature. Frosted cookies should be stored in the refrigerator in a single layer.
- Mama says, “Check all of your labels!” for gluten-free and dairy-free safety.
Nutrition
Serving: 1 cookie
Calories: 105 kcal
Carbohydrates: 12 g
Protein: 1 g
Fat: 6 g
Saturated Fat: 4 g
Cholesterol: 24 mg
Sodium: 17 mg
Potassium: 22 mg
Fiber: 1 g
Sugar: 7 g
Vitamin A: 190 IU
Calcium: 15 mg
Iron: 1 mg
Nutrition information is automatically calculated and should only be used as an approximation.
Additional Info
How to Make Gluten-Free Sugar Cookies: A Step-by-Step Visual Guide
Follow these simple steps with corresponding images to create perfect gluten-free sugar cookies:
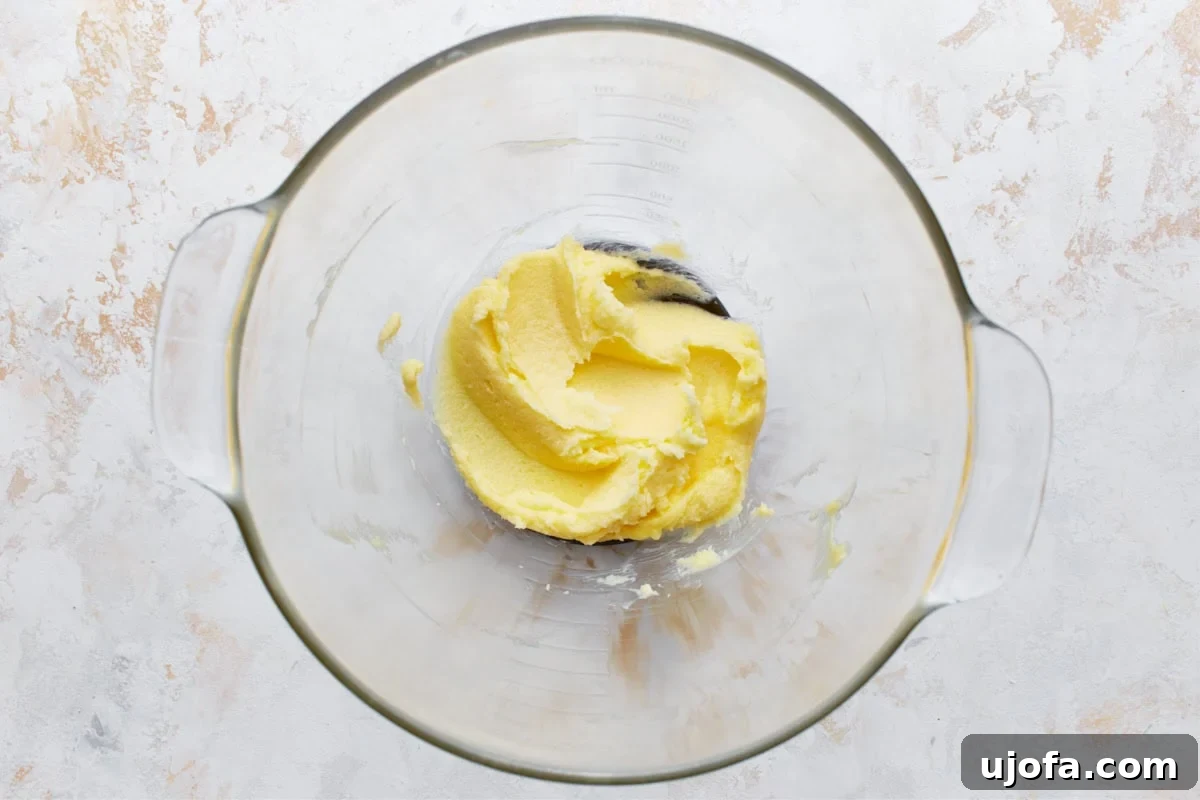
Step 1: Cream Butter and Sugar. Begin by preheating your oven to 375°F (190°C) and lining two baking sheets with parchment paper for easy release. In a large mixing bowl, combine ¾ cup of softened unsalted butter (or Smart Balance for dairy-free) with ¾ cup of granulated sugar. Beat them together on medium speed until the mixture is light, fluffy, and smooth, ensuring no sugar granules remain. This step is crucial for the cookie’s final texture.
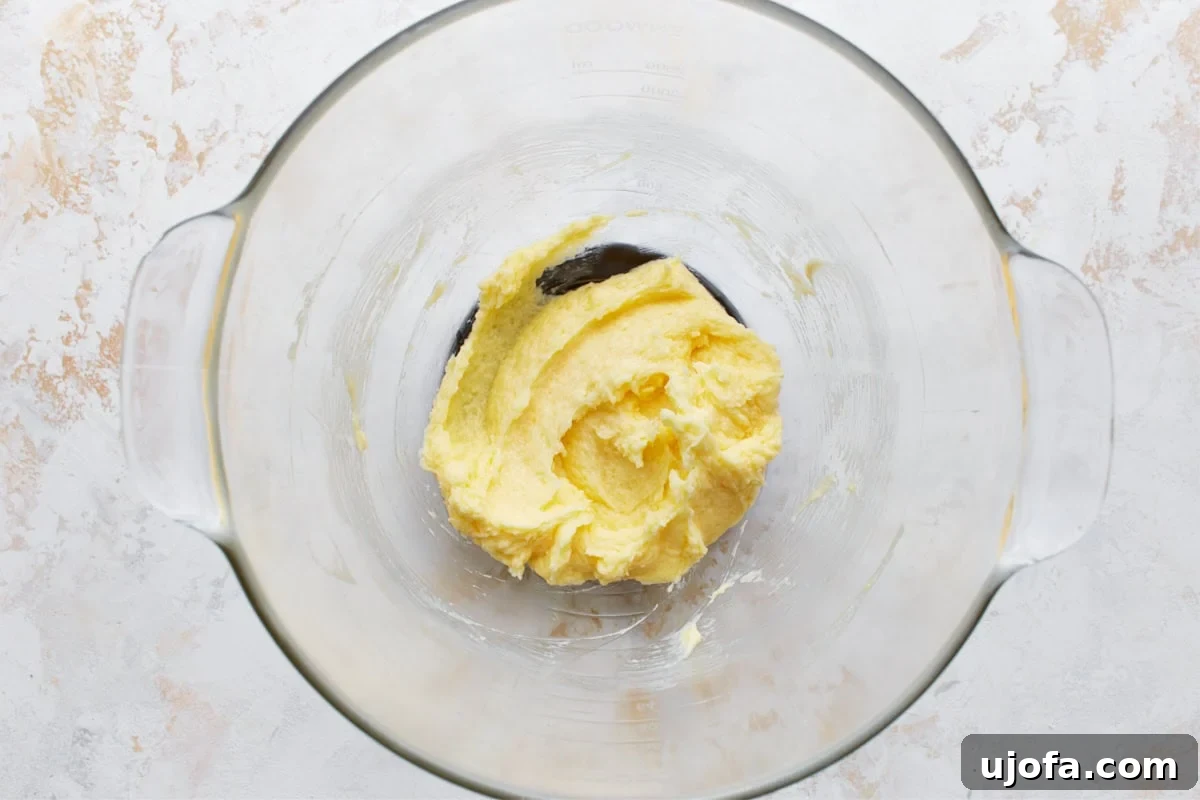
Step 2: Incorporate Wet Ingredients. Next, beat in 1 large egg, followed by 1 tablespoon of pure vanilla extract and ⅛ teaspoon of pure almond extract. Mix until just combined, being careful not to overmix. The extracts will infuse the dough with a delightful aroma and flavor.
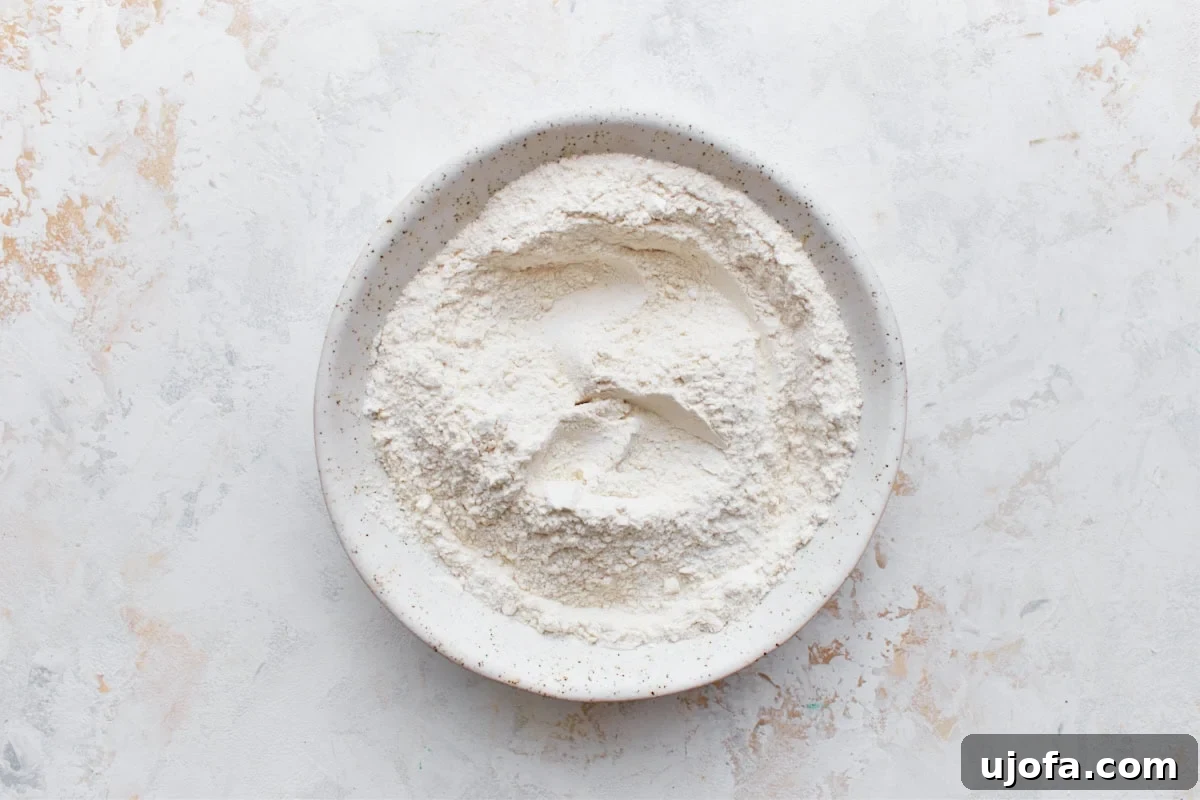
Step 3: Combine Dry Ingredients. In a separate, small bowl, thoroughly stir together 1 ½ cups of gluten-free all-purpose flour (with xanthan gum), 1 teaspoon of gluten-free baking powder, and ⅛ teaspoon of salt. Whisking these together ensures even distribution of the leavening agents and salt throughout the dough.
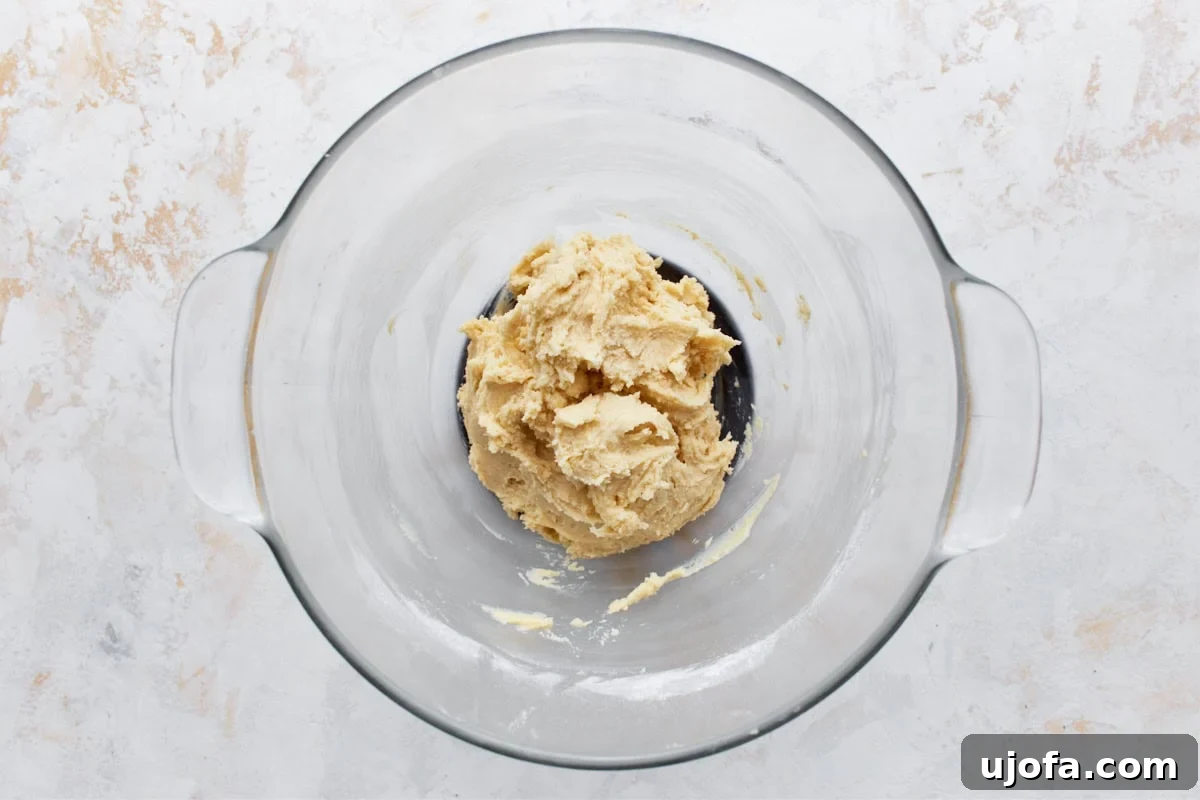
Step 4: Mix Wet and Dry. Gradually add the flour mixture into the wet batter, pouring it in slowly. Mix on low speed until all ingredients are just combined and a cohesive dough forms. Avoid overmixing, as this can develop any elasticity in the gluten-free flour and lead to tougher cookies. The dough will be soft and pliable, perfect for dropping.
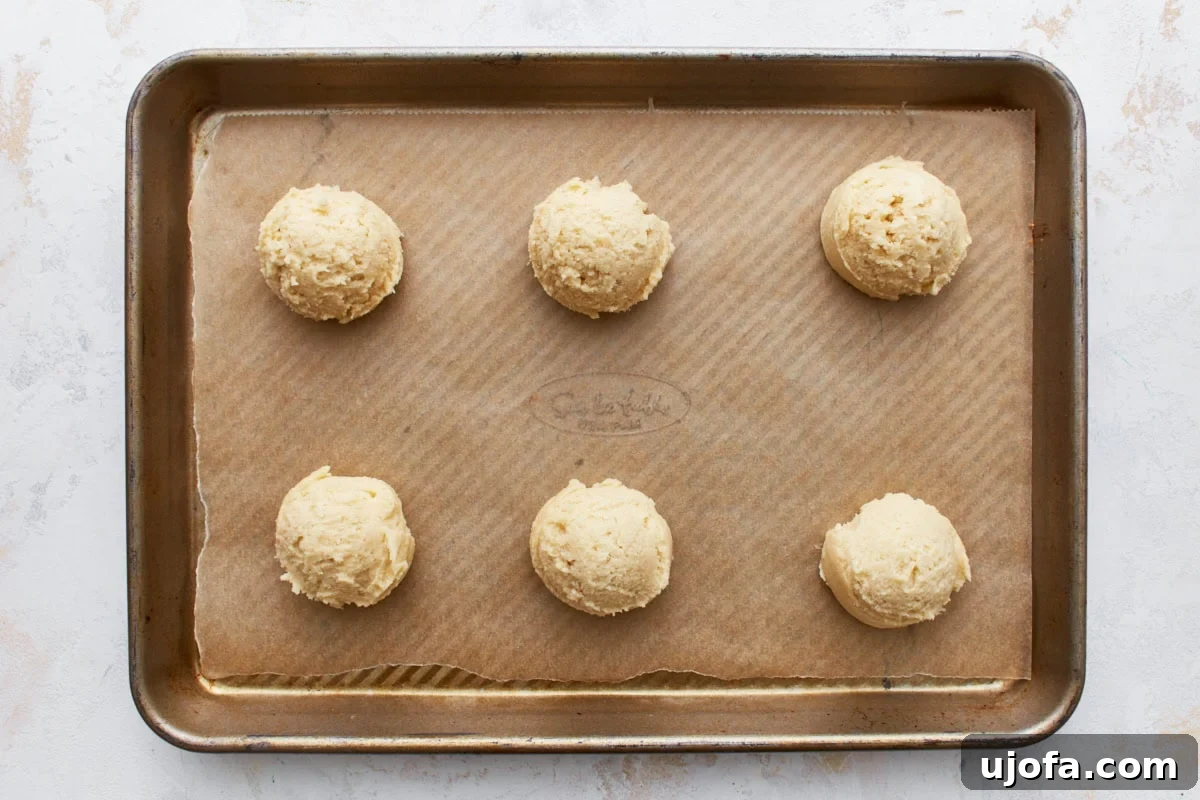
Step 5: Scoop and Bake. Using a greased cookie scoop (a 1 ½-tablespoon size works best), scoop the dough and place the balls approximately 2 inches apart on your prepared baking sheets. This spacing allows the cookies to spread slightly without touching. Bake in the preheated oven for 10–12 minutes, or until the edges appear very lightly golden brown. Remember, the centers might still look a bit soft, but they will firm up as they cool. Do not overbake!
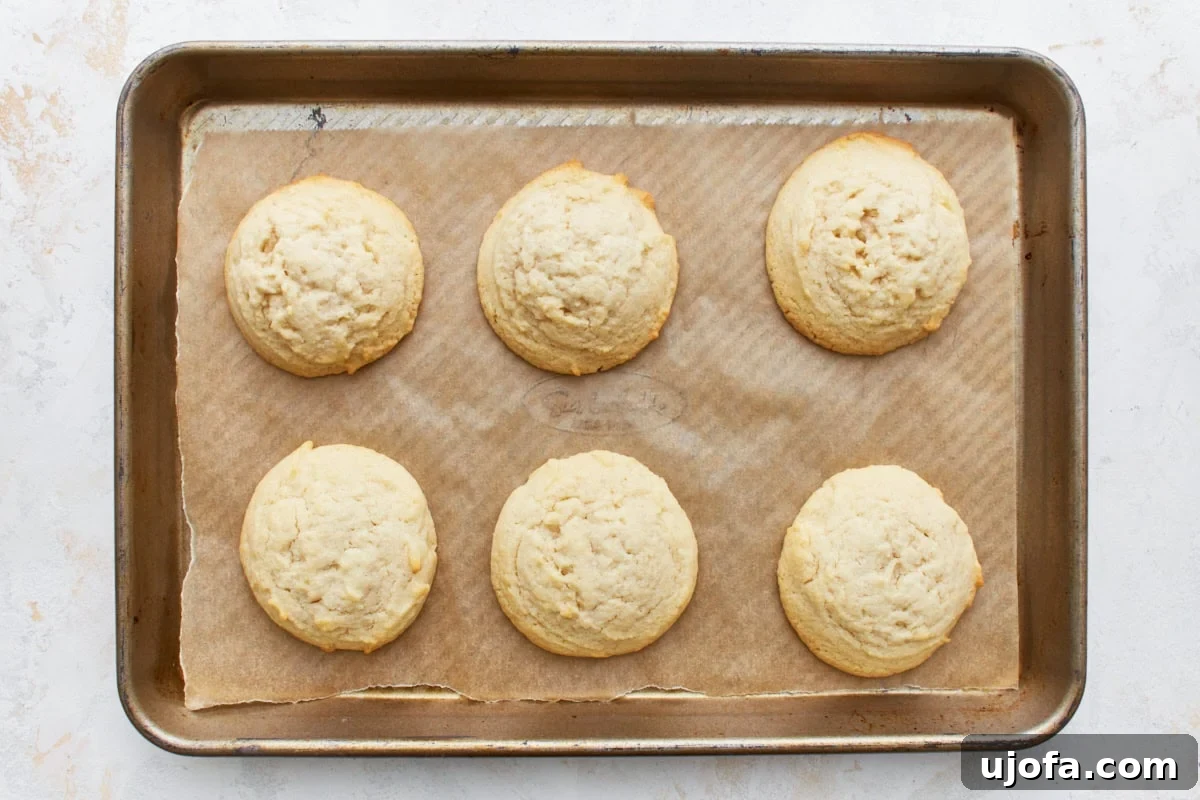
Step 6: Cool and Enjoy. Once baked, allow the cookies to cool on the baking sheets for 2–3 minutes. This initial cooling helps them set and prevents them from breaking when transferred. After this short period, carefully move the cookies to a wire cooling rack to cool completely. Once cooled, they are ready to be decorated, stored, or simply enjoyed as is! Store any undecorated cookies in an airtight container at room temperature.
These gluten-free sugar cookies are a testament to how simple and delicious gluten-free baking can be. With their soft, buttery texture and classic flavor, they are sure to become a cherished treat for you and your loved ones. Happy baking!