
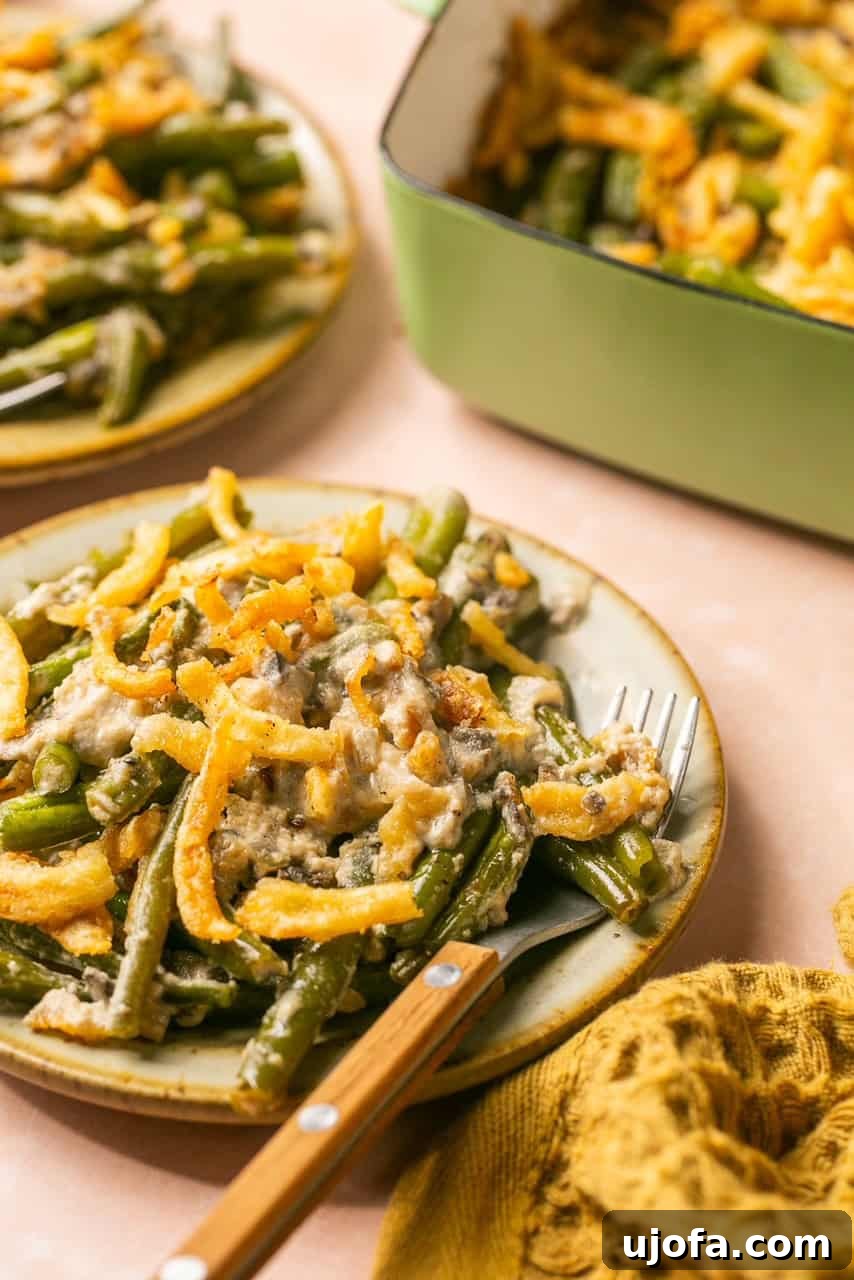
This exquisite homemade gluten-free green bean casserole recipe redefines a cherished holiday classic. Featuring crisp, fresh green beans enveloped in a rich, dairy-free mushroom sauce, and crowned with perfectly golden, crispy fried onions—either store-bought for convenience or lovingly homemade—this dish offers a healthy and equally delicious twist. It’s the ideal allergy-friendly side that promises to become a new favorite at your festive gatherings, delivering all the comforting flavors you adore without any of the common allergens.
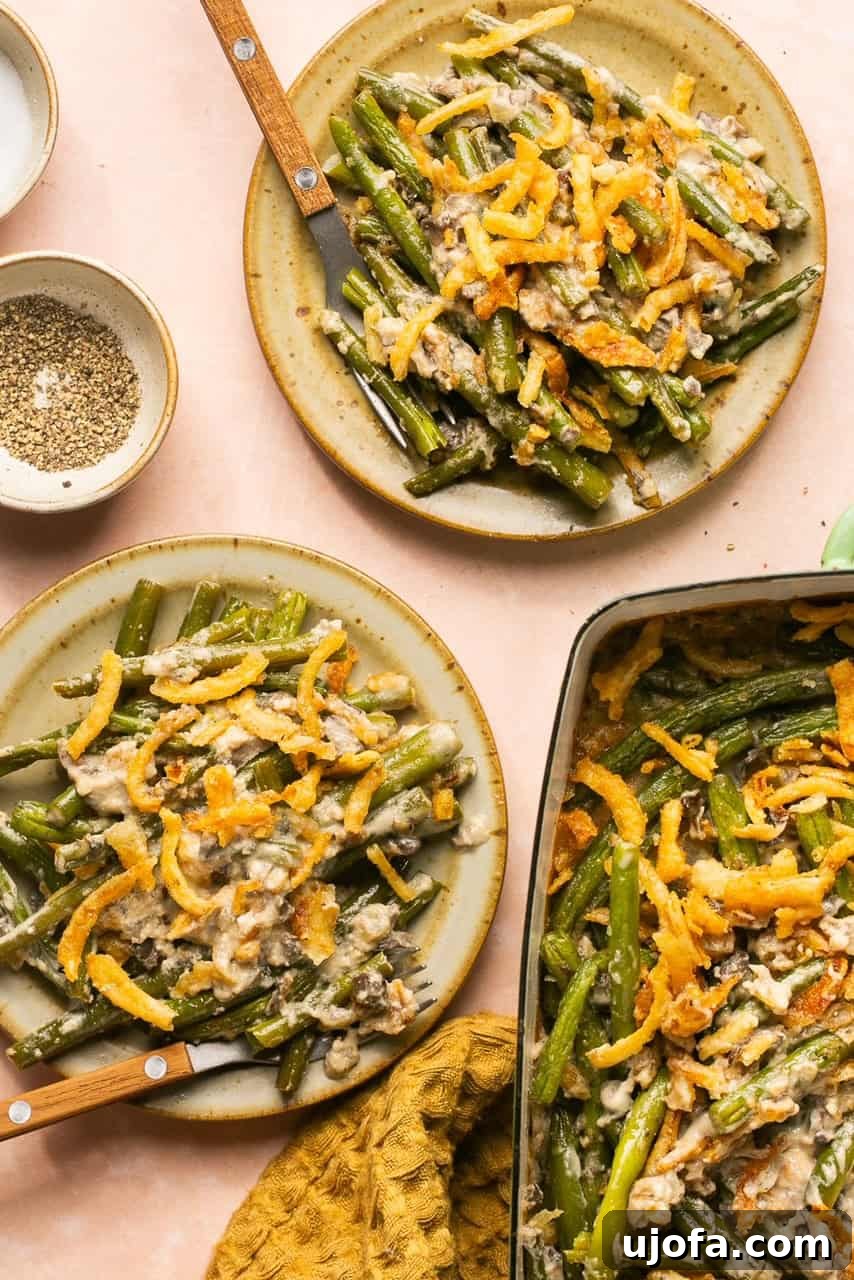
Why This Gluten-Free Green Bean Casserole Will Be Your New Holiday Star
Green bean casserole has long been a staple on holiday tables, celebrated for its irresistible combination of crisp-tender green beans, creamy sauce, and savory fried onion topping. It’s the epitome of comfort food, evoking warmth and tradition. However, for many navigating dietary restrictions, enjoying this classic often comes with unwanted post-meal discomfort due to common allergens. This recipe changes that. My mission is to ensure everyone can indulge in their favorite holiday dishes without compromise, and this gluten-free, dairy-free green bean casserole is a shining example of how effortless and delightful healthy alternatives can be. It’s thoughtfully crafted to be low in carbohydrates, completely free from common allergens like gluten and dairy, and packed with flavor that will impress even the most discerning palates at your holiday table.
As a personal favorite side dish, the traditional green bean casserole held a special place in my heart. However, after transitioning to a gluten-free and dairy-free lifestyle, I faced the dilemma of parting ways with this beloved dish. The conventional recipe, often relying on canned cream of mushroom soup, typically contains ingredients such as canola oil, soy, wheat, corn starch, and MSG—all of which are now off-limits for me. Driven by a desire to reclaim my cherished Thanksgiving side, I dedicated myself to developing a wholesome, allergy-friendly version that mirrors the comforting taste and texture of the original without any undesirable additives. This healthier rendition of green bean casserole offers the same rich, savory satisfaction, ensuring it can proudly take its place as a new, inclusive tradition in your holiday recipe rotation. It’s a testament to the fact that dietary needs don’t mean sacrificing flavor or tradition.
For those familiar with low-carb cooking, some green bean casserole adaptations incorporate crushed pork rinds and cream cheese for texture and richness. While those approaches certainly have their place, for this specific recipe, I opted for a different path. My version utilizes readily available gluten-free crispy fried onions, providing that essential crunch with ease. For the creamy base, I leaned into delicious and effective dairy-free substitutes, ensuring a luxurious, allergy-friendly sauce. Additionally, for the adventurous home cook, I’ve included a detailed guide below on how to prepare your own irresistibly crispy fried onions from scratch, elevating this dish even further!
Essential Ingredient Insights for the Perfect Casserole
While I generally lean towards using fresh, vibrant ingredients to achieve the best flavor and texture in this recipe, remember that flexibility is key, especially during busy holiday preparations. Feel free to adapt based on what you have on hand or what best suits your schedule. Thanksgiving dinner can be quite the culinary undertaking, so be sure to review the expert tips and make-ahead suggestions provided further down the page for guidance on preparing this perfect gluten-free side dish in advance, making your holiday cooking experience smoother and less stressful.
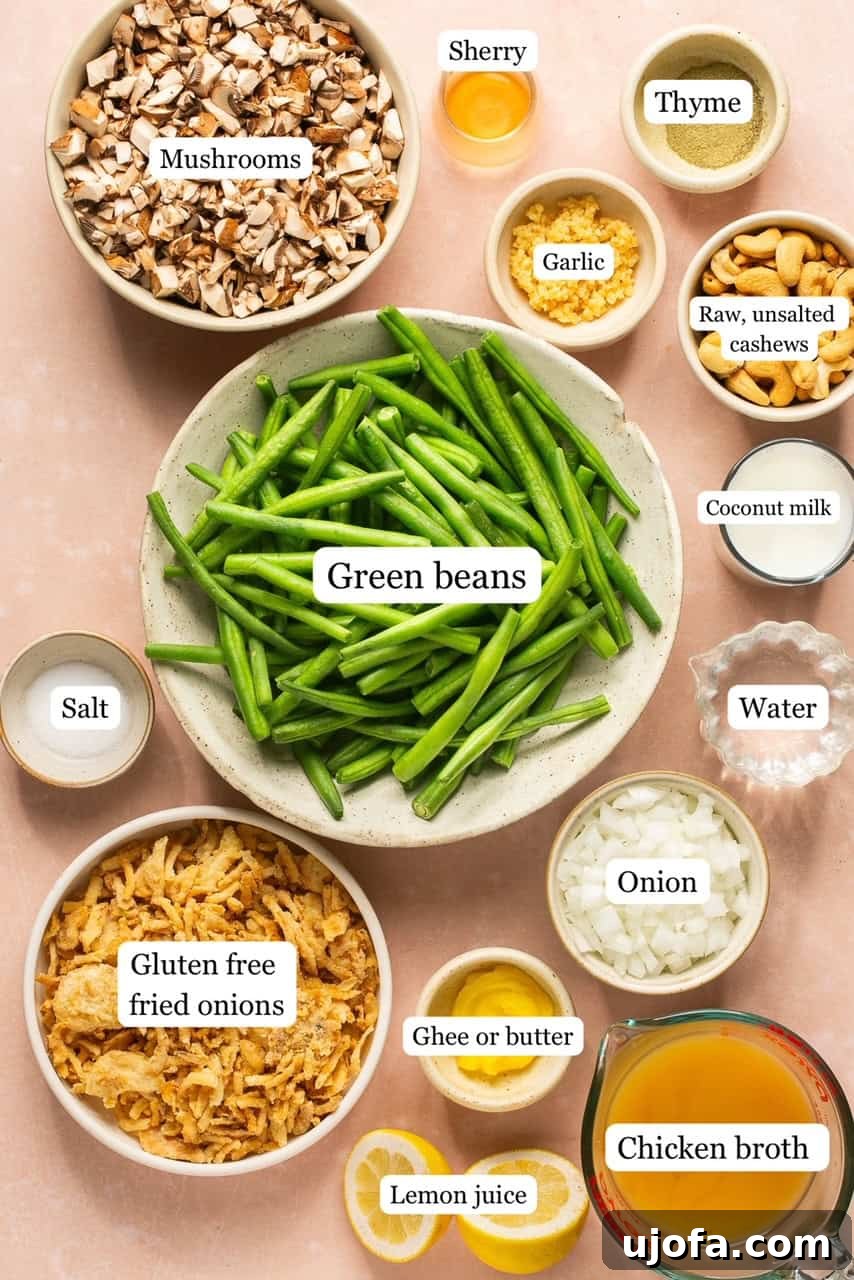
- Homemade Mushroom Sauce: The heart of this casserole lies in its creamy, low-carb, and dairy-free mushroom sauce. I achieve its luxurious texture and rich flavor by combining full-fat coconut milk with raw cashews. A crucial tip for coconut milk: always stir it thoroughly in the can before measuring, as its natural fats and liquids tend to separate, affecting consistency. To elevate the flavor profile, I incorporate Sherry cooking wine, which adds an incredible depth and complexity. If you’re following a Whole30 protocol, simply omit this ingredient; the sauce will remain wonderfully tasty and rich without it.
- Ghee: Ghee is clarified butter, meaning most of the milk solids (and thus lactose and casein) have been removed, making it tolerated by many who are dairy-sensitive. However, it does contain a trace amount of dairy proteins. If you have a severe dairy allergy or are strictly dairy-free, I recommend using a high-quality vegan or plant-based butter alternative to ensure complete adherence to your dietary needs.
- Green Beans: Fresh green beans are my top choice for their vibrant color, crisp texture, and superior flavor. They hold up beautifully during baking, offering that satisfying bite. If fresh aren’t available or you’re short on time, good quality canned green beans can be used in a pinch, though they may yield a softer texture. For canned, be sure to drain and rinse them well to remove excess sodium.
- Cremini Mushrooms: Also known as baby bellas, cremini mushrooms provide a deeper, earthier flavor than white button mushrooms, contributing significantly to the savory richness of the sauce. Their robust texture holds up well during cooking.
- Onion & Garlic: These aromatic powerhouses form the foundational flavor base of the mushroom sauce. Diced onion and minced garlic are sautéed to release their fragrant oils, building layers of savory goodness.
- Chicken Broth: Used to deglaze the pan and add liquid to the sauce, chicken broth (or vegetable broth for a vegetarian option) enriches the overall flavor and helps achieve the desired consistency.
- Dried Thyme: This classic herb beautifully complements the earthy flavors of mushrooms and green beans, adding a subtle, aromatic depth that is quintessential to a comforting casserole.
- Salt and Black Pepper: Essential for seasoning, these humble ingredients bring out the best in all the other flavors. Adjust to your personal preference throughout the cooking process.
- Fresh Lemon Juice: A squeeze of fresh lemon juice is a secret weapon in this recipe. It brightens the sauce, cutting through its richness and adding a subtle tang that balances the earthy mushroom and creamy coconut notes.
- Tapioca Flour: This gluten-free starch plays a crucial role in creating wonderfully crispy homemade fried onions. When combined with other flours and spices, it helps achieve that desirable crunchy coating while remaining keto-friendly. For frying the onions, I use a combination of ghee and avocado oil for a perfect crisp. The onions are first dipped in egg, then coated in a mixture of tapioca flour, coconut flour, and an array of spices.
- Crispy Onion Straws: For ultimate time-saving convenience, store-bought gluten-free crispy fried onion straws are a fantastic option. I’ve personally found the 365 brand at Whole Foods to be excellent. If you have a bit more time and wish to embark on the rewarding journey of making your own fried onions from scratch, a detailed recipe is provided below. While it requires a little more effort, the resulting homemade crispiness is truly unparalleled and worth every minute!
Step-by-Step Guide: Crafting Your Gluten-Free Green Bean Casserole
Step 1: Prepare the Green Beans and Oven
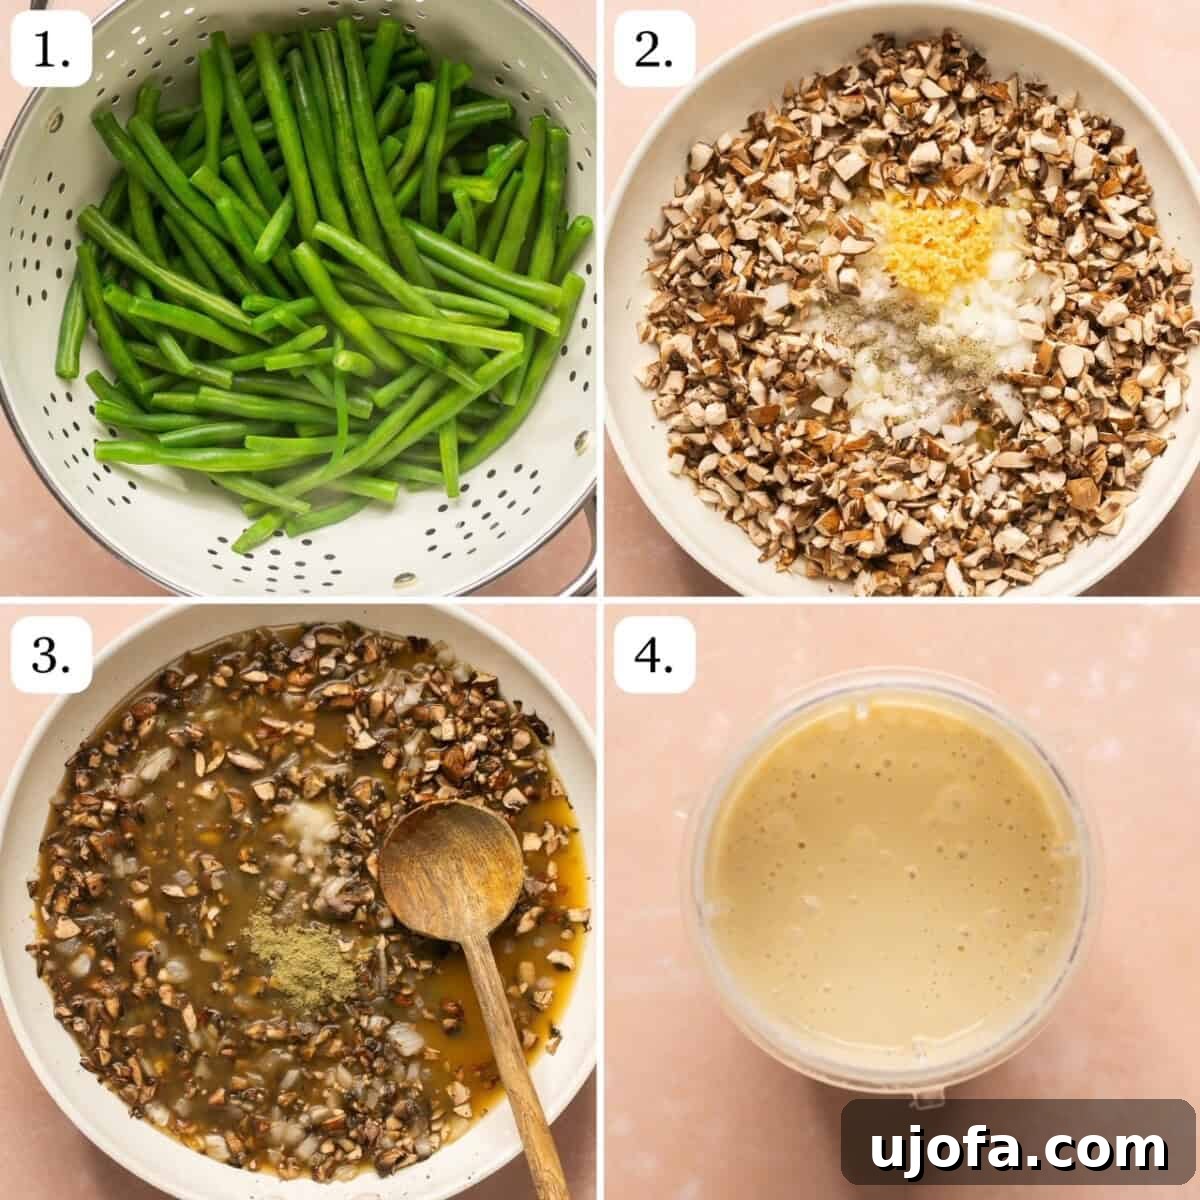
Begin by preheating your oven to a consistent 375°F (190°C). Lightly grease a 9×13 inch casserole dish to prevent sticking. Next, fill a large pot with water and bring it to a rolling boil over high heat. Once boiling, add your trimmed fresh green beans. Blanch them for precisely 5 minutes, or until they are vibrant green and tender-crisp, retaining a slight bite. This par-cooking step ensures they finish perfectly in the oven without becoming mushy. Drain the blanched green beans thoroughly and set them aside.
Step 2: Sauté the Aromatics and Mushrooms
In a large skillet, melt one tablespoon of ghee (or vegan butter) over medium heat. Once shimmering, add the diced onion, minced garlic, and chopped cremini mushrooms. Season generously with a pinch of salt and black pepper. Sauté this mixture for 7-8 minutes, stirring occasionally. During this time, the mushrooms will release their moisture, begin to brown, and develop a deeper, richer flavor, contributing significantly to the sauce’s body.
Step 3: Build the Sauce Base
If you’re using Sherry, now is the time to add it to the skillet. Use a wooden spoon to scrape up any flavorful brown bits (fond) from the bottom of the pan – this deglazing step adds immense depth to your sauce. Next, pour in the chicken broth, sprinkle in the dried thyme, and add the sea salt. Bring the mixture to a boil, then reduce the heat to medium-low and allow it to gently simmer. While the sauce base simmers, proceed to prepare your creamy coconut cashew mixture.
Step 4: Create the Coconut Cashew Cream
In a high-speed blender, combine the measured full-fat coconut milk (remember to stir it well in the can first!), raw cashews, fresh lemon juice, and ½ cup of water. Blend on high for a full minute, or until the mixture is incredibly smooth, thick, and resembles a luxurious cream. This blend will form the rich, dairy-free base of your casserole sauce.
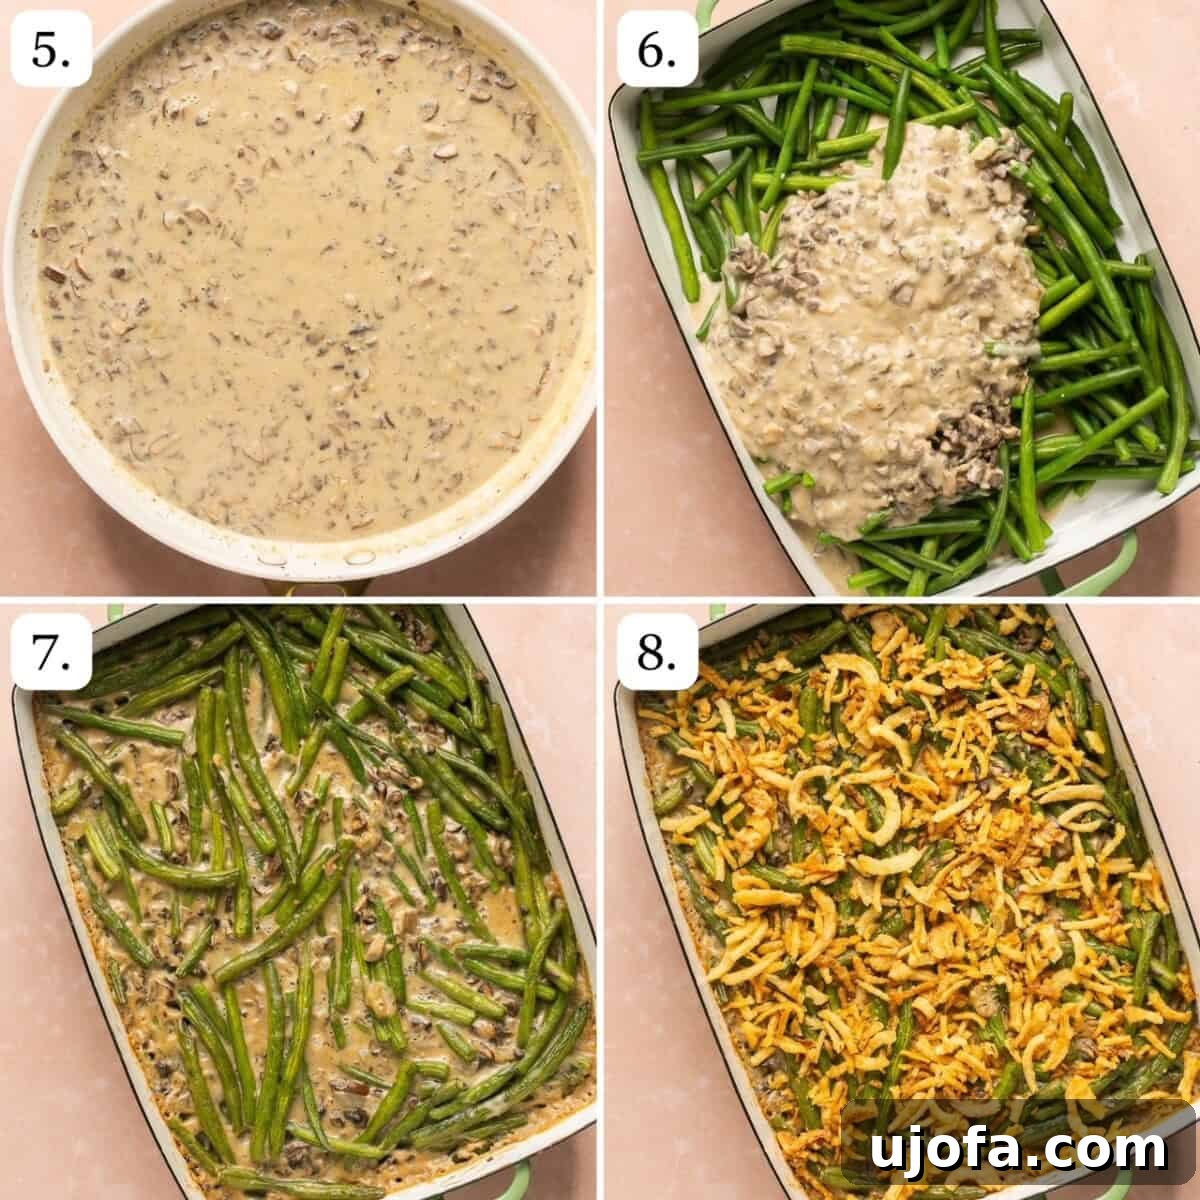
Step 5: Thicken the Mushroom Sauce
Carefully pour the freshly blended coconut cashew cream into the simmering mushroom mixture in the skillet. Stir continuously for 1-2 minutes. You’ll notice the sauce thickening fairly quickly, transforming into a velvety consistency. Taste the sauce and adjust the seasoning as needed, adding more salt or pepper if desired. At this point, you have a choice: you can leave the sauce as-is for a chunkier texture, or use an immersion blender directly in the pan to break down the mushrooms slightly, creating an even smoother sauce. Both methods yield delicious results, so choose what you prefer!
Step 6: Assemble the Casserole
Transfer the blanched green beans into your prepared 9×13 inch casserole dish. Evenly pour the rich, creamy mushroom sauce over the green beans, ensuring every bean is well coated. Gently stir to combine the green beans and sauce thoroughly in the dish.
Step 7: First Bake
Place the assembled casserole into the preheated 375°F (190°C) oven. Bake for 20 minutes. This initial baking time allows the flavors to meld, the sauce to further set, and the green beans to become perfectly tender.
Step 8: Finish with Crispy Onions and Serve
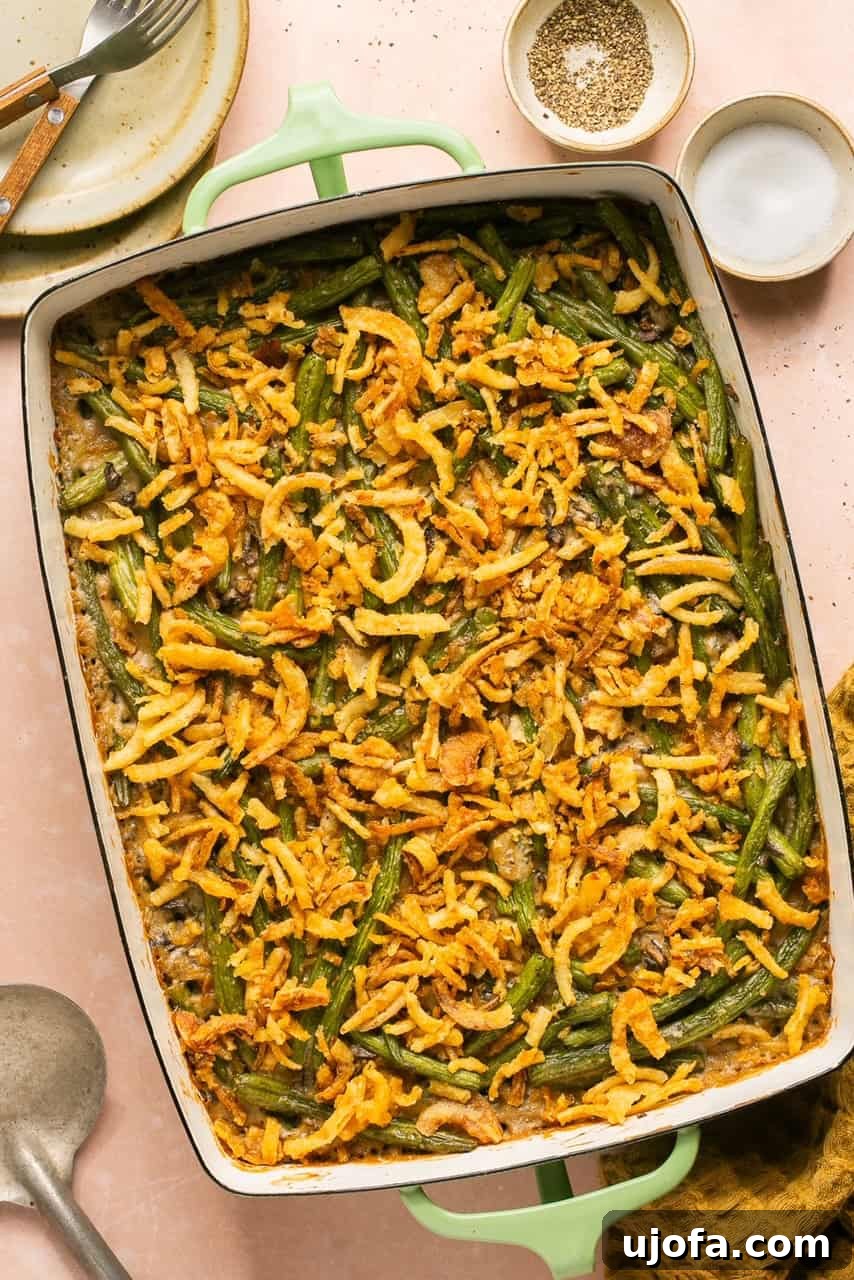
Once the 20-minute timer for the casserole goes off, remove the dish from the oven. Evenly sprinkle your crispy fried onions (either store-bought or homemade) over the top of the casserole. Return the dish to the oven and bake for an additional 10 minutes, or until the onions are golden brown and wonderfully crisp. This final step adds the quintessential crunchy texture and savory aroma. Serve immediately and savor every comforting bite of this healthy holiday favorite!
How To Make Perfectly Crispy Homemade Fried Onions
Step 1: Prepare the Breading Stations
Set up two shallow dishes. In the first dish, beat the eggs thoroughly. In the second shallow dish, combine the tapioca flour, coconut flour (or fine almond flour for an alternative), garlic powder, sea salt, and paprika. Stir these dry ingredients together until they are well mixed and uniform. These two stations will be crucial for coating your onion pieces evenly.
Step 2: Heat the Frying Oil
In a large skillet, heat the two tablespoons of ghee and two tablespoons of avocado oil (or coconut oil) over medium heat. You want the oil to be hot enough to sizzle when a test piece of onion is dropped in, but not smoking. Proper oil temperature is key for achieving a golden, crispy crust without burning.
Step 3: Coat and Fry the Onions
Take your sliced onion pieces and first dip them into the beaten egg, ensuring they are fully coated. Allow any excess egg to drip off. Then, transfer the egg-coated onions into the flour mixture, tossing them gently to achieve a full and even coating. Once coated, carefully place the onion pieces into the hot skillet. Fry them for 2-4 minutes on each side, turning occasionally, until they reach a beautiful golden-brown color and are wonderfully crisp. Adjust heat as needed to prevent burning.
Step 4: Drain Excess Oil
As the fried onions reach your desired crispness and color, carefully remove them from the skillet using tongs or a slotted spoon. Transfer them immediately to a plate lined with paper towels. This allows any excess oil to drain off, keeping your fried onions light and extra crispy.
Step 5: Fry in Batches
To avoid overcrowding the skillet and to ensure even cooking and crispiness, work in small batches. Continue the process of dipping, coating, and frying until all your onion pieces have been transformed into delicious, golden crispy onions.
Step 6: Final Integration with Casserole
Once the main casserole baking timer goes off, carefully remove the dish from the oven. Evenly scatter your freshly made crispy fried onions over the top of the green bean casserole. Return the casserole to the oven for an additional 10 minutes to allow the onions to heat through and crisp up perfectly. Serve warm and enjoy the homemade goodness!
Expert Tips for Green Bean Casserole Success
- Smart Shopping with Thrive Market: If you’re new to the Keto or Paleo lifestyle, or simply looking to stock up on these specialized pantry staples without breaking the bank, Thrive Market is an incredible resource. They offer a vast selection of healthier, high-quality items at prices often significantly lower than traditional retail. As a bonus, you can use this exclusive link to receive 30% off your very first order, making it even easier to gather all the ingredients for this recipe and more!
- Dairy Substitutions: For those who are not sensitive to dairy, you have the option to swap out the coconut milk and cashews in the mushroom sauce for heavy cream to achieve a similarly rich and creamy texture. Additionally, traditional butter can be used in place of ghee for sautéing and frying, offering that classic buttery flavor.
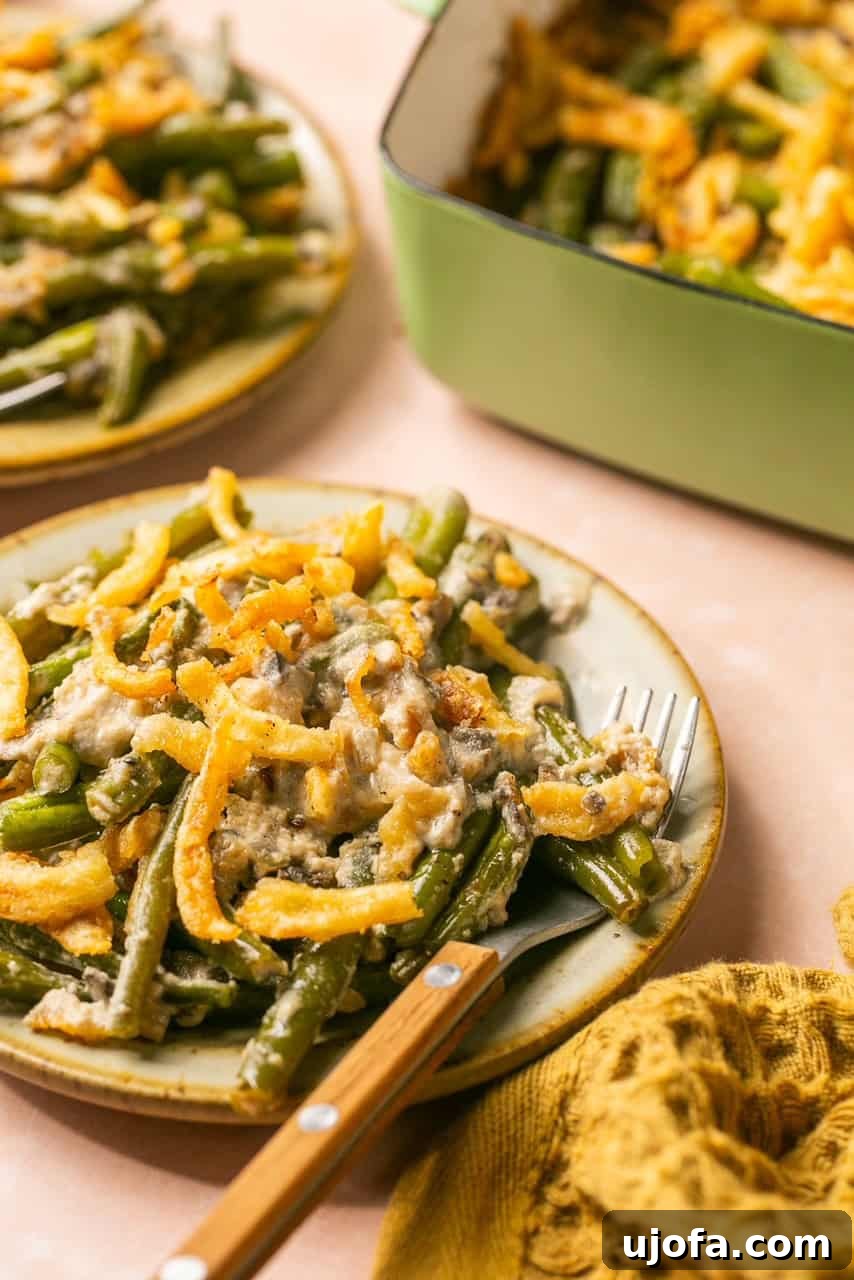
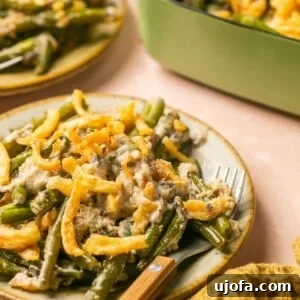
- Convenient Crispy Onions: If adhering to a Whole30 diet isn’t a concern, or if you’re simply aiming to save time during your holiday preparations, using store-bought crispy fried onions is a fantastic shortcut. For those requiring a gluten-free option, be sure to check your local Whole Foods for their reliable 365 brand Gluten-Free Crispy Onions. Many Aldi stores also carry their own gluten-free version, offering another accessible choice. The crispy onions featured in these photos are, in fact, the convenient store-bought variety!
Make-Ahead & Storage Tips to Simplify Your Holiday Cooking
Streamline your holiday preparations by assembling the casserole ahead of time. You can combine the cooked green beans and the creamy mushroom sauce up to one day in advance. Store this mixture securely in an airtight container or a covered casserole dish in the refrigerator. Before baking, remember to remove it from the fridge and allow it to come to room temperature for about 30 minutes. This prevents thermal shock in the oven and ensures even cooking. Once at room temperature, simply add your crispy onions and bake as directed.
Should you find yourself with delightful leftovers, they store exceptionally well. Place them in an airtight container or keep the casserole dish tightly covered. They will remain fresh in the refrigerator for 3-5 days. For longer storage, this green bean casserole freezes beautifully for 10-12 months. To enjoy, simply thaw overnight in the refrigerator (if frozen), then reheat gently in the oven or microwave until warmed through. Serve again and relish the convenience!
Frequently Asked Questions (FAQ’s)
No, for this particular recipe, you do not need to soak the cashews beforehand. The high-speed blending combined with the liquid ingredients will achieve a perfectly smooth and creamy consistency without the extra step of soaking.
I haven’t personally tested a version without cashews, but you could try to make it nut-free by using only full-fat coconut milk for the creamy base. To achieve the desired thickness, you might need to use a thickening agent like arrowroot powder. Whisk 1 tablespoon of arrowroot powder into 3 tablespoons of cold water to create a slurry, then gradually add this mixture to the simmering sauce, stirring constantly, until it reaches your preferred consistency. Add a little at a time, as arrowroot thickens quickly.
Yes, you can certainly use frozen green beans to save time. Make sure to thaw them completely and pat them dry before blanching (or simply boil for a couple of minutes until tender-crisp) to prevent excess water from making the casserole watery. The texture might be slightly softer than fresh green beans, but the flavor will still be delicious.
While I haven’t specifically tested this method for the homemade fried onions in this recipe, it’s generally possible to make crispy onions in an air fryer. After coating the onions, arrange them in a single layer in your air fryer basket, spray lightly with oil, and cook at around 375°F (190°C) for 8-12 minutes, shaking the basket occasionally, until golden and crisp. Keep a close eye on them to prevent burning, as air fryer cooking times can vary.
More Delicious Gluten-Free Thanksgiving Dishes to Explore
- Creamy Dairy-Free Mashed Potatoes
- Bacon Maple Brussels Sprouts with Pecans and Cranberries
- Gluten-Free Dairy-Free Sausage Apple Herb Stuffing
- Gluten-Free Pumpkin Pie
- Easy Paleo Roasted Turkey
Love this recipe? Please consider leaving a 5-star 🌟🌟🌟🌟🌟 rating in the recipe card below and a review in the comment section. Your feedback means the world! Or, connect with me and follow my culinary journey on Facebook, Pinterest, or Instagram today for more healthy and delicious recipes!
Pin
Easy Gluten-Free Green Bean Casserole (with Fried Onions)
Ingredients
- 2 lbs green beans, ends chopped
- 8 oz cremini mushrooms, chopped
- ½ large onion, diced
- 3 cloves garlic, minced
- 1 tbsp ghee, use vegan or plant-based butter for dairy free!
- 1 tbsp sherry, omit for Whole30
- 1 cup chicken broth
- 1 tsp dried thyme
- 1 tsp sea salt, more to taste
- ½ cup full fat coconut milk, stirred before measuring – it separates in the can
- ½ cup raw unsalted cashews
- 1 tbsp fresh squeezed lemon juice
- ½ cup water
Homemade Fried Onions
- 1 large onion, sliced in half and then cut into 2-3 inch pieces
- 2 tbsp ghee
- 2 tbsp avocado oil or coconut oil
- 2 eggs, beaten
- 2 tbsp tapioca flour
- ¼ cup coconut flour or fine almond flour
- 1 tsp garlic powder
- ½ tsp sea salt
- ½ tsp paprika
Instructions
-
Preheat oven to 375°F (190°C). Grease a 9×13 inch casserole dish. Fill a large pot with water and bring to a rolling boil. Add the green beans and boil for 5 minutes until they are crisp-tender and brightly colored. Drain thoroughly and set aside.
-
Heat 1 tablespoon of ghee in a large skillet over medium heat. Add the diced onion, minced garlic, and chopped mushrooms. Sprinkle with a bit of salt and pepper. Sauté for 7-8 minutes, stirring occasionally, until the mushrooms have released their liquid and are lightly browned. Add the sherry (if using) and use a spoon to scrape the flavorful brown bits from the bottom of the pan. Stir in the chicken broth, dried thyme, and sea salt. Bring to a boil, then reduce heat to medium-low and let it simmer gently while you prepare the coconut cashew cream.
-
In a blender, combine the full-fat coconut milk (stirred well before measuring), raw cashews, fresh lemon juice, and ½ cup of water. Blend on high for 1 minute until the mixture is very thick and creamy, ensuring no cashew pieces remain.
-
Pour the creamy cashew mixture into the simmering skillet with the mushroom sauce. Stir constantly for 1-2 minutes; the sauce should thicken quite rapidly. Taste and adjust seasoning, adding more salt if desired. For a smoother sauce, you can use an immersion blender to break down the mushrooms slightly at this stage.
-
Add the blanched green beans to the prepared casserole dish. Pour the rich mushroom sauce evenly over the green beans. Stir gently to ensure everything is well combined. Bake in the preheated oven for 20 minutes.
-
While the casserole bakes, prepare the homemade fried onions (if not using store-bought): Beat eggs in a shallow dish. In a separate shallow dish, combine tapioca flour, coconut (or almond) flour, garlic powder, salt, and paprika, stirring to mix well. Heat 2 tablespoons of ghee and 2 tablespoons of cooking oil (avocado or coconut) in a large skillet over medium heat. Dip onion pieces into the beaten egg, then coat thoroughly in the flour mixture. Fry in batches for 2-3 minutes per side, or until golden brown and crispy. Transfer to a paper towel-lined plate to drain.
-
Once the casserole’s initial baking timer goes off, remove it from the oven. Evenly spread the crispy fried onions (homemade or store-bought) over the top of the casserole (you might have some homemade ones left over, which make a fantastic snack!). Return the casserole to the oven and bake for an additional 10 minutes, or until the onions are golden brown and perfectly crisp. Serve hot and enjoy your wholesome, comforting green bean casserole!
Notes
- Thrive Market: If you are new to the Keto/Paleo lifestyle or don’t have a ton of these pantry staples on hand, Thrive Market is an amazing place to get them. They sell healthier items for cheaper than retail prices. You can use this link to get 30% off your first order! Everything linked above will also get you the 30% off.
- If you’re okay with dairy, feel free to use heavy cream for the mushroom sauce instead of coconut milk and cashews. You can also use butter instead of ghee.
- Fried Onions: If you’re not worried about Whole30, you can save time and use store-bought fried onions. If gluten-free, Check Whole Foods for their 365 brand Gluten Free Crispy Onions! Aldi also has a GF version, as well. This is what I used for these photos!
Make Ahead & Storage Tips
You can combine the green beans and the mushroom sauce the day before. Store in an airtight container in the refrigerator and bring it to room temperature before adding the onions and baking!
If you have leftovers, store them in an airtight container or covered casserole dish for 3-5 days in the fridge, and 10-12 months in the freezer! Reheat and serve.
Nutrition
All nutrition facts are an estimate and automatically calculated. While I fact check them using My Fitness Pal, please note that they may not always be 100% accurate and depend on ingredients used. Weigh your total and divide by the number of servings for the most accurate grams per serving size.
This post may contain affiliate links
This recipe was originally published on November 4, 2021 and updated with new copy on August 21, 2024 and new photos on August 26, 2024.