
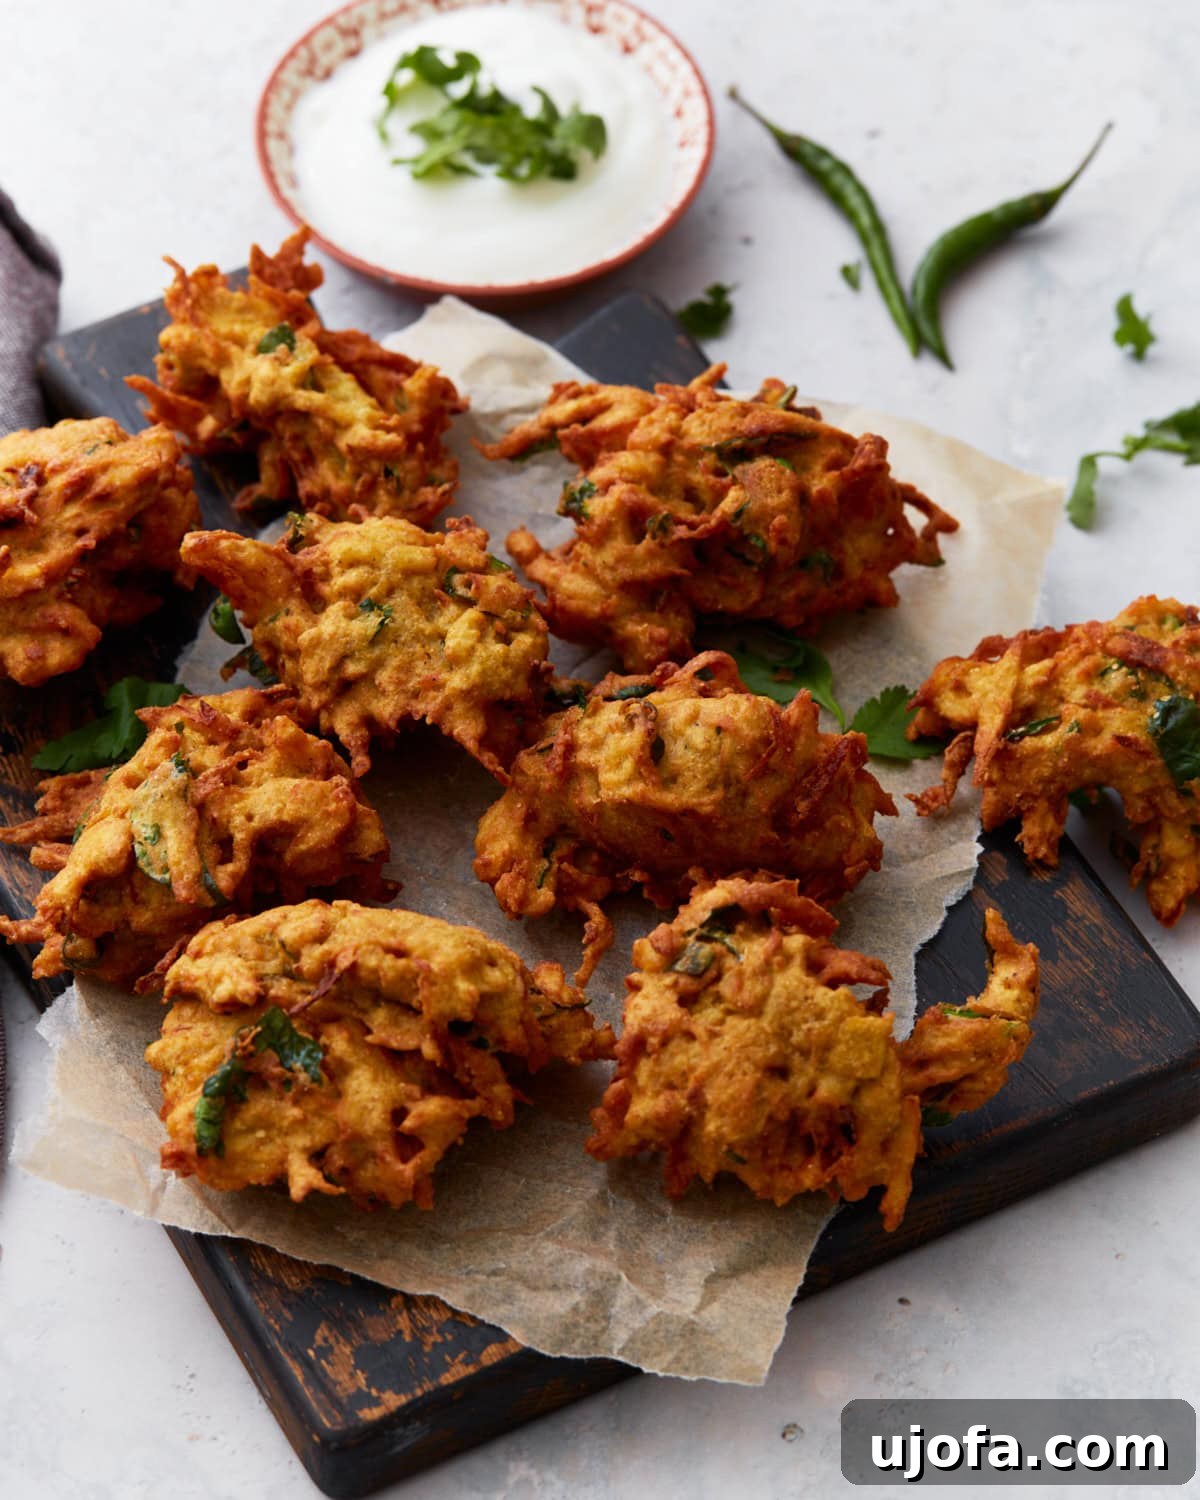
Crispy & Flavorful Gluten-Free Pakoras: Your Guide to Perfect Indian Fritters
Pakoras, those delightful golden-brown fritters, have long held a special place in my heart as the ultimate snack. There’s something truly magical about their crispy exterior giving way to a tender, flavorful interior, especially when paired with a steaming cup of masala chai. Crafted with naturally gluten-free chickpea flour and a medley of fresh vegetables like potatoes and onions, this recipe is designed to be effortlessly simple yet incredibly satisfying. Whether you’re indulging in a fresh batch fried to perfection for a cozy evening or opting for a lighter air-fried version, these pakoras promise a consistently golden, crunchy, and utterly delicious experience every time.
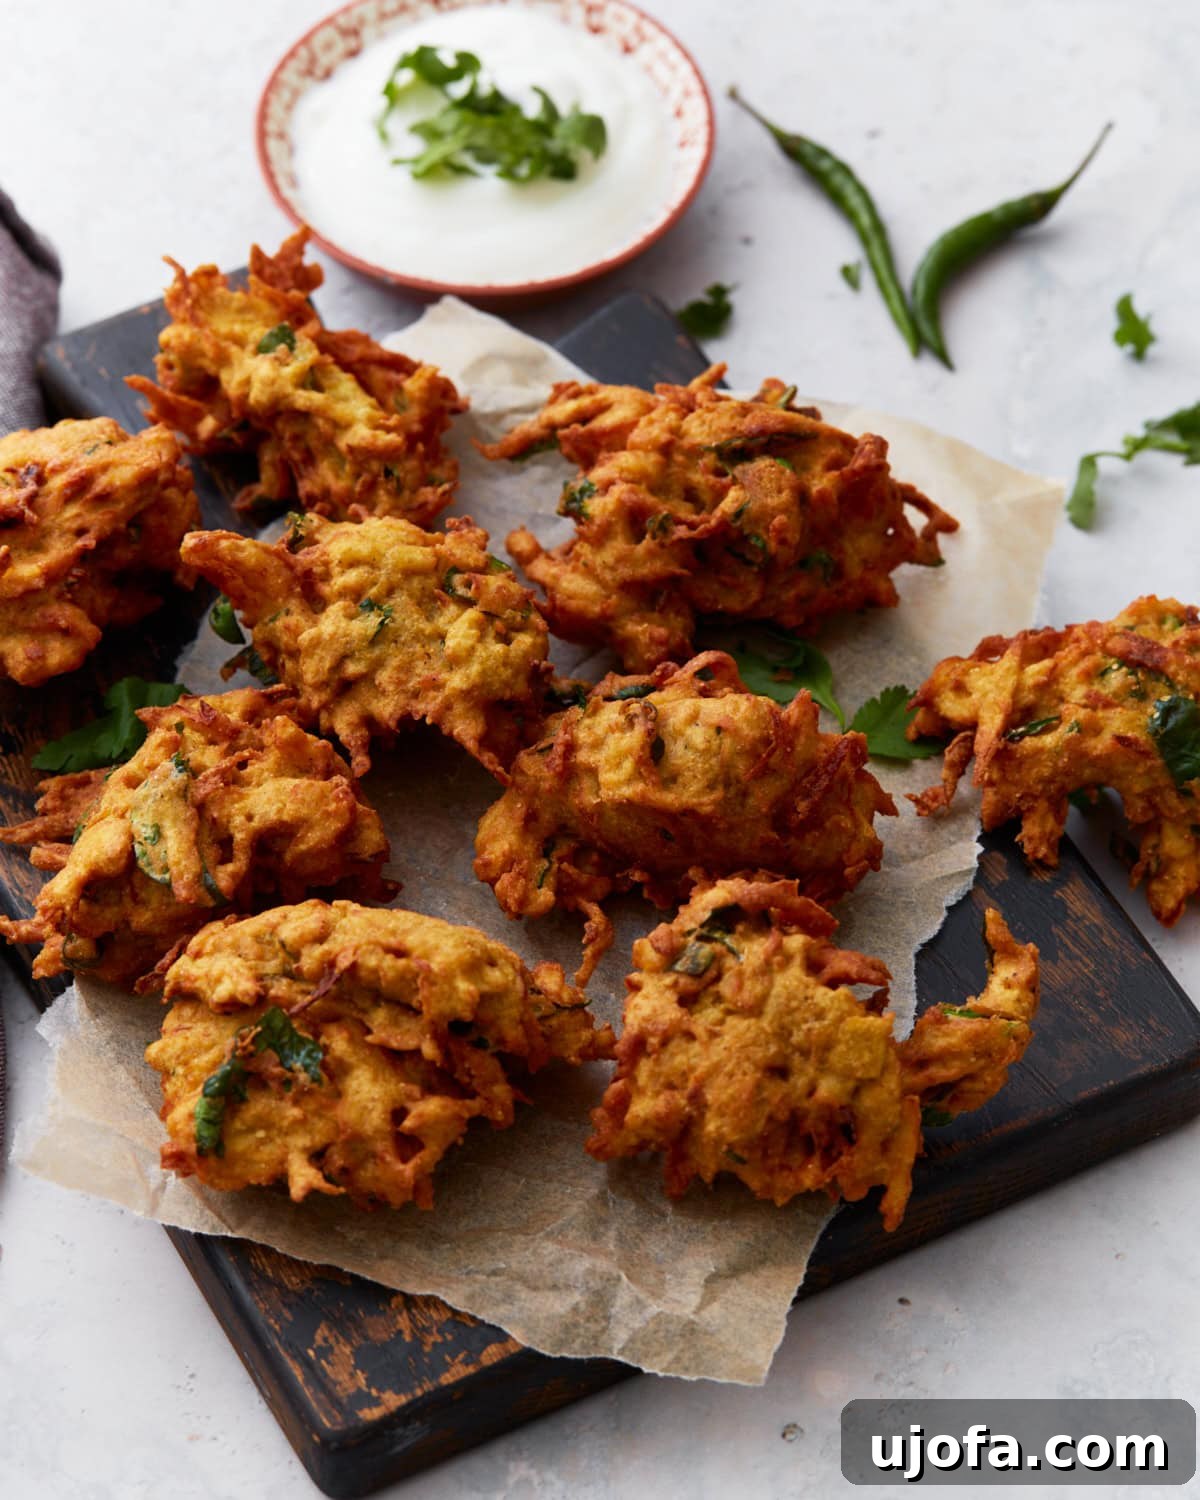
These savory fritters are a celebration of simple ingredients transformed into something extraordinary. Combining chickpea flour (besan), a touch of rice flour for extra crispness, a vibrant blend of warm Indian spices, and fresh vegetables such as spinach and green chilies, they are always a crowd-pleaser in my home. The batter comes together in mere minutes, and the entire cooking process, from mixing to serving, takes approximately 25 minutes. It’s one of those naturally gluten-free snacks that feels incredibly special and gourmet, yet is remarkably easy to prepare whenever that irresistible craving for something crispy and savory strikes.
Pakora
By: Sabine Venier
Servings: 4 servings
Prep: 10 mins | Cook: 15 mins | Total: 25 mins
Pin Recipe
Share by Email
Print Recipe

Pakoras have always been one of my favorite snacks—they’re crispy, flavorful, and perfect with a hot cup of chai. Made with chickpea flour and simple ingredients like potatoes and onions, this pakora recipe is naturally gluten-free and easy to pull together in just a few steps.
Step-by-step photos can be seen below the recipe card.
Ingredients
- 1 cup chickpea flour
- 1/4 cup rice flour
- 1/2 teaspoon coriander powder
- 1/2 teaspoon turmeric powder
- 1/2 teaspoon chili powder
- 1/2 teaspoon garam masala powder
- 1/2 teaspoon salt
- 1/4 teaspoon cumin powder
- 1/2 cup water, adjust as needed
- 1 1/2 cups potato, peeled and grated (squeeze out excess water with your hands)
- 1/2 cup onion, grated
- 1/2 cup chopped spinach
- 2 tablespoons cilantro, chopped
- 1 red or green chili, chopped
- Oil for frying
Instructions
- In a bowl, whisk together chickpea flour, rice flour, coriander powder, turmeric, chili powder, garam masala powder, salt, and cumin powder.
- Gradually add water, stirring until a thick batter forms (like a soft paste).
- Fold in the potato, onion, spinach, cilantro, and chili, ensuring they are well-coated.
- Heat oil in a deep pan over medium heat until hot (about 350°F). Drop spoonfuls of batter into the hot oil, frying in batches to avoid overcrowding. Fry for 3–4 minutes per side until golden brown and crispy.
- Remove and drain on paper towels. Serve warm and enjoy.
Notes
- To bake: place them on a parchment-lined baking sheet, brush with oil, and bake at 400°F for 20–25 minutes, flipping halfway. For air-frying, cook at 375°F for 12–15 minutes, shaking the basket midway.
- Rice flour helps make the pakoras crispier. If you don’t have it, you can replace it with cornstarch or more chickpea flour, but they may be slightly softer.
- Swap out the vegetables: Use cauliflower, bell peppers, zucchini, eggplant, or shredded carrots. Make sure to slice them thinly for even cooking.
- It’s best to mix the batter fresh, but you can prep the dry ingredients ahead of time and add water and vegetables just before frying.
Nutrition
Serving: 1 serving | Calories: 229 kcal | Carbohydrates: 42g | Protein: 9g | Fat: 2g | Saturated Fat: 0.3g | Polyunsaturated Fat: 1g | Monounsaturated Fat: 1g | Sodium: 362mg | Potassium: 661mg | Fiber: 6g | Sugar: 5g | Vitamin A: 455IU | Vitamin C: 20mg | Calcium: 38mg | Iron: 3mg
Nutrition information is automatically calculated, so should only be used as an approximation.
Additional Info
Course: Appetizer
Cuisine: Indian
Tried this recipe?
Mention @mamaknowsglutenfree or tag #mamaknowsglutenfree!
What Are Pakoras? A Culinary Delight
Pakoras are immensely popular Indian fritters, typically made from a variety of vegetables or पनीर (paneer) dipped in a spiced chickpea flour (besan) batter and deep-fried until golden and crisp. They are a staple street food across India and are cherished worldwide for their delightful crunch and aromatic flavors. The beauty of pakoras lies in their versatility; almost any vegetable can be transformed into these savory bites. Historically, pakoras have been a beloved snack, often enjoyed with a hot cup of tea (chai), especially during monsoon season or chilly evenings. This recipe embraces that tradition while offering a naturally gluten-free option that doesn’t compromise on taste or texture.
Why You’ll Love This Gluten-Free Pakora Recipe
- Naturally Gluten-Free: Made primarily with chickpea flour, these pakoras are inherently free from gluten, making them a fantastic option for those with dietary restrictions without needing any special substitutions.
- Quick & Easy: With only 10 minutes of prep and 15 minutes of cook time, you can have a fresh batch of delicious pakoras ready in under half an hour. Perfect for spontaneous cravings or last-minute entertaining.
- Incredibly Crispy Texture: The combination of chickpea and rice flour ensures a superior crispiness that holds up beautifully, whether deep-fried, baked, or air-fried.
- Customizable: This recipe is a fantastic starting point for culinary creativity. Easily swap out vegetables and adjust spices to suit your taste preferences, making it endlessly adaptable.
- Flavorful & Aromatic: A thoughtful blend of traditional Indian spices infuses each bite with warmth and depth, creating a truly authentic and satisfying taste experience.
- Versatile Serving: Ideal as a snack, appetizer, or a delightful accompaniment to main meals. They are perfect for dipping in chutneys or yogurt sauces.
Ingredients Spotlight: Crafting the Perfect Pakora
The magic of pakoras comes from a few key ingredients, each playing an important role in achieving that desirable texture and flavor profile.
- Chickpea Flour (Besan): This is the star of our gluten-free batter. Besan provides a distinct nutty flavor and helps create a wonderfully light and crisp coating. It’s naturally gluten-free and a great source of plant-based protein.
- Rice Flour: A secret weapon for extra crispiness! Adding rice flour to the batter ensures your pakoras achieve a superior crunch that lasts. If you don’t have it, a little cornstarch can also help, or you can use all chickpea flour, though the texture might be slightly softer.
- Spices (Coriander, Turmeric, Chili, Garam Masala, Cumin, Salt): This blend is the soul of Indian cooking. Coriander and cumin offer earthy undertones, turmeric provides warmth and a beautiful golden color, chili powder adds a gentle heat (adjust to your preference), and garam masala brings a complex, aromatic finish. Salt, of course, enhances all these flavors.
- Fresh Vegetables (Potatoes, Onion, Spinach, Cilantro, Chili): This combination provides a delightful contrast to the crispy batter. Grated potatoes and onions add moisture and sweetness, while spinach offers a hint of green and nutritional value. Fresh cilantro brightens the flavor, and a chopped red or green chili provides a fresh kick. Remember to squeeze excess water from grated vegetables to prevent a soggy batter.
Essential Equipment for Pakora Making
You don’t need fancy gadgets to make amazing pakoras, but having a few basic kitchen tools will make the process smoother:
- Large Mixing Bowl: For combining your dry and wet ingredients.
- Whisk: To ensure your batter is smooth and lump-free.
- Box Grater or Food Processor: For quickly grating potatoes and onions.
- Deep Pan or Dutch Oven: Essential for deep-frying your pakoras safely and efficiently.
- Slotted Spoon or Spider Strainer: For carefully removing fried pakoras from the hot oil.
- Paper Towels: To drain excess oil and keep your pakoras perfectly crispy.
- Thermometer (Optional but Recommended): A kitchen thermometer is incredibly helpful for maintaining the ideal oil temperature (around 350°F / 175°C), which is crucial for perfect pakoras.
How to Make Pakora Step by Step
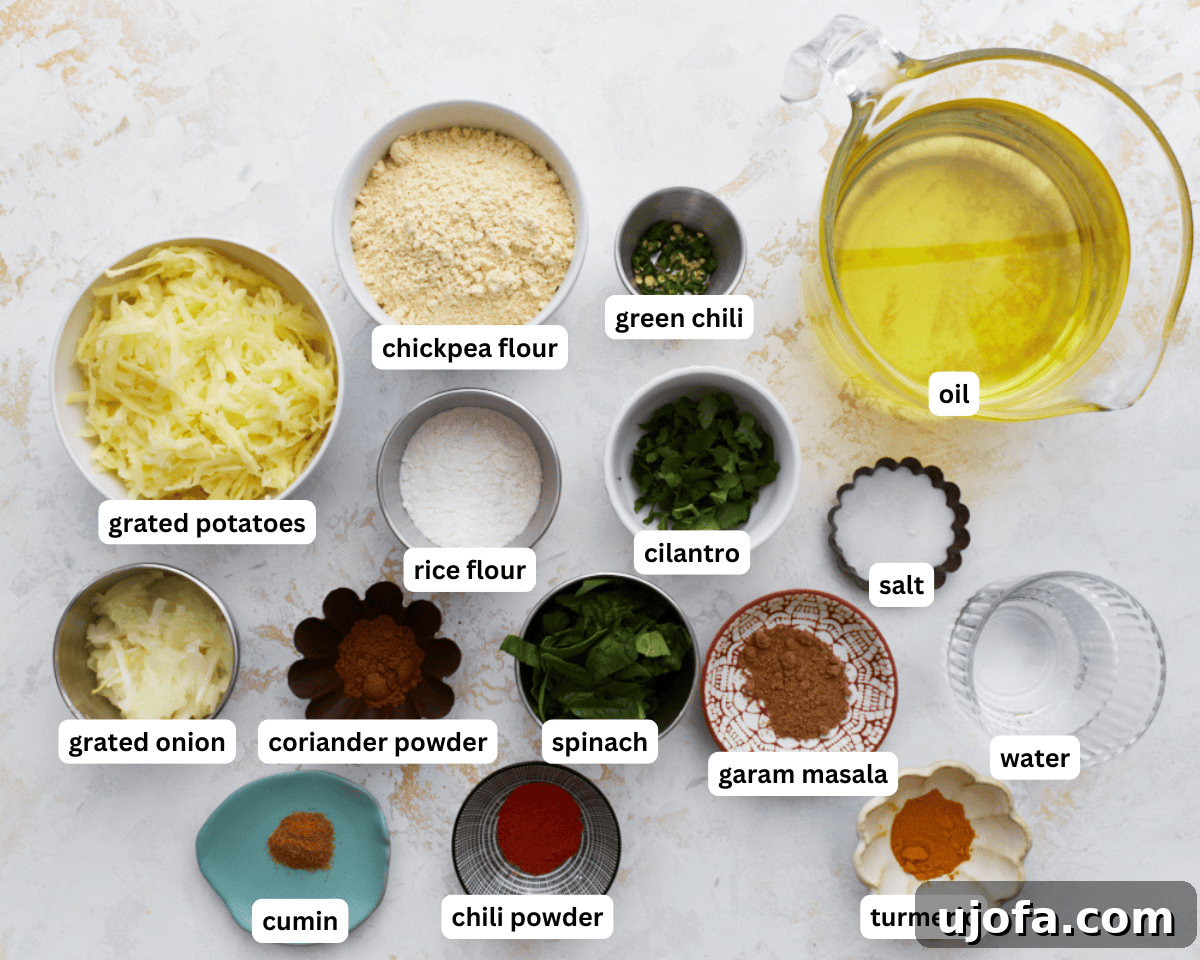
Step 1: Gather Your Ingredients. Start by laying out all your measured ingredients on your counter. This mise en place approach ensures you have everything at hand and makes the cooking process much more enjoyable and efficient. Take the time to peel and grate your potatoes and onions, and chop your spinach, cilantro, and chili. For the potatoes, an important tip is to gently squeeze out any excess water after grating. This prevents the batter from becoming too watery and ensures your pakoras are wonderfully crispy.
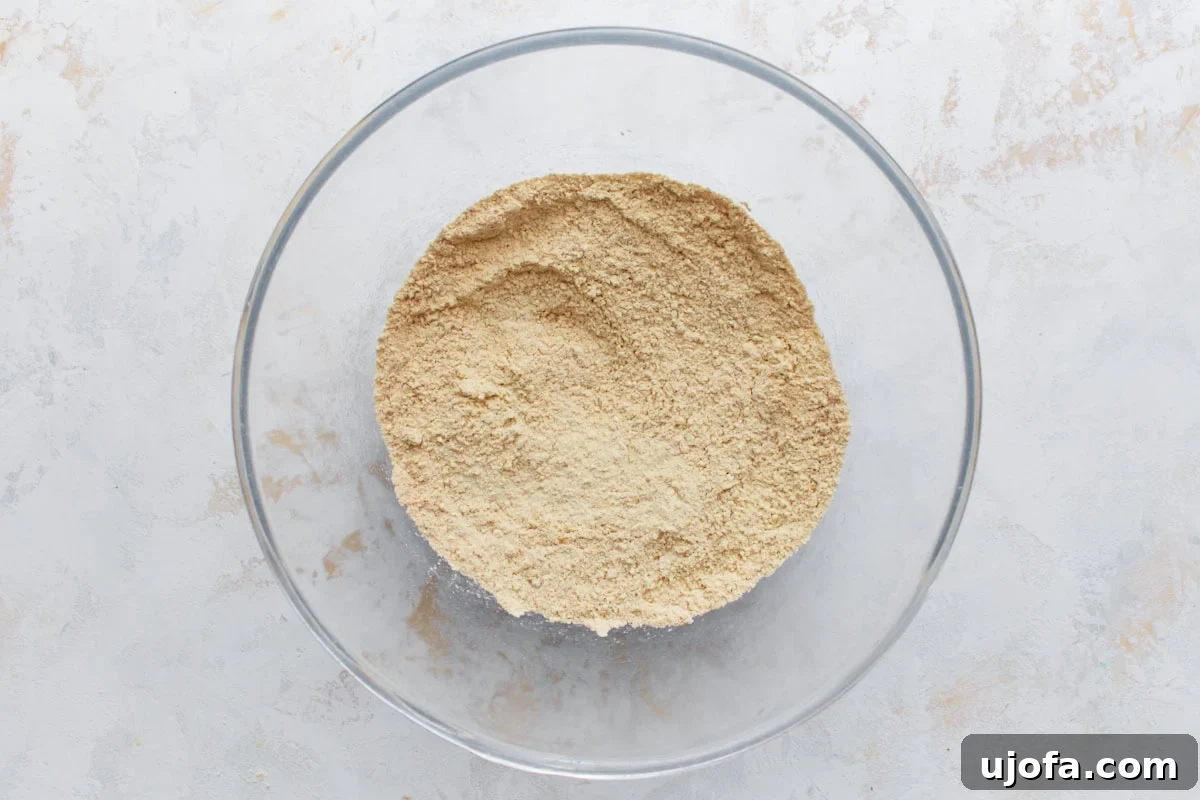
Step 2: Combine the Dry Ingredients. In a spacious mixing bowl, combine 1 cup of chickpea flour, 1/4 cup of rice flour, 1/2 teaspoon each of coriander powder, turmeric powder, chili powder, and garam masala powder, along with 1/2 teaspoon of salt and 1/4 teaspoon of cumin powder. Using a whisk, thoroughly blend all the dry ingredients together. This step is crucial for distributing the spices evenly throughout the batter, ensuring every pakora bursts with flavor.
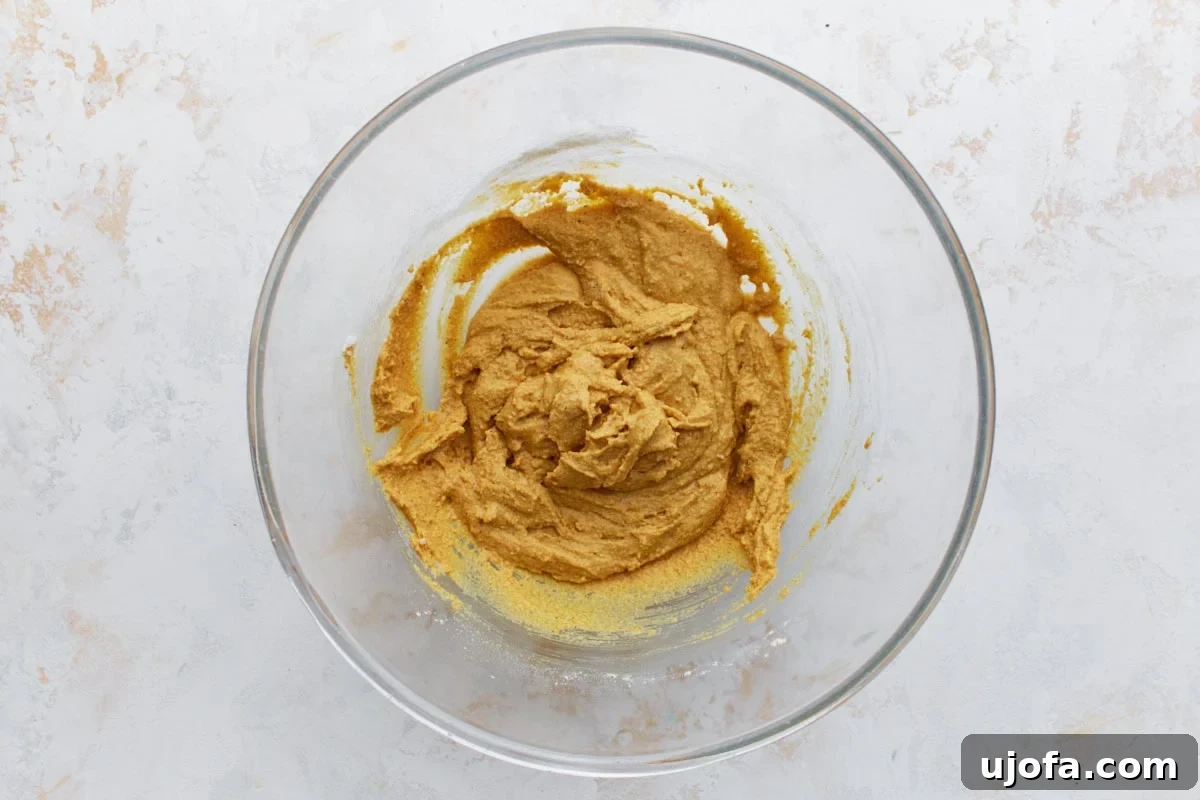
Step 3: Add the Water to Form the Batter. Gradually pour in 1/2 cup of water into the dry mixture, stirring continuously as you go. Your goal is to achieve a thick, soft paste-like batter. The consistency should be similar to that of a thick pancake batter, capable of coating the vegetables without being too runny or overly stiff. If the batter appears too thick or dry, add a small amount of water (about one tablespoon at a time) until you reach the desired consistency. Conversely, if it’s too thin, a spoonful of extra chickpea flour can help thicken it.
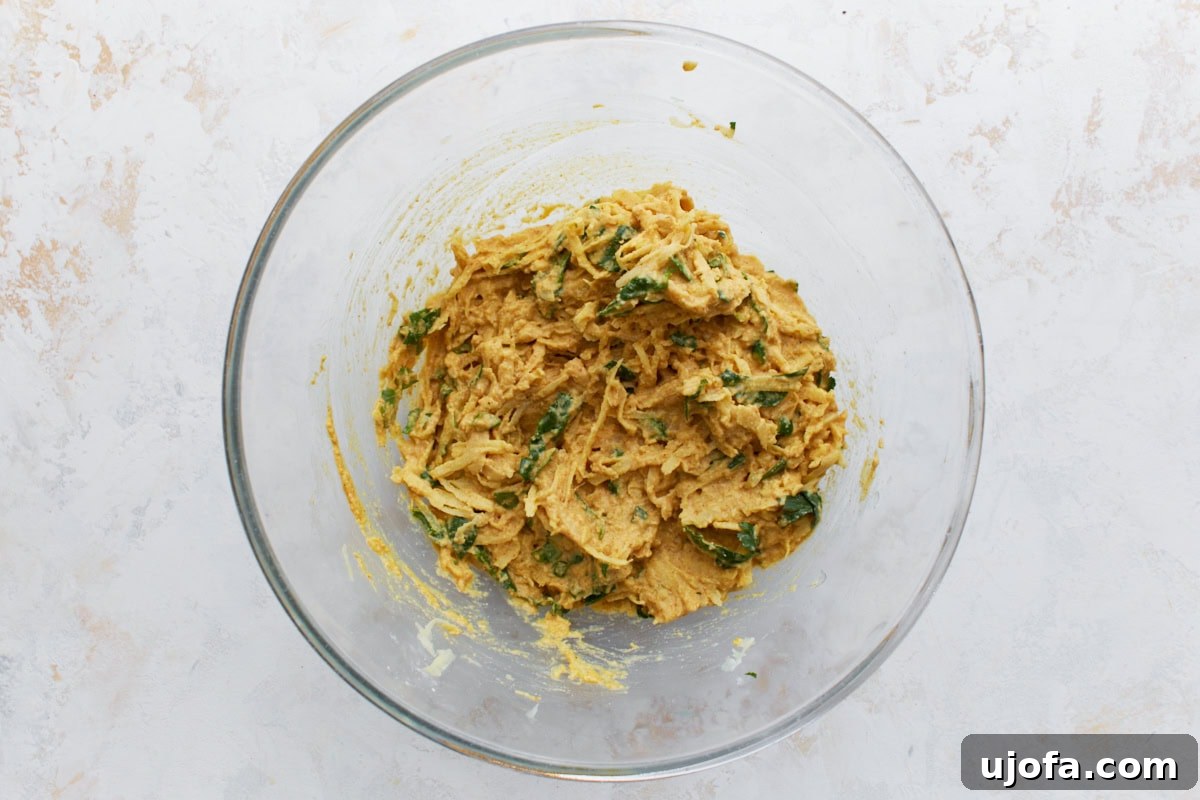
Step 4: Incorporate the Vegetables. Now it’s time to add the fresh components! Gently fold in your 1 1/2 cups of peeled and grated potato (remember to squeeze out excess water), 1/2 cup of grated onion, 1/2 cup of chopped spinach, 2 tablespoons of chopped cilantro, and 1 chopped red or green chili. Mix thoroughly until all the vegetables are evenly coated with the thick, spiced batter. Be careful not to overmix; just enough to combine everything well. This ensures that each pakora piece contains a good mix of vegetables and batter.
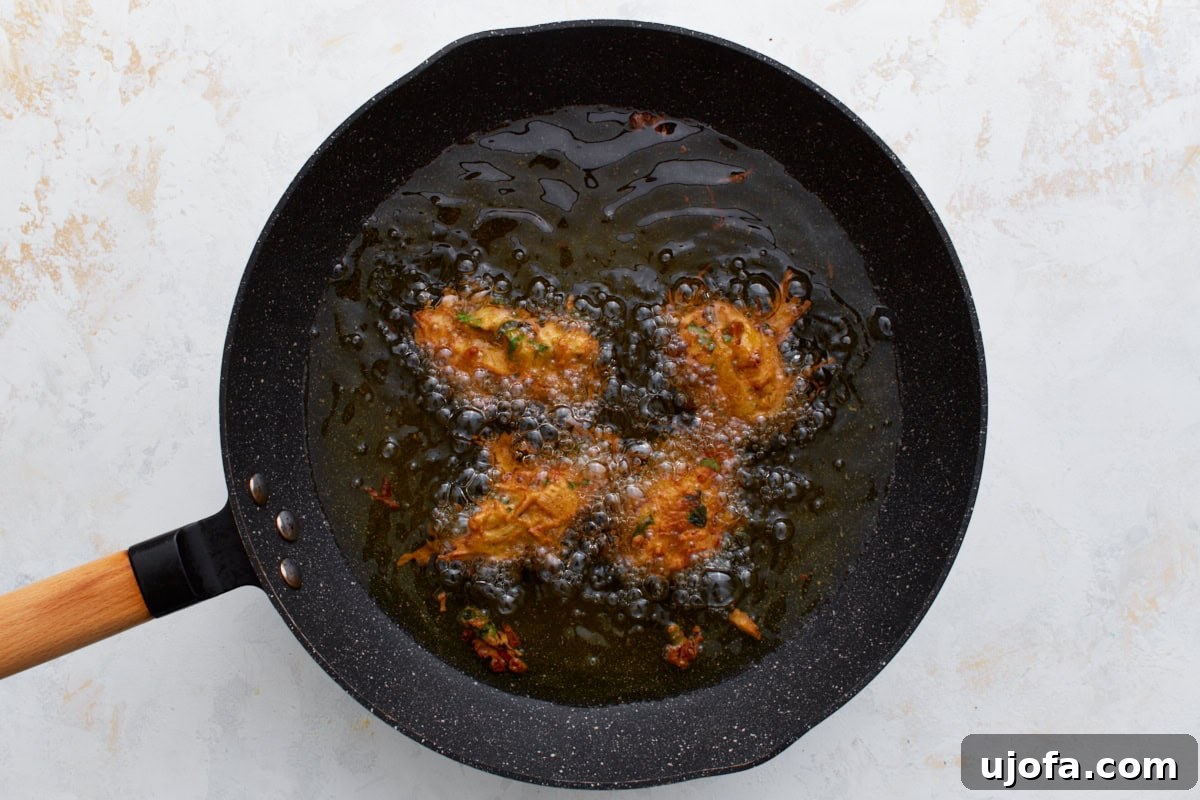
Step 5: Fry the Pakoras to Golden Perfection. Heat oil for frying in a deep pan or Dutch oven over medium heat. The ideal temperature for frying pakoras is around 350°F (175°C). If you have a kitchen thermometer, it’s a great tool to ensure consistent heat. Once the oil is hot, use a spoon or your hands to gently drop small, golf-ball-sized portions of the batter into the hot oil. Crucially, fry in batches to avoid overcrowding the pan. Overcrowding can lower the oil temperature, leading to soggy, oily pakoras instead of crispy ones. Give them space to cook and crisp up properly. Fry each pakora for 3–4 minutes per side, or until they achieve a beautiful golden-brown color and are crispy all over.
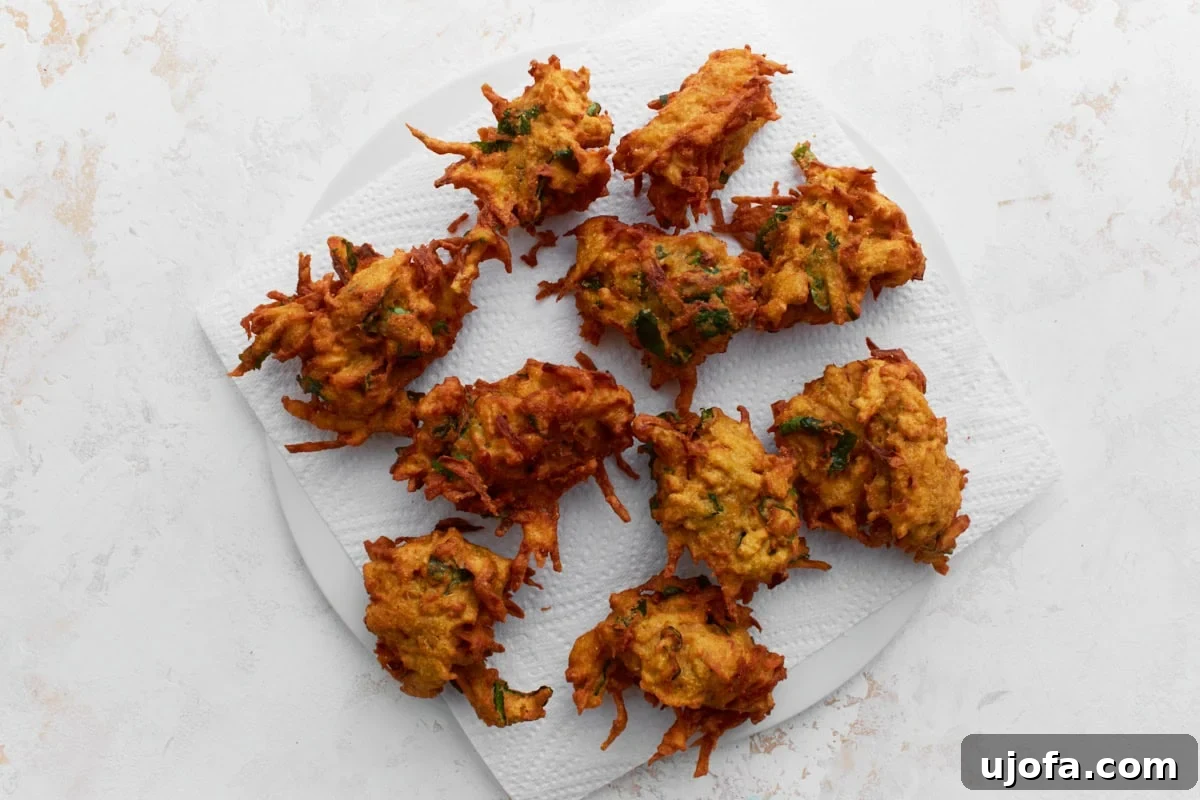
Step 6: Drain Excess Oil. As each batch finishes frying, use a slotted spoon or spider strainer to carefully remove the pakoras from the hot oil. Transfer them immediately to a plate lined with paper towels. The paper towels will absorb any excess oil, helping your pakoras maintain their crispiness and ensuring they are not greasy. Allow them to rest for a moment while you fry the remaining batches.
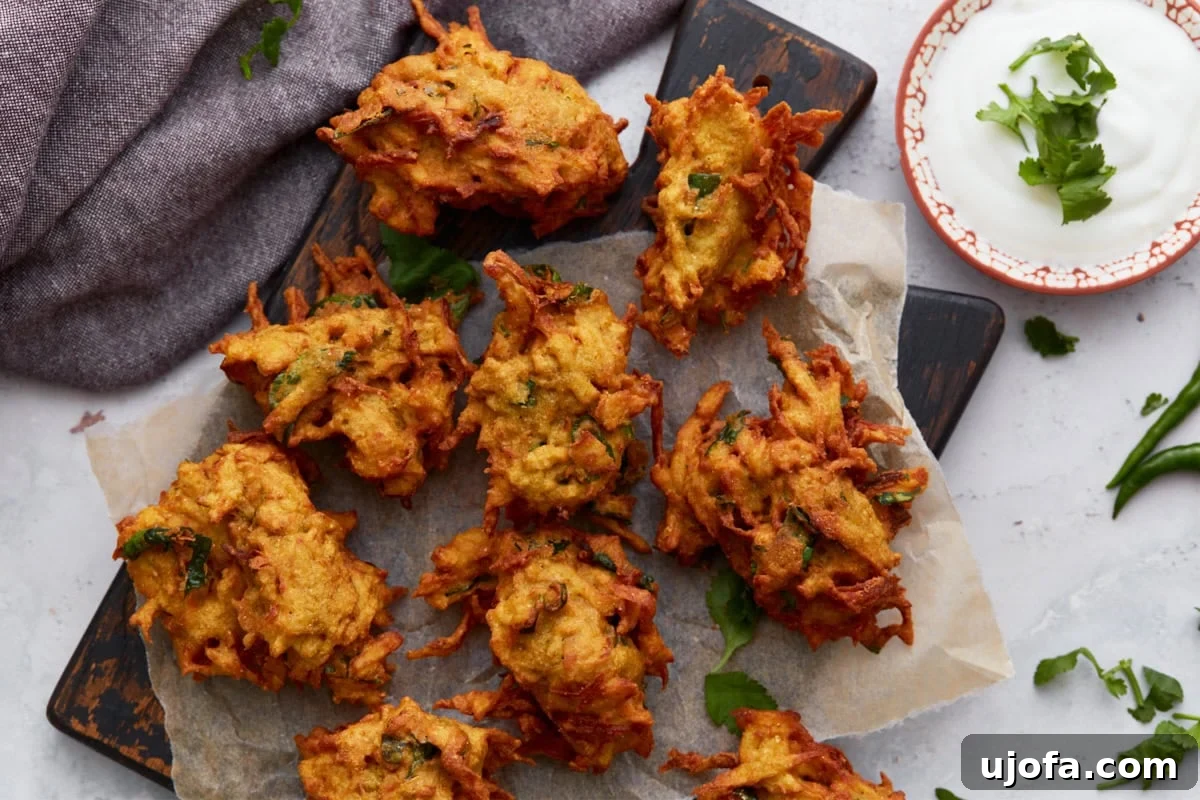
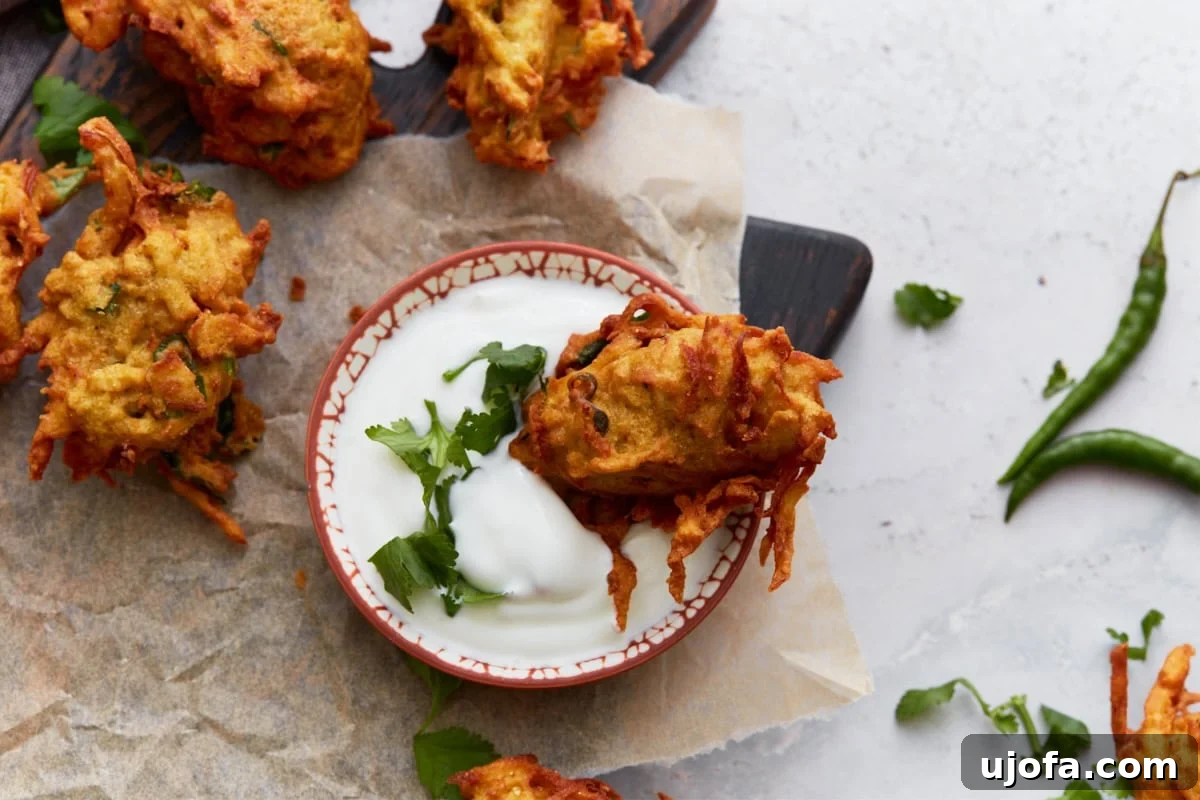
Step 7: Serve and Enjoy! Arrange your freshly fried, crispy pakoras on a serving platter. They are best enjoyed warm, straight from the pan. Serve them with your favorite chutney – a tangy tamarind chutney, a refreshing mint-cilantro chutney, or a simple spicy yogurt dip all make excellent accompaniments. A squeeze of fresh lemon juice over the top just before serving can also add a bright, zesty note that cuts through the richness of the fried fritters. Prepare for them to disappear quickly!
Expert Gluten-Free Cooking Tips for Perfect Pakoras
- Batter Consistency is Key: The ideal pakora batter should be thick enough to cling to the vegetables without dripping excessively, yet loose enough to easily drop into the hot oil. Think of a thick, scoopable paste that holds its shape. If your batter feels too runny, gradually stir in a little more chickpea flour until it thickens. If it’s too stiff and difficult to mix, add water one tablespoon at a time until it’s workable.
- Don’t Overmix the Batter: Once you add the vegetables, mix just until everything is combined. Overmixing can develop the gluten in the flours (though less of an issue with chickpea flour than wheat flour, it’s still good practice) and can lead to tougher pakoras.
- Squeeze Vegetables Dry: Especially for watery vegetables like grated potatoes or zucchini, take an extra moment to squeeze out any excess moisture using your hands or a clean kitchen towel. This prevents the batter from becoming watery and ensures maximum crispiness.
- Maintain Oil Temperature: This is critical for crispy, non-greasy pakoras. Too low a temperature, and the pakoras will soak up oil and become soggy. Too high, and they’ll brown too quickly on the outside while remaining raw inside. Aim for a consistent 350°F (175°C). Using a thermometer is highly recommended.
- Fry in Batches: Resist the urge to crowd the pan. Frying too many pakoras at once will drop the oil temperature significantly, resulting in unevenly cooked, soggy fritters. Give each pakora enough space to cook evenly and turn golden brown.
Customizing Your Pakoras: Delicious Variations
One of the best things about pakoras is how adaptable they are. Feel free to get creative with your choice of vegetables and spices:
- Vegetable Swaps: Beyond potatoes, onions, and spinach, consider adding finely chopped or shredded cauliflower, bell peppers, zucchini, eggplant, mushrooms, or even shredded carrots. Ensure softer vegetables are sliced thinly for even cooking. For a heartier option, you can even add cooked lentils or chickpeas.
- Spice It Up (or Down!): Adjust the amount of chili powder and fresh green chilies to match your preferred level of heat. For an extra layer of flavor, you could add a pinch of asafoetida (hing) to the dry ingredients, which aids digestion and adds a savory depth. A little ginger-garlic paste also works wonders.
- Herbal Infusion: Experiment with other fresh herbs like mint or fenugreek leaves (methi), which impart unique aromatic notes.
- Cheese Pakoras: For a decadent twist, add small cubes of paneer (Indian cottage cheese) or shredded cheddar to the batter.
Troubleshooting Common Pakora Problems
Even seasoned cooks encounter issues occasionally. Here’s how to tackle some common pakora challenges:
- Soggy Pakoras: This is usually due to oil that isn’t hot enough or overcrowding the pan. Ensure your oil reaches the correct temperature (350°F / 175°C) before adding the batter, and fry in small batches to maintain consistent heat. Also, make sure excess water is squeezed from vegetables.
- Pakoras Falling Apart: The batter might be too thin or you might have too many wet vegetables. Adjust by adding a little more chickpea flour to thicken the batter.
- Bland Flavor: Double-check your spices. You might need to increase the chili, salt, or garam masala. Freshly ground spices always provide a more potent flavor.
- Unevenly Cooked: This can happen if the oil temperature fluctuates too much or if the pakoras are not turned regularly during frying. Maintain a consistent oil temperature and flip the pakoras occasionally for even browning.
Delicious Serving Suggestions
I absolutely adore serving these pakoras hot and crispy, straight from the pan. My personal favorites for dipping are a vibrant mint chutney or a sweet and tangy tamarind sauce. They are simply perfect for dipping, snacking, or for a delightful accompaniment to a hot cup of authentic masala chai on a lazy afternoon. If I’m hosting a more elaborate Indian-themed meal, these pakoras make an excellent starter before diving into a rich dairy-free butter chicken or a flavorful lentil dish. Sometimes, I’ll add a generous squeeze of fresh lemon juice over the top for a bright, zesty contrast, or serve them alongside a simple, cooling yogurt dip mixed with a pinch of cumin and salt. Whether it’s a quick weekend treat, a special appetizer for friends, or part of a festive spread, these homemade pakoras always vanish in a flash!
Storage & Reheating for Maximum Freshness
While pakoras are undoubtedly best enjoyed fresh, you can certainly store leftovers for future enjoyment. If you happen to have any remaining, place them in an airtight container and store them in the refrigerator for up to 3 days. This method helps preserve their flavor and prevents them from drying out too much.
To recapture that irresistible crispy texture, I highly recommend reheating them using dry heat. My go-to method is to preheat the oven to 375°F (190°C) and bake the pakoras for about 8–10 minutes, or until they are heated through and regain their crispiness. Alternatively, an air fryer works wonders! Pop them into the air fryer at 350°F (175°C) for 5 minutes, giving the basket a gentle shake midway through. I strongly advise against microwaving pakoras, as this tends to make them soft and soggy, losing their signature crunch. A quick reheat in the oven or air fryer will make them taste almost as good as freshly made.
Frequently Asked Questions About Pakoras
- Are pakoras always gluten-free? Not always. While traditional pakoras typically use chickpea flour, some regional variations or commercial preparations might include a small amount of wheat flour or other gluten-containing ingredients in their batter. Always check the ingredients list if you have a gluten sensitivity. This recipe is specifically designed to be 100% gluten-free.
- Can I make pakoras without deep frying? Yes! This recipe includes notes for baking and air frying. Baking them on a parchment-lined sheet at 400°F (200°C) for 20-25 minutes (flipping halfway) or air frying at 375°F (190°C) for 12-15 minutes (shaking midway) are great healthier alternatives. While the texture won’t be identical to deep-fried, they will still be deliciously crispy.
- What is the best oil for frying pakoras? Any neutral-flavored oil with a high smoke point works well, such as vegetable oil, canola oil, sunflower oil, or peanut oil. These oils won’t impart unwanted flavors to your pakoras.
- Can I prepare the batter ahead of time? You can certainly prep the dry ingredients (flours and spices) in advance. However, it’s best to add the water and fresh vegetables just before you plan to fry. This prevents the vegetables from releasing too much moisture into the batter and keeps the batter from becoming too watery or dense.
- How do I prevent my pakoras from being greasy? The main culprits for greasy pakoras are oil that isn’t hot enough and overcrowding the frying pan. Ensure the oil is at the optimal temperature (around 350°F/175°C) and fry in small batches. Also, draining them on paper towels immediately after frying helps absorb excess oil.
More Irresistible Gluten-Free Finger Foods to Try
If you love these crispy pakoras and are looking for more delightful gluten-free finger foods, explore these fantastic recipes:
- Keto Jalapeno Poppers
- Gluten-Free Chicken Wings
- Gluten-Free Empanadas
- Gluten-Free Egg Rolls
- Gluten-Free Pierogi