
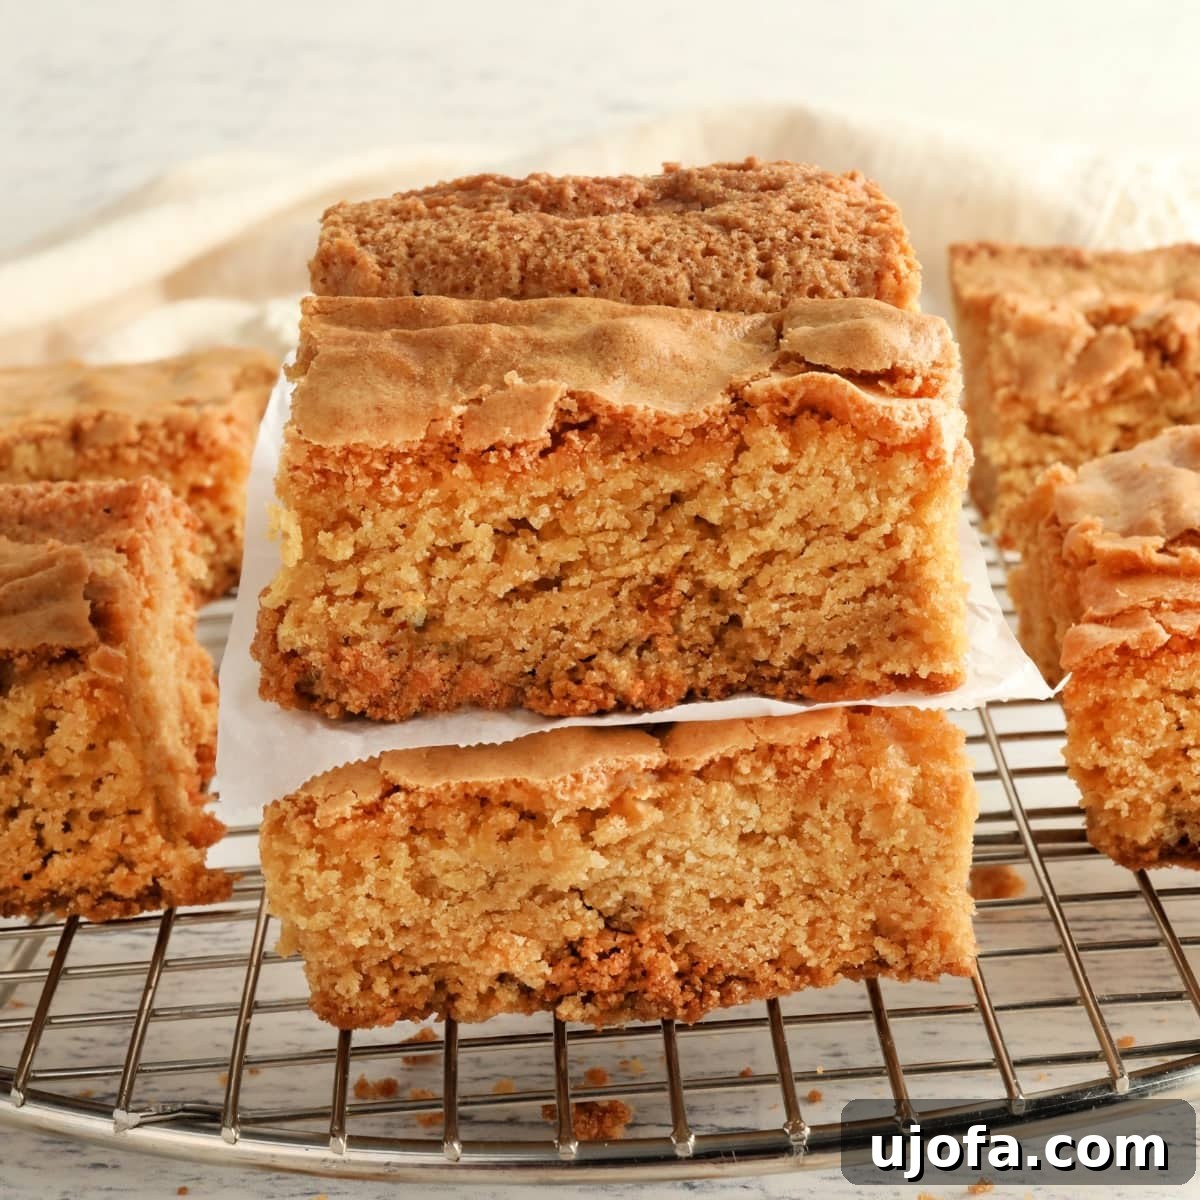
Delightful Gluten-Free Blondies: Your Easy & Dairy-Free Dessert Recipe
Indulge in the golden, buttery sweetness of homemade blondies without the gluten or dairy! This incredibly easy recipe for gluten-free blondies delivers a perfectly chewy, vanilla and brown sugar-infused dessert bar that will satisfy any sweet craving. Whether you’re navigating dietary restrictions or simply looking for a delicious, straightforward treat, these blondies are a guaranteed crowd-pleaser. With their rich flavor and tender texture, they’re poised to become your new favorite dessert bar, ready in under an hour with minimal fuss.
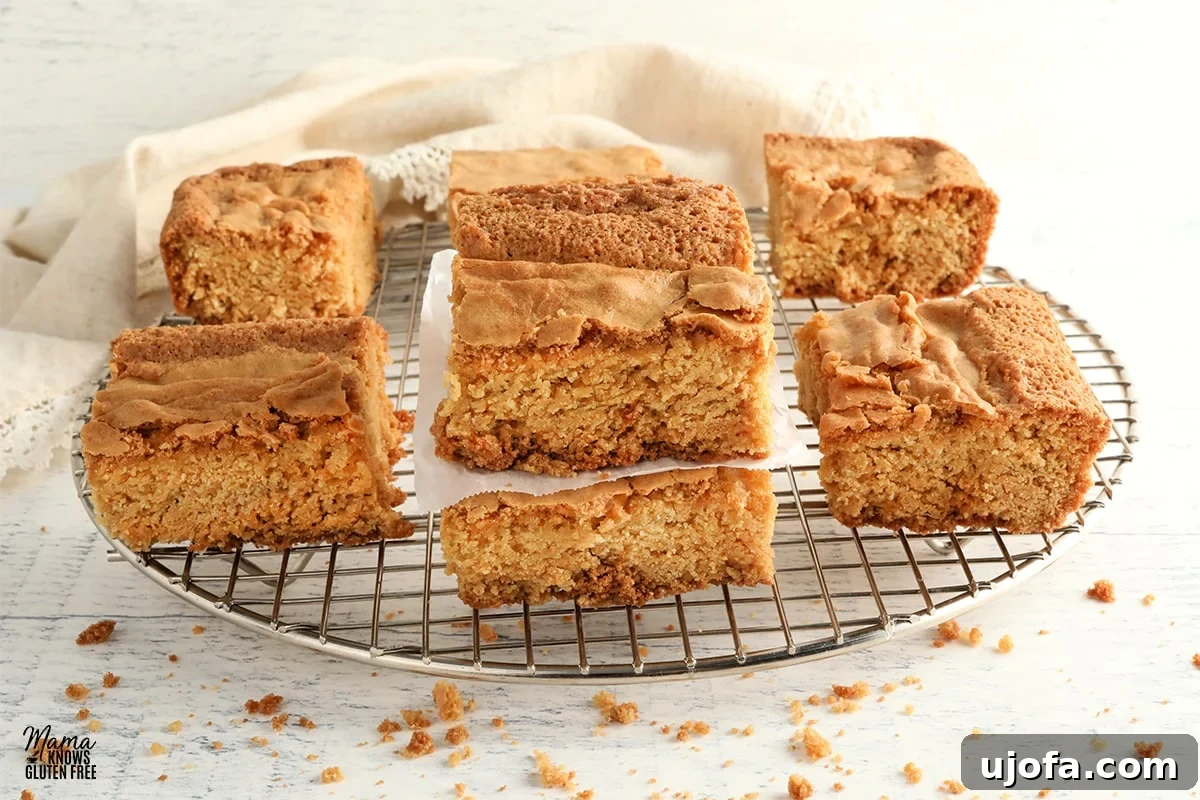
The Charm of Gluten-Free Blondies
Blondies are the beloved golden cousins of brownies, offering a rich, comforting dessert experience characterized by vanilla, butter, and the deep caramel notes of brown sugar. This particular gluten-free blondie recipe is a delightful variation inspired by our popular Gluten-Free Brownie recipe. What makes blondies so universally adored is their simplicity: they require only a handful of common pantry ingredients and bake up beautifully in a remarkably short time, making them an ideal treat for busy schedules or last-minute cravings.
Imagine a dessert that tastes like the most comforting, chewy chocolate chip cookie, but in a convenient bar form – that’s essentially a blondie! The base flavor is wonderfully versatile, making these bars highly customizable to suit any palate. While many adore the pure, unadulterated taste of vanilla, brown sugar, and butter, they also serve as an excellent canvas for your favorite additions. My own kids, for example, can’t get enough of them when I fold in a generous amount of chocolate chips, adding another layer of indulgence. Dive into this recipe and discover how effortlessly you can create these golden masterpieces, perfect for sharing or savoring all to yourself.
Blondies vs. Brownies: What Sets Them Apart?
It’s a common question: what exactly is the difference between a blondie and a brownie? The distinction is quite straightforward and centers primarily around the presence (or absence) of chocolate as the main flavor profile. Brownies are inherently chocolate-based dessert bars, deriving their characteristic dark color and intense flavor from cocoa powder, melted chocolate, or both, in the batter. Blondies, on the other hand, boast a distinct vanilla-centric flavor. Their appealing golden hue and rich taste come from a generous combination of brown sugar, butter, and pure vanilla extract.
While brownies are celebrated for their deep, sometimes fudgy, cocoa notes, blondies champion the warm, caramel-like sweetness of brown sugar and the aromatic essence of vanilla. Both are wonderfully indulgent dessert bars, incredibly versatile, and perfect for incorporating various mix-ins. Popular additions for blondies include a wide array of options such as chocolate chips (milk, dark, or white), butterscotch chips, chopped nuts like pecans or walnuts for added crunch, or even colorful sprinkles for a festive touch. The absence of cocoa in blondies allows the other foundational flavors to truly shine through, resulting in a unique and equally satisfying treat that stands proudly alongside its chocolatey cousin.
Mastering the Art of Gluten-Free Blondies: A Step-by-Step Guide
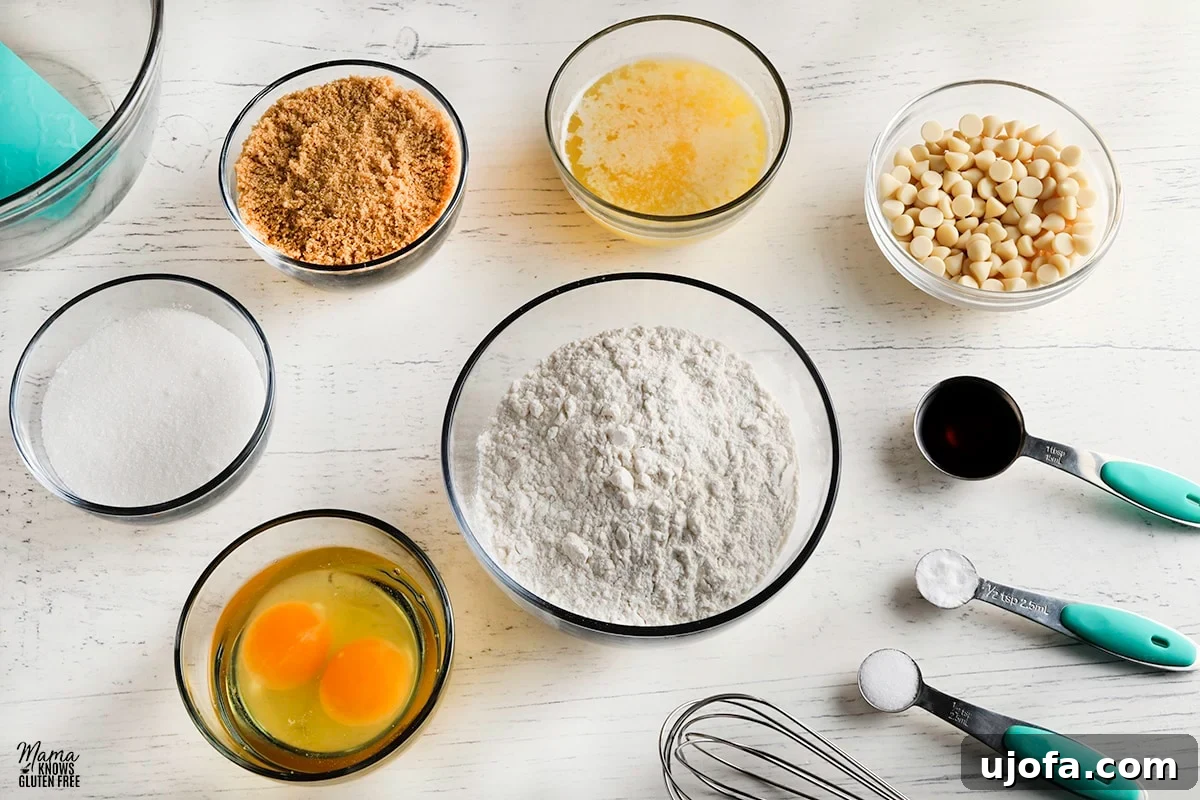
Crafting perfect gluten-free blondies is a straightforward and rewarding process that even novice bakers can master with ease. Follow these simple steps for a truly irresistible dessert bar that will impress everyone:
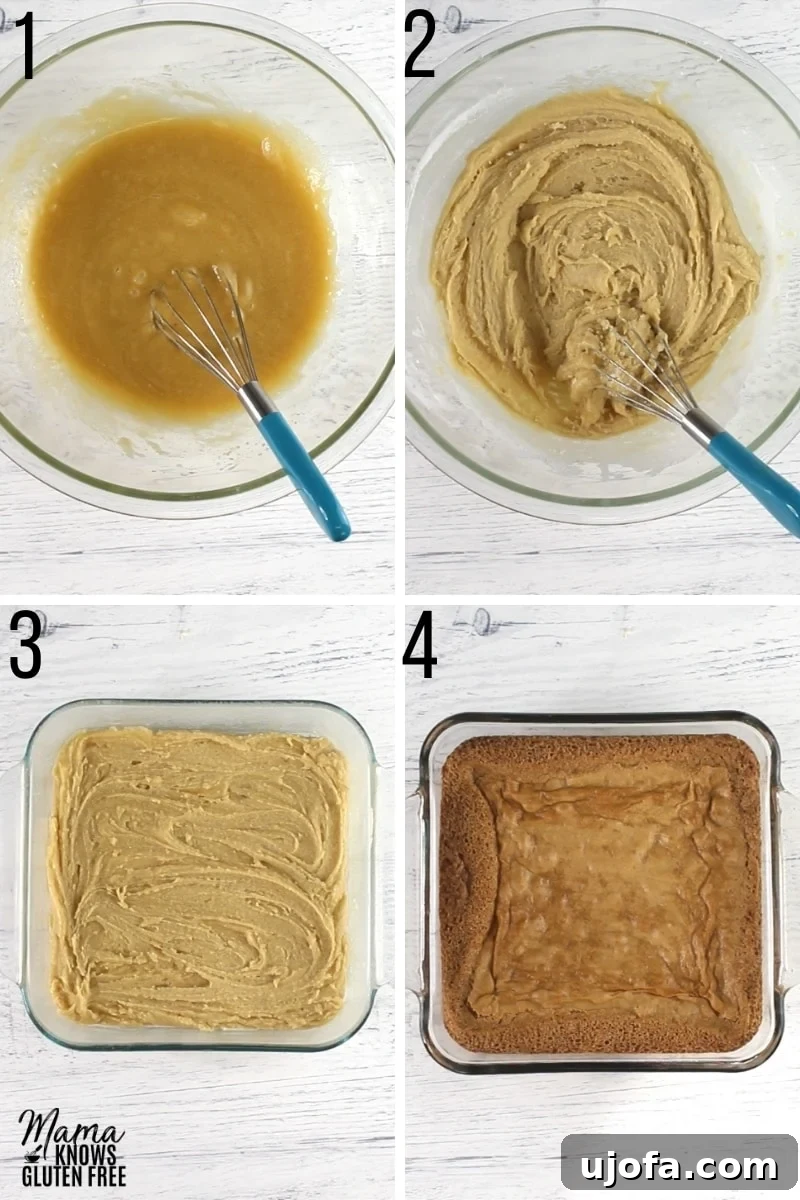
- **Prepare Your Oven and Pan:** Begin by preheating your oven to a precise 350ºF (175ºC). Next, prepare an 8 x 8-inch (20×20 cm) square baking pan. You can either lightly grease it with a gluten-free non-stick cooking spray or, for even easier removal, line the pan with parchment paper, ensuring the paper overhangs slightly on the sides to create “handles,” and then lightly grease the parchment paper as well. This crucial step prevents sticking and ensures your blondies come out beautifully.
- **Combine Wet Ingredients:** In a large mixing bowl, thoroughly whisk together the two large eggs, 3/4 cup of packed brown sugar, 1/2 cup of granulated sugar, one tablespoon of pure vanilla extract, and 1/2 cup of melted unsalted butter. Mix vigorously until the mixture is smooth, creamy, and all ingredients are fully incorporated, creating a rich, sweet base for your blondies.
- **Incorporate Dry Ingredients:** To the creamy wet mixture, add 1 1/4 cups of gluten-free all-purpose flour blend (it’s important that this blend already contains xanthan gum, or you’ll need to add it separately), 1/2 teaspoon of baking soda, and 1/2 teaspoon of salt. Mix gently with a spatula or spoon until the dry ingredients are just combined with the wet. Be very careful not to overmix the batter, as this can activate the xanthan gum excessively and lead to tough or gummy blondies. A few small streaks of flour are perfectly acceptable; they will disappear during the baking process.
- **Transfer and Smooth:** Carefully pour the prepared blondie batter evenly into your greased 8 x 8-inch baking pan. If needed, use the back of your spatula or a spoon to gently smooth out the top of the batter to ensure an even thickness and a consistent bake.
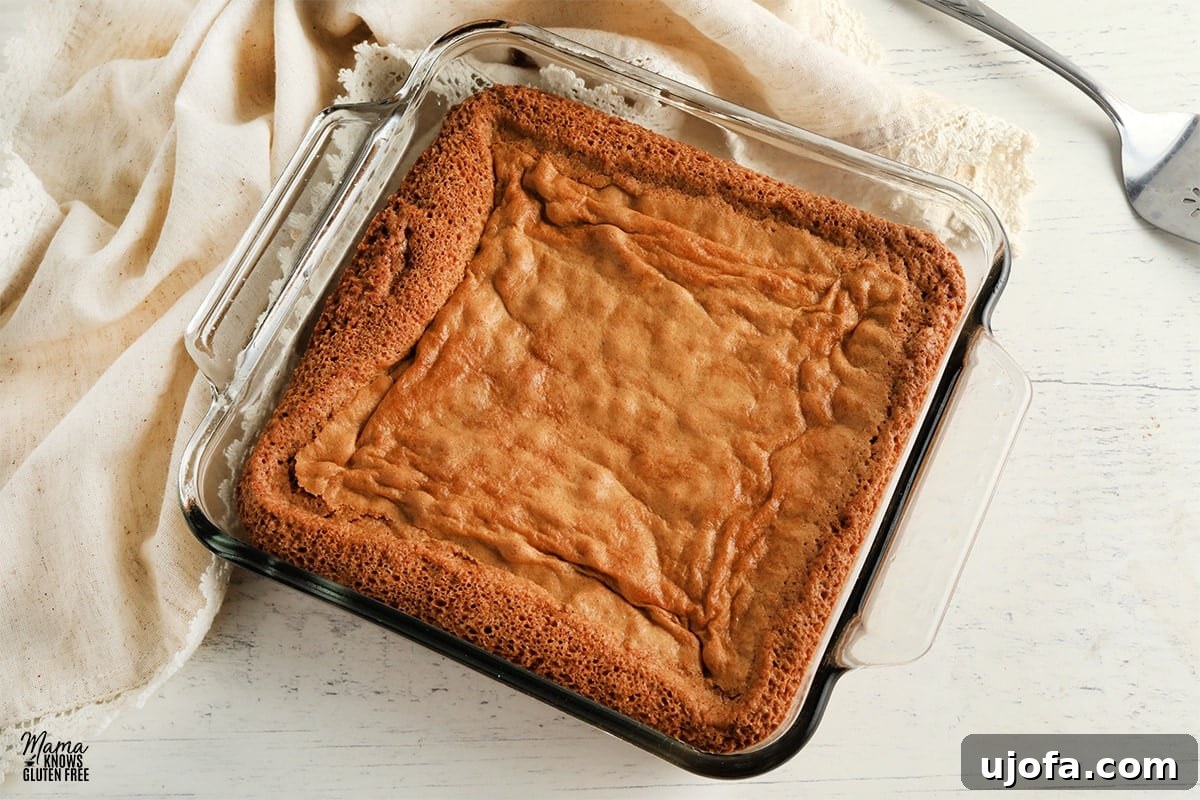
- **Bake to Perfection:** Place the pan in your preheated oven and bake for approximately 30-35 minutes. It’s essential to keep a close watch on your blondies, as baking times can vary significantly between different ovens. The blondies are ready when a toothpick inserted into the center comes out with moist crumbs attached, but no wet batter. The edges will also begin to pull away slightly from the sides of the pan and turn a lovely golden brown. Remember, avoiding over-baking is key to maintaining their wonderfully soft and chewy texture.
- **Cool Completely:** This step is absolutely crucial for perfectly structured blondies. Once removed from the oven, allow the blondies to cool completely in the pan on a wire rack before attempting to cut them. Warm blondies, while tempting, will be too soft and crumbly to slice cleanly and may fall apart. Patience here will be greatly rewarded with perfectly shaped bars.
- **Serve and Store:** Once fully cooled, slice your delectable blondies into squares and enjoy their irresistible sweetness! Store any leftover blondies in an airtight container at room temperature for up to 3-4 days to maintain their optimal freshness and delightful chewiness.
Expert Tips for Flawless Gluten-Free Blondies
Achieving the perfect blondie texture and flavor is remarkably easy with these insider tips and tricks:
- **Always Prepare Your Pan Thoroughly:** Greasing your baking pan is a non-negotiable step to prevent sticking and ensure your beautiful blondies release easily. I highly recommend using a gluten-free coconut oil cooking spray or lining the pan with parchment paper for extra assurance.
- **Do Not Overmix the Batter:** This is a golden rule for many baked goods, and especially important for gluten-free blondies. Overmixing can activate the xanthan gum too much or develop any potential gluten-like properties in certain flour blends, leading to a dense, tough, or gummy texture. Mix only until the ingredients are just combined for a wonderfully soft and tender result.
- **Recognize the Perfect Bake:** When your blondies are done, the center may still appear slightly less set than the edges. This is normal and desired. The key is to look for a toothpick inserted into the center to come out with moist crumbs, not liquid batter. The edges will also start to pull away from the sides of the pan and turn a beautiful golden brown.
- **Avoid Over-Baking at All Costs:** Over-baking is the quickest way to end up with dry, hard blondies. Keep a very close eye on them during the last few minutes of baking. Remember that residual heat will continue to cook them slightly even after they’ve been removed from the oven, so it’s better to under-bake by a minute or two than to over-bake.
- **Unleash Your Creativity with Mix-Ins:** Elevate your blondies by stirring in your favorite additions. Classic chocolate chips (milk, semi-sweet, dark, or white) are always a hit. Other fantastic options include butterscotch chips, chopped nuts (pecans, walnuts, almonds), shredded coconut, or even a delightful swirl of peanut butter or hazelnut spread on top before baking.
- **Patience is a Virtue (Especially During Cooling):** Resist the powerful urge to cut into hot blondies immediately after baking. Allowing them to cool completely in the pan helps them to set, firm up, and develop that signature chewy texture, making for clean, perfect slices. The bottom of the baking dish should feel only slightly warm to the touch before you begin slicing.
- **Consider Your Baking Dish:** While metal pans work perfectly well, I personally love baking blondies in a glass 8×8-inch baking dish. Glass tends to distribute heat more evenly and allows for easy visual monitoring of the browning process, ensuring an even bake.
Can You Freeze Blondies? Storage Made Easy
Yes, absolutely! Blondies are excellent candidates for freezing, making them a fantastic make-ahead dessert or a convenient treat to have on hand for unexpected guests. If you find yourself with extra blondies (a rare but wonderful problem to have!), or if you want to prepare a batch for future enjoyment, freezing is a simple and effective solution to lock in their freshness.
To freeze blondies, ensure they have cooled completely to room temperature. This is crucial to prevent condensation and ice crystals from forming. Once fully cooled, wrap individual bars or the entire slab tightly in plastic wrap, ensuring every surface is covered. Then, wrap them again in aluminum foil for an extra layer of protection against freezer burn. Place the well-wrapped blondies into a freezer-safe plastic bag or an airtight container. They can be safely stored in the freezer for up to 3 months without compromising quality.
When you’re ready to indulge, simply remove the desired number of blondies from the freezer and let them defrost at room temperature for a few hours. For a warm, freshly baked experience that rivals just-made blondies, you can gently reheat them in the microwave for a few seconds or in a low oven (around 250°F / 120°C) for 5-10 minutes after they have thawed. This method revives their chewy texture and brings out their rich flavors beautifully.
Understanding Gluten-Free Flour for Baking
The success of these delicious gluten-free blondies heavily relies on selecting the right flour blend. This recipe specifically calls for a rice flour-based cup-for-cup gluten-free all-purpose blend. What exactly does “cup-for-cup” (or “1:1”) mean in the world of gluten-free baking? It signifies a flour blend that has been carefully formulated to replace traditional wheat flour in recipes at an equal ratio, simplifying gluten-free conversions considerably. These versatile blends typically contain a combination of various gluten-free flours (such as rice flour, potato starch, and tapioca starch) and, critically, xanthan gum.
Xanthan gum plays a vital role in gluten-free baking. In conventional wheat-based baking, gluten proteins provide the essential elasticity, structure, and chewiness that prevent baked goods from becoming crumbly or dense. Since gluten-free flours naturally lack this protein, xanthan gum steps in as a substitute binder, mimicking those crucial properties. Most high-quality gluten-free all-purpose flour blends already include xanthan gum in their formulation, often listed among the ingredients. It is absolutely essential to check the ingredient list of your chosen gluten-free flour blend. If xanthan gum is already present, do *not* add any extra to your batter. Adding too much xanthan gum will result in an undesirable sticky, gummy, or unpleasantly chewy texture in your blondies, which is something you definitely want to avoid for the best results!
**Important Note on Flour Choice:** While the convenience of cup-for-cup blends is undeniable, it’s important to understand that not all gluten-free flours are created equal. Different brands may use varying ratios of flours and starches, leading to subtle differences in texture and absorption. I personally recommend and have had consistent success with **Pillsbury gluten-free flour** for this recipe, as it consistently yields perfectly soft and chewy blondies. However, depending on the specific composition of your preferred gluten-free flour blend, you may experience slight variations in baking results. It’s always a good idea to stick with a trusted brand or one you’ve had success with in other gluten-free baking endeavors to ensure consistent quality.
Pro Tip for Accurate Gluten-Free Flour Measurement
Accurate measurement is a cornerstone of successful baking, and this is especially true when working with gluten-free flours, which can be prone to compaction. The most reliable and recommended method for measuring gluten-free flour is the “spoon & level” technique. This simple method ensures you add precisely the right amount of flour to your recipe, preventing dry or heavy results:
- **Spoon the Flour:** Using a regular spoon (not your measuring cup), lightly scoop the gluten-free flour from its container into your dry measuring cup.
- **Avoid Packing:** As you spoon, avoid shaking or packing the flour down into the measuring cup. The goal is a loose, aerated measure.
- **Level It Off:** Once the measuring cup is slightly overflowing with flour, use the back of a straight edge, such as a knife or a bench scraper, to gently level off the excess flour across the top of the cup.
This “spoon & level” method is crucial because it prevents you from inadvertently compacting too much flour into your measuring cup. Directly scooping the flour out of the bag with your measuring cup can easily pack in significantly more flour than the recipe intends, throwing off the delicate balance of ingredients and often leading to a dry, dense, or heavy final product. Furthermore, always use dry ingredient measuring cups for flour and other dry ingredients; reserve glass measuring cups exclusively for liquids, as their measurement lines are calibrated differently.
Embracing Dairy-Free Baking for Blondies
For those with dairy sensitivities, allergies, or simply a preference for plant-based options, I’m delighted to confirm that this blondie recipe includes a fantastic and easy-to-implement dairy-free option! My family, including myself, adheres to a dairy-free diet, so ensuring all my recipes are inclusive and delicious for everyone is a top priority. Now, you too can enjoy these wonderfully chewy and sweet blondies, completely free of dairy, without sacrificing an ounce of flavor or texture.
For the dairy-free version of these blondies, I’ve consistently achieved excellent results using **Smart Balance butter alternative**. This product performs beautifully in baking, mimicking the texture, richness, and mouthfeel of traditional butter without the dairy components. Today, the market offers many excellent dairy-free butter sticks and spreads that work wonderfully in various baking applications. When selecting a dairy-free butter, look for stick varieties specifically designed for baking, as they typically have the correct fat content and moisture level to ensure your baked goods turn out perfectly.
Beyond butter, my kitchen frequently features other reliable dairy-free alternatives for a wide array of baking needs. Unsweetened almond milk or coconut milk are fantastic, versatile substitutes for dairy milk in recipes, adding richness without the dairy. For other fats, in addition to dairy-free butter, I often bake with coconut oil, which can impart a lovely subtle flavor and desirable texture, or neutral-flavored vegetable oils, depending on the specific requirements of the recipe. With these readily available alternatives, creating delicious dairy-free treats has never been easier or more enjoyable.
The Unbeatable Ease of Gluten-Free Blondies
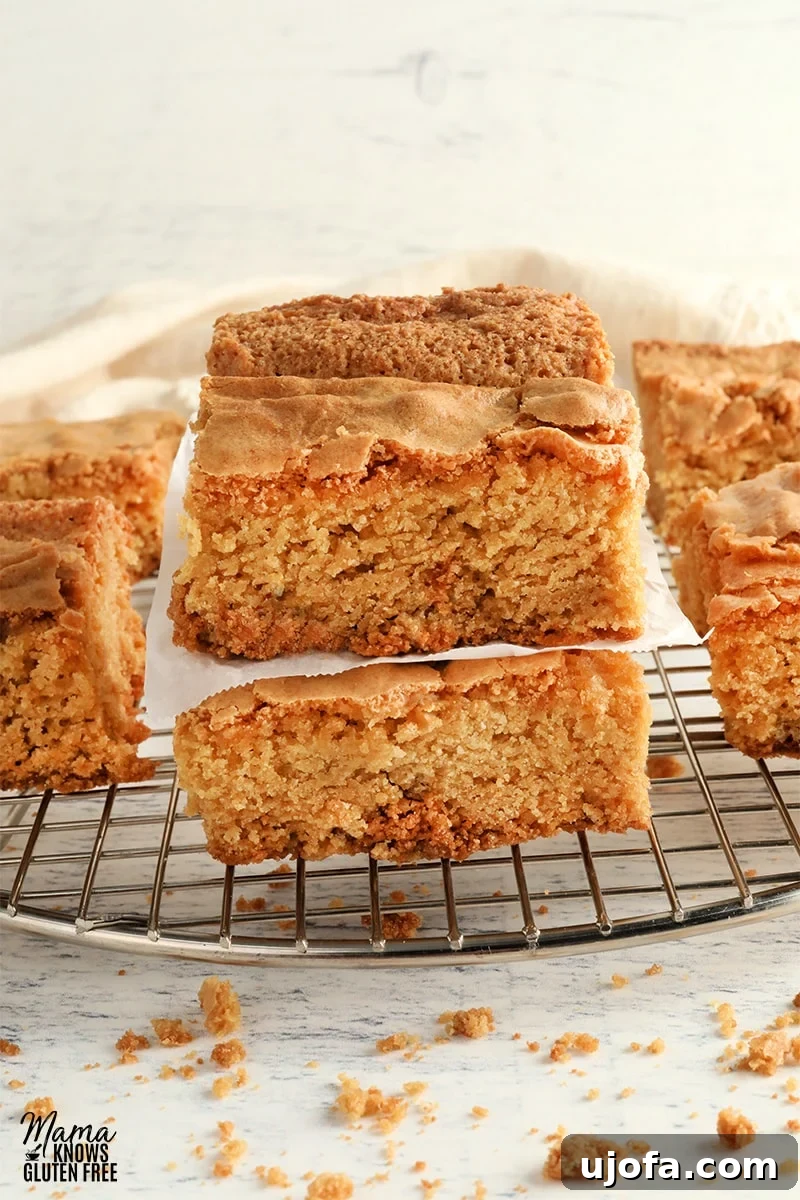
When it comes to hassle-free gluten-free desserts, blondies truly stand out as a shining example of simplicity and deliciousness. They are remarkably simple to prepare, requiring minimal effort and time in the kitchen, making them an ideal choice for bakers of all skill levels. The batter for these sweet treats comes together in just a few minutes, perfect for those spontaneous baking urges or when you need a quick dessert to impress. The baking time itself is also quite short, typically around 30-35 minutes, meaning you’ll be enjoying warm, gooey blondies in under an hour from start to finish.
Beyond their ease of preparation, these gluten-free dessert bars boast exceptional versatility. They can be effortlessly made ahead of time for parties, potlucks, or family gatherings, simplifying your event planning. Alternatively, you can bake a larger batch and conveniently freeze them for later enjoyment – a fantastic way to always have a delicious gluten-free treat on hand for unexpected cravings or visitors. Unlike some gluten-free baked goods that can notoriously dry out quickly, these blondies remain wonderfully soft, chewy, and moist for days, ensuring every bite is as delightful and satisfying as the first. Their forgiving nature, incredible flavor, and simple preparation make them an indispensable and beloved addition to any gluten-free baker’s repertoire.
Blondie Customization Ideas: Get Creative!
While these classic gluten-free blondies are utterly delicious and satisfying on their own, their simple yet rich flavor profile makes them an ideal canvas for culinary creativity. Don’t hesitate to experiment with different mix-ins and toppings to personalize your batch and make them uniquely yours!
- **Chocolate Lover’s Dream:** Beyond standard semi-sweet chocolate chips, explore options like creamy white chocolate chips for a milder, sweeter note, rich dark chocolate chunks for intensity, or even mini chocolate chips for an even distribution throughout each bite. A delightful mix of different chocolate types can also create an exciting flavor mosaic!
- **Nutty Additions for Crunch:** Incorporate a handful of chopped walnuts, pecans, or almonds for a delightful textural contrast and an earthy, nutty flavor. Lightly toasting the nuts before adding them can significantly enhance their aroma and taste.
- **Sweet & Tangy Bursts:** For a touch of fruitiness and chewiness, consider stirring in dried cranberries, chopped dried apricots, or even finely diced candied orange peel. These additions provide a lovely contrasting tartness that brightens the overall flavor.
- **Caramel & Butterscotch Bliss:** Swirl in some melted caramel sauce or fold in butterscotch chips to introduce an extra layer of sweet, buttery, and deeply comforting flavor that perfectly complements the blondies.
- **Coconutty Goodness:** Shredded coconut, especially if lightly toasted beforehand, can add a wonderful tropical twist and an appealing chewy texture.
- **Spice It Up (Subtly):** A pinch of warm spices like cinnamon, nutmeg, or even a tiny dash of cardamom can elevate the flavor profile, adding depth and a cozy aroma. For the adventurous, a hint of cayenne pepper can introduce a surprising sweet-heat kick!
- **Fruity Fun (Seasonal):** Gently fold in fresh berries like raspberries or chopped strawberries for a burst of fresh flavor. If using fresh fruit, be mindful that it may introduce extra moisture, potentially requiring a minute or two more of baking time.
- **Festive Touches:** For holidays, birthdays, or any special celebration, colorful sprinkles or gluten-free M&M’s are a fun and visually appealing addition that kids and adults alike will love.
When adding mix-ins, remember not to overload the batter, as too many additions can affect the blondies’ structure and how they bake. A good rule of thumb is to use about 1 cup to 1.5 cups of total additions for an 8×8-inch pan, ensuring a perfect balance of blondie and delightful extras.
Serving Suggestions for Your Delicious Blondies
These gluten-free blondies are truly delightful when served simply on their own, but they can also be transformed into an even more decadent and memorable dessert with a few thoughtful additions:
- **Warm with Ice Cream:** For an utterly irresistible treat, serve a slightly warm blondie topped with a generous scoop of creamy vanilla bean ice cream (dairy-free if preferred) and a drizzle of warm caramel or chocolate sauce. The delightful contrast between the warm, chewy bar and the cold, creamy ice cream is pure bliss and a true showstopper.
- **Elegant Dusting of Powdered Sugar:** For a touch of simple elegance, a light dusting of powdered sugar (confectioners’ sugar) over the cooled blondies adds a subtle extra sweetness and a beautiful finish.
- **With a Dollop of Whipped Cream:** A generous dollop of freshly whipped cream, or a rich dairy-free whipped topping, adds a luxurious creaminess that pairs wonderfully with the blondies’ texture and flavor.
- **Perfect Pairing with Hot Beverages:** Blondies make a wonderful accompaniment to your morning coffee, a cozy afternoon tea, or as a sweet ending to any meal. Their comforting flavor makes them an ideal partner for warm beverages.
- **A Star on Any Dessert Platter:** Cut into smaller squares or elegant triangles, these blondies make an attractive, crowd-pleasing, and absolutely delicious addition to any dessert platter, holiday spread, or potluck.
More Gluten-Free and Dairy-Free Dessert Recipes to Explore!
If you’ve loved creating and savoring these delightful gluten-free blondies, you’re in for a treat! Our kitchen is passionately dedicated to crafting delicious and approachable recipes specifically designed for those navigating gluten and dairy sensitivities. We believe everyone deserves to enjoy scrumptious desserts without compromise. Here are a few more must-try dessert recipes from our collection that we think you’ll adore:
- Gluten-Free Lemon Bars {Dairy-Free Option}: Bright, zesty, and perfectly tart, these lemon bars offer a refreshing burst of citrus flavor that’s utterly delightful and surprisingly easy to make.
- Gluten-Free Oatmeal Cookies {Dairy-Free Option}: Experience the comforting chewiness and wholesome goodness of classic oatmeal cookies, reimagined to be entirely gluten-free and with a simple dairy-free alternative. They’re perfect for dunking!
- Gluten-Free Blueberry Cobbler {Dairy-Free & Vegan Option}: A warm, bubbly, and fruity classic dessert, this blueberry cobbler recipe is incredibly comforting and versatile, offering both dairy-free and vegan options. It’s simply divine served with a scoop of vanilla ice cream.
Let’s Connect! You can FOLLOW ME on Facebook, Pinterest, YouTube, or Instagram!

Gluten-Free Blondies {Dairy-Free Option}
By: Audrey Roberts
Servings: 9 servings
Prep Time: 10 minutes
Cook Time: 35 minutes
Total Time: 45 minutes
An easy recipe for gluten-free blondies. A sweet vanilla and brown sugar-flavored dessert bar. This gluten-free dessert recipe also has a dairy-free option.
Ingredients
- 2 large eggs
- 3/4 cup packed brown sugar
- 1/2 cup granulated sugar
- 1/2 cup unsalted butter, melted (for dairy-free, use Smart Balance Butter alternative)
- 1 tablespoon pure vanilla extract
- 1 1/4 cup all-purpose gluten-free flour with xanthan gum (Pillsbury gluten-free is recommended for best results. Note that baking results may vary depending on the gluten-free flour blend you choose.)
- 1/2 teaspoon baking soda
- 1/2 teaspoon salt
US Customary – Metric
Instructions
- Preheat oven to 350ºF (175ºC).
- Spray an 8 x 8-inch square baking pan with gluten-free non-stick cooking spray or line the baking pan with parchment paper and coat the bottom and sides with spray or butter.
- In a large bowl, add the eggs, granulated sugar, brown sugar, pure vanilla extract, and melted butter. Mix until fully combined and smooth.
- Add the gluten-free all-purpose flour with xanthan gum, baking soda, and salt to the butter mixture. Mix gently until just combined. Avoid overmixing.
- Pour the blondies batter evenly into the prepared 8 x 8-inch baking pan. Smooth the top of the batter if needed.
- Bake for 30-35 minutes, or until a toothpick inserted into the center comes out with moist crumbs. The sides of the blondies will begin to pull away from the pan. Please watch your blondies carefully as oven temperatures can vary.
- Allow the blondies to cool completely in the pan before cutting into squares. Enjoy!
- Store any leftover blondies in an airtight container at room temperature to maintain freshness.
Notes
- **Flour Recommendation:** We recommend Pillsbury gluten-free flour for this recipe, as results can vary significantly with different gluten-free flour blends. Always check your flour’s ingredients for xanthan gum.
- **Accurate Flour Measurement:** For best results, use the “spoon & level” method for measuring gluten-free flour. Spoon flour into the measuring cup, then level off the top with the back of a knife. Do not scoop directly from the bag.
- **Dairy-Free Option:** For a dairy-free version of these blondies, we successfully use Smart Balance butter alternative.
- **Customization:** Enhance your blondies by adding your favorite mix-ins! Chocolate chips, chopped nuts, butterscotch chips, or shredded coconut are popular choices to fold into the batter before baking.
- **Freezing Instructions:** Cooled blondies can be frozen for longer storage. Wrap them tightly in plastic wrap and then foil, then place in a freezer-safe bag. They can be stored for up to 3 months and defrosted at room temperature.
- **Storage:** Keep leftover blondies in an airtight container at room temperature to preserve their softness and chewiness.
- **Allergen Awareness:** Mama says, “Please check all of your labels!” to ensure all ingredients meet your dietary requirements.
Nutrition Information (Approximate)
- Serving: 1 serving
- Calories: 279 kcal
- Carbohydrates: 41g
- Protein: 3g
- Fat: 12g
- Saturated Fat: 7g
- Trans Fat: 1g
- Cholesterol: 68mg
- Sodium: 213mg
- Potassium: 45mg
- Fiber: 2g
- Sugar: 30g
- Vitamin A: 375 IU
- Calcium: 36mg
- Iron: 1mg
Nutrition information is automatically calculated and should only be used as an approximation.
Additional Info
Course: Dessert
Cuisine: American
Tried this recipe? Mention @mamaknowsglutenfree or tag #mamaknowsglutenfree!