
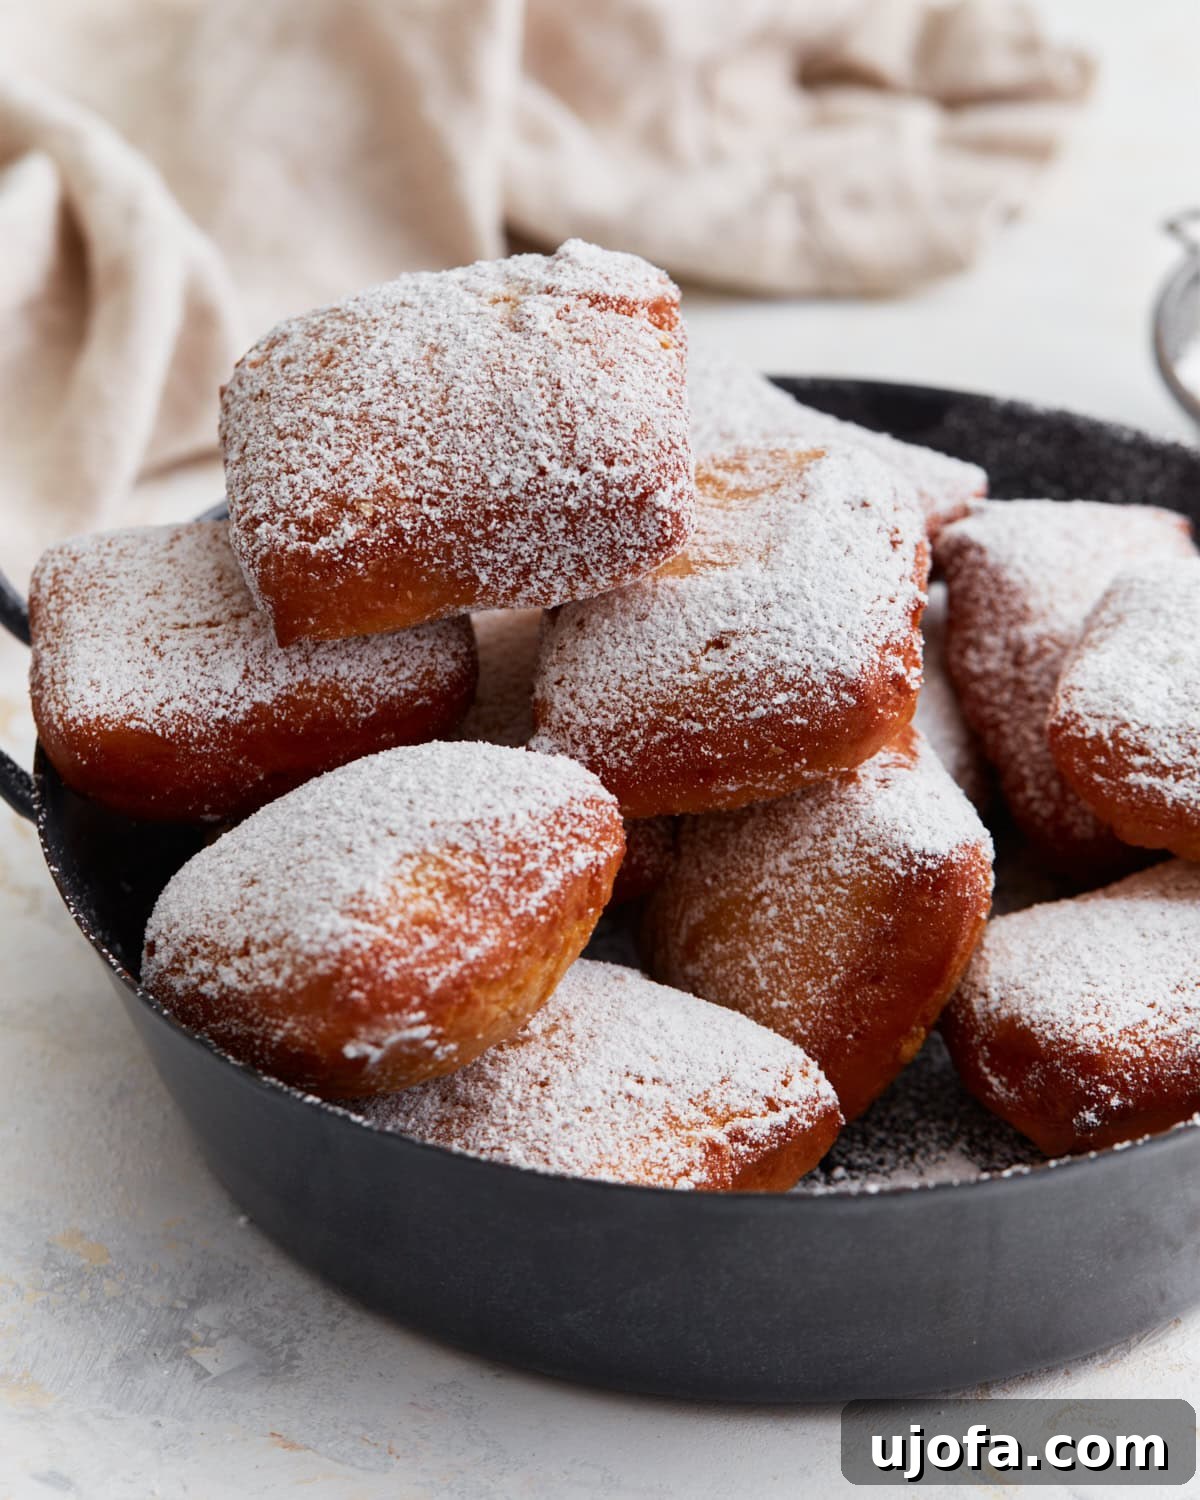
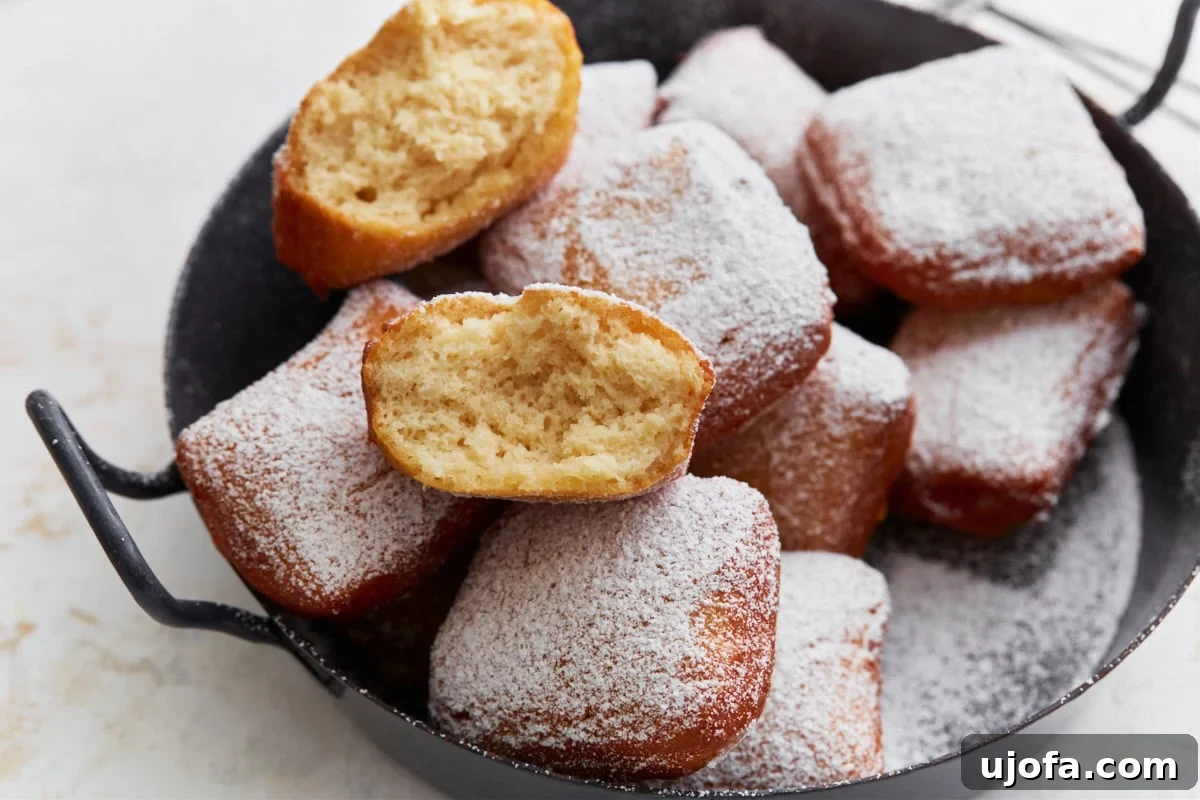
There’s an undeniable comfort in a warm, freshly fried piece of dough, generously coated in a cloud of powdered sugar. This recipe for gluten-free beignets promises just that – a taste of New Orleans’ iconic classic, made perfectly suitable for those avoiding gluten. Working with yeast dough, even in its gluten-free form, can be incredibly rewarding, and the journey to perfecting these light, airy fried delights has been both enjoyable and incredibly delicious. Each beignet puffs up beautifully when fried, developing a soft, tender interior contrasting with delicately crisp edges. A lavish dusting of powdered sugar elevates them to an unforgettable sweet treat, perfect for any occasion.
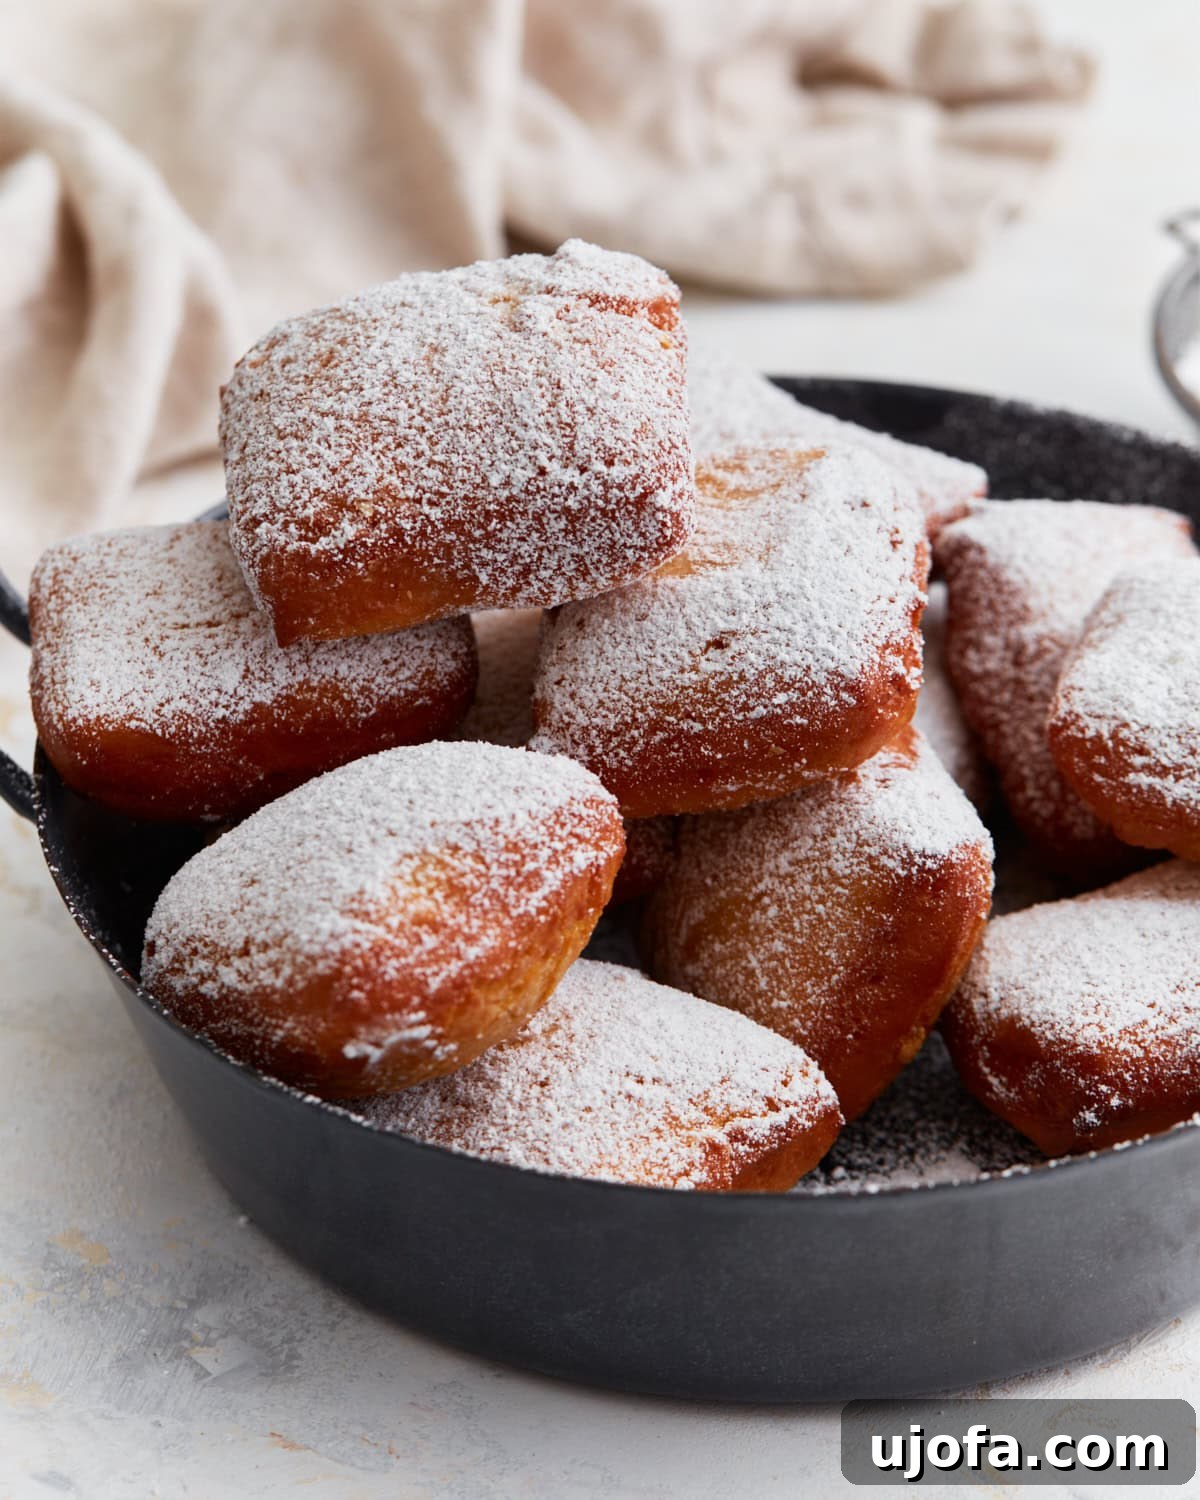
The Magic of Gluten-Free Beignets: Authentic Taste, Modern Twist
There’s something truly special about a homemade beignet, and bringing that authentic New Orleans experience into a gluten-free format is a real triumph. This recipe makes it incredibly easy to whip up a batch of these iconic fried pastries, whether you’re planning a lavish weekend brunch, celebrating Mardi Gras, or simply craving a sweet, doughy indulgence. The beauty of this recipe lies in its simplicity; the yeast dough, though gluten-free, is surprisingly pliable and forgiving. What sets it apart is that it only requires a single rise, streamlining the baking process without compromising on that coveted airy texture. Once the dough has gracefully risen, it’s a straightforward path to rolling it out, cutting it into neat squares, and preparing for the grand finale: a quick dip in hot oil. Moments later, you’ll be rewarded with golden-brown pillows, ready for a generous snowfall of powdered sugar, transforming them into the fluffiest, sweetest treat you could imagine.
For those new to gluten-free baking, especially with yeast, this recipe serves as an excellent introduction. It demystifies the process, proving that delicious, light, and airy fried dough is entirely achievable without traditional wheat flour. The result is a pastry that rivals its conventional counterparts in taste and texture, ensuring no one misses out on this delightful culinary tradition.
Essential Tips from Our Test Kitchen for Gluten-Free Frying Success
Achieving perfect gluten-free beignets requires a few key considerations. Our test kitchen has refined these tips to ensure your success, delivering beignets that are consistently light, airy, and wonderfully golden every time.
- Understanding Gluten-Free Dough Consistency: Gluten-free dough by nature is often softer and can feel tackier than wheat-based dough. This is completely normal! Don’t be alarmed if it feels a little sticky. If you find the dough excessively sticky and challenging to handle, lightly flour your hands and work surface with additional gluten-free flour. Add extra flour gradually, just 1 tablespoon at a time, until the dough becomes manageable without losing its softness or becoming dense. The goal is a dough that is slightly sticky but can still be shaped.
- The Critical Role of Oil Temperature: The temperature of your frying oil is paramount for perfectly cooked beignets. If your oil isn’t hot enough, the beignets will absorb too much oil, resulting in a greasy, heavy texture. Conversely, oil that is too hot will quickly burn the outside while leaving the inside raw. Aim for a steady 350°F (175°C). Use a reliable deep-fry thermometer to monitor the temperature continuously. It’s crucial for the oil to return to 350°F between batches to ensure consistent cooking.
- Patience for the Perfect Rise: The signature soft and airy texture of these beignets is largely due to a full and proper rise. Yeast needs warmth and time to activate and produce carbon dioxide bubbles, which create that desired light structure. Do not rush this step. Allow the dough to rise in a warm, draft-free place for the full recommended hour, or until it has visibly doubled in size. This wait is absolutely worth it for superior texture.
- Planning Ahead: Make-Ahead Dough Option: For convenience, you can prepare the dough in advance. After the initial rise, cover the bowl tightly and refrigerate the dough for up to 12 hours. This can be a great way to prep for a morning brunch. Before shaping and frying, ensure you let the dough come back to room temperature for about 30-60 minutes. This allows the yeast to become active again and the dough to become more pliable.
- Kneading Technique for Gluten-Free Dough: While traditional doughs benefit from extensive kneading to develop gluten, gluten-free doughs require a different approach. The 5-minute kneading time specified in this recipe is more about thoroughly combining ingredients and developing a smooth, homogenous mixture rather than building a gluten network. Avoid over-kneading, which can sometimes make GF dough tougher.
- Frying Safely: Always exercise caution when deep-frying. Use a deep pot with high sides to prevent splattering, and never fill the pot more than halfway with oil. Have a lid nearby in case of a grease fire (though unlikely if oil temperature is maintained). Keep children and pets away from the cooking area.
Gluten-Free Beignets Recipe

Ingredients
For the Beignets
- 2-2½ cups gluten-free bread flour blend, with xanthan gum
- 2 tsp instant yeast
- 2 tbsp granulated sugar
- ½ tsp salt
- 1 cup evaporated milk
- 3 tbsp unsalted butter, melted
- 1 large egg
- 1 tsp vanilla extract
- 1 cup powdered sugar, for dusting
For frying
- 4-5 cups vegetable oil, or other high smoke point oil
Instructions
-
In a generously sized mixing bowl, combine the dry ingredients: thoroughly whisk together the gluten-free bread flour blend (starting with 2 cups), instant yeast, granulated sugar, and salt. Ensure these are well combined before proceeding.
-
To the dry mixture, add the evaporated milk, melted unsalted butter, large egg, and vanilla extract. Using a stand mixer with a dough hook attachment (or a hand mixer with dough hooks), mix these ingredients on low speed until they are just combined and a shaggy dough begins to form.
-
Increase the mixer speed to medium-low and knead the dough for approximately 5 minutes. The goal is to achieve a smooth, slightly cohesive dough. Due to variations in gluten-free flour blends and environmental humidity, the dough’s moisture content may vary. If the dough feels overly soft or too sticky to handle, add the remaining gluten-free flour (up to an additional ½ cup) one tablespoon at a time, mixing until it reaches a more manageable, yet still soft and slightly sticky, consistency. If, conversely, the dough appears too dry and crumbly, add evaporated milk one tablespoon at a time until the desired soft, slightly sticky texture is achieved, similar to what’s depicted in our step-by-step photos.
-
Once the dough consistency is correct, cover the mixing bowl with a clean kitchen towel or plastic wrap. Place the bowl in a warm, draft-free location and allow the dough to rise for 1 hour. During this time, the dough should noticeably increase in volume, typically doubling in size, indicating that the yeast is active.
-
After the dough has successfully risen, gently turn it out onto a lightly floured work surface. Ensure your surface is dusted with extra gluten-free flour to prevent sticking. Using your hands, gently pat the dough out to an even thickness of approximately ½-inch. Avoid overworking the dough at this stage.
-
Using a sharp knife, a pastry wheel, or a pizza cutter, carefully cut the dough into uniform 2-inch squares. Consistency in size is important for even frying.
-
Prepare your frying station: In a deep skillet or a heavy-bottomed pot, pour 2–3 inches of vegetable oil. Heat the oil over medium-high heat until it reaches a steady temperature of 350°F (175°C), as verified by a deep-fry thermometer. Carefully place a few beignet squares into the hot oil at a time, ensuring not to overcrowd the pot, which can lower the oil temperature. Fry for about 1–2 minutes per side, turning them once, until they achieve a beautiful golden-brown color on both sides and are puffed up. Use a slotted spoon or spider tool to remove the fried beignets.
-
Immediately transfer the golden-brown beignets to a plate lined with paper towels to drain any excess oil. While still warm, dust them generously with a thick layer of powdered sugar using a fine-mesh sieve. Serve your homemade gluten-free beignets immediately to enjoy them at their absolute best!
Notes
- You can make the dough in advance to streamline your preparation. After the initial rise, cover the dough tightly and refrigerate it for up to 12 hours. Remember to let it come back to room temperature for about 30-60 minutes before shaping and frying, as this reactivates the yeast and makes the dough more pliable.
- For a healthier alternative, or if you prefer not to deep-fry, baking is an option, though it will yield a different texture (more like a soft bun rather than a puffy, airy fried dough). To bake, arrange shaped beignet squares on a parchment-lined baking sheet and bake at 375°F (190°C) for 12–15 minutes, or until they are lightly golden. Brush them with melted butter immediately after baking, then dust generously with powdered sugar.
- Yeast is crucial for traditional beignet texture. The light, airy, and fluffy interior of a classic beignet is achieved through the fermentation process of yeast, which produces gas bubbles that expand during frying. While baking powder can be used as a leavening agent in a pinch, it will result in a texture more akin to a biscuit or fritter, lacking the distinctive airy quality of a true beignet. For an authentic experience, stick with instant yeast.
- Creative Toppings: Beyond powdered sugar, consider serving your beignets with chocolate dipping sauce, a warm caramel drizzle, fruit compote, or a sprinkle of cinnamon sugar for a different twist.
Nutrition
Below is an approximation of the nutritional content per serving of gluten-free beignets, based on a yield of 12 servings. This information is automatically calculated and should be used as a guide only, as values can vary depending on specific ingredients and preparation methods.
- Serving: 1 beignet
- Calories: 200 kcal
- Carbohydrates: 35 g
- Protein: 4 g
- Fat: 5 g
- Saturated Fat: 3 g
- Polyunsaturated Fat: 0.2 g
- Monounsaturated Fat: 1 g
- Trans Fat: 0.1 g
- Cholesterol: 29 mg
- Sodium: 127 mg
- Potassium: 90 mg
- Fiber: 1 g
- Sugar: 14 g
- Vitamin A: 160 IU
- Vitamin C: 0.4 mg
- Calcium: 59 mg
- Iron: 0.2 mg
Nutrition information is automatically calculated, so should only be used as an approximation.
Step-by-Step Guide: Crafting Your Delicious Gluten-Free Beignets
Follow these detailed steps to ensure your gluten-free beignets turn out perfectly fluffy, golden, and utterly irresistible.
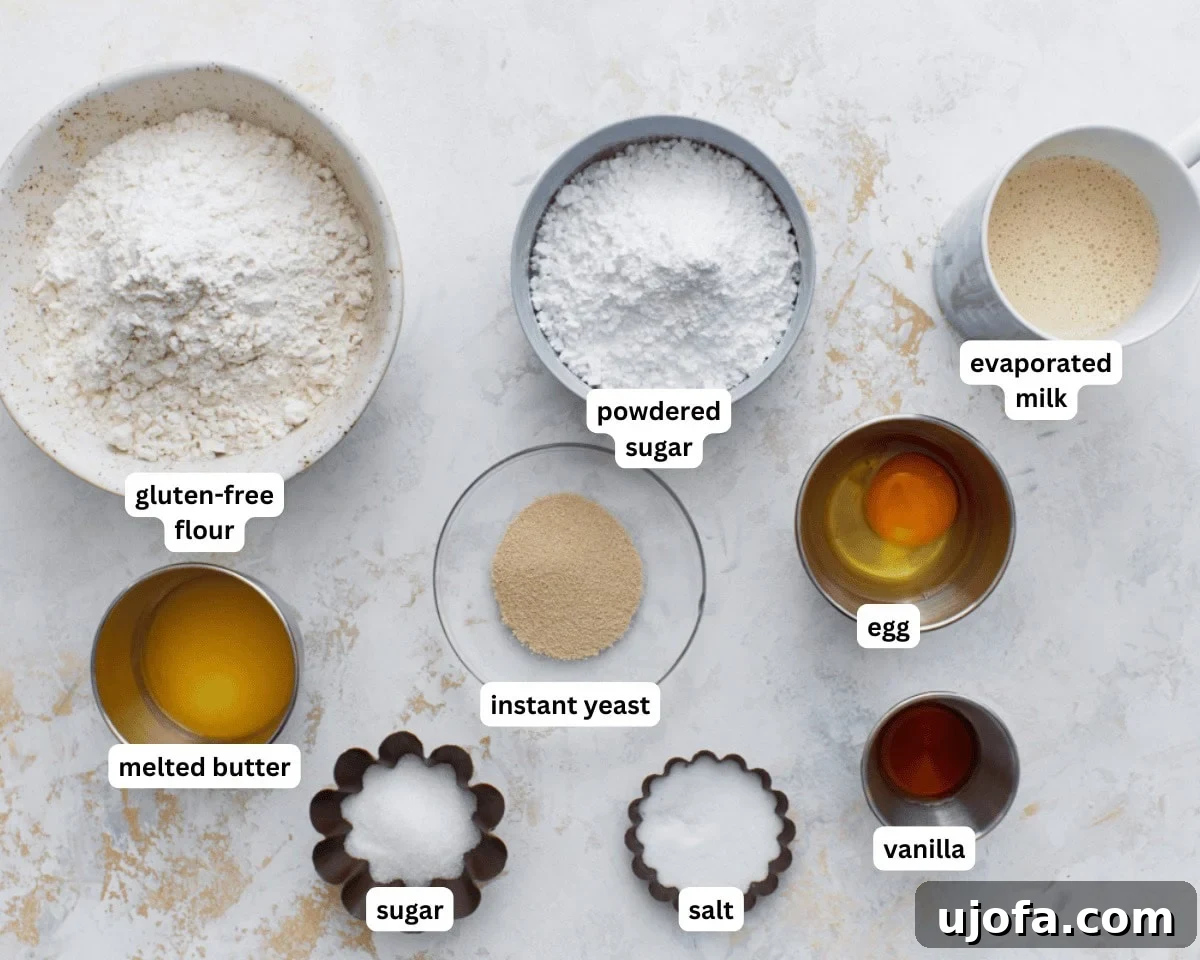
1. Gather Your Ingredients: Begin by assembling all the necessary ingredients on your counter. Ensure your evaporated milk, butter, and egg are at room temperature, as this helps the dough come together smoothly and promotes proper yeast activation. Precision is key in gluten-free baking, so having everything measured out beforehand will make the process much smoother.
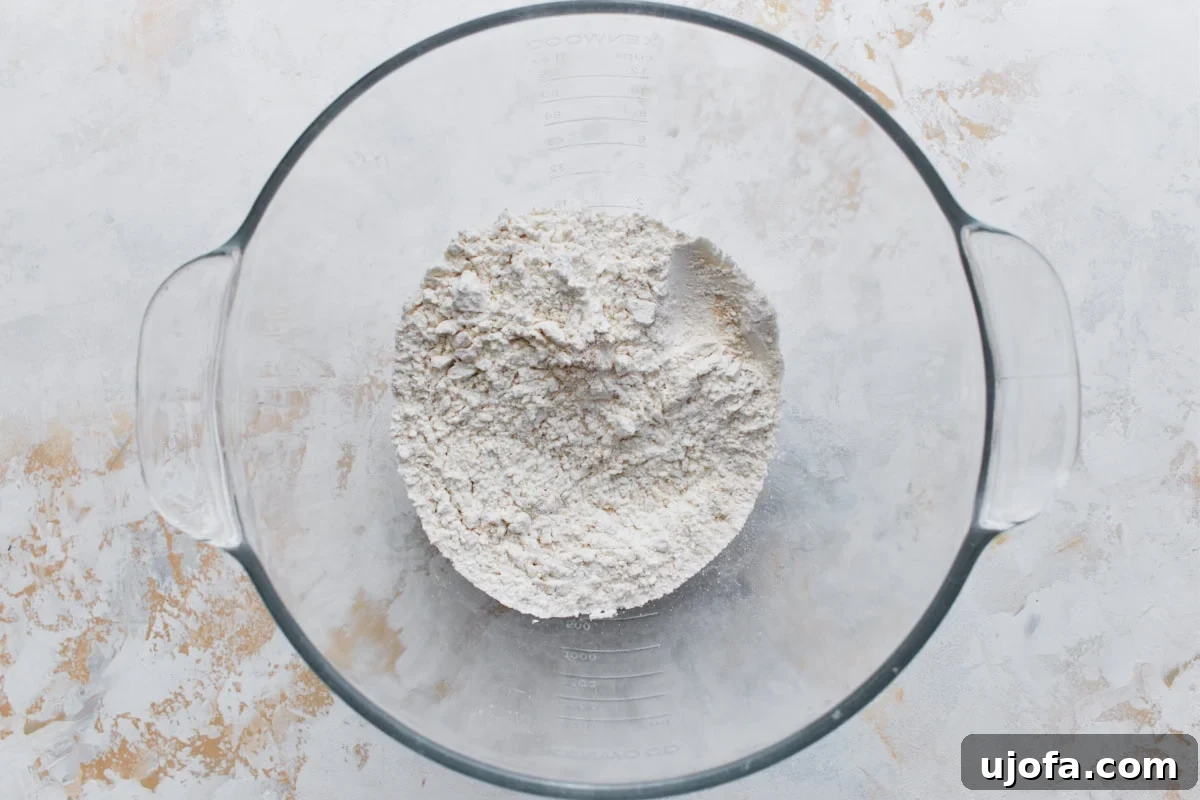
2. Mix the Dry Ingredients: In a large mixing bowl, combine the gluten-free bread flour blend (start with the minimum amount, 2 cups, as you might add more later), instant yeast, granulated sugar, and salt. Use a whisk to thoroughly blend these dry components. This ensures the yeast and leavening agents are evenly distributed throughout the flour, contributing to a consistent rise and texture in your beignets.
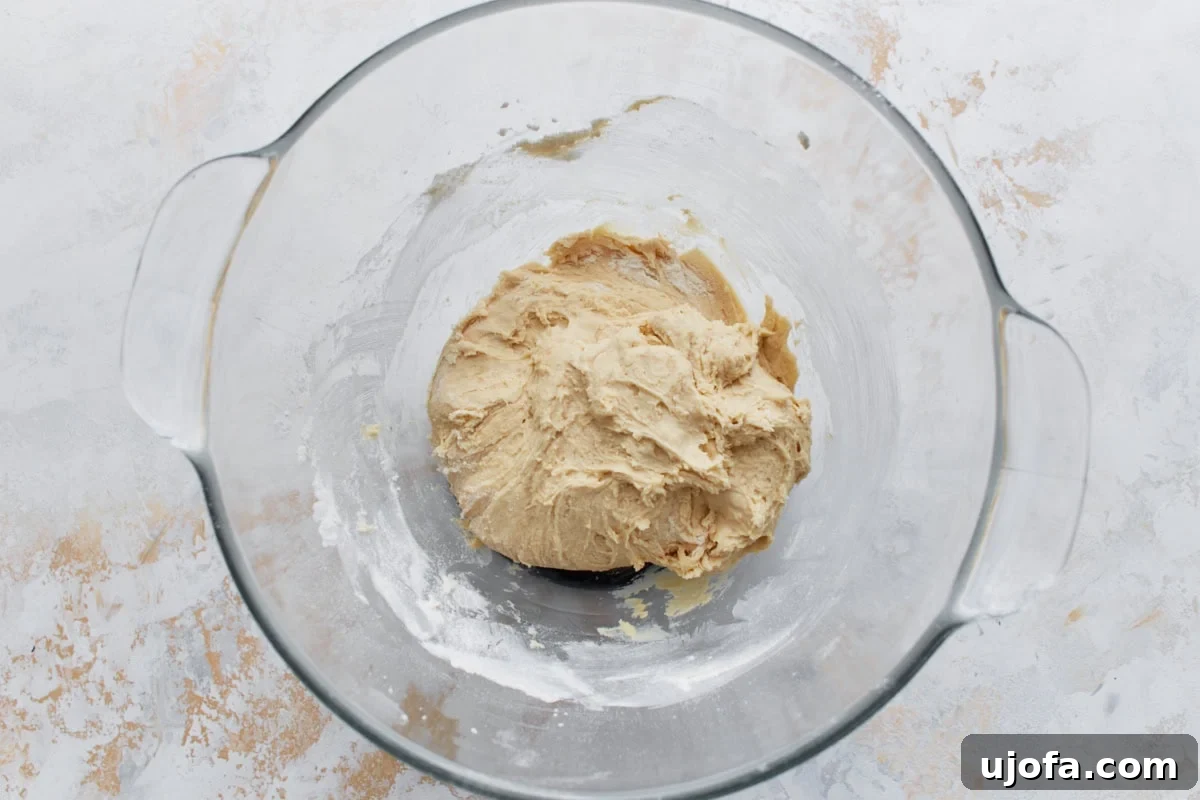
3. Incorporate Wet Ingredients: Pour the evaporated milk, melted unsalted butter, the large egg, and vanilla extract into the bowl with the dry ingredients. Start mixing on low speed using a stand mixer with a dough hook or a hand mixer with dough beaters. Mix until the ingredients are just combined and form a shaggy, somewhat sticky dough. Avoid overmixing at this initial stage.
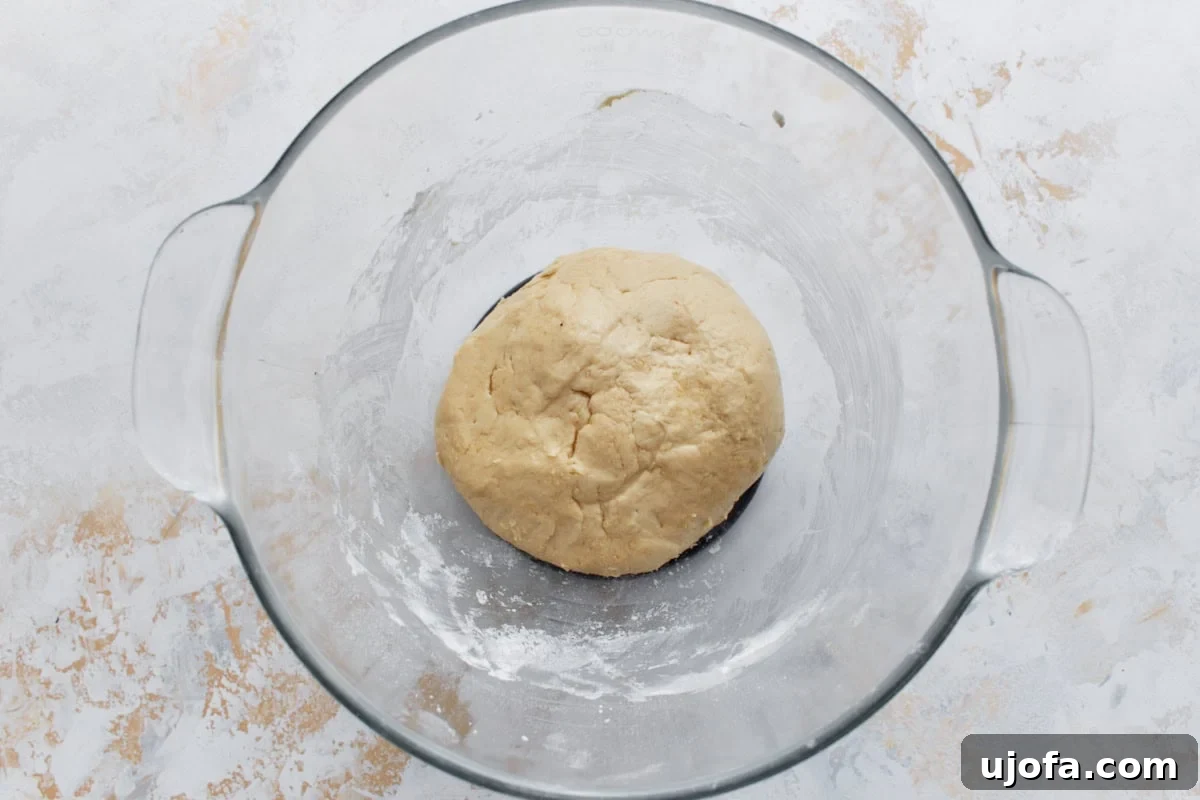
4. Knead and Refine the Dough: Increase the mixer speed to medium-low and continue kneading the dough for approximately 5 minutes. The dough should become smoother and more cohesive, though it will still be softer and slightly stickier than traditional wheat dough. This kneading time ensures ingredients are fully incorporated and the dough has a uniform texture. If it’s too sticky to manage, gradually add more gluten-free flour, one tablespoon at a time (up to a total of 2½ cups), until it’s pliable. Conversely, if it feels too dry, add a tablespoon of milk at a time until it reaches a soft, slightly sticky consistency.
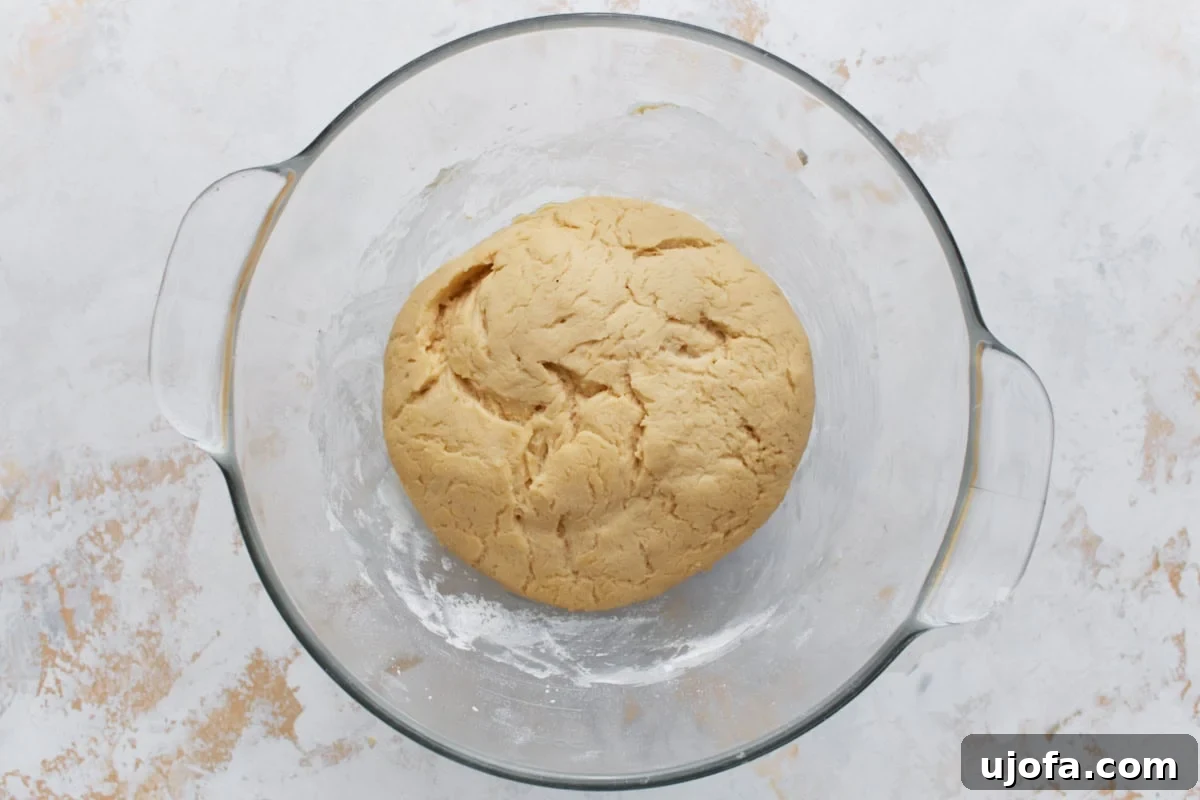
5. The Crucial Rise: Cover the bowl containing your dough with a clean kitchen towel or plastic wrap. Place the bowl in a warm, draft-free location in your kitchen. Allow the dough to rise for a full hour. During this period, the yeast will work its magic, causing the dough to double significantly in size. A successful rise is paramount for achieving the characteristic light and airy texture of a beignet.
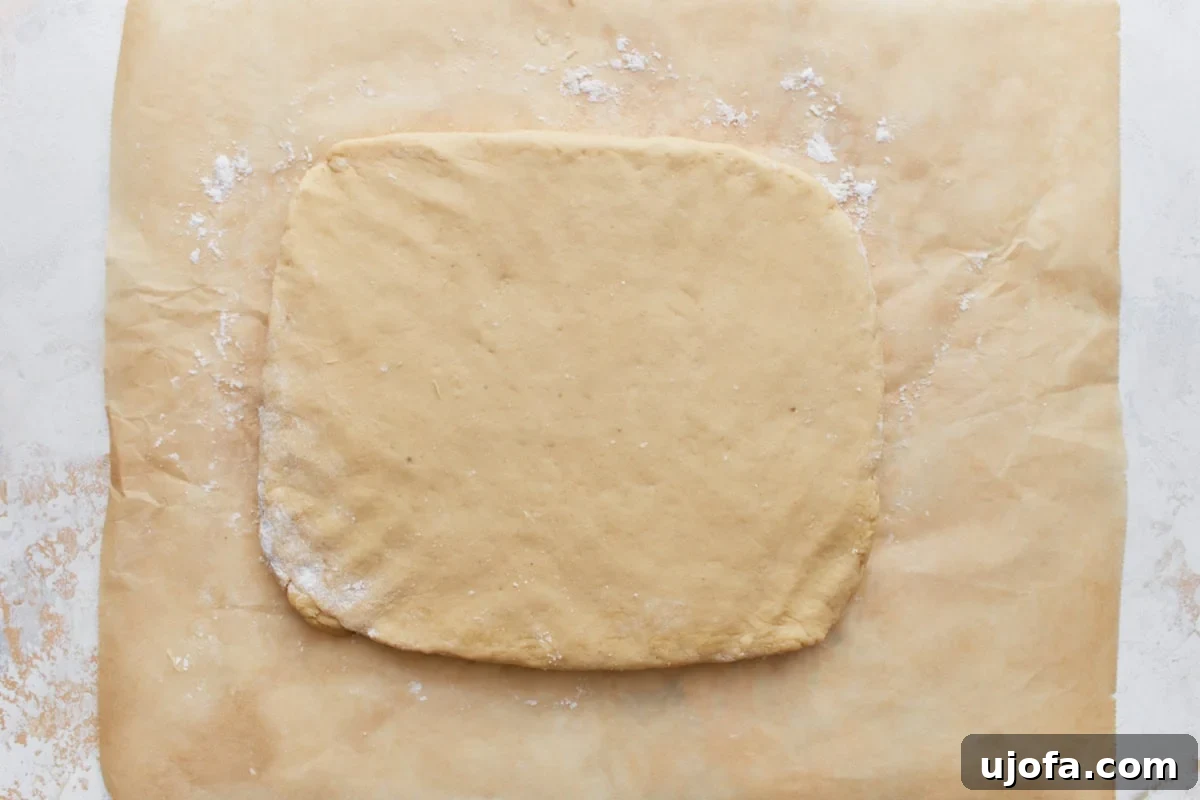
6. Gentle Shaping: Once the dough has risen beautifully, gently turn it out onto a lightly floured surface. Using additional gluten-free flour as needed to prevent sticking, pat the dough out evenly with your hands. Aim for a thickness of approximately ½-inch. Handle the dough gently to avoid deflating too much of the air created during the rise.
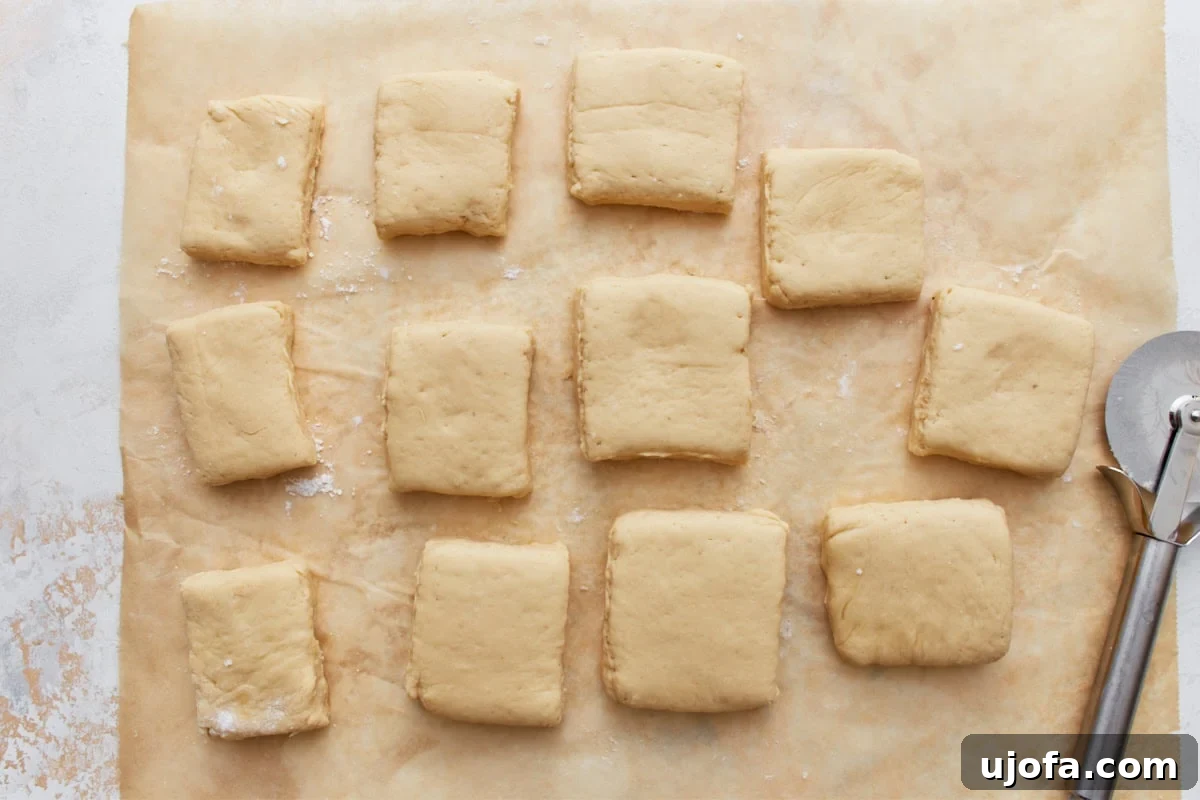
7. Precise Cutting into Squares: Using a sharp knife or a pizza cutter, carefully cut the flattened dough into uniform 2-inch squares. Consistency in size is important, as it ensures that all your beignets fry evenly and cook through at the same rate. This step prepares them for their transformation in the hot oil.
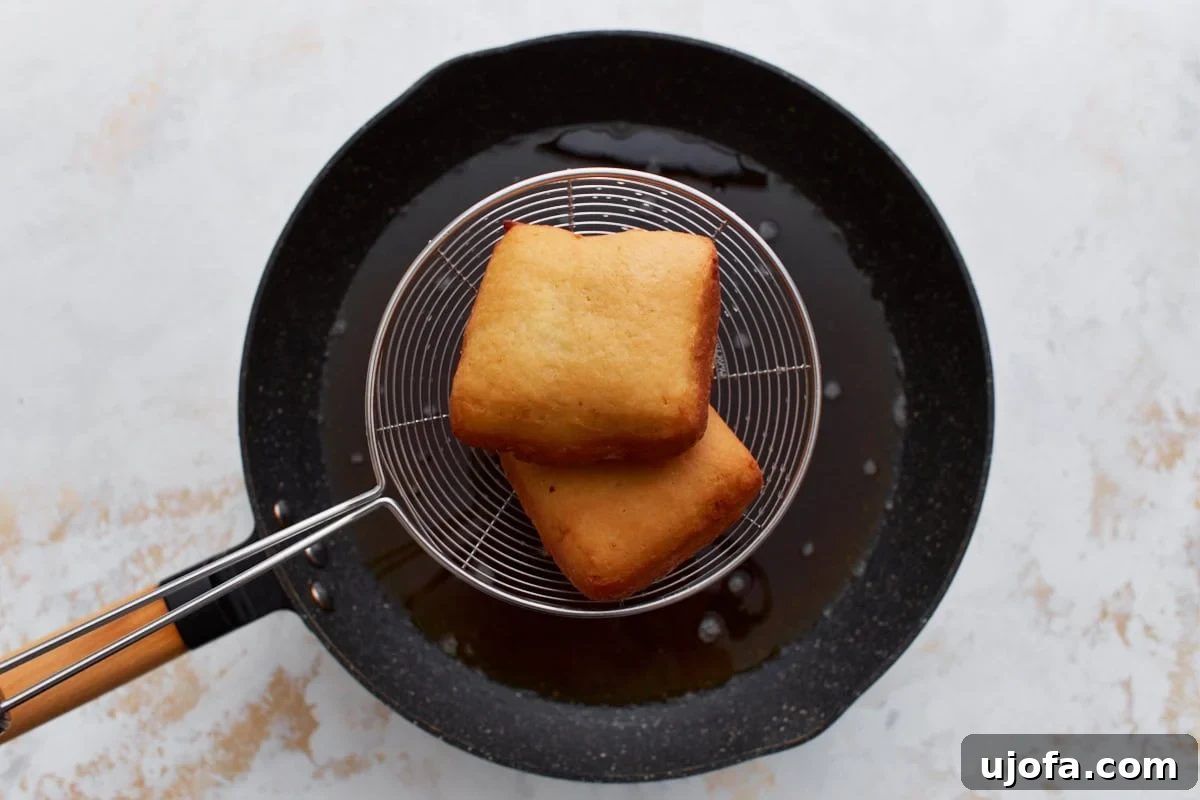
8. Frying to Golden Perfection: In a deep skillet or heavy-bottomed pot, heat 4-5 cups of vegetable oil (or another oil with a high smoke point) to precisely 350°F (175°C). Fry the beignet squares in small batches, taking care not to overcrowd the pot. Overcrowding will lower the oil temperature and lead to greasy beignets. Fry each side for about 1 to 2 minutes, flipping once, until they are beautifully golden brown and fully puffed up. Use a slotted spoon or spider to remove them.
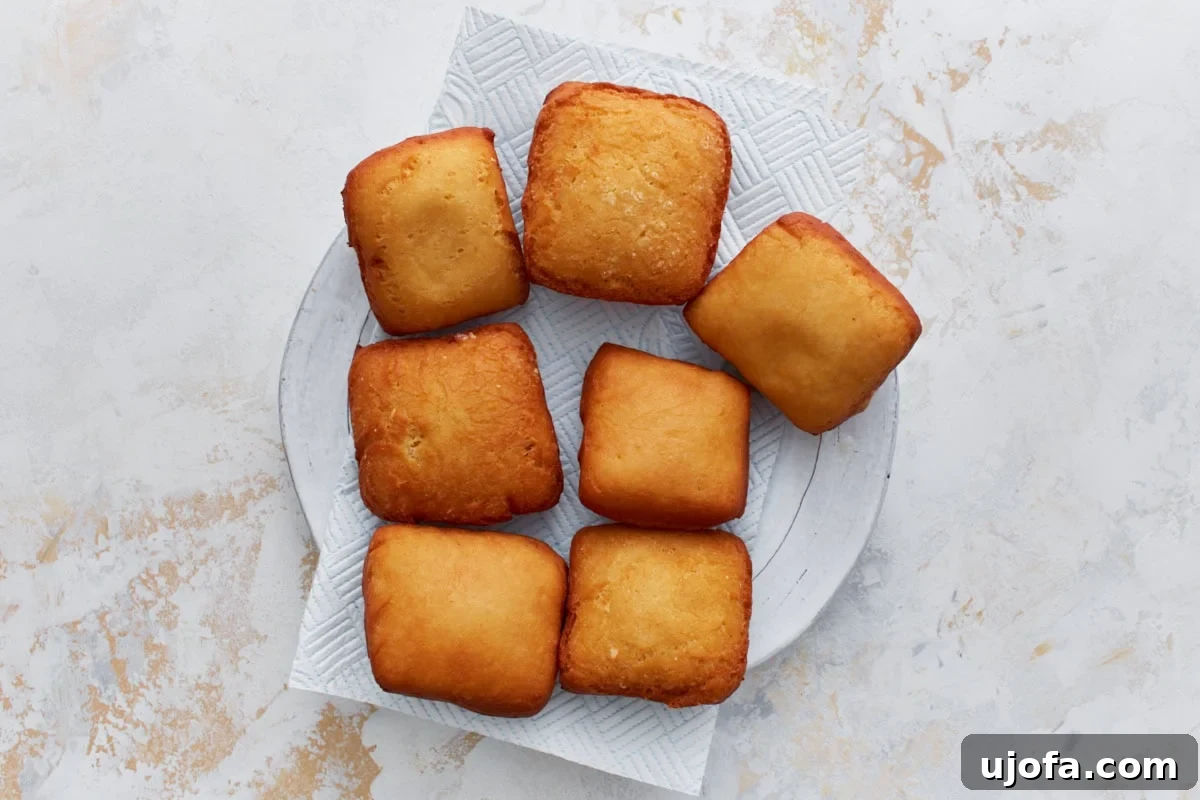
9. Draining Excess Oil: As you remove the fried beignets from the oil, immediately transfer them to a plate generously lined with paper towels. The paper towels will absorb any excess oil, ensuring your beignets remain light and not greasy. This step is crucial for achieving that delightful crisp exterior without an oily mouthfeel.
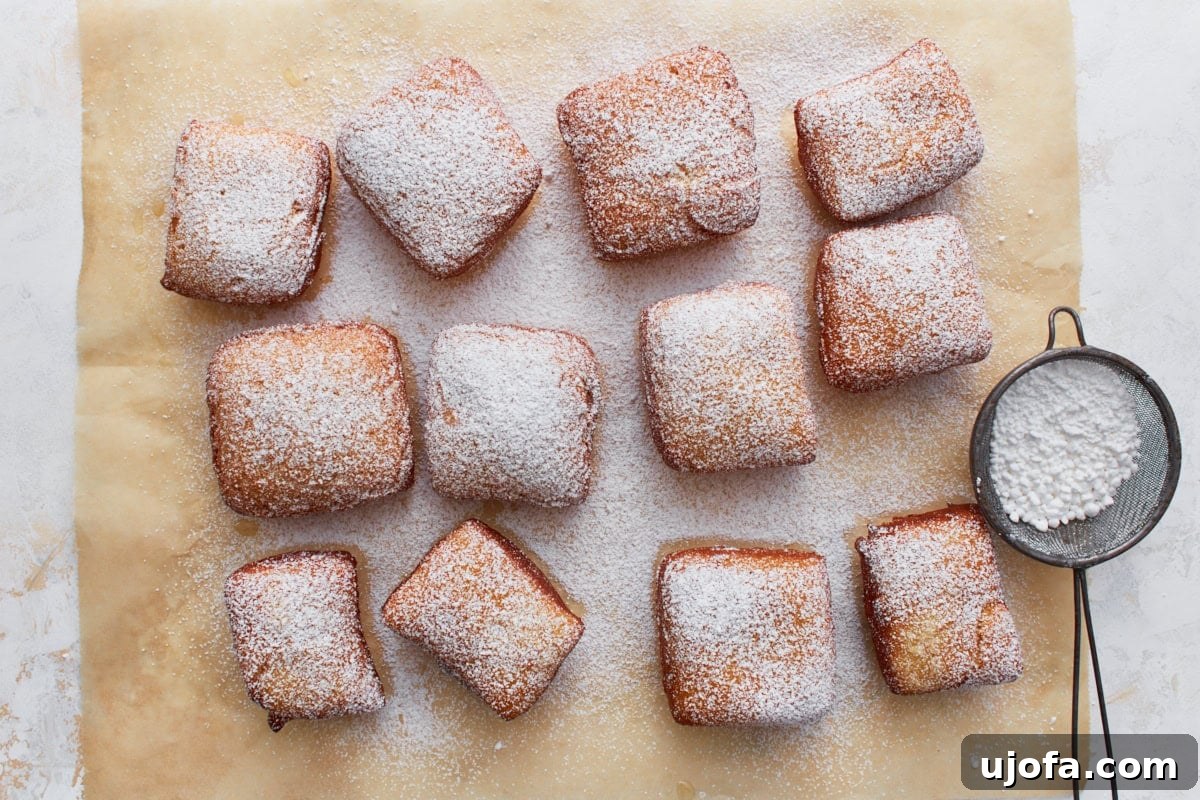
10. The Signature Dusting and Immediate Enjoyment: While the beignets are still warm from the fryer and draining, liberally dust them with powdered sugar. Use a fine-mesh sieve for an even, cloud-like coating. The warmth of the beignets helps the sugar adhere perfectly. Serve them immediately to experience their optimal taste and texture – fluffy, warm, and sweet, a truly authentic gluten-free New Orleans delight!
Creative Serving Suggestions for Your Gluten-Free Beignets
These gluten-free beignets are undeniably at their best when served warm, fresh from the fryer, and generously blanketed in powdered sugar. The classic pairing with a cup of rich, dark coffee or a café au lait evokes the true spirit of New Orleans. However, their simple, delightful flavor makes them incredibly versatile for various serving styles.
- Classic Indulgence: A thick dusting of powdered sugar is a must. For an extra touch, consider serving them with a side of warm chocolate ganache or a decadent caramel sauce for dipping.
- Cinnamon Sugar Twist: If you enjoy the warm spice of cinnamon, toss some of the fried beignets (before powdered sugar) in a mixture of cinnamon and sugar, similar to how you would prepare gluten-free churros.
- Fruit-Filled Delight: Pair them with a spoonful of fresh berry compote, cherry pie filling, or thinly sliced fresh fruit like strawberries or bananas. The tartness of the fruit beautifully balances the sweetness of the beignets.
- Brunch Extravaganza: Elevate your brunch spread by serving these alongside savory breakfast items. They make a perfect sweet counterpoint to eggs, bacon, or breakfast sausage.
- Holiday & Party Perfect: These beignets are fantastic for festive occasions. For a true Mardi Gras celebration, whip up a batch to complement a gluten-free king cake. Their individual portion size makes them easy to share and enjoy at gatherings.
- Ice Cream Companion: A warm beignet served with a scoop of vanilla bean ice cream creates a delightful contrast in temperatures and textures.
No matter how you choose to enjoy them, these gluten-free beignets are sure to be a crowd-pleaser, delivering a touch of NOLA charm to your table.
Storage and Reheating Tips for Freshness
While gluten-free beignets are unequivocally best enjoyed fresh, warm, and right out of the fryer, it is possible to store them and enjoy them later with a little care. Here’s how to handle any delicious leftovers:
- Short-Term Storage (Cooked Beignets): If you have any leftover fried beignets, store them in an airtight container at room temperature for up to 1 day. Keep in mind that their light and crispy texture will soften over time, and they may become less airy. Avoid refrigerating immediately, as it can dry them out.
- Refrigeration & Reheating (Cooked Beignets): For slightly longer storage, you can refrigerate cooked beignets in an airtight container for up to 2 days. To bring back some of their crispness and warmth, reheat them gently. A toaster oven set to 300°F (150°C) for 5-8 minutes, or an air fryer at 300°F (150°C) for 3-5 minutes, works wonderfully. Avoid microwaving, as it can make them rubbery. Dust with fresh powdered sugar after reheating.
- Freezing Unfried Dough: To prepare ahead for future cravings, you can freeze shaped, unfried dough squares. Arrange the cut squares in a single layer on a parchment-lined baking sheet and freeze until solid (about 1-2 hours). Once frozen, transfer the solid dough squares to a freezer-safe bag or airtight container. They can be stored for up to 3 months. When ready to fry, do not thaw! Fry them directly from frozen, adding an extra 1–2 minutes to the cook time per side, ensuring they cook through and puff up.
- Freezing Cooked Beignets: Cooked beignets can also be frozen. After frying and cooling completely, arrange them in a single layer on a baking sheet and freeze until solid. Then, transfer them to a freezer bag or airtight container. Freeze for up to 3 months. To reheat, place frozen beignets on a baking sheet and warm in a preheated oven at 350°F (175°C) for 5–8 minutes, or until heated through and lightly crispy. Dust with fresh powdered sugar before serving.
More Instant Yeast Recipes to Try
If you’ve enjoyed the delightful experience of making these gluten-free beignets, you’ll be thrilled to discover more delicious possibilities with instant yeast in gluten-free baking. Here are some other fantastic recipes to expand your repertoire:
- Gluten-Free Yeast Donuts: These light and fluffy gluten-free donuts are a perennial breakfast favorite in our household. I often find myself making double batches, as they’re devoured almost as quickly as they emerge from the fryer!
- Gluten-Free Croissant: There’s a special kind of magic in a freshly baked croissant – those delicate, flaky layers, the soft, tender center, and the rich, buttery edges. Crafting a gluten-free version brings that bakery-level experience right into your kitchen.
- Gluten-Free Danish: These gluten-free Danish pastries are among my absolute favorite weekend baking projects. Biting into the soft, buttery pastry, perfectly complemented by a sweet jam filling and a delicate glaze, is an indulgence that tastes every bit as authentic as anything from a traditional bakery.
- Gluten-Free Hot Cross Buns: Few aromas are as comforting and inviting as the scent of warm, spiced gluten-free hot cross buns baking in the oven. They are a delightful treat, especially during spring.
Frequently Asked Questions (FAQ) about Gluten-Free Beignets
Here are answers to some common questions you might have when making gluten-free beignets:
- Can I use a different gluten-free flour blend?
It’s generally recommended to use a high-quality gluten-free bread flour blend that already contains xanthan gum. Different blends have varying compositions, and switching to one without xanthan gum, or one designed for cakes, might alter the texture significantly. If your blend does not contain xanthan gum, add about ½ teaspoon per cup of flour. - What if my dough doesn’t rise?
Several factors can inhibit yeast activity. Ensure your yeast is fresh and active (check the expiration date). The evaporated milk should be warm (not hot!) – ideally between 105-115°F (40-46°C). Too cold, and the yeast won’t activate; too hot, and it will kill the yeast. Also, make sure your rising environment is warm and free from drafts. - Can I bake these instead of frying?
Yes, you can bake them, but the texture will be different. Baked beignets will be more like soft buns or rolls rather than the airy, puffed fried dough. For baking instructions, refer to the “Notes” section in the recipe card above. - Are these beignets naturally dairy-free or egg-free?
This specific recipe uses evaporated milk, unsalted butter, and a large egg, so it is not naturally dairy-free or egg-free. However, substitutions can often be made. For dairy, you might try a dairy-free evaporated milk alternative and vegan butter. For the egg, a flax egg or other egg replacer may work, but note that this could affect the dough’s structure and final texture. - How do I know the oil is hot enough without a thermometer?
While a thermometer is highly recommended for accuracy, if you don’t have one, you can test the oil by dropping a tiny piece of dough into it. If the dough sizzles immediately and floats to the top, the oil is likely ready. If it browns too quickly, the oil is too hot; if it just sits there without sizzling, it’s not hot enough. Adjust heat accordingly.
We hope these tips and answers help you create the most delightful gluten-free beignets!