
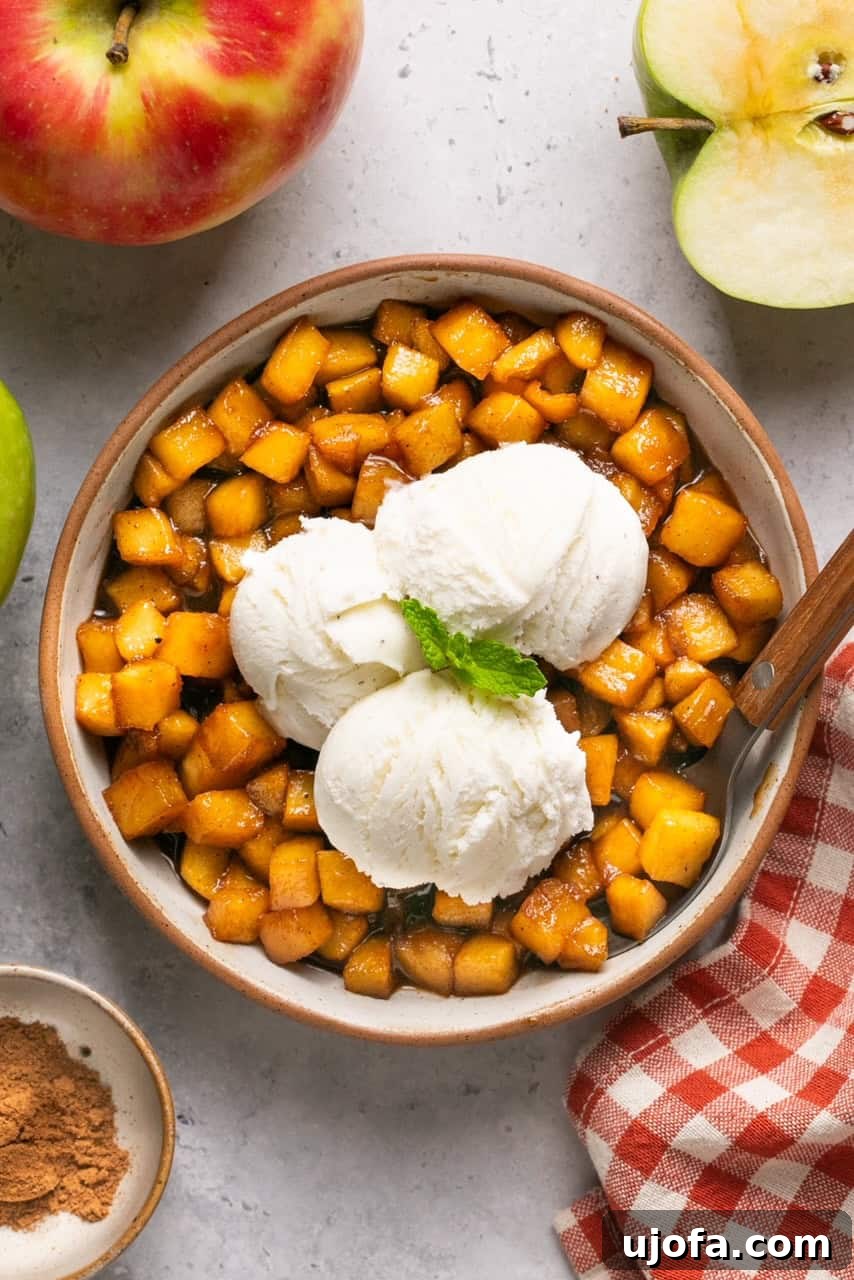
Irresistible Caramelized Apples: Your Go-To Refined Sugar-Free Recipe
Forget the fuss of complicated desserts this autumn – these **caramelized apples** are poised to become the star of your seasonal culinary repertoire! With their luscious, golden sweetness and enchanting aroma, they offer an effortlessly delicious way to elevate an array of dishes. This simple recipe stands out by swapping traditional brown sugar for nutrient-rich coconut sugar, making it entirely refined sugar-free. Crafted with just a handful of straightforward ingredients, it promises to be your new favorite apple topping, side dish, or even a delightful dessert on its own.
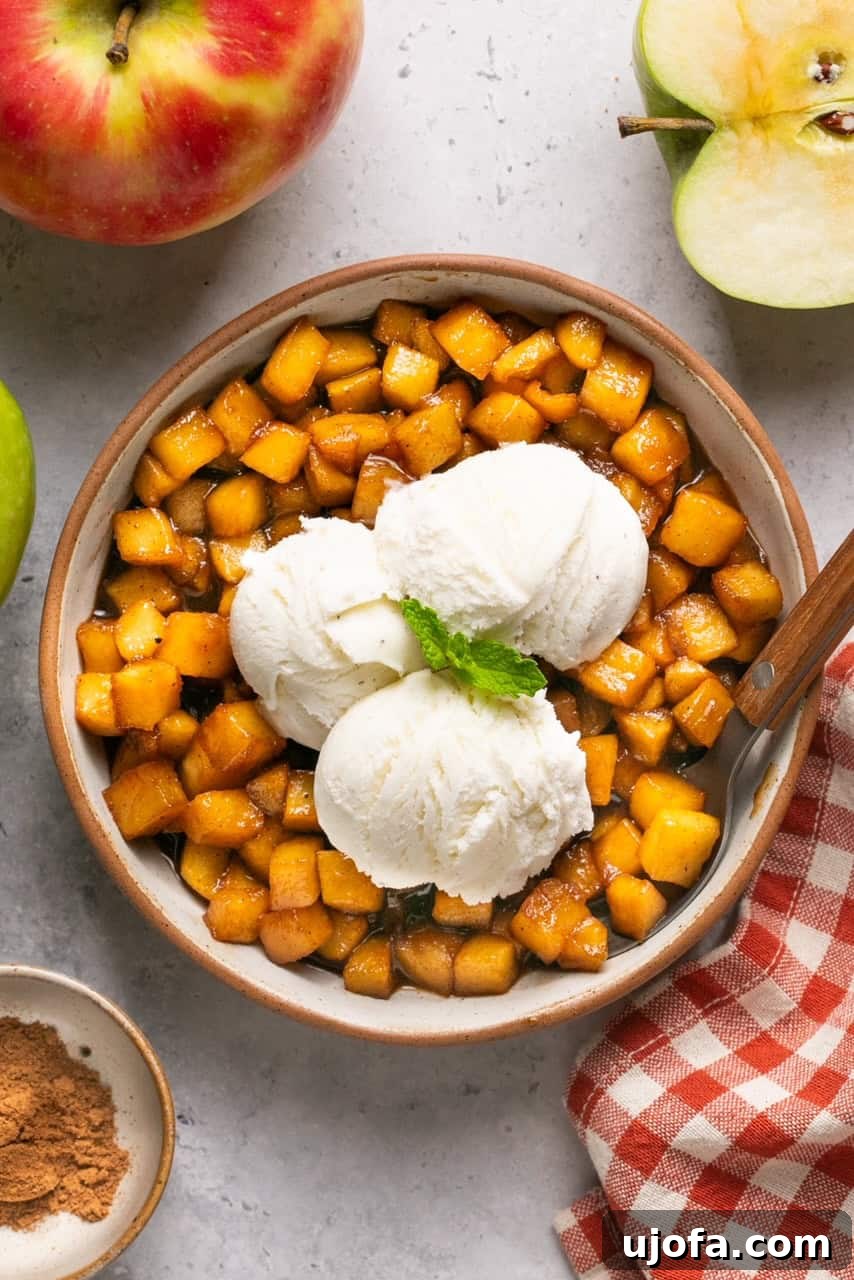
Why These Caramelized Apples Will Steal Your Heart
As the leaves begin to turn and the crisp autumn air signals the arrival of fall, so too does the irresistible craving for apple-infused delights. Caramelized apples are more than just a seasonal treat; they are a celebration of fall’s bounty, offering an unparalleled blend of versatility and a heavenly aroma that will envelop your home in warmth and comfort. This easy recipe promises a deeply satisfying flavor experience that transcends the ordinary.
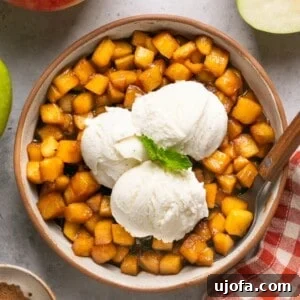
These sweet and tender apples are a delicious dessert in their own right, perfect for a cozy evening. But their true magic lies in their adaptability. Imagine pairing them with a stack of fluffy French toast or crispy waffles for an elevated breakfast experience. Swirl them into creamy Greek yogurt or cottage cheese for a high-protein, satisfying snack. For an indulgent touch, serve them warm alongside a scoop of rich vanilla ice cream, allowing the melting cream to mingle with the golden apple sauce. They also make an exquisite accompaniment to spiced cakes, bundt cakes, or even a simple pound cake, adding a layer of sophisticated sweetness and warmth.
But don’t stop at sweet! The delightful balance of sweet and tart in these caramelized apples allows them to shine in savory applications too. Think of them as a gourmet side dish to roasted meats, pork chops, or even chicken. They add a surprising burst of flavor that cuts through richness, creating a harmonious and memorable meal. Whether you’re aiming to infuse a touch of autumn into your morning routine or seeking the perfect finishing touch for a sophisticated dinner, these refined sugar-free caramelized apples are the ideal topping for an impressive range of both sweet and savory dishes. Fall dessert recipes hold a special place in my heart, and my family adores my Healthy Apple Crumble, my Grain-Free Pumpkin Cheesecake Bars, and The BEST Soft-Baked Pumpkin Cheesecake Cookies – but these caramelized apples are truly a game-changer!
Understanding the Key Ingredients
Crafting the perfect caramelized apples starts with selecting the right ingredients. Each component plays a crucial role in achieving that sought-after golden sweetness and tender texture. Here’s a detailed look at what you’ll need:
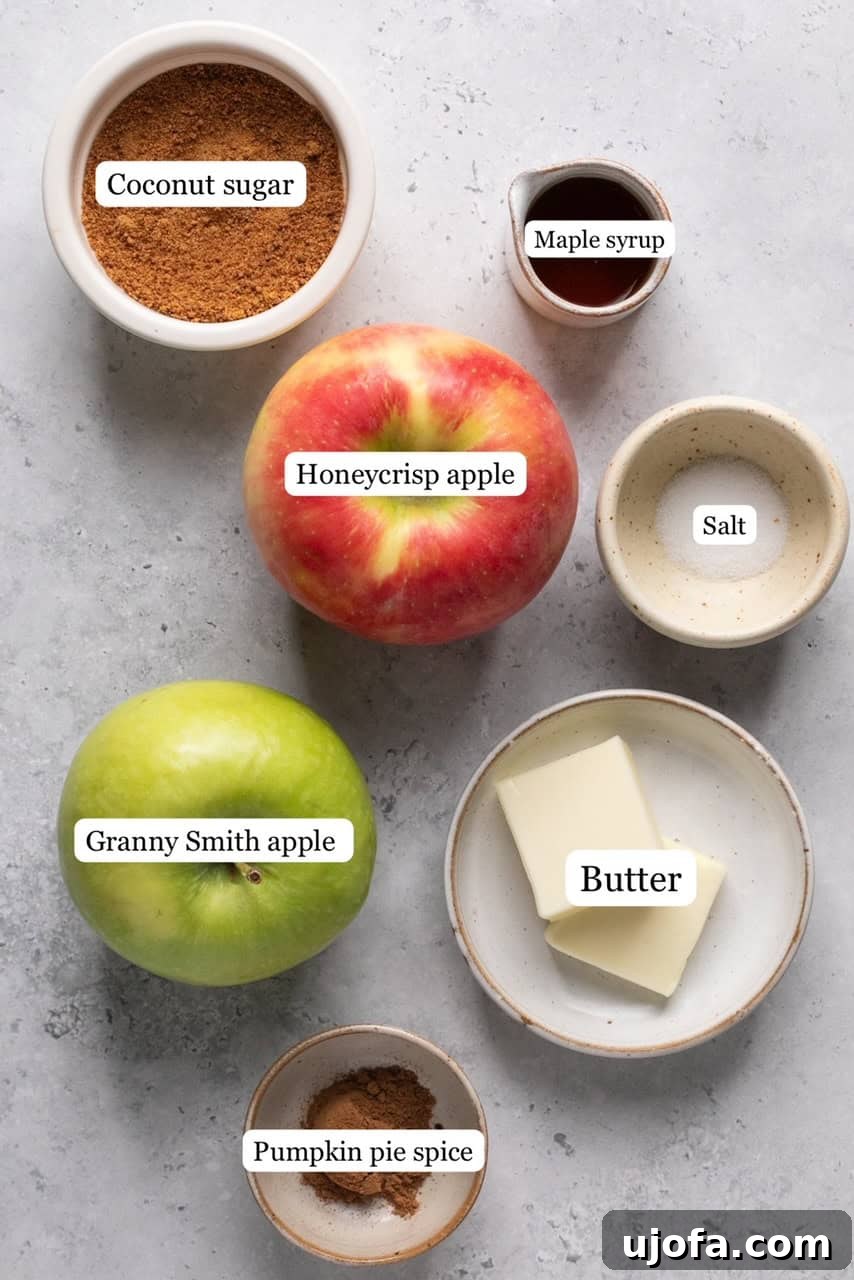
- Honeycrisp Apples: Or any other firm, naturally sweet red apple like Fuji, Gala, or Braeburn. These apples contribute a wonderful crispness and inherent sweetness that beautifully complements the caramelization process. Their robust structure ensures they hold their shape without turning mushy, while their sweet notes provide the “sweet” in our perfect sweet-tart combination.
- Granny Smith Apples: Or your preferred green apple variety. Granny Smiths are indispensable for their distinctive tartness, which expertly balances the sweetness of the other ingredients and the red apples. This sweet-tart duo is the secret to a caramelized apple that is neither overwhelmingly sweet nor too sour – it’s just right, creating a complex and delightful flavor profile.
- Butter: Essential for sautéing the apples and forming the rich, glossy caramel sauce. Butter adds depth, flavor, and helps the apples brown beautifully. For those following a dairy-free or vegan diet, high-quality vegan butter can be used as a seamless substitute without compromising on taste or texture.
- Coconut Sugar: My preferred choice for this recipe, making it a refined sugar-free delight. Coconut sugar boasts a lovely caramel-like flavor even before it’s cooked, which intensifies beautifully during the caramelization process. It’s a natural sweetener with a lower glycemic index compared to refined sugars, offering a healthier alternative without sacrificing sweetness. If you don’t have coconut sugar, you can certainly use regular brown sugar, though it will no longer be refined sugar-free.
- Pure Maple Syrup: Crucial for the best results, always opt for pure maple syrup (preferably Grade A dark, robust taste) over pancake syrup. Pure maple syrup adds a rich, distinctive sweetness and a wonderful depth of flavor that artificial syrups cannot replicate. It contributes to the luxurious consistency of the caramel sauce and enhances the autumnal notes.
- Pumpkin Pie Spice: This spice blend instantly evokes the comforting essence of fall. It typically includes cinnamon, nutmeg, ginger, and cloves, adding a warm, aromatic dimension to the apples. Start with the recommended amount and adjust to your personal preference – feel free to add a little more if you desire an extra punch of spice. Alternatively, apple pie spice can be swapped in for a slightly different, yet equally delicious, flavor profile.
- Sea Salt: A tiny pinch of sea salt is a game-changer in this recipe. It doesn’t make the apples taste salty, but rather enhances and balances all the sweet flavors, preventing them from becoming cloyingly sweet. It subtly highlights the apple’s natural notes and deepens the caramel undertones.
Step-by-Step Instructions for Perfectly Caramelized Apples
Making these caramelized apples is incredibly straightforward, even for novice cooks. Follow these simple steps to achieve tender, golden apples swimming in a luscious, refined sugar-free caramel sauce.
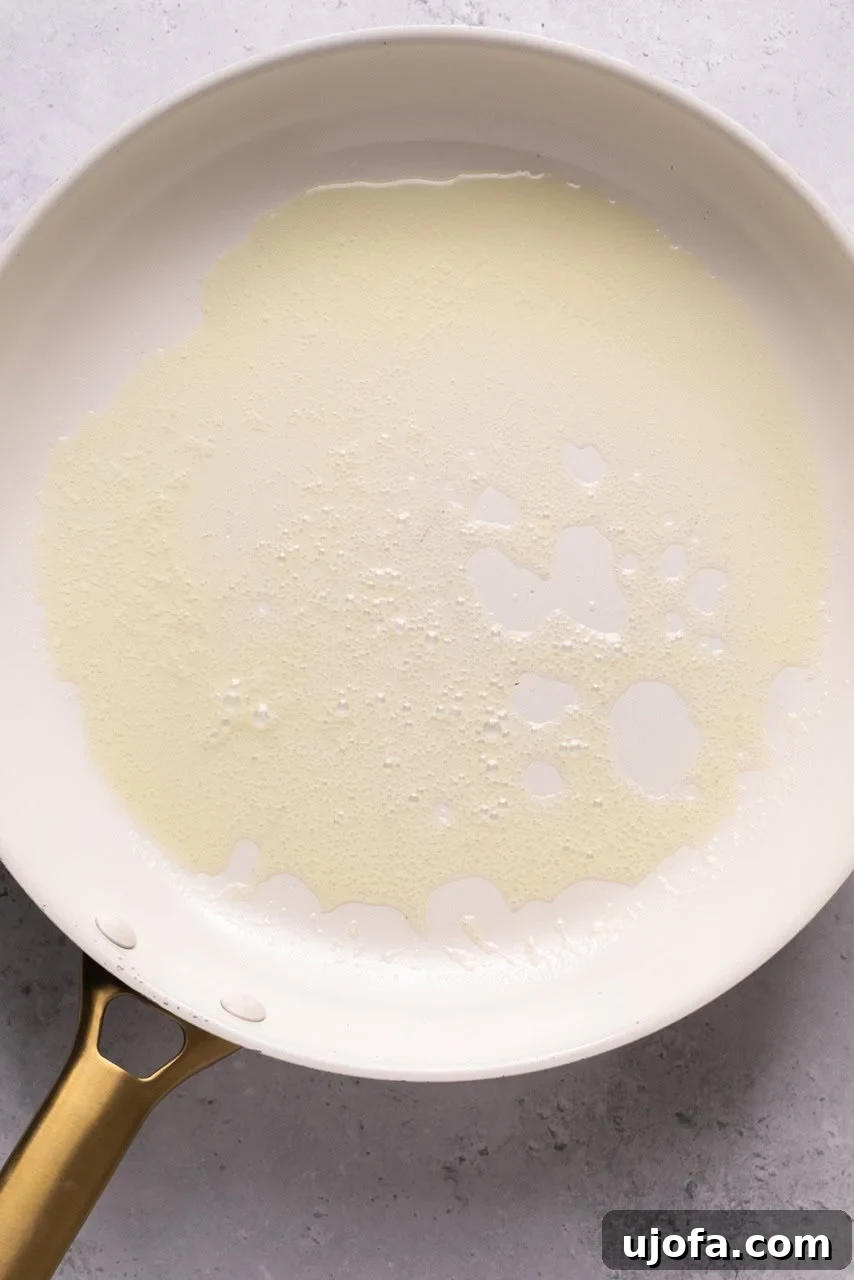
Step 1: Prepare Your Pan. Heat the butter of your choice (dairy or vegan) in a large, heavy-bottomed skillet over medium-high heat. Allow it to melt completely and become lightly bubbling, indicating it’s ready for the apples. This initial heat helps to achieve a beautiful sear on the apples.
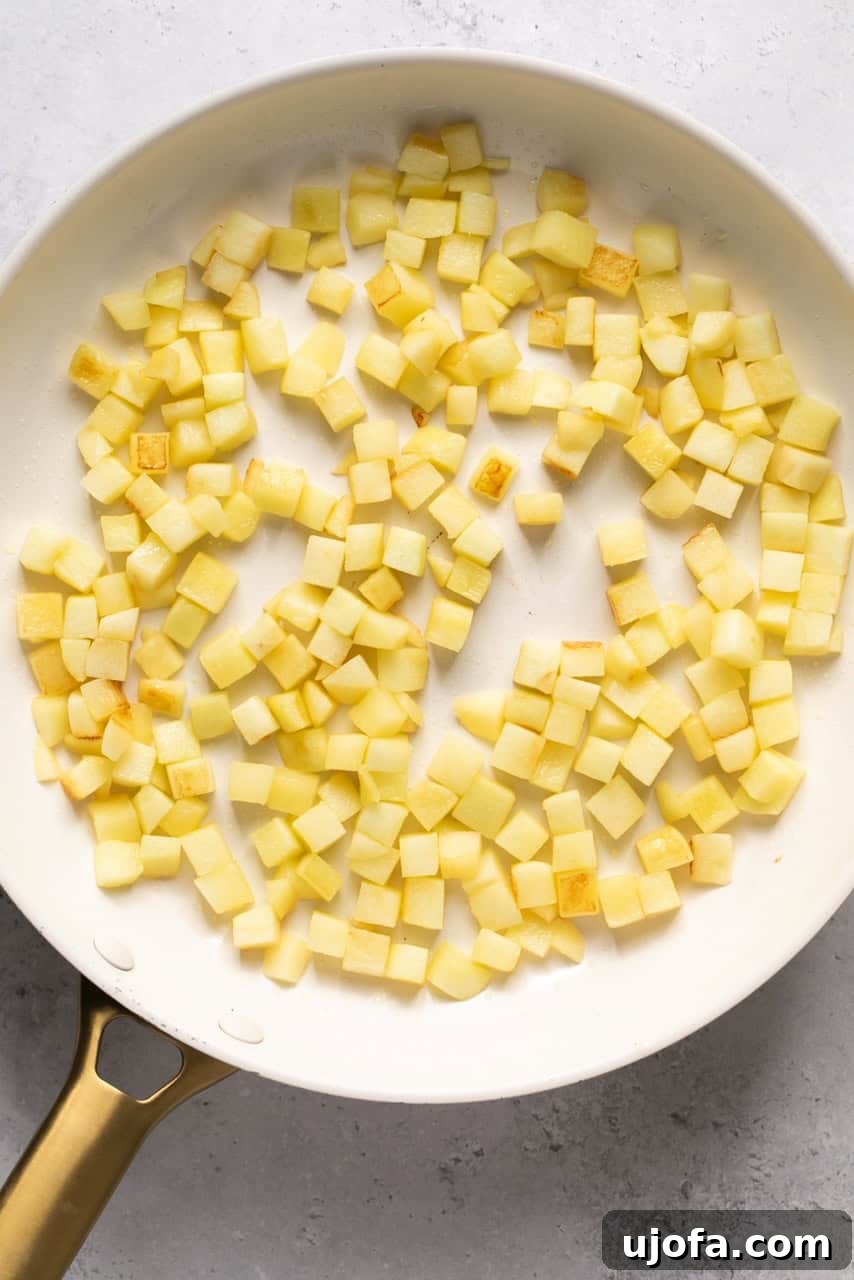
Step 2: Sauté the Apples. Add your cubed apples to the hot skillet. Cook them for 5-7 minutes, stirring occasionally. During this time, the apples will begin to soften and develop a lovely golden-brown hue on their edges. This step is crucial for developing the foundational texture and initial sweetness.
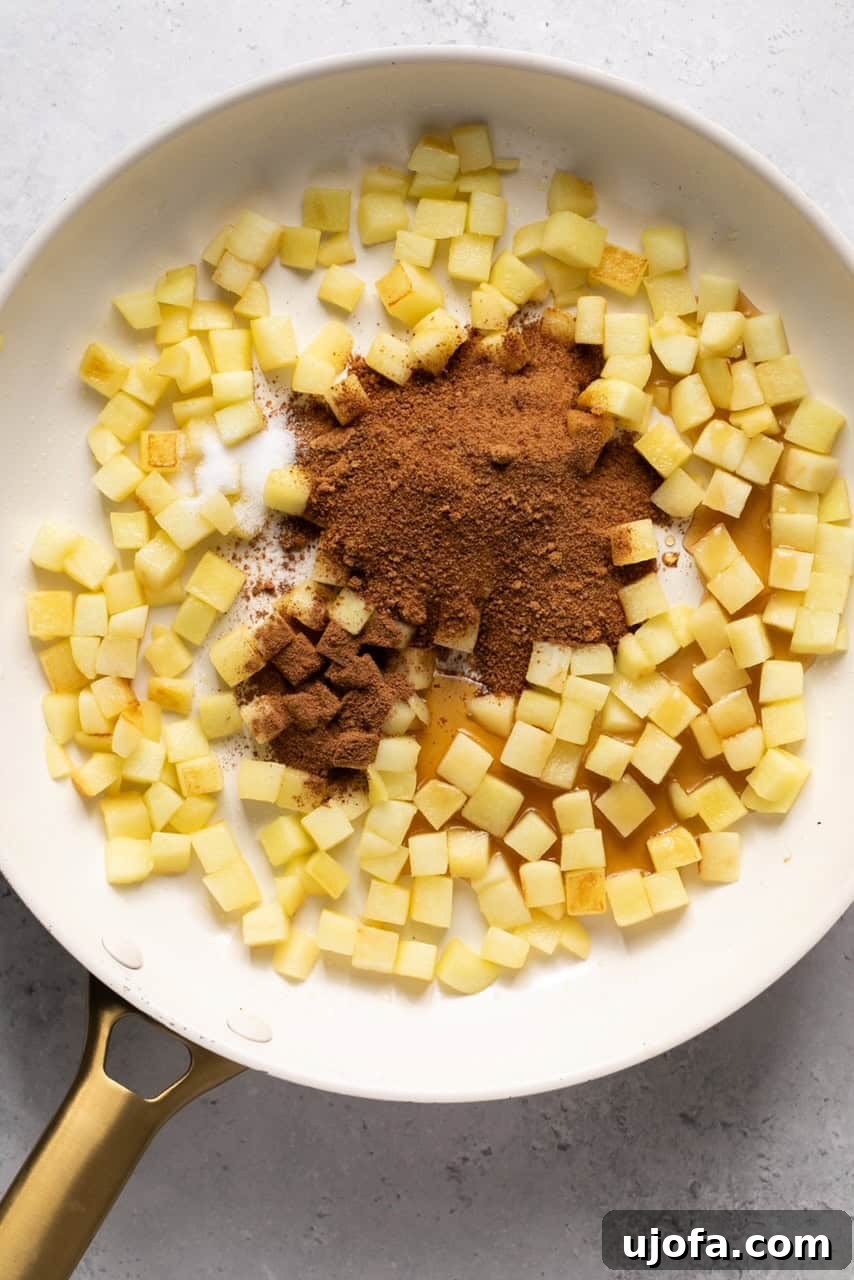
Step 3: Introduce the Sweeteners and Spices. Reduce the heat to medium to prevent burning. Now, add the coconut sugar, pure maple syrup, pumpkin pie spice, and a pinch of sea salt to the skillet with the apples. Stir everything together gently to ensure the apples are evenly coated with the sweet and aromatic mixture.
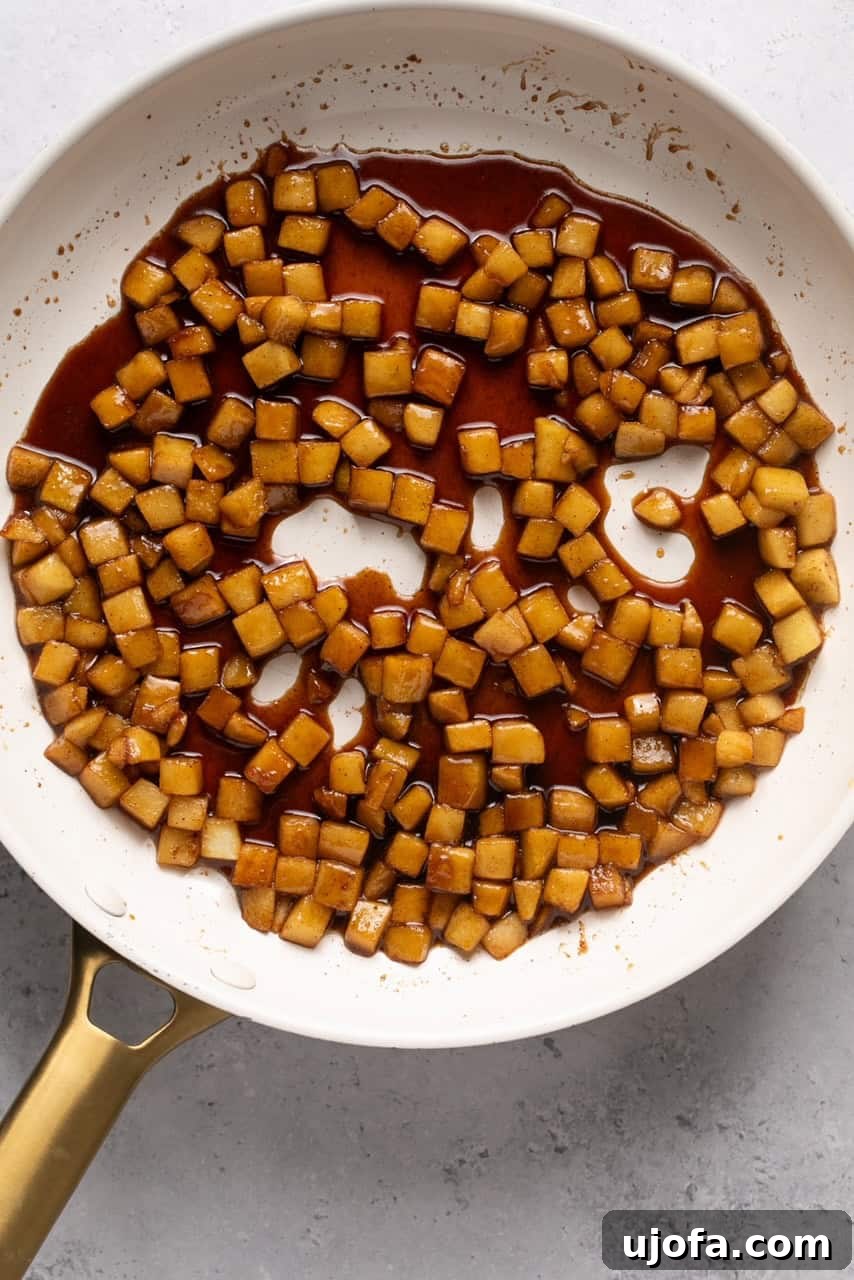
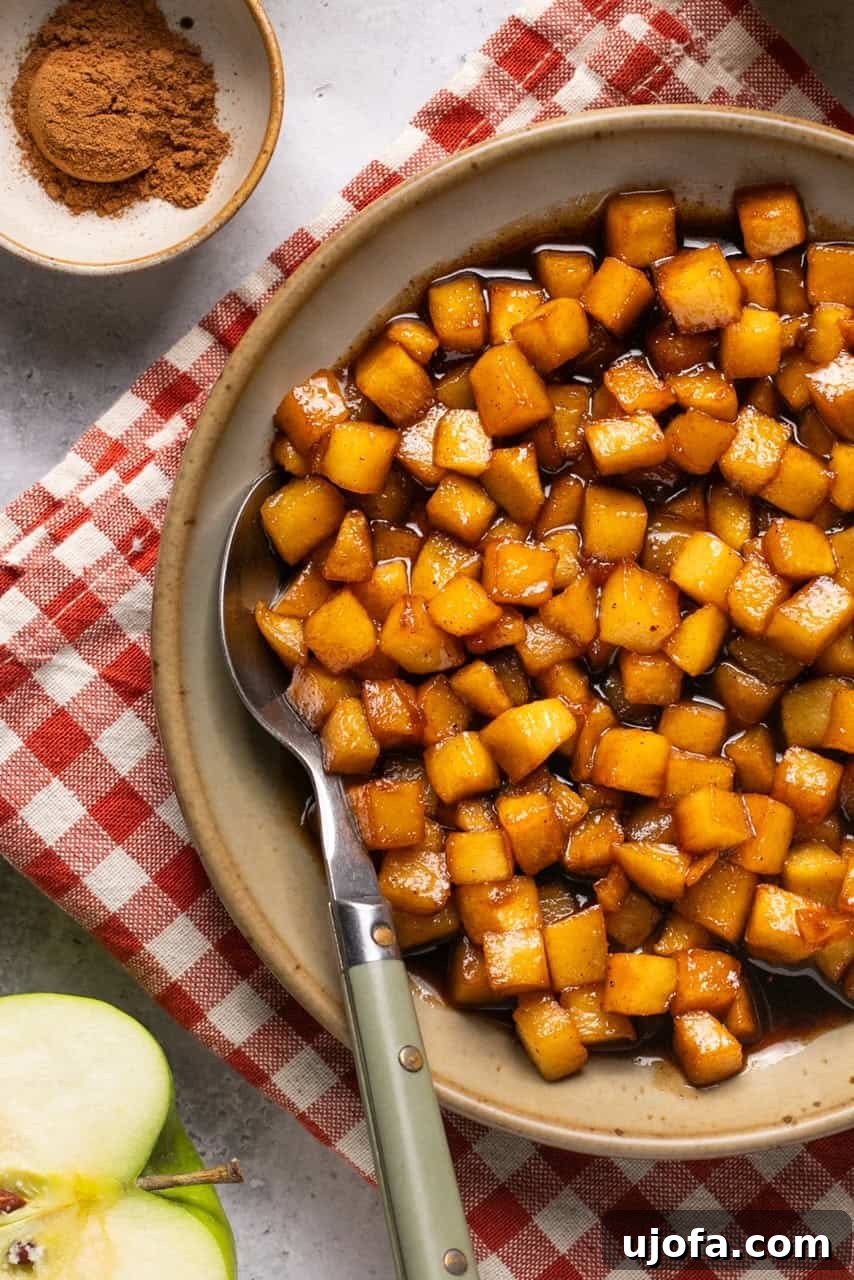
Step 4: Caramelize to Perfection. Continue stirring the apple mixture for another 2-3 minutes. As you stir, the sugars will melt and combine with the butter and apple juices, transforming into a glossy, thick, and irresistible caramel sauce that clings beautifully to the softened apples. Remove from heat and serve immediately for the best experience. Enjoy them over cottage cheese or with a scoop of ice cream on top!
Expert Tips for Flawless Caramelized Apples
Achieving perfectly caramelized apples is simple with a few insider tricks. These tips will help you create a batch that’s consistently delicious and beautifully textured every time:
- Prep Ahead for Success: Apples brown and oxidize quickly once cut. To prevent this, have all your other ingredients – butter, coconut sugar, maple syrup, spices, and salt – measured and ready in a large bowl before you even start cubing your apples. As soon as your apples are cut, add them to the hot pan to minimize browning.
- Choose Your Apples Wisely: The type of apple significantly impacts the final texture. Firm, sweet-tart apple varieties are the absolute best choice for caramelizing. Honeycrisp, Braeburn, Pink Lady, or Fuji apples hold their shape well under heat, offering a pleasant bite, while their natural sweetness and acidity create a balanced flavor profile. Avoid overly soft or mealy apples, as they will turn mushy during cooking.
- Consistency in Cutting: Aim for uniformly sized apple cubes, roughly ½ inch to 1 inch. This ensures even cooking, so all the apple pieces become tender at the same rate, without some being overcooked while others remain firm.
- Don’t Overcrowd the Pan: If you’re making a larger batch, consider working in two separate batches. Overcrowding the skillet will lower the pan’s temperature, causing the apples to steam rather than sauté and caramelize. You want them to get nicely browned, not just soft.
- Adjust Sweetness to Taste: While this recipe is balanced, feel free to adjust the amount of coconut sugar and maple syrup based on the natural sweetness of your chosen apples and your personal preference. Taste a piece of apple after step 4 and add a tiny bit more sweetener if desired, stirring until dissolved.
- Consider Adding Extra Flavor: A splash of pure vanilla extract (added at the very end), a tiny bit of lemon zest for brightness, or even a pinch of ground cardamom can elevate the flavor profile of your caramelized apples. Experiment to find your favorite additions!
Creative Serving Suggestions for Every Occasion
The true charm of these simple caramelized apples lies in their incredible versatility. They are a fantastic addition to countless dishes, transforming everyday meals into something special. Here are some of my favorite ways to enjoy them, from breakfast to dinner and everything in between:
- Dessert Delight: Serve them warm over a generous scoop of creamy vanilla ice cream. For an extra decadent touch, add a drizzle of rich caramel sauce or a sprinkle of chopped nuts. The contrast of warm apples and cold ice cream is simply divine.
- Breakfast Brilliance: Elevate your morning meal by spooning them over fluffy French toast, golden waffles, or warm, pillowy pancakes. The sweet, spiced apples soak into the bread or batter, creating an unparalleled flavor experience.
- Healthy Boost: Stir them into a bowl of plain or vanilla Greek yogurt or cottage cheese for a high-protein, fiber-rich, and incredibly satisfying option. It’s a delicious way to add natural sweetness and fruit to your diet.
- Oatmeal Upgrade: Fold these caramelized beauties into your morning oatmeal, transforming a simple bowl into a gourmet breakfast. The warm spices and tender apples make for a truly comforting start to your day.
- Savory Pairings: Don’t underestimate their potential in savory dishes! The sweet-tart profile of these apples pairs incredibly well with rich meats. Try them alongside my Air Fryer Pork Chops – trust me, the combination is sensational and will surprise your taste buds! They also work wonderfully with roasted chicken, duck, or even alongside a cheese board for a sophisticated appetizer.
- Pie Alternative: If you’re craving apple pie but don’t want the fuss of a crust, these caramelized apples are a perfect, lighter alternative. Serve them in a small ramekin with a dollop of whipped cream for a quick, comforting dessert.
Storage and Reheating Recommendations
While these caramelized apples are undeniably best when served fresh and warm, you can certainly prepare them in advance or save any leftovers. Proper storage ensures they remain delicious for future enjoyment.
- Refrigerator Storage: Any leftover caramelized apples can be stored in an airtight container in the refrigerator for 2 to 3 days. The flavors tend to meld even more over time, making them a fantastic make-ahead option.
- Freezer Storage: For longer storage, you can freeze these apples. First, allow them to cool completely to room temperature. Then, transfer them to an airtight freezer-safe container or a heavy-duty freezer bag. They can be frozen for up to 3 months. Freezing them flat in a bag can save space and allow for quicker thawing.
- Microwave Reheating: When you’re ready to enjoy your stored apples, simply place them in a microwave-safe dish. Reheat them in 30-second intervals, stirring in between, until they are warmed through to your desired temperature. Be careful not to overheat, which can make them too soft.
- Stovetop Reheating: For best results, especially if reheating a larger batch, transfer the apples to a large skillet. Turn the heat to low and stir occasionally until they are thoroughly warmed. This method helps maintain their texture and allows the sauce to gently re-thicken. You might add a tiny splash of water or apple juice if the sauce seems too thick.
Exploring the Nutritional Benefits of Apples
Apples are not just delicious; they are also packed with health benefits, making these caramelized apples a treat you can feel good about. Rich in fiber, especially soluble fiber, apples aid in digestion, help regulate blood sugar levels, and contribute to a feeling of fullness. They are also a good source of Vitamin C, an essential antioxidant that supports the immune system, and various other antioxidants that combat oxidative stress in the body. Choosing coconut sugar over refined sugar further enhances the nutritional profile, as coconut sugar retains some minerals and has a slightly lower glycemic index. Enjoying seasonal apples is a wonderful way to nourish your body while indulging in the comforting flavors of autumn.
Recipe FAQs: Your Caramelized Apple Questions Answered
Here are some common questions to help you master this delicious recipe and tailor it to your preferences:
While you can use whatever apples you prefer, this simple recipe will turn out best if firm, sweet-tart apples are used. Varieties like Honeycrisp, Granny Smith, Braeburn, Pink Lady, or Fuji are ideal as they hold their shape beautifully during cooking and offer a balanced flavor profile that prevents the dish from being overly sweet.
Absolutely! You can use brown sugar instead of coconut sugar if that’s what you have on hand or prefer. While coconut sugar keeps these caramelized apples refined sugar-free and complements the pumpkin pie spice beautifully with its subtle caramel notes, brown sugar works just as well. Both options will create deliciously sweet and caramelized results, though brown sugar will add a slightly different flavor depth.
There is no need to peel your apples before making this recipe! Leaving the skin on adds extra fiber, nutrients, and a rustic texture to the dish. It also makes the preparation even simpler and quicker, which is always a bonus!
To prevent mushy apples, ensure you use firm apple varieties and cut them into uniformly sized cubes. Also, avoid overcooking them. The goal is tender-crisp, not soft. Stick to the suggested cooking times and stir gently. If you prefer a firmer texture, reduce the cooking time slightly.
Yes, these caramelized apples are wonderful for meal prep! You can make them 2-3 days in advance and store them in an airtight container in the refrigerator. Reheat gently on the stovetop or in the microwave before serving. The flavors often deepen overnight, making them even more delightful.
More Delicious Fall Apple Recipes
If you’ve fallen in love with these caramelized apples, you’re sure to enjoy these other delightful fall-inspired apple recipes that capture the essence of the season:
Explore More Apple Delights
Sweet & Spicy Delicata Squash with Apples & Onions
Amazing Fall Harvest Salad with Maple Apple Cider Vinaigrette
Slow Cooker Sausage, Sauerkraut, and Apples (Whole30)
Grain Free Apple Crisp (Paleo, Gluten Free)
Caramelized Apples Recipe Card
How to Make Caramelized Apples (Refined Sugar-Free)
Mary Smith
5 mins
6 mins
11 mins
2 servings
These refined sugar-free **caramelized apples** are a delicious, golden, and easy way to elevate any dish this apple season. Made with coconut sugar, they’re an irresistible and healthier alternative to traditional apple pie filling!
Equipment
- Apple Peeler/Slicer/Corer (optional, but helpful for even cuts)
- Large Skillet (preferably heavy-bottomed or non-stick)
Ingredients
- 1 Honeycrisp apple, or preferred firm red apple, cored, peeled (optional), and cut into ½ inch – 1 inch cubes
- 1 Granny Smith apple, or preferred green apple, cored, peeled (optional), and cut into ½ inch – 1 inch cubes
- 2 tbsp butter (use vegan butter for dairy-free/vegan option)
- ¼ cup coconut sugar
- 1 tbsp pure maple syrup
- 1 tsp pumpkin pie spice (or apple pie spice)
- Pinch of sea salt
Instructions
- Heat the butter over medium-high heat in a large skillet until it’s melted and lightly bubbling.
- Add the cubed apples to the skillet and cook for 5-7 minutes, stirring occasionally. Cook until they begin to soften and develop a golden-brown color.
- Reduce the heat to medium. Add the coconut sugar, pure maple syrup, pumpkin pie spice, and sea salt to the skillet. Stir thoroughly to coat the apples evenly.
- Continue stirring for another 2-3 minutes as the apples finish softening and the mixture transforms into a rich, glossy caramel sauce.
- Serve immediately, perhaps over cottage cheese or with a scoop of vanilla ice cream, and enjoy!
Notes
- Prepare all other ingredients before cutting your apples, as apples oxidize (brown) quickly once exposed to air.
- Firm, sweet-tart apples like Honeycrisp, Braeburn, Pink Lady, or Fuji are recommended for the best texture and flavor balance.
- Leftover caramelized apples can be stored in an airtight container in the refrigerator for 2-3 days.
- For longer storage, cool apples completely, then freeze in an airtight container or freezer bag for up to 3 months.
- Reheat refrigerated apples in a microwave-safe dish in 30-second increments until warm.
- Alternatively, reheat on the stovetop in a skillet over low heat, stirring occasionally, until warmed through.
Nutrition
Serving: 1 cup | Calories: 291kcal | Carbohydrates: 50g | Protein: 1g | Fat: 12g | Saturated Fat: 7g | Polyunsaturated Fat: 1g | Monounsaturated Fat: 3g | Trans Fat: 0.5g | Cholesterol: 30mg | Sodium: 132mg | Potassium: 227mg | Fiber: 5g | Sugar: 38g | Vitamin A: 451IU | Vitamin C: 9mg | Calcium: 32mg | Iron: 0.4mg
All nutrition facts are an estimate and automatically calculated. While I fact check them using My Fitness Pal, please note that they may not always be 100% accurate and depend on ingredients used. Weigh your total and divide by the number of servings for the most accurate grams per serving size.
Love this recipe? Please leave a 5-star 🌟🌟🌟🌟🌟 rating in the comments section below! Or, follow me on Facebook, Pinterest or Instagram today!
Did you make this?
Rate & comment below, and tag me on Instagram @maryswholelife