
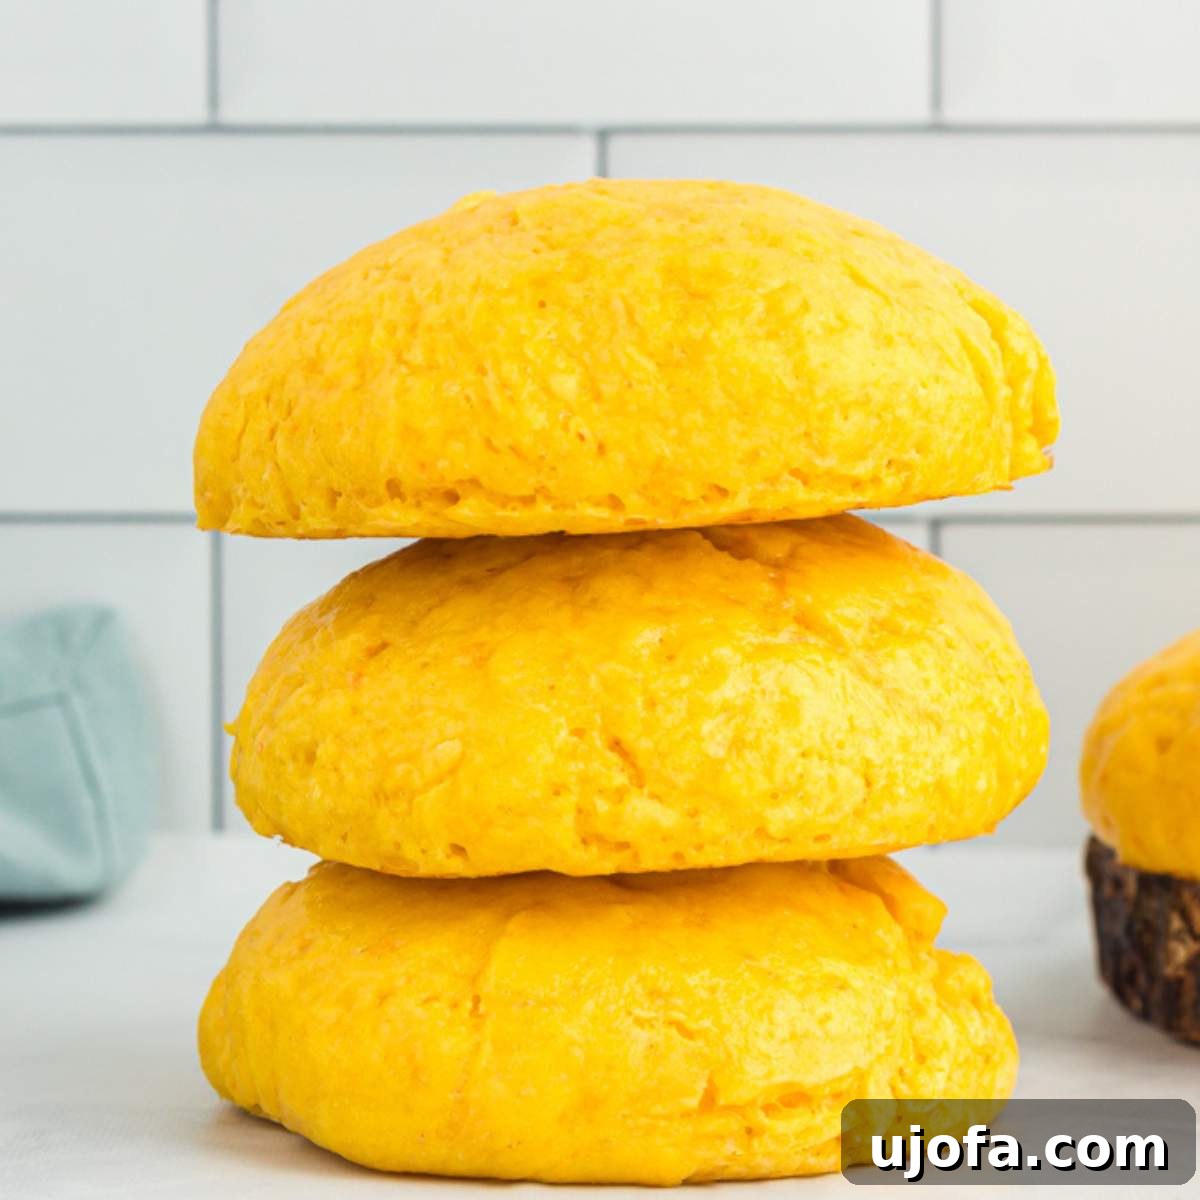
Imagine biting into a soft, fluffy, and slightly sweet bun that melts in your mouth – and it’s completely gluten-free! These Gluten-Free Sweet Potato Rolls offer a delightful autumn twist on traditional dinner rolls, making them an irresistible addition to your Thanksgiving feast, holiday potlucks, or simply as the perfect companion for a hearty, juicy burger. Preparing gluten-free bread can often be a daunting task, but this recipe has been meticulously tested to ensure a foolproof experience, delivering consistently delicious results that will impress even the most discerning palates. Say goodbye to dense, crumbly gluten-free bread and hello to light, airy rolls packed with flavor and moisture.
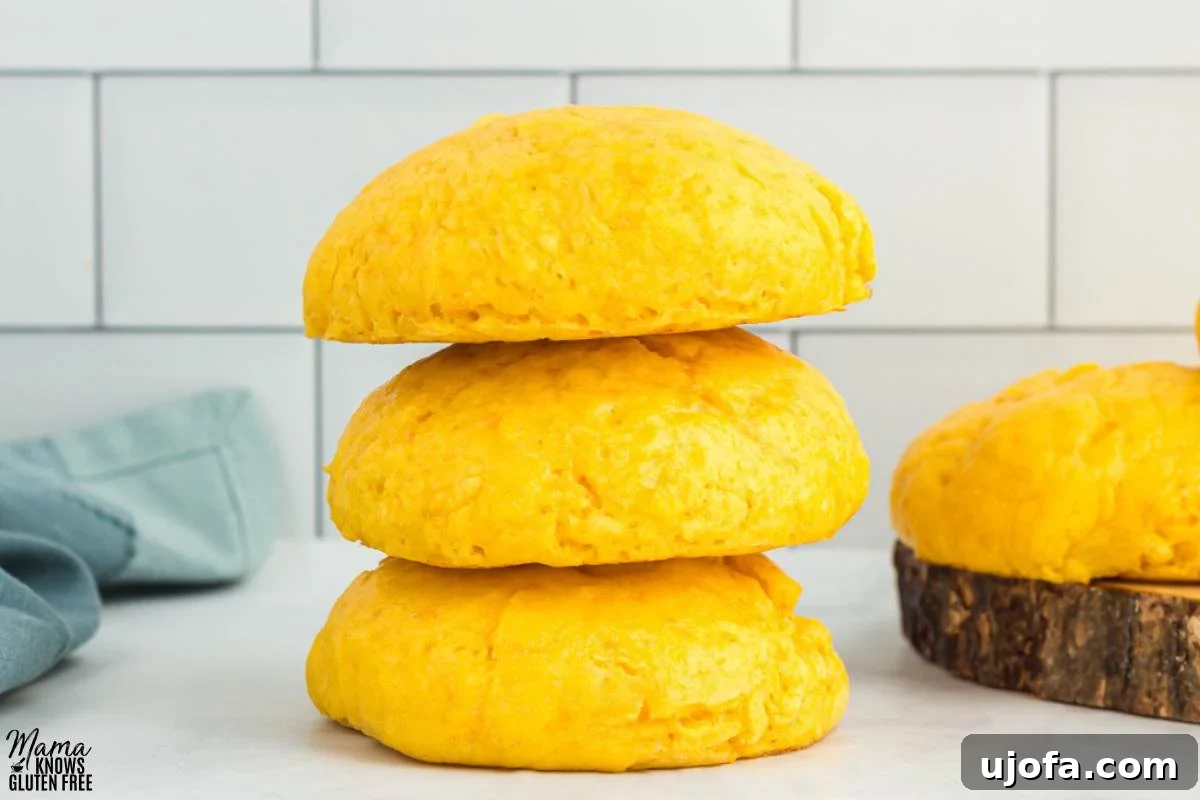
Crafting the Perfect Gluten-Free Sweet Potato Rolls: A Foolproof Guide
Creating truly exceptional gluten-free rolls that everyone can master might seem like a dream, but with this recipe, it’s a delicious reality! After countless tests and refinements, I’ve perfected a formula for light, tender, and incredibly flavorful gluten-free sweet potato rolls that are versatile enough for any occasion. Whether you’re serving them as elegant gluten-free dinner rolls for a festive Thanksgiving gathering, a comforting side for fall potlucks, or as a sturdy yet soft bun for your favorite burgers and sandwiches, these rolls are sure to become a staple in your kitchen. This guide will walk you through every step, from selecting the right ingredients to mastering the rising process, ensuring your success.
Before you begin your baking adventure, it’s crucial to thoroughly read all the notes and tips provided. In gluten-free baking, small details often make a significant difference. For instance, the exact temperature of your milk can drastically impact yeast activation, and using the correct type of gluten-free flour is paramount for achieving the desired texture. Take a moment to check your pantry and refrigerator to ensure you have all the ingredients at the recommended temperatures. Precision and patience are your best allies in creating these delightful sweet potato rolls.
Why Choose Sweet Potato Rolls?
Beyond their stunning color and naturally sweet flavor, sweet potatoes bring a host of benefits to these rolls. They act as a natural humectant, adding essential moisture that is often lacking in gluten-free baked goods, resulting in a much softer and less crumbly crumb. Nutritionally, sweet potatoes are powerhouses, rich in vitamins, minerals, and fiber, adding a healthy boost to your bread. This makes these rolls not just delicious, but also a more wholesome alternative to many traditional bread recipes.
Essential Ingredients for Fluffy Sweet Potato Rolls
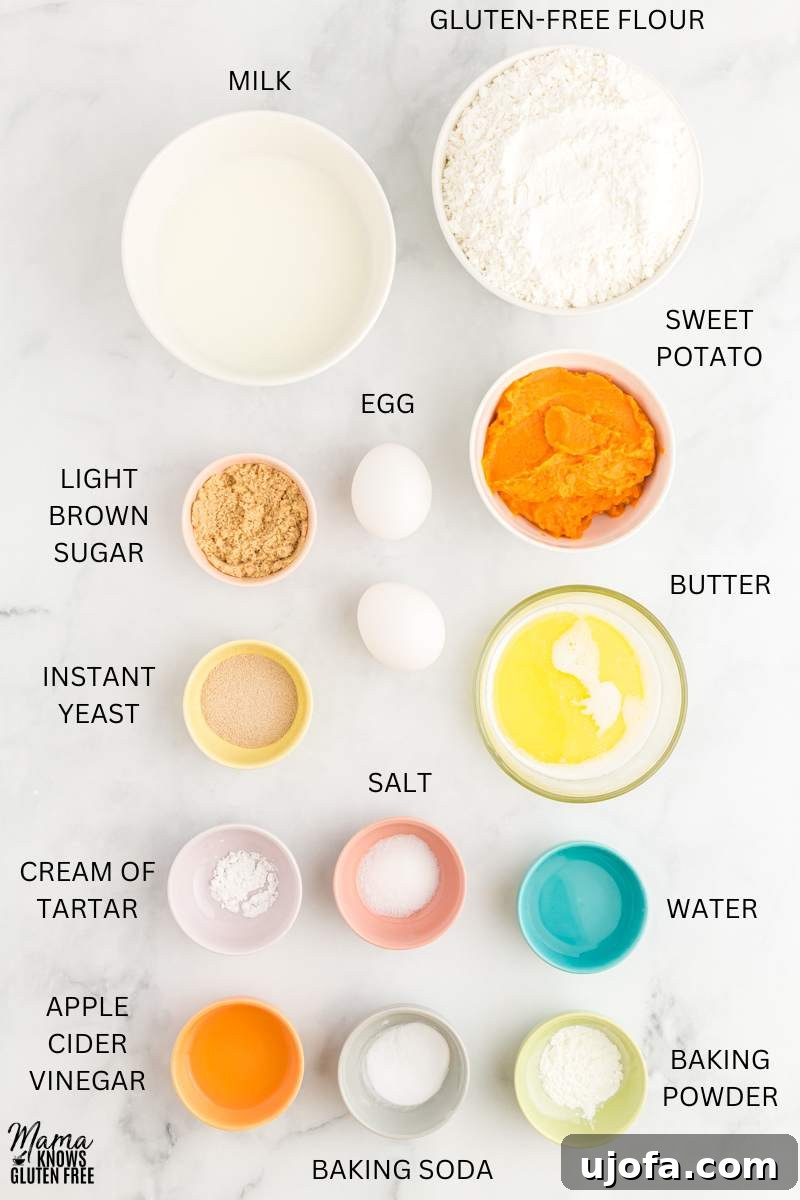
The success of these gluten-free sweet potato rolls hinges on a thoughtful selection and careful handling of each ingredient. Here’s a detailed breakdown of what you’ll need and why each component is vital:
- Milk: The temperature of your milk is critically important. It must be warm, precisely 115°F (46°C), to properly activate the yeast. Milk that is too hot will kill the yeast, preventing your rolls from rising. Conversely, milk that is too cold will inhibit yeast activity, leading to a sluggish rise or no rise at all. A food thermometer is your best friend here.
- Light Brown Sugar: This ingredient serves two key purposes: it adds a subtle, delicious sweetness to the rolls, enhancing the natural flavor of the sweet potato, and more importantly, it provides essential food for the yeast. The sugar helps to kickstart and sustain the yeast’s activity, contributing to a light and airy texture. Do not omit this or substitute it with honey or maple syrup, as the sugar’s chemical structure is vital for yeast activation in this specific recipe.
- Quick-Rise Instant Yeast: This type of yeast is preferred for its efficiency and reliability, ensuring your buns develop a wonderfully light and fluffy texture. Always check the expiration date on your yeast; old yeast will not activate properly, leading to flat rolls.
- Gluten-Free Flour Blend: This is arguably the most critical ingredient. Not all gluten-free flours are created equal, and using the wrong one can lead to gritty, dense, or rubbery rolls. It is imperative to choose a high-quality gluten-free flour blend specifically designed for baking with yeast. My preference is a rice flour blend like Cup4Cup Multipurpose Flour Blend due to its fine texture and neutral flavor that doesn’t become gritty. Ensure your chosen blend contains xanthan gum (or guar gum); if it doesn’t, you’ll need to add 1 teaspoon per recipe to provide the necessary structure that gluten typically offers.
- Salt: A fundamental flavor enhancer, salt balances the sweetness of the sugar and sweet potato, bringing all the flavors into harmony. It also plays a subtle role in controlling yeast activity, preventing it from over-fermenting too quickly.
- Baking Powder, Baking Soda, and Cream of Tartar: This powerful trio acts as a secondary leavening agent, working in conjunction with the yeast to give the rolls an extra lift and contribute to their exceptionally soft and tender crumb. Cream of tartar reacts with baking soda to create carbon dioxide, while baking powder provides an additional boost.
- Mashed Sweet Potato: This is the star ingredient that gives these rolls their unique flavor, beautiful color, and incredible moisture. Sweet potato not only adds a healthy boost of vitamins and fiber but also helps keep the rolls moist and tender, counteracting the tendency for gluten-free baked goods to dry out. Ensure it’s smoothly mashed and at room temperature.
- Eggs: Eggs serve as a binder, holding all the ingredients together and adding richness and structure to the dough. They also contribute to the rolls’ golden-brown crust and moist interior. Make sure your egg is at room temperature to prevent it from chilling the dough and hindering yeast activity.
- Unsalted Butter: Butter imparts a luxurious, rich flavor and contributes to the rolls’ tenderness. Using unsalted butter allows you to control the overall salt content of the recipe. Ensure it’s melted but not hot, as excessive heat can negatively affect the yeast.
- Apple Cider Vinegar: This might seem like an unusual addition, but apple cider vinegar plays a crucial role. It reacts with the baking soda to aid in rising and also works to tenderize the dough, resulting in a more delicate and pleasant texture.
Step-by-Step Guide: How to Make Gluten-Free Sweet Potato Rolls
Follow these detailed instructions carefully to ensure your gluten-free sweet potato rolls turn out perfectly light, fluffy, and utterly delicious.
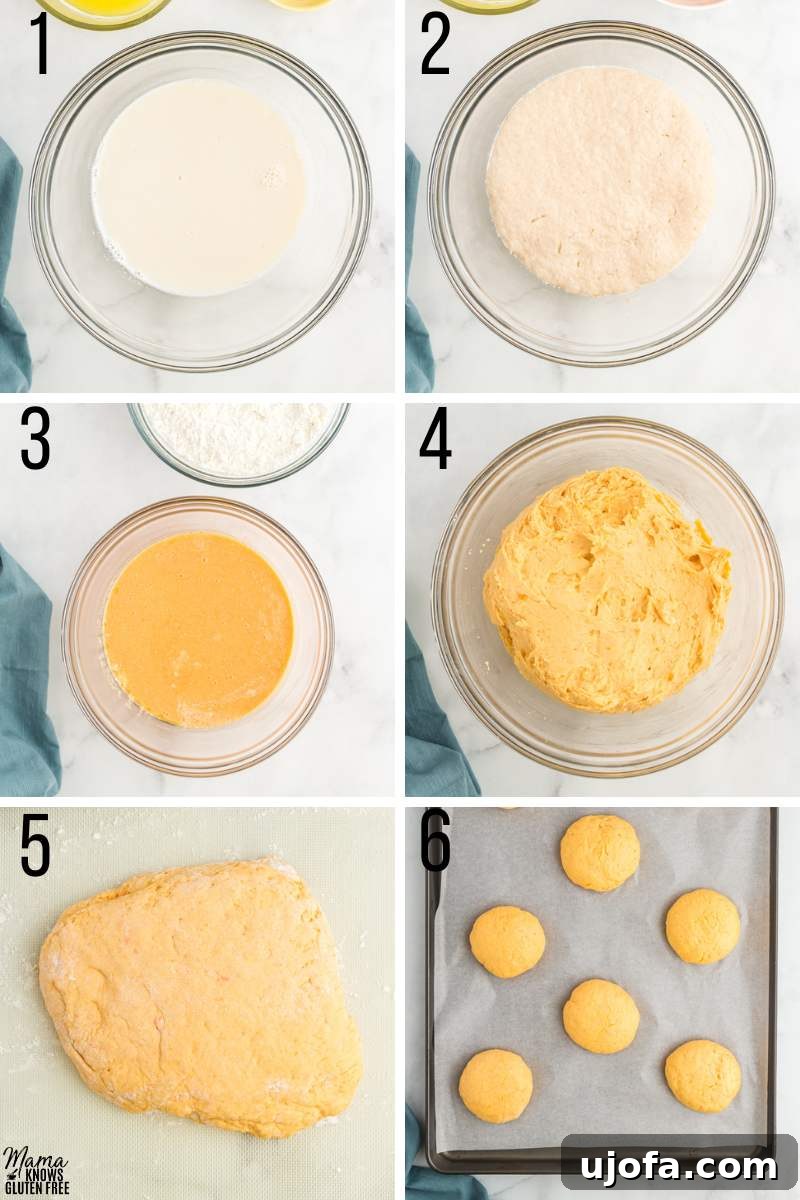
- Begin by preparing your yeast mixture. In a large mixing bowl, combine the warmed milk (ensuring it’s precisely 115°F/46°C using a food thermometer) and the light brown sugar. Stir these together until the sugar is fully dissolved. This creates a sweet, warm environment for the yeast to thrive.
- Next, sprinkle the quick-rise instant yeast over the milk and sugar mixture. Do not stir it in immediately. Let this mixture sit undisturbed for 10 minutes. During this time, the yeast should activate, and you will observe a foamy layer forming on the surface. This “bloom” indicates your yeast is alive and ready to work. If no foam appears, your yeast may be old or the milk temperature was off; refer to the “How Do I Know If My Yeast Is Still Good?” section below.
- While the yeast is activating, prepare your dry ingredients. In a separate medium-sized bowl, whisk together the gluten-free flour blend, salt, baking powder, baking soda, and cream of tartar until they are thoroughly combined. Set this bowl aside.
- Once your yeast mixture has bloomed, add the mashed sweet potato (at room temperature), the large room-temperature egg, the melted (but not hot) unsalted butter, and the apple cider vinegar to the bowl with the yeast. Stir all these wet ingredients together until they are well combined and uniform in consistency.
- Now, it’s time to bring the wet and dry ingredients together. Attach a dough hook to your stand mixer. With the mixer on low speed, slowly add the dry ingredients mixture to the wet ingredients. As the dough comes together, use a spatula to scrape down the sides and bottom of the bowl, ensuring all the dry ingredients are fully incorporated. Once combined, increase the mixer speed to medium and continue to knead the dough with the dough hook for a full 5 minutes. This develops the necessary structure for gluten-free dough.
- Prepare for the first rise. Lightly spray a separate large bowl with non-stick cooking spray. Using a greased spatula, carefully transfer the dough from the mixer bowl into this prepared bowl. The bowl should be large enough to allow the dough to almost double in size. Take a large piece of food-safe plastic wrap, spray one side with cooking spray, and cover the bowl with the oiled side facing down onto the dough. Place the covered bowl in a warm (slightly warmer than room temperature), draft-free spot for 1 hour to 1 ½ hours, or until the dough has visibly increased in size and nearly doubled. A turned-off oven (preheated slightly then cooled) with the door propped open can be an ideal spot in a cold house.
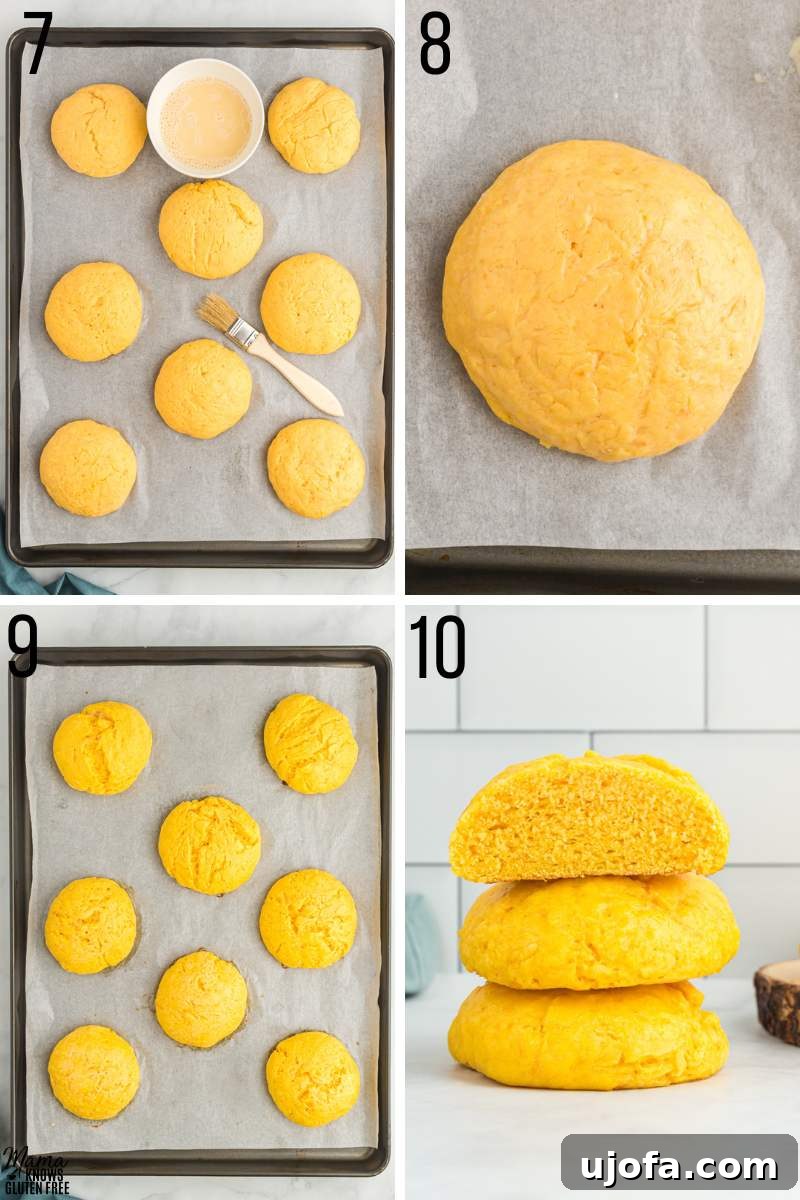
- While the dough is rising, line a large baking sheet (at least 21 x 15 inches to allow rolls ample space) with parchment paper. Set it aside, ready for the next step.
- After the first rise, gently transfer the dough to a lightly floured work surface (use gluten-free flour). Sprinkle your hands lightly with gluten-free flour or cooking spray to prevent sticking. Gently fold the dough over itself a few times to release any large air bubbles without overworking it. Remember, gentle handling is key at this stage.
- Divide the dough into 8 equal-sized portions. For consistent baking and appearance, use a food scale to ensure each roll weighs approximately 130 grams. Gently roll each portion between your hands to form a smooth, round ball. Avoid adding excessive flour during this step, as too much can dry out the rolls.
- Arrange the shaped rolls on your prepared baking sheet, ensuring they are placed at least 2 inches apart. This spacing is crucial to prevent them from sticking together as they rise and bake. Cover the tray loosely with a large piece of cooking-sprayed plastic wrap (oiled side down). Let the rolls undergo their second rise in a warm, draft-free location for another 1 hour to 1 ½ hours, or until they have visibly plumped up and grown in size.
- Approximately 15-20 minutes before the rolls are ready to bake, preheat your oven to 350°F (175°C).
- Prepare the egg wash: In a small bowl, whisk together one large room-temperature egg with one tablespoon of warm water until well combined. Just before placing the rolls into the oven, lightly brush this egg wash over the tops of each roll. This creates a beautiful golden crust and adds a slight shine.
- Bake the rolls for 17 to 19 minutes. To ensure they are fully cooked, use an instant-read food thermometer; the internal temperature should reach 180°F (82°C). The rolls should be golden brown on top.
- For an extra touch of indulgence, consider brushing additional melted butter over the rolls immediately after they come out of the oven. This adds extra flavor and a beautiful sheen.
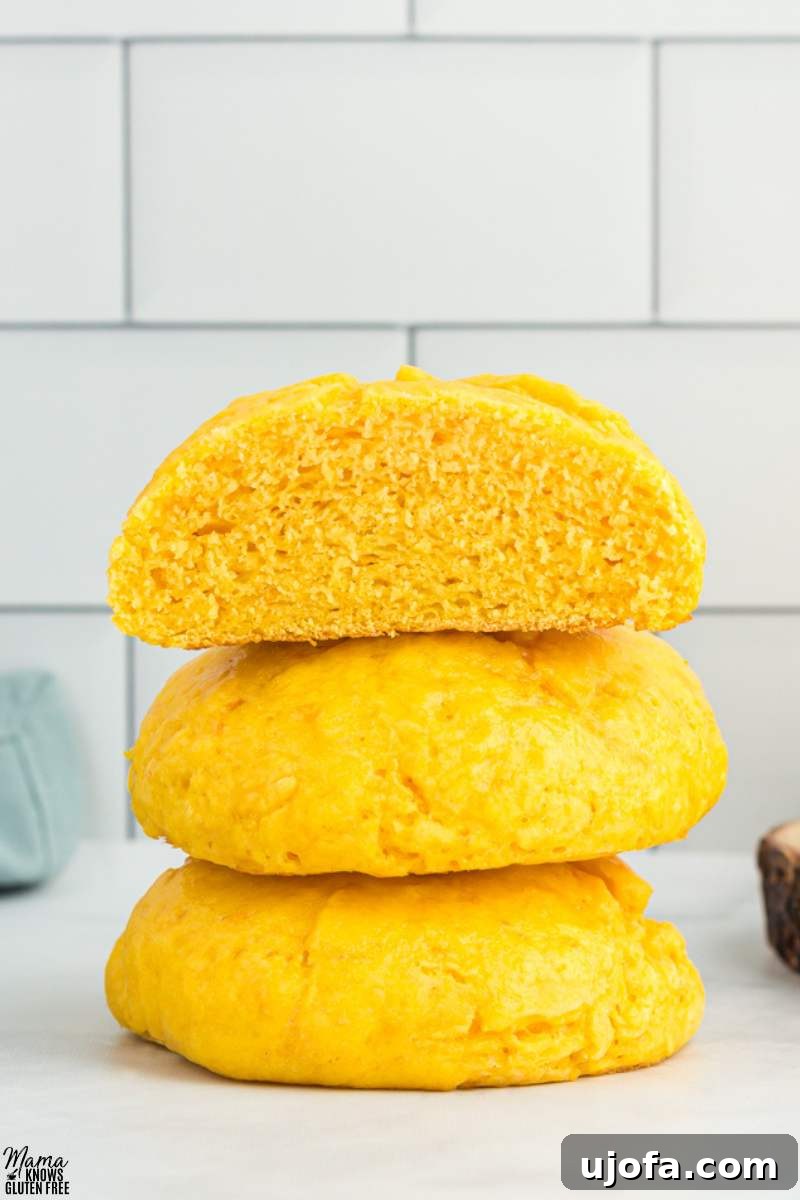
- Patience is a virtue! Allow the rolls to cool completely on the baking sheet or a wire rack before attempting to cut or serve them. Cutting hot rolls can release steam too quickly, leading to a dry interior. Cooling allows the internal structure to set, ensuring a perfectly moist and tender crumb.
Essential Equipment and Tools for Gluten-Free Baking Success
While some baking can be done with minimal tools, certain equipment can significantly enhance your gluten-free baking experience and guarantee the best results for these sweet potato rolls. Here’s what I recommend:
- Food Thermometer: Absolutely indispensable for accurately checking the temperature of your milk. Yeast is incredibly sensitive to temperature; too hot, it dies; too cold, it stays dormant. A thermometer ensures your milk is precisely 115°F (46°C) for optimal yeast activation.
- Food Scale: For consistent and accurate gluten-free baking, a food scale is a game-changer. Measuring flour by volume (cups) can lead to significant variations, which can drastically alter the texture of gluten-free dough. A scale ensures precise ingredient ratios and helps you divide the dough into equally sized rolls (approximately 130 grams each), promoting even baking.
- Stand Mixer with Dough Hooks: While hand-kneading is possible, a stand mixer with a dough hook attachment makes the kneading process much easier and more effective for gluten-free dough. It ensures thorough mixing and develops the necessary structure without overworking the dough, which can be tricky with sticky gluten-free varieties.
- Large Baking Sheet: A baking sheet measuring at least 21 x 15 inches provides ample space for 8 rolls. Proper spacing (at least 2 inches apart) is vital to allow the rolls to rise fully and bake evenly without crowding, ensuring they don’t stick together and develop a beautiful all-around crust.
- Parchment Paper: Lining your baking sheet with parchment paper is crucial for preventing the rolls from sticking. Gluten-free dough can be quite sticky, and parchment paper ensures easy removal and cleanup, preserving the perfect shape of your rolls.
- Pastry Brush: A pastry brush is ideal for gently applying the egg wash to the tops of the rolls, creating that desirable golden-brown and shiny crust without deflating the delicate dough.
Expert Tips for Baking the Best Gluten-Free Sweet Potato Rolls
Achieving bakery-quality gluten-free rolls is within reach with these expert tips:
- Room Temperature Wet Ingredients: Always ensure your wet ingredients, especially eggs and mashed sweet potato, are at room temperature. Cold ingredients can shock the yeast mixture, slowing down or even halting the activation process, which will result in dense rolls. Plan ahead and take them out of the refrigerator at least 30 minutes to an hour before you start.
- Perfectly Mashed Sweet Potatoes: The consistency of your mashed sweet potato is crucial. Mash them thoroughly until there are no large, hard chunks remaining. If you have a food processor or immersion blender, pureeing the sweet potato without adding any extra liquid (like water or milk) will yield the smoothest texture and best incorporation into the dough. Avoid adding any water, oil, or spices to the mashed sweet potatoes themselves, as this can alter the dough’s moisture balance.
- Accurate Flour Measurement: Gluten-free baking is often more sensitive to ingredient ratios than traditional baking. Use a food scale to measure your gluten-free flour precisely. Even a small amount too little or too much can significantly impact the final texture of your rolls, making them too dry and crumbly or too wet and sticky.
- Creating an Ideal Rising Environment: Yeast dough thrives in warmth and a draft-free environment. If your kitchen tends to be cold and dry, you can create a perfect proofing box: Preheat your oven to its lowest setting (around 200°F/95°C) for just a few minutes, then turn it off. Prop the oven door open slightly and let it sit empty for about 10 minutes to cool slightly. Once it’s warm but not hot, place your covered dough bowl or baking tray inside, leaving the oven door propped open slightly throughout the rising time. This provides a consistently warm, humid, and draft-free space. If you’re baking on a warm summer day, simply letting the dough rise at room temperature should be sufficient.
- Gentle Dough Handling After Rising: Once the dough has completed its first rise, handle it with extreme gentleness. Do not knead the dough again. Overworking the dough at this stage can deflate the precious air pockets created by the yeast, leading to a denser roll. You can gently fold it over a few times to release any excessively large air pockets, and then roll it lightly between your hands to form individual round balls.
- Preventing Sticky Dough: Gluten-free dough can sometimes be sticky. To prevent it from adhering to your hands during shaping, lightly spritz your hands with non-stick cooking spray or dust them very sparingly with gluten-free flour. Avoid adding too much extra flour directly to the dough, as this can dry out the final product.
Choosing the Best Gluten-Free Flour for Your Rolls
As repeatedly emphasized, the choice of gluten-free flour is paramount to the success of these sweet potato rolls. Gluten-free flours vary dramatically in their composition, texture, and baking properties, and what works for one recipe might fail miserably in another, especially when yeast is involved. For this particular recipe, you need a gluten-free flour blend that can interact effectively with yeast, provide a soft texture, and offer a pleasant, non-gritty taste.
My top recommendation for these rolls is a high-quality, rice-based multipurpose gluten-free flour blend, such as Cup4Cup Multipurpose Flour Blend. These blends are typically formulated with a balance of starches and flours that mimic the characteristics of wheat flour, resulting in baked goods that are light, airy, and free from the coarse, gritty texture often associated with single gluten-free flours. Crucially, these blends usually contain xanthan gum.
Why is Xanthan Gum Important? In traditional baking, gluten (a protein found in wheat) provides the elasticity and structure necessary for dough to rise and hold its shape. In gluten-free baking, xanthan gum (or sometimes guar gum) acts as a substitute, providing that essential binding and elasticity. Without it, your rolls would likely be dense, crumbly, and fail to rise properly. If the gluten-free flour blend you choose does not explicitly list xanthan gum or guar gum in its ingredients, you must add 1 teaspoon of xanthan gum to your dry ingredients mixture for this recipe to ensure proper structure and rise.
Flours to Avoid: While many gluten-free flours exist, certain types are simply not suitable for yeast-risen breads like these rolls. Avoid using oat flour or nut flours (like almond flour or coconut flour) as the primary flour for this recipe. These flours lack the necessary starch and protein structure to support yeast activity and will likely result in rolls that are heavy, dense, and will not rise adequately. Stick to a dedicated gluten-free all-purpose blend for the best outcome.
Ensuring Yeast Potency: How to Test Your Yeast
Yeast is a living organism, and like all living things, it has a shelf life. Using expired or inactive yeast is one of the most common reasons for failed bread recipes, especially in gluten-free baking where the yeast plays an even more critical role in leavening. Before you commit all your precious ingredients, it’s a wise practice to test your yeast to ensure it’s still potent.
The Yeast Activation Test:
- In a small bowl, combine your warm milk (at the precise temperature of 115°F/46°C, as tested with a food thermometer) and the light brown sugar from the recipe. Stir until the sugar is dissolved.
- Sprinkle the quick-rise instant yeast over this warm liquid.
- Let the mixture sit undisturbed at room temperature for about 10 minutes.
What to look for:
- Good Yeast: If your yeast is alive and active, the mixture will begin to foam, bubble, and develop a frothy layer on the surface. This “bloom” indicates that the yeast is consuming the sugar and producing carbon dioxide, which is exactly what you want for rising dough.
- Bad Yeast: If after 10 minutes the mixture remains flat, with no significant foaming or bubbling, and simply looks like milk with some yeast granules floating in it, your yeast is likely inactive or expired. In this case, do not proceed with that yeast. Discard it and purchase a fresh bag or jar of quick-rise instant yeast. It’s a small step that can save you from a disappointing baking experience.
Remember, yeast needs warmth (not heat, which kills it) and food (sugar) to activate properly. Getting these conditions right is fundamental for light and airy rolls.
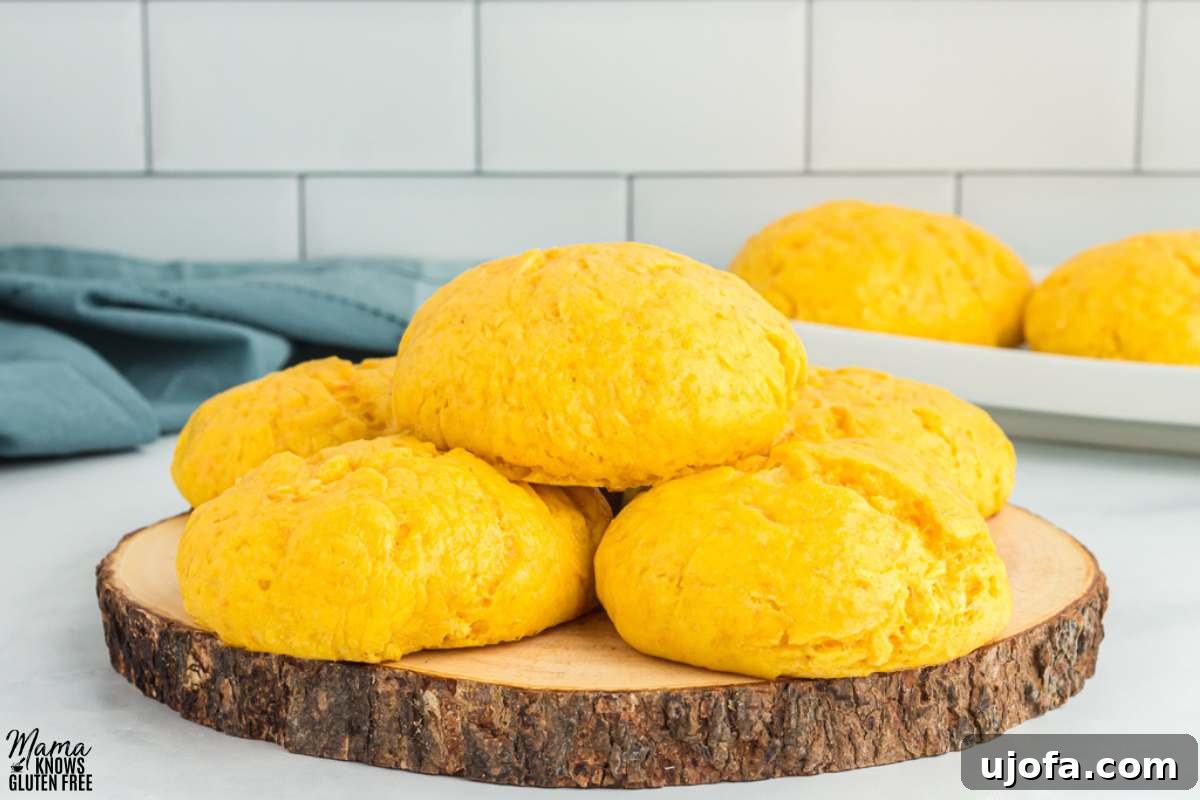
Patience is Key: Understanding the Timeline for Gluten-Free Sweet Potato Rolls
While the active preparation and baking time for these delicious gluten-free sweet potato rolls is surprisingly quick, totaling less than 35 minutes, it’s important to account for the crucial rising periods. The dough requires two distinct resting and rising stages, which collectively add at least 2 hours (and potentially up to 3 hours, depending on your kitchen environment and yeast activity) to the overall process. This means that from start to finish, you should allocate approximately 2 hours and 35 minutes to 3 hours for this recipe.
There’s simply no way to rush or skip these rising processes. Yeast-leavened breads, especially gluten-free ones, rely heavily on these periods for the yeast to work its magic, creating carbon dioxide bubbles that give the rolls their light, airy texture and characteristic volume. Attempting to shorten the rising times will inevitably lead to dense, heavy rolls that lack the desired fluffiness. Patience is not just a virtue in baking; it’s a non-negotiable requirement for achieving perfect results with yeast dough. Plan your baking session accordingly, allowing ample time for the dough to prove and develop properly.
Storage & Freezing Tips for Gluten-Free Sweet Potato Rolls
Once you’ve baked a batch of these glorious gluten-free sweet potato rolls, you’ll want to ensure they stay fresh and delicious for as long as possible. Proper storage is key to maintaining their soft texture and wonderful flavor.
- Room Temperature Storage: After the rolls have cooled completely to room temperature, transfer them to an airtight, food-safe container. Stored this way, they will remain fresh and delightful for up to 3 days on your countertop. For optimal freshness, you might consider wrapping individual rolls in plastic wrap before placing them in the container to protect them from air exposure.
- Freezing for Longer Freshness: These rolls freeze beautifully, making them an excellent option for meal prep or enjoying fresh rolls whenever a craving strikes. Once the rolls are entirely cool, place them in a single layer on a baking sheet and flash freeze them for about 1-2 hours until solid. This prevents them from sticking together. Then, transfer the frozen rolls to a freezer-safe bag or an airtight container, removing as much air as possible to prevent freezer burn. They can be stored in the freezer for up to two months.
- Thawing and Reheating: To enjoy frozen rolls, simply remove them from the freezer and let them thaw at room temperature for a few hours. For a warm, “freshly baked” experience, you can gently reheat them in a preheated oven at 300°F (150°C) for about 5-10 minutes, or until warmed through. You can also briefly warm them in a microwave, but be careful not to overdo it, as this can make gluten-free bread tough.
Remember to always allow the rolls to cool completely before storing them. Storing warm rolls will create condensation, which can lead to sogginess and premature spoilage.
Why These Gluten-Free Sweet Potato Rolls Will Become Your Favorite
There are countless reasons to fall in love with these flavorful gluten-free sweet potato rolls. For anyone navigating a gluten-free diet, finding a truly satisfying bread product can be a challenge. These rolls overcome that hurdle with flying colors, offering a texture and taste that rivals their gluten-containing counterparts.
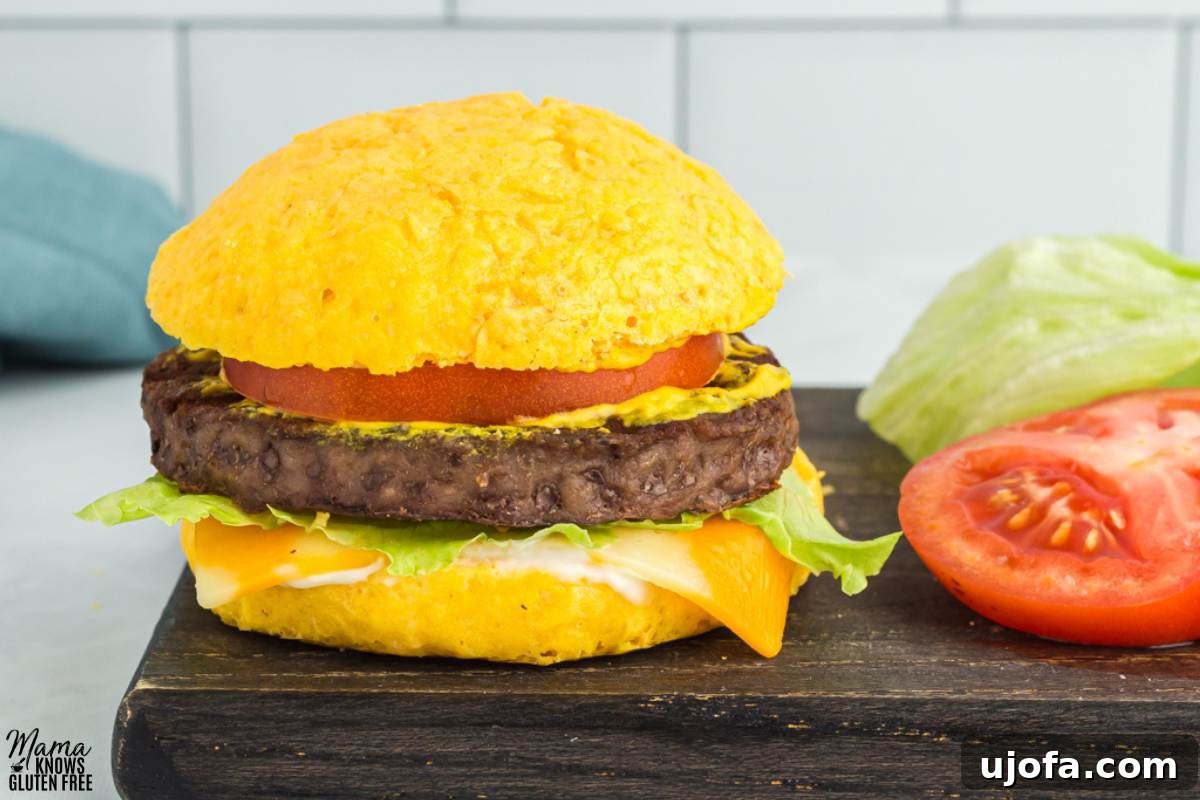
Their versatility is unmatched. They are absolutely fantastic with a traditional Thanksgiving dinner, soaking up all the rich flavors of gravy and holiday dishes. But their appeal extends far beyond the festive table. Imagine sinking your teeth into a juicy homemade burger nestled between two soft, slightly sweet sweet potato buns – a revelation for any burger night! They also make excellent bases for sandwiches, complementing both savory fillings like deli meats and cheeses, or even sweet spreads like jam. They’re also perfect alongside a warm bowl of soup or chili, or simply enjoyed on their own as a delicious snack.
My absolute favorite way to savor these rolls is when they’re slightly warmed in the oven, with a generous brush of extra melted butter on top. The warmth enhances their delicate aroma and soft texture, and the added butter creates an incredibly rich and comforting experience that is pure bliss. These rolls aren’t just a gluten-free alternative; they’re a delicious bread in their own right, guaranteed to be a hit with everyone, gluten-free or not.
Explore More Delicious Gluten-Free Bread Recipes!
If you’ve loved making these sweet potato rolls and are eager to expand your gluten-free baking repertoire, you’re in luck! The world of gluten-free bread is rich with possibilities, and with the right recipes, you can enjoy a variety of delicious, allergy-friendly options. Here are some more of my favorite gluten-free bread recipes that are sure to satisfy:
- Gluten-Free Focaccia: A wonderfully airy and flavorful Italian bread, perfect for dipping in olive oil or serving with meals.
- Easy Gluten-Free Bread: A staple recipe for everyday sandwiches and toast, proving that gluten-free bread can be simple to make and delicious.
- Gluten-Free Dinner Rolls: Classic, buttery rolls that are perfect for any dinner table, especially if you prefer a simpler flavor profile than sweet potato.
- Gluten-Free Naan: Soft, chewy Indian flatbread that’s ideal for scooping up curries and stews.
- Gluten-Free Cornbread: A sweet and crumbly cornbread that’s perfect with chili, BBQ, or as a comforting side.
★Did you make this recipe? Please give it a star rating below!★
Gluten-Free Sweet Potato Rolls
Share by Email
Print Recipe

Light and fluffy gluten-free sweet potato rolls perfect for serving with Thanksgiving dinner.
Ingredients
Sweet Potato Roll Dough
- 1 cup milk, warmed to 115°F
- 2 tablespoons light brown sugar, packed
- 1 tablespoon quick-rise instant yeast
- 3 ½ cups gluten-free flour blend (ensure it contains xanthan gum)
- 1 ½ teaspoons salt
- 1 teaspoon baking powder
- ½ teaspoon baking soda
- ¼ teaspoon cream of tartar
- ¾ cup mashed sweet potato, room temperature, pureed until smooth
- 1 large egg, room temperature
- ¼ cup unsalted butter, melted, but not hot
- 1 tablespoon apple cider vinegar
Egg Wash
- 1 large egg, room temperature
- 1 tablespoon warm water
- 2 tablespoons butter, melted, optional for brushing on rolls after baking
Instructions
- In a large bowl, stir the warmed milk and brown sugar together until dissolved.
- Stir in the yeast and let sit for 10 minutes. The yeast should activate and start to form a foamy layer on top.
- In a separate medium bowl, whisk together the gluten-free flour, salt, baking powder, baking soda, and cream of tartar. Set aside.
- In the bowl with the yeast mixture, add the mashed sweet potato, egg, melted butter, and apple cider vinegar. Stir until well combined.
- Using a mixer with a dough hook attachment, slowly mix the dry ingredients into the wet ingredients on low speed. Use a spatula to scrape down the sides and bottom of the bowl to make sure all the dry ingredients are fully mixed in. Increase mixer speed to medium and continue to knead the dough for 5 minutes.
- Spray a separate large bowl with non-stick cooking spray and transfer the dough to the new bowl using a greased spatula. This new bowl should have enough space for the dough to grow to almost double in size. Spray a large piece of food-safe plastic wrap with cooking spray and cover the bowl with the oil side down. Set the bowl aside for 1 hour to 1 ½ hours to allow the dough time to almost double in size. The dough should be kept in a warm (slightly warmer than room temperature) draft-free area.
- Line a large baking sheet with parchment paper and set aside.
- Once the dough has risen, lightly sprinkle gluten-free flour on a table or silicone baking mat. Transfer the dough to the surface and gently fold the dough over a few times to work out large air bubbles. Handle the dough gently. Spray your hands with non-stick cooking spray or lightly sprinkle on gluten-free flour to prevent the dough from sticking to your hands.
- Gently roll the dough in your hands to form 8 round rolls, each weighing about 130 grams. Do not add flour to the dough and be careful not to add too much flour to your work surface. Too much can dry out the rolls.
- Place rolls at least 2 inches apart on the prepared baking sheet. Spray a large piece of food-safe plastic wrap and cover the tray of dough rolls. Set this aside for 1 hour to 1 ½ hours to allow the rolls to rise again.
- Right before the rolls are ready to bake, preheat the oven to 350°F (175°C).
- For the egg wash, whisk together the egg and water. Lightly brush over the rolls right before baking.
- Bake for 17 to 19 minutes or until the internal temperature reaches 180°F (82°C).
- Optional: Brush melted butter over rolls when they first come out of the oven.
- Let the buns cool before cutting and serving. If you cut the buns when they’re still hot, this could cause the buns to dry out.
Notes
- For this recipe, you want a gluten-free flour with the right texture and taste. I prefer to use Cup4Cup Multipurpose Flour Blend (a rice flour blend) for rolls since it bakes up with a pleasant taste that isn’t gritty. Do not use an oat or nut flour as the buns won’t rise properly.
- The gluten-free flour needs to contain xanthan gum. If the gluten-free flour you choose does not include that or guar gum, add 1 teaspoon to the dry ingredients.
- Use a food scale to accurately measure ingredients like flour and making sure the rolls are the same size so they bake at the same speed. For making 8 rolls, each roll will be about 130 grams.
- Mash the sweet potatoes until no large, hard chunks are left. If you’re able to puree the sweet potato without adding any extra liquid, that’s even better. Do not add any water, oil, or spices to the sweet potatoes.
- Your baking sheet should be at least 21 x 15 inches to give the rolls space to rise without sticking to each other.
- The wet ingredients should be at room temperature. Adding them in cold will negatively affect the yeast.
- If your house tends to be cold and dry, preheating the oven to 200°F (95°C), turn it off, prop the door open, let the oven sit empty for 10 minutes, then place the dough inside to rest in the covered sprayed bowl or on the covered baking tray. Leave the oven door propped open the entire time the dough is rising. You just want a warm (not hot), draft-free place for your dough to rise. If you’re making these buns in a warm environment (or a hot summer day), then letting the dough rise at room temperature should be fine.
- After the dough rises, all handling of the dough should be light. Do not knead the dough after rising. You can gently fold it over several times to remove large air pockets and roll it in your hands to create round balls.
- If the dough is sticking to your hands, lightly spritz them with non-stick cooking spray or lightly dust with gluten-free flour.
- To store: These buns can remain at room temperature stored in an airtight food-safe container for up to 3 days.
- To freeze: The buns can be frozen for up to two months.
- Mama says, “Make sure to always check your labels!
Nutrition Information (Approximate Per Serving)
Serving: 1 roll | Calories: 321kcal | Carbohydrates: 48g | Protein: 9g | Fat: 13g | Saturated Fat: 6g | Polyunsaturated Fat: 1g | Monounsaturated Fat: 3g | Trans Fat: 0.4g | Cholesterol: 73mg | Sodium: 565mg | Potassium: 202mg | Fiber: 6g | Sugar: 6g | Vitamin A: 382IU | Vitamin C: 5mg | Calcium: 108mg | Iron: 2mg
Nutrition information is automatically calculated and should only be used as an approximation. Individual results may vary based on exact ingredients and preparation.
Additional Info
Tried this recipe?
Mention @mamaknowsglutenfree or tag #mamaknowsglutenfree!