Delicious Homemade Strawberry Reduction Sauce: Your Ultimate Gluten-Free Topping & Flavor Enhancer
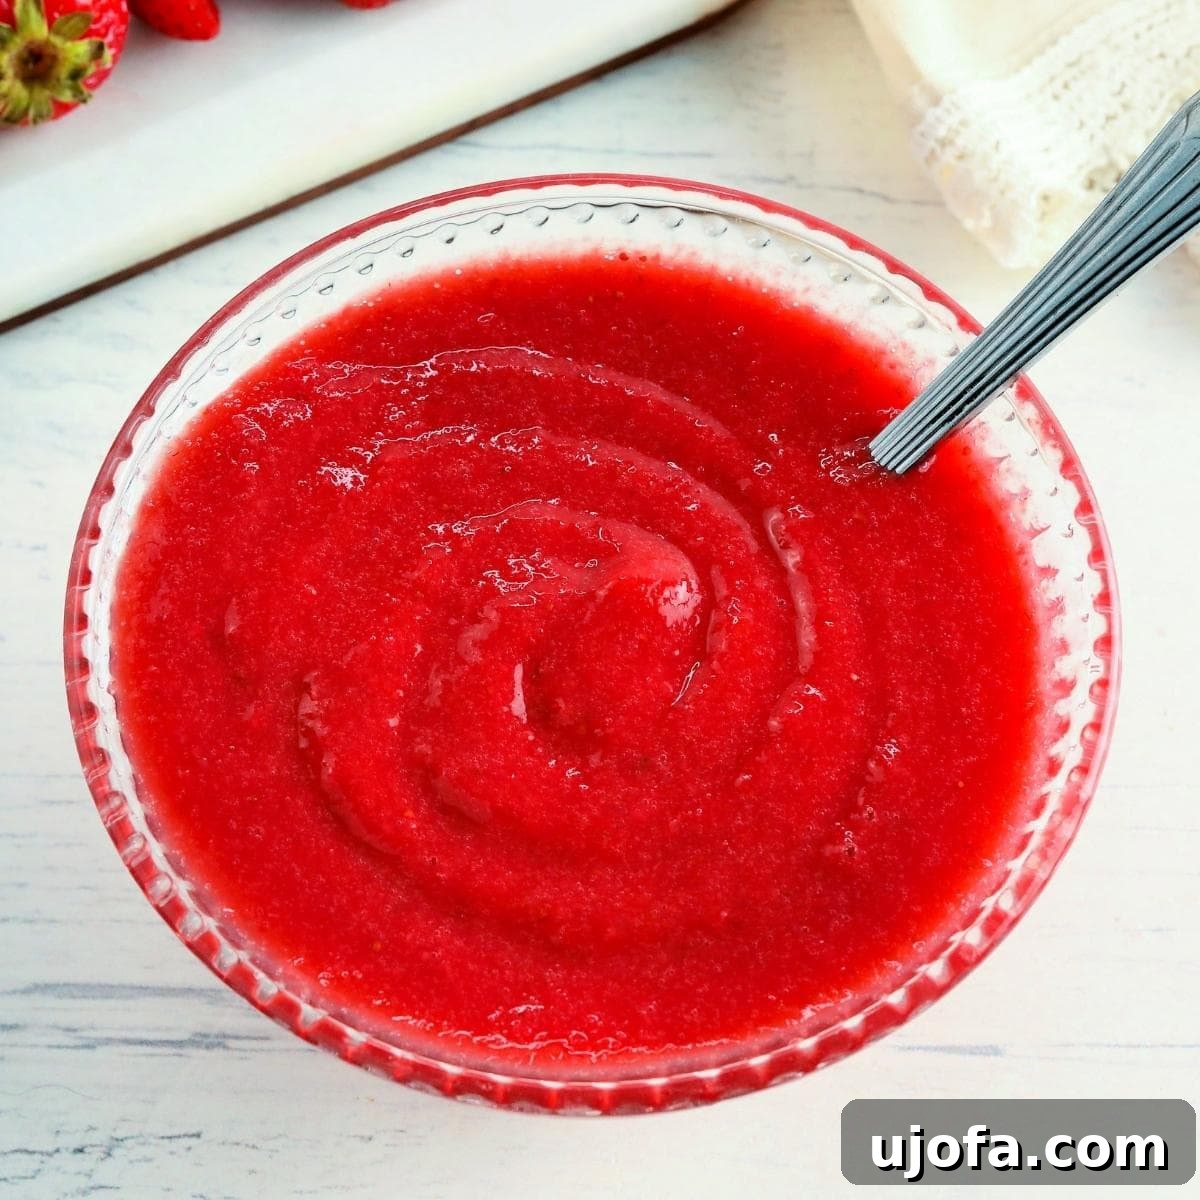
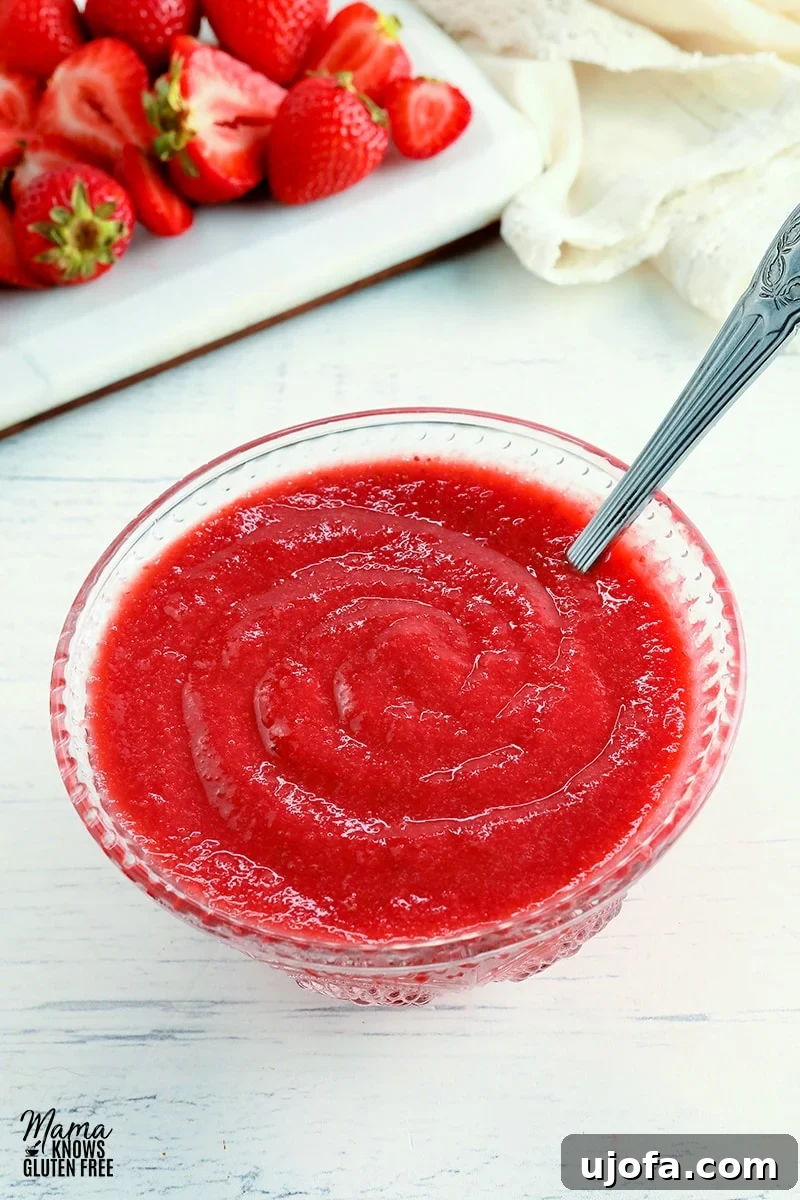
There’s nothing quite like the vibrant flavor of fresh strawberries, and when you find yourself with an abundance of these juicy gems, making a strawberry reduction sauce is an absolute must. This incredibly easy and naturally gluten-free recipe transforms simple strawberries into a rich, luscious, and intensely flavorful sauce that will elevate any dessert or baked good. Tangy, sweet, and bursting with the pure essence of summer strawberries, this homemade reduction is a culinary secret weapon. While my kids love it generously drizzled over ice cream, I find its complex sweetness and slight tartness to be a perfect complement to rich cheesecakes, or as a delightful flavor infusion for homemade cakes and cupcakes. It’s a truly versatile creation that brings a touch of gourmet elegance to everyday treats, proving that delicious can also be simple and wholesome.
What is Strawberry Reduction Sauce?
A strawberry reduction sauce is essentially concentrated strawberry flavor captured in a thick, glossy liquid. The process of “reducing” involves simmering the fruit with a bit of sugar and sometimes lemon juice, allowing the water content to evaporate slowly. This leaves behind a more intense, richer flavor and a much thicker consistency than a simple strawberry puree or compote. Unlike jams or jellies, which often rely on pectin for setting, a reduction thickens naturally as the water evaporates and the sugars caramelize slightly. The result is a vibrant, deeply flavored sauce that offers a more sophisticated taste profile compared to fresh berries alone, making it ideal for incorporating into batters or as an elegant topping.
The Simple & Sweet Strawberry Reduction Recipe
Creating this irresistible strawberry reduction sauce is remarkably straightforward and requires minimal effort, taking approximately 30 minutes from start to finish to achieve its perfect consistency. The magic happens as fresh or frozen strawberries are gently simmered in a saucepan with granulated sugar and a touch of lemon juice. This gentle heat coaxes the strawberries to break down, releasing their juices and slowly thickening into a luscious, intensely flavored sauce. The reduction process concentrates the natural sweetness and tang of the fruit, resulting in a sauce that is significantly thicker and boasts a more profound flavor than a basic strawberry puree. Its rich texture and vibrant taste make it an incredibly versatile addition to your culinary repertoire. Once prepared and cooled, I always ensure I have a container of this delightful sauce tucked away in my freezer, ready to infuse a burst of strawberry goodness into countless dishes, such as my beloved gluten-free strawberry cupcakes.
Key Ingredients for Perfect Strawberry Reduction
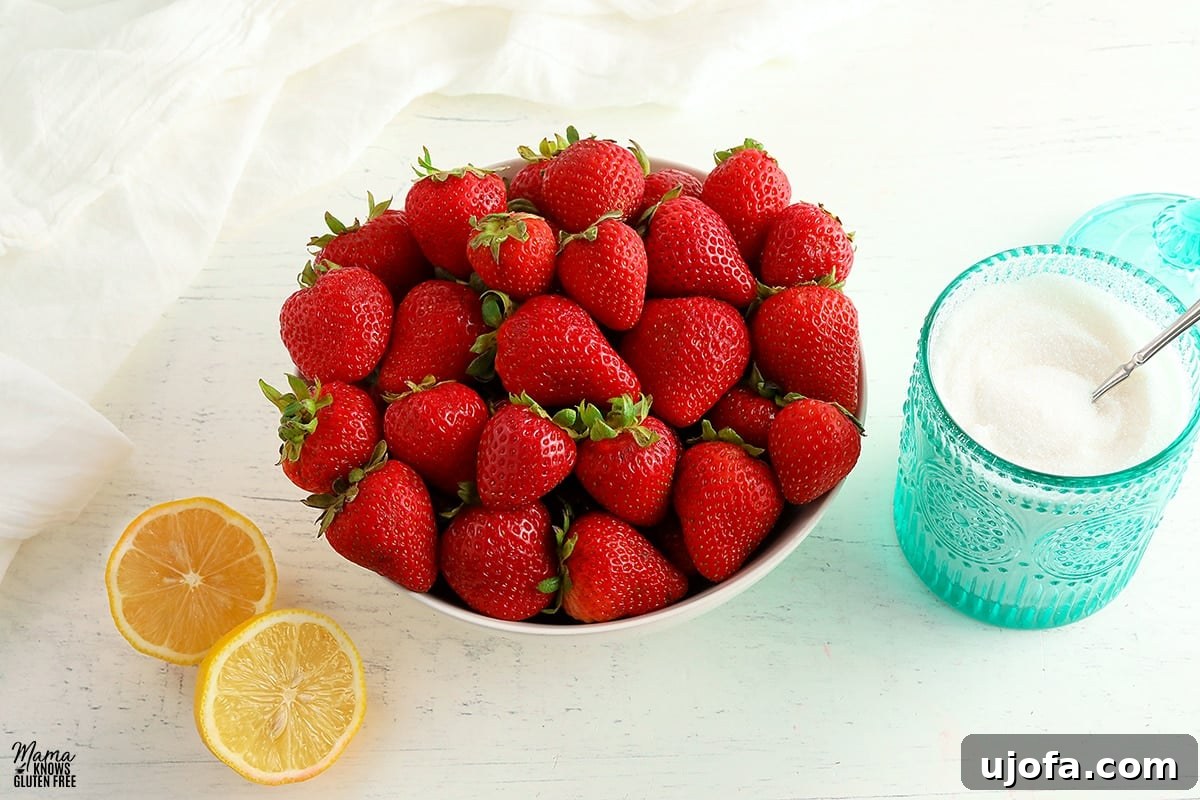
Only a few simple ingredients are needed to create this spectacular strawberry reduction sauce, making it accessible and easy to whip up anytime you crave that concentrated berry flavor.
- Strawberries: The star of our show! You have the flexibility to use either fresh or frozen strawberries for this recipe, and both yield equally delicious results. Fresh, ripe, in-season strawberries will provide the most vibrant flavor, but frozen strawberries are an excellent alternative, offering convenience and consistent sweetness year-round. If opting for frozen berries, remember to defrost them thoroughly before pureeing to ensure a smooth consistency and even cooking. Look for bright red, shiny fresh berries that are firm to the touch. Avoid any that are soft, shriveled, molded, or wet at the bottom of the container, as these indicate overripeness or spoilage.
- Granulated Sugar: Beyond merely adding sweetness, granulated sugar plays a crucial role in the texture and preservation of the sauce. It helps to thicken the reduction as it cooks by drawing out moisture from the strawberries and, through the reduction process, contributes to that lovely glossy finish. The sugar also acts as a natural preservative, extending the shelf life of your homemade sauce.
- Lemon Juice: While entirely optional, I highly recommend including a tablespoon of fresh lemon juice. Its bright acidity cuts through the sweetness of the strawberries and sugar, enhancing and balancing the overall flavor profile. It prevents the sauce from becoming overly sweet and adds a delightful tangy lift that truly makes the strawberry flavor sing. Think of it as a natural flavor enhancer that makes the sauce even more vibrant and refreshing.
- Optional Enhancements (for added depth): For those looking to subtly enhance the flavor even further, consider adding a tiny pinch of salt (it miraculously makes sweet flavors pop!) or a splash of vanilla extract after the sauce has cooled slightly for a warm, aromatic note. A very small dash of balsamic vinegar can also add an unexpected depth and complexity, complementing the strawberries beautifully.
Step-by-Step Guide: How to Make Strawberry Reduction Sauce
Follow these detailed steps to create a perfect batch of homemade strawberry reduction sauce. For best results, I highly recommend preparing this sauce several hours in advance or even the night before you plan to use it in baked goods or batters. It must be completely cooled to avoid altering the consistency of your desserts.
Preparation is Key: Washing & Hulling Strawberries
- Wash the Strawberries: It’s crucial to properly clean your berries to remove any dirt, pesticides, or residues. My preferred method is to soak them in a water and vinegar mixture. To do this, combine 3 cups of cold water with 1 cup of white vinegar in a large bowl. Add your strawberries to this mixture and let them soak for about 5 minutes. Don’t worry, your berries will absolutely not taste like vinegar! The vinegar helps sanitize and clean the fruit effectively.
- Rinse and Dry: After soaking, drain the strawberries thoroughly and rinse them under cold tap water. This step is essential to wash away any residual vinegar flavor and loose debris. Finally, pat the berries completely dry with paper towels or a clean kitchen towel. Excess moisture can affect the consistency of your sauce and the effectiveness of the reduction.
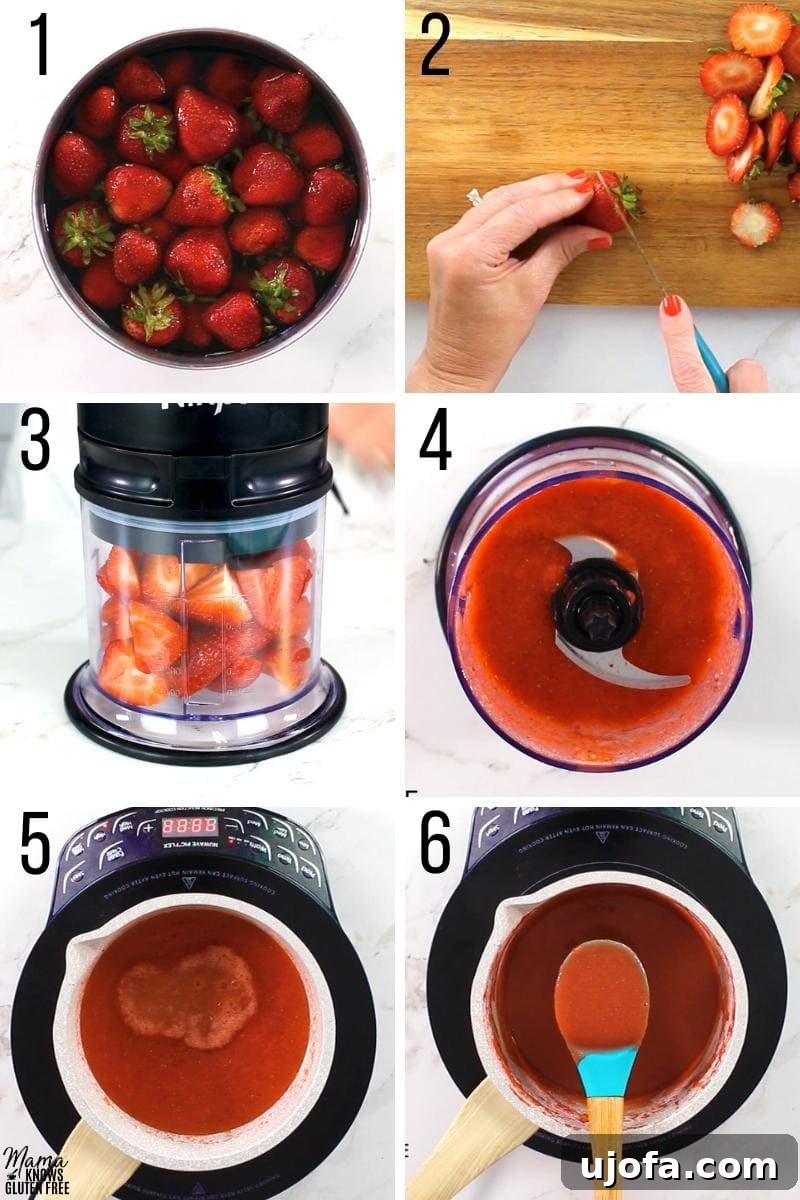
- Remove Stems and Halve: Carefully remove the green stems (hull) from each strawberry. Then, cut the strawberries in half to prepare them for pureeing. (See photo 1 & 2 for visual guidance on washing and halving).
Pureeing for Perfection
- Puree the Strawberries: Transfer the cleaned, hulled, and halved strawberries to a food processor or blender. Process until the strawberries are completely smooth. For this recipe, I find my NinjaMaster Prep Pro System works wonderfully, but any powerful blender or food processor will do the trick. The goal is a uniform, liquid consistency with no large chunks remaining. (See photo 3 & 4).
Simmering to Sweet Perfection
- Combine and Start Simmering: Pour the pureed strawberries into a small to medium-sized saucepan. Add the granulated sugar and the optional lemon juice. Stir everything together well to combine the ingredients evenly. Place the saucepan over medium heat and bring the mixture to a gentle simmer.
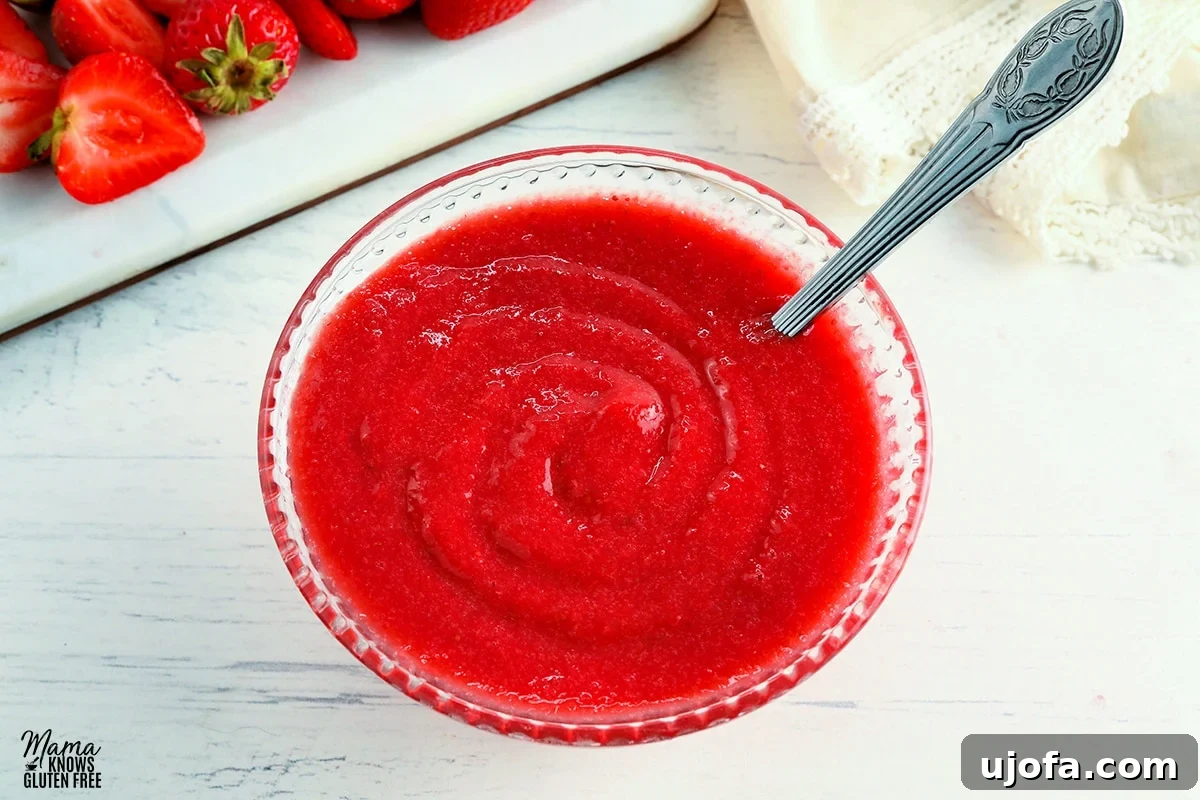
- Reduce Slowly: Once the mixture begins bubbling around the edges, reduce the heat to low. The aim is a slow, steady simmer, not a vigorous boil. Let the strawberries slowly reduce, stirring occasionally to prevent the sauce from sticking to the bottom of the pan and burning. This reduction process typically takes about 30 minutes, but the exact time can vary depending on the water content of your strawberries and the heat setting. The sauce is ready when it has significantly thickened, resembling the consistency of a thick tomato sauce or a thin fruit jam. It will coat the back of a spoon. (See photo 5 & 6).
Cooling: The Crucial Final Step
- Cool Completely: Remove the saucepan from the heat and allow the strawberry reduction sauce to cool down completely to room temperature before transferring it to an airtight container for refrigeration. This step is absolutely critical, especially if you plan to use the sauce in batters or for baking. Using hot or even warm strawberry reduction can significantly alter the consistency and structure of your baked goods, leading to undesirable results. Patience in cooling ensures your desserts turn out perfectly.
Mastering Your Strawberry Reduction: Essential Tips & Tricks
To ensure your strawberry reduction sauce turns out perfectly every time, keep these expert tips in mind.
Patience is a Virtue: Low & Slow Reduction
- The key to a truly flavorful and perfectly thick strawberry reduction lies in a low and slow simmer. Resist the urge to crank up the heat to speed up the process. A gentle, consistent simmer allows the water to evaporate gradually, concentrating the natural sugars and flavors without burning them. This slow reduction also contributes to the beautiful glossy texture of the finished sauce.
Preventing Sticking & Burning
- Stirring occasionally throughout the simmering process is crucial. This prevents the fruit solids and sugars from sticking to the bottom of the saucepan and burning, which can impart an unpleasant taste to your entire batch of sauce. A silicone spatula is ideal for this, as it effectively scrapes the bottom and sides of the pan.
Adjusting Sweetness and Tartness
- Once the sauce has reduced and cooled slightly, taste it. If your strawberries were particularly tart, you might want to add a tiny bit more sugar, stirring until dissolved. If they were exceptionally sweet, a few extra drops of lemon juice can brighten the flavor beautifully.
Achieving the Right Consistency
- The sauce should be thick enough to coat the back of a spoon, leaving a clear path when you run your finger across it. Remember, it will continue to thicken slightly as it cools. If it’s too thin after 30 minutes, continue simmering for another 5-10 minutes, stirring frequently, until the desired consistency is reached.
Unleash the Flavor: Creative Serving Suggestions for Strawberry Reduction
The beauty of this strawberry reduction sauce lies in its incredible versatility. Its concentrated flavor and smooth, thick texture make it a fantastic addition to both sweet and savory dishes. Here are just a few ways to enjoy your homemade strawberry reduction:
Elevate Your Baked Goods
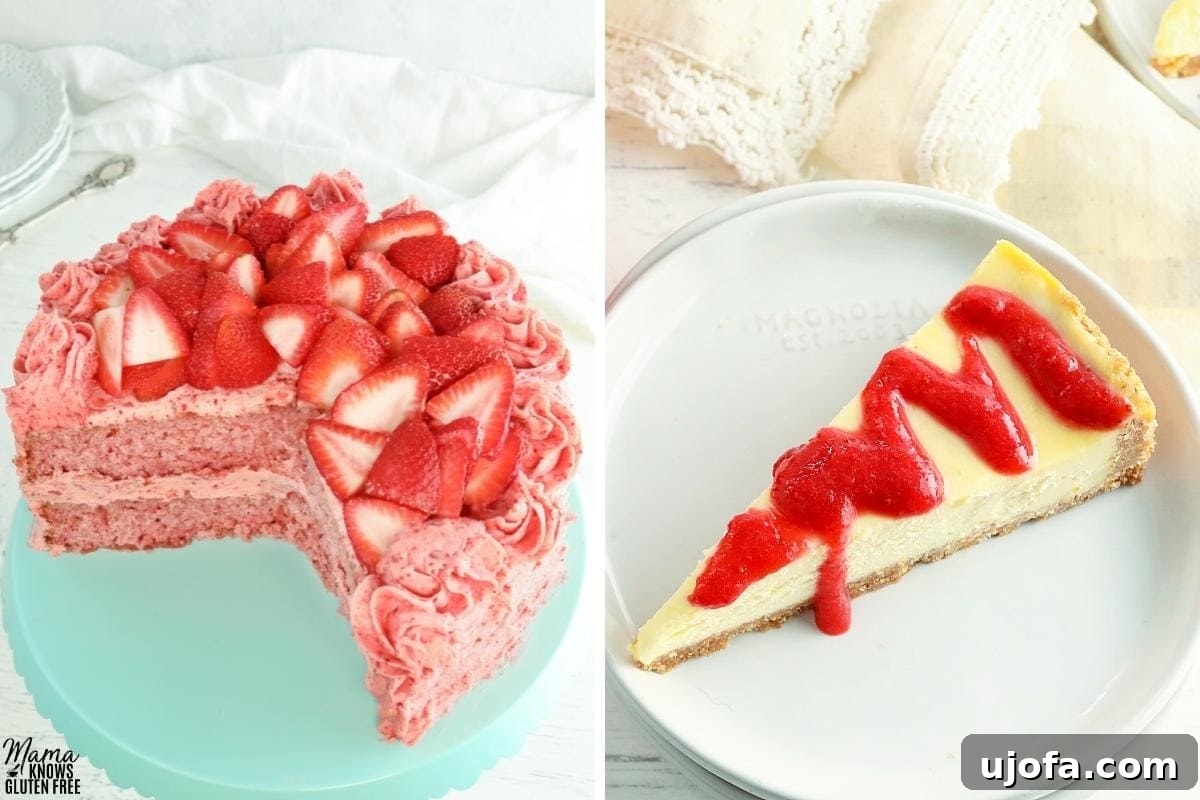
- Cakes and Cupcakes: Mix it directly into your gluten-free strawberry cake batter for an extra moist, flavorful crumb, or use it as a delightful filling between cake layers. It’s also perfect for infusing flavor into strawberry frosting.
- Muffins and Scones: Swirl a spoonful into muffin batter before baking, or dollop it onto freshly baked scones with a dollop of cream.
- Tarts and Pies: It makes a fantastic base for fruit tarts, adding a burst of intense strawberry flavor beneath a layer of fresh berries, or as a vibrant filling for hand pies.
- Glazes and Icings: Whisk a little into powdered sugar with a touch of milk for a quick and easy strawberry glaze for pastries or quick breads.
Breakfast & Brunch Delights
- Pancakes, Waffles, and French Toast: Move beyond basic syrup! Drizzle this luscious sauce generously over fluffy gluten-free pancakes, crispy buttermilk waffles, or golden French toast for an unforgettable breakfast.
- Oatmeal and Yogurt: Stir a spoonful into your morning oatmeal or swirl it into plain Greek yogurt for a healthy, flavor-packed start to your day.
- Crepes: Fill delicate crepes with this sauce, perhaps with a dollop of whipped cream, for a sophisticated brunch treat.
- Granola: Mix it with your favorite granola for a fresh, fruity twist.
Decadent Desserts
- Ice Cream: The classic pairing! It’s an unparalleled topping for vanilla ice cream, but also fantastic with chocolate or pistachio.
- Cheesecake: Pour a generous layer over your gluten-free cheesecake for a stunning presentation and irresistible flavor combination.
- Panna Cotta and Pavlova: A vibrant counterpoint to the creamy richness of panna cotta or the crisp sweetness of pavlova.
- Parfaits and Trifles: Layer it with whipped cream, cake cubes, and fresh berries for elegant individual desserts.
Refreshing Beverages & Cocktails
- Smoothies: Blend a spoonful into your morning smoothie for an extra punch of fruit flavor.
- Lemonade or Iced Tea: Stir a dash into your favorite summer drinks for a refreshing strawberry twist.
- Cocktails: Use it as a base for strawberry margaritas, daiquiris, or a vibrant spritzer.
Storage Solutions for Your Homemade Strawberry Sauce
Proper storage ensures you can enjoy your delicious homemade strawberry reduction sauce for an extended period, making it a convenient staple for future culinary adventures.
- Refrigeration: Any leftover reduction sauce should be stored in an airtight container in the refrigerator. When properly stored, it will maintain its freshness and quality for up to 2 days. Always ensure the sauce is completely cool before refrigerating to prevent condensation and potential spoilage.
- Freezing: For longer-term storage, this strawberry reduction freezes beautifully. Pour the cooled sauce into freezer-safe containers, leaving a little headspace to allow for expansion. It can be frozen for up to 6 months without losing its vibrant flavor or texture. When you’re ready to use it, simply defrost it in the refrigerator overnight or gently warm it on the stovetop over low heat until thawed.
Discover More Gluten-Free Berry Recipes!
If you love the taste of fresh berries and are looking for more delicious gluten-free options, be sure to explore these other fantastic recipes:
- Strawberry Frosting
- Gluten-Free Strawberry Shortcake
- Raspberry Coulis
- Gluten-Free Blueberry Muffins
Strawberry Reduction Sauce Recipe
Audrey Roberts
8 servings
15 mins
15 mins
Share by Email
Print Recipe
Ingredients
- 2 pounds fresh strawberries (32 ounces)
- 4 tablespoons granulated sugar
- 1 tablespoon lemon juice (Optional)
Instructions
- Wash the strawberries. I like to wash my strawberries in water mixed with white vinegar.
- Remove the stems of the strawberries and cut the strawberries in half. Puree the strawberries in a food processor or blender. I used my NinjaMaster Prep Pro System.
- Place the pureed strawberries, sugar, and lemon juice into a small saucepan and stir to combine. Bring to a simmer over medium heat.
- Once bubbling, reduce the heat to low and let the strawberries slowly reduce stirring occasionally. Reduce for about 30 minutes. The strawberry sauce will be thick like tomato sauce.
- Allow the sauce to cool before placing it in an airtight container and refrigerating. Don’t use hot or warm strawberry reduction in batters or for baking. The strawberry sauce needs to be completely cooled for use in baking or as a topping.
Notes
- I recommend making this several hours (or the prior night) before baking cakes or adding to batters. The strawberry sauce needs to be completely cooled before using in batters or as a topping.
- You can use fresh or frozen strawberries to make this strawberry sauce. Let frozen strawberries defrost before pureeing them.
- To Store: Keep your sauce in an airtight container in the refrigerator for up to 2 days.
- To Freeze: Pour into freezer-safe containers and freeze for up to 6 months. Defrost as needed.
- Mama says, “Always check your labels!”
Nutrition
Serving: 1 serving | Calories: 60kcal | Carbohydrates: 15g | Protein: 1g | Fat: 0.4g | Saturated Fat: 0.02g | Polyunsaturated Fat: 0.2g | Monounsaturated Fat: 0.05g | Sodium: 1mg | Potassium: 176mg | Fiber: 2g | Sugar: 12g | Vitamin A: 14IU | Vitamin C: 67mg | Calcium: 18mg | Iron: 0.5mg
Nutrition information is automatically calculated, so should only be used as an approximation.
Additional Info
condiments, Dessert, sauces
American
Tried this recipe?
Mention @mamaknowsglutenfree or tag #mamaknowsglutenfree!
How To Make Strawberry Reduction Step-by-Step with Visuals
For those who appreciate visual guidance, here’s a step-by-step breakdown of how to prepare this delightful strawberry reduction, complemented by photos to ensure your success. Remember, allowing the sauce to cool completely is vital before incorporating it into batters or using it as a topping for optimal results.
- Step 1: Wash Your Strawberries. Begin by thoroughly washing 2 pounds of fresh strawberries. As mentioned, I prefer to soak them in a mixture of water and white vinegar (3 cups cold water to 1 cup vinegar for 5 minutes), then rinse and pat dry. (See photo 1 in the collage below)
- Step 2: Hull and Halve. Remove the green stems from each strawberry, also known as hulling. Then, carefully cut each strawberry in half to prepare them for pureeing. (See photo 2)
- Step 3: Puree the Berries. Transfer the hulled and halved strawberries to a food processor or blender. Process until you achieve a completely smooth puree. My NinjaMaster Prep Pro System works wonders for this, but any reliable blender will do. (See photos 3 & 4 for the pureeing process)
- Step 4: Combine and Simmer. Pour the smooth strawberry puree into a small saucepan. Add 4 tablespoons of granulated sugar and 1 tablespoon of lemon juice (if using). Stir these ingredients together until well combined. Place the saucepan over medium heat and bring the mixture to a gentle simmer.
- Step 5: Reduce to Perfection. Once the sauce begins to bubble gently, reduce the heat to low. Allow the strawberries to slowly reduce, stirring occasionally to prevent sticking and burning. Continue this gentle simmer for about 30 minutes, or until the sauce has thickened considerably, reaching a consistency similar to a rich tomato sauce or a slightly runny jam. (See photos 5 & 6 illustrating the reduction process)
- Step 6: Cool Completely. Remove the saucepan from the heat. This is a crucial step: allow the strawberry sauce to cool completely to room temperature before transferring it to an airtight container and refrigerating. It is imperative that the sauce is cold before it is used in any batters for baking or as a topping for desserts, as warmth can negatively impact the final texture of your dish.