
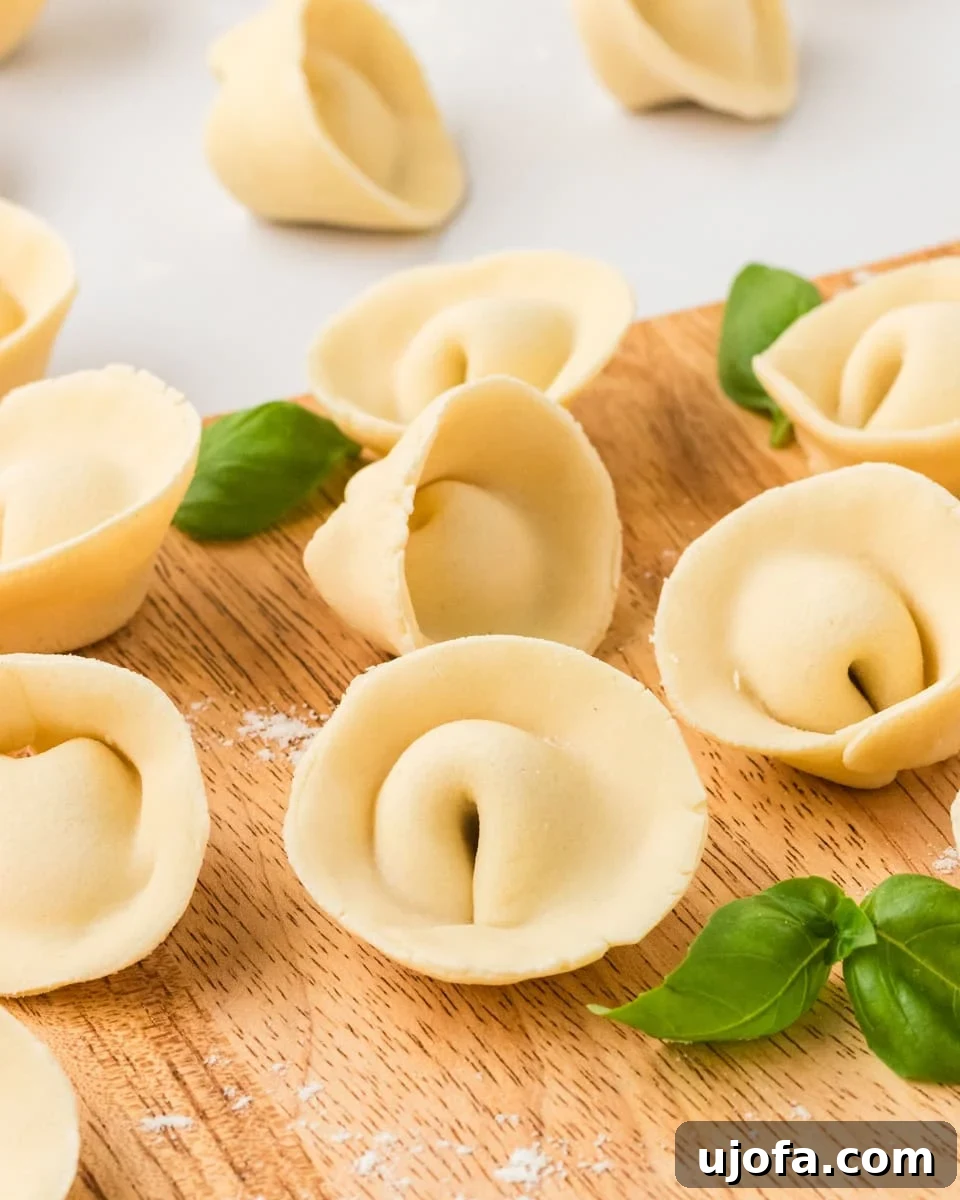
Welcome to the delightful world of homemade gluten-free pasta! For those of us navigating a gluten-free lifestyle, the idea of enjoying freshly made, perfectly stuffed pasta might seem like a distant dream. However, I’m here to tell you that it’s not only possible but surprisingly straightforward to create tender, delicious gluten-free tortellini right in your own kitchen. Forget those bland, store-bought alternatives; this recipe brings the authentic joy of Italian pasta back to your table.
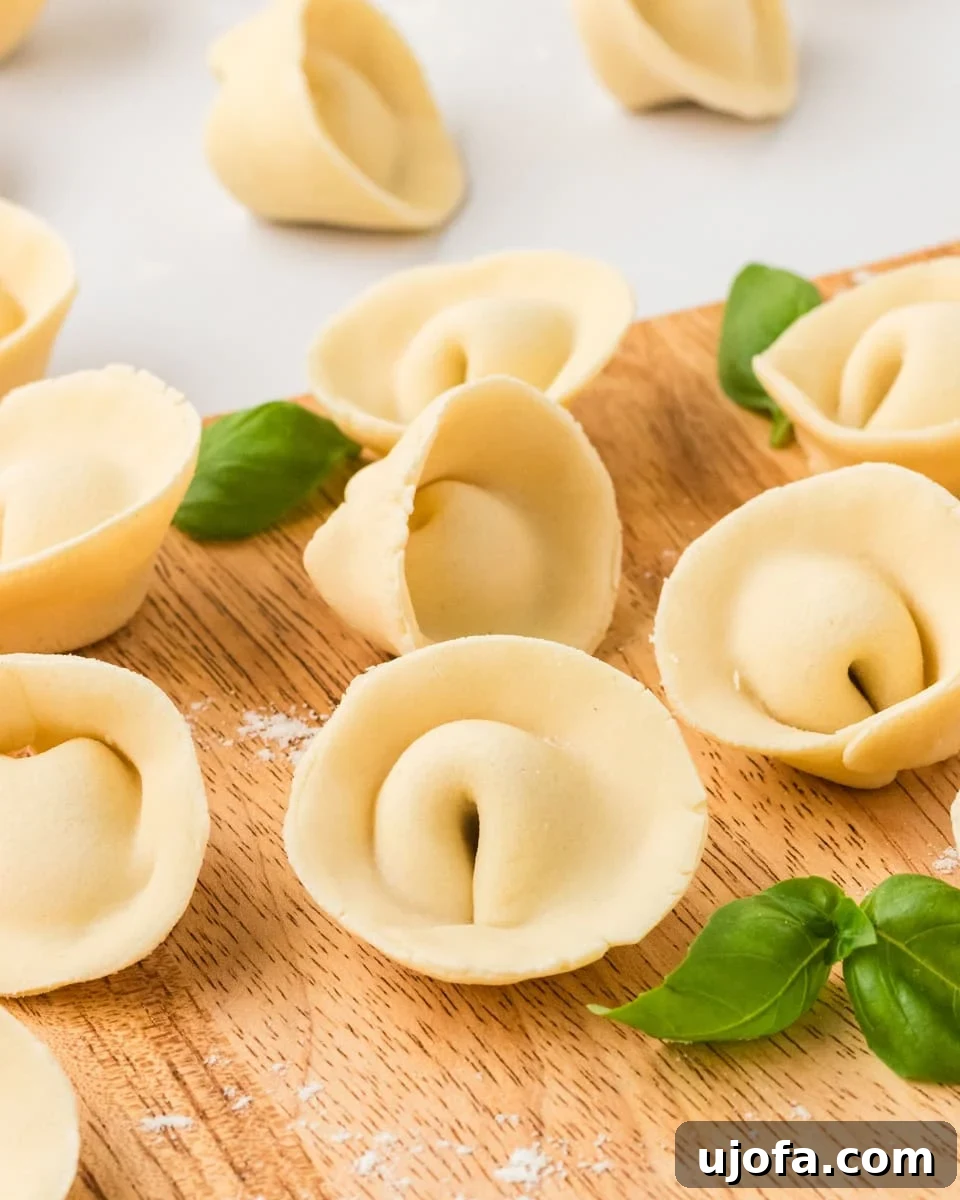
After perfecting my gluten-free pasta dough, I couldn’t wait to explore more intricate pasta shapes. I’d already mastered gluten-free ravioli, so crafting delicate tortellini felt like the natural next step. While these little stuffed pasta pillows do require a bit more time and patience, the reward is absolutely worth every moment. The dough is wonderfully soft and pliable, a true dream to work with once you get the hang of it. And the filling? It’s a simple yet incredibly flavorful combination of creamy ricotta, savory Parmesan, and vibrant fresh basil, delivering a fresh, herbaceous burst in every bite. Whether you prefer them swimming in a rich broth or tossed with your favorite sauce, these homemade tortellini hold their shape beautifully and taste remarkably like their traditional counterparts.
This recipe isn’t just about avoiding gluten; it’s about embracing the craft of pasta making and experiencing the unparalleled taste of fresh, homemade food. It’s an easily customizable recipe, making it a fantastic addition to your gluten-free culinary repertoire. Prepare to impress your family and friends (and yourself!) with these exquisite, tender, and flavor-packed gluten-free tortellini. They are perfect for a special meal, a comforting weeknight dinner, or even frozen for a quick and easy gourmet option later on.
Gluten-Free Tortellini
By: Julia Elizabeth
Servings: 5 servings (about 35 tortellini)
Prep Time: 2 hrs
Rest Time: 30 mins
Total Time: 2 hrs 30 mins
Share by Email
Print Recipe
I thought I was going to have to leave the deliciously stuffed pasta behind, but I quickly realized I could make gluten-free tortellini at home with ingredients I already have. Tender pasta stuffed with a creamy filling and ready to top with your favorite sauces, add to soup, or freeze for later. This gluten-free tortellini recipe is easily customizable and the perfect addition to your gluten-free repertoire.
Step-by-step photos can be seen below the recipe card.
Ingredients
Pasta
- 1½ cup gluten free all purpose flour
- 3 tbsp tapioca flour
- ½ tsp salt
- 1 egg, beaten and at room temp
- 1 tbsp olive oil
- ⅓ cup and 1 tablespoon water
Filling
- ½ cup ricotta
- ¼ cup Parmesan
- 1 tbsp fresh basil, finely chopped
- ½ tsp salt
- ⅛ tsp black pepper
US Customary – Metric
Instructions
- In a medium bowl, stir together your gluten-free all-purpose flour, tapioca flour, and salt. Then add in the beaten egg, olive oil, and water. Knead everything together with your hands until a cohesive dough forms. The dough will be slightly sticky and tacky but should not be impossible to handle. The flour will continue to absorb moisture as you work with it and as it rests, leading to a smoother consistency.
- Lightly flour a clean work surface and continue to knead your pasta dough for about 5 minutes. Aim to use as little additional flour as possible during this step. After kneading, the pasta should become notably smoother and less sticky. Cover the dough tightly in plastic wrap and allow it to rest at room temperature for 30 minutes. This resting period is crucial for the dough’s texture and pliability.
- While your pasta dough is resting, prepare the delicious filling. In a small bowl, combine the ricotta cheese, grated Parmesan, finely chopped fresh basil, salt, and black pepper. Mix thoroughly until all ingredients are well incorporated. Also, fill another small bowl with a little bit of water and set it aside; this water will be used later to help seal the tortellini.
- Once the pasta dough has finished its resting period, gently unwrap it and divide the dough into two equal halves. Immediately re-wrap one half tightly in plastic wrap to prevent it from drying out while you work with the first portion. This ensures both halves remain moist and pliable.
- Take one half of the dough and place it on a very lightly floured surface. Using a rolling pin, roll out the dough evenly until it is approximately ⅛ of an inch thick. It’s important to find the right thickness: if it’s too thin, it will tear easily during folding, but if it’s too thick, the cooked pasta will be chewy rather than tender. Remember, using too much flour will make the pasta stiffer and harder to work with, while a slightly moist dough will be softer and easier to fold without cracking.
- Once your dough is rolled, use a 2¾ inch round cookie or biscuit cutter to cut out as many circles as possible. Carefully stack these cut circles and cover them immediately with a damp paper towel or a clean linen cloth to keep them from drying out. Gather any dough scraps, gently re-roll them, and cut out more circles, repeating this process until all of the first dough half is used. Then, take the second half of your pasta dough that was set aside and repeat the entire rolling and cutting process.
- Now it’s time to fill and shape your tortellini. Pick up one of your pasta circles and place it in the palm of your hand. Using a ½ teaspoon, scoop out a small amount of the prepared cheese filling and carefully place it in the very center of the pasta round.
- Dip your finger into the small bowl of water you prepared earlier. Lightly moisten the entire edge of the pasta circle. This water acts as a “glue” and is essential for securely sealing the pasta, ensuring the filling stays inside during cooking.
- Carefully fold the pasta circle over itself, enclosing the filling, to create a half-moon shape. Gently pinch the middle of the curved edge closed with your thumb and index finger. Continue to seal the rest of the edge all the way around, making sure to gently press out any trapped air from around the filling before fully sealing the edges. This prevents the tortellini from bursting during cooking.
- To form the classic tortellini shape, make a small indentation in the center of the filled, sealed edge with your thumb. Then, carefully bring the two corners of the half-moon together. Moisten one of these corners with a tiny bit of water on your finger, then press the two corners firmly together to stick. This action will transform your half-moon into a charming ring-like shape. Set the finished tortellini aside on a lightly floured surface and repeat this process for all your remaining pasta rounds. This step takes a bit of practice to perfect, so be patient with yourself! Refer to the step-by-step photos below for visual guidance.
- Your homemade gluten-free tortellini are now ready to be cooked or frozen for later enjoyment. To cook fresh tortellini, bring a large pot of salted water to a gentle boil and carefully drop them in. They will cook quickly, usually becoming tender in about 4-6 minutes, floating to the surface when done. If you plan to freeze them, arrange them in a single layer on a baking tray, cover with plastic wrap, and place the tray in the freezer. Once they are completely solid (this prevents them from sticking together), transfer the frozen tortellini to a freezer-safe bag or container. They will keep well in the freezer for up to 3 months. Frozen tortellini will take a few minutes longer to cook than fresh ones.
Notes
- Use fresh basil for the best, most vibrant flavor in your filling. Dried basil won’t yield the same aromatic results.
- Ensure your egg is at room temperature before adding it to the dough. This helps it incorporate more smoothly with the dry ingredients.
Nutrition
Serving: 1 serving | Calories: 236kcal | Carbohydrates: 31g | Protein: 9g | Fat: 9g | Saturated Fat: 4g | Polyunsaturated Fat: 1g | Monounsaturated Fat: 4g | Trans Fat: 0.004g | Cholesterol: 49mg | Sodium: 579mg | Potassium: 46mg | Fiber: 4g | Sugar: 1g | Vitamin A: 218IU | Vitamin C: 0.1mg | Calcium: 141mg | Iron: 2mg
Nutrition information is automatically calculated, so should only be used as an approximation.
Additional Info
Course: Dinner, Lunch
Cuisine: Italian
Mention @mamaknowsglutenfree or tag #mamaknowsglutenfree!
How to Make Gluten-Free Tortellini: A Step-by-Step Visual Guide
Making homemade gluten-free tortellini is a rewarding process, and seeing each step can make all the difference. Follow along with these detailed visuals to ensure your pasta-making journey is a delicious success!
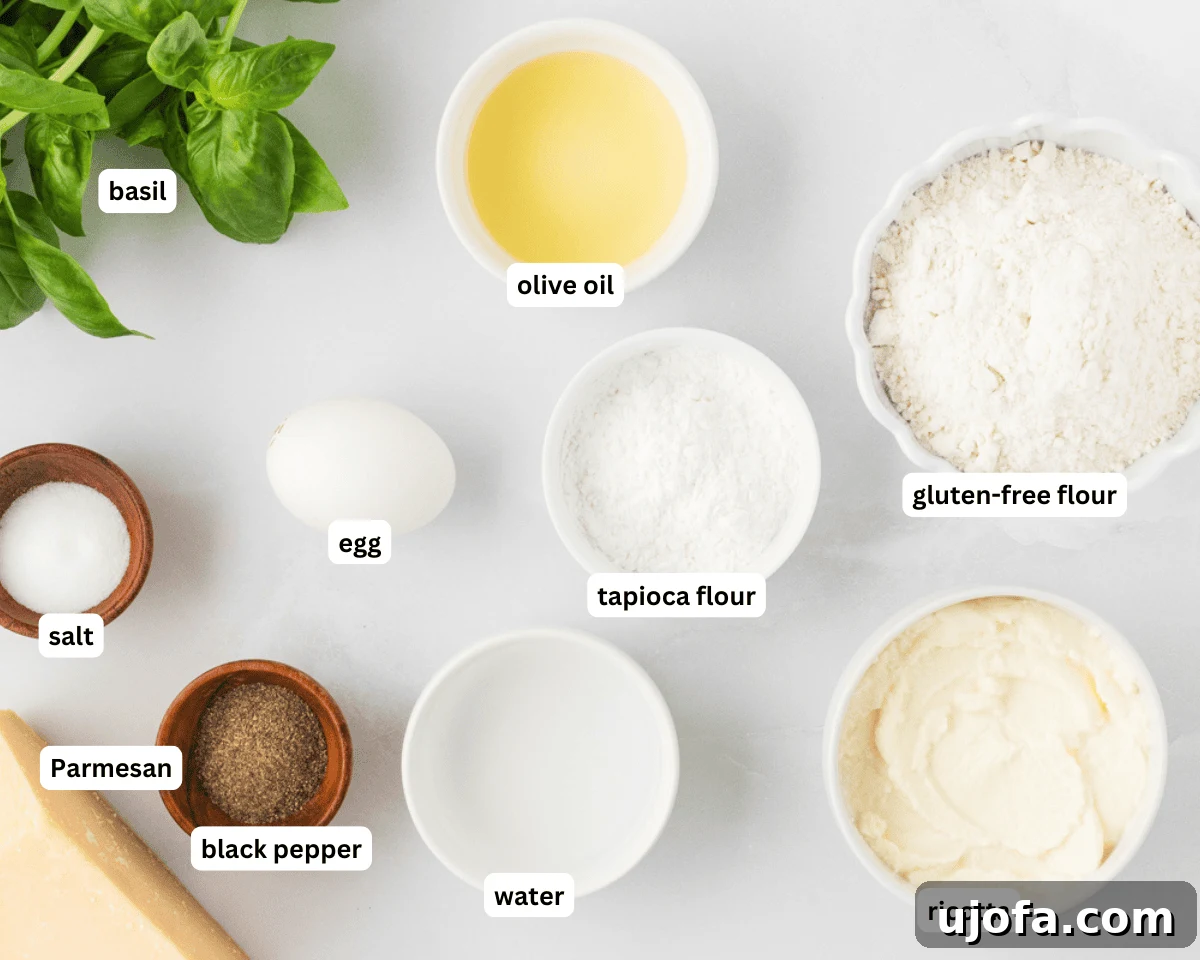
Step 1: Gather Your Ingredients. Before you begin, lay out all your ingredients for both the pasta dough and the filling. Having everything prepped and ready will make the process smoother and more enjoyable. This includes gluten-free all-purpose flour, tapioca flour, salt, an egg, olive oil, water, ricotta, Parmesan, fresh basil, black pepper, and extra salt.
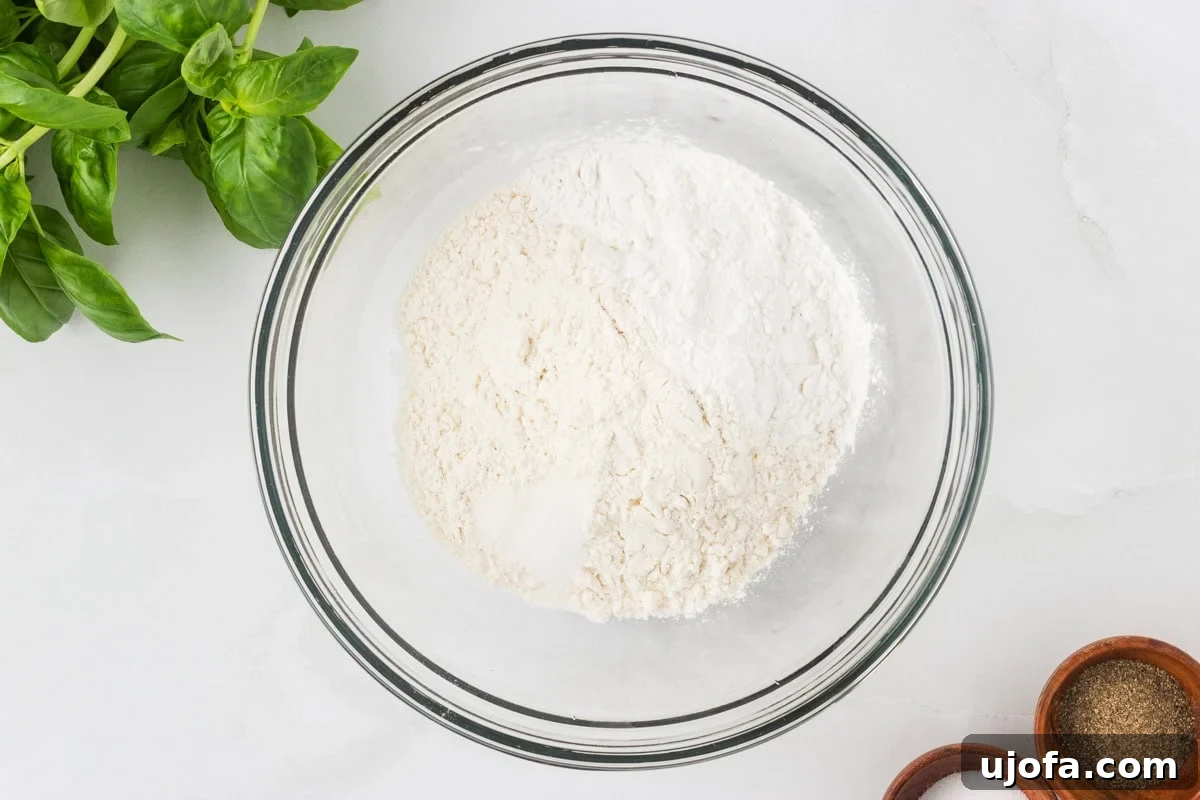
Step 2: Prepare the Dry Pasta Ingredients. In a medium-sized mixing bowl, thoroughly combine 1 ½ cups of your chosen gluten-free all-purpose flour, 3 tablespoons of tapioca flour, and ½ teaspoon of salt. Whisk them together to ensure an even distribution.
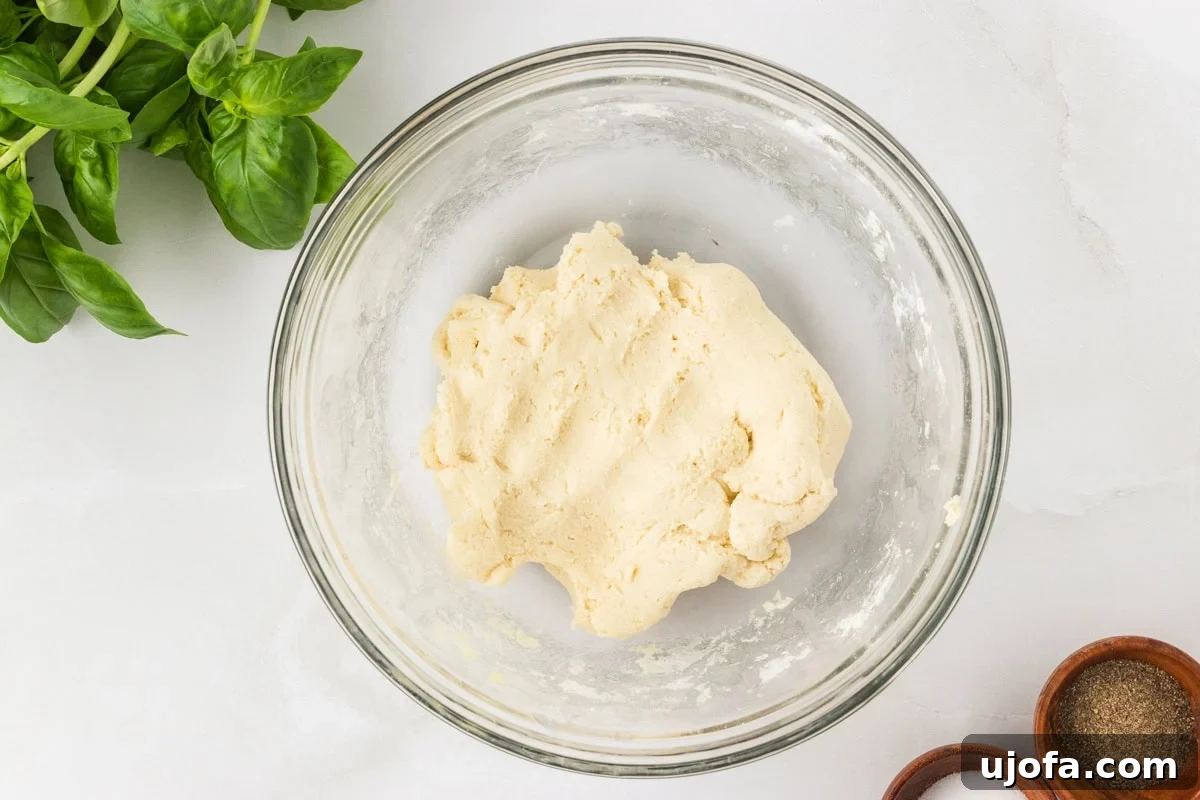
Step 3: Add Wet Ingredients to Form Dough. Create a well in the center of your dry ingredients. Add 1 beaten egg (ensure it’s at room temperature), 1 tablespoon of olive oil, and a combination of ⅓ cup plus 1 tablespoon of water. Mix everything together with your hands, bringing the ingredients from the outside in until a shaggy dough begins to form. Continue mixing and gently kneading until you have a cohesive ball. It should feel slightly sticky but workable; don’t worry if it’s a bit tacky – it will firm up. The flour will absorb more moisture as you continue to work with it.
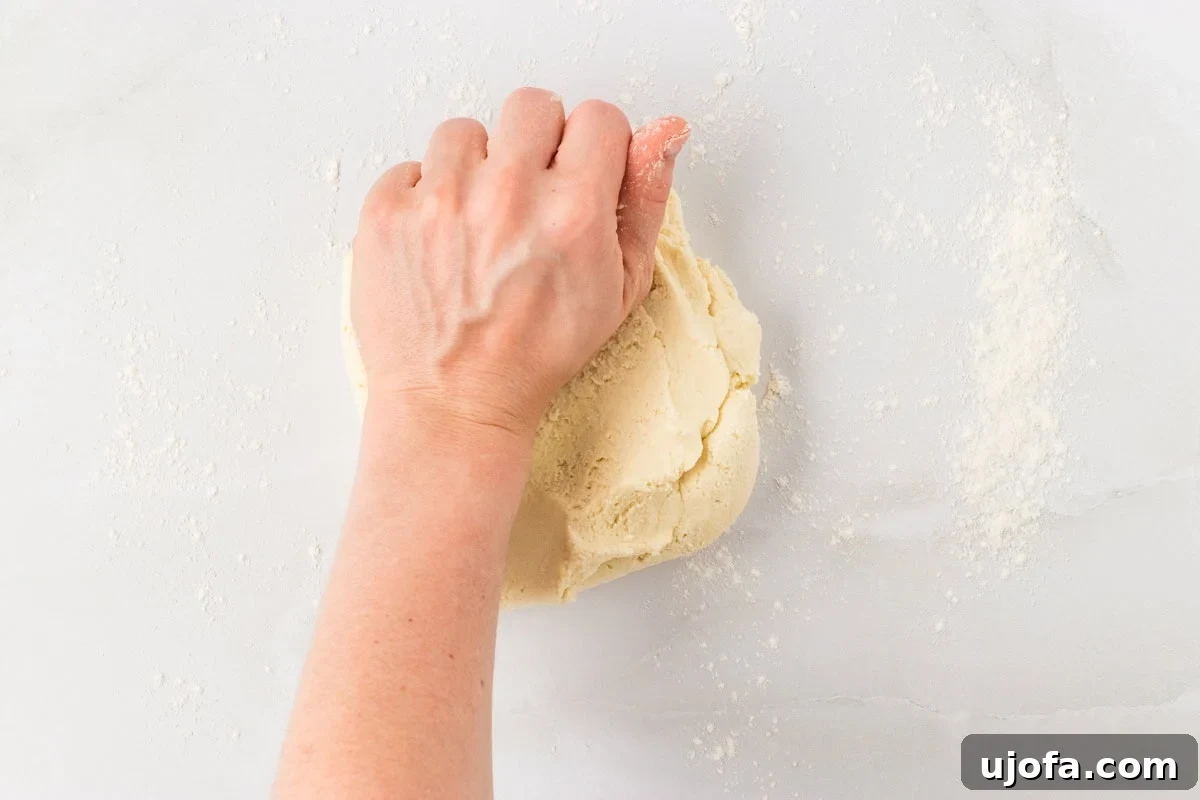
Step 4: Knead the Dough for Smoothness. Transfer the dough to a clean, lightly floured work surface. Knead the pasta dough for approximately 5 minutes. As you knead, the dough will become smoother and less sticky. The key here is to use minimal additional flour to avoid drying out the dough, which can make it difficult to roll and shape later.
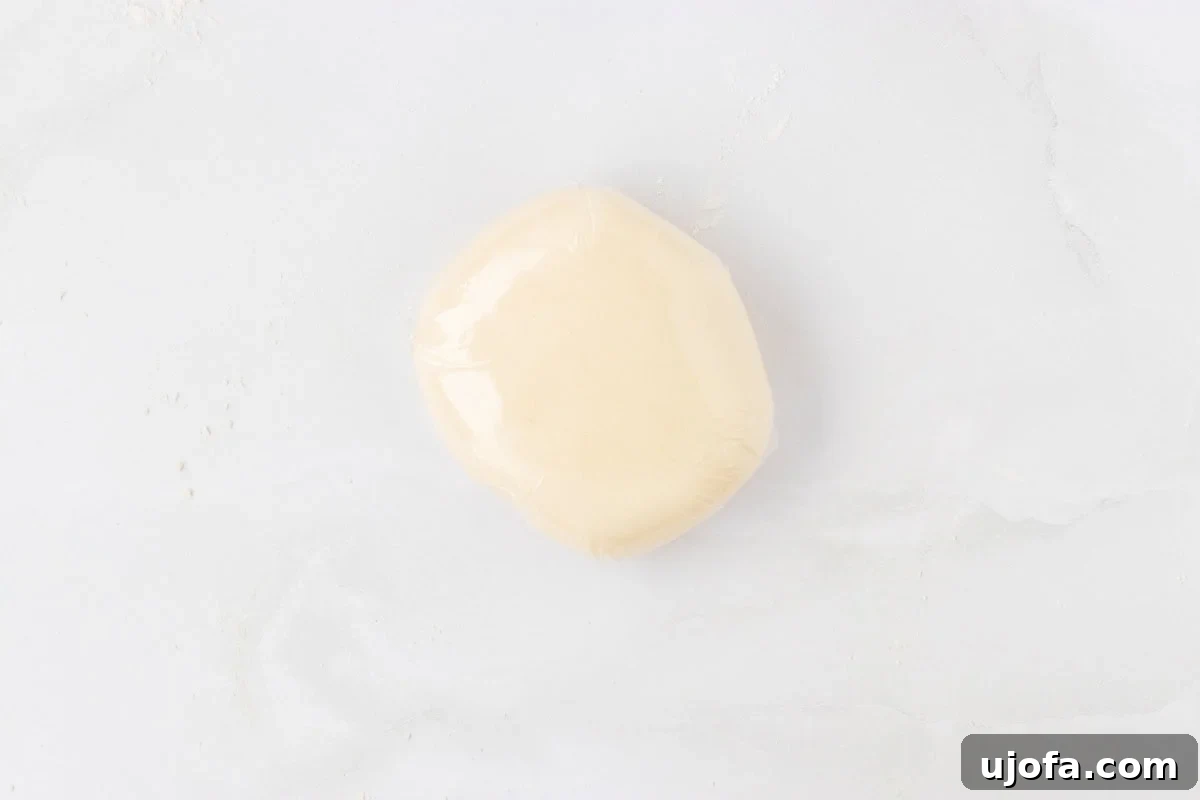
Step 5: Rest the Dough. Once kneaded to a smooth consistency, wrap the dough ball tightly in plastic wrap. Allow it to rest at room temperature for a minimum of 30 minutes. This resting period is crucial for hydrating the gluten-free flours and making the dough more elastic and easier to roll without tearing.
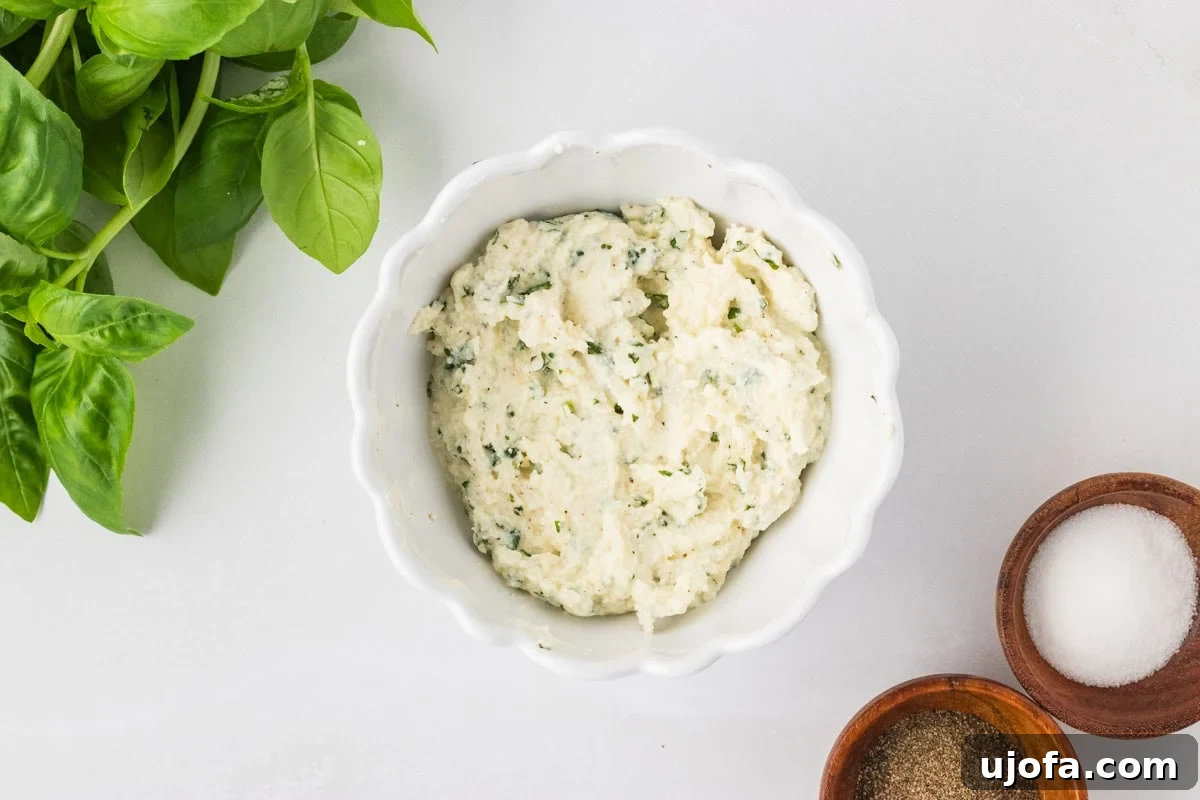
Step 6: Prepare the Creamy Filling. While your pasta dough is resting, prepare the flavorful tortellini filling. In a small bowl, combine ½ cup of ricotta cheese, ¼ cup of grated Parmesan cheese, 1 tablespoon of finely chopped fresh basil, ½ teaspoon of salt, and ⅛ teaspoon of black pepper. Stir these ingredients together until they are well combined and form a uniform mixture. Also, prepare a separate small bowl of plain water; this will be your “glue” for sealing the tortellini later on.
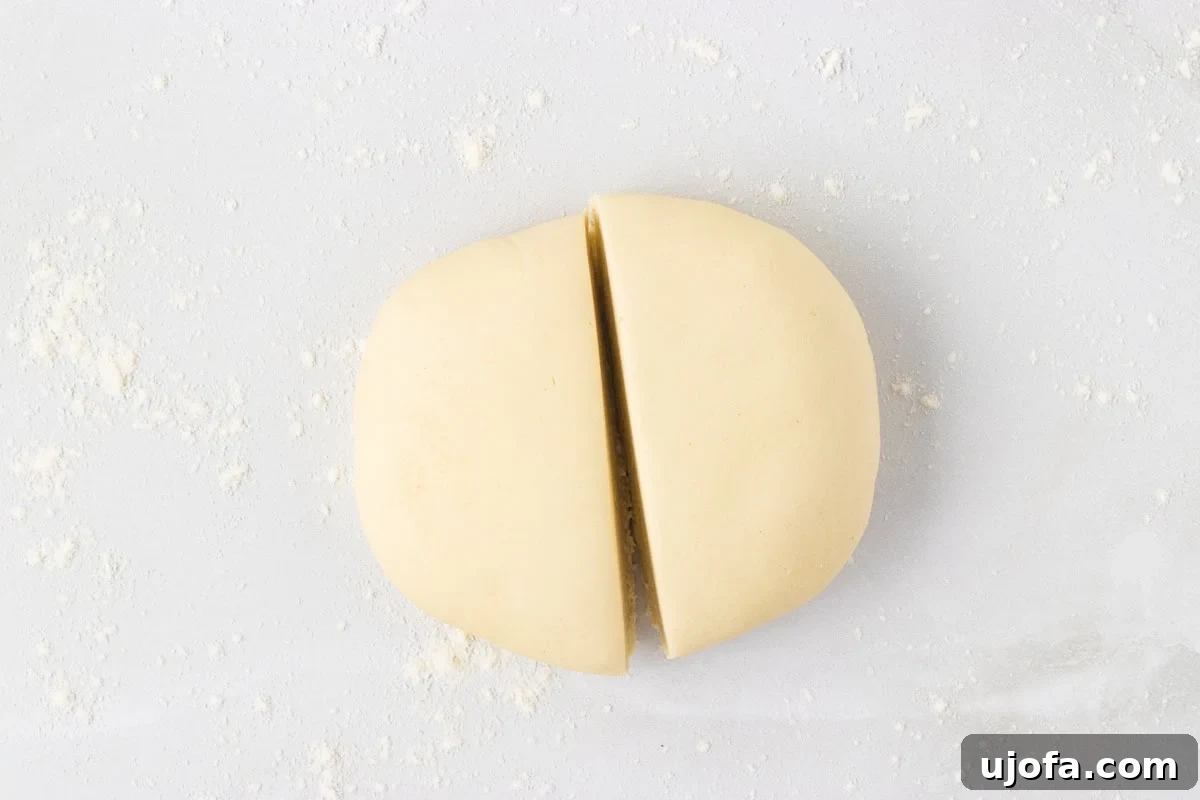
Step 7: Divide the Dough. After the dough has rested, unwrap it and carefully divide it into two equal halves. Keep one half wrapped tightly in plastic wrap and set it aside to prevent it from drying out while you work with the first portion.
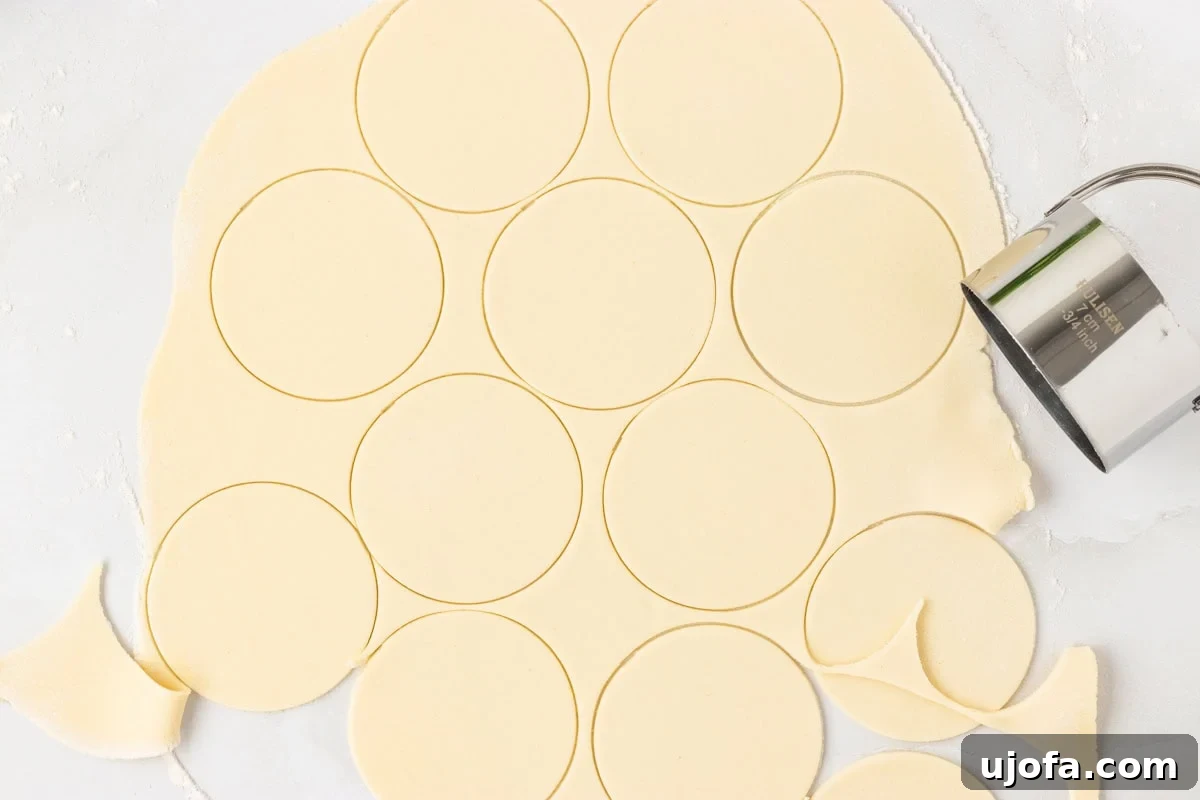
Step 8: Roll and Cut Pasta Rounds. On a very lightly floured surface, take one half of the dough and roll it out using a rolling pin until it is approximately ⅛ inch thick. Aim for an even thickness throughout the sheet. Use a 2 ¾ inch round cookie or biscuit cutter to cut out as many circles as possible. As you cut them, carefully stack the rounds and cover them immediately with a damp kitchen towel or paper towel to prevent drying. Gather any dough scraps, gently re-roll them, and cut out more circles until the dough is fully utilized. Repeat this entire process with the second half of your dough.
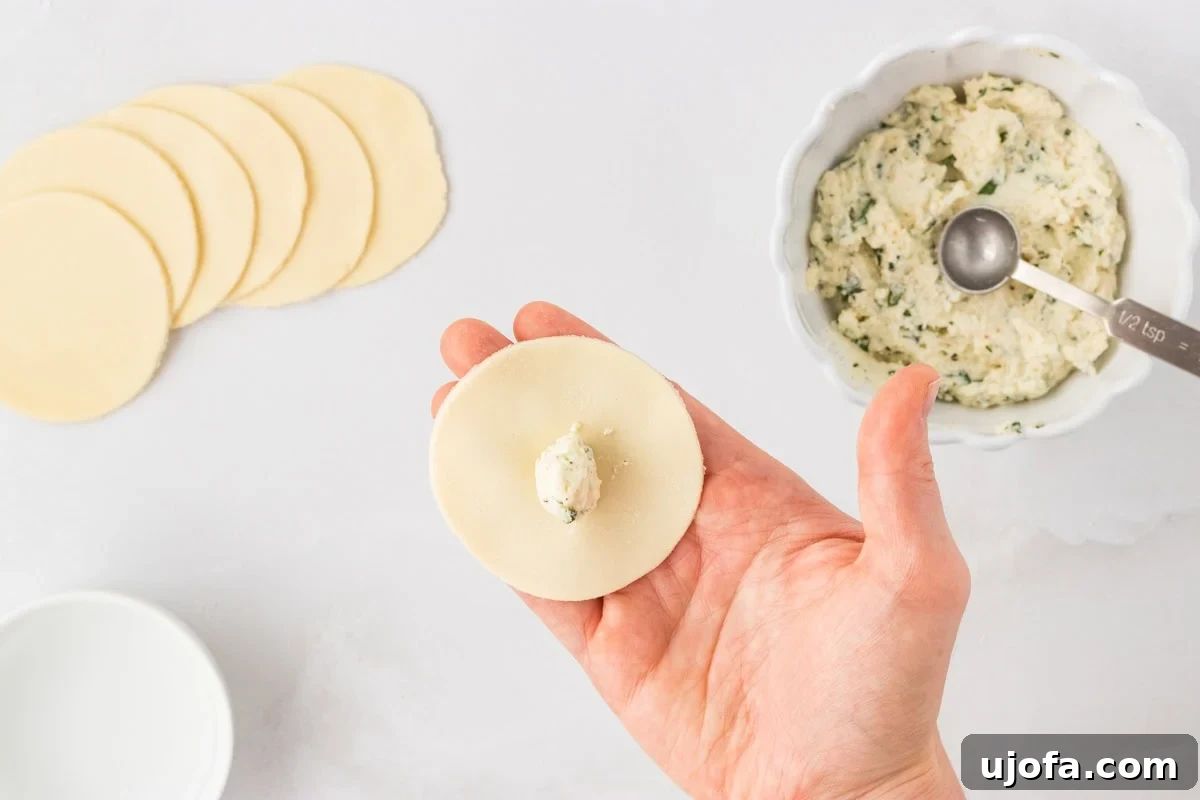
Step 9: Fill the Pasta Rounds. Take one of the cut pasta circles and place it in the palm of your hand. Using a ½ teaspoon measure, spoon a small amount of the prepared cheese filling directly into the center of the pasta round. Don’t overfill, as this can make sealing difficult.
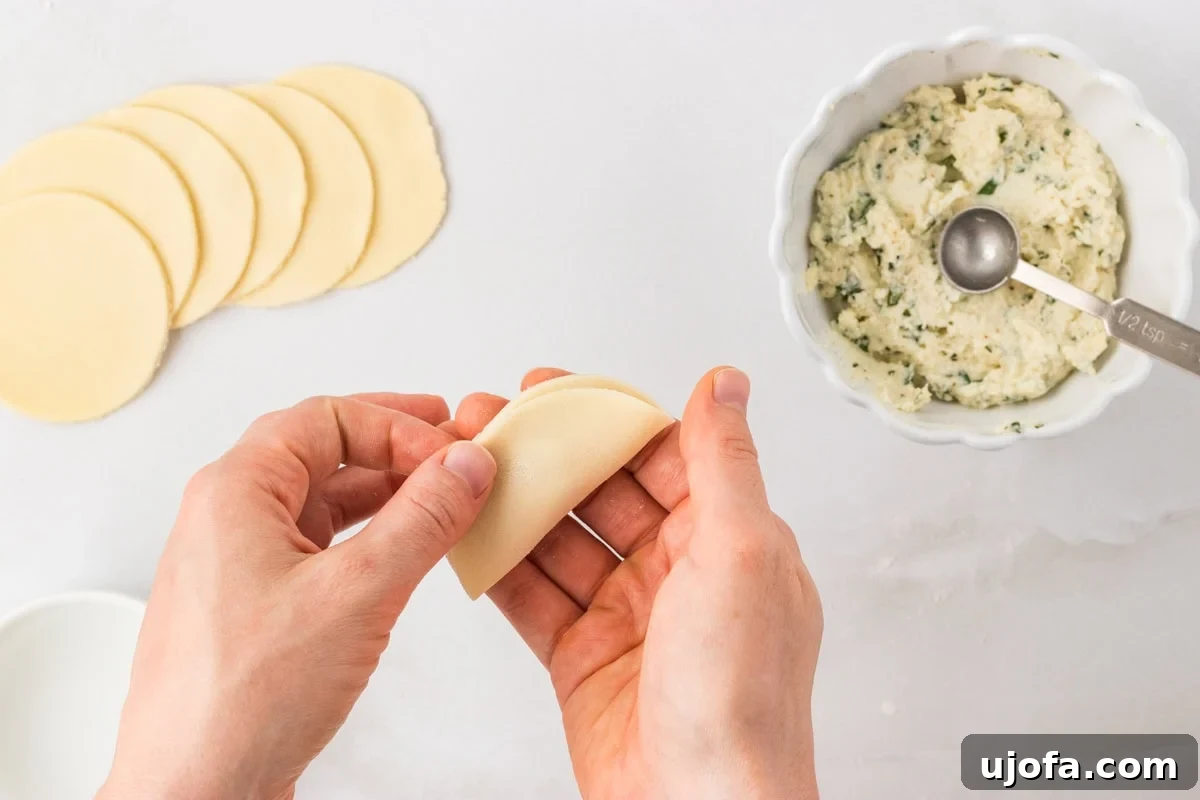
Step 10: Moisten and Fold. Dip your finger into the small bowl of water and lightly moisten the entire edge of the pasta circle. This creates a seal when folded. Carefully fold the circle in half over the filling, creating a perfect half-moon shape. Press the edges together gently.
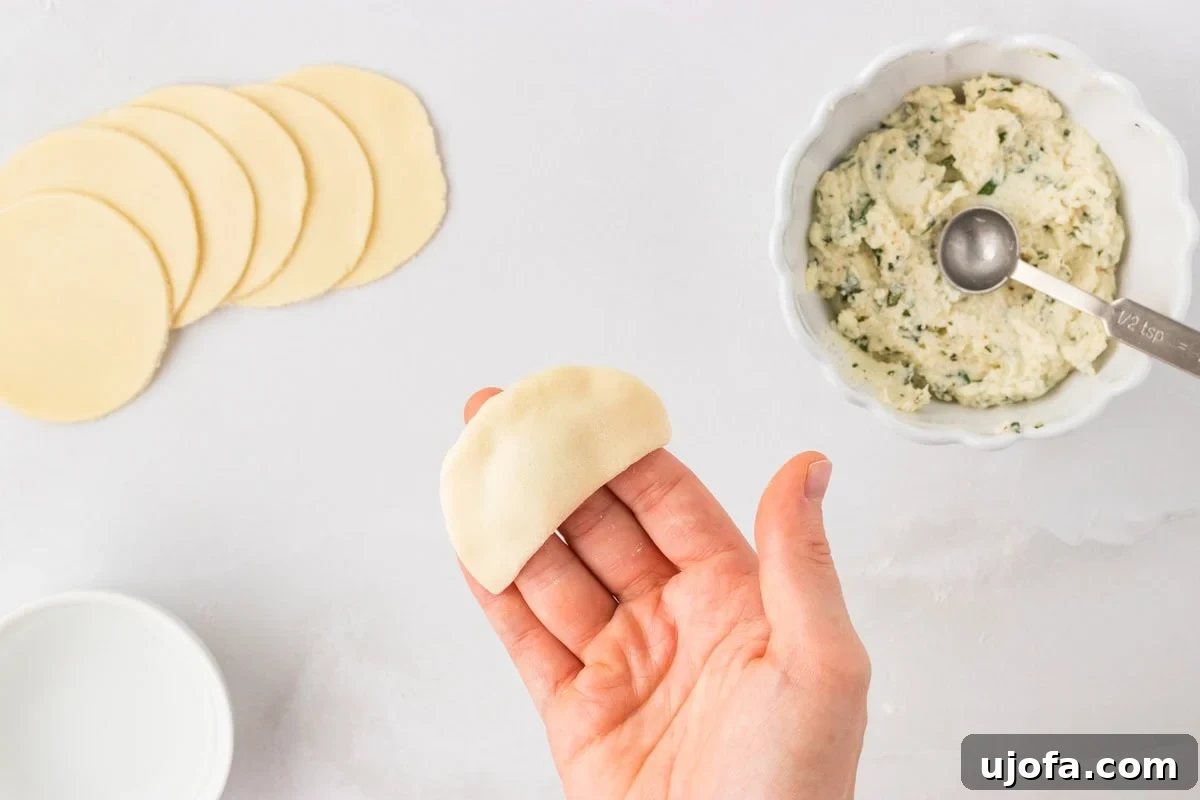
Step 11: Seal the Edges Securely. Pinch the very center of the curved edge closed with your thumb and index finger. Continue to work your way around the entire edge, sealing it completely. As you seal, gently press out any air that might be trapped around the filling. This prevents the tortellini from expanding and potentially bursting during cooking.
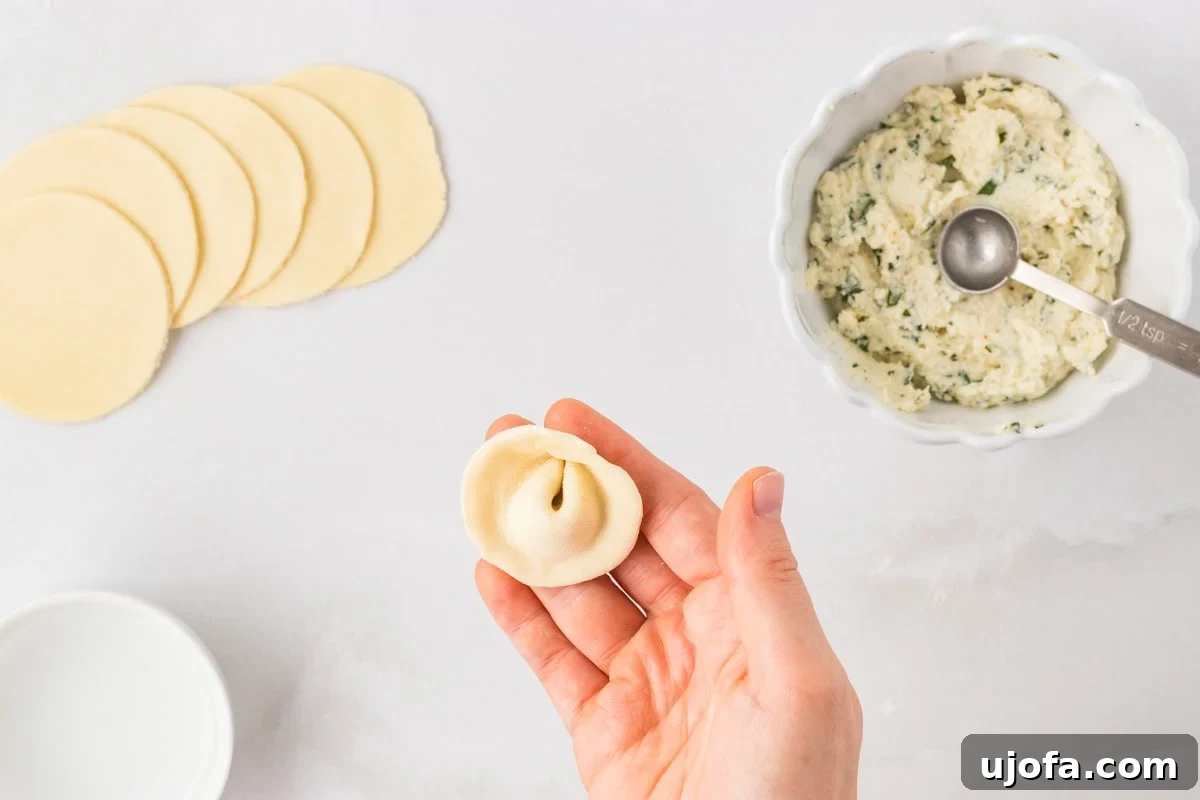
Step 12: Shape into Classic Tortellini. With your thumb, make a small indentation in the center of the filled and sealed edge of the half-moon. Then, carefully bring the two pointed corners of the half-moon together, overlapping them slightly. Moisten one of the corners with a tiny dab of water from your finger, and then press the two corners firmly together to stick. This action transforms the half-moon into the classic tortellini ring shape. Set the finished tortellini aside on a lightly floured surface and repeat the entire filling and shaping process with all your remaining pasta rounds. Don’t be discouraged if it takes a few tries to get the hang of the shaping technique – practice makes perfect!
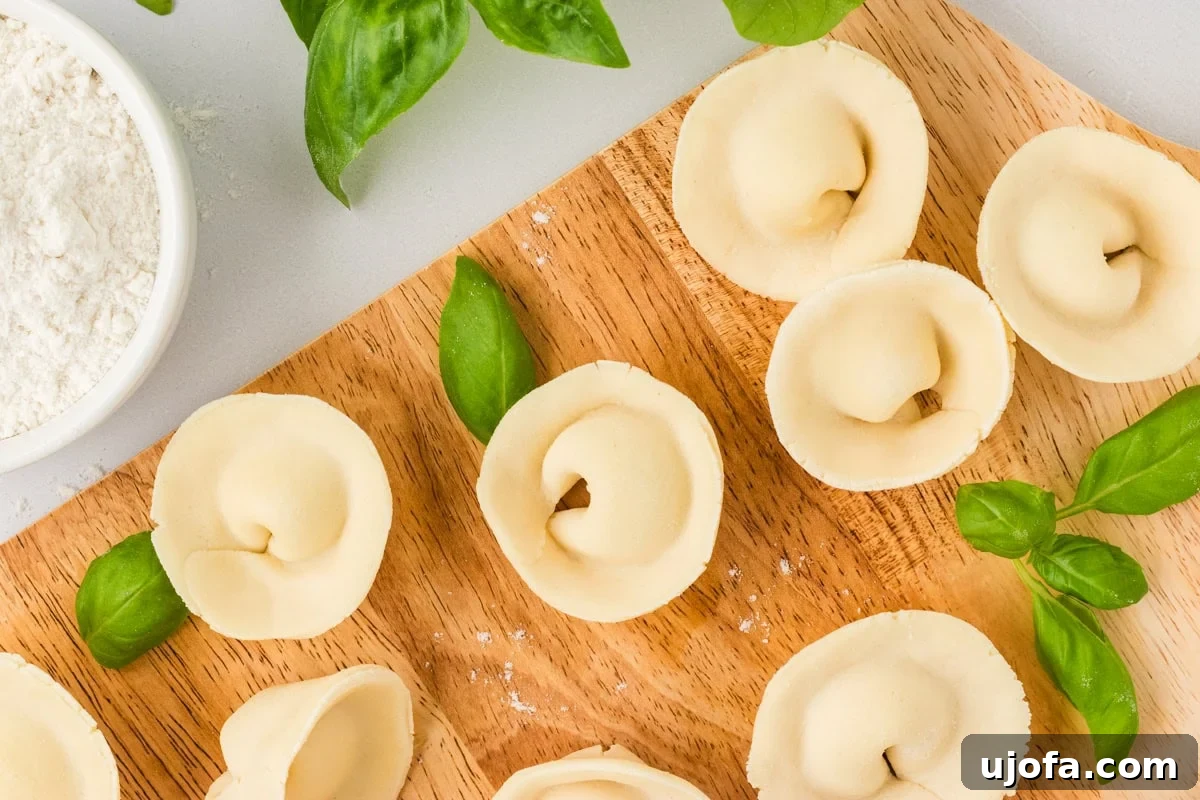
Step 13: Ready to Cook or Freeze. Once all your beautiful gluten-free tortellini are shaped, they are ready for their next step! You can cook them immediately for a fresh pasta experience. To cook, simply bring a large pot of salted water to a gentle boil, then carefully drop in your fresh tortellini. They will cook until tender, usually in about 4-6 minutes, floating to the top when done. Alternatively, you can freeze them for future meals. To freeze, arrange the tortellini in a single layer on a baking tray, ensuring they don’t touch. Cover the tray with plastic wrap and place it in the freezer. Once the tortellini are completely solid, transfer them to a freezer-safe bag or airtight container. They will maintain their quality in the freezer for up to 3 months. When cooking frozen tortellini, there’s no need to thaw them; simply drop them into boiling water straight from the freezer, and cook for 7-9 minutes.
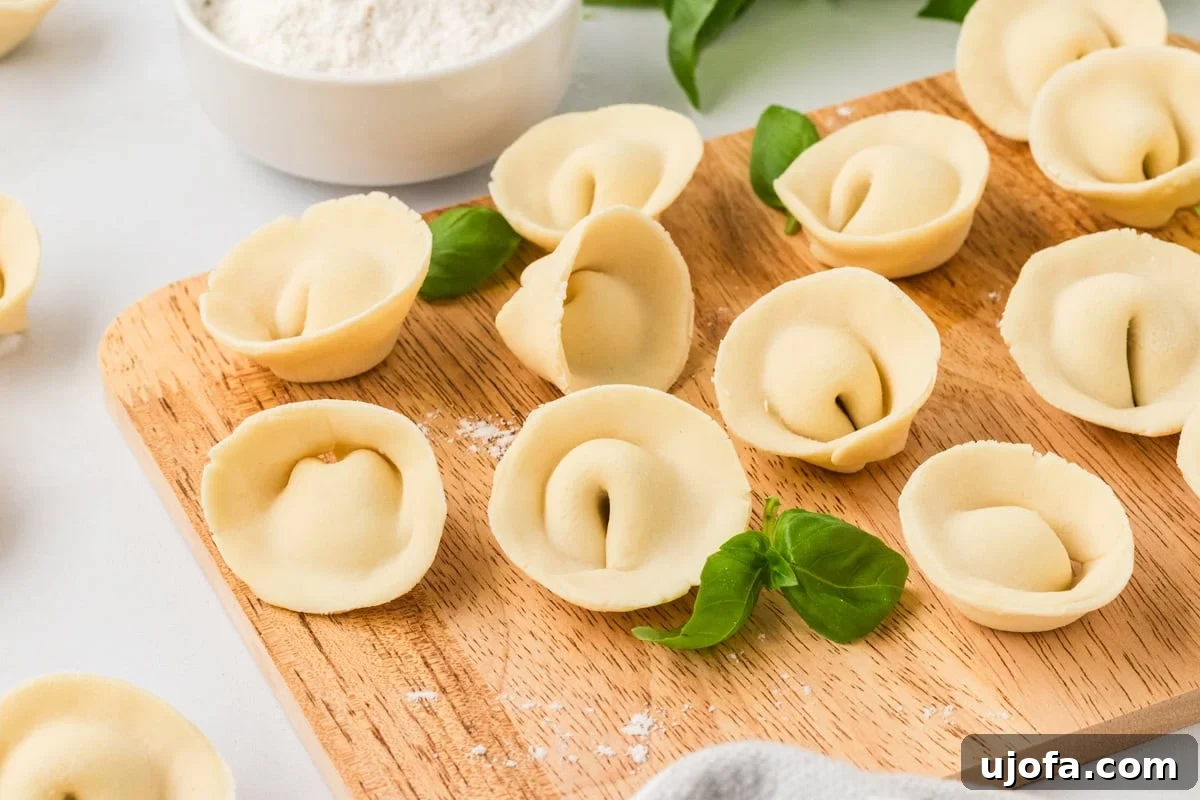
Step 14: Serve and Enjoy! Your perfectly cooked gluten-free tortellini are now ready to be enjoyed! Drain them gently and toss with your favorite sauce, add to a comforting soup, or simply drizzle with olive oil and fresh herbs. Garnish with a sprinkle of Parmesan and fresh basil for a truly irresistible meal. The satisfaction of making these from scratch is truly unmatched!
Essential Gluten-Free Pasta Making Tips
Working with gluten-free pasta dough can be a bit different from traditional wheat flour dough, but with a few key tips, you’ll achieve perfect results every time. The main secret lies in understanding and managing moisture, as gluten-free flours behave uniquely.
- Moisture is Key: Unlike wheat dough which relies on gluten development for elasticity, gluten-free pasta needs to be precisely hydrated. The dough should feel slightly tacky to the touch – not dry and crumbly, but also not so sticky that it clings stubbornly to your hands or the rolling pin. Don’t be overly rigid about the exact water measurement; instead, let the feel of the dough guide you. Factors like kitchen humidity and even altitude can affect how much liquid your flour absorbs. Always aim for a dough that is soft and just barely sticky. If it feels too wet after resting, lightly flour your work surface and rolling pin. However, resist the urge to add too much flour, as this is the quickest way to end up with a dry, cracked, and difficult-to-work-with dough. When in doubt, a slightly wetter dough is generally easier to rescue by adding a tiny bit more flour to your work surface than a dough that is too dry.
- Keep it Covered: Gluten-free dough dries out significantly faster than traditional pasta dough. This makes it prone to cracking and tearing, especially during the delicate rolling and shaping stages. To combat this, always keep both the main dough ball and any cut pasta rounds covered with a damp kitchen towel or plastic wrap whenever you’re not actively working with them. If your dough starts to feel dry or brittle, sealing the tortellini becomes incredibly difficult, and they are more likely to fall apart during cooking. Maintain that crucial moisture for pliability and easy sealing.
- The Right Flour Blend Matters: A good quality gluten-free all-purpose flour blend is crucial. Look for blends that specifically state they are suitable for baking and pasta, and often contain a mix of rice flour, tapioca starch, and sometimes xanthan gum (though this recipe includes tapioca flour separately to ensure the right texture). Each brand can vary, so you might need slight adjustments.
- Room Temperature Ingredients: Ensure your egg and water are at room temperature. This helps them incorporate more smoothly and evenly into the dry ingredients, resulting in a more uniform dough texture. Cold ingredients can cause the dough to be lumpy and harder to work with.
- Gentle Rolling Technique: When rolling out your dough, use a steady, even pressure. Roll from the center outwards, rotating the dough frequently to achieve a consistent thickness. Avoid overly aggressive rolling, which can tear the delicate dough. The goal is to get it thin enough for tenderness but thick enough to withstand handling and folding without breaking.
- Practice Makes Perfect: Don’t get discouraged if your first batch of tortellini isn’t perfectly uniform. Shaping tortellini takes a little practice. The more you make them, the quicker and more artful your process will become. Embrace the rustic charm of homemade pasta!
Serving Suggestions for Your Gluten-Free Tortellini
Once you’ve put in the effort to create these exquisite gluten-free tortellini, deciding how to serve them is the fun part! These versatile pasta pillows are incredibly delicious with a variety of accompaniments. Here are some of my favorite ways to enjoy them:
- Simple Butter and Basil: For a quick and utterly satisfying meal, toss the freshly cooked tortellini with a generous knob of melted butter, a sprinkle of sea salt, and plenty of fresh basil leaves. The simplicity allows the delicate flavor of the homemade pasta and creamy filling to truly shine. A dash of red pepper flakes can add a lovely kick.
- Classic Marinara: Pair your tortellini with my favorite gluten-free spaghetti sauce or your preferred marinara. The rich, tangy tomato sauce beautifully complements the cheesy filling, creating a comforting and familiar Italian experience.
- Creamy Alfredo or Dairy-Free Alternative: For something richer and more indulgent, a luscious Alfredo sauce is a perfect match. If you’re dairy-free, my dairy-free Alfredo sauce is an incredible option that offers all the creaminess without the dairy.
- Broth-Based Soups: Tortellini are traditionally served in broth, especially during colder months. Add freshly cooked or frozen tortellini directly into a simmering chicken or vegetable broth for a light yet satisfying meal. You can enhance it with a few fresh spinach leaves or finely chopped carrots.
- Sage Butter Sauce: A browned butter and sage sauce is another classic pairing that highlights the savory notes of the tortellini. Melt butter in a skillet, add fresh sage leaves, and cook until the butter is nutty brown and the sage is crispy. Toss with the cooked tortellini.
- Pesto Perfection: A vibrant green pesto, whether homemade or store-bought, offers a fresh and herbaceous alternative. Toss gently with the cooked tortellini for a burst of fresh flavor.
- Garlic and Olive Oil: Sometimes, the simplest things are the best. Sauté minced garlic in good quality olive oil until fragrant, then toss with the cooked tortellini and a sprinkle of Parmesan.
- Side Dishes: If serving for dinner, these tortellini are wonderful alongside a crisp, fresh green salad with a light vinaigrette, some garlicky sautéed seasonal vegetables (like asparagus or broccoli), or a slice of warm, crusty gluten-free baguette perfect for soaking up any extra sauce.
No matter how you choose to serve them, these homemade gluten-free tortellini are a cozy, comforting, and always feel like a special treat.
Storage and Freezing Instructions
Proper storage is essential to maintain the quality and texture of your homemade gluten-free tortellini. Based on my experience, how you store them makes a significant difference in their final deliciousness.
- Fresh Tortellini: For the absolute best taste and texture, I highly recommend enjoying your homemade gluten-free tortellini immediately after shaping and cooking. Fresh pasta always yields the most tender and delightful results.
- Refrigeration – Not Recommended: I’ve tested storing these tortellini in the refrigerator, and I don’t recommend it for uncooked pasta. Gluten-free pasta dough tends to dry out very quickly in the fridge, making the tortellini tough and brittle. Even prolonged boiling didn’t restore the desired tender texture. The uncooked, refrigerated tortellini often cooked up dense and unappetizing.
- Freezing – Highly Recommended: Freezing is by far the best method for long-term storage of uncooked gluten-free tortellini. They freeze beautifully and maintain their shape and texture exceptionally well when cooked from frozen.
- How to Freeze: To freeze, arrange the freshly shaped tortellini in a single layer on a baking sheet lined with parchment paper. Ensure they are not touching each other to prevent them from sticking together. Cover the baking sheet loosely with plastic wrap and place it in the freezer. Once the tortellini are completely solid (this usually takes 1-2 hours), transfer them to a freezer-safe airtight container or a heavy-duty freezer bag. This step helps prevent freezer burn and keeps them protected.
- Freezer Lifespan: Properly frozen, your gluten-free tortellini will keep well for up to 3 months.
- Cooking from Frozen: There’s no need to thaw frozen tortellini! Simply drop them directly into a large pot of gently boiling, salted water. Cook for approximately 7–9 minutes, or until they float to the surface and are tender throughout. Be gentle when stirring to avoid breaking apart the delicate pasta.
By following these storage guidelines, you can ensure that every batch of your homemade gluten-free tortellini tastes as wonderful as the first!
Troubleshooting Common Gluten-Free Pasta Issues
Even with the best recipe, sometimes things can go a little awry when making homemade pasta, especially when it’s gluten-free. Here are some common problems you might encounter and how to fix them:
- Dough is Too Sticky: If your dough feels excessively sticky and unmanageable after the initial mix and rest, it might have too much moisture. Lightly dust your work surface and hands with a little more gluten-free flour (preferably the all-purpose blend). Knead for another minute or two, incorporating just enough flour until it becomes workable. Remember, a slight tackiness is good, but it shouldn’t be stubbornly sticking everywhere.
- Dough is Too Dry or Crumbly: A dry dough will crack and tear when you try to roll it. This means it needs more moisture. Add water very sparingly, a teaspoon at a time. Dip your fingers in water and gently knead it into the dough until it becomes pliable again. Wrap it back in plastic wrap and let it rest for 10-15 minutes to allow the water to absorb fully before trying to roll again.
- Pasta Tears During Rolling: This often happens if the dough is too dry or rolled too thin too quickly. If it’s dry, refer to the “Dough is Too Dry” tip above. If you’re rolling too fast, slow down and apply even pressure. Ensure your surface is lightly floured to prevent sticking, but not so much that it dries out the dough further. Also, make sure the dough is properly rested.
- Tortellini Don’t Seal Properly / Filling Leaks: This is usually a moisture issue. Either the edges weren’t wet enough, or the dough was too dry to begin with. Make sure you lightly wet the entire edge of the pasta round with water before folding. If the dough itself is too dry, it won’t adhere well. Keep cut rounds covered with a damp cloth to prevent drying. Press firmly but gently when sealing, ensuring no air is trapped.
- Tortellini Fall Apart During Cooking: This often indicates that the tortellini weren’t sealed properly or the dough was too dry. Ensure firm, complete seals around the filling. Overfilling can also cause them to burst. Cook in gently boiling water, not a violent rolling boil, which can be too aggressive for delicate pasta.
- Pasta is Chewy After Cooking: If your pasta turns out chewy, it’s likely too thick. Aim for that ⅛-inch thickness or even slightly thinner if you prefer. Also, ensure you don’t overcook them; fresh pasta cooks very quickly.
Patience and observation are your best tools when troubleshooting. Don’t be afraid to adjust as you go, and remember that every batch is a learning experience!
Variations and Customizations
One of the beautiful aspects of homemade pasta is the endless possibilities for customization. While this ricotta and basil filling is a classic, don’t hesitate to get creative with your gluten-free tortellini!
- Different Fillings:
- Spinach and Ricotta: Sauté fresh spinach, squeeze out excess water, chop finely, and mix with ricotta, Parmesan, a pinch of nutmeg, salt, and pepper.
- Mushroom and Thyme: Sauté finely chopped mushrooms with garlic and fresh thyme until all moisture has evaporated. Mix with ricotta or a dairy-free cream cheese alternative.
- Butternut Squash: Roast or steam butternut squash until very tender, mash it, and mix with ricotta, a touch of brown sugar or maple syrup, and sage.
- Meat Filling: For a heartier option, use finely ground cooked meat (like beef, pork, or a mix) seasoned with herbs, mixed with a little Parmesan and maybe a breadcrumb substitute to bind.
- Vegan Options: For a dairy-free and vegan tortellini, you can use a high-quality gluten-free vegan pasta dough recipe (often using chickpea or lentil flour for protein) and fill it with a mixture of cashew cheese, tofu ricotta, or finely mashed sweet potato with herbs.
- Herb Variations: Experiment with different fresh herbs in your filling. Instead of basil, try parsley, chives, dill, or a mix of Italian herbs.
- Cheese Combos: While Parmesan is traditional, you can also incorporate other cheeses like mozzarella (shredded), Pecorino Romano for a sharper flavor, or even a smoked gouda for a unique twist.
- Spice it Up: Add a pinch of red pepper flakes to your filling for a subtle heat, or a dash of black pepper for extra zing.
- Serving Sauce Swaps: Beyond the suggestions above, consider serving your tortellini with a creamy pesto, a vibrant roasted red pepper sauce, or a simple olive oil and garlic infused with chili.
Don’t be afraid to play around with flavors and textures to find your perfect gluten-free tortellini combination!
More Delicious Gluten-Free Pasta Recipes to Explore
If you’ve fallen in love with making homemade gluten-free tortellini, you’re in for a treat! There’s a whole world of gluten-free pasta possibilities waiting to be explored. Here are some other fantastic recipes to expand your gluten-free repertoire and keep your pasta cravings satisfied:
- Almond Flour Pasta: A delicate and flavorful alternative, perfect for lighter sauces.
- Gluten-Free Boursin Cheese Pasta: A wonderfully creamy and rich pasta dish that comes together quickly.
- Gluten-Free Gnocchi: Soft, pillowy potato dumplings that are naturally gluten-free and incredibly comforting.
- Gluten-Free Lasagna: A classic Italian favorite reimagined without gluten, perfect for feeding a crowd.
Embrace the joy of homemade gluten-free pasta – it’s a journey of delicious discovery!