
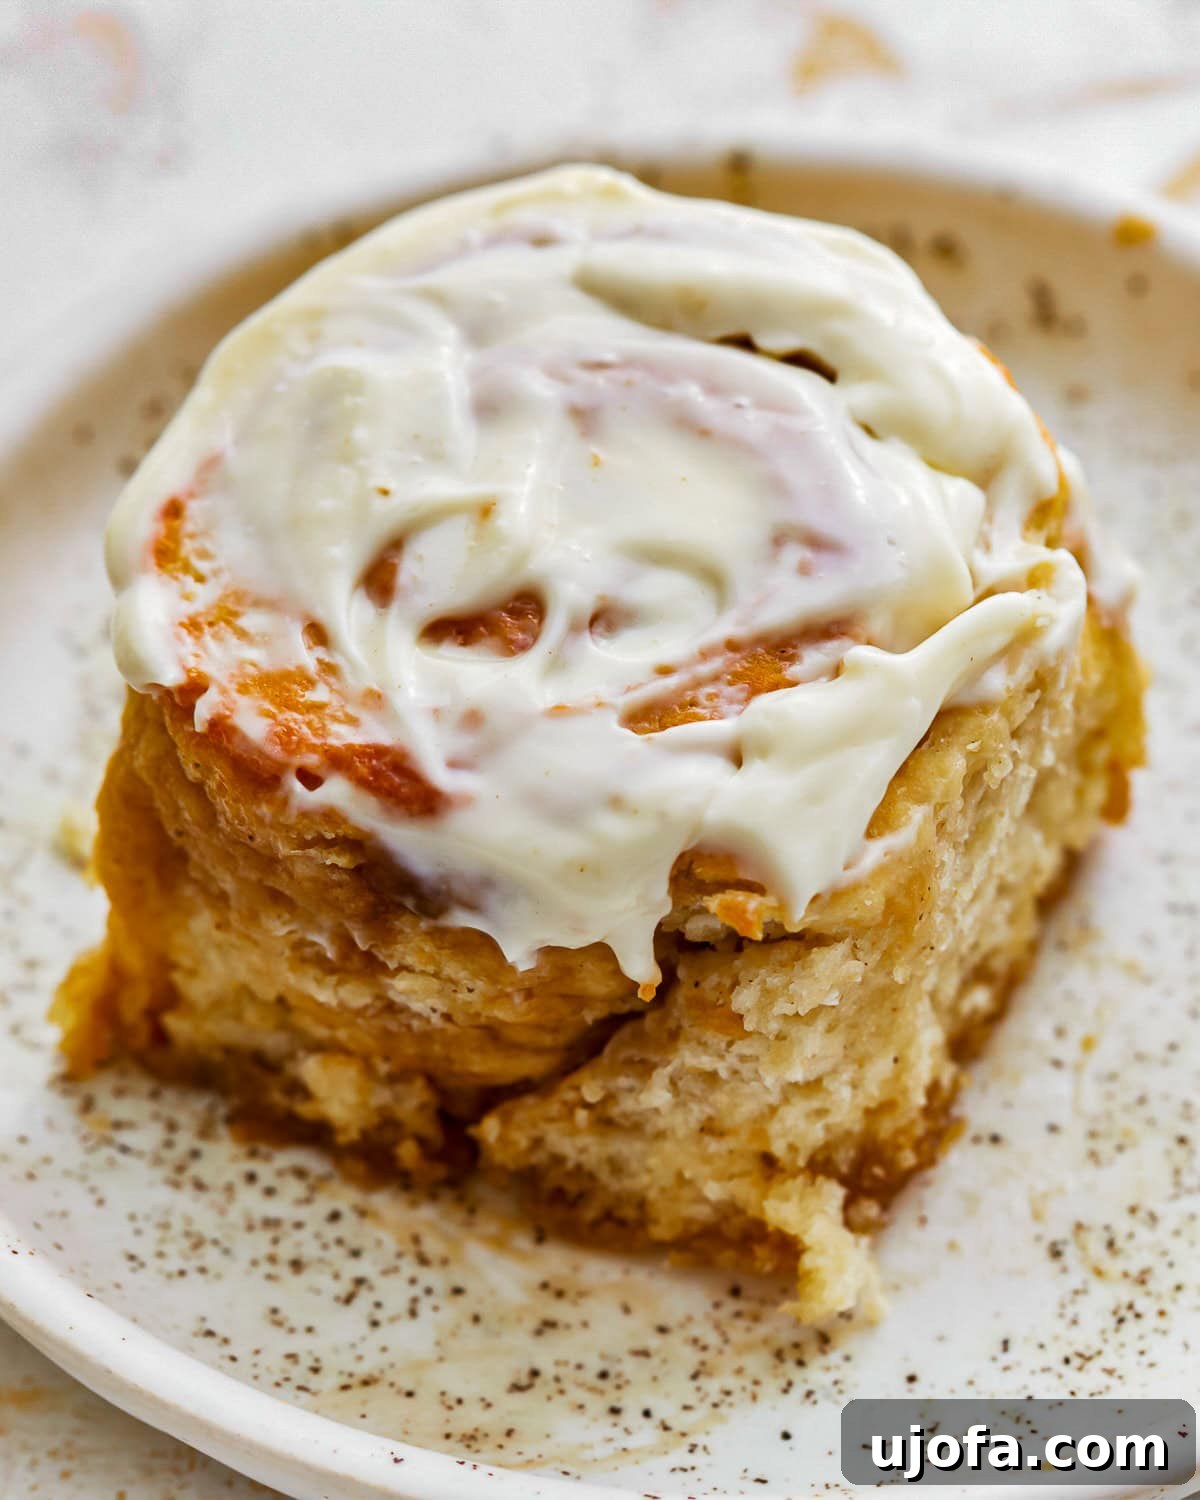
There’s arguably no breakfast treat more comforting and indulgent than a warm, pillowy gluten-free cinnamon roll. Imagine biting into a swirl of soft, sweet dough, generously filled with a rich cinnamon-sugar mixture, all crowned with a luscious layer of tangy cream cheese frosting or a delicate vanilla glaze. If you’ve been searching for the perfect recipe to recreate this bliss without gluten, your search ends here. These easy gluten-free cinnamon rolls are designed to be incredibly soft, delightfully fluffy, and bursting with that classic cinnamon flavor. What’s more, this versatile recipe also offers simple modifications to make them dairy-free, egg-free, or even entirely vegan, ensuring everyone can enjoy this beloved pastry!
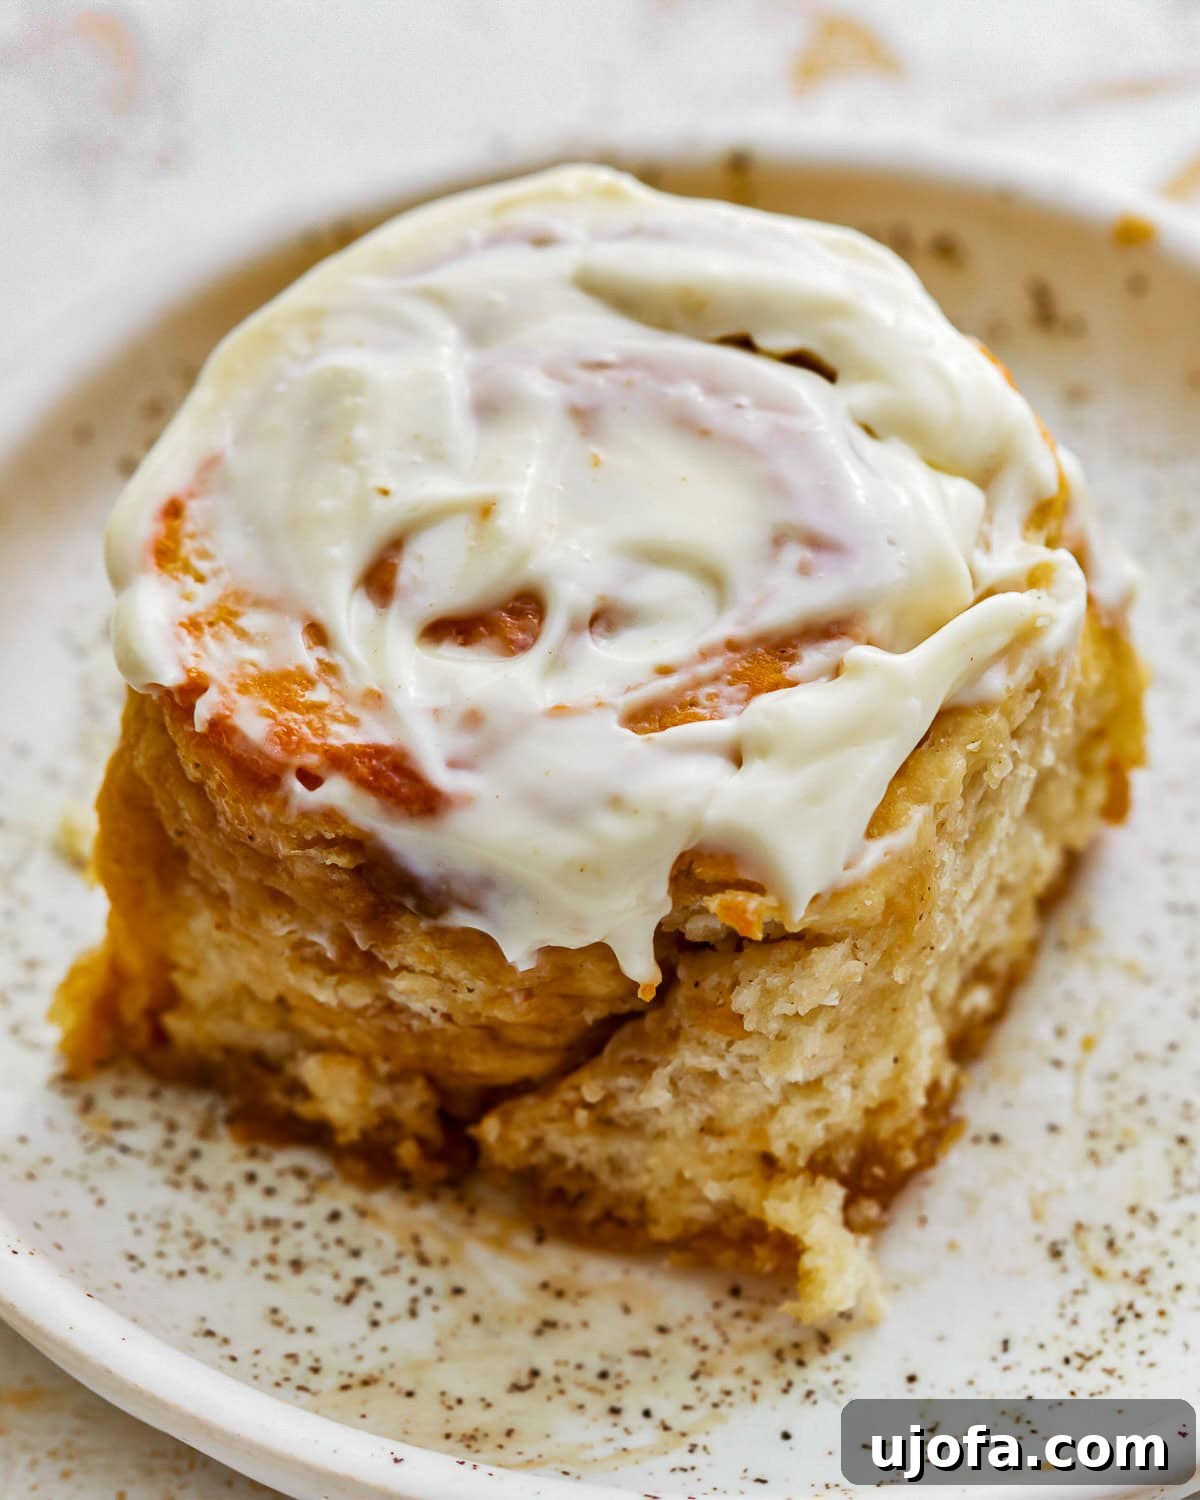
Crazy good!!! We used the cream cheese frosting that oozed down between tender layers of cinnamon dough. Best gf cinnamon roll I’ve ever had, AND better than most gluten ones!
– Gina
The Ultimate Gluten-Free Cinnamon Rolls Recipe: Soft, Fluffy, and Flavorful
Cinnamon rolls hold a special place in the hearts of many, often serving as a cherished sweet breakfast or brunch treat, particularly during festive seasons like Easter or Christmas. However, the joy of a homemade cinnamon roll shouldn’t be reserved for special occasions. This exceptional gluten-free cinnamon roll recipe empowers you to create bakery-quality rolls right in your own kitchen, any day of the week. Designed for simplicity, it features easy-to-follow, step-by-step instructions, a clever quick-rise method to save time, and not one, but two delectable topping options: the rich, classic cream cheese frosting, or a delicate, sweet vanilla glaze. Get ready to impress yourself and your loved ones with these irresistible gluten-free delights!
Essential Gluten-Free Baking Tips for Perfect Cinnamon Rolls
Baking with gluten-free flours can sometimes feel a bit different from traditional baking, but with a few key tips, you can achieve remarkable results. These insights are specifically tailored to help you master gluten-free cinnamon rolls, ensuring they turn out soft, airy, and perfectly risen every time.
- Choose the Right Gluten-Free Flour Blend for Yeast Baking: The foundation of soft, well-risen cinnamon rolls lies in selecting an appropriate gluten-free flour blend. Opt for blends specifically designed for yeast baking that already include a binder like xanthan gum or psyllium husk. These binders are crucial as they mimic the elasticity that gluten provides, helping the dough to rise and hold its structure. Excellent choices often include Pillsbury Gluten-Free All-Purpose Flour Blend, King Arthur Gluten-Free Bread Flour, Better Batter, or Cup4Cup. Avoid using single flours such as almond flour or oat flour on their own, or blends that lack binders, as they will likely result in a dense, crumbly, or gummy dough that won’t rise properly. If your chosen blend does not contain a binder, add 1 teaspoon of xanthan gum per cup of flour for optimal results.
- Maintain Ideal Temperatures for Yeast Activation: Yeast is a living organism, and its activity is highly sensitive to temperature. It’s critical not to overheat your milk or melted butter, as excessive heat will kill the yeast, preventing your cinnamon rolls from rising. The milk and butter should be just warm to the touch, similar to bathwater, ideally between 110-115°F (43-46°C). Using a food thermometer is highly recommended for accuracy.
- Precision in Warming Milk: For consistent results, I find microwaving the milk to be very effective. Use a glass measuring cup and microwave the milk for approximately 1 minute. Always check the temperature with a thermometer to ensure it falls within the 110-115°F (43-46°C) range, which is perfect for activating the yeast without damaging it.
- Avoid Over-Thinning the Dough: Gluten-free yeast dough, by its nature, is not as elastic or pliable as traditional wheat-based dough. When rolling it out, resist the urge to make it too thin. A thickness of about 1/2-inch is ideal to ensure the rolls maintain their structure, remain moist, and offer that satisfying fluffy texture. Over-thinning can lead to dry, brittle rolls.
- Seal Dough Cracks with Warm Water: You might notice small cracks appearing in gluten-free dough during rolling and shaping. Don’t worry, this is normal! To smooth these out and help the dough maintain its integrity, simply dip your fingers in warm water and gently smooth over any cracks. This also adds a touch of moisture, which is beneficial for the dough’s texture.
- Roll Dough Tightly, But Gently: When forming your cinnamon roll log, aim for a tight roll to create those beautiful, distinct swirls. However, be careful not to roll it so tightly that you squeeze out the delicious cinnamon filling. A gentle but firm tension is the key to perfectly shaped rolls with the filling evenly distributed.
- The Second Rise Happens in the Preheating Oven: This is a fantastic quick-rise method! Instead of a separate, lengthy second rise, place your shaped cinnamon rolls directly into the cold oven. Then, turn on the oven to its baking temperature (375°F / 190°C). As the oven preheats, the warmth will encourage the dough to rise. Keep a close eye on them and start your baking timer as soon as the oven reaches the target temperature. This method significantly cuts down on overall preparation time without compromising on rise or texture.
- Room Temperature Ingredients for Dough: For the best incorporation and rise, ensure your eggs and butter (for the dough, if softened) are at room temperature. This helps them blend more smoothly with other ingredients, creating a more cohesive and evenly textured dough.
- Don’t Add Too Much Flour: Gluten-free dough can often be tackier than its gluten-containing counterpart. Resist the temptation to add more flour than specified, even if it feels sticky. Too much flour will result in dry, dense rolls. The dough should be soft and slightly tacky.
★
★
★
★
Gluten-Free Cinnamon Rolls
Audrey Roberts
12
cinnamon rolls
15
mins
15
mins
40
mins
1
hr
10
mins
Share by Email
Print Recipe
Ingredients
Gluten-Free Dough
- ½ cup granulated sugar
- 1 cup milk, warmed to 110-115°F (43-46°C)
- 1 tbsp instant yeast/rapid yeast
- ¼ cup unsalted butter, melted and cooled
- 2 large eggs, room temperature
- 1 tsp apple cider vinegar
- 3¼ cups gluten-free all-purpose flour with xanthan gum (recommended for yeast baking, we recommend Pillsbury or Better Batter Brand)
- 2 tsp baking powder
- ¼ tsp salt
- ½ cup heavy whipping cream, warmed
Cinnamon Filling
- ¼ cup unsalted butter, softened
- ½ tsp pure vanilla extract
- 1 cup brown sugar, packed
- 1½ tbsp ground cinnamon
Cream Cheese Frosting
- 6 oz. cream cheese, softened
- ⅓ cup unsalted butter, softened
- 2 cups powdered sugar
- 1 tsp pure vanilla extract
- ⅛ tsp salt
Vanilla Icing
- 2 cups powdered sugar
- 5 tbsp milk
- 1 tsp pure vanilla extract
Instructions
For the Rolls:
-
Pour the warm milk into a large mixing bowl. Add the granulated sugar to the warm milk and stir to combine. Pour the instant yeast over the milk mixture, cover with a kitchen towel, and allow it to bubble up for 1-2 minutes. This “proofs” the yeast, ensuring it’s active.
-
Whisk the room-temperature eggs in a small bowl until lightly beaten. Add the whisked eggs and the apple cider vinegar into the large mixing bowl with the yeast mixture. Mix until all the wet ingredients are well combined.
-
Add the gluten-free flour blend, baking powder, and salt to the mixing bowl with the wet ingredients.
-
Pour the melted and cooled butter into the flour mixture. Mix for 1-2 minutes, or until all the ingredients are fully combined and a cohesive dough begins to form. If using a KitchenAid stand mixer, the paddle attachment works well for this initial mixing. Scrape down the sides of the bowl to ensure everything is incorporated.
-
Switch from the paddle attachment to the dough hook on your stand mixer. Mix on medium speed for 3-5 minutes. During this process, the dough will become more elastic and start to pull away from the sides of the bowl. Remember, gluten-free yeast dough is naturally softer and tackier than traditional wheat dough, so resist the urge to add more flour. It should be soft and sticky to the touch.
-
Prepare for the first rise: Lightly grease a heat-proof bowl. Transfer the dough into this greased bowl. Dip your hands in warm water and gently rub the dough ball to smooth its surface. This not only makes it easier to handle but also adds crucial moisture, aiding in a better rise. Cover the bowl tightly with plastic wrap to prevent the dough from drying out.
-
Create a warm environment for rising: Place the covered dough bowl inside a larger heat-proof bowl. Heat 2 cups of water in the microwave for 2 minutes until very hot. Carefully pour this hot water into the larger bowl, being very careful not to get any water into the bowl containing the dough. Cover both bowls with a kitchen towel to trap the warmth and humidity. Allow the dough to rise in this warm environment for 20 minutes. This quick-rise method promotes a good, airy texture.
-
While the dough is undergoing its first rise, prepare the irresistible cinnamon filling. In a small bowl, combine the softened 1/4 cup of unsalted butter and 1/2 tsp of pure vanilla extract. Beat or mix these ingredients together until they are smooth and well combined.
-
In a separate small bowl, mix together the 1 cup of packed brown sugar and 1 1/2 tbsp of ground cinnamon until evenly combined. This creates the aromatic cinnamon-sugar mixture for the filling.
-
Prepare your work surface for rolling the dough. Lay a piece of parchment paper on a clean counter and spray it generously with gluten-free cooking spray or grease it lightly with oil or butter. Carefully transfer the risen dough onto the greased parchment paper. Lightly dust the top of the dough with 1 tablespoon of gluten-free flour to prevent sticking. Using your hands, gently press and shape the dough into a rough rectangle. Dust your rolling pin with gluten-free flour as well, then roll out the dough to an approximate thickness of 1/2-inch, forming a rectangle roughly 12×14 inches in size.
-
Using a spatula or the back of a spoon, evenly spread the prepared butter mixture over the entire surface of the rolled-out dough, extending all the way to the edges. This butter layer will help the cinnamon sugar adhere and create a gooey texture.
-
Generously sprinkle the brown sugar and cinnamon mixture evenly over the buttered dough. Gently pat the mixture down with your hands to ensure it sticks and is well-distributed.
-
Time to roll! Using the edge of the parchment paper to assist you, begin folding the longest edge of the dough up to start forming the roll. Continue to roll the dough slowly and tightly, creating a uniform log shape. Ensure it’s snug but not so tight that the filling squeezes out.
-
To cut perfectly even rolls without flattening them, use dental floss. Slide a piece of unflavored dental floss underneath the dough log, cross the ends over the top, and pull firmly to slice through. First, cut the dough log in half, then cut each half into 6 equal rolls, yielding a total of 12 beautiful cinnamon rolls.
-
Lightly grease a 9×13-inch baking dish. Arrange the cut cinnamon rolls in the prepared dish, leaving a little space between each to allow for expansion during the rise and bake.
-
For an extra moist and gooey result, warm 1/2 cup of heavy cream in the microwave for about 30 seconds. Carefully pour this warm cream evenly over the arranged cinnamon rolls in the baking dish. This “cream bath” is a secret to their incredible tenderness.
-
Initiate the second rise and bake: Place the baking dish with the cinnamon rolls on the middle rack of your oven. Close the oven door, then turn your oven to 375°F (190°C). As the oven preheats, the rolls will undergo their final rise. Once your oven reaches the target temperature, begin timing the bake. Bake the rolls for 15-20 minutes, or until they are beautifully light golden brown on top and cooked through. It’s always a good idea to check your rolls at the 15-minute mark to prevent over-baking.
-
Once baked, remove the cinnamon rolls from the oven. Allow them to cool for a few minutes in the baking dish before applying your chosen frosting or icing. This short cooling period helps the frosting set slightly without completely melting.
For the Cream Cheese Frosting:
-
In a medium-sized mixing bowl, combine the softened 6 ounces of cream cheese, 1/3 cup of softened unsalted butter, 1 tsp of pure vanilla extract, and 1/8 tsp of salt. Beat these ingredients together with an electric mixer until the mixture is completely smooth and creamy. Gradually add the 2 cups of powdered sugar, one cup at a time, mixing thoroughly after each addition until the frosting is smooth, lump-free, and has a spreadable consistency. It’s important not to chill this frosting; keep it at room temperature until your cinnamon rolls are freshly baked and slightly cooled. Generously spread the luscious cream cheese frosting over the warm cinnamon rolls, allowing it to melt slightly into the cracks for maximum indulgence.
For the Vanilla Icing:
-
For a simpler, sweet topping, combine all the vanilla icing ingredients—2 cups of powdered sugar, 5 tbsp of milk, and 1 tsp of pure vanilla extract—in a medium-sized bowl. Whisk or stir vigorously until the mixture is completely smooth and free of lumps. The consistency should be pourable but thick enough to coat a spoon. Drizzle this sweet vanilla icing over the warm cinnamon rolls for a delicate finish.
Recipe Notes
- No Stand Mixer? No Problem! If you don’t have a stand mixer, you can absolutely make this dough by hand. Simply use a sturdy spoon or spatula to mix the initial ingredients until combined. For the kneading step, turn the dough out onto a lightly floured surface and knead it by hand for about 5-7 minutes until it feels cohesive and slightly elastic. It requires a bit more elbow grease but is totally doable!
- Bringing Eggs to Room Temperature Quickly: Room temperature eggs incorporate better into dough, leading to a smoother texture. If you forgot to take your eggs out ahead of time, simply place the whole (uncooked) eggs in a bowl of warm (not hot) water for 5-10 minutes. They’ll be ready to use!
- Flour Your Rolling Pin for Ease: To prevent the gluten-free dough from sticking to your rolling pin, always dust the pin lightly with gluten-free flour before rolling. This will make the process of shaping your dough much smoother and less frustrating.
- Dental Floss for Perfect Cuts: Using unflavored dental floss to cut your cinnamon rolls is a game-changer! It creates incredibly clean, sharp cuts without compressing the delicate dough layers or squeezing out the filling, which can often happen with a knife. Just slide it under the log, cross, and pull.
- Adjusting Sweetness: Feel free to slightly adjust the amount of sugar in both the dough and the filling to suit your personal preference. For a less sweet roll, you can reduce the granulated sugar in the dough by a couple of tablespoons.
Nutrition Facts (Approximate per serving)
Serving: 1serving
Calories: 424kcal
Carbohydrates: 73g
Protein: 6g
Fat: 14g
Saturated Fat: 8g
Polyunsaturated Fat: 1g
Monounsaturated Fat: 4g
Trans Fat: 1g
Cholesterol: 68mg
Sodium: 116mg
Potassium: 157mg
Fiber: 4g
Sugar: 48g
Vitamin A: 473IU
Vitamin C: 1mg
Calcium: 120mg
Iron: 2mg
Nutrition information is automatically calculated, so should only be used as an approximation.
Additional Info
Breakfast, Brunch, Dessert
American
How To Make Gluten-Free Cinnamon Rolls: A Detailed Step-by-Step Guide
Creating these heavenly gluten-free cinnamon rolls is a straightforward process when you follow these visual and detailed steps. Each stage is designed to ensure you achieve soft, fluffy, and perfectly sweet rolls every time.
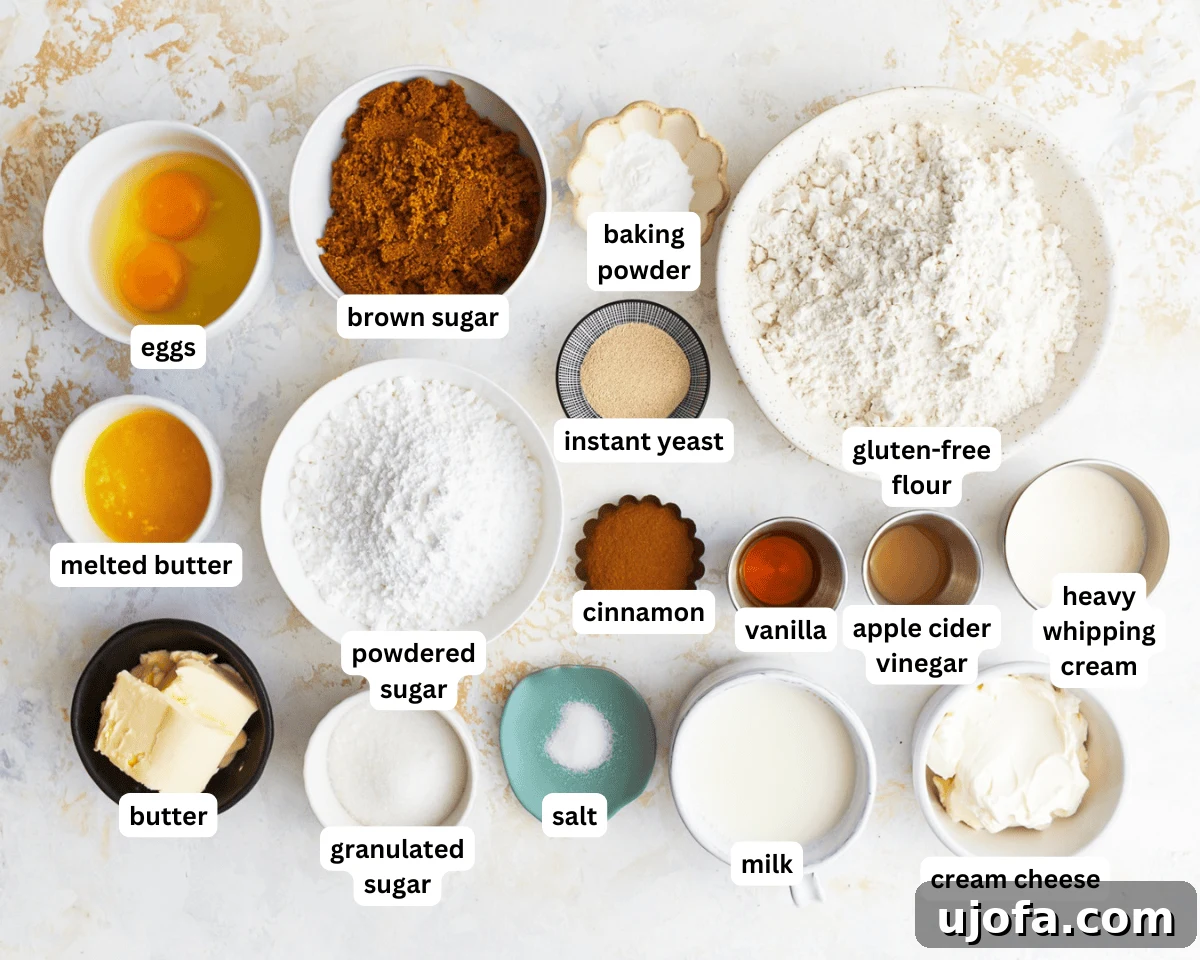
Begin by gathering all the necessary ingredients. Having everything prepped makes the baking process smoother and more enjoyable. Make sure your eggs and butter (for the dough) are at room temperature for optimal mixing.
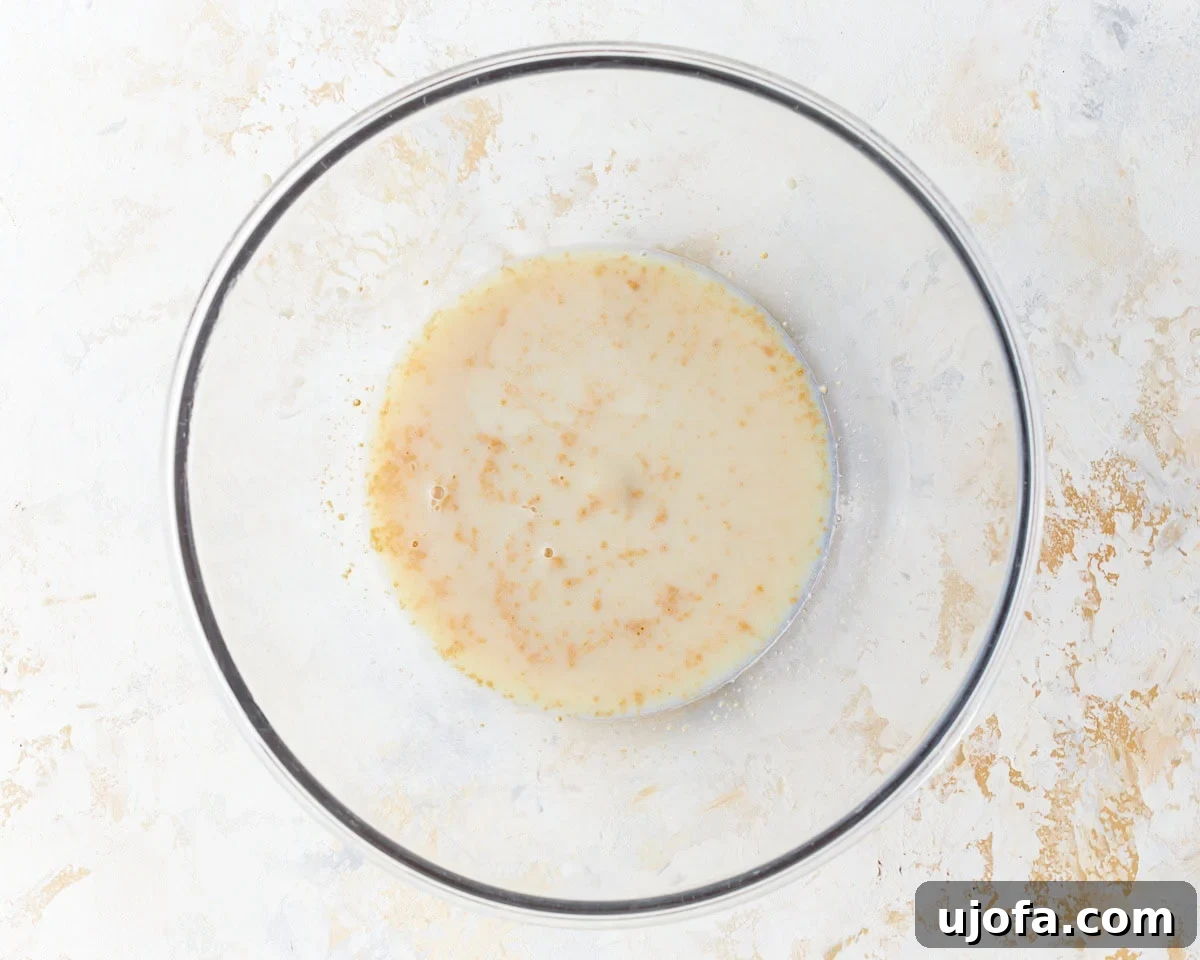
Proof the yeast base: In a large mixing bowl, pour 1 cup of warm milk (ensure it’s between 110-115°F / 43-46°C). Add 1/2 cup of granulated sugar and stir until the sugar dissolves. Evenly sprinkle 1 tablespoon of instant yeast over this milk mixture. Cover the bowl with a clean kitchen towel and let it sit for 1-2 minutes. You’ll see the yeast begin to bubble and foam, indicating it’s active and ready to work its magic.
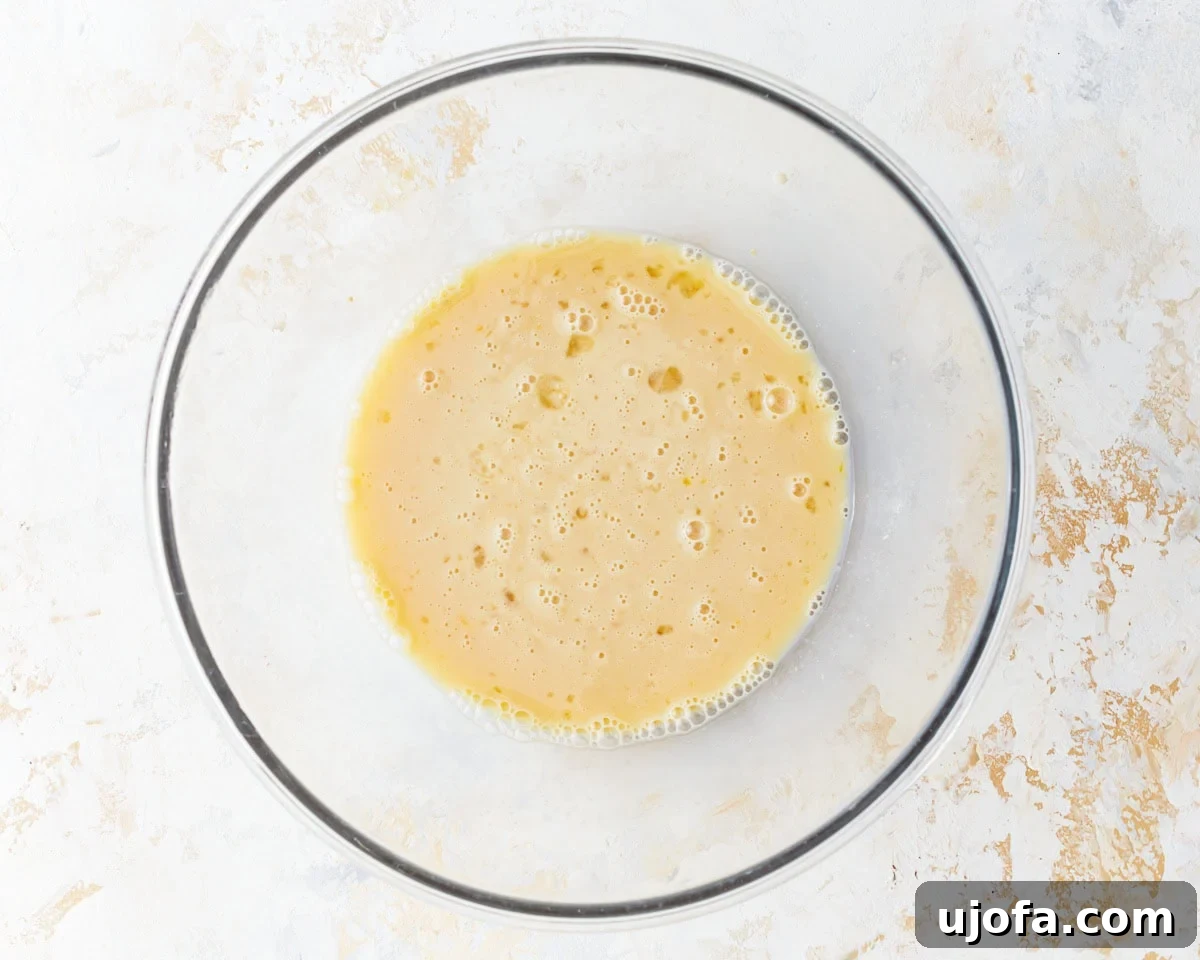
Add eggs and vinegar: In a separate small bowl, lightly whisk 2 room-temperature large eggs. Pour the whisked eggs and 1 teaspoon of apple cider vinegar into the mixing bowl with the yeast mixture. Mix all these ingredients until they are thoroughly combined, creating a smooth liquid base for your dough.
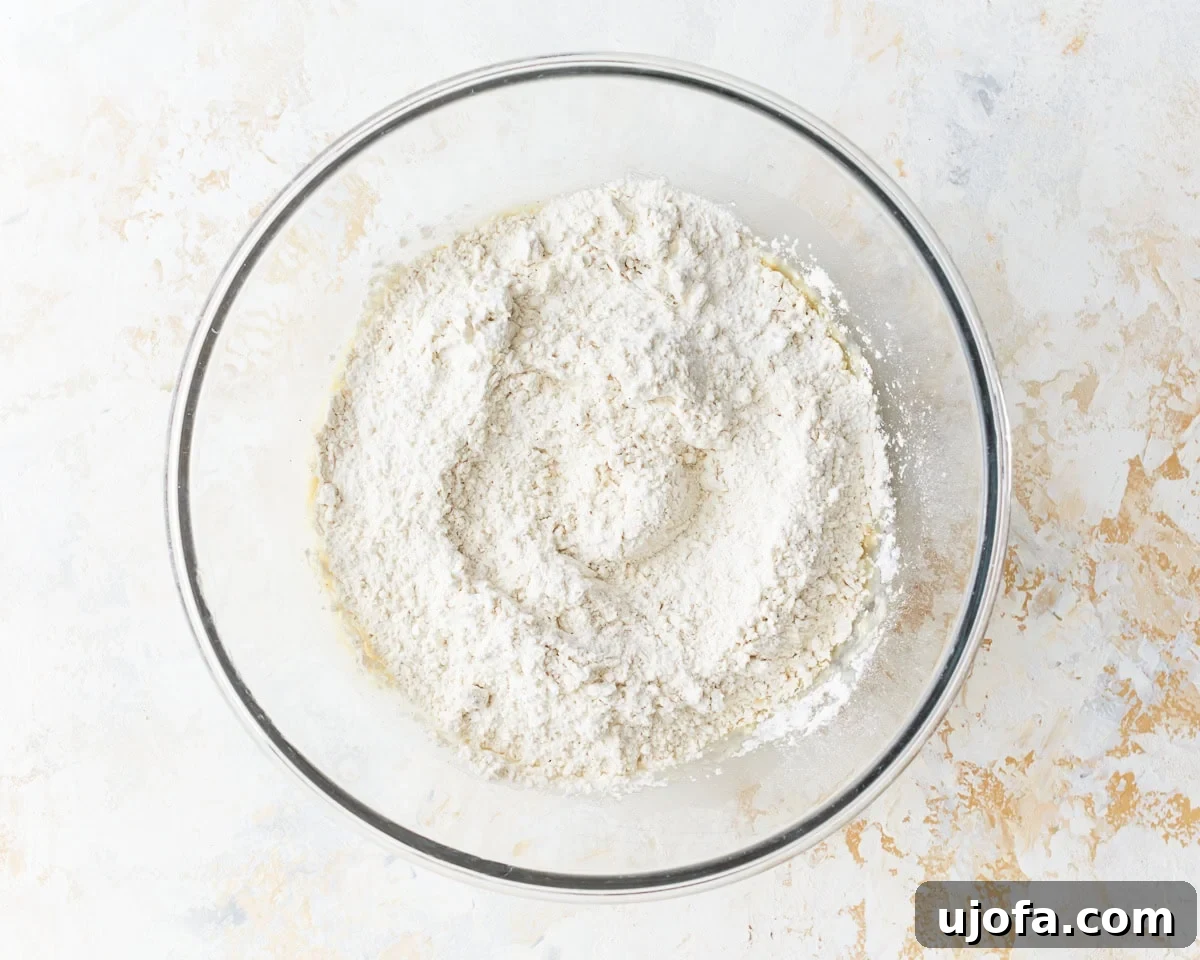
Combine the dry ingredients: To the large mixing bowl, add 3 1/4 cups of your chosen gluten-free all-purpose flour blend (one that includes xanthan gum for yeast baking), 2 teaspoons of baking powder, and 1/4 teaspoon of salt. These dry components will give your rolls their structure and flavor.
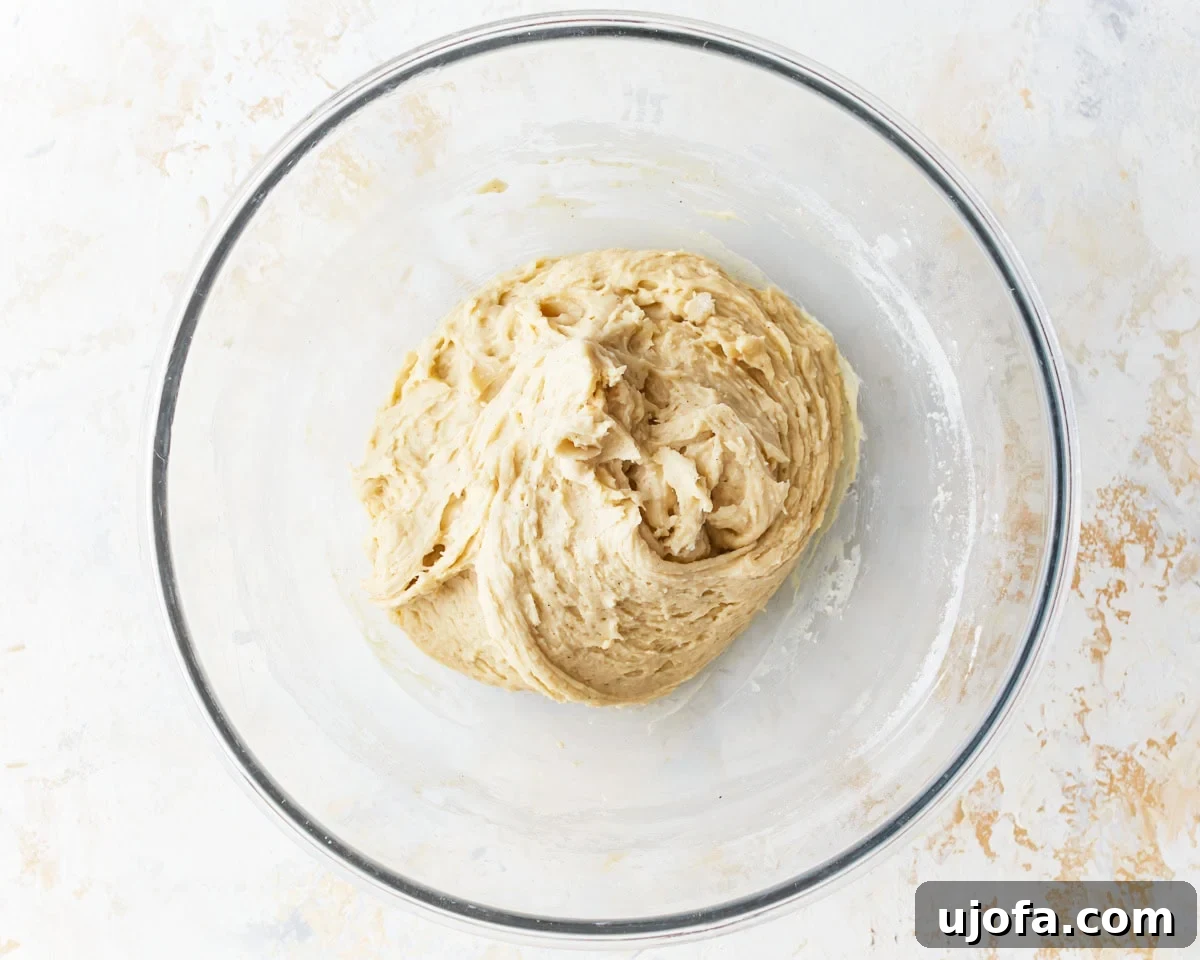
Add the melted butter: Pour the melted and cooled butter into the flour mixture in the mixing bowl. Mix for 1-2 minutes using the paddle attachment of your KitchenAid stand mixer, or by hand with a sturdy spoon, until all ingredients are fully combined and a shaggy dough forms. Be sure to scrape down the sides of the bowl to ensure everything is incorporated.
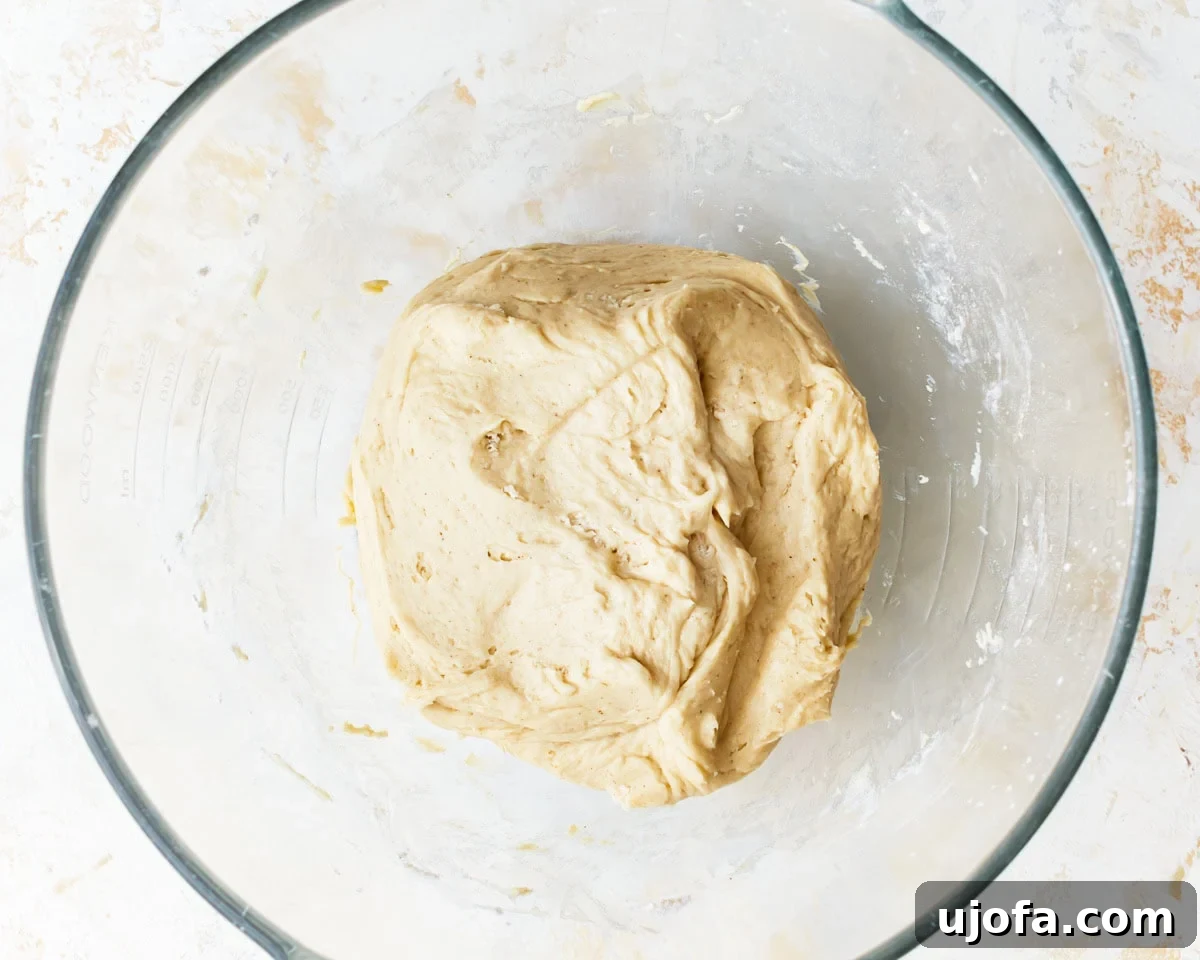
Gently knead the dough: Switch to the dough hook attachment on your stand mixer. Mix the dough on medium speed for 3-5 minutes. During this process, the dough will become more uniform and start to pull away from the sides of the bowl. It’s important to remember that gluten-free yeast dough will always be softer and tackier than traditional dough; do not be tempted to add more flour, as this will result in dry rolls. The consistency should be soft and sticky.
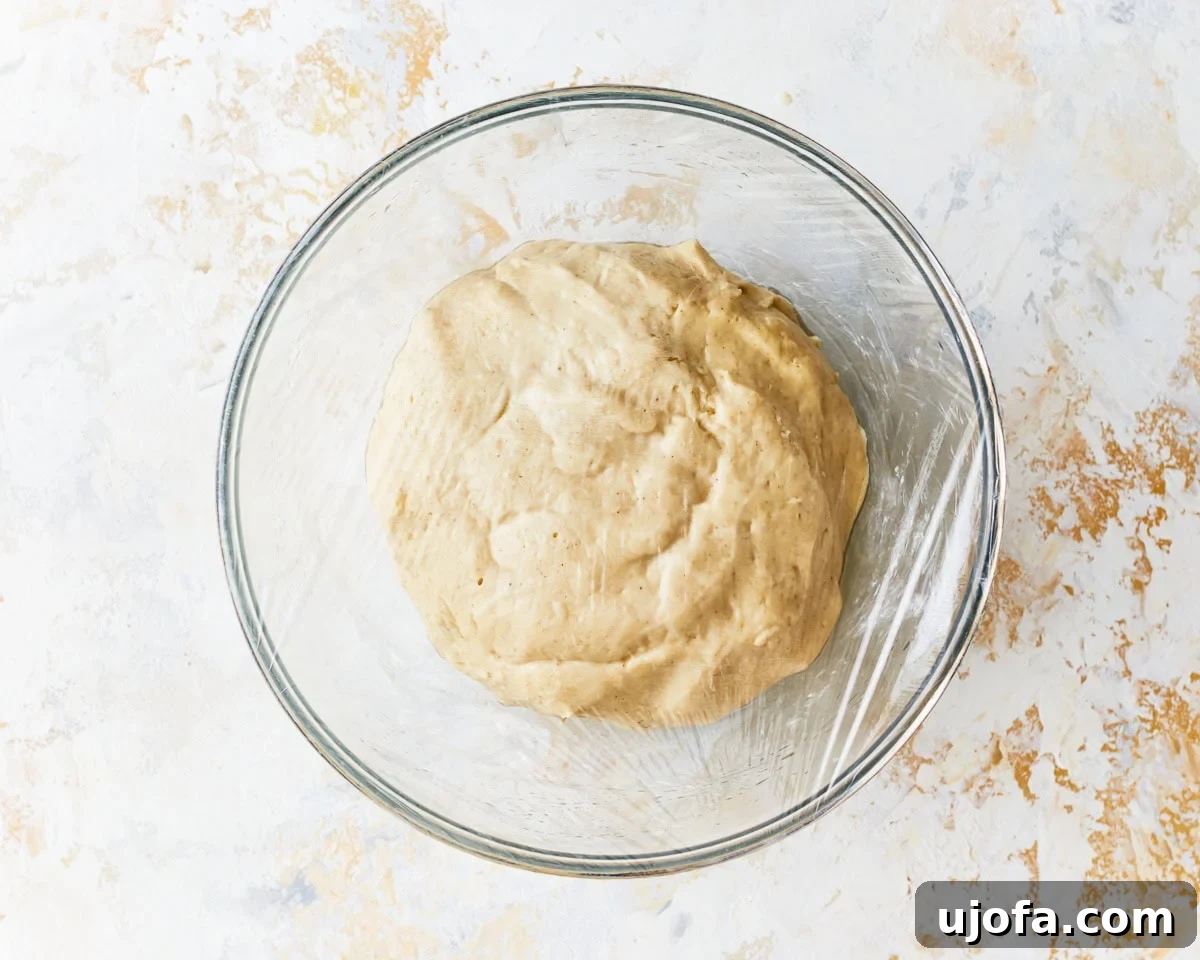
First rise: Transfer the kneaded dough into a greased, heat-proof bowl. Wet your hands slightly with warm water and gently rub the surface of the dough ball to make it smooth. This step helps add moisture and aids in the rising process. Cover the bowl tightly with plastic wrap. For an effective warm environment, place this bowl inside a larger heat-proof bowl. Microwave 2 cups of water for 2 minutes until it’s very hot, then carefully pour it into the larger bowl (avoiding getting water into the dough bowl). Cover both bowls with a kitchen towel and let the dough rise for 20 minutes. This creates a humid, warm mini-proofing box.
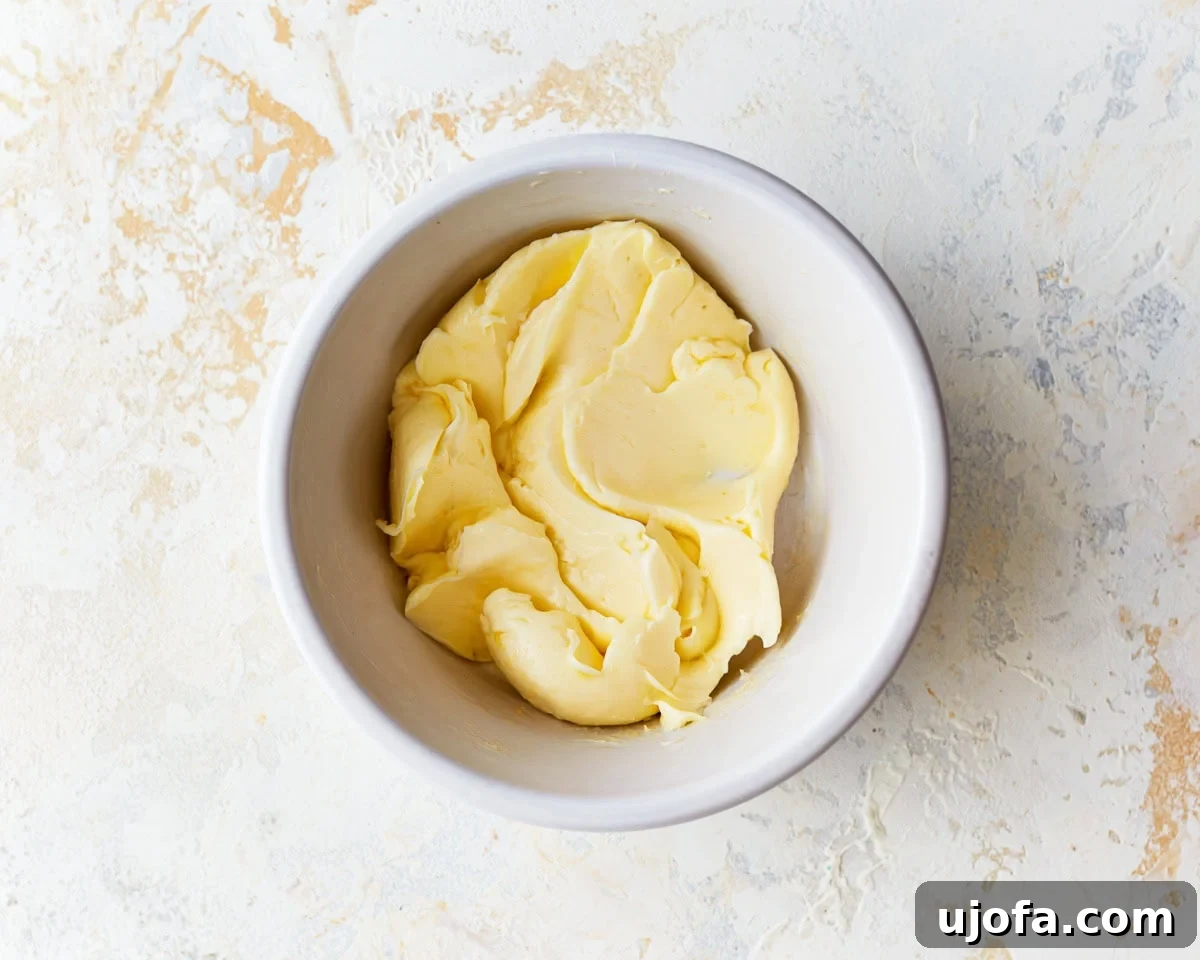
Make the cinnamon filling: While your dough is rising, prepare the gooey cinnamon filling. In a small bowl, combine 1/4 cup of softened unsalted butter with 1/2 teaspoon of pure vanilla extract. Mix them together until they are well combined and smooth. This buttery vanilla mixture will be spread over the dough.
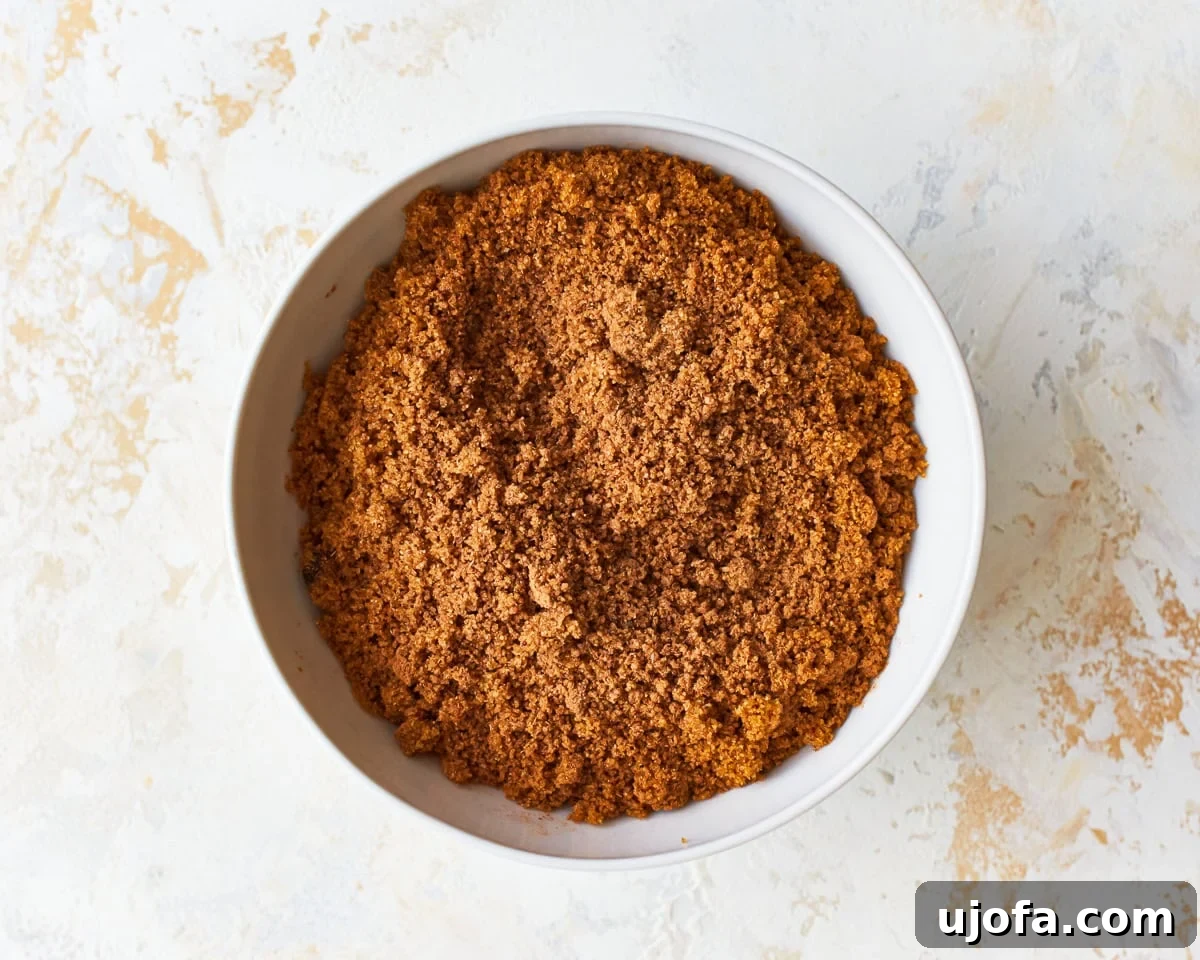
Add the cinnamon & sugar: In a separate small bowl, combine 1 cup of packed brown sugar with 1 1/2 tablespoons of ground cinnamon. Stir well until the brown sugar and cinnamon are thoroughly mixed, creating your aromatic cinnamon-sugar layer.
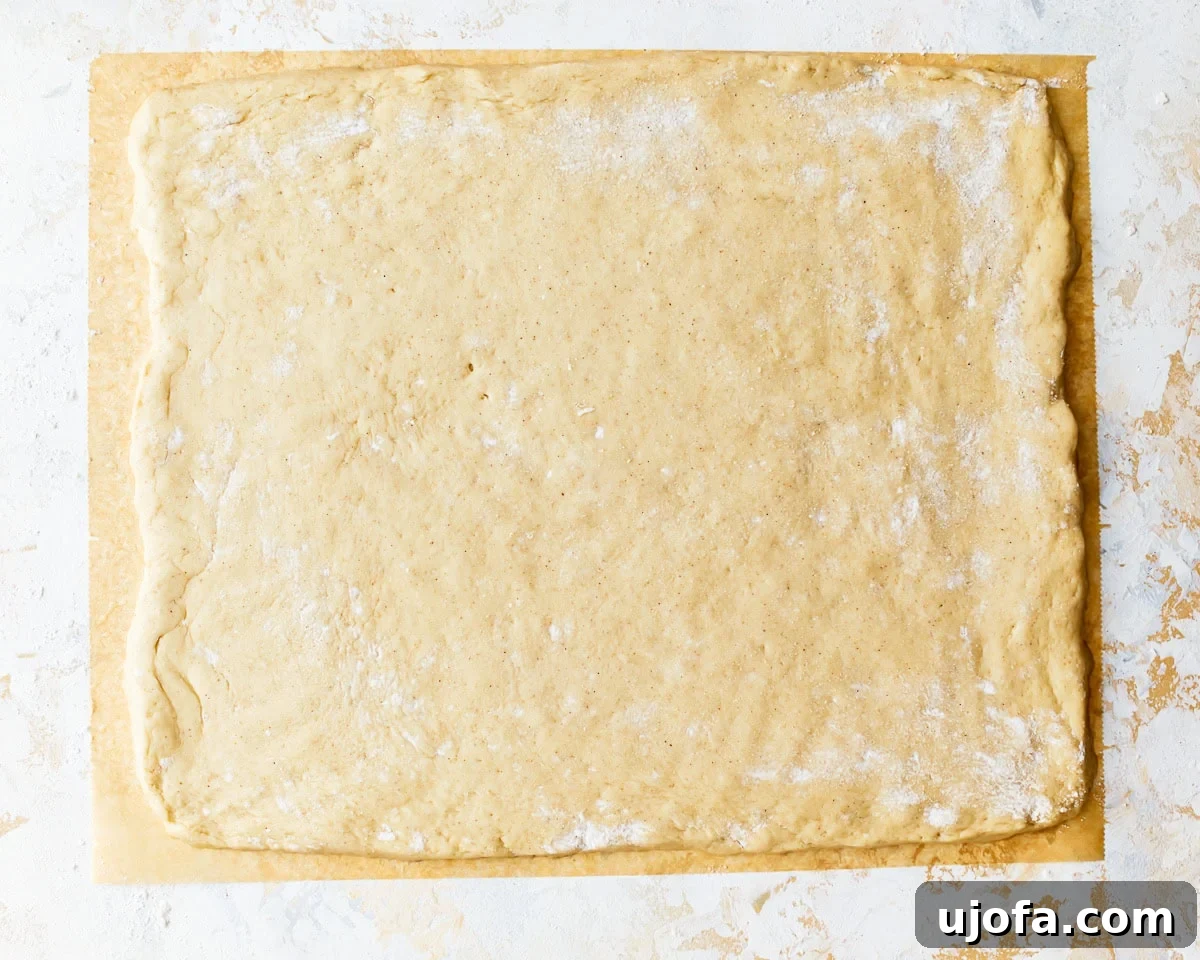
Roll out the dough: Lay a piece of parchment paper on your clean counter and spray it with gluten-free cooking spray or lightly grease it with oil or butter. Carefully transfer the risen dough onto the greased parchment paper. Dust the top of the dough with 1 tablespoon of gluten-free flour. Using your hands, gently press and shape the dough into a rough rectangle. Then, using a floured rolling pin, roll out the dough to approximately 1/2-inch thick, forming a rectangle roughly 12×14 inches in size. If cracks appear, smooth them with a wet finger.
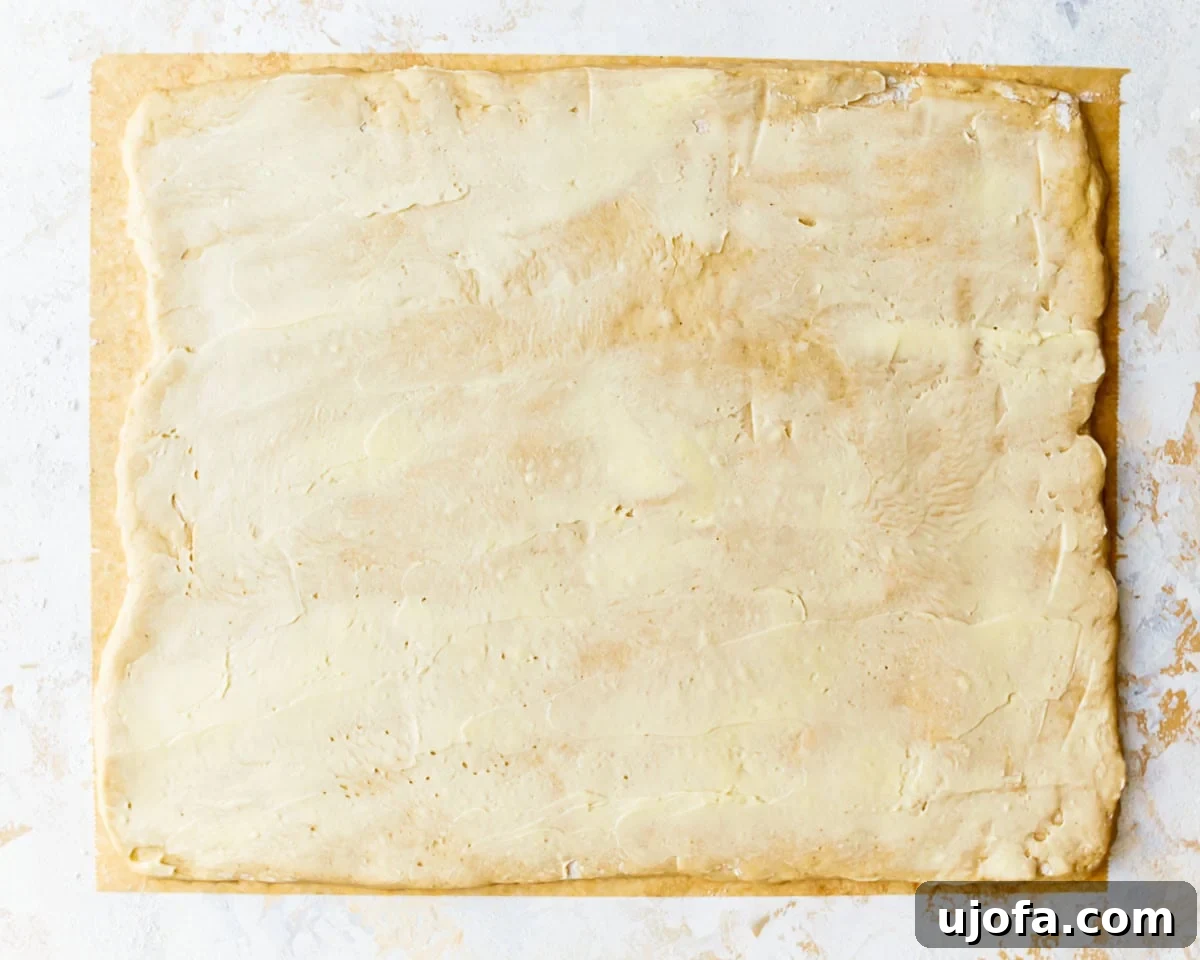
Butter the dough: With a spatula or the back of a spoon, carefully spread the prepared butter and vanilla mixture evenly over the entire surface of the rolled-out dough. Make sure to extend the butter all the way to the edges for maximum flavor and moisture in every bite.
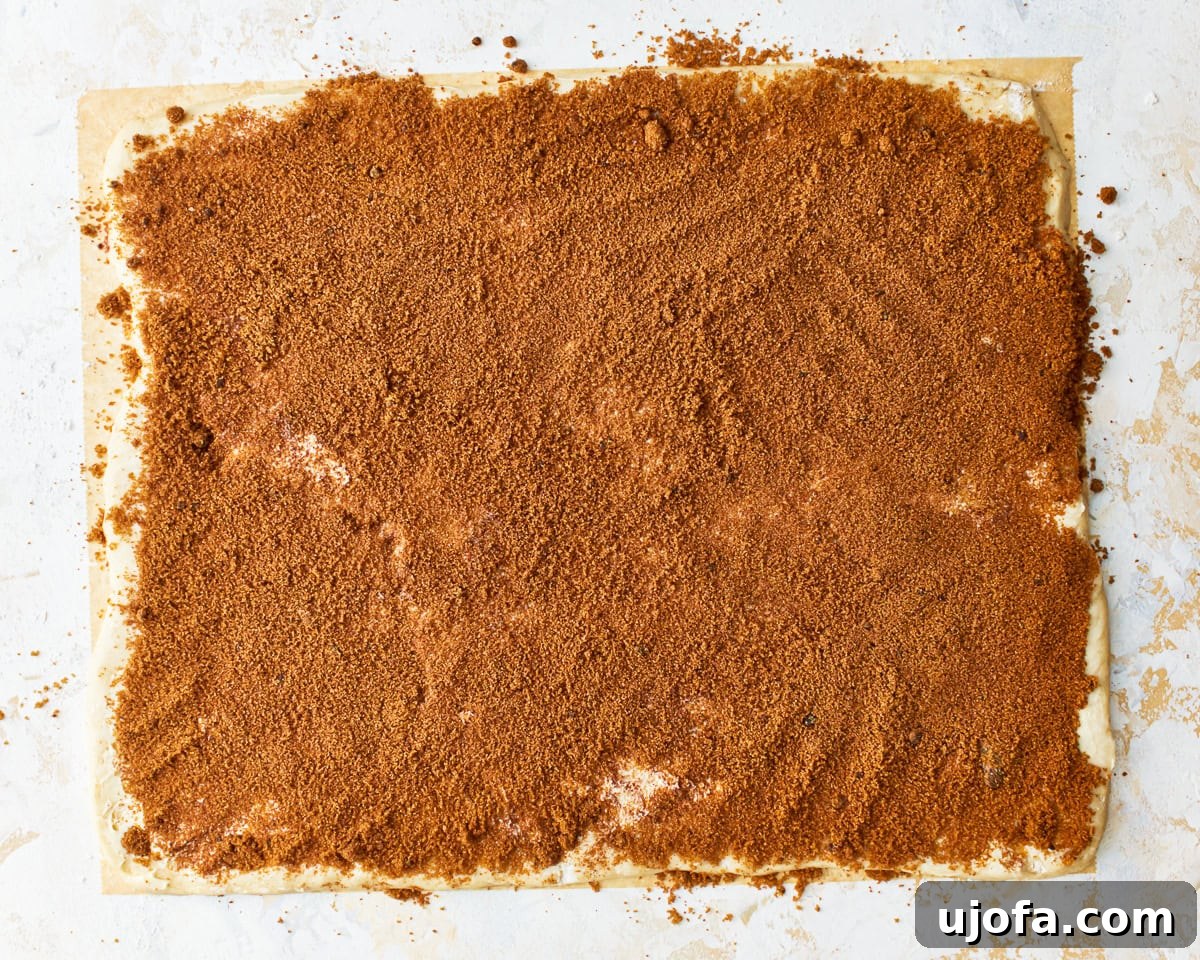
Add the cinnamon filling: Liberally sprinkle the brown sugar and cinnamon mixture over the buttered dough. Once sprinkled, gently pat the mixture down with your hands to help it adhere to the butter and ensure it’s evenly distributed throughout what will become your delicious cinnamon swirls.
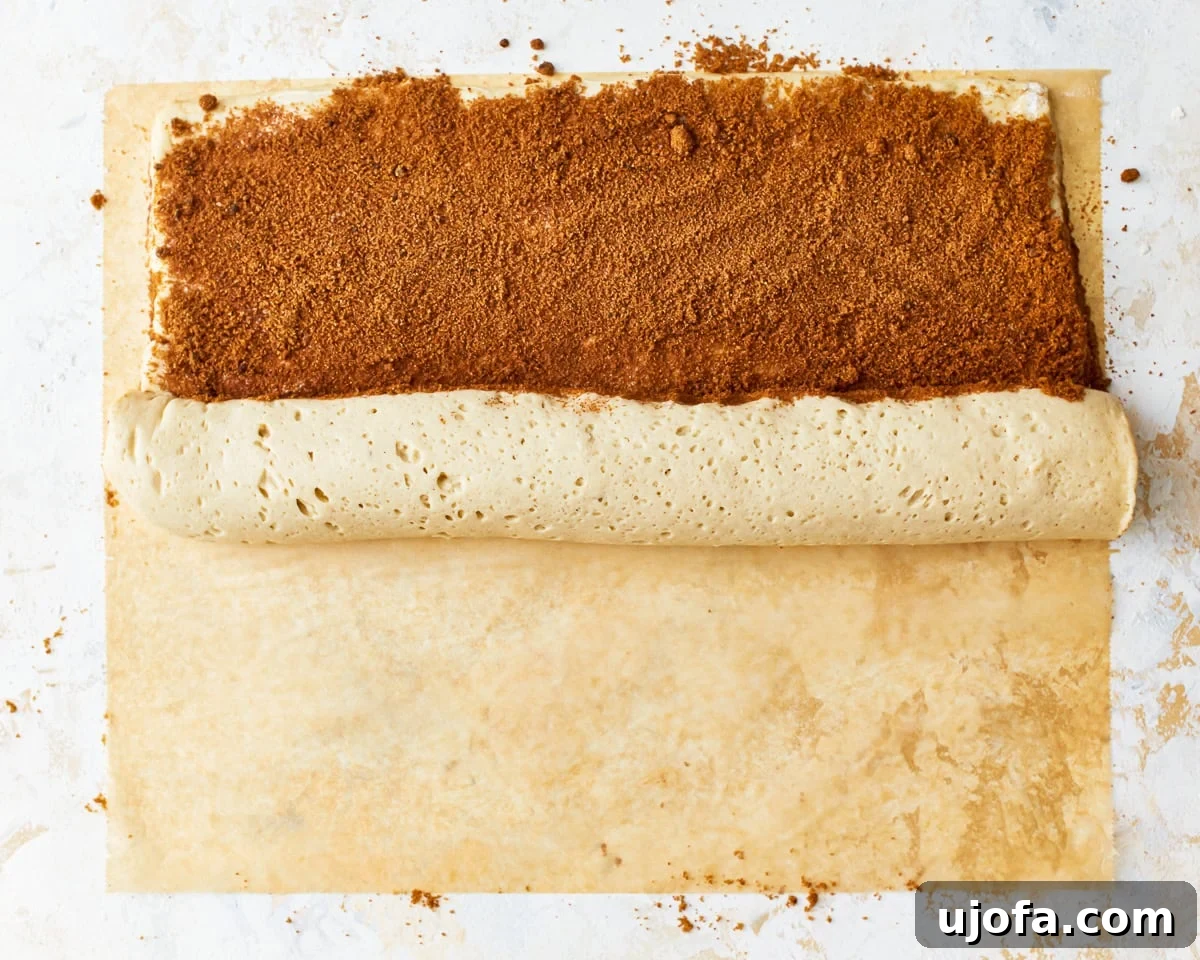
Make the dough log: Gently lift the longest edge of the parchment paper to help you start rolling the dough. Slowly and carefully roll the dough into a log shape, keeping it as tight as possible without squeezing out the filling. A tight roll ensures those beautiful, distinct spirals in your finished cinnamon rolls.
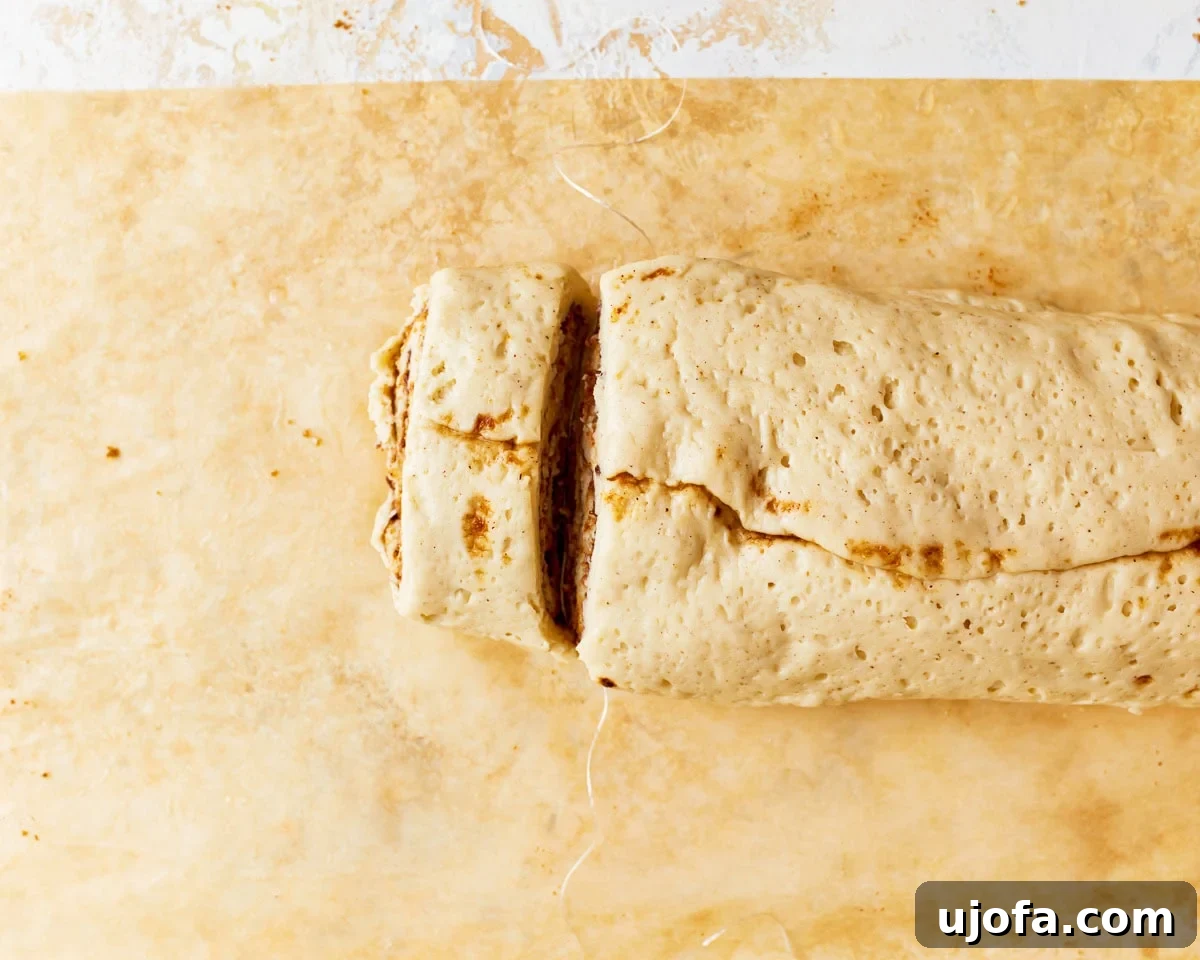
Slice even rolls: For perfectly clean and even cuts, use unflavored dental floss. Slide a piece of floss underneath the dough log, cross the ends over the top, and pull them firmly to slice through. First, cut the dough log in half, then cut each half into 6 equal rolls, giving you a total of 12 beautifully spiraled cinnamon rolls. This method prevents the flattening that can occur with a knife.
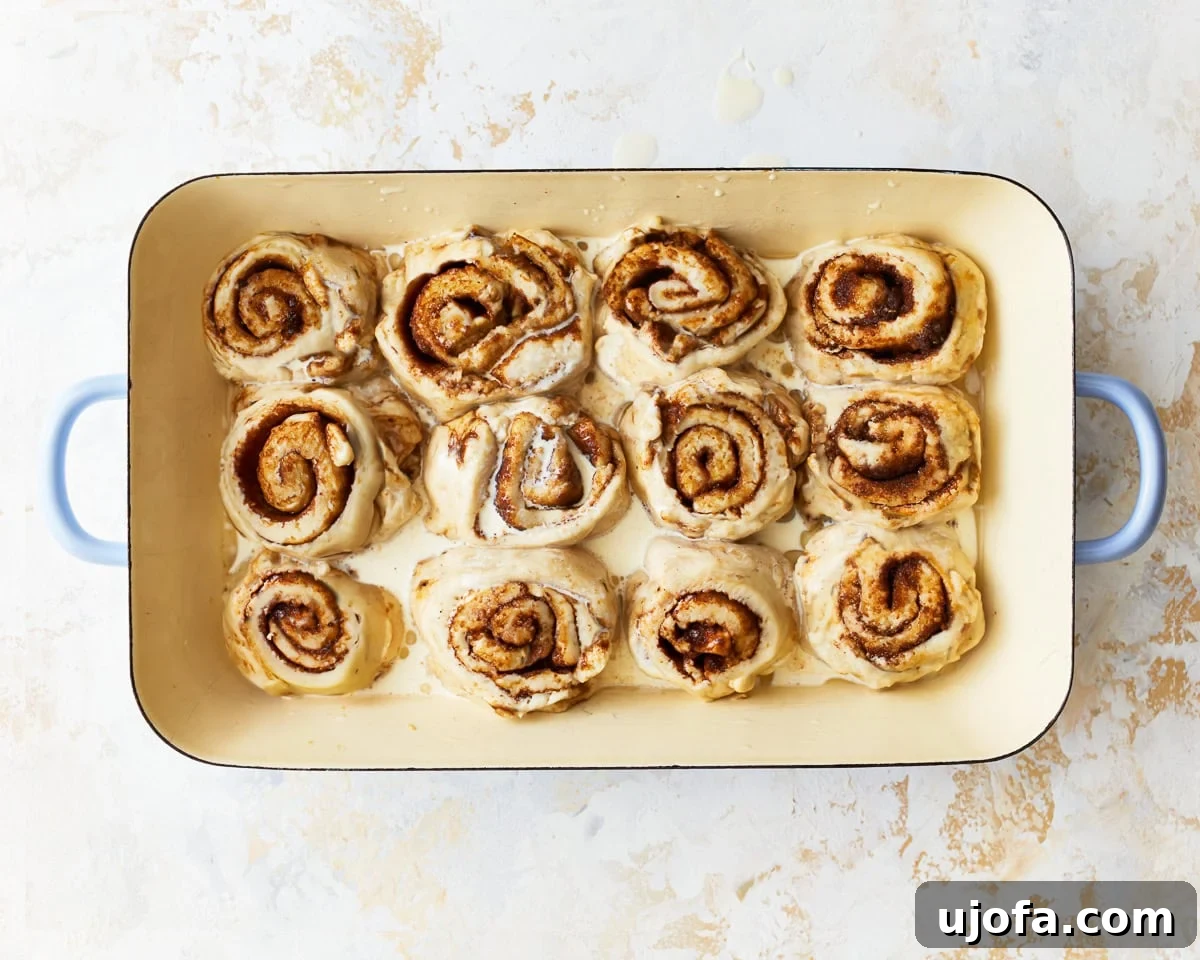
Arrange the rolls and add the cream bath: Lightly grease a 9×13-inch baking dish. Carefully arrange the sliced cinnamon rolls in a single layer within the prepared dish, leaving a small amount of space between each to allow for expansion. Warm 1/2 cup of heavy cream in the microwave for approximately 30 seconds. This warm cream will create an incredibly moist and gooey texture. Pour the warm cream evenly over all the cinnamon rolls in the dish.
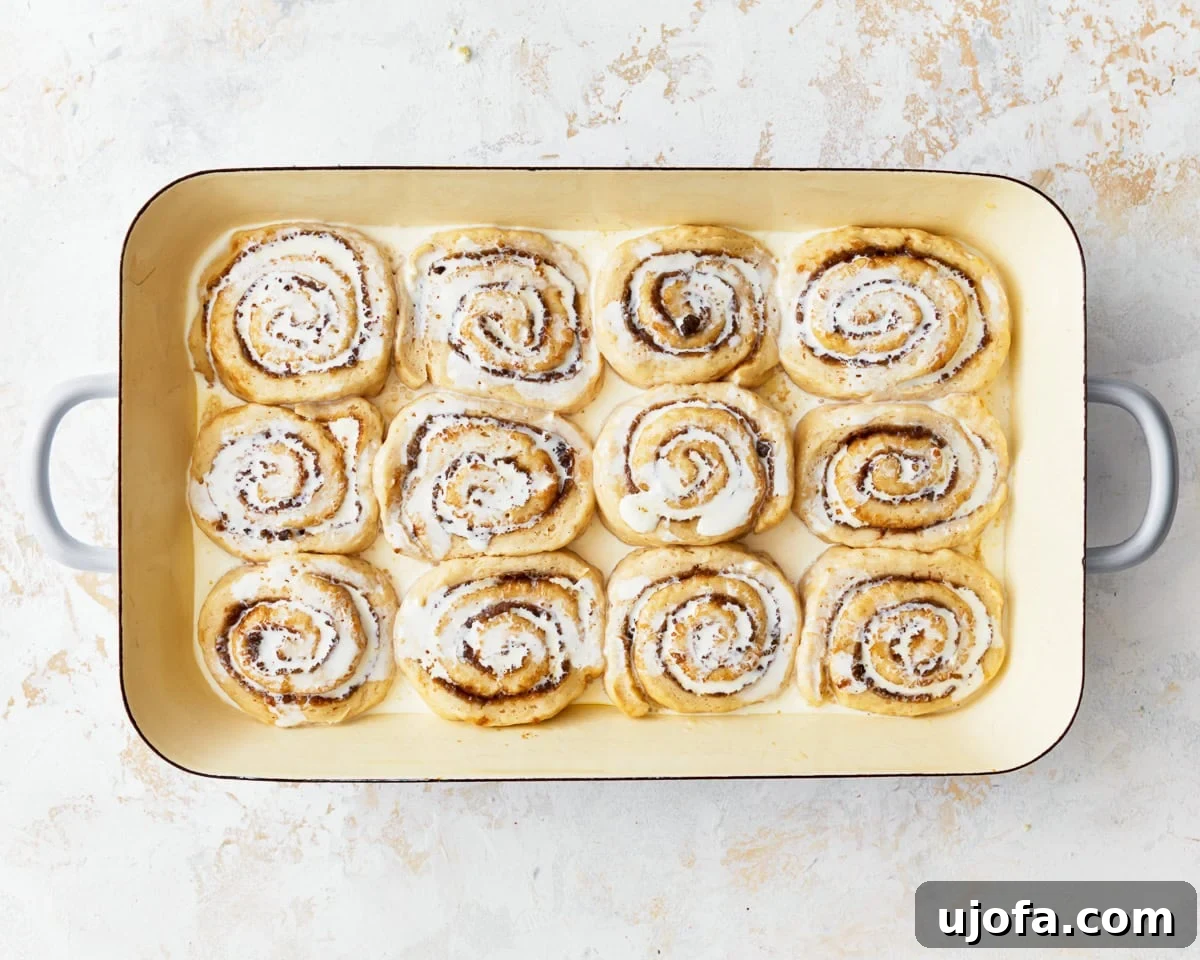
Second rise and bake: Place the baking dish containing the cream-bathed cinnamon rolls on the middle rack of your cold oven. Close the oven door and turn your oven’s temperature to 375°F (190°C). This acts as the second, quick rise; as the oven gradually heats up, the rolls will gently puff up. Once the oven reaches 375°F, set a timer for 15-20 minutes. Bake until the tops are a beautiful light golden brown and the centers are cooked through. Always check at the 15-minute mark to avoid over-baking. Allow the cinnamon rolls to cool in the pan for a few minutes before moving on to the frosting stage.
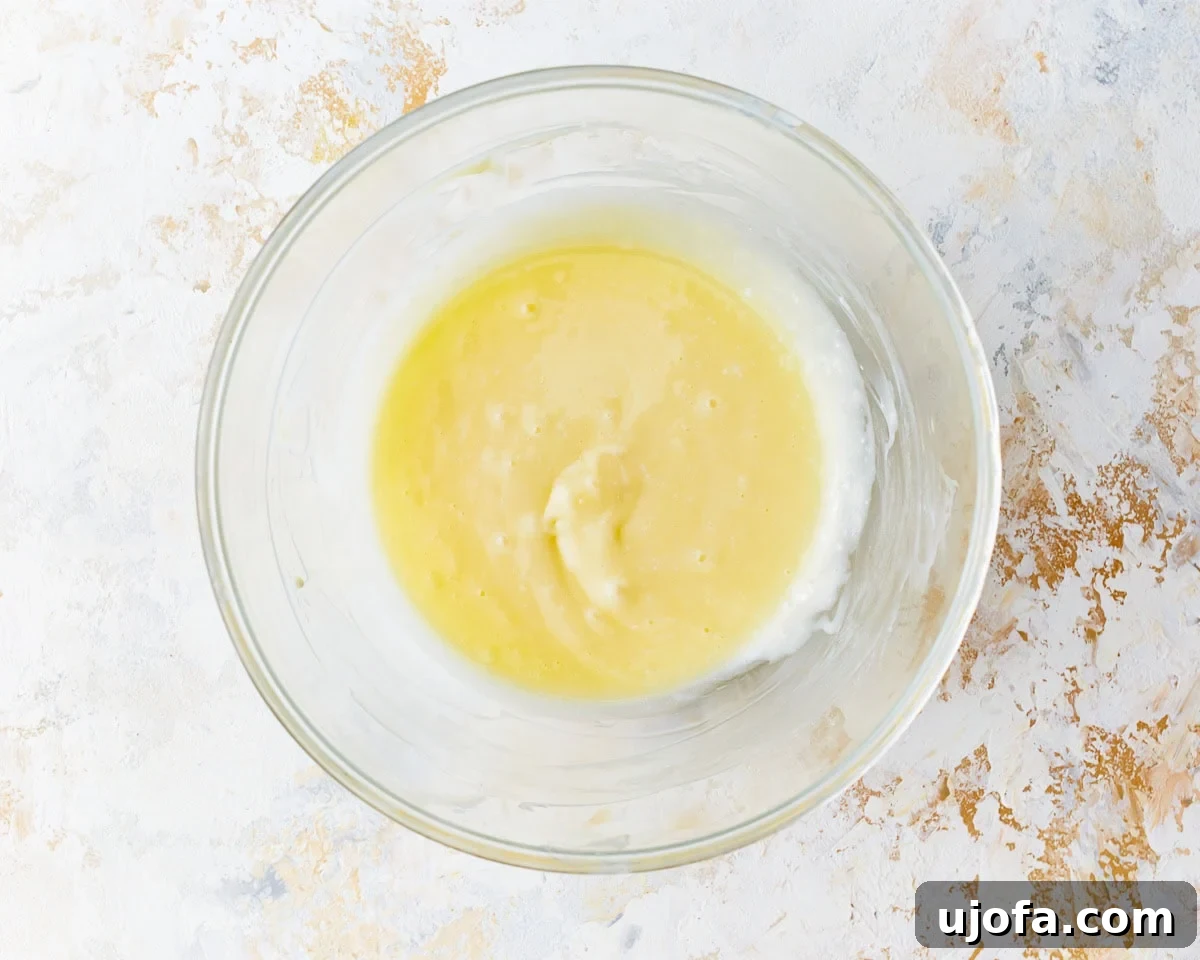
Make the frosting: While the cinnamon rolls are cooling slightly, prepare your chosen topping. For the cream cheese frosting: In a medium-sized bowl, beat together 6 ounces of softened cream cheese, 1/3 cup of softened unsalted butter, 1 teaspoon of pure vanilla extract, and 1/8 teaspoon of salt until the mixture is perfectly smooth and creamy. Gradually add 2 cups of powdered sugar, one cup at a time, mixing until smooth after each addition. The frosting should be thick yet spreadable. Keep it at room temperature until ready to use. If opting for vanilla icing, simply stir together 2 cups powdered sugar, 5 tbsp milk, and 1 tsp pure vanilla extract until smooth.
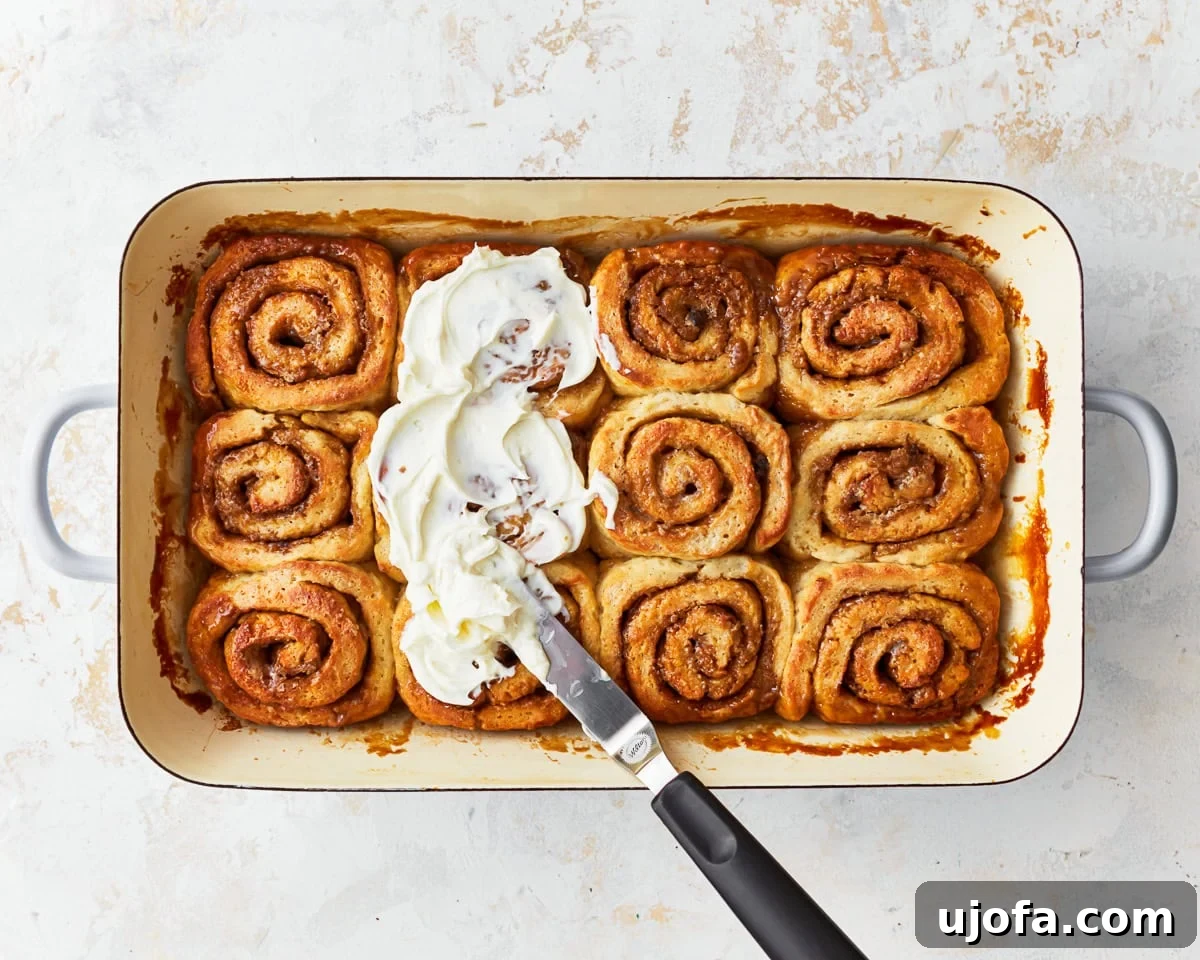
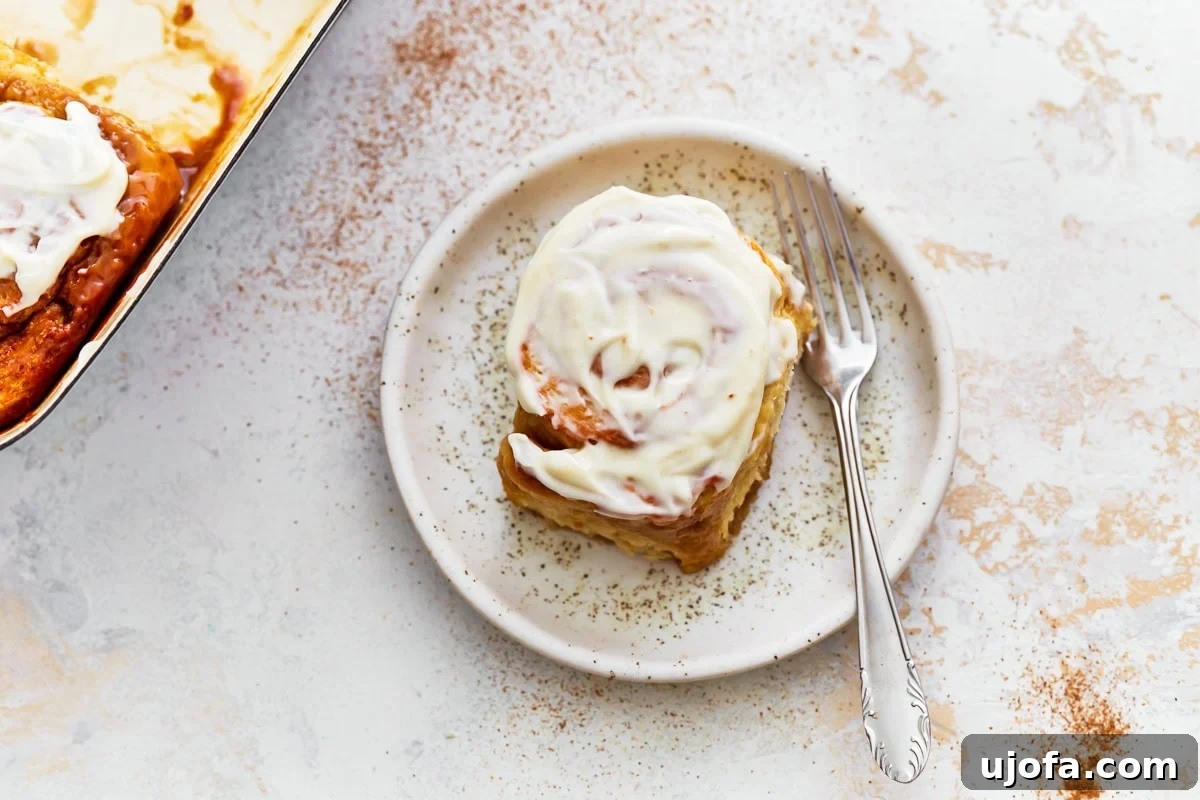
Cool and frost: Once your gluten-free cinnamon rolls have cooled for a few minutes and are still wonderfully warm, it’s time for the grand finale! Generously spread the creamy cream cheese frosting over them, ensuring every nook and cranny is covered, or drizzle the sweet vanilla icing for a lighter touch. The warmth of the rolls will make the frosting slightly melt, creating an irresistible gooey finish. Serve immediately and savor every delicious bite!
Versatile Recipe Substitutions for Your Dietary Needs
One of the greatest strengths of this gluten-free cinnamon roll recipe is its flexibility. Whether you’re navigating allergies, dietary restrictions, or simply looking for alternatives, you can easily adapt these rolls to fit your needs without sacrificing flavor or texture. Here are some common substitutions:
Dairy-Free Modifications:
- Milk and Cream Alternatives: For the dough and the cream bath, you can seamlessly replace regular milk or heavy whipping cream with unsweetened almond milk, coconut milk (from a carton, not canned for the dough), or cashew milk. Ensure your chosen dairy-free milk is plain and unsweetened.
- Butter Substitutes: Swap out unsalted butter for your favorite vegan butter alternative. Brands like Earth Balance or Miyoko’s Kitchen (for a butter-like taste and texture) work wonderfully in both the dough and the filling.
- Cream Cheese Frosting Adjustments: For the frosting, use a high-quality dairy-free cream cheese substitute. Alternatively, for a lighter, dairy-free glaze, you can use chilled full-fat coconut cream (the thick part from a can of coconut milk, chilled overnight) whipped with powdered sugar and vanilla extract.
Egg-Free Alternatives:
- Chia or Flax Eggs: Replace each large egg with a “chia egg” or “flax egg.” To make one, combine 1 tablespoon of ground chia seeds or ground flaxseed meal with 3 tablespoons of water. Let this mixture sit for 5-10 minutes until it thickens into a gel-like consistency. These binders work well in gluten-free baking to provide structure and moisture.
- Commercial Egg Replacers: Many excellent commercial egg replacers are available, such as Bob’s Red Mill Egg Replacer. Follow the package instructions for the equivalent amount needed for two eggs.
Flour & Starch Considerations:
- Recommended Gluten-Free Flour: For optimal results with yeast baking, stick to a rice flour-based gluten-free blend that explicitly states it contains xanthan gum. As mentioned, brands like Pillsbury or Better Batter are excellent choices. These blends are formulated to provide the best structure and rise for yeast dough.
- Tapioca Starch Alternatives: If you need to avoid tapioca starch (which is often found in GF blends), you can typically substitute it with an equal amount of cornstarch or arrowroot powder without significantly altering the recipe’s outcome.
Buttermilk Substitute (if applicable, though not strictly required for this recipe):
- If a recipe calls for buttermilk, and you need a dairy-free option, simply mix 1 cup of your preferred dairy-free milk with 1 tablespoon of lemon juice or apple cider vinegar. Let it sit for 5-10 minutes until it curdles slightly before using.
These substitutions allow you to tailor your gluten-free cinnamon rolls to various dietary requirements, ensuring everyone can enjoy these delightful treats. Remember that slight adjustments to texture or rise may occur with certain substitutions, but the core deliciousness will remain!
Storage Instructions for Freshness
Proper storage is key to enjoying your gluten-free cinnamon rolls for as long as possible. Whether you’re planning ahead or savoring leftovers, here’s how to keep them fresh and delicious:
Make Ahead Option (Overnight Preparation): This recipe is perfect for preparing ahead of time, especially if you want warm rolls for breakfast without the early morning effort.
Cover the shaped, unbaked cinnamon rolls tightly with plastic wrap in their baking dish. Place them in the refrigerator overnight (for up to 12-18 hours). When you’re ready to bake, remove the rolls from the refrigerator and let them come to room temperature for about 30-60 minutes. Discard the plastic wrap and proceed with the recipe from the “second rise and bake” step (Step 16).
Refrigerator Storage (for Baked Rolls):
If your cinnamon rolls are plain or simply drizzled with vanilla icing, they can be stored in an airtight container at room temperature for up to 2 days. However, if they are frosted with cream cheese frosting, they must be stored in an airtight container in the refrigerator for up to 4 days due to the perishable nature of cream cheese.
To reheat, place them in an oven preheated to 350°F (175°C) for 10-15 minutes, or microwave individual rolls for 20-30 seconds until warmed through.
Freezer Storage (Before or After Baking): These gluten-free cinnamon rolls freeze beautifully, giving you the flexibility to enjoy them whenever a craving strikes.
- To freeze before baking: This method is fantastic for future fresh-baked treats. After the dough is rolled, filled, and cut into individual rolls (Step 14, before the cream bath), arrange them in a freezer-safe baking pan. Cover the pan tightly with aluminum foil, then place it in the freezer for up to 1 month. When you’re ready to bake, transfer the frozen rolls to the refrigerator overnight to thaw. In the morning, bring them to room temperature (about 1-2 hours) and then proceed with the recipe from the “Arrange the rolls and add the cream bath” step (Step 15), including the second rise in the preheating oven.
- To freeze after baking: This is ideal for having fully prepared rolls on hand. Allow the baked cinnamon rolls to cool completely before frosting them (if desired). If frosting, apply it after reheating. Wrap individual cooled rolls tightly in aluminum foil, then place them in a large plastic freezer bag or a freezer-safe container. They can be stored for up to 2 months. To eat, defrost the cinnamon rolls at room temperature. For best results, warm the defrosted rolls in an oven at 350°F (175°C) for 10-15 minutes, or microwave individual rolls for 20-30 seconds. If unfrosted, you can apply fresh frosting after warming.
Frequently Asked Questions About Gluten-Free Cinnamon Rolls
Even with a clear recipe, some questions might pop up. Here are answers to common queries to help you on your gluten-free cinnamon roll journey:
- Why is my gluten-free dough sticky? Gluten-free dough is naturally stickier than traditional wheat-based dough because it lacks the elastic gluten proteins. This is normal and expected! Resist the urge to add excessive amounts of extra flour, as this will lead to dry, dense rolls. A light dusting of flour on your hands and rolling pin, or oiling them, can help with handling.
- Can I make these cinnamon rolls vegan? Absolutely! This recipe is easily adaptable for a vegan diet. Simply follow the dairy-free substitutions (using unsweetened plant-based milk and vegan butter) and the egg-free alternatives (using flax or chia eggs, or a commercial egg replacer). For the cream cheese frosting, ensure you use a vegan cream cheese alternative.
- My rolls didn’t rise enough. What went wrong? Several factors can affect the rise of gluten-free yeast dough. The most common culprits are: 1) inactive yeast (ensure your yeast is fresh and properly proofed in warm milk); 2) milk or butter being too hot (killing the yeast) or too cold (slowing yeast activity); 3) using a gluten-free flour blend without a binder or one not suitable for yeast baking; 4) a cold environment for rising. Ensure your rising environment is consistently warm and humid.
- How do I prevent my cinnamon rolls from drying out? Gluten-free baked goods can sometimes be prone to drying out faster. Key steps to prevent this include: not over-baking (check at the minimum bake time), adding the “cream bath” before baking as instructed, and proper storage (airtight containers are essential). Reheating gently also helps maintain moisture.
- Can I use a different kind of sugar for the filling? While brown sugar provides a specific depth of flavor and moisture, you can experiment with other sugars. Coconut sugar could be an option for a slightly less refined sweetness, but it might alter the texture of the filling slightly. White granulated sugar would make the filling less gooey.
- Is xanthan gum necessary? For gluten-free yeast baking, xanthan gum (or psyllium husk) is highly recommended. It acts as a binder, providing elasticity and structure that gluten would normally provide, which is crucial for a good rise and a soft, non-crumbly texture. If your flour blend doesn’t include it, add it separately.
Why These Gluten-Free Cinnamon Rolls Are a Must-Try
For anyone living gluten-free, finding baked goods that truly rival their gluten-containing counterparts can be a challenge. These gluten-free cinnamon rolls not only meet but often exceed expectations, offering a truly delightful experience. They represent the perfect blend of traditional comfort and modern dietary adaptability. Here’s why you absolutely need to try this recipe:
- Uncompromised Texture: Forget dense, gummy, or dry gluten-free pastries. This recipe yields rolls that are wonderfully soft, incredibly fluffy, and melt-in-your-mouth tender, just like classic cinnamon rolls should be. The meticulous steps and ingredient ratios are designed to achieve this ideal texture.
- Rich, Authentic Flavor: Every bite is packed with the warm, comforting spice of cinnamon swirled into a sweet, buttery filling. Combined with your choice of tangy cream cheese frosting or a simple vanilla glaze, the flavor profile is perfectly balanced and utterly addictive.
- Accessible for Many Diets: The thoughtful inclusion of dairy-free, egg-free, and vegan options makes this a truly inclusive recipe. No one has to miss out on the joy of fresh-baked cinnamon rolls, regardless of their specific dietary needs. This adaptability makes it a go-to recipe for gatherings and diverse households.
- Surprisingly Easy to Make: Despite their impressive appearance, these cinnamon rolls are designed to be approachable for home bakers. With clear, step-by-step instructions and clever techniques like the quick-rise method, you’ll find the process manageable and rewarding.
- Perfect for Any Occasion: While often associated with holidays, these rolls are versatile. They make an indulgent breakfast, a festive brunch centerpiece, a comforting dessert, or a delightful treat for an afternoon coffee break. Their homemade charm is always appreciated.
- Freezer-Friendly Convenience: The ability to prepare and freeze these rolls (either before or after baking) is a huge bonus. It means you can always have a batch of warm, fresh cinnamon rolls ready to go with minimal effort, perfect for busy mornings or unexpected guests.
Embrace the warmth, the aroma, and the sheer delight of biting into one of these gluten-free cinnamon rolls. They are more than just a recipe; they are an invitation to rediscover a beloved comfort food, made perfectly to suit your lifestyle.
More Gluten-Free Breakfast Recipes to Try!
If you loved these cinnamon rolls, explore other delicious gluten-free breakfast and brunch ideas from our collection:
- Gluten-Free Banana Bread: A perfectly moist and flavorful classic.
- Gluten-Free Donuts: Light, airy, and irresistible fried treats.
- Gluten-Free Muffins: A versatile master recipe for any flavor combination.
- Gluten-Free Pancakes: Fluffy stacks for a delightful morning.
- Gluten-Free Waffles: Crispy on the outside, soft on the inside.
- Gluten-Free Cinnamon Bread: A comforting loaf, perfect with coffee.