
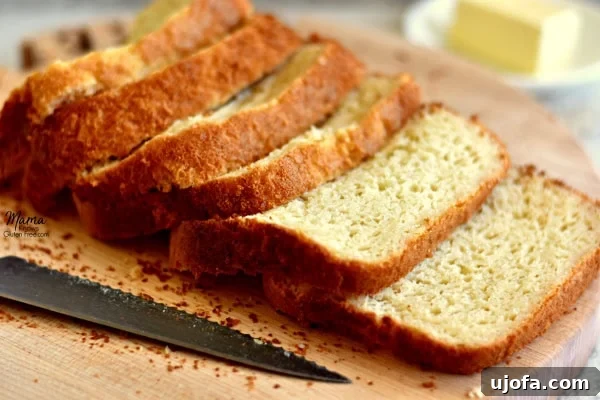
Are you searching for that elusive perfect loaf of homemade gluten-free bread? Look no further! This easy gluten-free bread machine recipe is designed to satisfy all your cravings for soft, flavorful, and perfectly textured bread. Plus, it includes a simple dairy-free option so everyone can enjoy a slice.
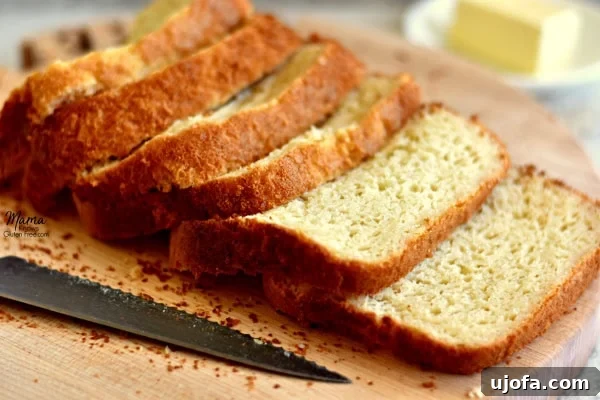
Click HERE to save this recipe to Pinterest!
This recipe was originally posted in April 2017, with photos updated in April 2018.
Crafting the Perfect Loaf: Easy Gluten-Free Bread Machine Bread with a Dairy-Free Option
For anyone living a gluten-free lifestyle, the quest for truly good bread can feel like a never-ending journey. Over the years, I’ve personally sampled countless gluten-free bread brands available on the market, often with disappointing results. The texture can be dense, crumbly, or simply lack the comforting chewiness we all associate with a great loaf.
While I’m not a huge sandwich enthusiast (unless it’s a hearty, generously filled cheesesteak sub!), I truly appreciate having fresh bread to accompany my pasta dishes and soups. This culinary dilemma led me to a simple solution: investing in a bread machine. Specifically, I opted for an Oster bread machine equipped with a dedicated gluten-free setting, which simplifies the baking process immensely. When set to the gluten-free mode, my machine typically produces what I assume is a 2lb loaf, as it doesn’t offer a size selection.
Through some experimentation, I adapted a recipe from the back of Gluten Free Mama’s flour blend, tweaking it slightly to create what has become the perfect bread machine bread for my family. This recipe has also been successfully made using Pillsbury gluten-free flour, yielding consistent and delicious results every time. This method not only saves money but also ensures a fresh, soft, and tasty loaf that rivals any bakery offering.
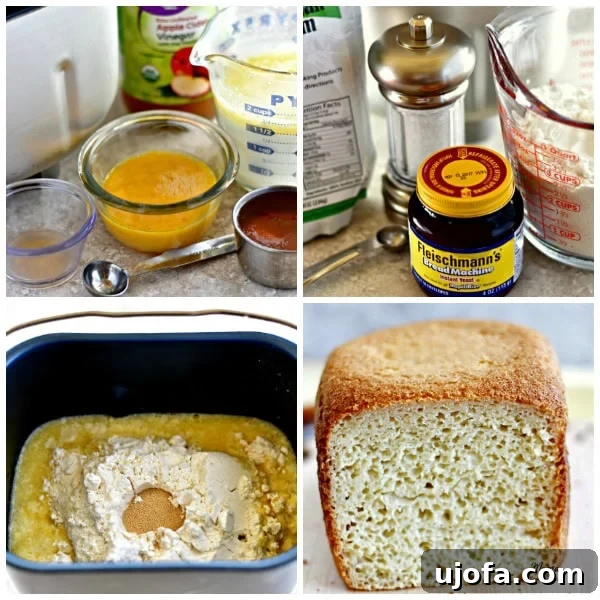
Effortless Baking: How To Make Gluten-Free Bread Machine Bread in 3 Easy Steps
Using a bread machine with a gluten-free setting is truly a game-changer, simplifying the baking process to an incredible degree. Forget about kneading, proofing, and the extensive hands-on time typically associated with traditional bread making. With this method, you’re just three straightforward steps away from a fragrant, warm loaf:
- Step One: Add Wet Ingredients. Begin by carefully measuring and adding all your liquid ingredients directly into the bread machine pan. This foundational layer sets the stage for the rest of the dough.
- Step Two: Introduce Dry Ingredients (Except Yeast). Next, layer in all the dry ingredients, such as your gluten-free flour blend, salt, and xanthan gum. It’s crucial to keep the yeast separate for now to ensure proper activation.
- Step Three: Incorporate the Yeast. Finally, create a small indentation or “well” in the center of your dry ingredients with your finger. Gently pour the yeast into this pocket. This ensures the yeast remains dry and doesn’t prematurely activate with the wet ingredients, which is vital for a good rise.
Once these ingredients are in place, simply select the gluten-free mode on your bread machine, and let it handle the rest. This hands-off approach makes homemade gluten-free bread accessible even on your busiest days. I personally haven’t attempted to make this bread by hand because the convenience of the bread machine allows me to simply add the ingredients and walk away, returning to a perfectly baked loaf.
Navigating Bread Machines Without a Gluten-Free Setting
Don’t worry if your bread machine lacks a specific “gluten-free” setting! Many standard bread machines can still produce excellent gluten-free loaves with a little adjustment. The key difference in gluten-free baking is that the dough does not require a second rise, which traditional wheat bread relies on for its structure. Therefore, you’ll want to select a program that features only one mixing cycle.
Look for settings often labeled “quick,” “rapid,” “rapid rise,” “one rise,” or “basic.” These programs typically have a shorter, single rise cycle ideal for gluten-free dough. If you can’t find a suitable pre-programmed option, some machines allow you to override settings. In such cases, aim for a custom cycle that includes a roughly 20-minute mix, a 1-hour rise, and a 1-hour bake. For specific guidance, consult your bread machine’s manufacturer website; some offer instructions for adapting older models for gluten-free recipes.
Expert Tips for the Best Gluten-Free Bread Machine Loaf
Achieving a consistently soft and delicious gluten-free loaf from your bread machine is easy with these insider tips:
- Cool Completely Before Storing: Once your bread machine signals the end of its cycle, immediately remove the bread pan and invert the loaf onto a wire rack. Allow the bread to cool completely, which can take an hour or two. This crucial step prevents condensation and ensures the crust remains crisp while the interior sets properly.
- Airtight Storage: Once fully cooled, store any leftover bread in an airtight container at room temperature. This helps maintain its freshness and prevents it from drying out. Avoid refrigerating, as it can accelerate staling.
- Slice Just Before Serving: For optimal freshness and to prevent the bread from drying out, it’s always best to store the unsliced portion of the loaf. Slice only the amount you intend to eat at that moment.
- Reheat for Ultimate Enjoyment: Gluten-free bread often tastes its absolute best when warm. If you’re enjoying leftovers the next day, a quick reheat in the microwave or toaster oven will bring back its wonderful soft texture and inviting aroma.
- Scrape Down the Sides (If Needed): During the initial mixing cycle, gluten-free dough can sometimes be thicker and stick to the sides of the bread pan. Keep an eye on your machine, and if you notice dry flour or batter clinging to the edges, gently scrape it down with a rubber spatula. This ensures all ingredients are thoroughly incorporated for an even consistency. The final dough should resemble a thick cake batter rather than a traditional elastic bread dough.
Selecting the Right Gluten-Free All-Purpose Flour
The choice of gluten-free flour is paramount to the success of your bread. Unlike traditional wheat flour, gluten-free blends can vary significantly in their composition and behavior. I personally find that Pillsbury gluten-free all-purpose flour delivers excellent results for this recipe, yielding a consistent and appealing loaf every time. It’s important to understand that not all gluten-free flours are created equal.
Different brands utilize varying ratios of rice flour, tapioca starch, potato starch, and other ingredients, which can lead to noticeable differences in your baking outcomes. For yeast-based recipes like bread, some blends (such as Bob’s Red Mill 1-to-1 or King Arthur Measure for Measure) explicitly state on their packaging or websites that they are not recommended for yeast baking. Always check the labels and choose a blend suitable for yeast-risen breads to ensure the best possible texture and rise.
The Crucial “Spoon & Level” Method for Measuring Flour
Properly measuring gluten-free flour is a foundational step that can dramatically impact your baking results. Unlike scooping flour directly from the bag (which can compact it and lead to using too much flour), the “spoon & level” method ensures accuracy:
Here’s how to do it: Using a spoon, gently scoop the gluten-free flour from its container and lightly sprinkle it into your dry measuring cup. Do not pack it down or tap the cup. Once the measuring cup is overflowing slightly, take the back of a straight-edged knife or a flat spatula and level off the top. This technique ensures you’re using the correct amount of flour, preventing a dense or dry loaf. Remember, accuracy in baking is key, especially with gluten-free ingredients.
Achieving Deliciousness: Dairy-Free Baking Options
Living dairy-free doesn’t mean you have to miss out on freshly baked bread! This recipe thoughtfully includes a dairy-free option, ensuring that everyone in your household can enjoy a slice. My husband, youngest son, and I all follow a dairy-free diet, so developing equally delicious alternatives was a priority.
I can confidently say that this bread is just as delightful when made with dairy-free butter and milk substitutes. For the warm milk, I often use unsweetened almond, cashew, or coconut milk, all of which integrate beautifully into the recipe without altering the flavor or texture negatively. For the butter, I highly recommend Earth Balance or Smart Balance butter alternatives, or even coconut oil, which provide the necessary fat and richness for a tender crumb. These simple swaps make it possible to enjoy a truly gluten-free and dairy-free homemade bread that is both satisfying and full of flavor.
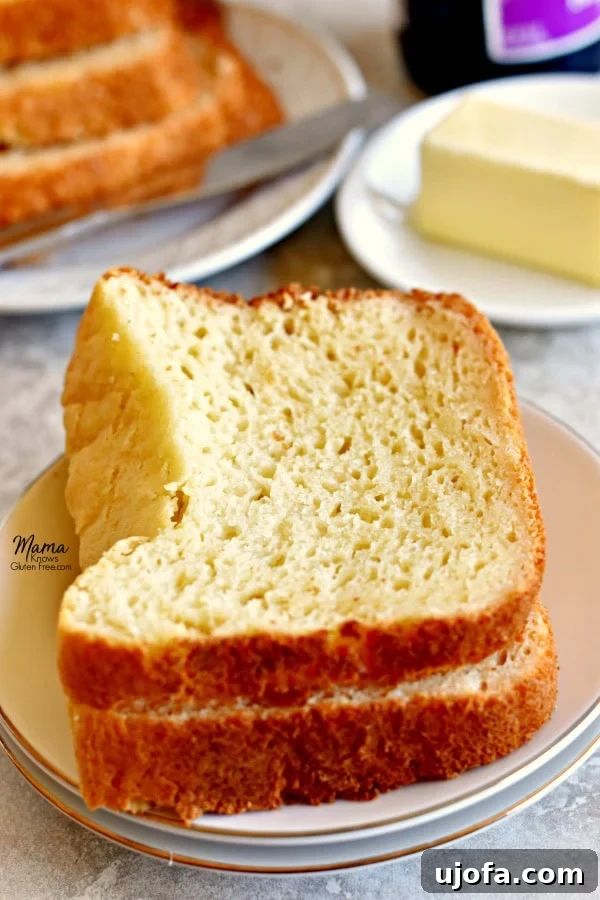
The difference between this homemade gluten-free bread and many store-bought varieties is astonishing. Unlike the often dry, crumbly, or “cardboard-tasting” commercial options, this recipe yields a loaf that is incredibly soft, moist, and bursting with genuine bread flavor. It’s truly a delight! We always serve this bread warm in our home, and it’s so popular that my family tends to devour the entire loaf in one sitting. It’s the perfect accompaniment to any meal or simply enjoyed on its own with a smear of butter or jam.
Explore More Gluten-Free Bread Recipes
If you love the ease and deliciousness of this bread machine recipe, you’ll be thrilled to discover more of my favorite gluten-free bread creations. These recipes are designed to be simple, satisfying, and perfect for gluten-free households:
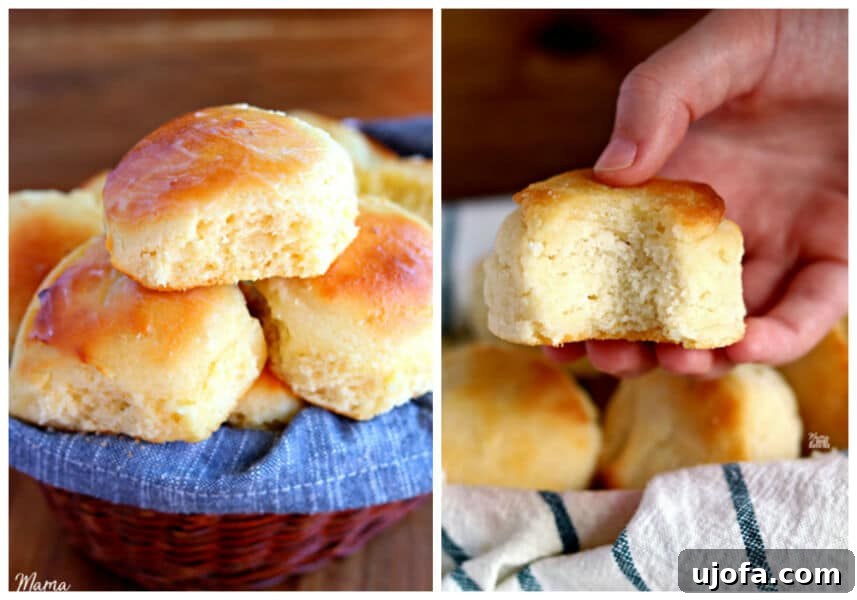
- My Gluten-Free Rolls {Dairy-Free Option} are wonderfully soft and ideal for dinner parties or holiday meals.
- You’ll also adore my Gluten-Free Buttermilk Biscuits {Dairy-Free Option}, which are incredibly flaky and perfect for breakfast or with savory dishes.
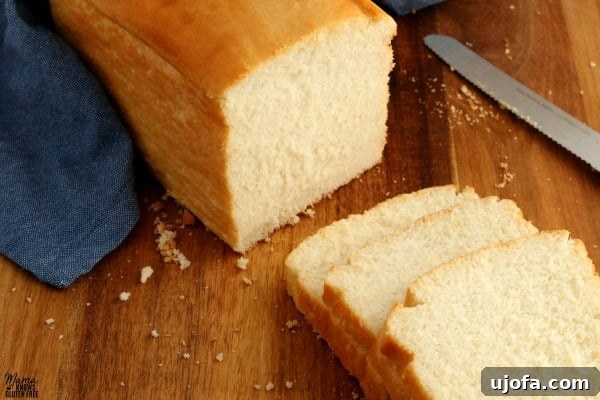
Craving a gluten-free bread recipe baked in a traditional oven? Be sure to try my NEW recipe for Easy Gluten-Free Bread {Dairy-Free}!
Discover More Popular Gluten-Free Recipes
My kitchen is full of delicious and approachable gluten-free recipes for every meal and occasion. If you’re looking for more crowd-pleasing dishes, check out some of my most popular creations:
- Easy Gluten-Free Banana Bread – a moist and flavorful classic.
- Easy Gluten-Free Pancakes {Dairy-Free & Vegan Option} – perfect for a weekend breakfast.
- Gluten-Free Cinnamon Roll Cake – all the flavor of cinnamon rolls in a simpler cake form.
- Easy Gluten-Free Banana Blueberry Muffins – a delightful treat for any time of day.
Let’s Connect! You can FOLLOW ME on Facebook, Instagram, or Pinterest!
★Did you make this recipe? Please give it a star rating below in the comments!★
Recipe adapted from Old Fashioned White Bread by Gluten Free Mama.
Homemade Gluten-Free Bread {bread machine, dairy-free option}
Share by Email
Print Recipe
Want to save this recipe? Just enter your email and get it sent to your inbox! Plus you’ll get new recipes from us every week!
Sign up for our newsletter to save this recipe and get weekly updates!
Ingredients
- 1 1/2 cups warm milk (for dairy-free, use cashew, almond, or coconut milk)
- 1/4 cup unsalted butter (for dairy-free, use Earth Balance or Smart Balance)
- 2 eggs, beaten
- 1 teaspoon apple cider vinegar
- 1/2 cup honey
- 3 cups all-purpose gluten-free flour (I like Pillsbury gluten-free flour. Note that not all gluten-free flours are created equal; baking results may vary. Bob’s Red Mill 1-to-1 and King Arthur Measure for Measure blends are generally not recommended for yeast baking.)
- 1 teaspoon salt
- 1 1/2 teaspoons xanthan gum (omit if your flour blend already contains it)
- 1 3/4 teaspoons rapid yeast/instant yeast (I use Fleischmann’s Bread Machine Instant Yeast)
Instructions
- Begin by adding all the wet ingredients to the bread baking pan of your bread machine.
- Warm the milk and melt the butter. I find it convenient to combine this step by adding the milk and butter to a large glass measuring cup and heating it gently in the microwave. Pour the warm milk and melted butter into the bread baking pan.
- Next, pour the honey into the bread baking pan.
- Add the beaten eggs to the pan.
- Finally, add the apple cider vinegar to the wet ingredients in the bread baking pan.
- Now it’s time to add your dry ingredients.
- Carefully add the flour, salt, and xanthan gum (remember to omit xanthan gum if your chosen gluten-free flour blend already includes it) to the bread baking pan, layering them over the wet ingredients.
- The very last step is to add your yeast. Make a small indentation or “hole” in the center of the flour with your finger. Gently pour the yeast into this hole, ensuring it doesn’t directly contact the liquid ingredients initially.
- Place the bread pan into your bread machine, close the lid, and set the machine to the gluten-free setting. Start the cycle.
- As your bread machine begins mixing, observe the dough. You may occasionally need to use a rubber spatula to scrape down any dry ingredients clinging to the sides of the pan, ensuring everything is thoroughly incorporated into the batter. The dough will have a consistency similar to thick cake batter, not a traditional elastic bread dough. This step might not be necessary for all bread machines.
- Once the baking cycle is complete, carefully remove the pan from the machine and invert the loaf onto a wire rack to cool completely before slicing. Enjoy your delicious homemade gluten-free bread!
Notes
- Flour Choice: I recommend Pillsbury gluten-free flour for consistent results. Be aware that different gluten-free flour blends can significantly affect the outcome, especially for yeast baking. Check labels carefully.
- Measuring Flour: Always use the “spoon & level” method for measuring gluten-free flour. Spoon flour into the measuring cup and level off with the back of a knife. Do not scoop directly from the bag, as this compacts the flour.
- Storage: Store cooled leftover bread in an airtight container at room temperature.
- Slicing: For best freshness, avoid slicing the entire loaf at once. Store the remaining portion unsliced.
- Reheating: Gluten-free bread is often best when warmed. Reheat slices before serving for optimal texture and flavor.
- Bread Machine Model: I use an Oster bread machine with a dedicated gluten-free setting.
- No Gluten-Free Setting?: If your bread machine doesn’t have a gluten-free setting, use a program with only one mixing cycle (e.g., quick, rapid, basic). Alternatively, override settings for a 20-minute mix, 1-hour rise, and 1-hour bake.
- Check Labels: Always double-check all ingredient labels to ensure they are certified gluten-free, especially for products like yeast and butter substitutes.
Nutrition
Calories: 210 kcal
Carbohydrates: 35 g
Protein: 5 g
Fat: 7 g
Saturated Fat: 3 g
Polyunsaturated Fat: 1 g
Monounsaturated Fat: 2 g
Trans Fat: 0.2 g
Cholesterol: 45 mg
Sodium: 229 mg
Potassium: 72 mg
Fiber: 3 g
Sugar: 14 g
Vitamin A: 213 IU
Vitamin C: 0.1 mg
Calcium: 64 mg
Iron: 1 mg
Nutrition information is automatically calculated, so should only be used as an approximation.
Additional Info
Tried this recipe?
Mention @mamaknowsglutenfree or tag #mamaknowsglutenfree!