
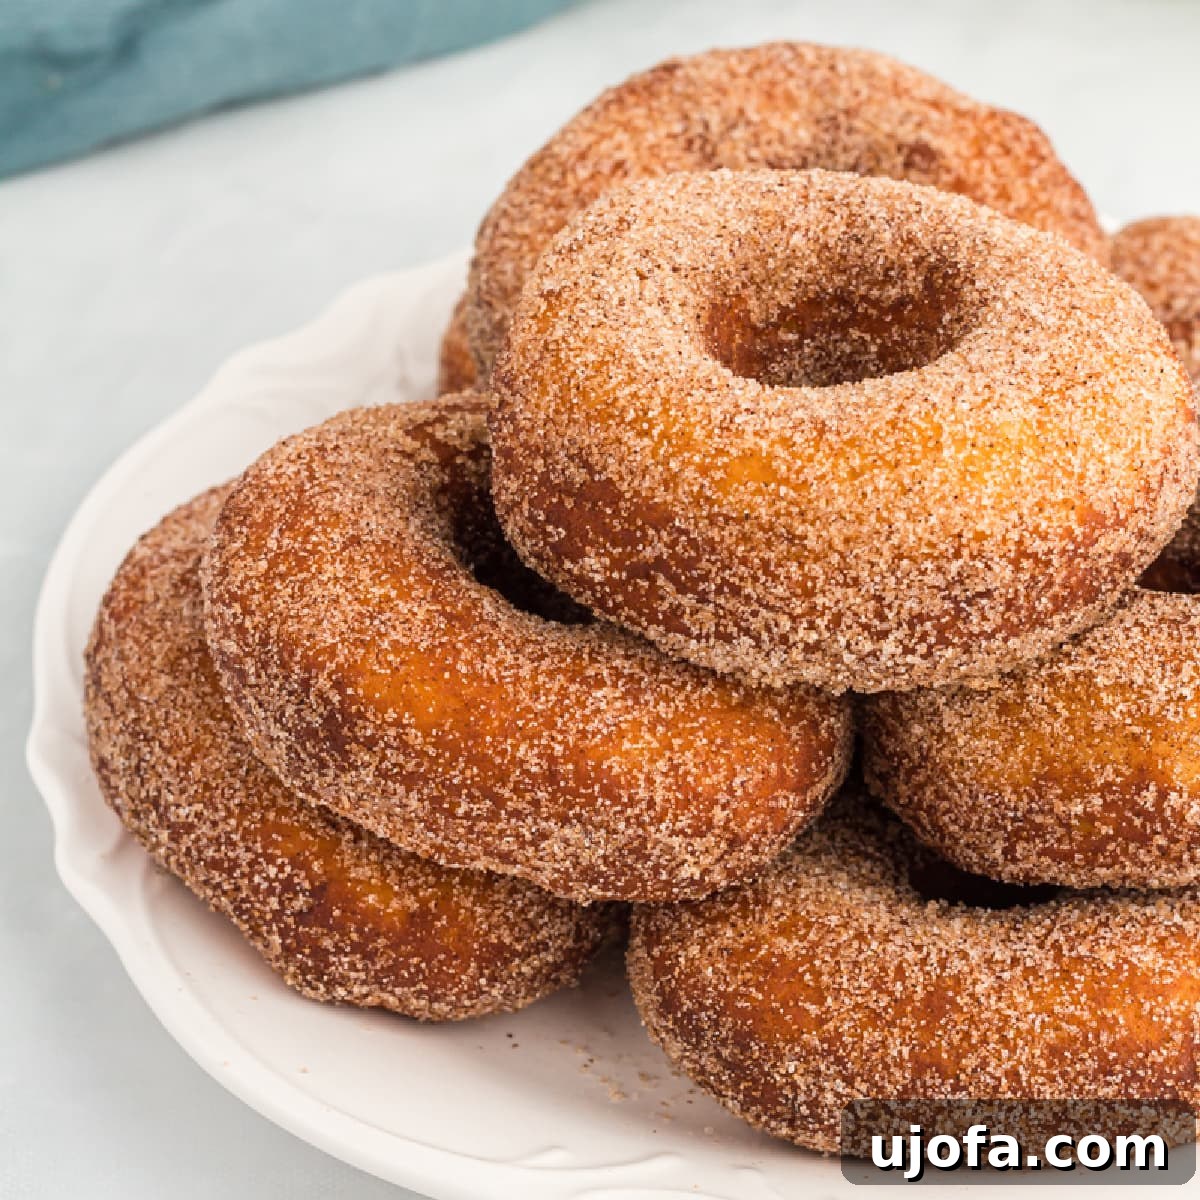
Welcome to the ultimate guide for creating irresistibly fluffy and tender gluten-free yeast donuts right in your own kitchen! If you’ve been missing the joy of a warm, fresh donut due to dietary restrictions, prepare to be amazed. This easy-to-follow recipe brings the beloved donut shop experience home, delivering a treat that’s truly lighter than air, boasting a pillowy soft rise and incredible flavor.
For many families, donuts are a cherished breakfast staple, and mine is no exception. My kids can never get enough of these golden delights. This recipe utilizes a specific blend of gluten-free flour and instant yeast to ensure a consistent, beautiful rise, resulting in donuts so delicious, you won’t believe they’re gluten-free. Get ready to indulge in homemade goodness!
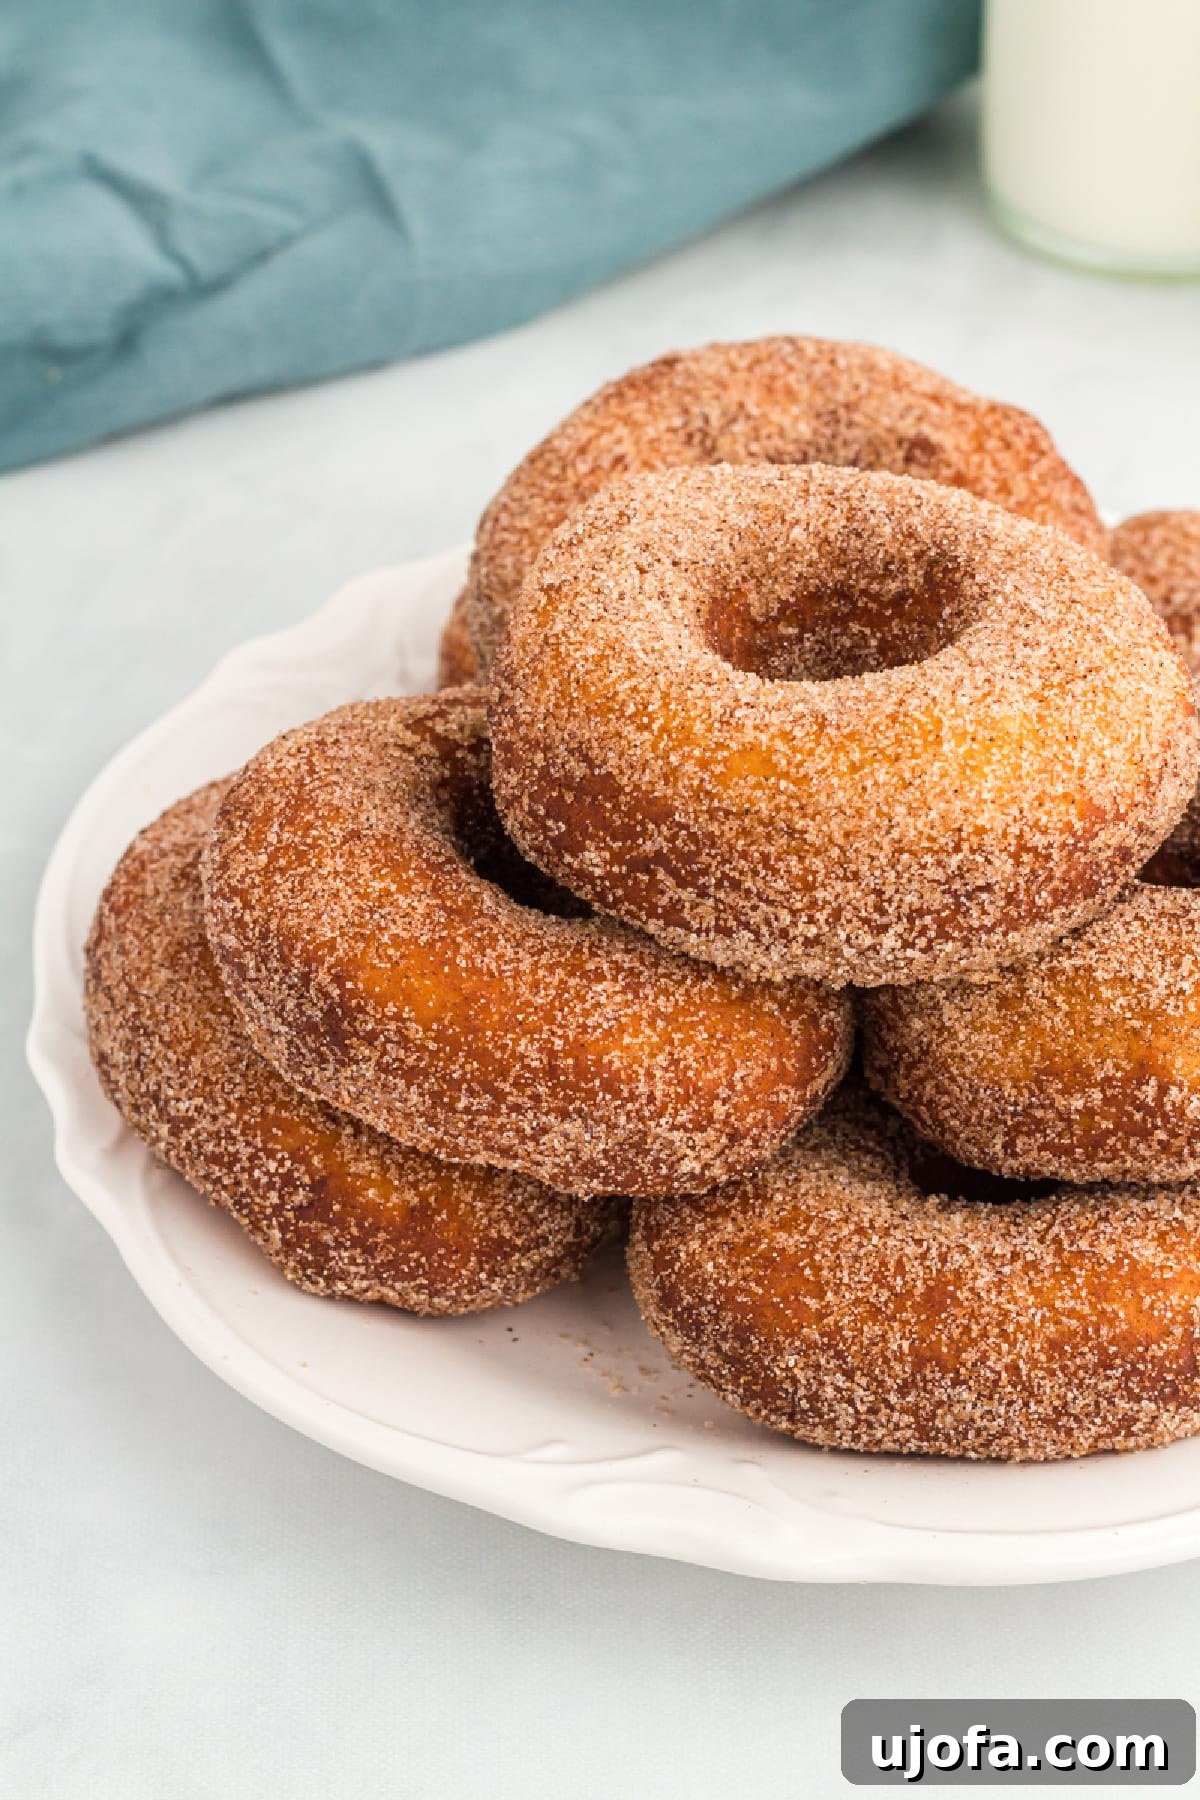
Crafting the Perfect Easy Gluten-Free Yeast Donut Recipe
There’s something incredibly satisfying about making your own donuts. The aroma filling your home, the anticipation as they fry to golden perfection – it’s an experience unmatched by any store-bought alternative. This recipe is designed to be straightforward, even for those new to gluten-free baking or yeast doughs. We’ve meticulously developed a technique that guarantees success, allowing you to enjoy delicious, homemade breakfast donuts without the fuss or the gluten.
Forget the fear of dense, crumbly gluten-free baked goods. Our method focuses on achieving that coveted light, airy texture with a crisp exterior that’s characteristic of classic yeast donuts. By following our detailed notes, ingredient insights, and step-by-step instructions, you’ll master the art of gluten-free donut making and bring the sweet joy of the donut shop directly to your countertop.
Essential Ingredients for Flawless Gluten-Free Donuts
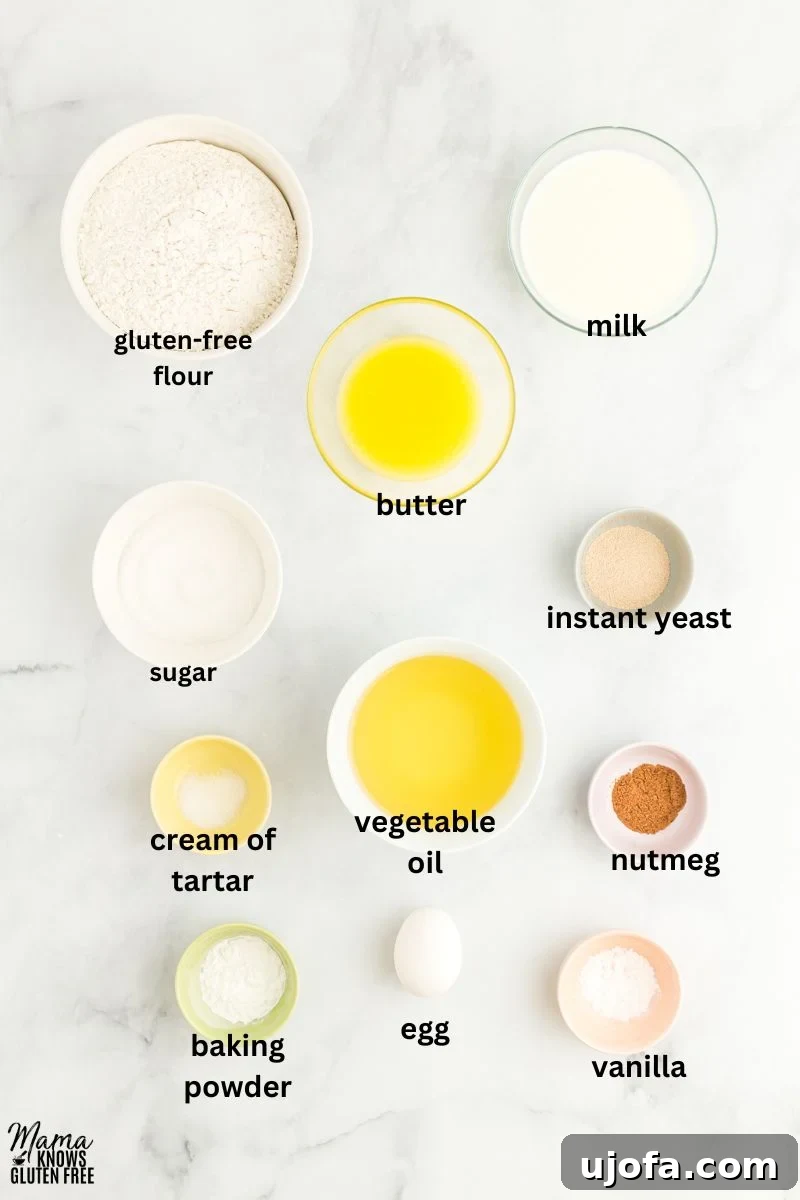
Creating exceptional gluten-free donuts starts with understanding each ingredient’s role. Here’s a breakdown of what you’ll need and why it matters:
- Gluten-Free Flour with Xanthan Gum (recommended for yeast baking): This is arguably the most critical ingredient. Unlike traditional wheat flour, gluten-free blends lack the elastic protein network of gluten, which is essential for trapping gas and creating structure in yeast doughs. Xanthan gum acts as a binder, mimicking gluten’s properties, preventing a crumbly texture, and allowing the dough to rise effectively. We highly recommend using a high-quality all-purpose gluten-free flour blend that already contains xanthan gum, such as Pillsbury or Better Batter Brand, for optimal results. Different brands can yield varying results, so sticking to recommended ones ensures consistency.
- Granulated Sugar: Beyond simply sweetening the dough, granulated sugar plays a vital role in feeding the instant yeast, activating it and encouraging a robust rise. It also contributes to the beautiful golden-brown color during frying.
- Baking Powder: While instant yeast does the heavy lifting for the rise, baking powder provides an additional chemical leavening boost. This dual-action approach helps achieve that extra light and fluffy interior, ensuring your donuts are remarkably tender.
- Instant Yeast (also known as rapid-rise yeast): This type of yeast is specifically formulated to be mixed directly with dry ingredients, eliminating the need for proofing in warm water. It activates quickly, making the dough preparation process more efficient and user-friendly. Ensure your yeast is fresh and not expired for the best rise.
- Cream of Tartar: This acidic ingredient helps stabilize the dough and contributes to a wonderfully soft and tender crumb. It prevents the dough from becoming tough and can also aid in achieving a slightly chewy texture.
- Ground Nutmeg: A classic donut spice, ground nutmeg adds a subtle yet essential warmth and aromatic depth to the dough. It enhances the overall flavor profile, giving your homemade donuts that authentic, nostalgic taste.
- Salt: Salt is crucial for balancing the sweetness, enhancing the natural flavors of the other ingredients, and regulating yeast activity. A small amount goes a long way in preventing the donuts from tasting bland or overly sweet.
- Whole Milk: Whole milk hydrates the dough, providing necessary moisture. Its fat content also enriches the dough, contributing to a softer texture and a richer flavor. Ensure it’s at room temperature or lukewarm to properly activate the yeast without shocking it.
- Egg: A large egg adds richness, moisture, and acts as a binder, helping to hold the gluten-free dough together. It also contributes to the donut’s structure and golden color.
- Unsalted Butter: Melted unsalted butter enriches the dough, adding luscious flavor and further enhancing the tender crumb. If you’re dairy-free, a good quality dairy-free butter alternative can be used successfully. Ensure it’s melted but not hot, to avoid interfering with yeast activity.
- Vegetable Oil (for frying): A high smoke point, neutral-flavored oil like vegetable oil is ideal for deep frying. It allows the donuts to cook evenly and achieve a crisp exterior without imparting unwanted flavors. Canola oil or sunflower seed oil are also excellent substitutes.
Mastering the Art of Homemade Gluten-Free Yeast Donuts: Step-by-Step Instructions
Follow these detailed steps carefully to achieve perfectly risen, golden-brown gluten-free yeast donuts every time. Precision, especially with gluten-free baking, is key!
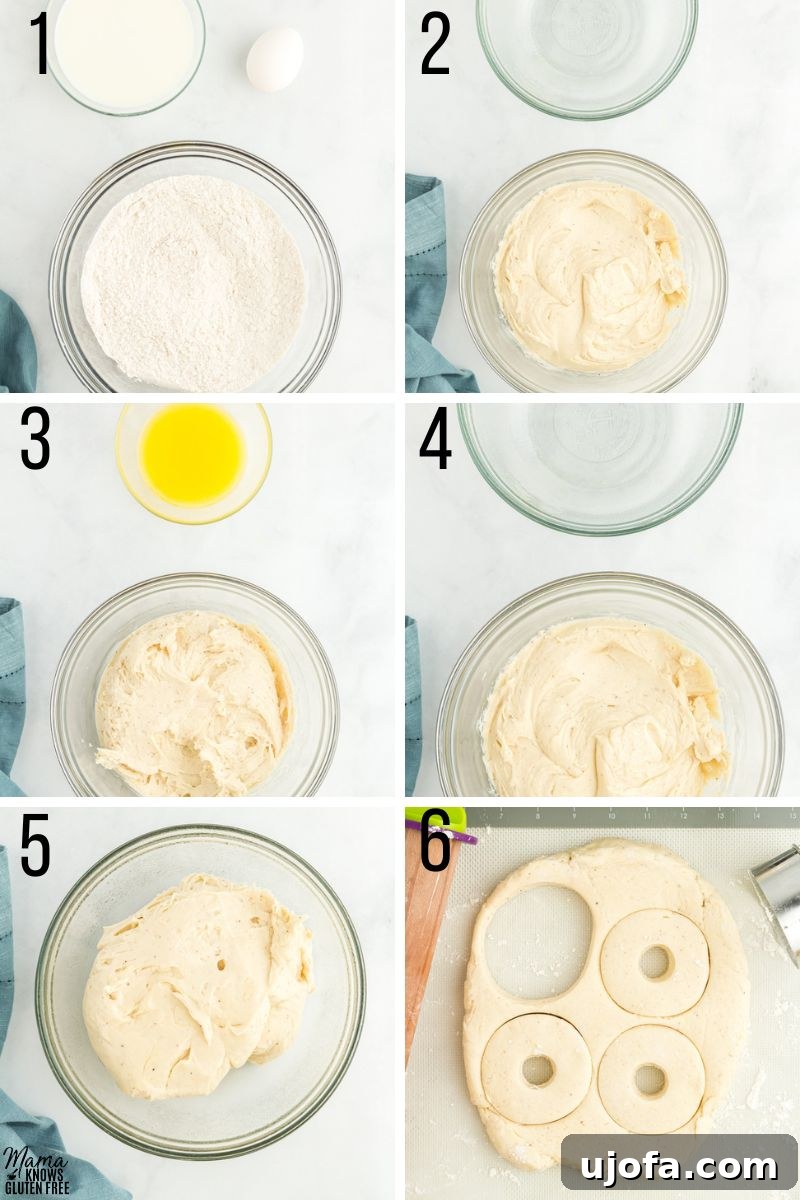
- Combine Dry Ingredients: In a large mixing bowl, thoroughly combine the gluten-free flour blend, granulated sugar, baking powder, instant yeast, cream of tartar, ground nutmeg, and salt. Stir everything together until evenly distributed. This ensures all leavening agents and flavorings are well-integrated before liquids are added.
- Add Wet Ingredients & Initial Kneading: Pour the room-temperature whole milk and the large egg into the dry mixture. Using an electric mixer fitted with a dough hook attachment, knead the dough on low to medium speed for 5 minutes. During this initial kneading phase, the dough will start somewhat sticky. Use a spatula to scrape down any dry ingredients that settle at the bottom of the bowl to ensure they are fully incorporated. Continue kneading with the dough hook for the full 5 minutes; this helps hydrate the gluten-free flour and allows the dough to develop a smoother, more cohesive texture.
- Incorporate Butter: Add the melted but not hot unsalted butter to the dough. Continue kneading with the dough hook on low-medium speed for about 1 minute, or until the butter is fully incorporated and the dough is smooth and slightly elastic.
- First Rise (Cold Proof): Lightly spray a clean, medium-sized bowl with non-stick cooking spray. Transfer the dough into this bowl, cover it tightly with food-safe plastic wrap, and place it in the refrigerator for at least 2 hours. This cold proofing step is crucial for gluten-free dough, as it allows the flour to fully hydrate and develop flavor, improving the final texture of the donuts. The dough can also be left to rise overnight in the fridge for convenience.
- Prepare Baking Sheet: While the dough is proofing, line a large baking sheet with parchment paper. This will prevent the cut donuts from sticking. Set it aside.
- Roll and Cut Dough: Once the cold proofing is complete, lightly flour your work surface, your rolling pin, and your donut cutter with extra gluten-free flour. Gently transfer the chilled dough onto the lightly floured surface. Roll the dough out to an even thickness of approximately ¾ inch. Use a 3-inch diameter donut cutter to cut out the donut shapes. Re-roll any scraps gently to cut additional donuts, being careful not to overwork the dough.
- Second Rise (Warm Proof): Carefully place the cut, raw donuts onto the prepared baking sheet, ensuring they are spaced at least 2 inches apart to allow for expansion. Wrap the entire tray well with food-safe plastic wrap. Place the tray in a warm, draft-free area of your kitchen (ideally between 75°F to 78°F) to rise for 1½ to 2 hours, or until the donuts have increased in size by about 50%. This second proof is essential for a light, airy texture.
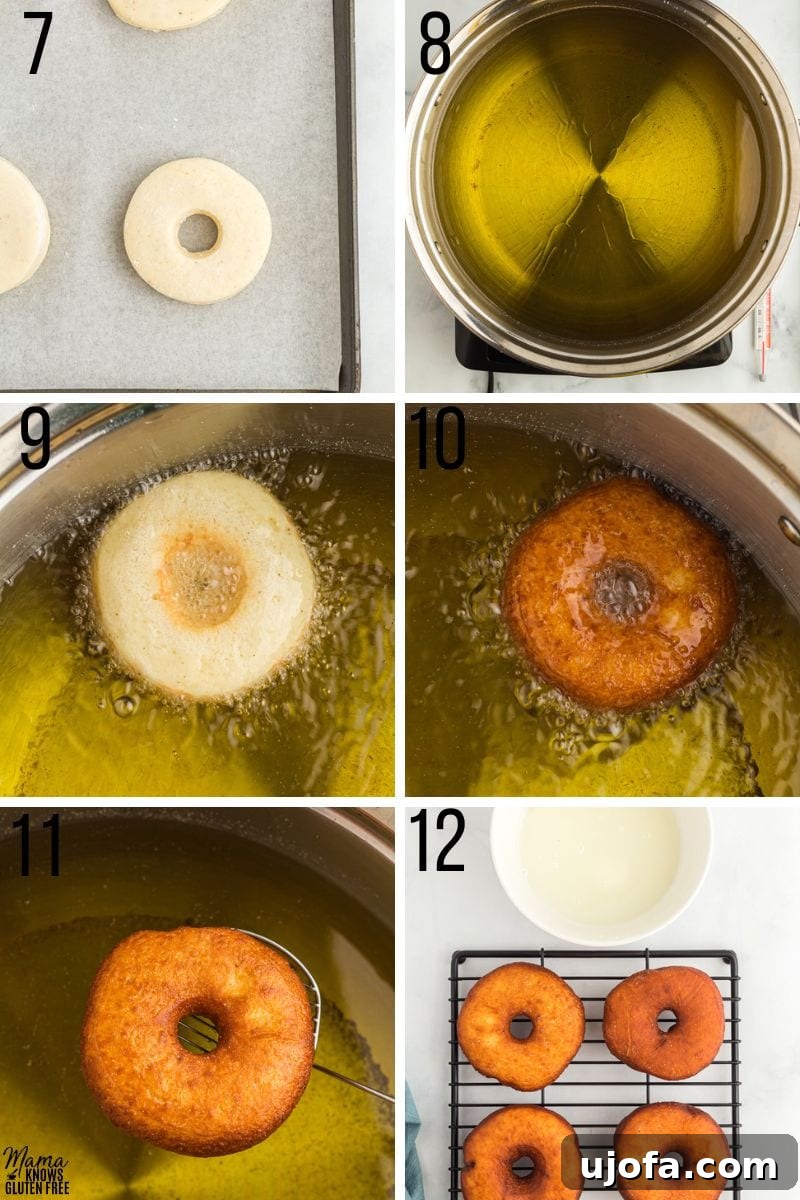
- Heat Frying Oil: In a large, heavy-bottomed pot (or a Dutch oven), add enough vegetable oil to reach at least 2 inches deep without overflowing. Begin heating the oil over medium heat. It is absolutely critical to maintain the correct oil temperature for frying gluten-free donuts. Use a candy thermometer to monitor the oil temperature, aiming for a consistent range between 320°F and 330°F. If the oil is too hot, the donuts will burn on the outside and remain raw inside. If it’s not hot enough, they will absorb too much oil, becoming greasy and dense.
- Set Up Frying Station: While the oil heats, prepare your frying station. Line a wire rack with several layers of paper towels to absorb excess oil from the fried donuts. You will also need long metal tongs for safely flipping the donuts in the hot oil and a slotted spoon or spider strainer to carefully remove them from the oil.
- Fry the Donuts: When the oil reaches the target temperature of 330°F, gently lower 1-2 donuts into the hot oil using your slotted spoon or tongs, ensuring not to overcrowd the pot. If this is your first time, frying one donut at a time is recommended to gauge cooking time. Fry each side for less than a minute, approximately 30-45 seconds, until they are a beautiful golden brown color. Avoid over-browning, which can lead to a burnt exterior.
- Flip Donuts: Use the metal tongs to carefully flip the donuts over in the oil to ensure even cooking and browning on both sides.
- Remove & Drain: Once both sides are golden brown, use the slotted spoon to carefully remove the fried donuts from the oil. Immediately transfer them to the paper towel-lined wire rack to drain any excess oil.
- Cool Slightly Before Topping: Allow the donuts to cool for about 10 minutes on the wire rack before adding your desired toppings. This brief cooling period helps the toppings adhere properly and prevents them from melting too quickly.
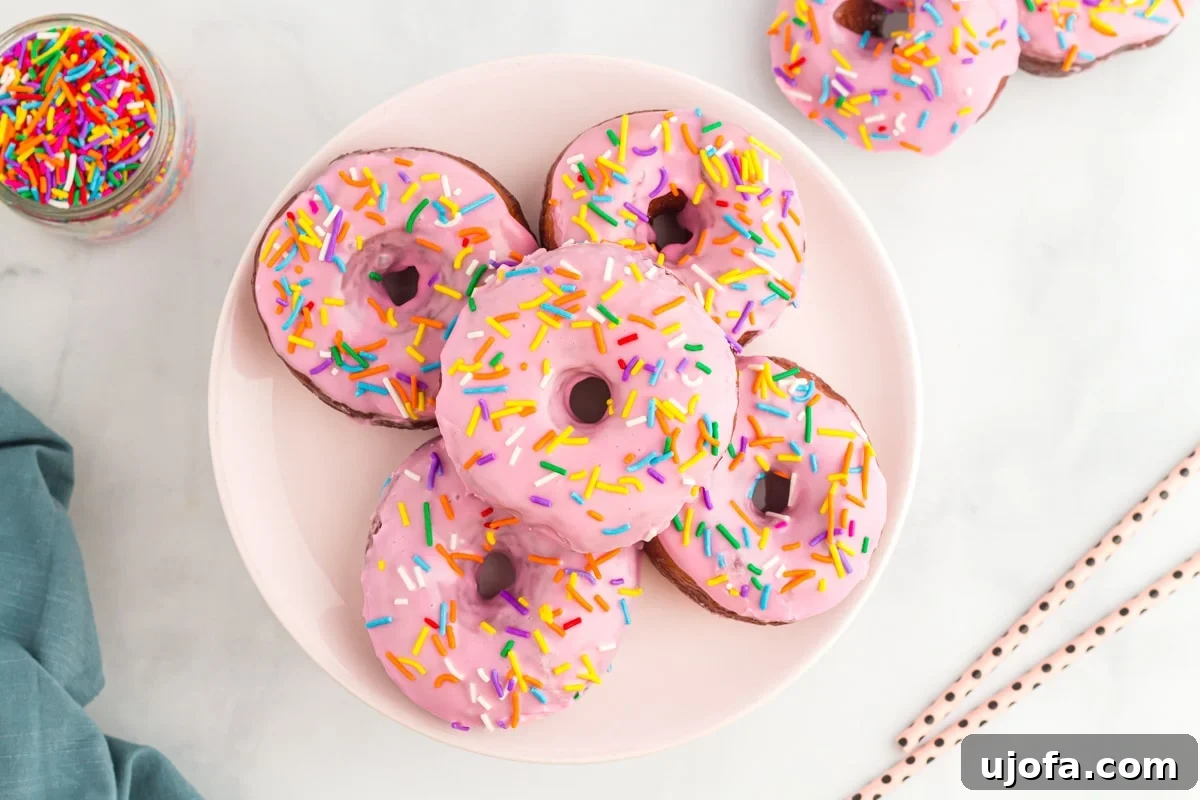
- For Glazed Donuts: In a shallow bowl, whisk together 2 cups of confectioner’s sugar with ⅓ cup of whole milk until completely smooth and free of lumps. You can adjust the milk amount slightly for your desired glaze consistency. Dip each donut (either fully or just the top) into the glaze. For a fun touch, you can add a few drops of gel food coloring to create vibrant glazes.
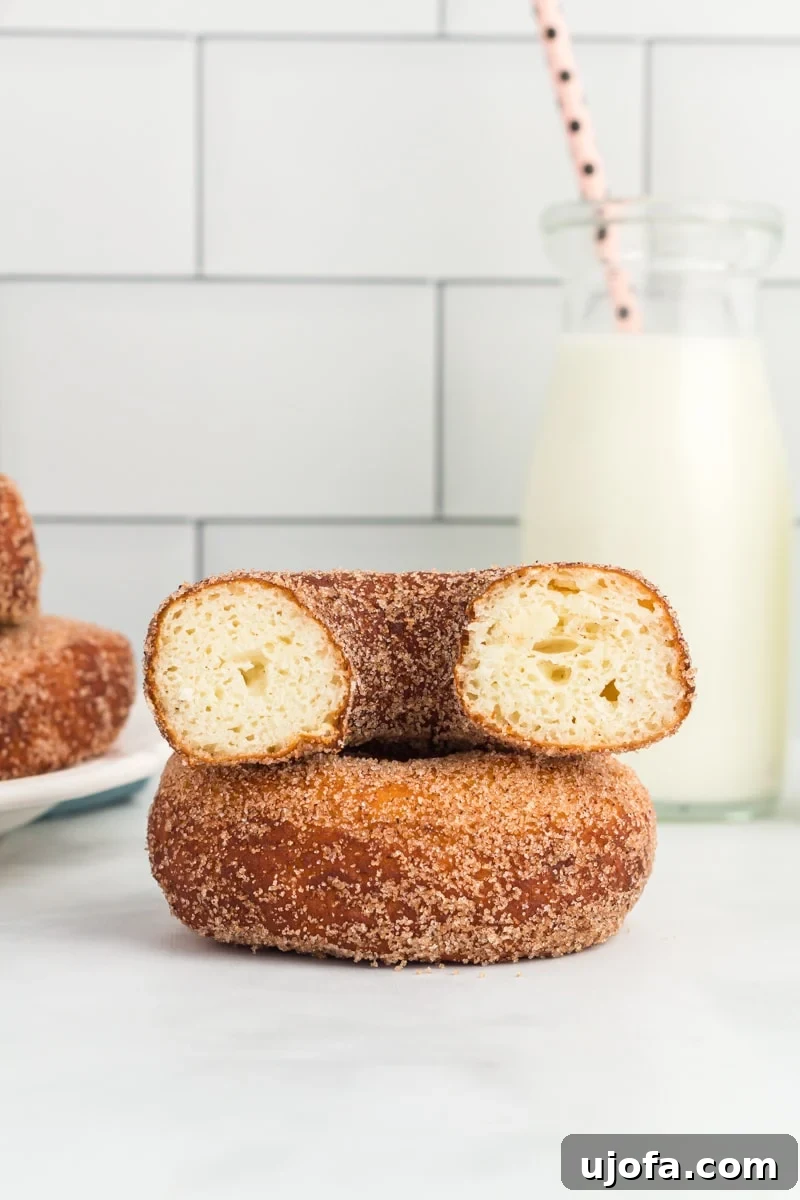
- For Cinnamon-Sugar Donuts: In a shallow bowl, combine ⅓ cup granulated sugar with 1 teaspoon ground cinnamon. Mix well. While the donuts are still warm (this is crucial for the sugar to stick!), gently dip both sides of each donut into the cinnamon-sugar mixture. Shake off any excess sugar before serving.
Expert Tips for Unforgettable Gluten-Free Donuts
Achieving bakery-quality gluten-free donuts requires a few key considerations. These tips will help you navigate common challenges and ensure your homemade treats are nothing short of spectacular:
- Choose the Right Flour Blend: As highlighted earlier, using a gluten-free flour blend specifically designed for yeast baking and containing xanthan gum is non-negotiable. Brands like Pillsbury or Better Batter are highly recommended because they provide the necessary structure and absorbency for gluten-free yeast doughs. Using a different blend might alter the hydration and elasticity, leading to different results.
- Accurate Flour Measurement is Key: Unlike traditional baking where scooping flour might be acceptable, gluten-free flour should ideally be measured by weight using a food scale (in grams). If you don’t have a scale, use the spoon-and-level method: spoon flour into your measuring cup and then level it off with a straight edge. Too much flour will result in a dry, crumbly dough that won’t come together or rise properly. Too little flour will make the dough excessively sticky and difficult to handle. If your dough is too crumbly after correct measurement, add an extra tablespoon or two of lukewarm milk until it reaches a soft, slightly sticky consistency—think a little lighter and stickier than Play-Doh.
- Oil Depth for Frying: The amount of vegetable oil needed depends on the size of the pot you’re using for deep frying. Aim for at least 2 inches of oil in the pan to ensure the donuts are fully submerged and cook evenly. You can substitute vegetable oil with canola oil or sunflower seed oil, both of which have high smoke points and neutral flavors.
- Embrace the Electric Mixer: This gluten-free yeast dough starts quite sticky, making hand-kneading challenging, especially initially. For best results, use an electric stand mixer fitted with a dough hook to knead the dough up until the point of placing it in the fridge for the first proof. After the cold proofing, the dough will be much firmer and easier to handle by hand for rolling and cutting.
- Donut Cutter Alternatives: If you don’t own a specialized donut cutter, don’t worry! You can easily create the classic donut shape using a 3-inch round cookie cutter for the outer ring and a smaller round cutter, like a Wilton 1M tip or a clean, small bottle cap, to cut out the center hole.
- Mind the Rising Environment: Yeast is sensitive to temperature. For the second rise, place your donut tray in a warm, draft-free area of your kitchen. The ideal temperature range is between 75°F to 78°F (24°C to 26°C). Avoid placing the tray in direct sunlight or an oven that’s too hot, as excessive heat can kill the yeast, preventing your donuts from rising and resulting in a dense texture.
- Don’t Overcrowd the Pot: When frying, resist the urge to put too many donuts in the oil at once. Overcrowding lowers the oil temperature significantly, leading to greasy, undercooked donuts. Fry in small batches, usually 1-3 donuts at a time, depending on your pot size, to maintain consistent oil temperature.
- Gentle Handling: Gluten-free yeast dough can be a bit more delicate than wheat-based dough once risen. Handle the proofed donuts gently when transferring them to the hot oil to avoid deflating them.
Creative Variations: Beyond the Classic Ring Shape
Absolutely! This versatile gluten-free yeast dough is perfect for more than just traditional donut rings. Feel free to unleash your creativity and experiment with different shapes and fillings to create a variety of delicious treats.
You can easily make elongated donut sticks, which are fantastic for dipping into glazes or chocolate sauces. Or, for a delightful surprise, skip cutting out the middle hole entirely to create solid donuts. Once fried, these can be filled with your favorite jams, rich custards, or creamy fillings using a piping bag fitted with a long, thin tip. Imagine biting into a fluffy donut oozing with raspberry jam or a decadent vanilla custard!
Beyond shaping, consider different toppings. While classic glaze and cinnamon sugar are divine, you could also dip them in melted chocolate and add sprinkles, create a maple glaze, or simply dust them with powdered sugar for a simple yet elegant finish. The possibilities are endless for customizing your homemade gluten-free donuts.
Troubleshooting: My Dough Didn’t Rise—What Went Wrong?
If your gluten-free donut dough didn’t rise as expected, there are a few common culprits to investigate. First, check the expiration date of your instant yeast. Expired yeast loses its potency and won’t be able to properly leaven the dough. Second, ensure that your rising environment is adequately warm but not too hot. Yeast thrives in temperatures between 75°F to 78°F (24°C to 26°C). If the room is too cold, the yeast will be sluggish. If it’s too hot, or if the milk/butter added was too warm, it could kill the yeast, rendering it inactive. Always check the temperature of your liquids and rising environment.
Troubleshooting: Why Are My Yeast Donuts Dense?
Dense donuts are usually a sign of one of two issues: incorrect oil temperature during frying or insufficient proofing time. If your frying oil isn’t hot enough (below 320°F), the donuts will absorb too much oil, becoming heavy, greasy, and dense, failing to hold their shape or puff up properly. A candy thermometer is crucial for maintaining the ideal oil temperature. Additionally, if the donuts weren’t allowed to proof (rise) for long enough during the second rise, they won’t have developed enough air pockets, resulting in a heavier, more compact texture. Always give them ample time to increase by about 50% in size during the final proof.
Can I Bake These Gluten-Free Donuts?
This particular recipe is specifically formulated for frying and is not suitable for baking. The dough’s unique composition and leavening agents are designed to achieve that characteristic light and airy fried texture. Baking this yeast donut dough would likely result in a very dense and dry product, as it wouldn’t expand and cook in the same way. For a delicious baked donut option, you’ll want to seek out a gluten-free cake-based donut recipe, which relies on different leavening and structural components for a successful baked outcome.
Storing and Enjoying Your Gluten-Free Donuts
Gluten-free yeast donuts are truly at their peak when enjoyed fresh, ideally within an hour or two of frying. This is when they are at their softest, fluffiest, and most flavorful. Like many yeast-based gluten-free baked goods, they tend to start firming up after 4 to 5 hours. While they can certainly be eaten the day after, they won’t retain the same incredibly soft and airy texture they had immediately after cooking. For any leftovers, place them in a sealed, food-safe container and store them at room temperature. For longer storage, you can tightly wrap unfrosted or unglazed donuts in plastic wrap and then place them in a freezer bag. They will keep in the freezer for up to 3 months. When ready to enjoy, thaw at room temperature and warm slightly for a softer bite.
The Irresistible Charm of Homemade Gluten-Free Yeast Donuts
There’s a reason these gluten-free yeast donuts have become a beloved treat in our home. Their unparalleled lightness and airy texture truly set them apart. Each bite offers a satisfying crispness on the outside, yielding to a wonderfully tender and flavorful interior. The beauty of this recipe lies in its ability to deliver all the joy and deliciousness of a classic donut shop treat, without any added gluten. For anyone navigating a gluten-free lifestyle, being able to enjoy such an authentic and delightful donut is a real game-changer. They’re more than just a breakfast item; they’re a moment of pure, sweet indulgence that tastes just like tradition intended.
Explore More Gluten-Free Donut Delights!
If you’ve fallen in love with homemade gluten-free donuts, there’s a whole world of delicious possibilities to explore! Expand your baking repertoire with these other fantastic gluten-free donut recipes:
- Gluten-Free Vanilla Cake Donuts
- Gluten-Free Chocolate Cake Donuts
- Gluten-Free Baked Pumpkin Donuts
- Gluten-Free Baked Apple Cinnamon Donuts
Gluten-Free Yeast Donuts Recipe
This easy recipe for gluten-free yeast donuts yields a treat that fries up lighter than air, using a specialized gluten-free flour blend and instant yeast to achieve a pillowy soft rise. Perfect for breakfast or dessert!
Recipe Details:
- By: Cheryl Johnson
- Servings: 8 donuts
- Prep Time: 20 minutes
- Cook Time: 5 minutes
- Proofing Time: 4 hours
- Total Time: 4 hours 25 minutes
Ingredients
For the Donuts:
- 2½ cups Gluten-Free Flour with Xanthan Gum (Pillsbury or Better Batter Brand recommended)
- ¼ cup granulated sugar
- 2 teaspoons baking powder
- 2 teaspoons instant yeast (rapid rise yeast)
- ½ teaspoon cream of tartar
- ½ teaspoon ground nutmeg
- ¼ teaspoon salt
- ¾ cup whole milk, room temperature or lukewarm
- 1 large egg
- ¼ cup unsalted butter, melted but not hot
- Vegetable oil, for frying (enough to fill pot 2 inches deep)
For Glazed Donuts:
- 2 cups confectioner’s sugar
- ⅓ cup whole milk
For Cinnamon-Sugar Donuts:
- ⅓ cup granulated sugar
- 1 teaspoon ground cinnamon
Instructions
- In a large bowl, combine gluten-free flour, granulated sugar, baking powder, instant yeast, cream of tartar, nutmeg, and salt. Stir together until well combined.
- Add milk and egg into the flour mixture. Use an electric mixer with a dough hook and knead on low-medium speed for 5 minutes. Use a spatula to blend in any dry ingredients that have settled at the bottom of the bowl. Keep kneading with the dough hook for the full 5 minutes and the dough will start to come together better into smoother dough.
- Knead the butter in, using the dough hook on low-medium speed, until it is well combined (about 1 minute).
- Spray a medium bowl with non-stick cooking spray and place the dough into the bowl. Cover the bowl with food-safe plastic wrap and place the dough into the fridge for at least 2 hours. This can also sit overnight in the fridge. Gluten-free flour needs this time to hydrate so don’t skip this cooled proofing time.
- Line a large baking sheet with parchment paper. Set aside for now.
- Lightly flour your work surface, your rolling pin, and your donut cutter with gluten-free flour then place your dough down on that lightly floured work surface. Roll the dough out to about ¾” thickness then use a donut cutter to cut out the donut shapes. The size of the donut cutter I used is 3” in diameter.
- Gently place the raw donuts onto the prepared baking sheet. Space the donuts out at least 2 inches from each other. Wrap this tray well with food-safe plastic wrap then place in a warm area of your kitchen to rise for 1½ to 2 hours (until about 50% larger in size).
- Heat oil in a pot that’s big enough to have at least 2 inches of oil in it without spilling over the edges. Oil should be heated to a temperature between 320°F to 330°F. Use a candy thermometer to measure the temperature of the oil. Too hot of oil will burn the outside of the donut while the middle remains raw. Oil that isn’t hot enough will result in your donut turning into a lump of dough and not holding its shape. A candy thermometer is essential as the temperature of your oil will make or break your donuts.
- While your oil is heating up, prepare your work space by lining a wire rack with paper towels (to soak up oil after removing the donut from the pot). You’ll also need metal tongs for turning your donuts over while frying plus a slotted spoon for removing the donut from the oil and placing on the paper towel to cool.
- If this is your first time deep frying donuts, start with frying one donut at a time. This will give you a better idea of how long you’ll want to keep your donut in the oil. At a temperature of 330°F, I cook the donuts for less than a minute on each side. You’re looking for a golden color but not too brown as that will lead to a burnt outer layer.
- Use the metal tongs to flip donuts over in the oil during baking.
- Use a slotted spoon to scoop donuts out of the oil and place on the paper towel lined wire rack.
- Let the donuts cool slightly (about 10 minutes) before adding toppings.
- For glazed donuts: Stir the confectioner’s sugar and milk together until smooth. Dip donuts as desired (either fully dipping them or just dipping the tops). Can add gel food coloring if you’d like.
- For cinnamon-sugar donuts: Stir the sugar and cinnamon together. Dip both sides of warm donut into the mixture and gently shake off excess sugar. This needs to be done while the donuts are warm or the sugar mixture won’t stick to the donut.
Notes
- We recommend Pillsbury Gluten Free Flour or Better Batter for any gluten free yeast recipes.
- Measure the flour using a scale or the spoon-and-level method. If you’ve measured your flour correctly and the dough is still too crumbly, add another tablespoon or two of milk until it is a soft dough consistency (a little lighter and stickier than play-dough).
- The amount of vegetable oil needed for frying depends on the size of pot you’re using to deep fry the donuts. You’ll need at least 2 inches of oil in the pan. You can substitute the vegetable oil for canola oil or sunflower seed oil.
- I wouldn’t recommend hand kneading this dough. It’s much too sticky to work with at first. Use an electric mixer with a dough hook to knead this dough up to the step of placing in the fridge to proof. After removing from the fridge, the dough will then be at a consistency suitable for handling with your hands.
- If you do not have a donut cutter, I’d recommend using a 3” circle cookie cutter with a Wilton 1M tip (or similar size) to cut out the hole in the middle of the donut.
- The area you choose should be about room temperature. Do not place the tray in direct sunlight as too much heat will kill the yeast.
- Nutritional information does not include glaze or cinnamon-sugar.
- To store: Gluten-free yeast donuts are best eaten within an hour of baking them. They start to harden after 4 to 5 hours. They can be eaten the day after but they won’t be soft and fluffy like they were within an hour of baking them. Place leftovers in a sealed food-safe container and store at room temperature.
- To freeze: Tightly wrap the gluten-free yeast donuts in plastic wrap and place them in a freezer bag for up to 3 months.
- Mama says, “Make sure to always check your labels!”
Nutrition
Nutrition information is an approximation per 1 donut (does not include glaze or cinnamon-sugar):
- Serving: 1 donut
- Calories: 297 kcal
- Carbohydrates: 37g
- Protein: 7g
- Fat: 15g
- Saturated Fat: 5g
- Polyunsaturated Fat: 4g
- Monounsaturated Fat: 4g
- Trans Fat: 0.3g
- Cholesterol: 41mg
- Sodium: 220mg
- Potassium: 107mg
- Fiber: 5g
- Sugar: 9g
- Vitamin A: 248 IU
- Vitamin C: 0.01mg
- Calcium: 118mg
- Iron: 2mg
Additional Info
- Course: Breakfast, Dessert
- Cuisine: American