Mastering Gluten-Free Egg Rolls: Crispy, Savory, and Irresistibly Homemade
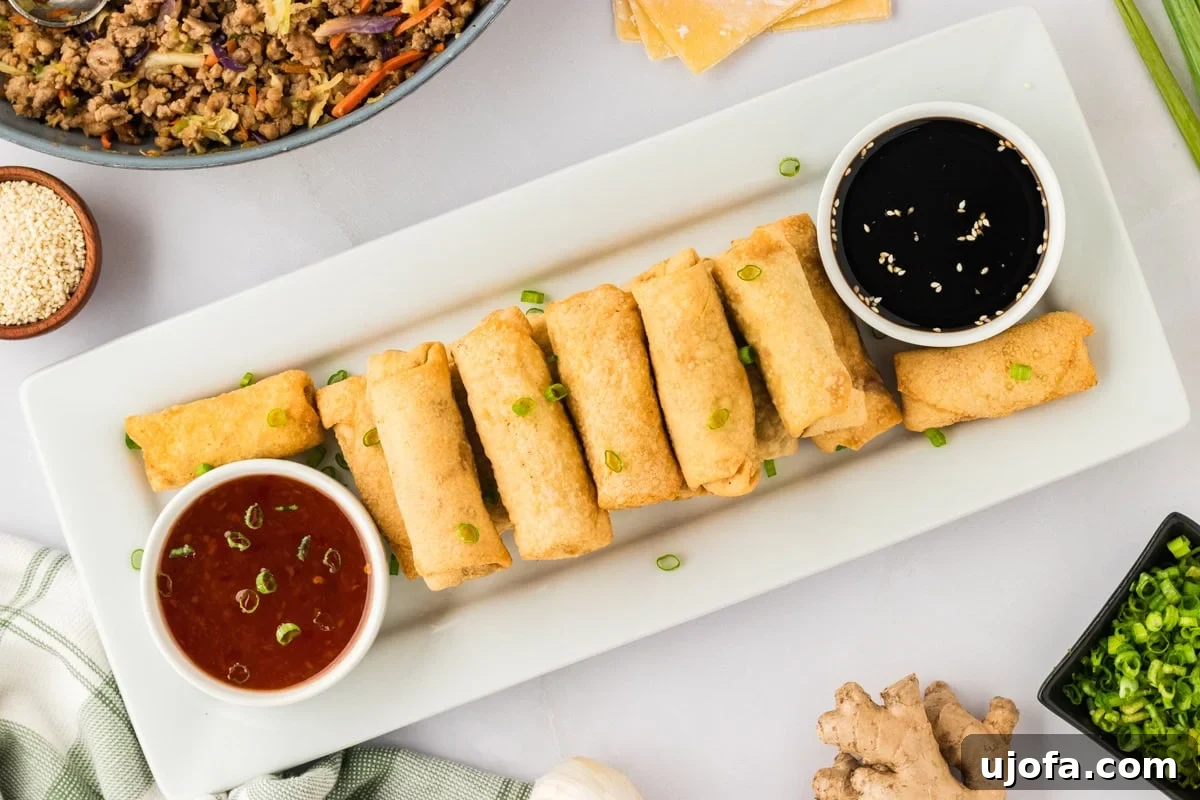
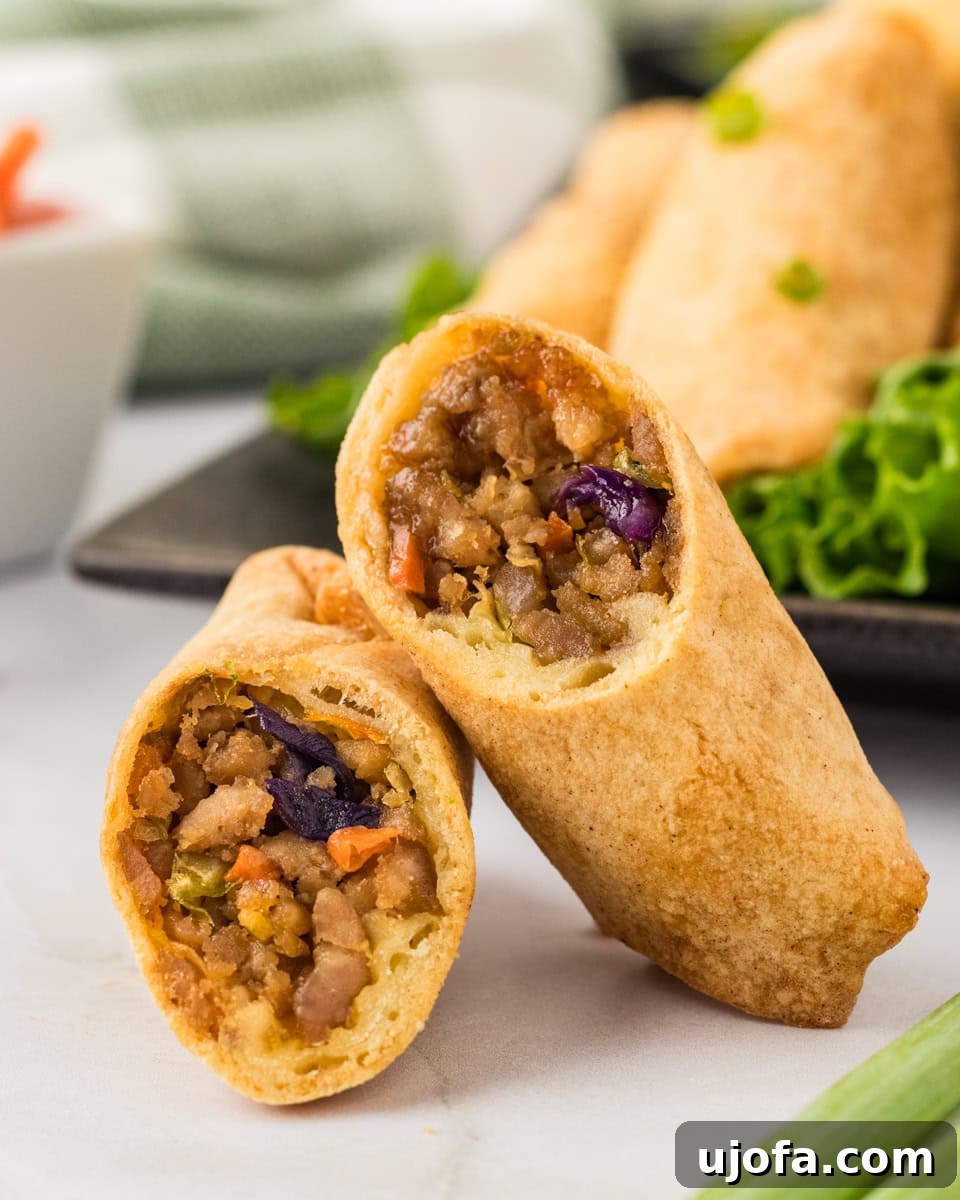
Embark on a culinary journey to create the perfect gluten-free egg rolls right in your kitchen. These delectable American-Chinese appetizers offer an irresistible crunch and a deeply savory filling, infused with the vibrant flavors of ginger and garlic. While takeout egg rolls are a beloved staple, crafting them at home with gluten-free ingredients elevates the experience, ensuring a fresh, wholesome, and perfectly tailored treat for everyone, especially those with gluten sensitivities.
Why Homemade Gluten-Free Egg Rolls Are a Must-Try
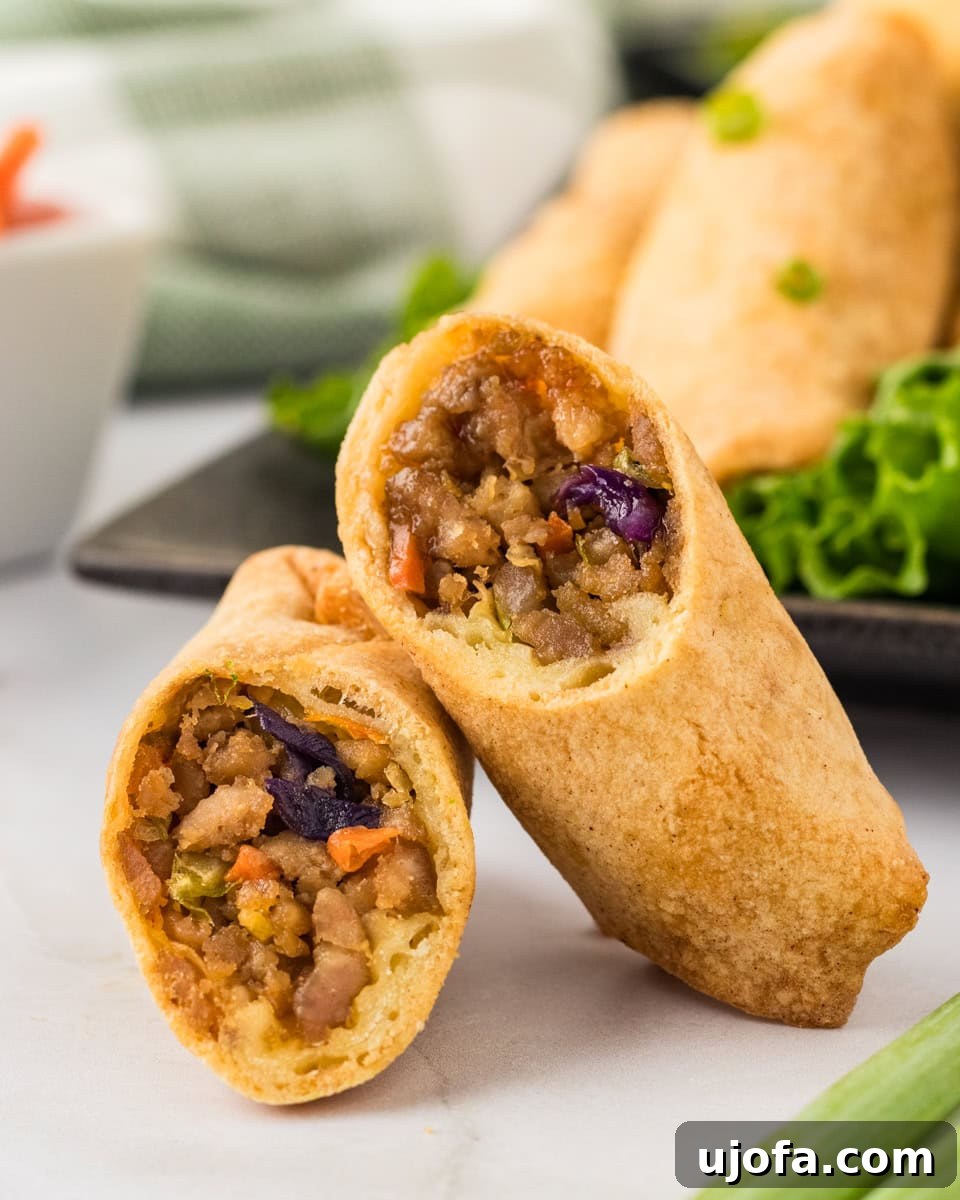
Making your own gluten-free egg rolls isn’t just about catering to dietary needs; it’s about unlocking a superior flavor and texture that store-bought versions often lack. You gain complete control over the quality of ingredients, from the freshest vegetables to the leanest ground meat, and the precise blend of seasonings. The result is an appetizer that boasts a remarkably crispy exterior and a tender, flavorful interior—a true culinary delight that will impress your guests and become a new favorite in your recipe collection. This recipe takes inspiration from our acclaimed gluten-free wonton wrapper recipe, showcasing the versatility of homemade gluten-free dough in diverse Asian-inspired dishes.
The Benefits of Crafting Your Own Egg Rolls
- Dietary Control: Ensure every ingredient is safe and suitable for a gluten-free diet, avoiding cross-contamination risks common in commercial kitchens.
- Superior Freshness & Flavor: Experience the difference fresh ingredients make. The vibrant ginger, pungent garlic, and crisp vegetables contribute to a more aromatic and flavorful filling.
- Customization: Adjust seasonings to your preference, swap out meats, or add extra vegetables to create an egg roll that’s uniquely yours.
- Cost-Effective: Enjoy restaurant-quality appetizers at a fraction of the price.
- Rewarding Experience: The process of preparing, wrapping, and frying your own egg rolls is incredibly satisfying, culminating in a dish you’ll be proud to serve.
Essential Ingredients for Your Gluten-Free Egg Rolls
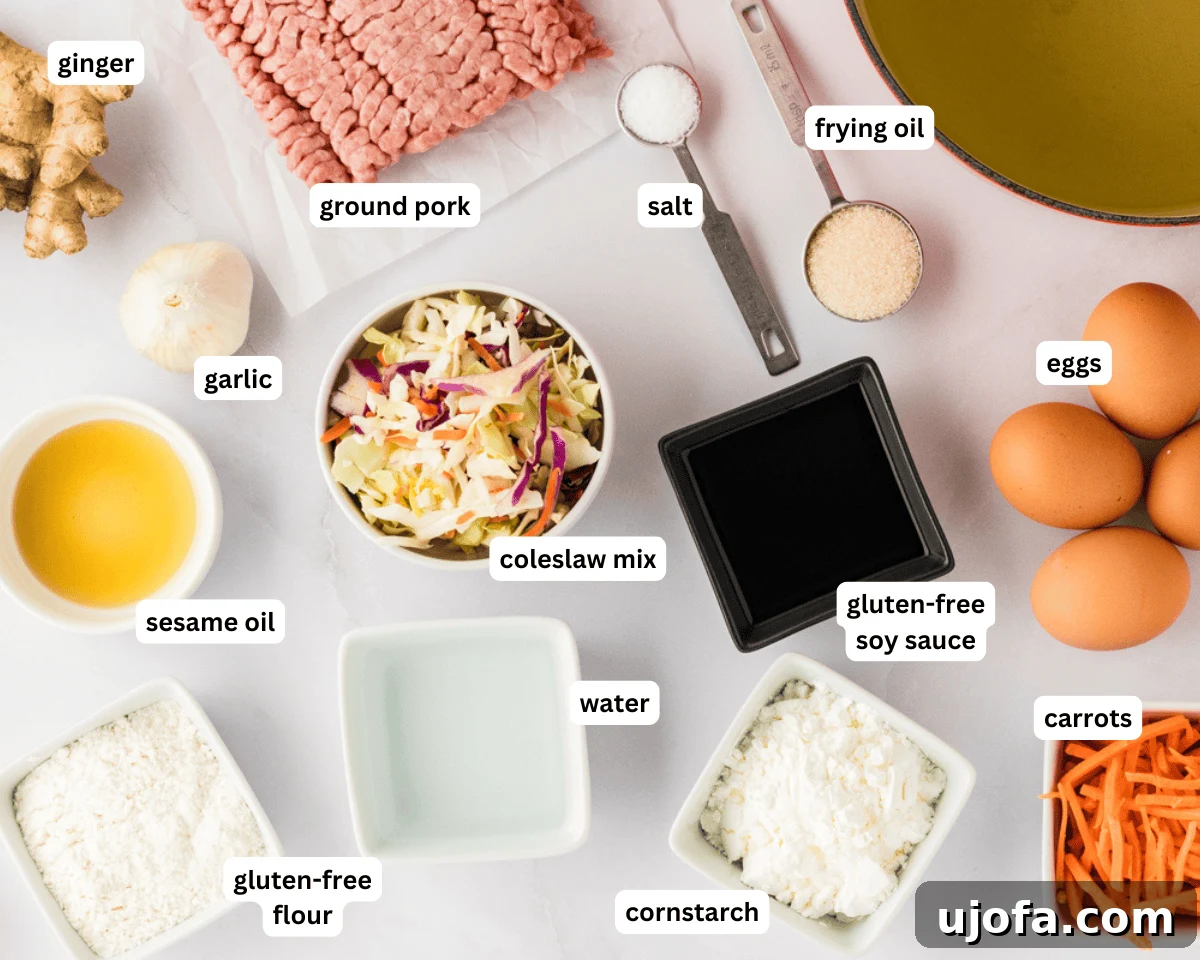
Crafting these perfect gluten-free egg rolls requires a blend of high-quality ingredients for both the savory filling and the pliable, crispy wrappers. Attention to detail, especially regarding gluten-free certifications, is key for a successful outcome.
For the Irresistible Filling:
- Gluten-Free Soy Sauce: This is a non-negotiable! Always verify the “gluten-free” label on your soy sauce bottle. Tamari is an excellent and widely available gluten-free alternative. For a soy-free option, coconut aminos work beautifully, offering a similar umami depth with a hint of sweetness.
- Sesame Oil: A foundational flavor in many Asian dishes, sesame oil imparts a distinct, rich, and nutty aroma. Toasted sesame oil, with its deeper color and more intense flavor, is highly recommended for an authentic taste.
- Granulated Sugar: A touch of sugar is crucial for balancing the savory elements, creating a well-rounded and harmonious flavor profile that prevents the filling from being one-note.
- Salt: Essential for seasoning and enhancing the natural flavors of the other ingredients. Adjust to taste, remembering that soy sauce also contributes salinity.
- Cornstarch: Acts as a thickening agent for the filling’s sauce, helping to bind the ingredients together and prevent excess moisture, which is vital for crisp egg rolls.
- Ground Pork: The traditional choice for egg rolls, offering a rich flavor and desirable fat content. If substituting, opt for ground chicken, turkey, or even a plant-based alternative. Remember that leaner meats may require a bit more oil during cooking to prevent drying out.
- Fresh Ginger: Minced fresh ginger provides a warm, slightly spicy, and aromatic zing that beautifully complements the other seasonings. Do not underestimate the power of fresh ginger!
- Fresh Garlic: Minced garlic delivers a robust, savory depth and an unmistakable aroma, enhancing the overall umami experience of each bite.
- Coleslaw Mix: A convenient shortcut! A pre-packaged coleslaw mix (shredded green and purple cabbage) adds crunch and a fresh vegetable element. Broccoli slaw or finely shredded cabbage and carrots are also great options.
- Carrots: Shredded carrots contribute natural sweetness and additional texture, creating a visually appealing and more balanced filling.
- Green Onions (Scallions): Use both the white and green parts for a mild oniony flavor and a fresh garnish.
For the Crispy Gluten-Free Wrapper:
- Gluten-Free All-Purpose Flour Blend: The cornerstone of our wrappers. We recommend a quality blend like Pillsbury Gluten-Free All-Purpose Flour. Be aware that different gluten-free flour blends can vary significantly in moisture absorption, texture, and flavor due to varying compositions (rice flour, tapioca starch, potato starch, xanthan gum). You might need slight adjustments to water content.
- Eggs: Eggs are crucial in the wrapper dough. They act as a binding agent, providing structure, elasticity, and flexibility, which are especially important for gluten-free doughs that lack the natural elasticity of wheat gluten.
- Warm Water: Warm water helps activate starches in the gluten-free flour, allowing for better absorption and a more pliable dough. It contributes to the desired soft, yet firm consistency.
- Frying Oil: Choose a high smoke point oil for deep frying, such as vegetable oil, peanut oil, canola oil, or avocado oil. Ensure you have enough oil to completely submerge the egg rolls for even cooking.
- Additional Cornstarch: Used for dusting your work surface and rolling pin to prevent the dough from sticking, which is essential when working with delicate gluten-free dough.
Expert Tips and Suggestions for Perfect Egg Rolls
- Prepare Filling in Advance: The meat filling can be made ahead of time and stored in the refrigerator for up to 2-3 days. This significantly cuts down on prep time on the day you plan to fry. Just ensure the filling returns to room temperature before you start wrapping your egg rolls to prevent temperature shock with the hot oil.
- Wrapper Freshness is Key: Unlike the filling, egg roll wrappers are best made fresh on the day of assembly. Gluten-free dough tends to dry out quickly, losing its pliability and becoming difficult to work with if prepared too far in advance.
- Manage Moisture Content: After cooking the filling, allow it to cool and then drain any excess moisture. Too much liquid in the filling can lead to soggy egg rolls, compromising their crispiness during frying. A truly crispy egg roll starts with a well-drained filling.
- Maintain Optimal Oil Temperature: Consistency is crucial for frying. Keep your oil at a steady temperature between 350-375°F (175-190°C). If the oil is too cool, the egg rolls will absorb too much oil and become greasy. If it’s too hot, they will burn on the outside before the filling is thoroughly heated. Using a deep-fry thermometer is highly recommended for precision.
- Avoid Overcrowding the Pot: Fry egg rolls in small batches. Overcrowding the pot will cause the oil temperature to drop rapidly, leading to uneven cooking and greasy results. Give each egg roll enough space to fry properly.
- Drain on a Wire Rack: Once fried to golden perfection, transfer the egg rolls to a wire rack set over a baking sheet. This allows air to circulate around all sides, preventing them from steaming and becoming soft. Avoid placing them directly on paper towels for too long, as this can trap moisture.
- Dough Handling: Gluten-free dough can be more delicate and prone to tearing than traditional wheat dough. Work gently and use plenty of cornstarch on your surface and rolling pin. Don’t be discouraged if it takes a few tries to get the hang of rolling it thin enough without tearing.
Spring Rolls vs. Egg Rolls: What’s the Difference?
Often confused, spring rolls and egg rolls are distinct Asian appetizers, primarily differing in their wrappers and typical serving styles. Understanding these differences can help you appreciate each dish’s unique characteristics:
- Wrapper Composition: The most significant distinction lies in the wrapper. Traditional spring roll wrappers are typically made from rice flour and water, resulting in a very thin, delicate, and often translucent wrapper. When fried, they achieve an exceptionally crisp and airy texture. Egg roll wrappers, on the other hand, are traditionally made from wheat flour and usually include egg, giving them a thicker, more substantial texture. Our gluten-free egg roll wrappers replicate this heartier consistency using a specialized gluten-free flour blend and eggs.
- Texture and Appearance: Upon frying, a spring roll will often have a smooth, almost glass-like, and delicate crispiness. Egg rolls are known for their signature blistered, bubbly, and often bumpy exterior, providing a satisfyingly chewy crunch.
- Serving Style: While egg rolls are almost exclusively served hot and deep-fried, spring rolls offer more versatility. Many varieties of spring rolls are served fresh and cold, encased in a soft, pliable rice paper wrapper (often called “summer rolls” or “fresh rolls”), filled with fresh vegetables, herbs, and sometimes shrimp or cooked meat. Fried spring rolls are also common, but their delicate wrapper offers a different experience than a fried egg roll.
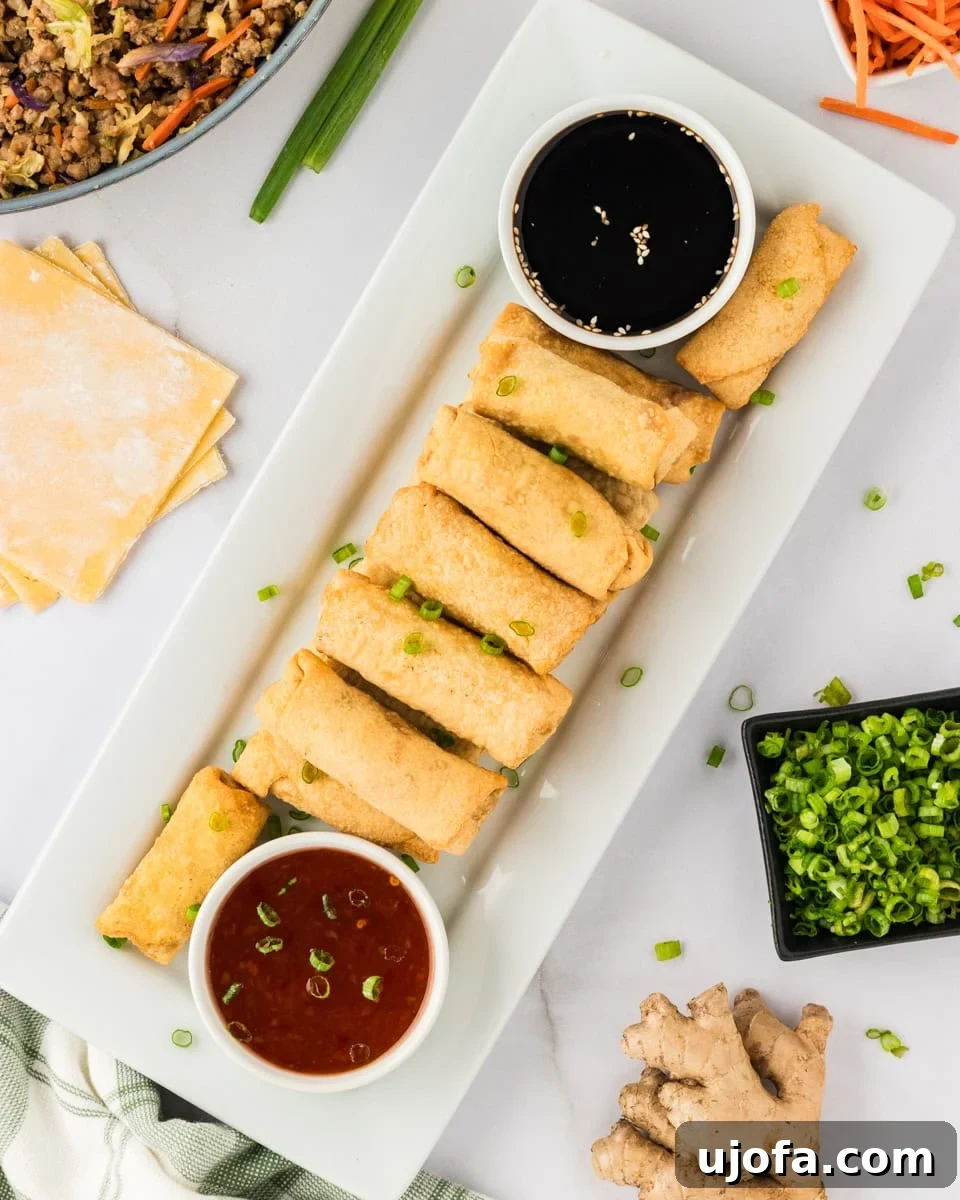
Serving Suggestions for Your Gluten-Free Egg Rolls
These homemade gluten-free egg rolls are delicious on their own, but they truly shine when paired with complementary dipping sauces and other Asian-inspired dishes. Here are some ideas to elevate your dining experience:
- Classic Dipping Sauces:
- Sweet Chili Sauce: A fan-favorite combination, offering a perfect balance of sweet, spicy, and tangy notes that beautifully cut through the richness of the egg rolls.
- Gluten-Free Soy Sauce or Tamari: A simple yet effective choice for those who appreciate the pure, savory umami flavor.
- Homemade Teriyaki Sauce: A sweet and savory glaze that adds another layer of complexity. Our homemade recipe ensures it’s perfectly gluten-free.
- Spicy Mustard: For those who love a kick, a dab of spicy Chinese mustard adds a potent, sinus-clearing heat.
- Duck Sauce: A sweet and sour fruit-based sauce that provides a contrasting sweetness.
- As Part of an Appetizer Spread: If you’re hosting or simply enjoying a variety of flavors, serve these egg rolls alongside other popular gluten-free Asian appetizers:
- Gluten-Free Fried Rice: A hearty and satisfying accompaniment that pairs well with almost any Asian meal.
- Gluten-Free Asian Sticky Wings: Sweet, sticky, and full of flavor, these wings make an excellent partner to crispy egg rolls.
- Gluten-Free Spring Rolls or Summer Rolls: Offer a lighter, fresher contrast to the fried egg rolls.
- Full Meal Integration: While perfect as an appetizer, a larger serving of these egg rolls can easily anchor a light lunch or dinner, especially when accompanied by a fresh salad or a simple soup.
Storage and Reheating Instructions
Proper storage and reheating ensure your gluten-free egg rolls remain delicious and crispy for future enjoyment.
- Refrigeration: Cooked egg rolls can be stored in an airtight container in the refrigerator for up to 5 days.
- Freezing: For longer storage, cooked egg rolls can be frozen for up to 2-3 months. Arrange them in a single layer on a baking sheet to freeze solid, then transfer to a freezer-safe bag or container. This prevents them from sticking together.
- Reheating for Crispiness: To restore their crisp texture, avoid the microwave.
- Oven: Preheat your oven to 350°F (175°C). Place the egg rolls on a wire rack set over a baking sheet (this is crucial for crispiness) and bake for 8-12 minutes for refrigerated rolls, or 15-20 minutes for frozen rolls, until heated through and crispy.
- Air Fryer: Preheat your air fryer to 350°F (175°C). Air fry for 6-8 minutes for refrigerated rolls, or 10-15 minutes for frozen rolls, shaking the basket halfway through. This method often yields the best crispness for reheated egg rolls.
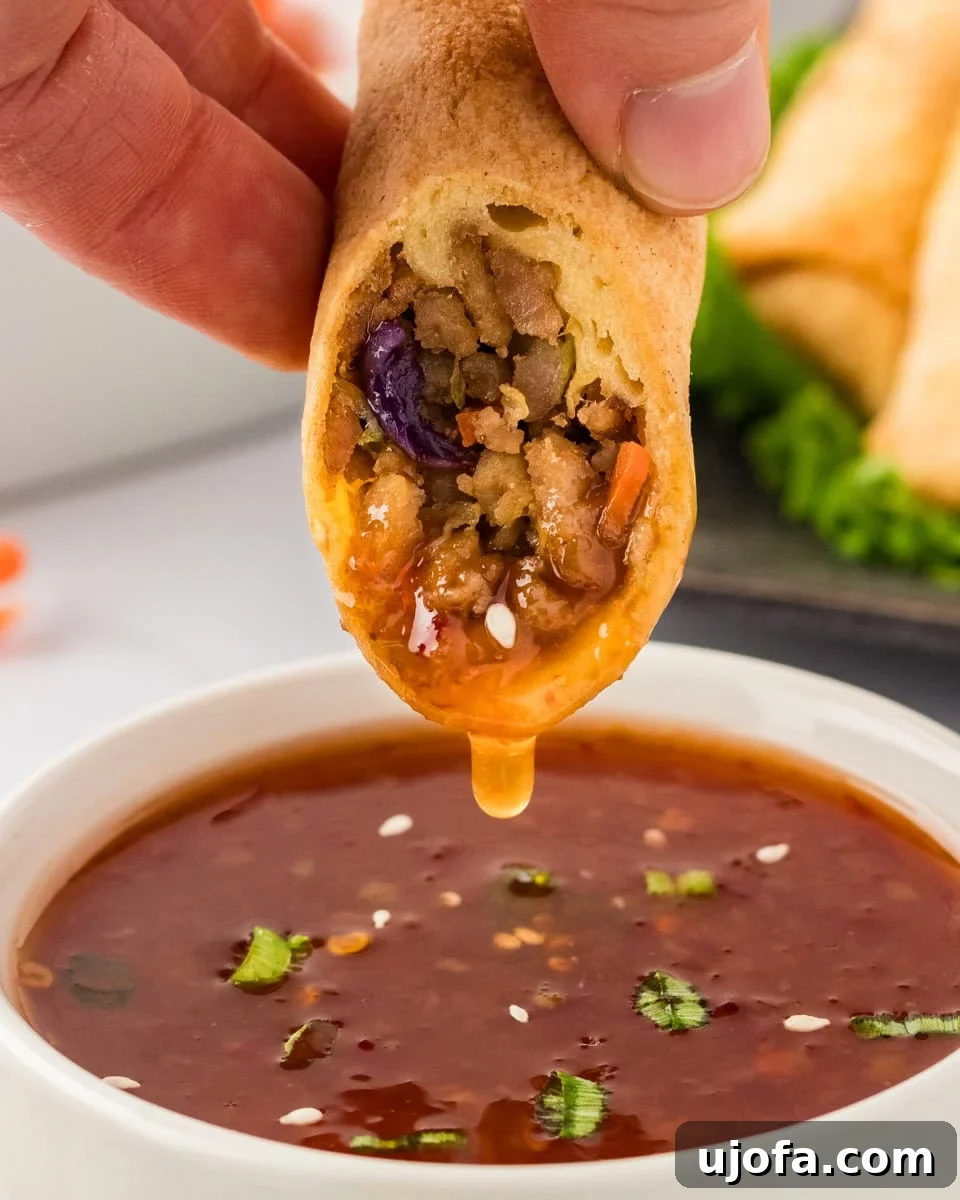
More Delicious Asian-Inspired Gluten-Free Recipes
If you’re loving these gluten-free egg rolls, be sure to explore more of our Asian-inspired gluten-free dishes:
- Gluten-Free Egg Noodles: Perfect for stir-fries and soups.
- Gluten-Free Ramen: Enjoy a comforting bowl of ramen without the gluten.
- Gluten-Free Pad Thai: A classic Thai noodle dish, made safe for gluten-free diets.
Gluten-Free Egg Rolls Recipe
These gluten-free egg rolls are irresistibly crispy and packed with a savory filling of ginger and garlic, making them a delicious twist on a classic American-Chinese appetizer.
By: Julia Elizabeth
Servings: 22 egg rolls
Prep Time: 40 minutes
Cook Time: 15 minutes
Rest Time: 30 minutes
Total Time: 1 hour 25 minutes
Equipment
- 1 large skillet
- 1 large pot
- 1 thermometer
- 1 rolling pin
- 1 baking rack
- 1 skimmer or tongs
- Mixing bowls
Ingredients
For the Filling
- 2 tablespoons gluten-free soy sauce
- 2 teaspoons sesame oil
- 1 tablespoon sugar
- 2 teaspoons cornstarch
- 1 teaspoon salt
- 1 pound ground pork (or preferred ground meat)
- 1 tablespoon fresh ginger, minced
- 4 cloves of garlic, minced
- 2 cups coleslaw mix (shredded green and purple cabbage)
- ½ cup shredded carrots
- 2 large green onions, chopped (both white and green parts)
For the Wrapper
- 1 ¾ cup Pillsbury gluten-free all-purpose flour (or your preferred blend)
- ¼ cup cornstarch, plus more for rolling
- ¼ teaspoon salt
- 3 eggs (approx. 150 grams), plus 1 extra egg for the egg wash
- ⅛ cup and 2 tablespoons of warm water, divided
- Frying oil (vegetable, peanut, canola, or avocado oil)
Instructions
- Prepare the Sauce: In a small bowl, combine gluten-free soy sauce, sesame oil, sugar, cornstarch, and salt. Whisk until well combined and set aside.
- Cook the Pork: In a large pan, brown the ground pork over medium heat, breaking it up as it cooks, until fully cooked through.
- Add Aromatics: Stir in the minced garlic and fresh ginger to the cooked pork. Cook for another minute until fragrant.
- Incorporate Vegetables & Sauce: Add the chopped green onions, shredded carrots, coleslaw mix, and the prepared sauce to the pan. Cook for 2-3 minutes, stirring frequently, until the vegetables begin to soften slightly but still retain some of their vibrant color and crunch.
- Cool the Filling: Remove the filling from the heat and allow it to cool completely to room temperature. This is crucial before filling the wrappers to prevent them from becoming soggy.
- Prepare Egg Wash: Whisk one egg in a small bowl to create an egg wash, and set it aside. This will be used to seal the egg rolls.
- Mix Dry Wrapper Ingredients: In a medium mixing bowl, combine the gluten-free all-purpose flour, ¼ cup cornstarch, and ¼ teaspoon salt. Mix well.
- Form the Dough: Add 3 eggs (approx. 150g) and ⅛ cup of warm water to the dry ingredients. Begin mixing with your hands, kneading the mixture within the bowl. The dough will appear shaggy initially. Continue kneading until it starts to come together into a cohesive dough that can be compressed in your fist and hold its shape. If it’s too dry, gradually add the remaining 2 tablespoons of warm water, one tablespoon at a time, until the desired consistency is reached.
- Knead the Dough: Transfer the dough to a clean, lightly cornstarch-dusted surface. Knead the dough for approximately 3 minutes until it becomes smooth, slightly sticky, and tacky, but doesn’t stick excessively to your hands or the surface. If it feels too dry, add a tiny bit more water; if too sticky, add a little more cornstarch.
- Rest the Dough: Tightly wrap the smooth dough in plastic wrap and let it rest at room temperature for 30 minutes. This allows the flours to fully hydrate, making the dough easier to roll.
- Divide the Dough: After resting, unwrap the dough and divide it into two equal pieces. Keep the piece you’re not immediately working with wrapped in plastic to prevent it from drying out.
- First Roll: Lightly dust your work surface and rolling pin with cornstarch. Roll out one piece of dough into as flat and rectangular a shape as possible. Add more cornstarch as needed to prevent sticking, and frequently turn and flip the dough. Work carefully, as gluten-free dough is prone to tearing. Roll it thin enough that it is opaque, but not so thin you can see through it.
- Cut Squares: Cut the rolled dough into as many approximate 4-inch squares as you can (you should get around 22 total from both dough pieces). Don’t worry about perfection, as you’ll re-roll them. Lightly dust the squares with cornstarch, stack them, and cover them with a damp paper towel to keep them from drying out.
- Final Roll: Apply more cornstarch to your work surface. Take one 4-inch square at a time and roll it out until it is approximately 5-6 inches and thin enough that you can just see your hand through it (it should be opaque, not transparent, but very thin). This step requires practice to achieve the right thickness without tearing.
- Trim and Position: Trim the edges of the now larger square to make them as uniform as possible. Turn the dough square diagonally so one of the corners points towards you.
- Fill the Wrapper: Place about one tablespoon of the cooled meat filling slightly lower than the center of the wrapper, shaping it into a log.
- Fold and Seal: Using a brush, lightly apply the prepared egg wash to the exposed edges of the wrapper. Carefully peel up the corner closest to you and fold it tightly over the meat filling. Then, fold the two side corners inwards, forming an envelope shape. Finally, roll the entire egg roll upwards to close it completely, creating a tight seal without stretching or tearing the dough. Repeat for all remaining wrappers and filling. Keep rolled egg rolls under a damp towel until ready to fry.
- Heat Frying Oil: In a medium or large heavy-bottomed pot, heat enough frying oil (at least 2-3 inches deep) to 350°F (175°C) to fully submerge the egg rolls. Use a thermometer to monitor the temperature.
- Fry the Egg Rolls: Carefully lower 3-4 egg rolls into the hot oil, dropping them away from you. Fry for 5-6 minutes, flipping them occasionally to ensure even browning and crispiness. Do not overcrowd the pot, as this will drop the oil temperature and result in greasy egg rolls.
- Drain and Serve: Once golden brown and crispy, remove the egg rolls with a skimmer or tongs and place them on a wire rack set over a baking sheet to drain any excess oil. Serve warm with your favorite dipping sauces. Enjoy your perfectly crispy, homemade gluten-free egg rolls!
Notes
- You can certainly make the meat filling ahead of time and store it in the fridge until you are ready to use it; just let it come to room temperature before filling your egg rolls. I would not, however, recommend making the wrappers ahead of time, as they dry out too easily.
- Drain any excess moisture from the filling to avoid soggy egg rolls. This helps keep the rolls crisp during frying.
- Keep the oil at a steady 350-375°F (175-190°C). Too low, and the rolls will be greasy; too high, and they may burn. Use a thermometer for precision.
- After frying, place egg rolls on a wire rack instead of paper towels to keep them crisp on all sides.
- Store in the fridge for up to 5 days and reheat by baking or air frying them at 350°F for 6-8 minutes.
Nutrition
Nutrition information is automatically calculated, so should only be used as an approximation.
- Serving: 1 egg roll
- Calories: 111 kcal
- Carbohydrates: 10g
- Protein: 6g
- Fat: 6g
- Saturated Fat: 2g
- Polyunsaturated Fat: 1g
- Monounsaturated Fat: 2g
- Trans Fat: 0.002g
- Cholesterol: 37mg
- Sodium: 248mg
- Potassium: 95mg
- Fiber: 1g
- Sugar: 1g
- Vitamin A: 452 IU
- Vitamin C: 3mg
- Calcium: 18mg
- Iron: 1mg
Additional Info
- Course: Appetizer
- Cuisine: Asian
How to Make Gluten-Free Egg Rolls Step-by-Step with Images
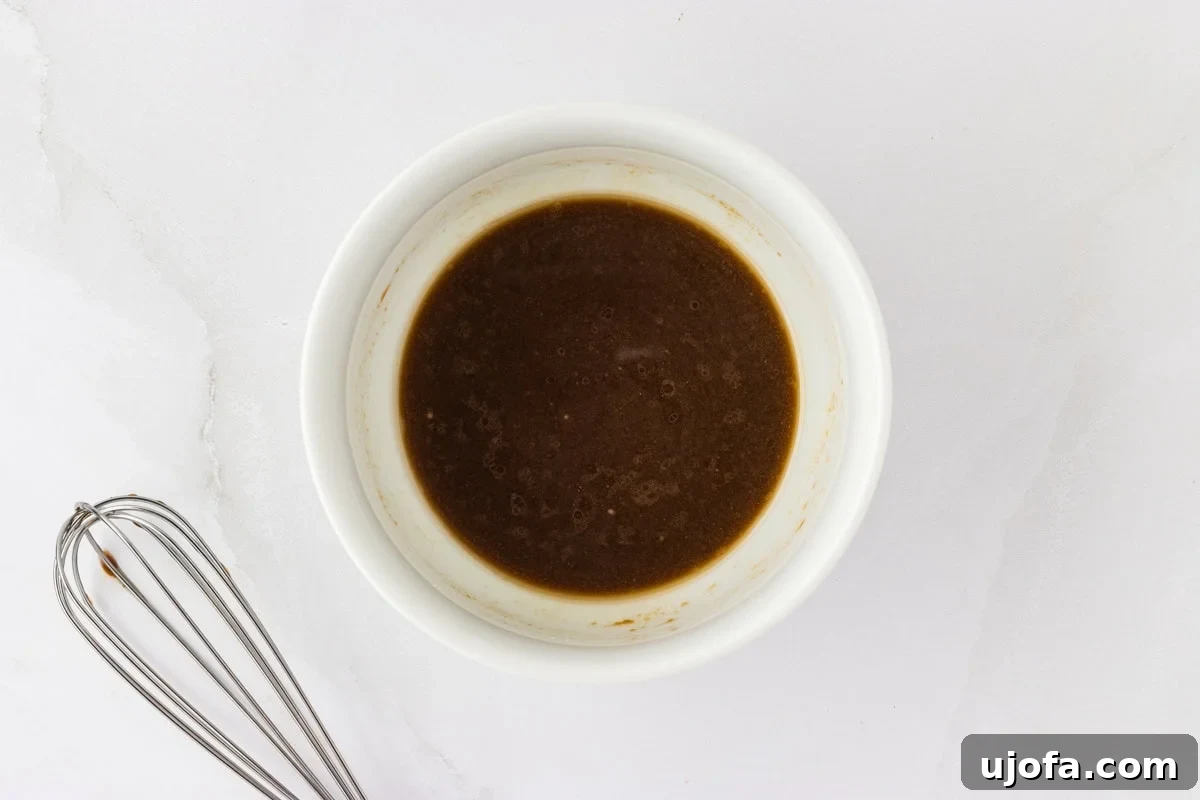
Step 1: Prepare the Flavorful Sauce. In a small bowl, combine 2 tablespoons of gluten-free soy sauce, 2 teaspoons of sesame oil, 1 tablespoon of sugar, 2 teaspoons of cornstarch, and 1 teaspoon of salt. Whisk these ingredients together until they are thoroughly combined, creating a smooth, aromatic sauce. Set this mixture aside; it will be added to the filling later to impart its savory and slightly sweet notes.
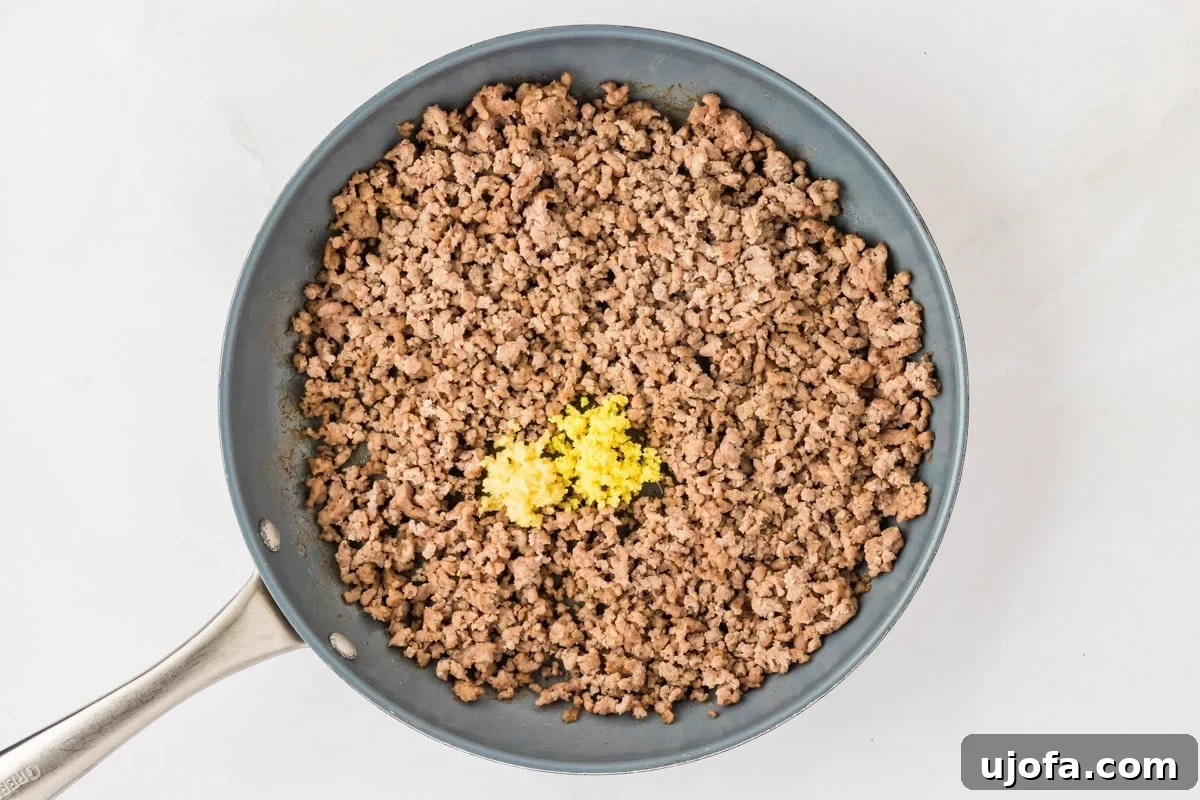
Step 2: Brown the Ground Pork. Heat a large pan over medium heat. Add 1 pound of ground pork to the pan. Cook the pork, breaking it up with a spatula or spoon as it browns, until it is completely cooked through and no longer pink. Once the pork is cooked, add 1 tablespoon of freshly minced ginger and 4 cloves of minced garlic to the pan. Sauté for an additional minute, stirring continuously, until the aromatics become fragrant and their enticing scent fills your kitchen.
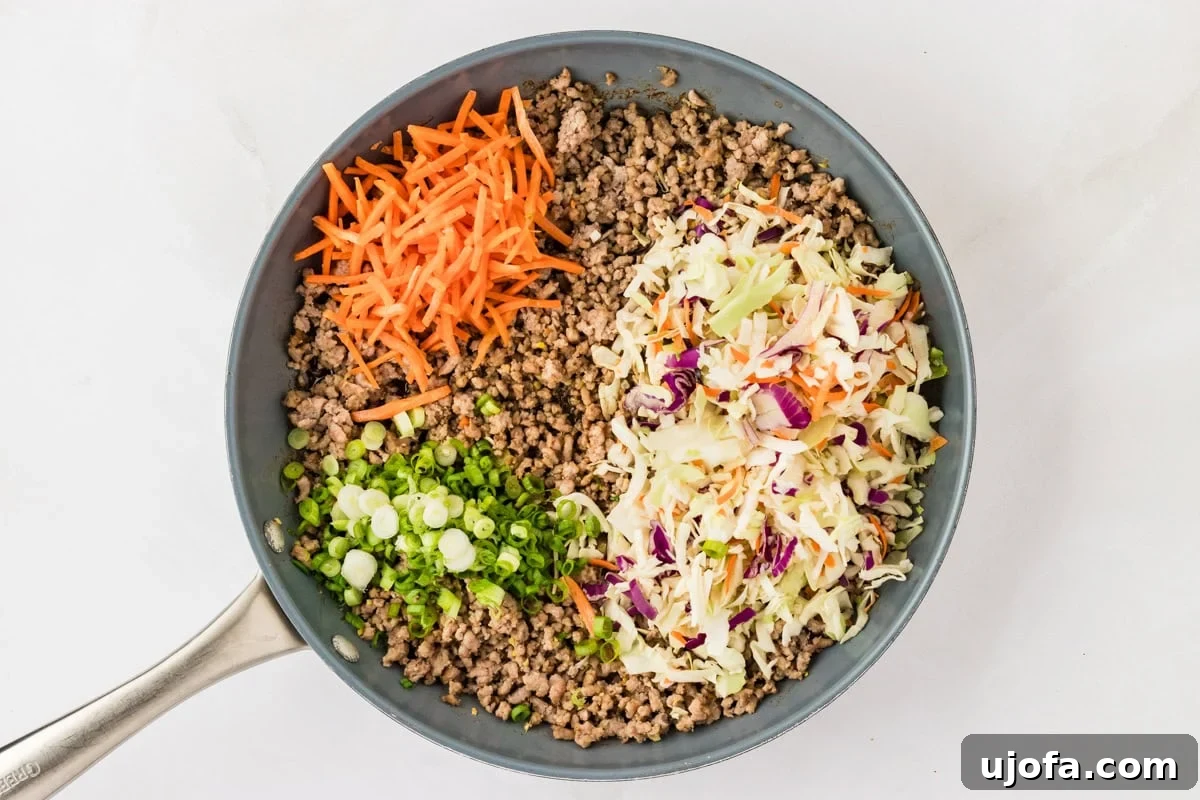
Step 3: Combine with Vegetables and Sauce. To the cooked pork, ginger, and garlic mixture in the skillet, add 2 whole chopped green onions (using both white and green parts for full flavor), ½ cup of shredded carrots, and 2 cups of coleslaw mix. Pour in the prepared soy sauce mixture from Step 1. Cook this entire mixture for 2-3 minutes, stirring frequently. The goal is for the vegetables to soften slightly while still retaining a pleasant crispness and their vibrant colors. Be careful not to overcook them, as they will lose their texture and visual appeal.
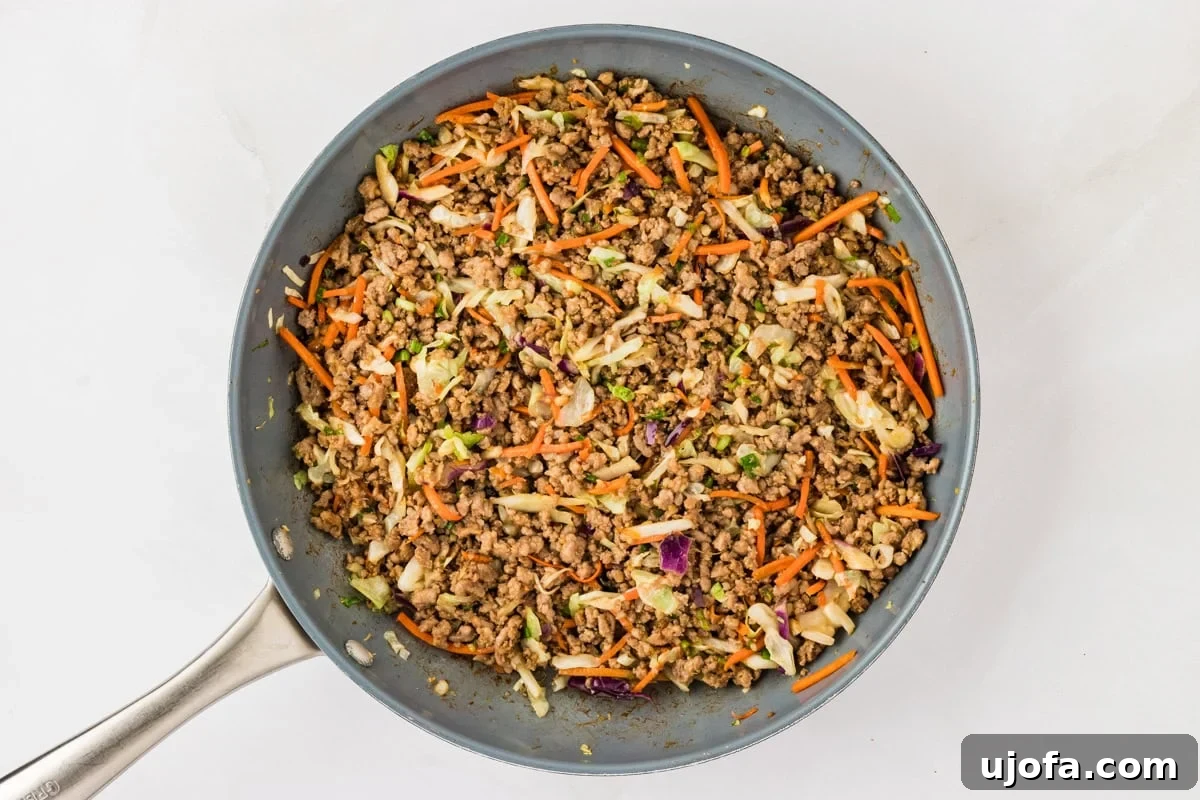
Step 4: Cool the Filling. Once the filling is cooked, remove the pan from the heat. It is essential to let the filling cool down completely to room temperature before you attempt to fill your egg roll wrappers. Cooling prevents the wrappers from becoming prematurely soft or tearing due to heat and steam, ensuring your final egg rolls are perfectly crispy.
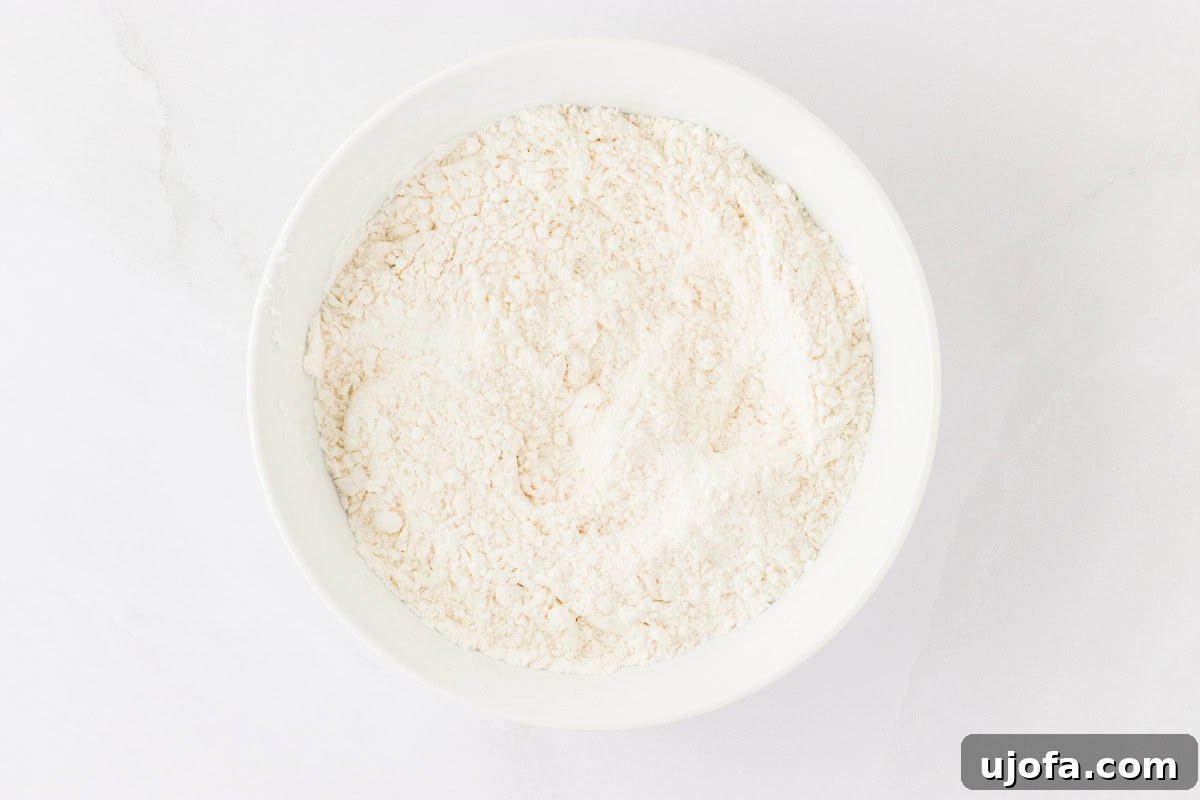
Step 5: Prepare the Wrapper Dry Ingredients. While the filling cools, begin making the gluten-free wrappers. First, whisk one egg in a small separate bowl to use later as an egg wash for sealing the egg rolls. In a larger mixing bowl, combine 1 ¾ cups of your chosen gluten-free all-purpose flour blend, ¼ cup of cornstarch, and ¼ teaspoon of salt. Mix these dry ingredients thoroughly until they are evenly combined.
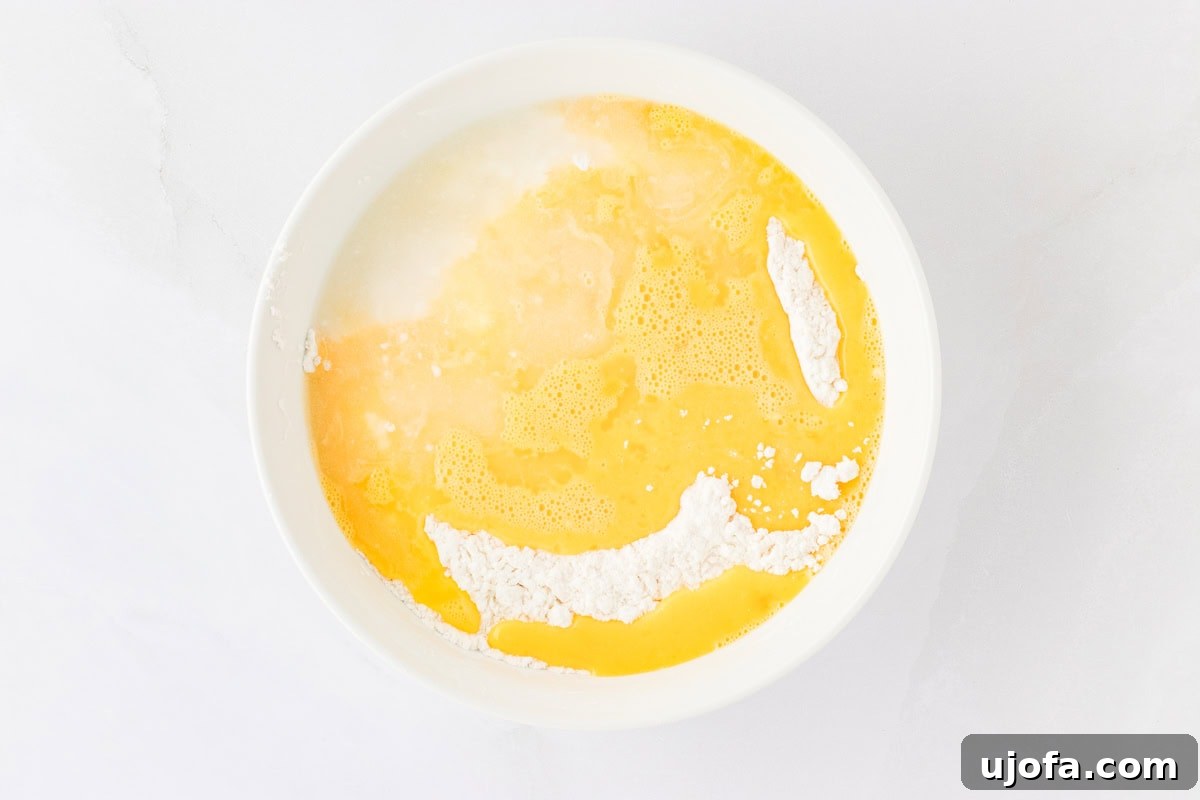
Step 6: Add Wet Ingredients to Dough. To the bowl containing the dry flour mixture, add 3 whole eggs (approximately 150 grams) and ⅛ cup of warm water. Keep the remaining 2 tablespoons of warm water reserved; you might need to add it gradually later to achieve the correct dough consistency. It’s always better to start with less water and add more if needed, as too much liquid can make the dough unworkable.
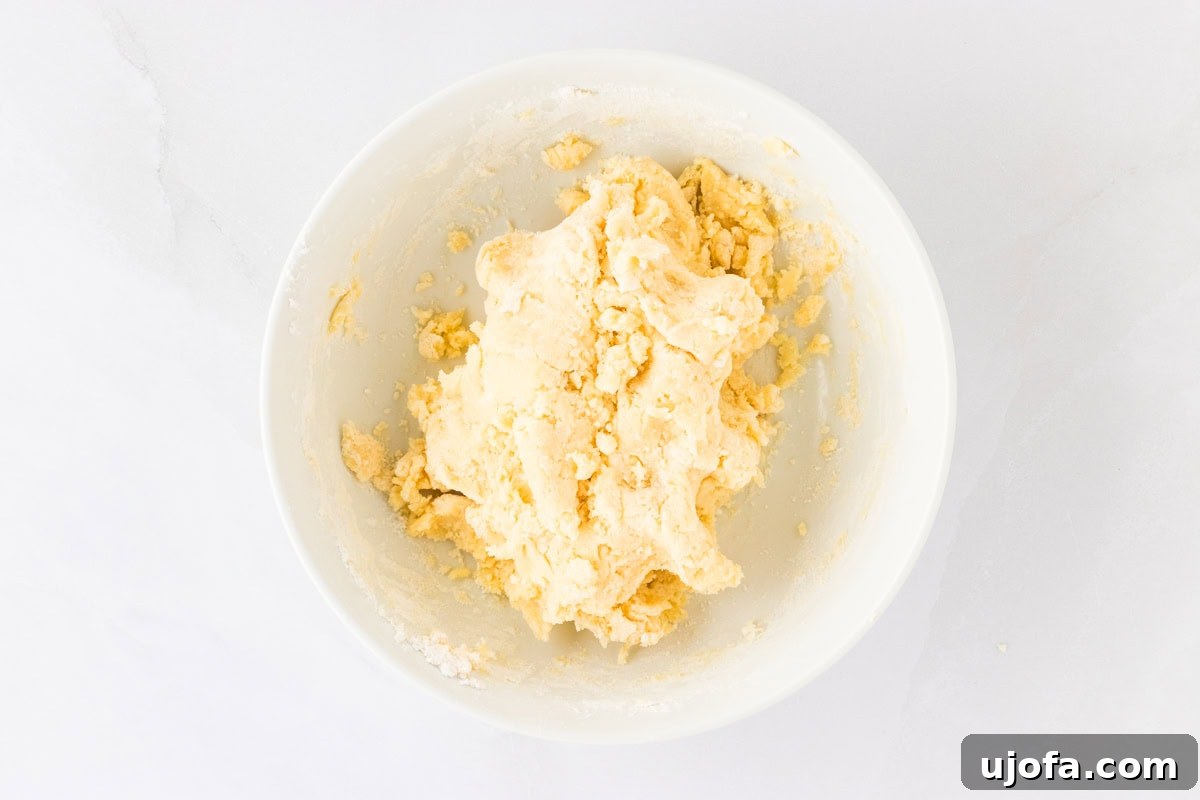
Step 7: Form the Dough. Begin mixing the ingredients in the bowl with your hands, gently kneading until the dough starts to come together. Initially, it will appear somewhat shaggy and crumbly. Continue mixing and compressing; the dough should eventually form a mass that holds together when you squeeze it in your fist. If the dough remains too dry and doesn’t cohere, add one more tablespoon of the reserved warm water at a time, mixing until the right consistency is achieved.
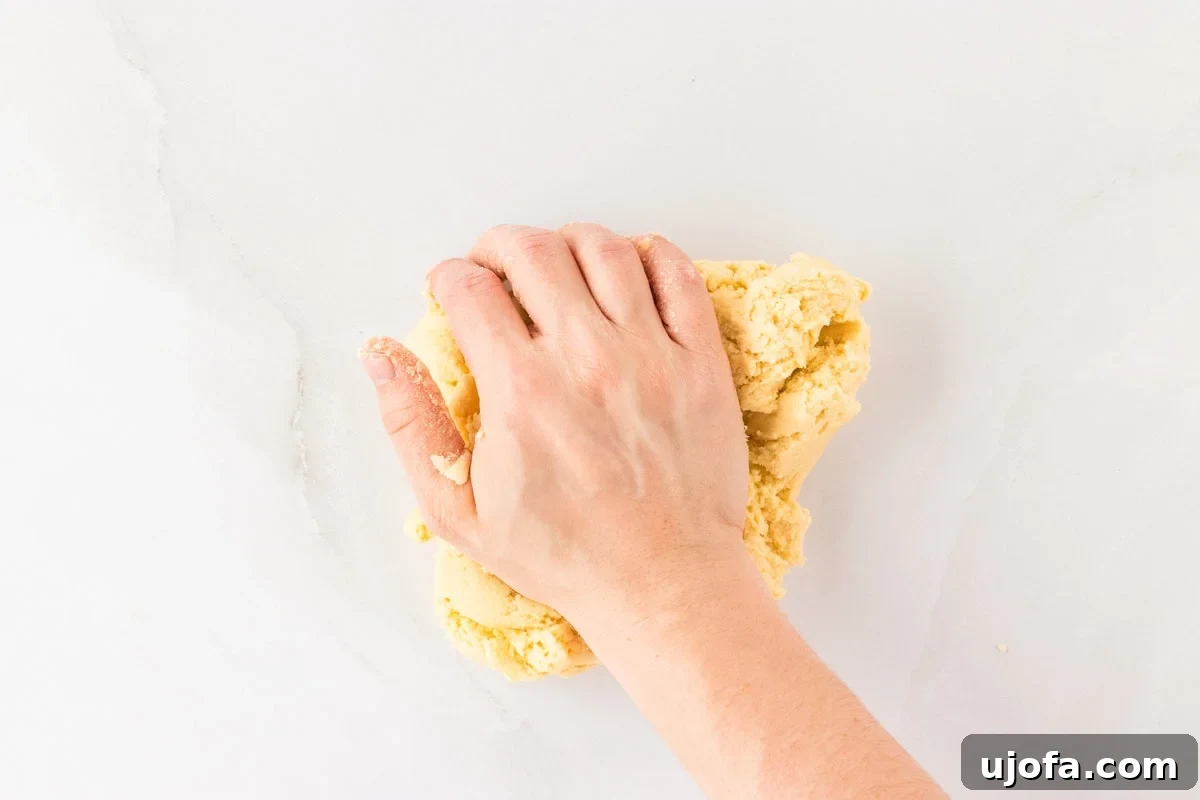
Step 8: Knead Until Smooth. Remove the dough from the bowl and transfer it to a clean, lightly dusted work surface. Continue kneading the dough outside the bowl. The ideal dough should be slightly sticky and tacky to the touch, but it should not adhere excessively to your hands or the work surface. If it feels too dry, add a few drops more water; if it’s too sticky, incorporate a tiny bit more cornstarch. As you knead, the dough will become progressively smoother and more elastic.
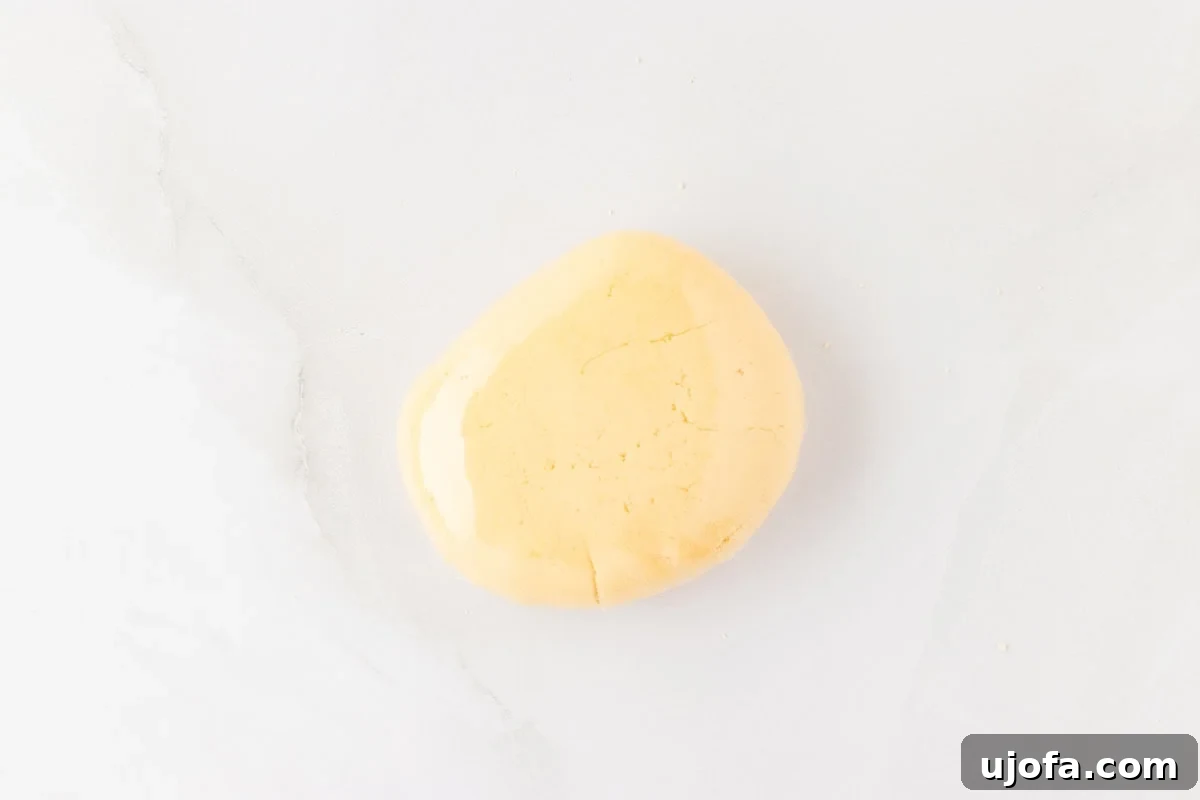
Step 9: Rest the Dough. Continue kneading the dough until it is completely smooth, a process that typically takes about 3 minutes. Once it reaches this smooth consistency, wrap the dough tightly in plastic wrap. Allow the dough to rest at room temperature for at least 30 minutes. This resting period is crucial as it allows the gluten-free flours to fully hydrate and relax, making the dough much easier to roll out without tearing.
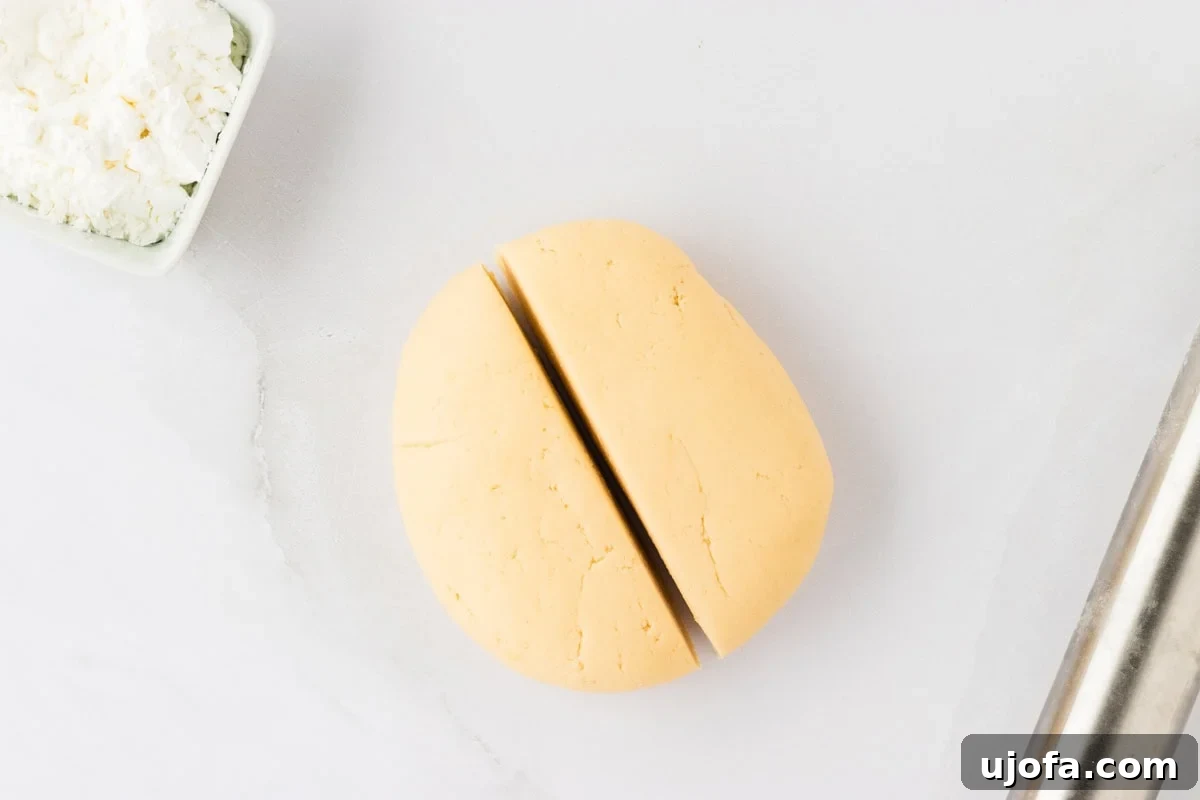
Step 10: Divide the Dough. After the 30-minute resting period, remove the dough from its plastic wrap. Carefully divide the dough into two equally sized pieces. As you work with one piece, ensure the other piece remains tightly wrapped in plastic wrap. This prevents the unused dough from drying out, maintaining its pliability for later use.
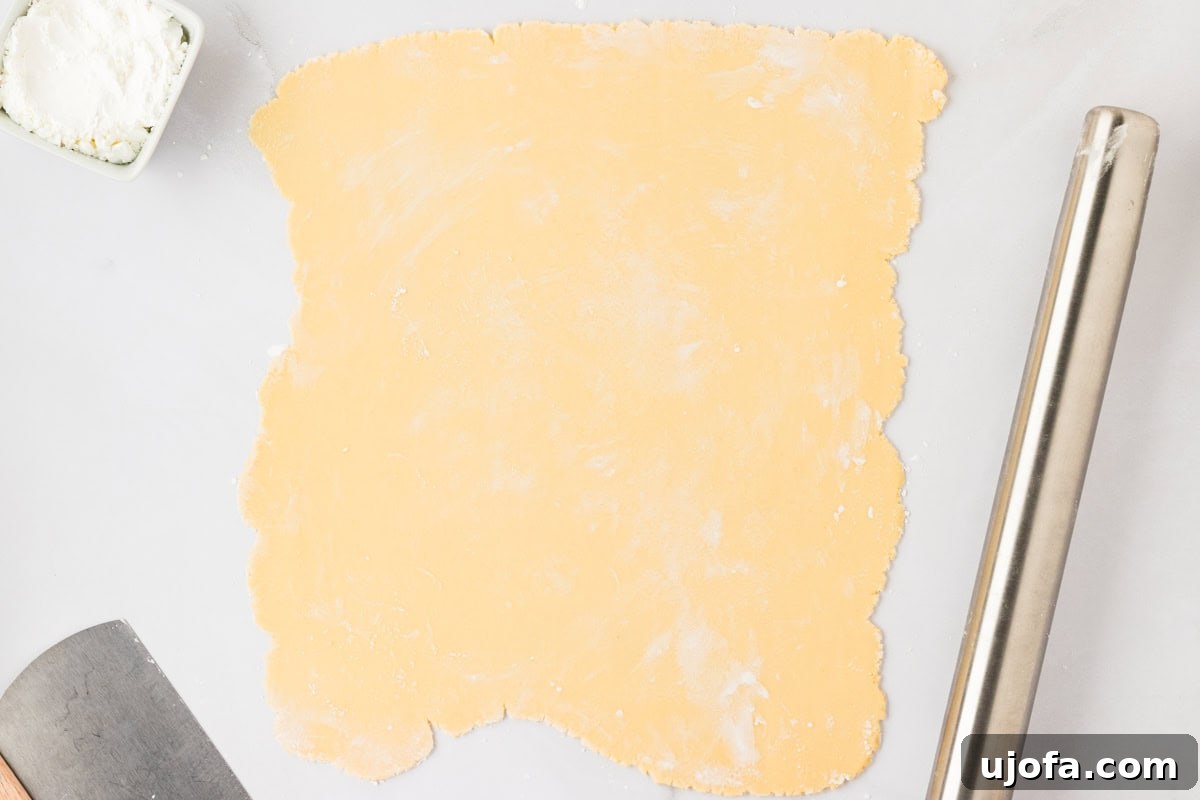
Step 11: Roll the First Dough Portion. Lightly dust your clean work surface and your rolling pin generously with cornstarch. Place one half of the dough onto the dusted surface and begin to roll it out flat. Aim to create a large, rectangular shape. Continue adding more cornstarch to your surface, rolling pin, or directly onto the dough as needed to prevent it from sticking. Frequently turn and flip the dough to ensure even rolling and prevent adhesion. Exercise caution, as gluten-free dough is inherently more delicate and prone to tearing than traditional wheat dough. Roll it thinly, but not so thin that you can clearly see through it at this stage.
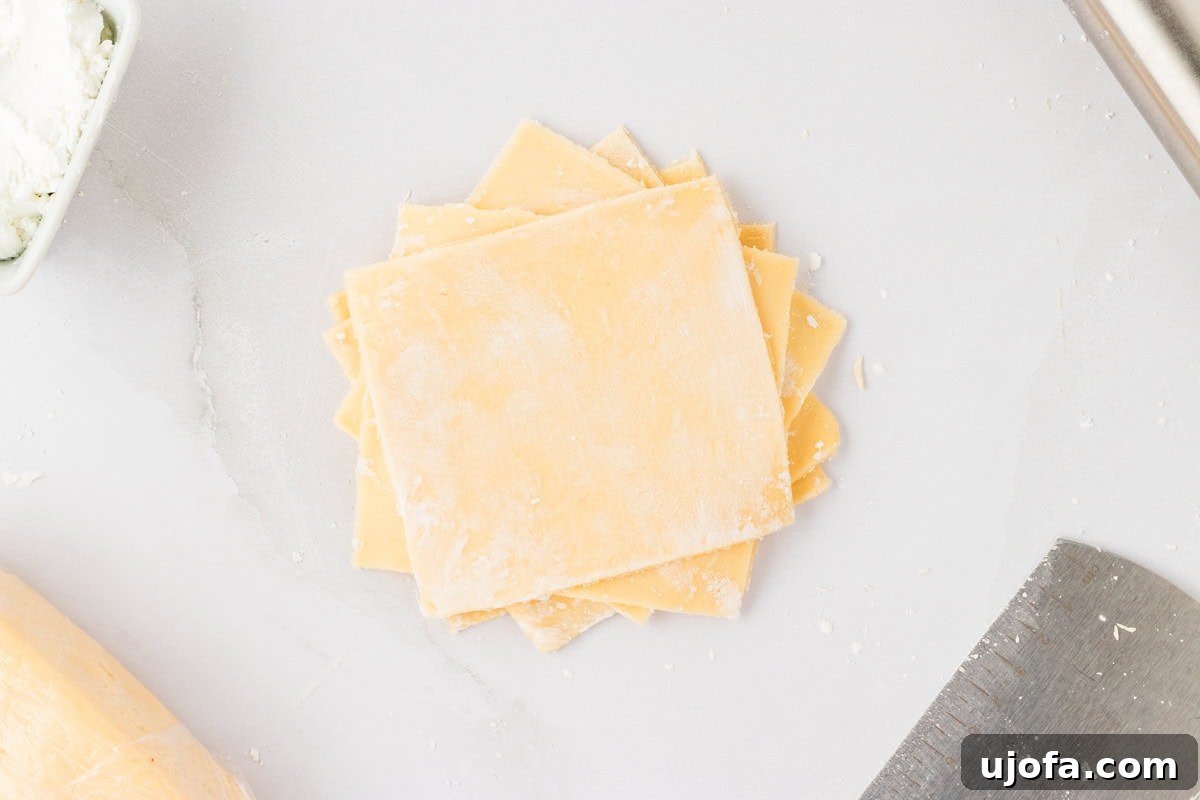
Step 12: Cut Initial Squares. Once the dough is rolled out thinly (but not transparently thin), use a knife or pastry cutter to cut it into approximately 4-inch squares. The exact size and perfect uniformity are not critical at this stage, as you’ll be re-rolling them. From the entire dough, you should yield around 22 squares. Lightly dust these cut squares with more cornstarch to prevent them from sticking together. Stack them neatly and cover the stack with a damp paper towel to keep them moist and pliable while you continue the process.
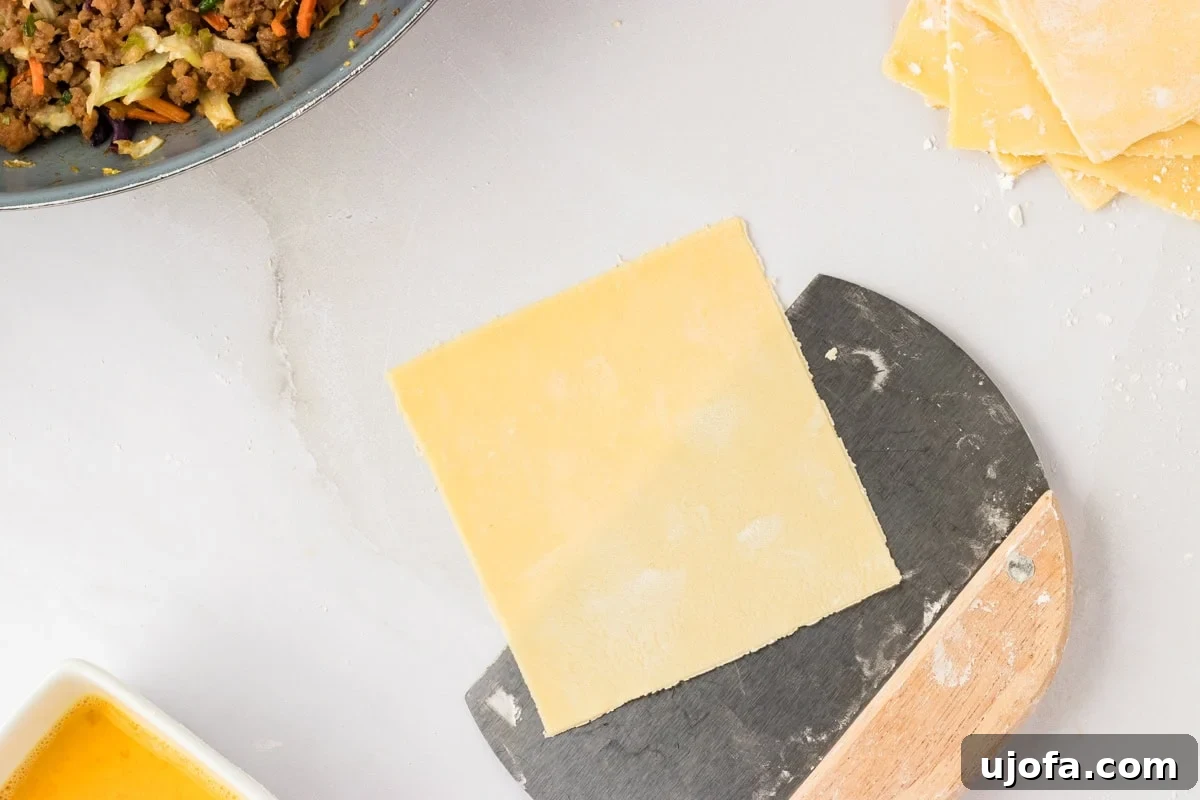
Step 13: Final Thin Roll for Each Wrapper. Dust your work surface with more cornstarch. Take one 4-inch square of dough at a time. Using your rolling pin, carefully roll this square out until it measures approximately 5-6 inches on each side and is considerably thinner. At this stage, you should be able to faintly see your hand through the dough, indicating it’s thin enough. This step can be delicate; strive for thinness without creating tears. It might take a few attempts to master the technique of rolling gluten-free dough to this ideal, almost opaque thinness while keeping it intact.
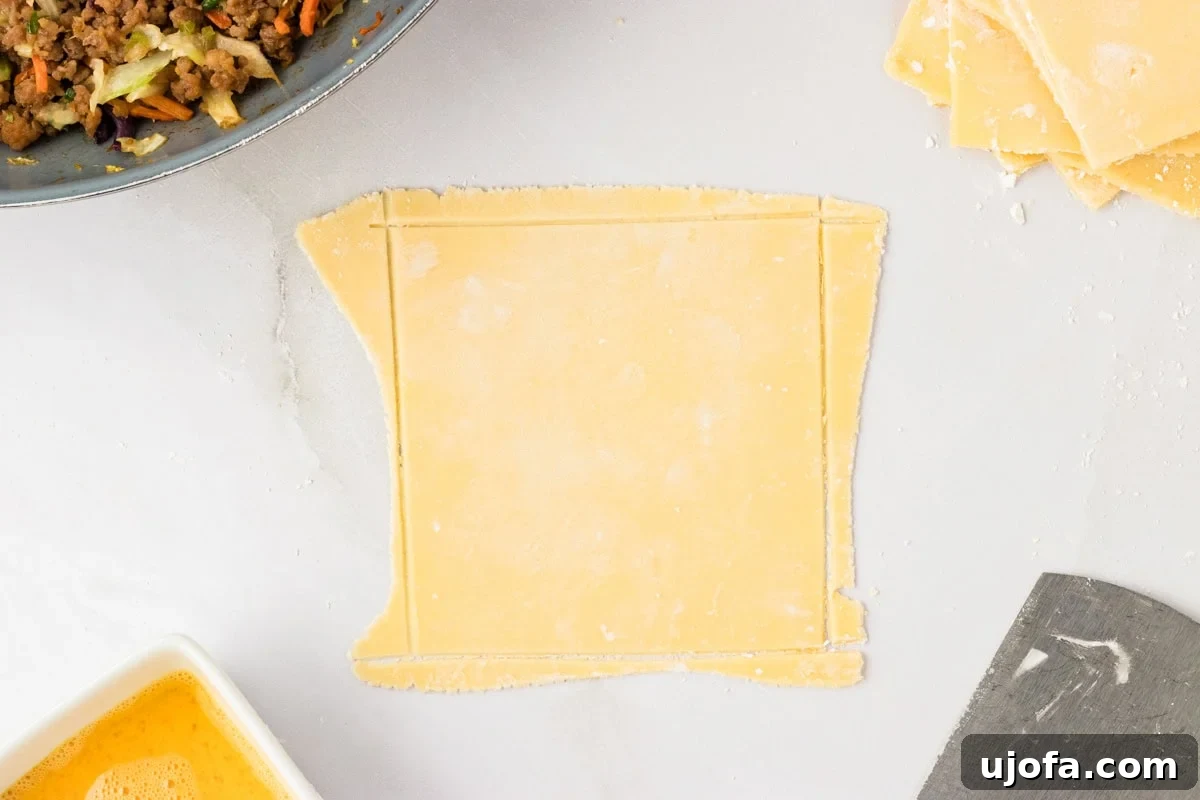
Step 14: Trim and Orient the Wrapper. Once you’ve rolled each square to its final thinness, trim the edges once more to make them as uniform and straight as possible. This creates a neat, professional-looking egg roll. Next, turn the dough square diagonally on your work surface so that one of its corners is pointed directly towards you. This diagonal orientation makes the wrapping process much easier.
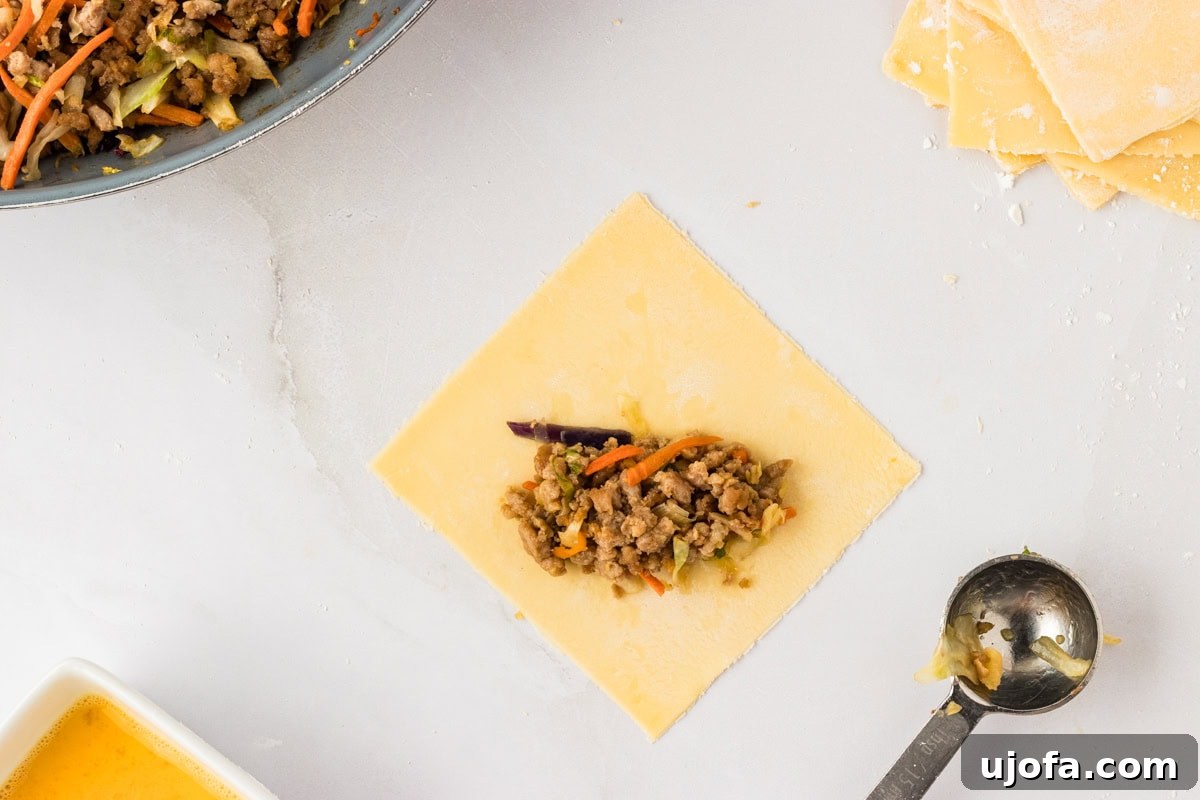
Step 15: Add the Filling. Take approximately one tablespoon of the cooled egg roll filling mixture. Place this filling diagonally across the center of the dough square, positioning it slightly lower than the true center. Gently shape the filling into a compact log. Ensure the log is not too wide, leaving sufficient dough on the sides for folding.
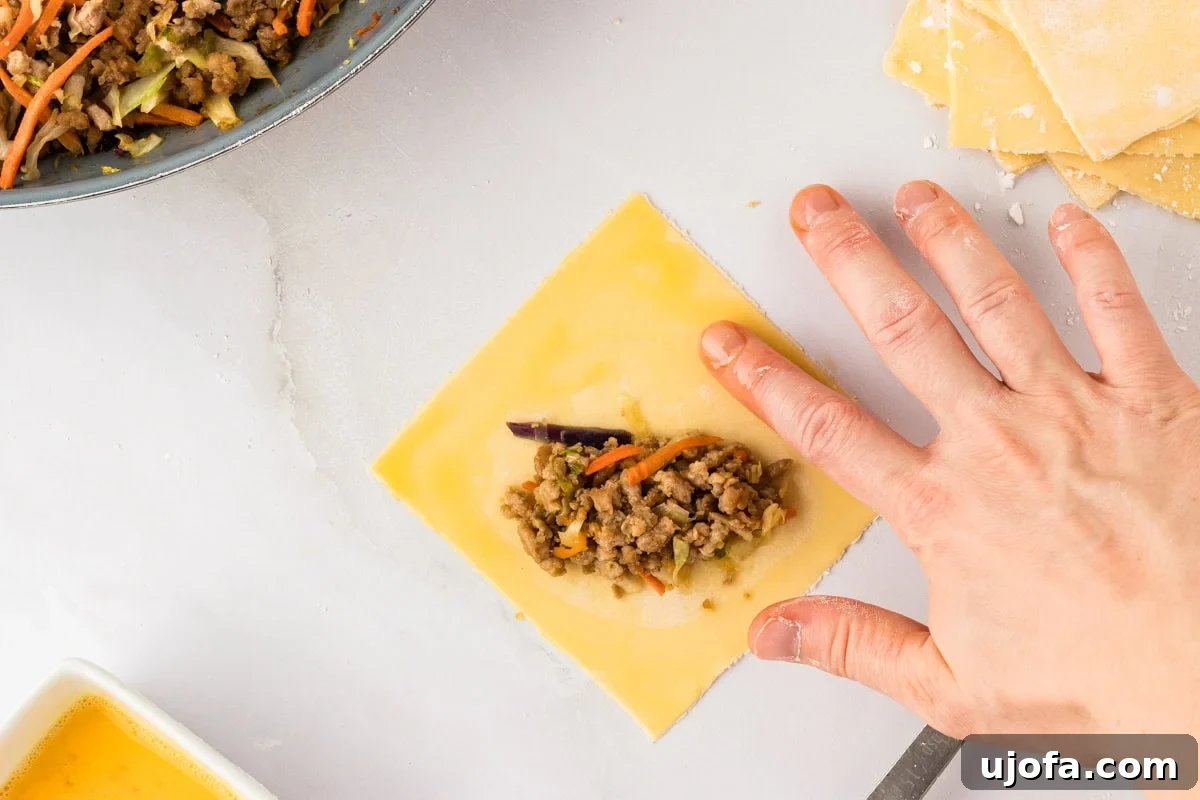
Step 16: Apply Egg Wash. Retrieve the whisked egg wash you prepared earlier. Using a small pastry brush or your fingertip, lightly moisten the exposed edges of the egg roll wrapper around the filling. This egg wash acts as a glue, ensuring the wrapper adheres securely and creates a tight seal during frying, preventing the filling from escaping.
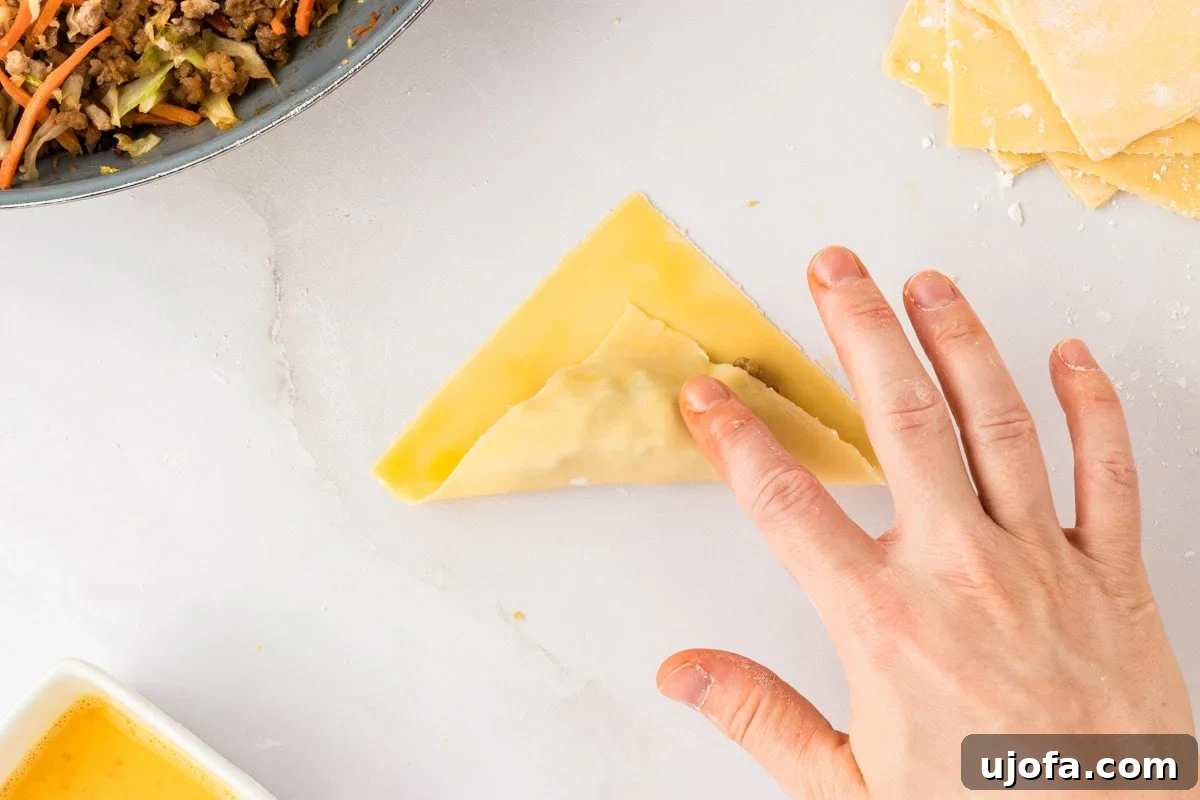
Step 17: First Fold. With the filling log positioned and the edges egg-washed, carefully take the corner of the wrapper that is closest to you. Gently lift it and fold it tightly over the top of the meat filling, tucking it in snugly. Ensure this first fold is firm but not so tight that it stretches or tears the delicate dough.
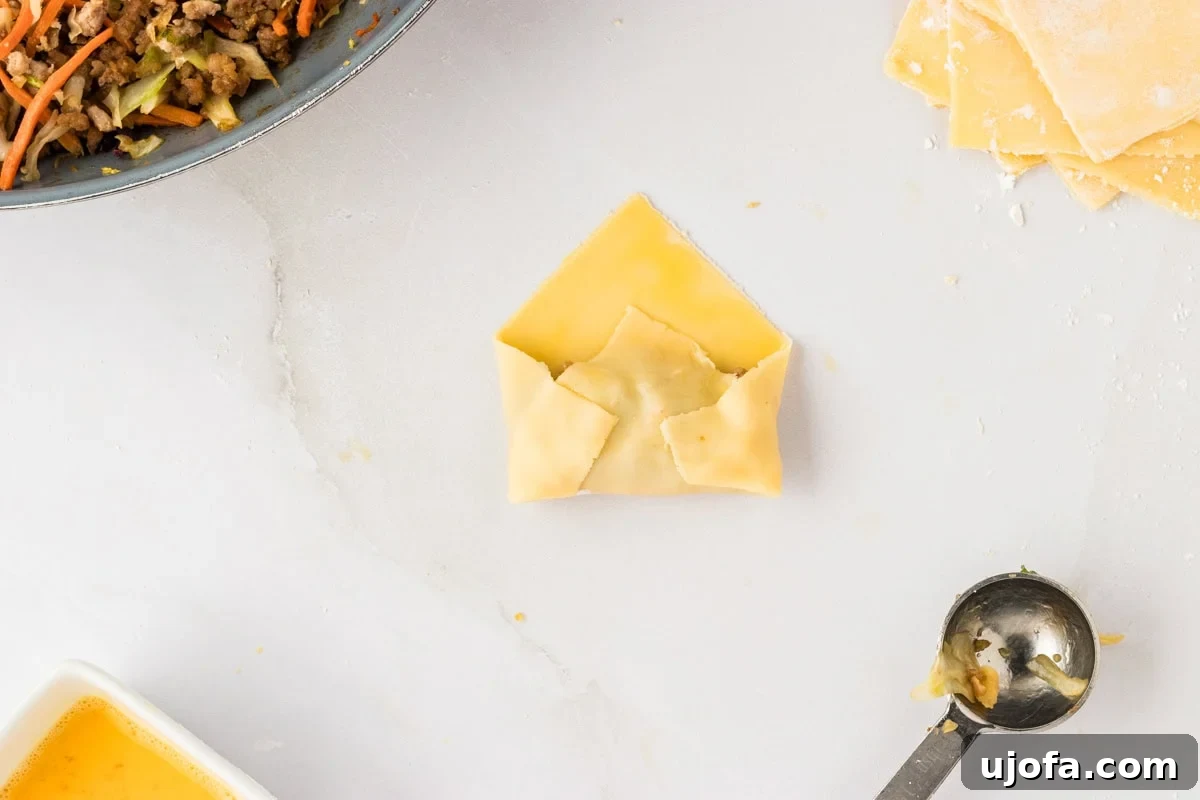
Step 18: Fold in the Sides. After the first corner is folded over the filling, take the two side corners of the wrapper (which are now facing left and right) and fold them inward towards the center. This creates an envelope-like shape, further securing the filling and preparing the egg roll for its final roll. Press down gently to ensure the egg-washed edges adhere.
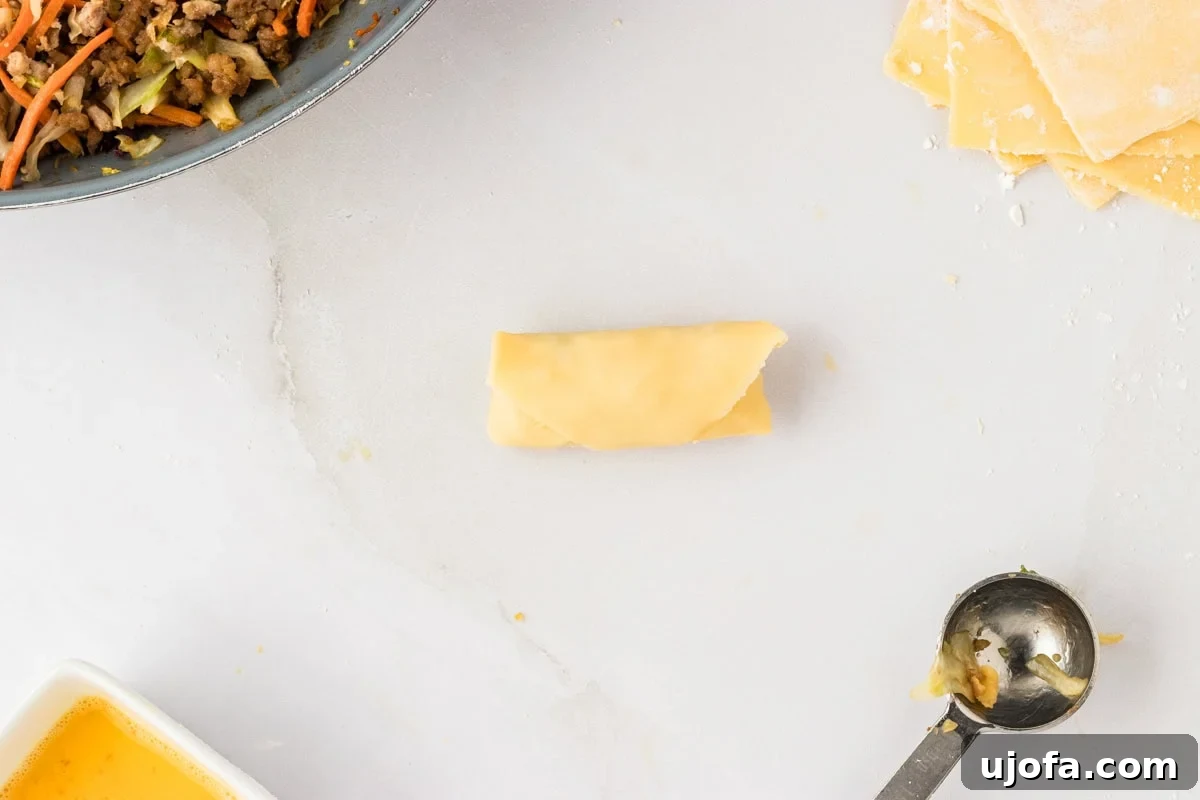
Step 19: Final Roll and Repeat. Now, take the partially rolled egg roll and continue rolling it upwards, away from you, until the entire wrapper is closed. Ensure the roll is firm and compact, but avoid pulling too tightly, which could cause the dough to rip. Repeat this entire wrapping process for each square of dough until all your filling is used up and all egg rolls are formed. To prevent your freshly rolled egg rolls from drying out while you prepare the others, keep them covered with a damp towel.
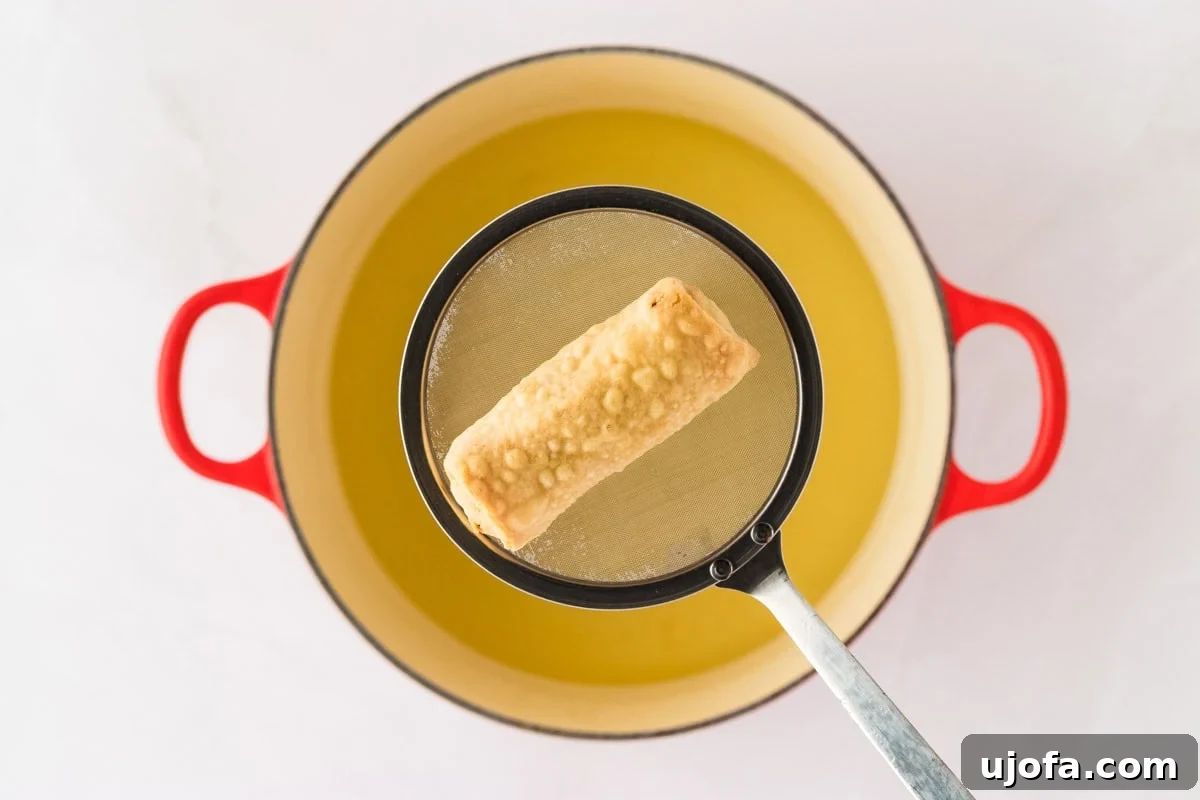
Step 20: Fry the Egg Rolls. In a medium or large heavy-bottomed pot, heat enough frying oil (at least 2-3 inches deep) to a temperature of 350°F (175°C). Use a deep-fry thermometer to ensure accuracy. Once the oil is hot and ready, carefully drop a few egg rolls into the oil, placing them away from you to avoid splashes. Fry the egg rolls for 5-6 minutes, flipping them frequently with tongs or a skimmer to ensure they cook evenly and achieve a beautiful golden-brown color and crispy texture. Be mindful not to overcrowd the pot, as this will drastically lower the oil temperature and lead to greasy, unevenly cooked egg rolls. Fry in batches if necessary.
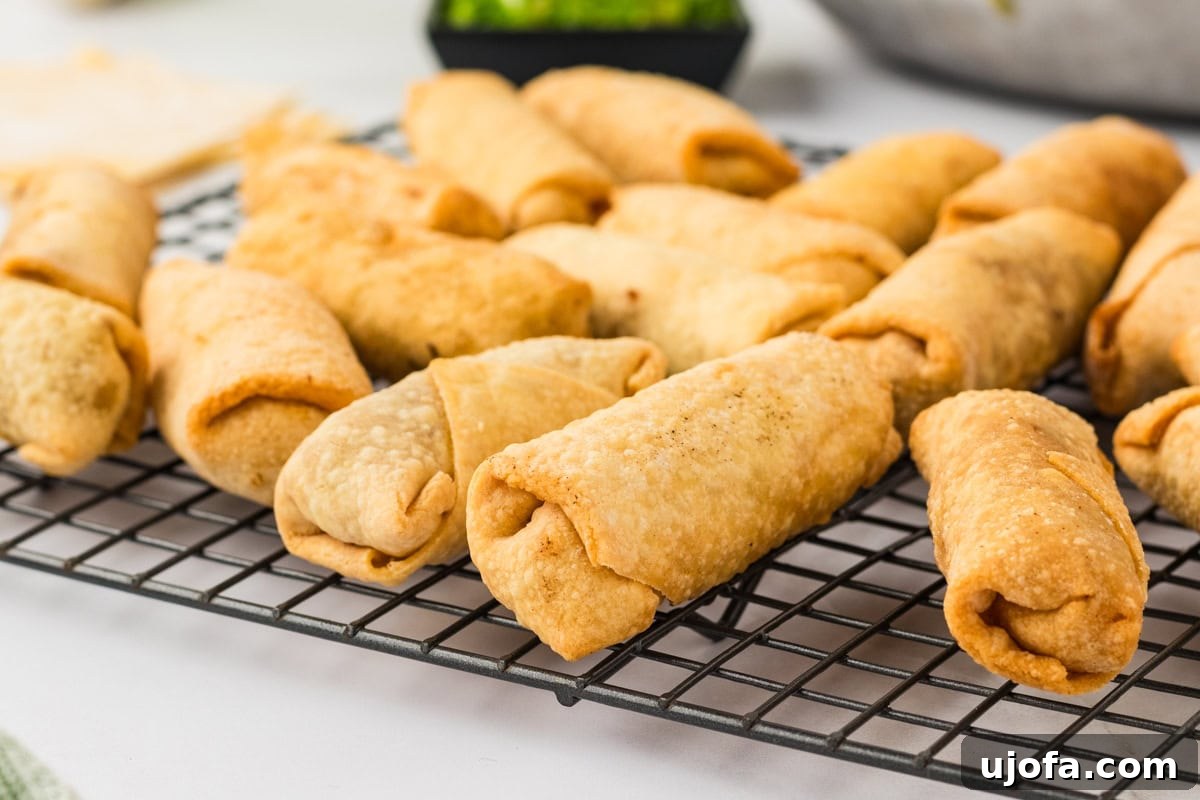
Step 21: Drain and Cool. As each batch of egg rolls finishes frying, remove them from the hot oil using a skimmer or tongs. Immediately transfer the cooked egg rolls to a wire rack that has been placed over a baking sheet. This setup allows air to circulate around all sides of the egg rolls, helping any excess oil to drain off and ensuring they remain incredibly crispy as they cool. Serving your homemade gluten-free egg rolls warm with your favorite dipping sauces is the best way to enjoy them. Enjoy your culinary creation!