
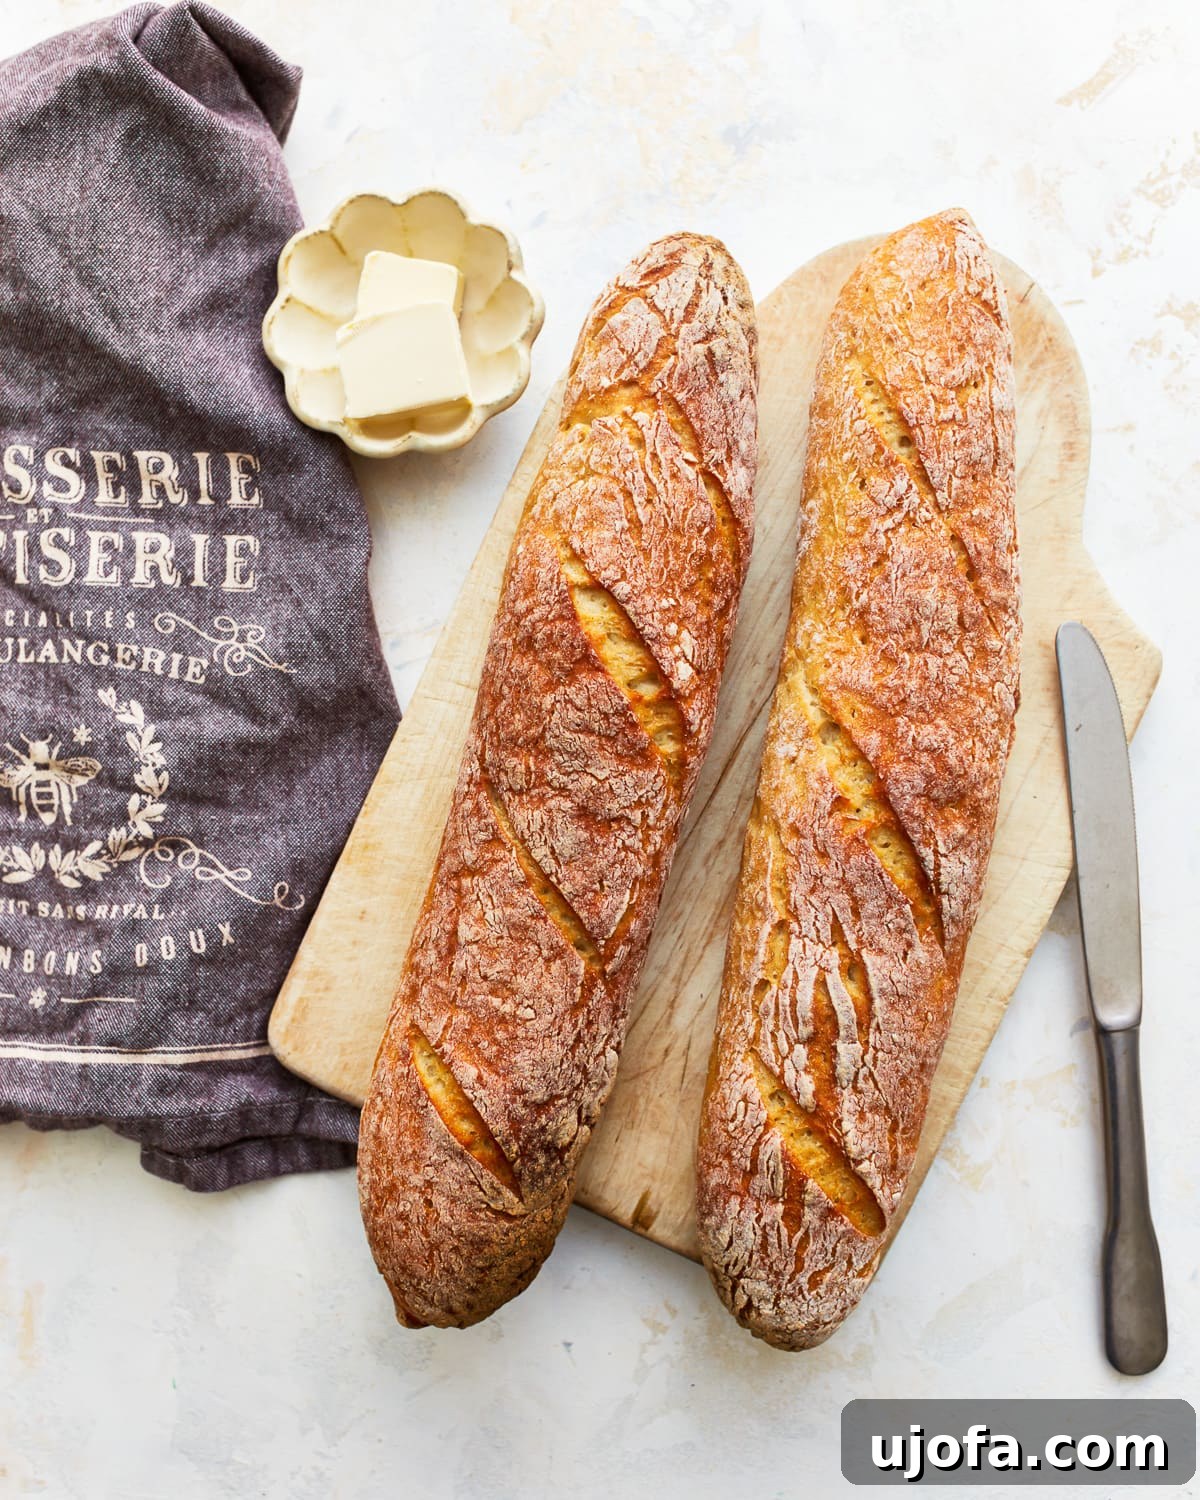
Imagine a leisurely morning stroll through the charming streets of Paris, a warm coffee in one hand and a perfectly crusty, yet tender, baguette in the other. While an impromptu trip to the City of Lights might be just a dream for now, the exquisite taste and texture of a freshly baked French baguette can become a delightful reality right in your own kitchen! Yes, even if you follow a gluten-free diet. This comprehensive guide will show you how to create an incredible gluten-free baguette with a soft, airy crumb and that signature crunchy crust, making it perfect for any occasion, from a quick snack to an elegant dinner accompaniment.
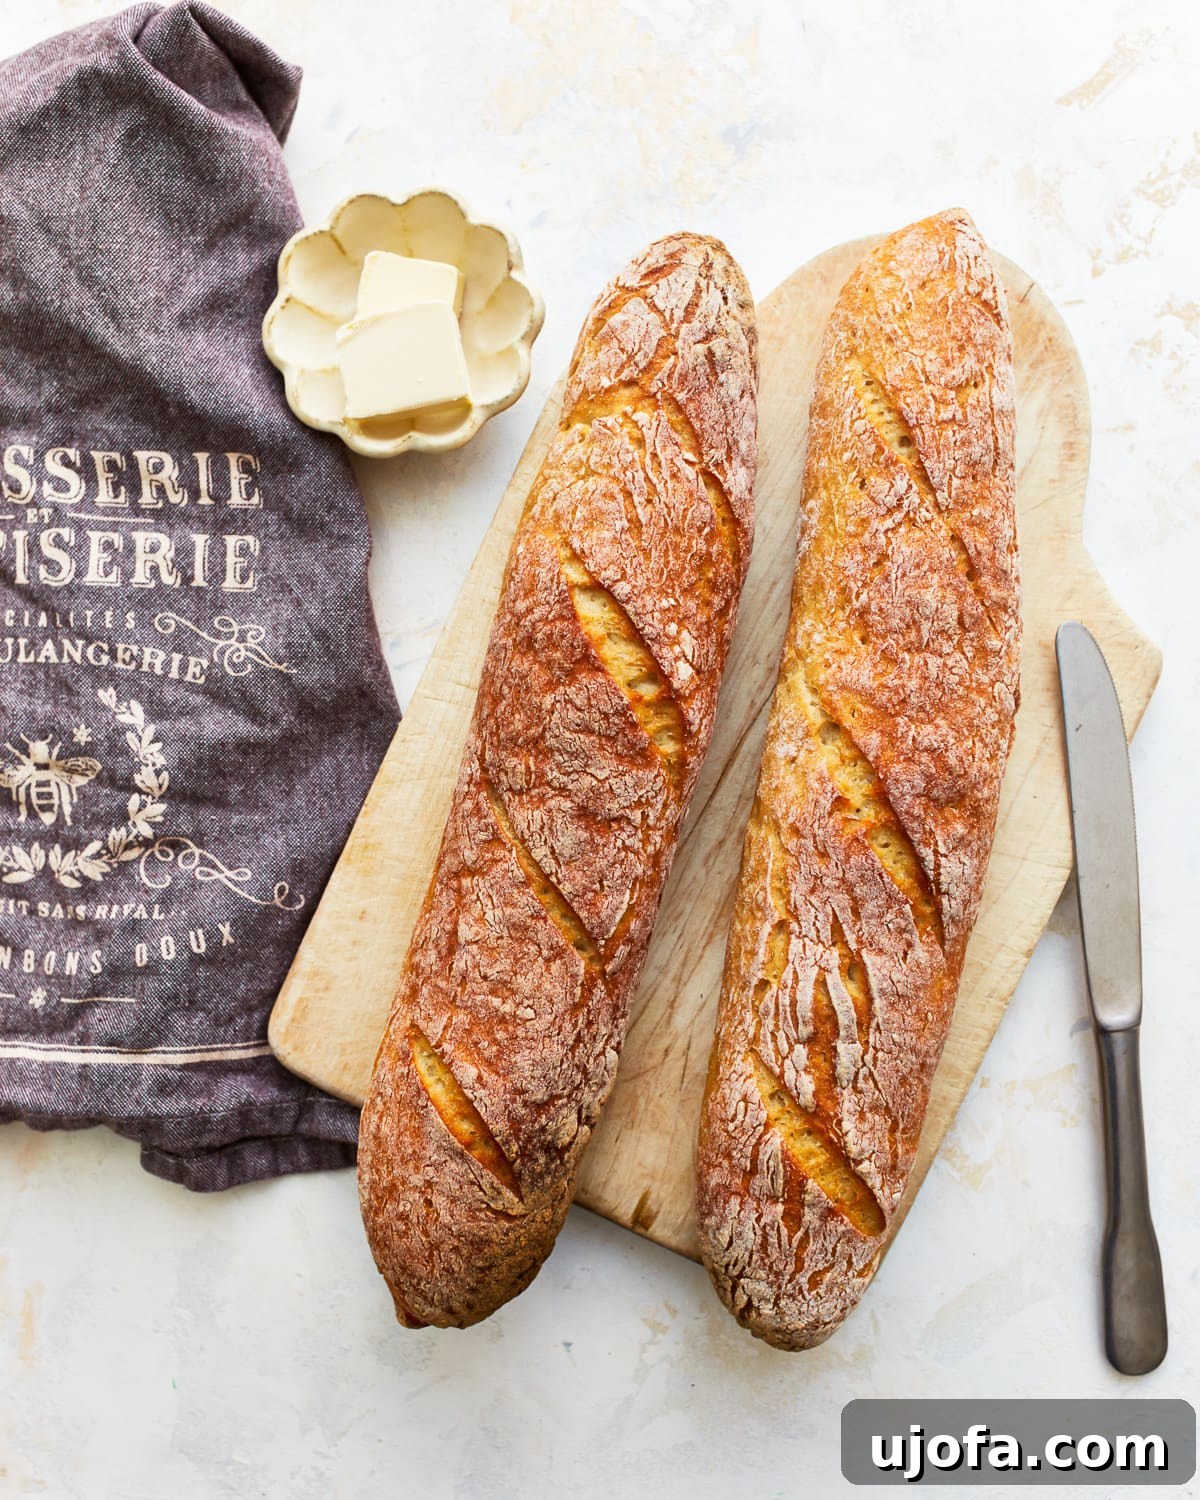
Unlocking the Secret to the Perfect Gluten-Free Baguette Recipe
The classic French baguette is renowned for its elongated shape, minimal ingredients, and unmistakable crispy exterior. For those of us navigating the world of gluten-free eating, the thought of biting into a warm, buttery baguette might seem like a distant memory. However, I’m thrilled to share a foolproof recipe that captures the essence of this beloved bread, allowing you to indulge in all its glory without compromise. My secret? A carefully balanced blend of gluten-free flours and precise techniques that mimic the qualities of traditional wheat-based dough. And for those with dairy sensitivities, pairing it with dairy-free butter, like Smart Balance, makes for an utterly blissful experience.
Prepare to impress your family and friends with this artisanal gluten-free French baguette. Follow my expert tips and step-by-step instructions to achieve baking perfection.
Why Choose Homemade Gluten-Free Baguettes?
Beyond dietary needs, baking your own gluten-free baguettes offers a multitude of benefits. You control the quality of ingredients, ensuring freshness and avoiding unwanted additives often found in store-bought options. There’s an undeniable satisfaction in pulling warm, fragrant bread from your oven, filling your home with an aroma that signals comfort and good food. Plus, this recipe is designed to be accessible, transforming what might seem like a complex baking endeavor into an enjoyable and rewarding process.
Essential Ingredients for Your Gluten-Free Baguettes
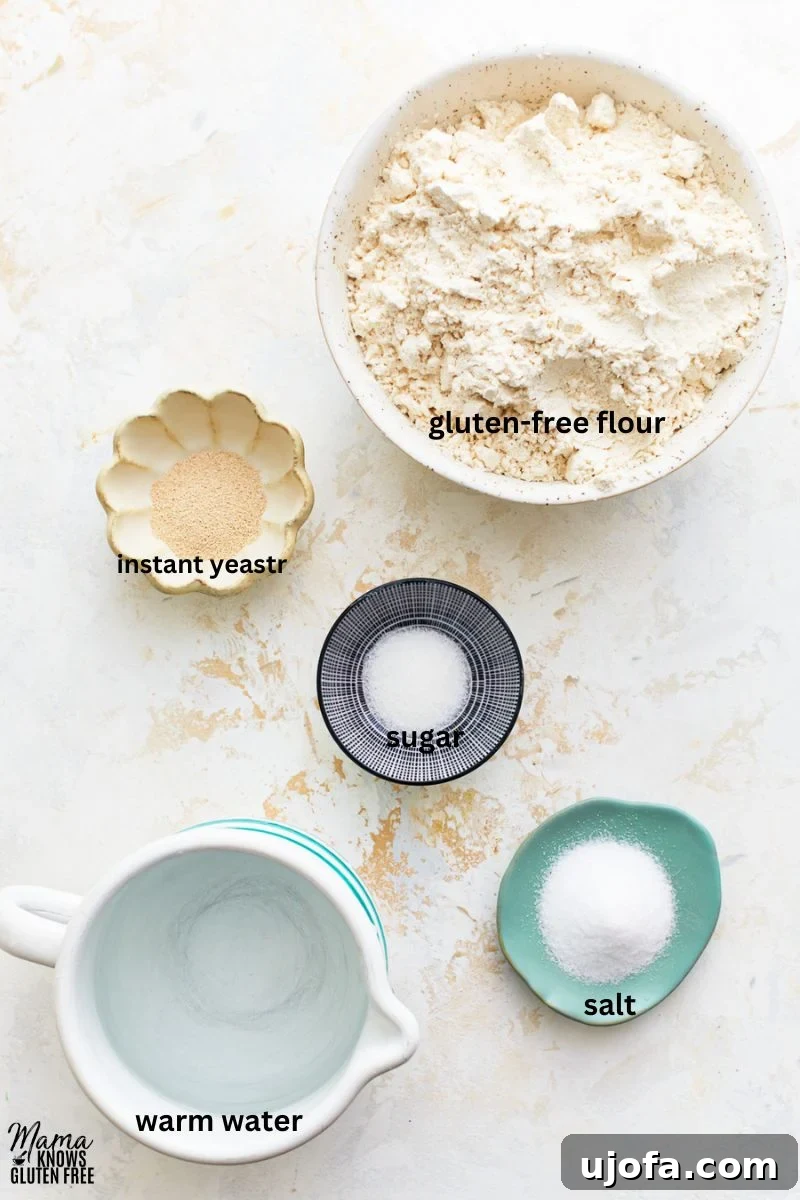
Crafting a truly exceptional gluten-free baguette starts with understanding the role of each ingredient. While simple, each component is crucial for achieving the desired texture and flavor.
- Gluten-Free All-Purpose Flour with Xanthan Gum: This is the cornerstone of our baguette. It’s vital to use a high-quality blend specifically designed for yeast baking. Unlike wheat flour, gluten-free flours lack gluten, the protein network responsible for bread’s structure and elasticity. Xanthan gum acts as a binder, mimicking gluten’s properties, providing elasticity, and preventing crumbling. I highly recommend reputable brands such as Pillsbury or Better Batter for consistent results. Different blends can yield varying results, so sticking to recommended brands or those you trust for yeast baking is key.
- Salt: More than just a flavor enhancer, salt plays a crucial role in regulating yeast activity. It slows down fermentation, allowing the dough to develop more flavor and a finer texture. Don’t be tempted to reduce the salt content too much, as it can lead to a bland loaf and an over-proofed dough.
- Granulated Sugar: A small amount of sugar is essential to “feed” the yeast, providing the initial energy it needs to activate and produce carbon dioxide, which makes the bread rise. This sugar is consumed by the yeast during fermentation, so the final product isn’t overly sweet.
- Instant Yeast: This magical ingredient is what gives our baguettes their light, airy structure. Instant yeast is convenient because it can be mixed directly with the dry ingredients without needing to be proofed first. Ensure your yeast is fresh and active for the best rise.
- Warm Water (100°F to 110°F): The temperature of your water is critical for activating the yeast. Water that’s too cold won’t activate it effectively, leading to a poor rise. Water that’s too hot can kill the yeast, preventing any rise at all. Aim for a temperature that feels comfortably warm to the touch, similar to a warm bath.
Essential Equipment for Gluten-Free Baguette Baking
While you don’t need a professional bakery setup, having the right tools can significantly enhance your baking experience and the quality of your baguettes. Here are some key pieces of equipment:
- Large Mixing Bowl: Essential for combining ingredients and allowing the dough to rise.
- Whisk: For thoroughly mixing dry ingredients.
- Rubber Spatula or Wooden Spoon: Helpful for initial mixing, especially as the dough gets sticky.
- Digital Kitchen Scale (Optional but Recommended): For precise measurement of flour, which is crucial in gluten-free baking to ensure the correct hydration.
- Baking Sheet: A standard baking sheet lined with parchment paper works well.
- Baguette Pan (Optional): A perforated baguette pan helps the bread maintain its classic shape and promotes a crispier bottom crust.
- Parchment Paper: Prevents sticking and makes cleanup easier.
- Plastic Wrap or Clean Kitchen Towel: For covering the dough during rising.
- Sharp Knife or Lame: For scoring the dough before baking. A lame (pronounced “lahm”) is a specialized razor blade for bread scoring and provides cleaner, more precise cuts.
- Spray Bottle with Water: Crucial for creating steam in the oven, which is essential for a crispy crust.
- Wire Rack: For cooling the baguettes completely after baking to prevent a soggy bottom.
- Baking Stone or Steel (Optional): Provides an intense, even heat from below, contributing to a superior crust.
Mastering the Art of Gluten-Free Baguettes: Expert Tips for a Perfect Loaf
Gluten-free baking often requires a slightly different approach than traditional baking. These tips are tailored to help you achieve the best possible results with your baguettes:
- Gentle Handling is Key: Gluten-free dough lacks the elastic network of gluten, making it more delicate. Overworking or rough handling can deflate the precious air pockets created by the yeast, resulting in a dense baguette. Always handle the dough gently, using a light touch when shaping and transferring. Think of it more like working with a thick batter than a traditional bread dough.
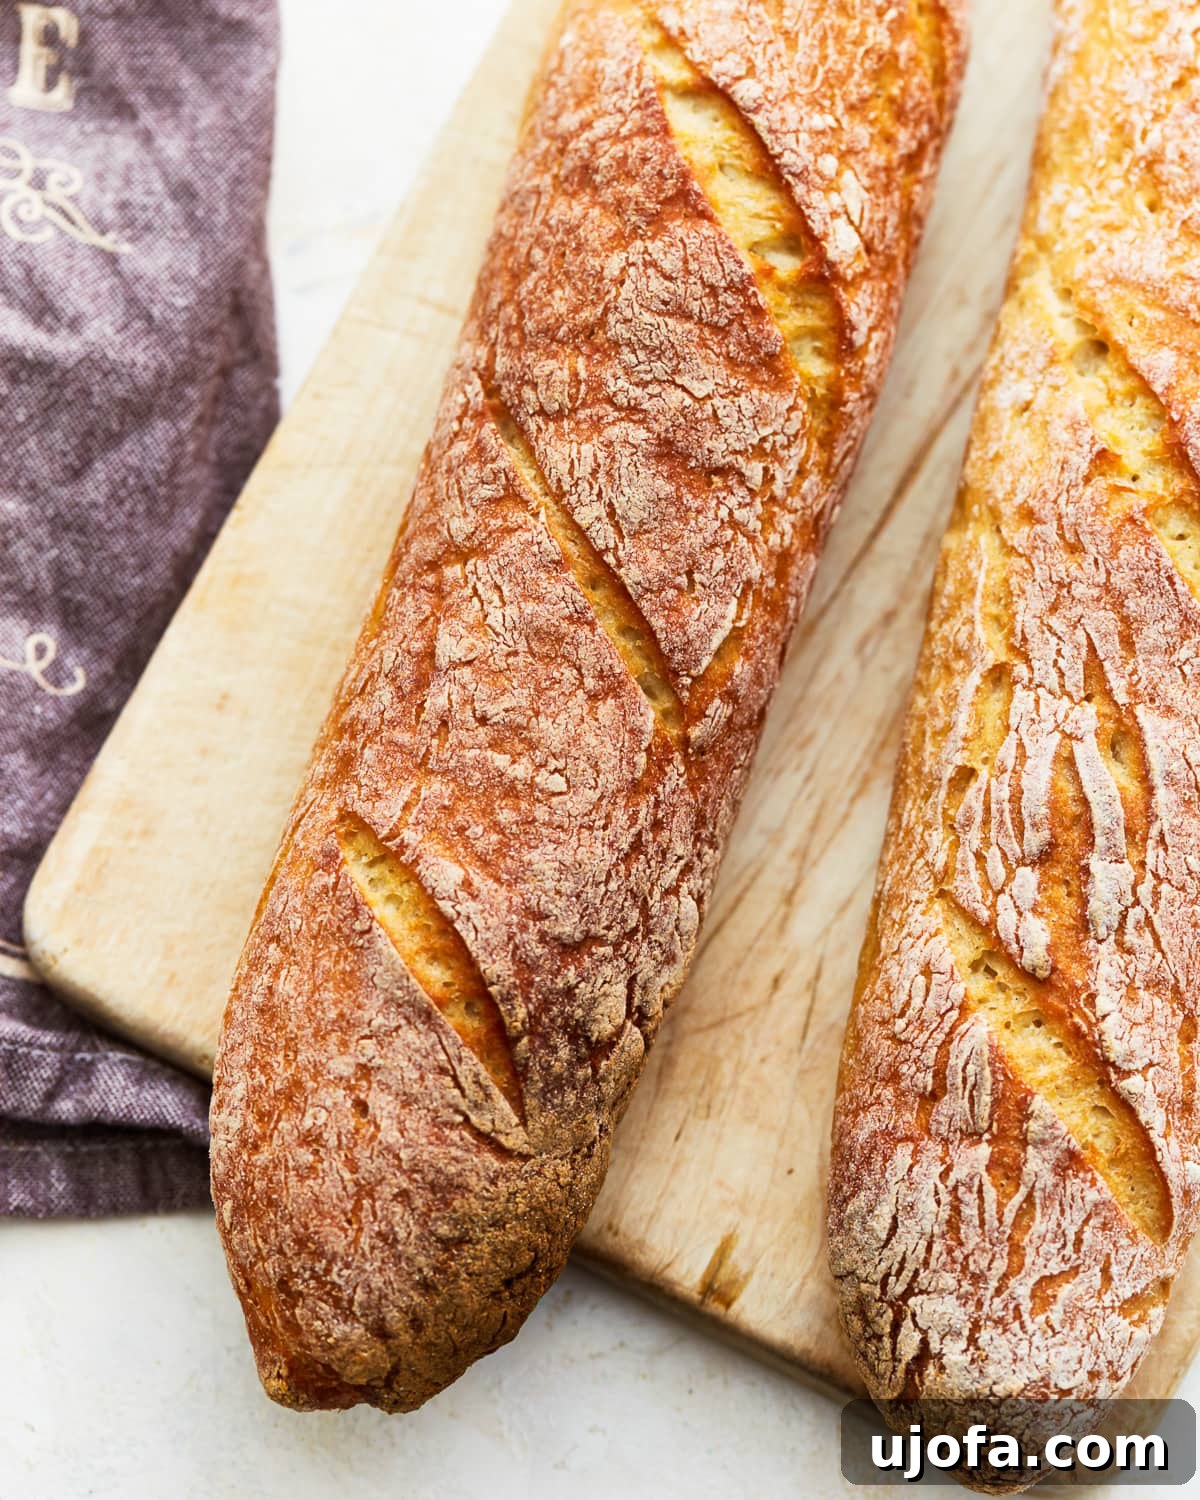
- The Art of Slashing (Scoring): Just before baking, slashing the dough with a sharp knife or a specialized bread lame isn’t just for aesthetics; it serves a crucial purpose. These strategic cuts allow steam to escape in a controlled manner during the initial phase of baking, directing the expansion of the bread and preventing uncontrolled cracks. This process, known as “oven spring,” contributes significantly to the baguette’s volume and its beautiful, artisanal appearance. If you’re new to slashing, practice on a piece of parchment paper or a soft fruit a few times to get a feel for the decisive, swift cuts required. Aim for 3-4 diagonal slashes along the length of each baguette.
- Baking Surface Matters: While a baking stone or steel can undoubtedly contribute to an exceptionally crispy crust by providing intense, even heat from below, it’s not absolutely essential for delicious results. If you have one, preheat it with your oven for at least 30-60 minutes to ensure it’s scorching hot. If not, a sturdy baking sheet lined with parchment paper will still yield great baguettes. The key is ensuring even heat distribution, so avoid overcrowding the oven.
- The Power of a Warm Environment for Rising: Yeast thrives in warmth. A draft-free environment around 75°F (24°C) is ideal for proofing your dough. Cold temperatures will significantly slow down the rise, while excessively hot temperatures can kill the yeast. If your kitchen is cool, consider placing the covered bowl in a slightly warm (but not hot) oven (turned off, with just the light on), or near a sunny window.
Troubleshooting Common Gluten-Free Baguette Issues
Baking, especially gluten-free baking, can sometimes present challenges. Here’s how to address common issues:
Why Is My Dough Too Sticky or Too Dry?
Gluten-free doughs are particularly sensitive to moisture content. Factors like the specific brand of gluten-free flour, the humidity in your kitchen, and even how you measure your flour (scooping vs. spooning and leveling) can affect the consistency. If your dough feels overly sticky and difficult to handle, add a small amount of gluten-free flour, one tablespoon at a time, mixing well after each addition until you reach a more manageable texture. Conversely, if your dough seems too dry, crumbly, or isn’t coming together properly, gradually add warm water by the teaspoon until it reaches the desired smooth, albeit still sticky, consistency.
Why Didn’t My Baguette Rise?
A baguette that doesn’t rise can be disheartening, but several common culprits are usually to blame:
- Expired or Inactive Yeast: Yeast is a living organism, and like all living things, it has a shelf life. Always check the expiration date on your yeast package. If you’re unsure, you can “proof” your yeast by mixing a small amount with warm water (100-110°F) and a pinch of sugar. If it’s active, it will become foamy and bubbly within 5-10 minutes.
- Incorrect Water Temperature: As mentioned, water that is too cold won’t activate the yeast, and water that is too hot will kill it. Ensure your water is within the optimal range of 100°F to 110°F (38°C to 43°C).
- Lack of a Warm Environment: Yeast needs warmth to thrive and produce carbon dioxide. A cold, drafty kitchen can severely inhibit rising. Ensure your dough is rising in a consistently warm, draft-free place, ideally around 75°F (24°C).
- Too Much Salt: While salt is important, an excessive amount can inhibit yeast activity. Stick to the recipe’s recommended quantities.
How Do I Ensure My Baguettes Have a Crispy Crust?
That coveted crispy crust is a hallmark of a great baguette. Achieving it with gluten-free bread is absolutely possible with these techniques:
- Steam, Steam, Steam: This is arguably the most crucial factor for a crispy crust. Introducing steam into the oven during the first few minutes of baking keeps the crust moist and pliable, allowing the bread to expand fully before the crust sets. You can create steam by misting the oven walls with water just before placing the baguettes inside, or by placing a pan of hot water on the bottom rack of your oven during preheating.
- High Baking Temperature: Baguettes are baked at a high temperature (475°F / 245°C). This intense heat helps to quickly form and crisp the crust.
- Proper Cooling: Once baked, it’s tempting to dive right in, but allowing the baguettes to cool completely on a wire rack is essential. This prevents condensation from building up on the bottom, which would make the crust soggy, and allows the internal structure of the bread to fully set, resulting in the best texture and flavor.
Serving Suggestions for Your Gluten-Free Baguettes
Once your beautiful gluten-free baguettes emerge from the oven, the possibilities for enjoyment are endless! Here are some delectable ways to serve them:
- Classic with Butter: There’s nothing quite like a slice of warm baguette slathered with salted butter (dairy or dairy-free). Simple, yet utterly satisfying.
- Olive Oil Dip: A high-quality extra virgin olive oil, perhaps seasoned with a pinch of salt, pepper, and herbs, makes for an elegant and flavorful dip.
- Bruschetta Base: Slice your baguette, toast it lightly, then top with fresh tomatoes, basil, garlic, and a drizzle of balsamic glaze for a delightful appetizer.
- Sandwiches & Paninis: The sturdy crust and tender interior make these baguettes perfect for building gourmet sandwiches, from classic ham and cheese to sophisticated vegetarian options.
- Soup & Salad Companion: Tear off a piece to sop up flavorful broths or use it to complement a fresh, crisp salad.
- With Cheese & Charcuterie: A baguette is the ideal vehicle for a cheese board, offering a neutral canvas for a variety of cheeses, cured meats, and spreads.
- Garlic Bread: Slice lengthwise, spread with garlic butter, and bake until golden for a flavorful side dish.
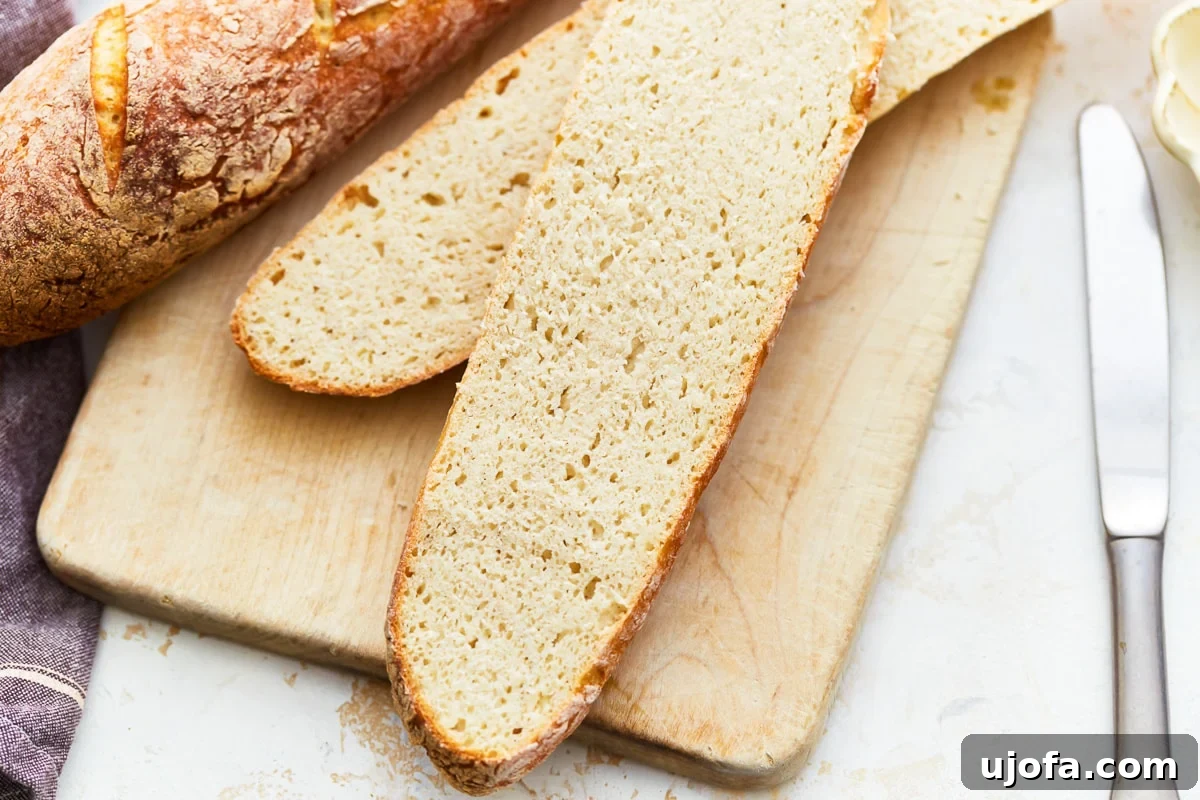
There’s truly nothing better than a fresh-from-the-oven gluten-free baguette, whether it’s dipped in fragrant olive oil or generously spread with creamy butter. The mere thought is pure heaven!
Storage and Reheating Instructions
To enjoy your homemade gluten-free baguettes at their best, proper storage is essential. While fresh is always supreme, these guidelines will help extend their life:
- Room Temperature Storage: Once completely cooled, store your baguettes in an airtight container or a paper bag (to maintain some crispness) at room temperature for up to 2 days. For optimal freshness and to prevent them from drying out, wrapping them in foil before placing them in an airtight container can also help.
- Freezing for Longer Storage: For extended storage, tightly wrap the cooled baguettes in aluminum foil, then place them in a freezer-safe bag. They will keep well in the freezer for up to 1 month. Freezing is an excellent option for always having a delicious baguette on hand.
- Reheating to Restore Crispiness: To bring frozen baguettes back to life, remove them from the freezer, unwrap them, and place them directly in a preheated 350°F (175°C) oven for 10-15 minutes (or 5-10 minutes for unfrozen baguettes). This reheating method helps to reactivate the crust, making it wonderfully crispy again.
Other Gluten-Free Bread Recipes to Explore!
If you’ve enjoyed mastering this gluten-free baguette, you might be ready to expand your repertoire of homemade gluten-free breads. Here are some other fantastic recipes to try:
- Gluten-Free Focaccia
- Easy Gluten-Free Bread
- Gluten-Free Bread Machine Bread
- Gluten-Free Naan Bread
- Gluten-Free Dinner Rolls
Gluten-Free Baguette Recipe
Gluten-Free Baguette
By: Sabine Venier
Servings: 16 slices (2 baguettes)
Prep Time: 20 mins
Cook Time: 25 mins
Rise Time: 2 hrs
Total Time: 2 hrs 45 mins
A soft, tender crumb and a crunchy crust are both possible with this gluten-free baguette recipe! Perfect for snacking or sandwiches.
Ingredients
- 3 1/4 cups Gluten-Free All-Purpose Flour with Xanthan Gum recommended for yeast baking
- 1 1/2 teaspoons salt
- 1 teaspoon granulated sugar
- 1 teaspoon instant yeast
- 2 cups warm water, 100-110°F
Instructions
- In a large mixing bowl, whisk together the gluten-free flour, salt, sugar, and instant yeast until well mixed.
- Gradually add the water to the dry ingredients, stirring continuously. Mix until all the ingredients are well combined and form a sticky dough.
- Knead gently for 2-3 minutes until the dough is slightly elastic. Gluten-free dough won’t become as elastic as wheat dough, but it should be smooth and manageable.
- Cover with plastic wrap and let it rise in a warm, draft-free place for about 1 hour, or until it nearly doubles in size.
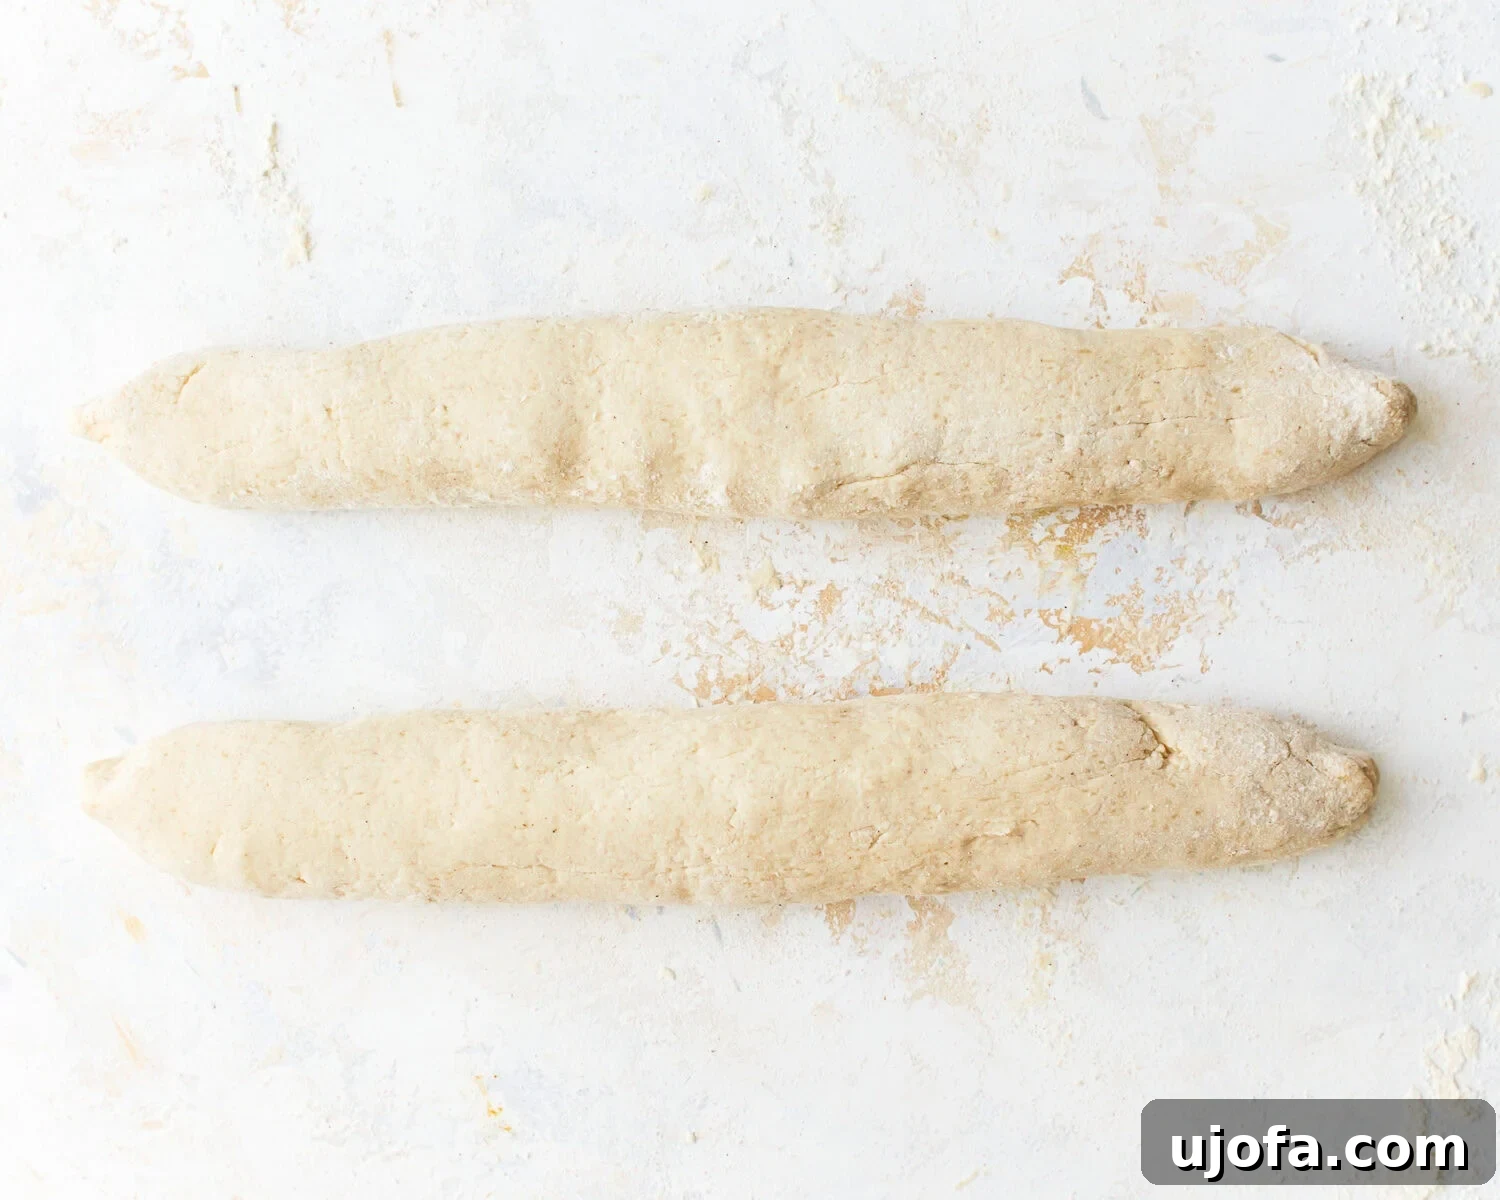
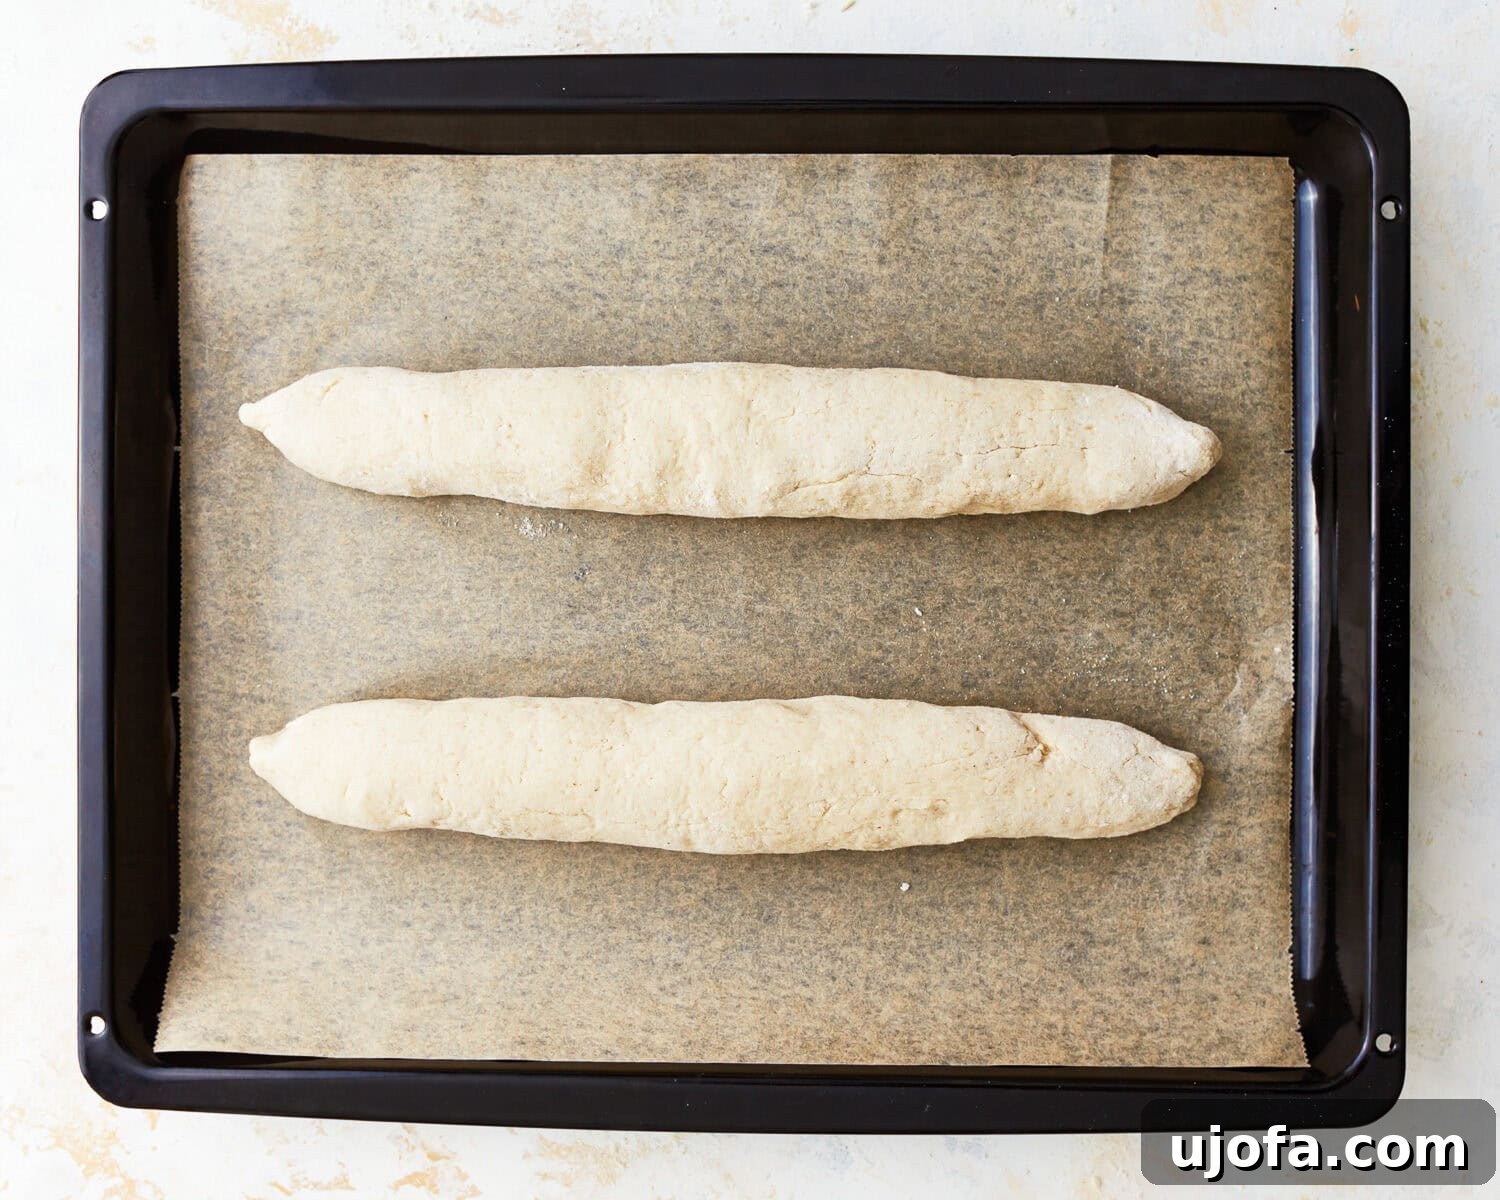
- Gently deflate the dough and divide it into two equal parts. On a lightly floured surface, roll and stretch each piece into a 12-inch long baguette shape. Place these on a baking sheet lined with parchment paper, leaving ample space between them.
- Cover the shaped baguettes with a clean kitchen towel and let them rise for another hour, or until they puff up noticeably.
- About 20 minutes before the second rise is complete, preheat your oven to 475°F (245°C). Place a baking stone inside if you have one, or simply use the middle rack.
- Using a sharp knife or lame, make 3-4 diagonal slashes on top of each baguette. This helps the steam escape during baking and encourages the baguettes to expand.
- Mist the oven with water (to create steam) before quickly placing the baguettes inside. Bake for 25 minutes, or until the baguettes are golden brown and have a hollow sound when tapped on the bottom.
- Remove the baguettes from the oven and transfer them to a wire rack to cool completely. This step is crucial for developing the texture and flavor of the crust.
Notes
- Gluten-free dough is more fragile than its gluten-containing counterparts. Handling it gently maintains the air pockets that contribute to the bread’s rise.
- The technique of slashing the dough with a sharp knife or lame just before baking not only helps with the rise but also gives that artisanal look. Practice making decisive, swift cuts a few times before doing it to the actual loaves to create a pattern that will open beautifully in the oven.
- While a baking stone can help create a crispy crust by evenly distributing heat, it’s not strictly necessary. You can achieve good results by baking on a regular baking sheet lined with parchment paper.
- To store: Store cooled gluten-free baguettes in an airtight container at room temperature for up to 2 days.
- To freeze: Freeze tightly wrapped in aluminum foil for up to 1 month.
Nutrition
Calories: 85 kcal
Carbohydrates: 18 g
Protein: 3 g
Fat: 1 g
Saturated Fat: 0.01 g
Polyunsaturated Fat: 0.1 g
Monounsaturated Fat: 0.2 g
Sodium: 220 mg
Potassium: 7 mg
Fiber: 3 g
Sugar: 1 g
Vitamin C: 0.003 mg
Calcium: 17 mg
Iron: 1 mg
Nutrition information is automatically calculated, so should only be used as an approximation.
Additional Info
Course: Side Dish
Cuisine: French
How to Make a Gluten-Free Baguette: A Detailed Step-by-Step Visual Guide
For those who appreciate a visual walkthrough, here’s a step-by-step guide with corresponding images to ensure you master every stage of creating your gluten-free baguettes. Follow these instructions in conjunction with the full recipe details above for the best results.
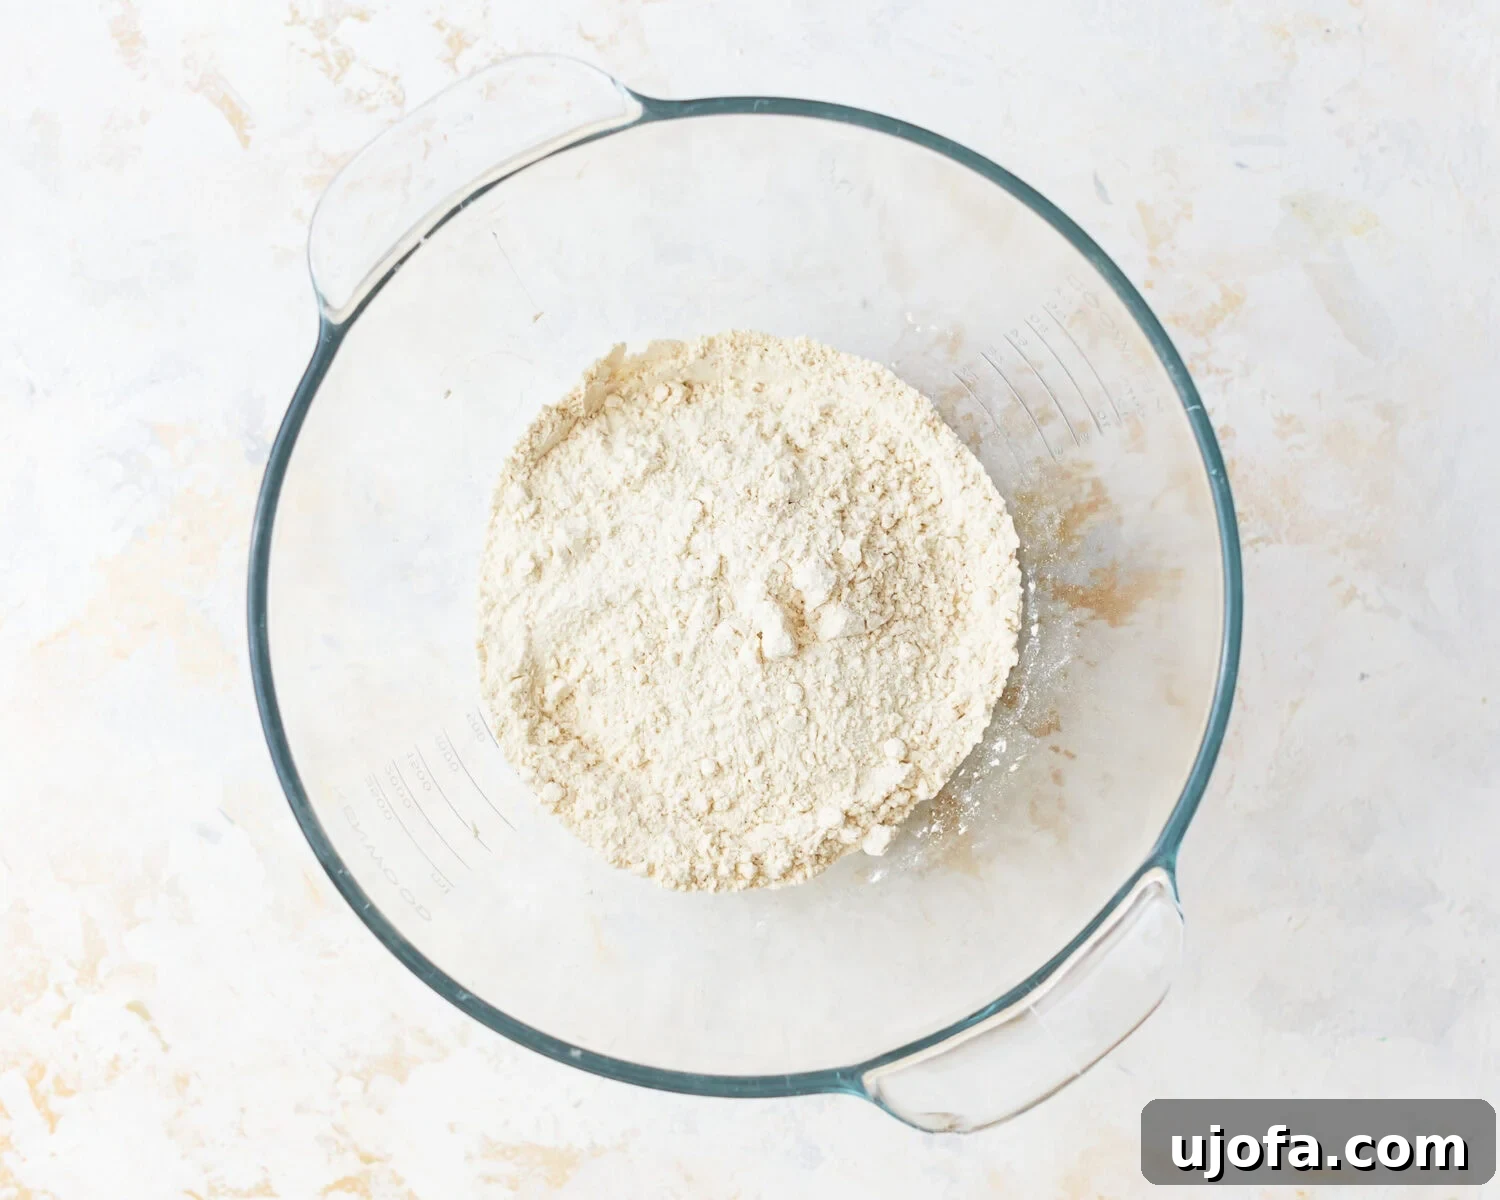
Step 1: Combine Dry Ingredients. In a large mixing bowl, thoroughly whisk together 3 1/4 cups gluten-free all-purpose flour (with xanthan gum), 1 1/2 teaspoons salt, 1 teaspoon granulated sugar, and 1 teaspoon instant yeast. Ensure everything is evenly distributed.
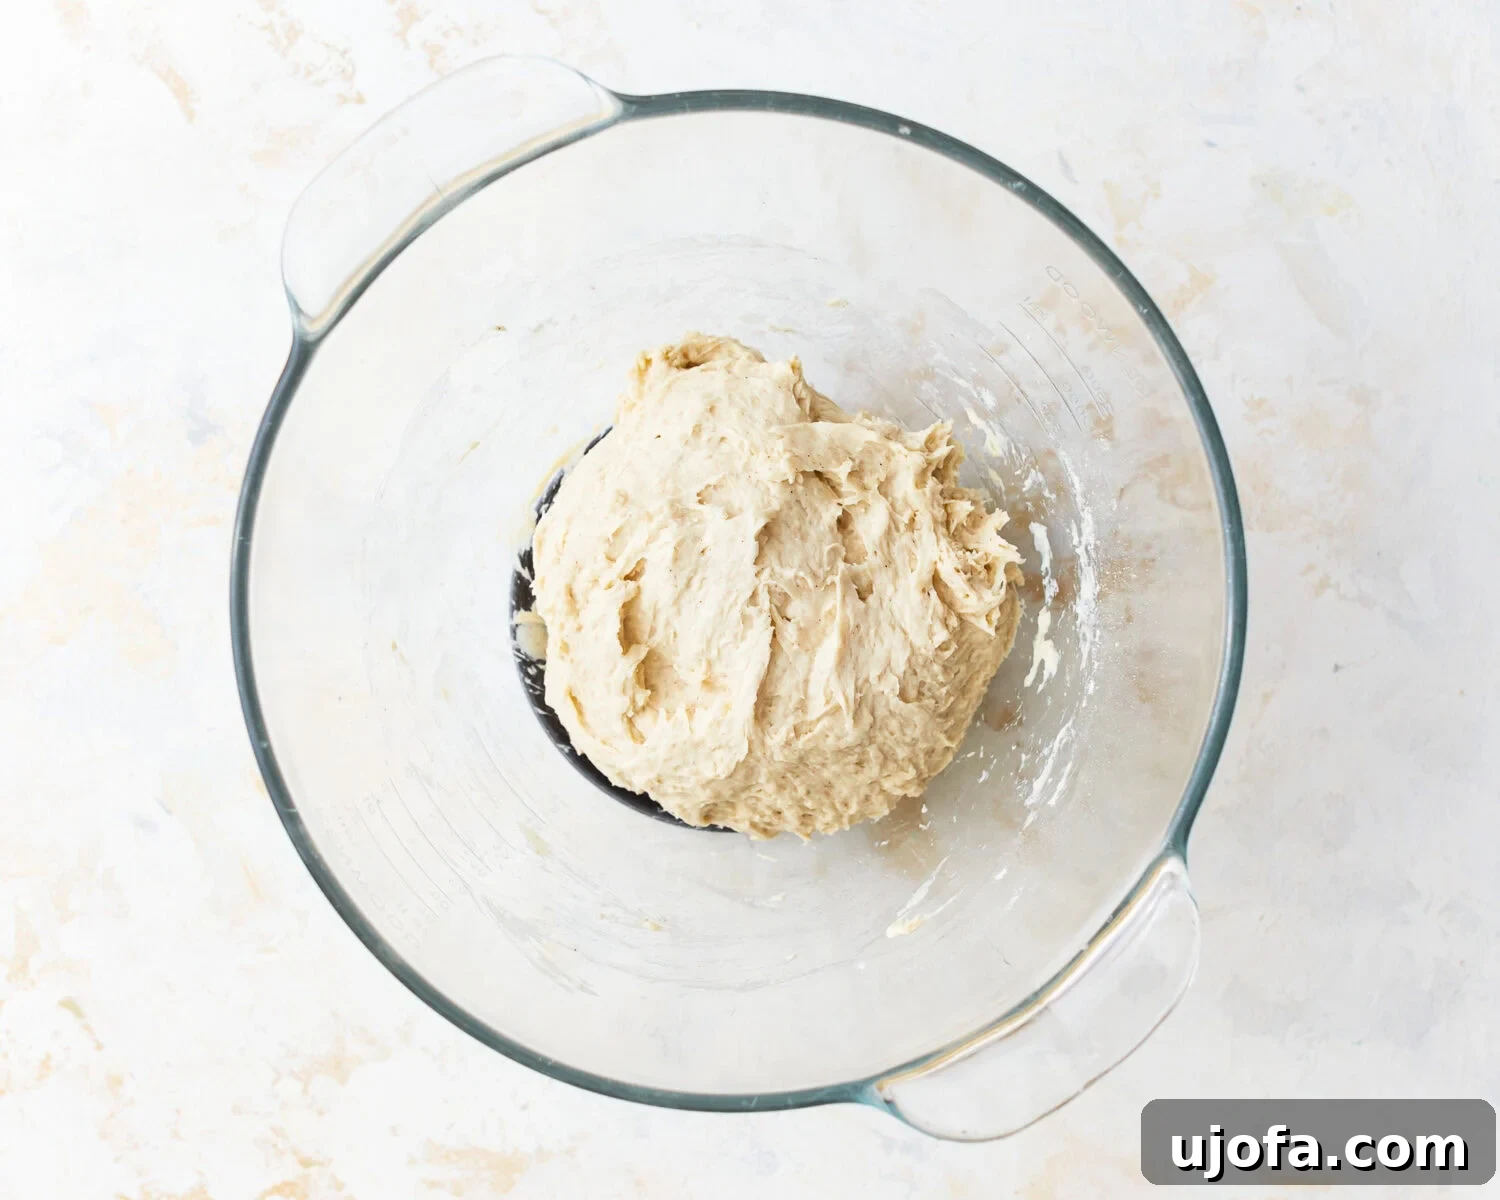
Step 2: Add Water and Mix. Gradually pour 2 cups of warm water (100-110°F) into the dry mixture, stirring continuously. Mix until all ingredients are fully incorporated and a sticky dough forms. Avoid overmixing, as gluten-free dough benefits from a lighter touch.
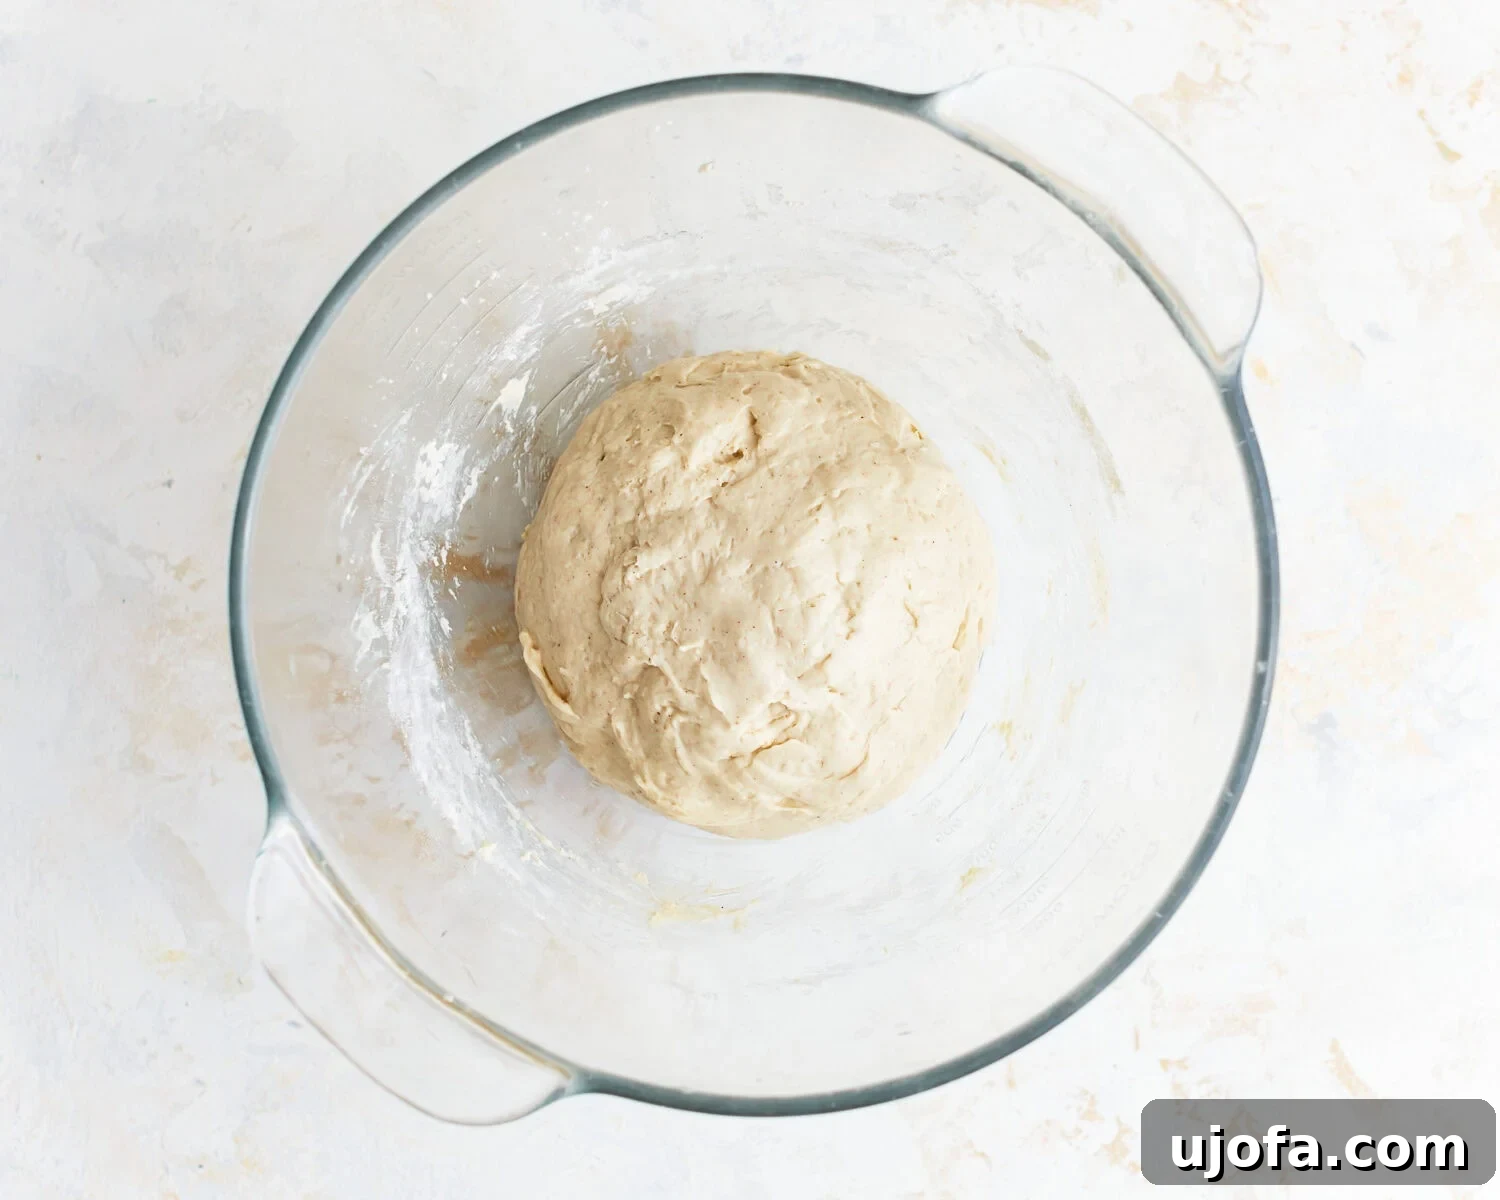
Step 3: Gentle Kneading. Knead the dough gently for 2-3 minutes. While gluten-free dough won’t develop the same elasticity as traditional wheat dough, it should become smoother and more manageable with this brief kneading.
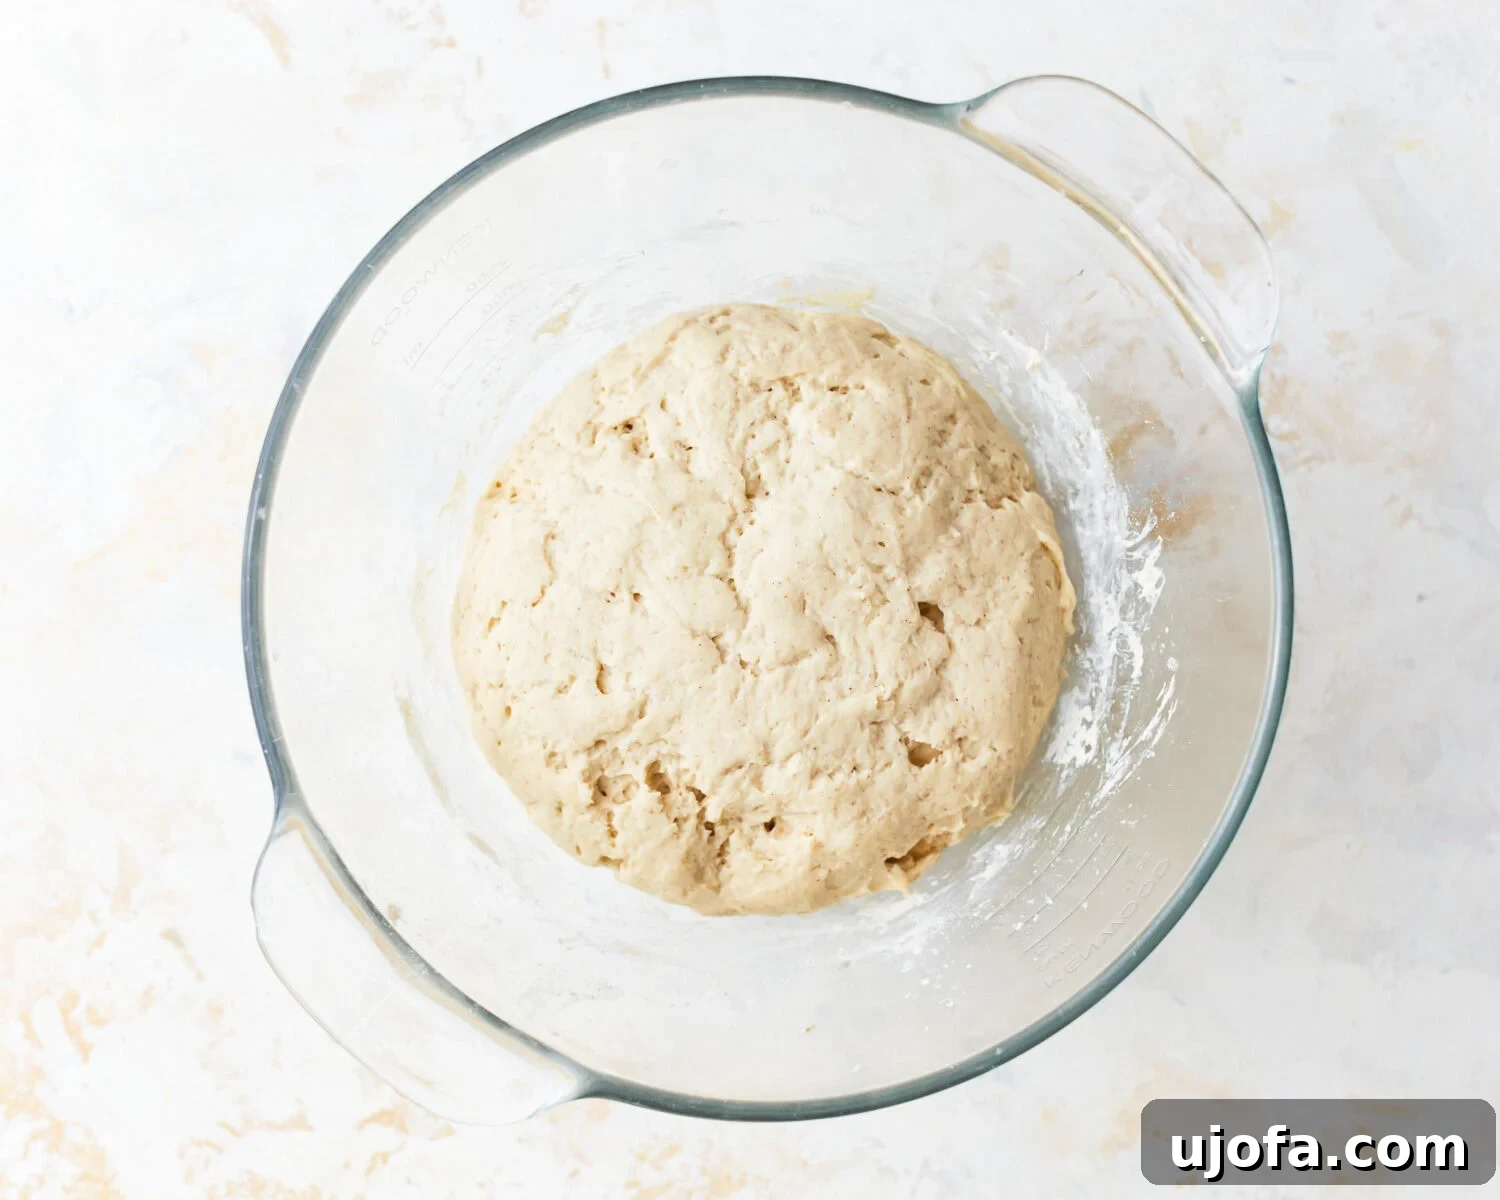
Step 4: First Rise. Cover the bowl tightly with plastic wrap and place it in a warm, draft-free location. Allow the dough to rise for approximately 1 hour, or until it has nearly doubled in size. This initial proofing develops flavor and texture.
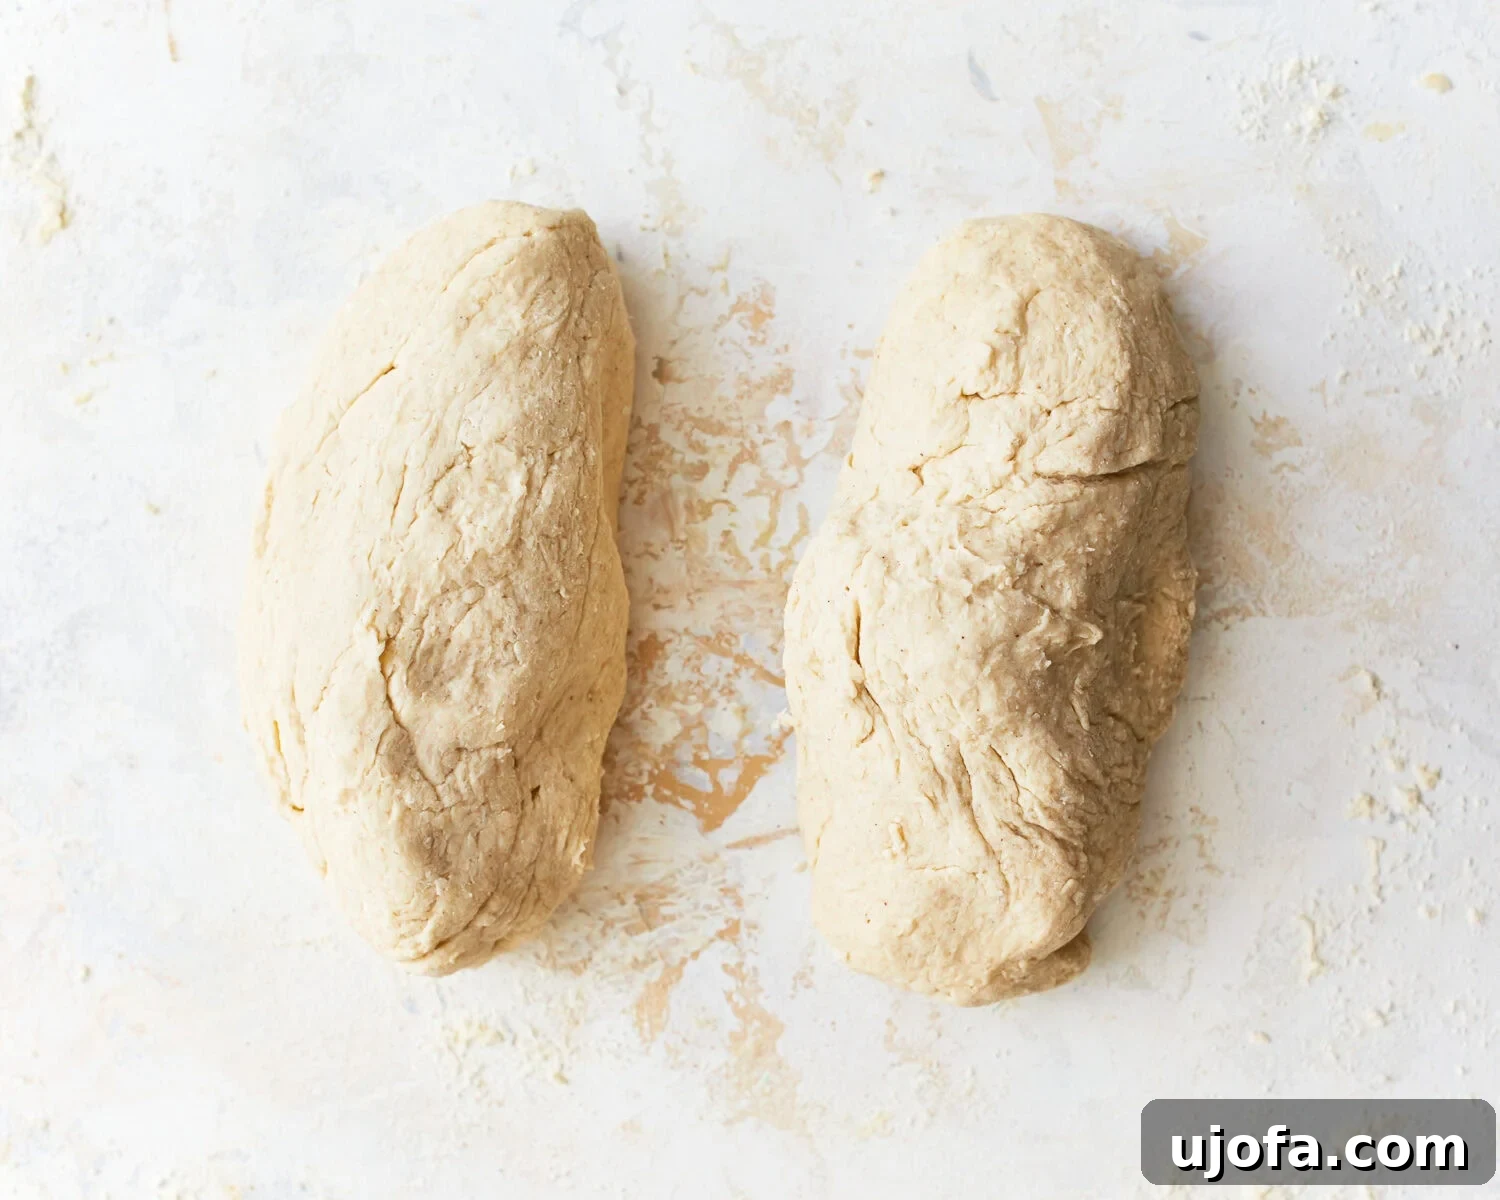
Step 5: Divide and Shape. Gently deflate the risen dough and divide it into two equal portions. On a lightly floured surface, carefully roll and stretch each portion into a 12-inch long baguette shape. Place these shaped loaves onto a baking sheet lined with parchment paper, ensuring there’s ample space between them for expansion.
Step 6: Second Rise. Cover the shaped baguettes with a clean kitchen towel. Allow them to rise for another hour in a warm, draft-free spot, or until they appear noticeably puffed up and lighter.
Step 7: Preheat Oven. Approximately 20 minutes before the second rise is complete, preheat your oven to a high temperature of 475°F (245°C). If you are using a baking stone, place it in the oven during preheating to get it piping hot.
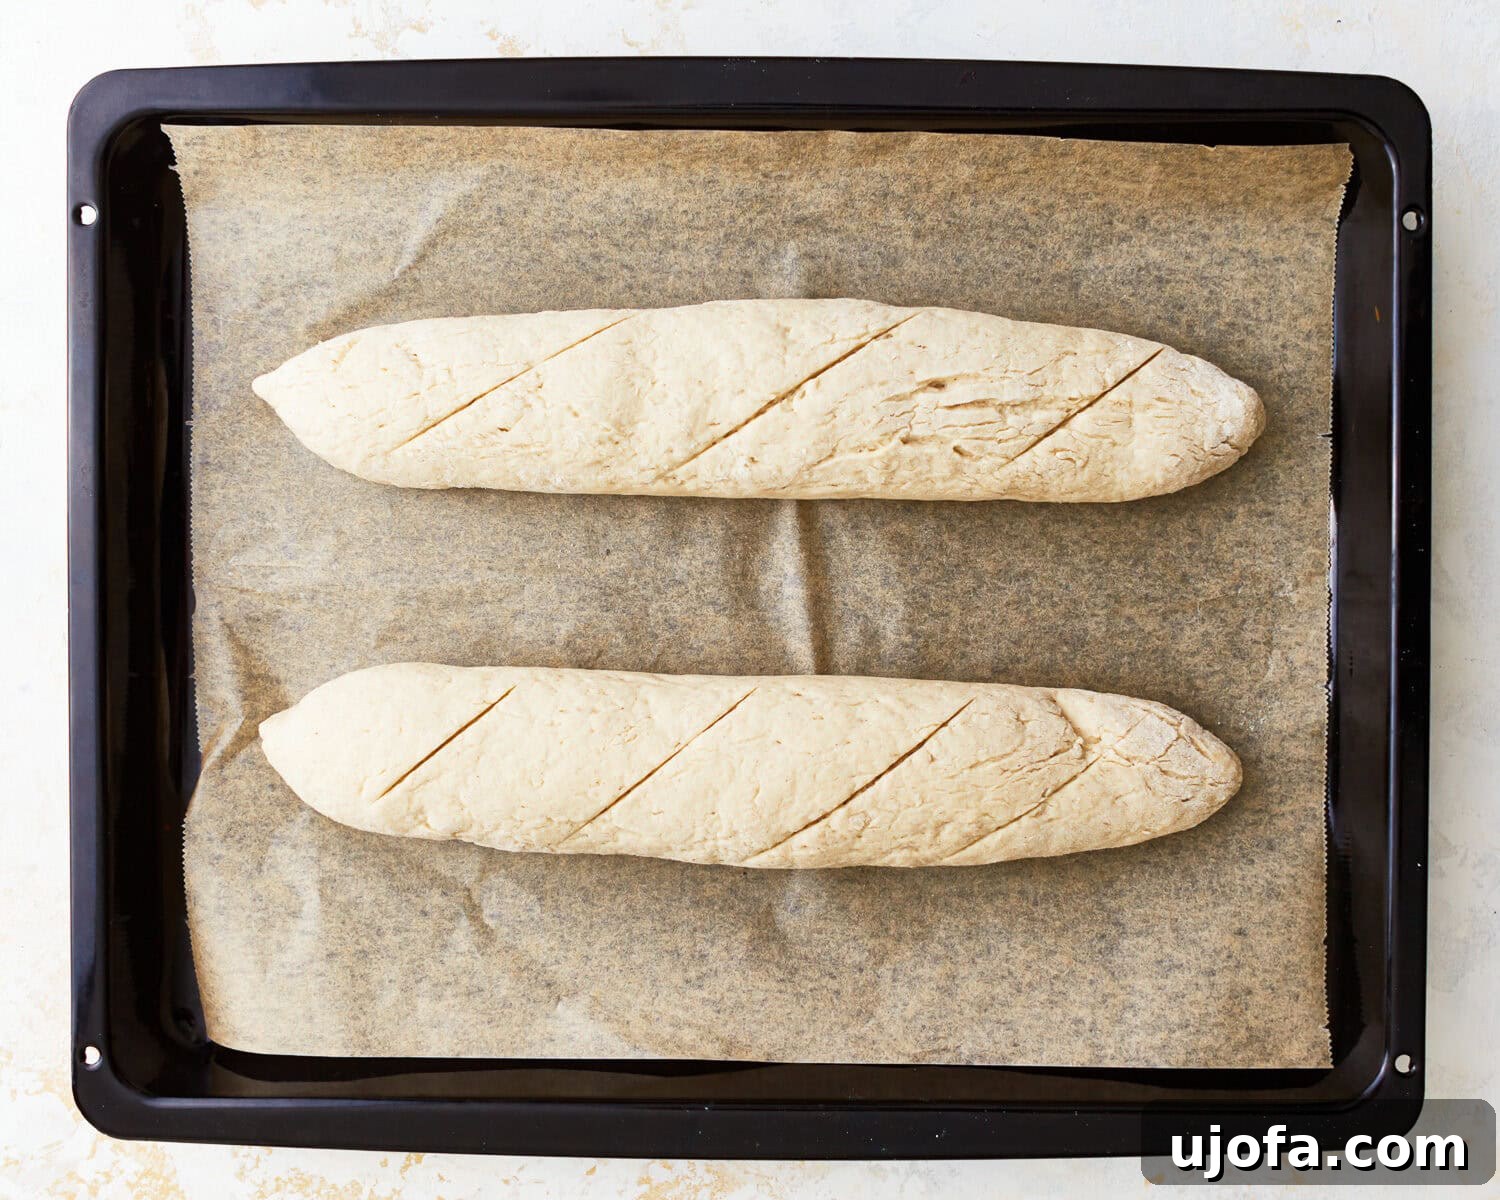
Step 8: Score the Baguettes. Just before baking, use a very sharp knife or a bread lame to make 3-4 diagonal slashes across the top of each baguette. These scores guide the bread’s expansion and contribute to its classic look.
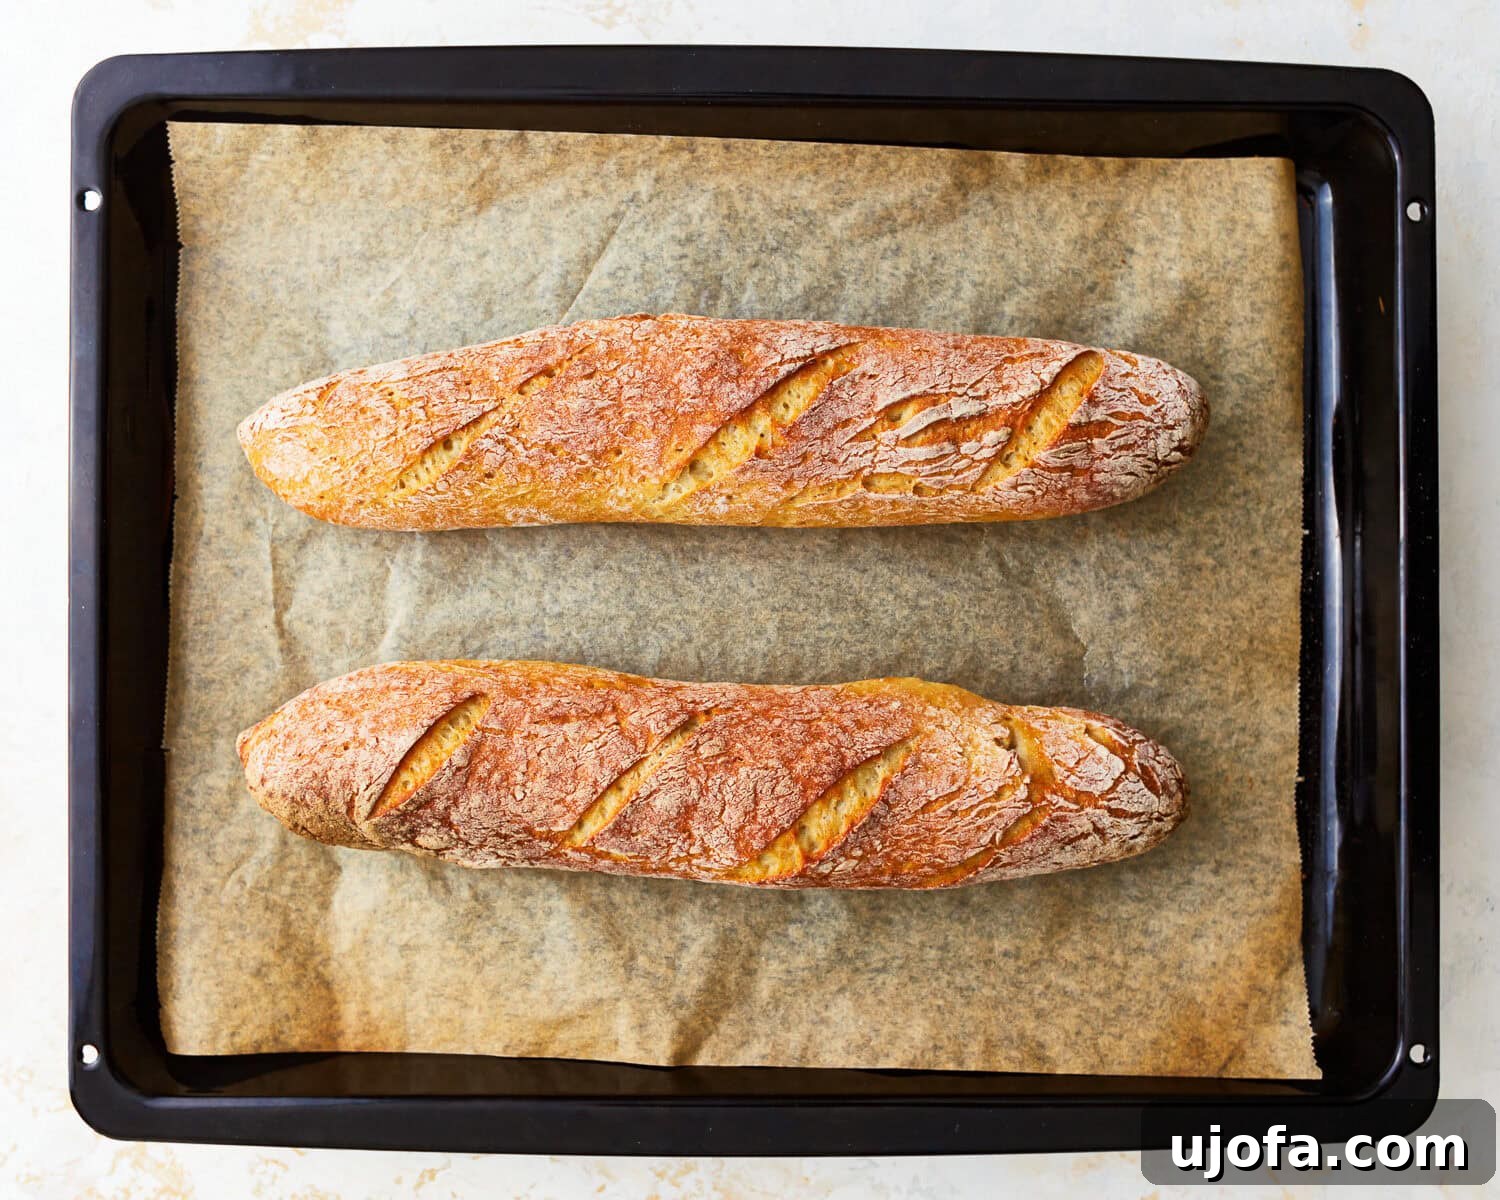
Step 9: Bake with Steam. Mist the preheated oven generously with water to create steam, then quickly and carefully transfer the baguettes inside. Bake for 25 minutes, or until the baguettes achieve a beautiful golden-brown color and sound hollow when tapped on the bottom. The steam is critical for a crispy crust!
Step 10: Cool Completely. Immediately remove the baked baguettes from the oven and transfer them to a wire rack. Allow them to cool completely before slicing and serving. This cooling process is crucial for the crust to crisp up and for the interior texture and flavor to fully develop.