
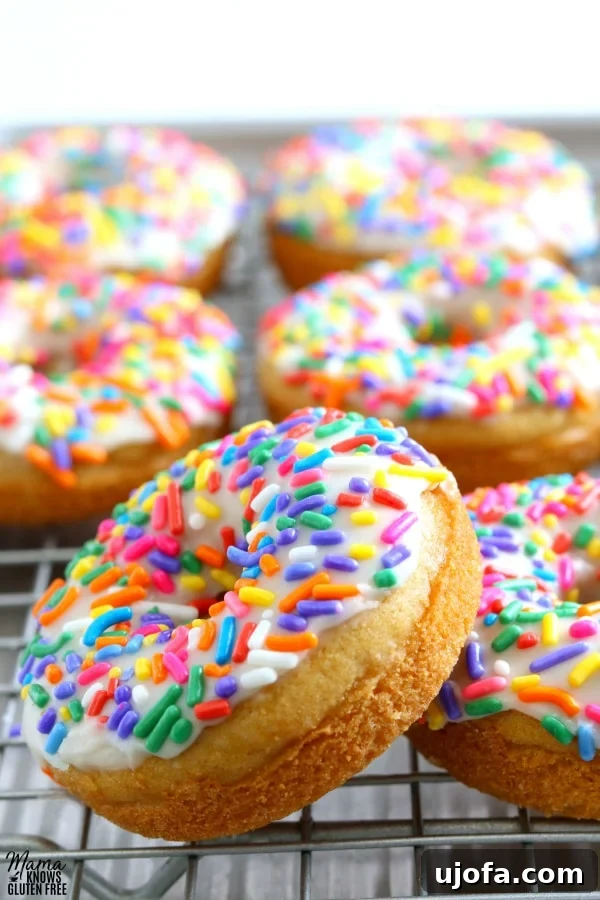
Delightfully Delicious: Easy Gluten-Free Vanilla Cake Donuts with a Dairy-Free Option
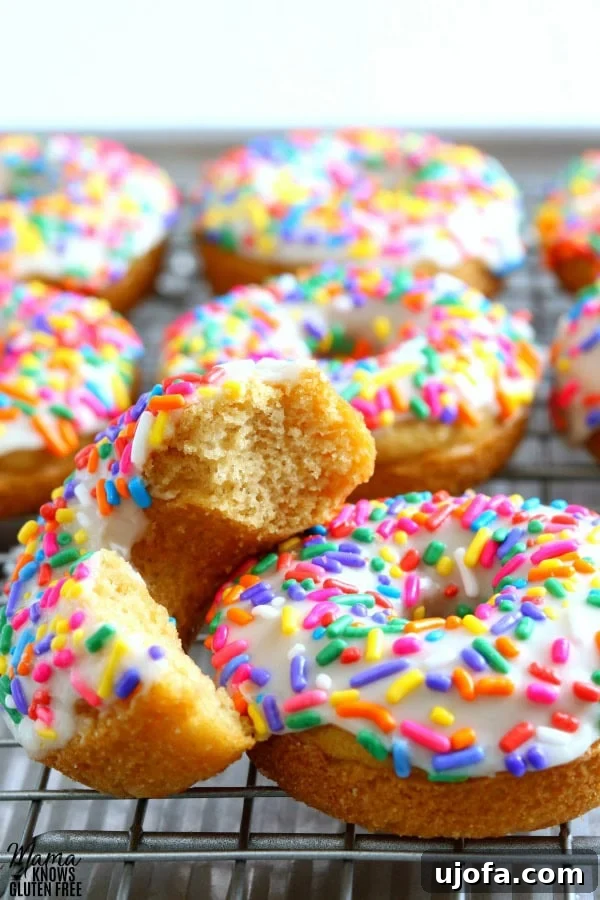
Welcome to a world of tender, perfectly baked gluten-free vanilla cake donuts, generously coated with a sweet, luscious vanilla glaze. This easy-to-follow recipe brings the joy of homemade donuts right to your kitchen, complete with a dairy-free option so everyone can indulge in this delightful treat. Say goodbye to dry, crumbly gluten-free baked goods and prepare for soft, fluffy perfection that will become a family favorite!
This post contains Amazon affiliate links. As an Amazon Associate, I earn from qualifying purchases.
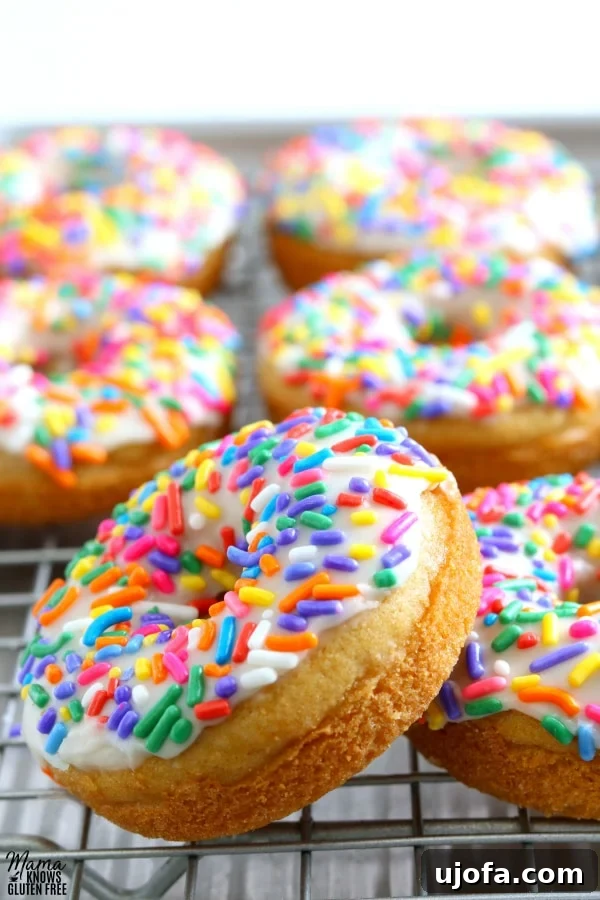
Unlock the Simplicity of Homemade Gluten-Free Donuts
Imagine biting into a soft, tender cake donut, rich with vanilla flavor and topped with a sweet, silky glaze. Now imagine making it yourself with just a few common pantry ingredients and a donut pan! Baking homemade gluten-free donuts is surprisingly easy and incredibly rewarding. Forget the hassle of deep-frying; these baked beauties are a healthier, simpler alternative that doesn’t compromise on taste or texture.
Ever since I embraced a gluten-free lifestyle in 2010, perfecting beloved recipes has been a passion. Donuts, in particular, hold a special place in my husband’s heart (and mine!), making them one of the first treats I meticulously adapted to be gluten-free. The result? A collection of easy gluten-free donut recipes that our family adores. Beyond these fantastic vanilla donuts, you can explore other delicious variations like:
- Decadent Gluten-Free Chocolate Cake Donuts
- Warm Baked Apple Cinnamon Donuts (Gluten-Free)
- Seasonal Gluten-Free Baked Pumpkin Donuts
But today, we’re celebrating the classic vanilla – a timeless flavor that my husband proudly declares as his absolute favorite. Get ready to create bakery-quality donuts that are not only gluten-free but also incredibly satisfying.
Essential Ingredients for Your Perfect Vanilla Donuts
Creating these scrumptious gluten-free vanilla cake donuts starts with gathering the right ingredients. The beauty of this recipe lies in its simplicity; you likely have most of these items in your pantry already. Each component plays a vital role in achieving that perfect cake-like texture and rich vanilla flavor.
For the Donuts:
- Gluten-Free All-Purpose Rice Flour Blend with Xanthan Gum: This is the cornerstone of our donuts. I highly recommend Pillsbury gluten-free flour for consistent, excellent results. The xanthan gum in the blend is crucial as it replaces the elasticity that gluten typically provides, preventing crumbly textures.
- Gluten-Free Baking Powder & Baking Soda: These leavening agents work together to give our donuts their irresistible rise and tender crumb.
- Salt: A pinch of salt enhances all the other flavors, balancing the sweetness and deepening the vanilla notes.
- Light Brown Sugar (packed): Brown sugar contributes to a moist, tender texture and adds a subtle caramel undertone that complements the vanilla beautifully.
- Large Egg: The egg binds the ingredients, adds moisture, and helps with the overall structure of the donut.
- Unsalted Butter (melted): Butter provides richness and a tender crumb. For a dairy-free option, use Smart Balance butter or your preferred dairy-free butter alternative.
- Pure Vanilla Extract: Don’t skimp on quality here! Pure vanilla extract is key to infusing your donuts with authentic, aromatic vanilla flavor.
- Milk: Dairy milk works wonderfully, but for a dairy-free version, unsweetened almond, cashew, or coconut milk (from a carton) are excellent choices.
For the Vanilla Glaze:
- Powdered Sugar: This fine sugar forms the smooth, sweet base of our glaze.
- Pure Vanilla Extract: Again, pure vanilla extract is essential for a vibrant vanilla flavor in the glaze.
- Milk: Just a touch of milk (dairy or dairy-free) helps achieve the perfect dipping consistency for the glaze.
Step-by-Step Guide to Baking Gluten-Free Vanilla Donuts
Follow these simple instructions to create flawless gluten-free vanilla cake donuts from scratch. Precision and gentle handling are key to achieving their signature soft texture.
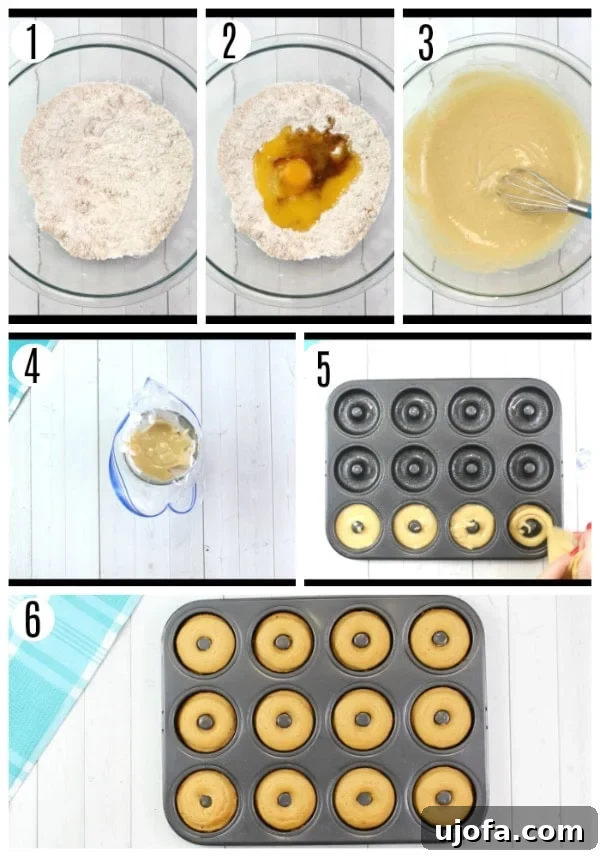
- Prepare Your Oven: Begin by preheating your oven to 350°F (175°C). This ensures the oven is at the correct temperature for even baking.
- Grease the Pan: Lightly spray a full-sized donut pan with a gluten-free nonstick cooking spray. I find coconut oil cooking spray works particularly well. Proper greasing prevents sticking and ensures easy release.
- Combine Dry Ingredients: In a large mixing bowl, whisk together the gluten-free flour blend, baking powder, baking soda, salt, and light brown sugar until thoroughly combined. Whisking helps to aerate the flour and distribute the leavening agents evenly.
- Incorporate Wet Ingredients: Add the egg, melted butter, milk, and pure vanilla extract to the dry mixture. Mix gently until just combined. Be careful not to overmix; overmixing can lead to tougher donuts. A few lumps are perfectly fine.
- Prepare for Piping: Transfer the donut batter into a large plastic storage bag or a piping bag. Seal the bag securely and snip a corner (or the tip of the piping bag) off, creating an opening about ½ inch wide. This method makes filling the donut pan incredibly neat and easy.
- Fill the Donut Pan: Carefully squeeze the bag, filling each cavity of the greased donut pan with batter. Fill each section about two-thirds full to allow for expansion during baking.
- Bake to Perfection: Place the donut pan in the preheated oven and bake for 10–12 minutes. The donuts are done when they are lightly golden brown and spring back when gently touched.
- Cooling: Once baked, remove the pan from the oven and place it on a wire cooling rack for 1 minute. This brief cooling period helps the donuts set. After 1 minute, carefully remove the donuts from the pan and transfer them directly onto the cooling rack to cool completely before glazing.
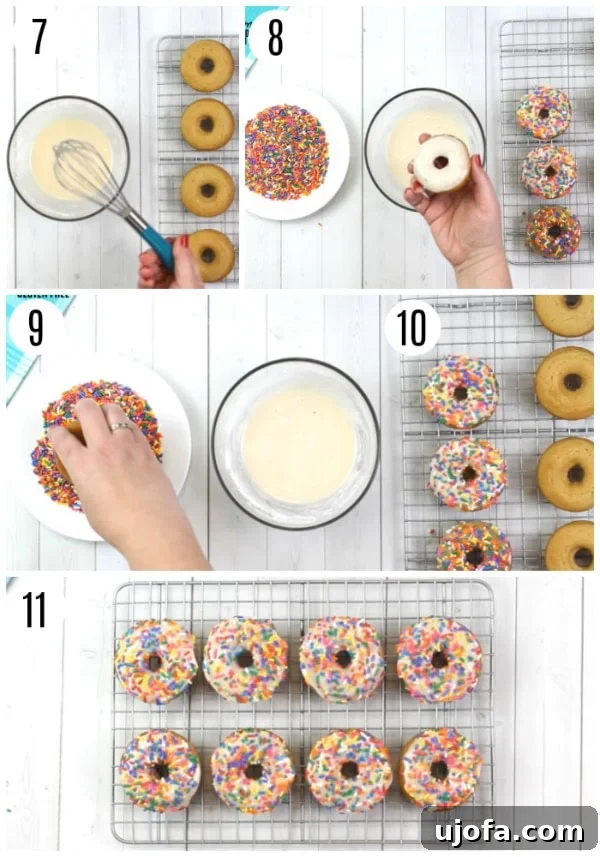
Crafting the Silky Smooth Vanilla Glaze
The vanilla glaze is the crowning glory of these donuts, adding an extra layer of sweetness and a beautiful sheen. It’s incredibly simple to make while your donuts are cooling.
- Whisk the Glaze: In a small bowl, combine the powdered sugar, pure vanilla extract, and milk. Whisk thoroughly until the mixture is smooth and lump-free. The consistency should be thick enough to coat the back of a spoon but still pourable. If it’s too thick, add a tiny bit more milk; if too thin, add a pinch more powdered sugar.
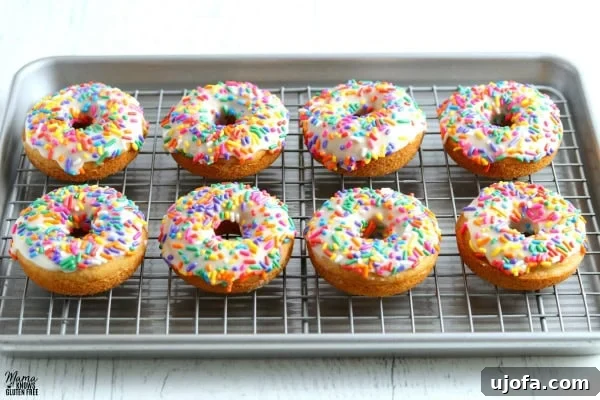
- Glaze and Decorate: Once the donuts have cooled slightly (they can still be a little warm, but not hot), dip the top of each donut into the prepared vanilla glaze. If desired, immediately add sprinkles before the glaze sets. Place the glazed donuts on a plate or back on the wire rack to allow the glaze to set.
- Serve and Enjoy: These donuts are best served warm, shortly after glazing. The warmth brings out their tender texture and fragrant vanilla flavor.
- Storage: Store any leftover donuts in an airtight container at room temperature for up to 2-3 days.
Pro Tips for Gluten-Free Donut Success
Achieving bakery-quality gluten-free donuts is easier than you think with these expert tips:
- Always Grease Your Pan: This might seem obvious, but it’s crucial for gluten-free baking. Use a high-quality gluten-free nonstick cooking spray to ensure your donuts release cleanly. My personal favorite is coconut oil cooking spray.
- The Piping Bag Trick is a Game-Changer: For neat, perfectly shaped donuts, the plastic storage bag method is indispensable. Place a large plastic storage bag inside a tall cup, folding the excess bag over the cup’s rim. Pour your batter into the bag, then snip off a corner. This makes piping the batter into the donut pan incredibly easy and mess-free, leading to beautifully uniform donuts and minimal cleanup.
- Don’t Overmix the Batter: Overmixing gluten-free flour can sometimes result in a tougher texture. Mix the wet and dry ingredients only until they are just combined and no streaks of dry flour remain. A few small lumps are perfectly acceptable.
- Accurate Flour Measurement: Gluten-free flours can be dense. Always use the “spoon & level” method for measuring flour (spoon flour into the measuring cup, then level off with a knife) to avoid adding too much, which can make your donuts dry and dense.
- Cool Properly Before Glazing: While a slightly warm donut can be glazed, ensure it’s not piping hot. Glazing hot donuts will cause the glaze to melt and slide right off. Allowing them to cool on a wire rack ensures the glaze adheres beautifully.
Do I Have to Use a Donut Pan? Alternatives and Adjustments
While a donut pan is highly recommended for achieving the classic donut shape and consistent baking, you can still enjoy these delicious cake treats even without one. Donut pans are widely available online (like Amazon) and in most major retailers such as Target, Walmart, and craft stores in the baking aisle.
If you don’t have a donut pan, you can certainly use a muffin pan or even a mini muffin pan. The shape will be different, but the delicious flavor and texture will remain. You will need to adjust the baking time:
- For standard muffin pans: Start by adding 2-4 minutes to the original baking time (so, 12-16 minutes total).
- For mini muffin pans: The baking time will be shorter, likely around 8-10 minutes.
Always check for doneness by inserting a toothpick into the center of a muffin; if it comes out clean, they are ready. Continue baking in 2-minute increments until fully cooked.
Storage and Freezing Your Homemade Donuts
One of the best things about these gluten-free vanilla donuts is how well they store, making them perfect for meal prep or enjoying over several days. You have options whether you prefer to freeze them glazed or unglazed.
Freezing Glazed Donuts:
If you’ve already glazed your donuts and want to freeze them for later, here’s how:
- Ensure the donuts are completely cooled and the glaze has fully set.
- Place the glazed donuts in a single layer on a baking sheet.
- Freeze for several hours until solid. This prevents them from sticking together.
- Once frozen, transfer the donuts to a plastic freezer bag or an airtight freezer-safe container.
- Label with the date. Glazed donuts can be frozen for up to three months.
- To defrost, simply remove from the freezer and let them thaw in the refrigerator overnight or at room temperature for a few hours.
Freezing Unglazed Donuts:
For maximum freshness or if you prefer to glaze them right before serving, freeze the donuts without the glaze:
- Allow the baked donuts to cool completely on a wire rack.
- Place the cooled donuts in a plastic freezer bag or an airtight freezer-safe container.
- Label with the date. Unglazed donuts can also be frozen for up to three months.
- To defrost, you can either thaw them in the refrigerator overnight or gently warm them in the microwave for a quick treat. Once defrosted, prepare the fresh vanilla glaze and dip!
Understanding Gluten-Free All-Purpose Flour
The choice of gluten-free all-purpose flour is crucial for the success of these donuts. Not all gluten-free flour blends are created equal, and using the wrong one can drastically alter your baking results. My go-to is Pillsbury gluten-free flour because of its consistent performance and reliable texture.
This recipe calls for an all-purpose rice flour blend that is specifically designed as a “cup for cup” or “1-to-1” substitute for traditional wheat flour. These blends are formulated to mimic the properties of wheat flour, making gluten-free baking much more straightforward. A key component often included in these blends is xanthan gum.
Xanthan gum is a food additive that acts as a binder, replacing the elasticity and structure that gluten provides. It’s essential for preventing baked goods from becoming crumbly or falling apart. If your chosen gluten-free flour blend already contains xanthan gum (which most quality cup-for-cup blends do), make sure *not* to add any extra. Adding too much xanthan gum can lead to a gummy or chewy texture in your donuts – definitely not what we’re aiming for!
Tips for Measuring Gluten-Free Flour
Accurate measurement is paramount in gluten-free baking. I’ve found that the “spoon & level” method is the best way to measure gluten-free flour for this recipe:
- Use a spoon to scoop the flour out of its bag or container and into your measuring cup.
- Do not pack the flour down.
- Once the measuring cup is overflowing slightly, use the back of a straight knife or a flat edge to level off the excess flour, ensuring a precise measurement.
Please do not scoop the measuring cup directly into the flour bag. This method compacts the flour, leading to significantly more flour than the recipe requires, which will result in dry and dense donuts.
It’s also important to note that this specific recipe is formulated for an all-purpose rice flour blend and will generally not work well with single-ingredient flours like almond flour or coconut flour, which have very different absorption and binding properties.
Gluten-Free and Dairy-Free Vanilla Donuts: A Recipe for Everyone
Living with dietary restrictions shouldn’t mean sacrificing delicious treats. That’s why I’m always committed to including a dairy-free option in my recipes. With three dairy-free individuals in my family (myself included!), I understand the importance of having inclusive baking options. You’ll be thrilled to know that these gluten-free vanilla cake donuts are effortlessly adaptable to be completely dairy-free without compromising on their incredible taste or texture.
For the dairy-free version of this recipe, I successfully use Smart Balance butter and unsweetened almond milk. These substitutes perform beautifully, yielding donuts that are just as moist, tender, and flavorful as their dairy counterparts. No one will ever guess they’re dairy-free!
If you’re exploring other dairy-free alternatives, here are some of my favorites that I often bake with:
- Unsweetened Plant-Based Milks: Almond milk is a staple, but unsweetened cashew milk or coconut milk (the kind in a carton, not canned coconut cream) also work wonderfully. If you have nut allergies, unsweetened soy milk is another excellent option.
- Dairy-Free Butters: Besides Smart Balance, many other plant-based butter sticks are available that can be used cup-for-cup in baking. Look for brands specifically designed for baking.
- Coconut Oil: In recipes where a subtle coconut flavor is welcome, melted coconut oil can often replace butter, adding richness and moisture.
Experiment to find your preferred dairy-free products, knowing that these donuts will be a hit regardless of your dietary needs!
What Gluten-Free Sprinkles Do You Recommend?
Adding sprinkles is a fun way to elevate your donuts, especially for celebrations or a festive touch! I often get asked which brands of sprinkles are safe for gluten-free baking. I typically pick up either the Great Value brand (Walmart’s house brand) or Wilton brand sprinkles when I do my grocery shopping.
A crucial piece of advice: always, always check the label of any sprinkles you buy. Product ingredients can change without notice, so it’s a good habit to check every time to ensure they remain gluten-free and safe for your consumption. Mama knows gluten-free means checking all your labels!
An Easy Gluten-Free Donut Recipe You’ll Cherish
This recipe for baked gluten-free vanilla cake donuts is truly a gem – simple enough for beginners and quick enough for busy mornings. From start to finish, you can have a batch of these soft, sweet treats ready in just about 20 minutes! They are wonderfully versatile, perfect as a comforting breakfast, an elegant dessert, or a delightful special treat to brighten anyone’s day.
Baking at home allows you to control the ingredients and savor the fresh, warm goodness that store-bought options simply can’t match. I sincerely hope that you and your family will enjoy these gluten-free vanilla donuts as much as my family does. Happy baking!
Recipe Card: Gluten-Free Baked Vanilla Donuts {Dairy-Free Option}
Gluten-Free Baked Vanilla Donuts {Dairy-Free Option}
Audrey Roberts
12 donuts
10 mins
10 mins
20 mins
Share by Email
Print Recipe
Equipment
-
Donut Pan
Ingredients
DONUTS
- 1 cup gluten-free all-purpose rice flour blend flour with xanthan gum, (I like Pillsbury gluten-free flour. Not all gluten-free flours are created equal. You may experience different baking results depending on the gluten-free flour blend you choose.)
- 1 teaspoon gluten-free baking powder
- 1/4 teaspoon baking soda
- 1/4 teaspoon salt
- 1/2 cup light brown sugar, packed
- 1 large egg
- 3 tablespoons unsalted butter, melted, (dairy-free use Smart Balance butter)
- 1 tablespoon pure vanilla extract
- 1/2 cup milk, (dairy-free use unsweetened almond, cashew or coconut milk)
GLAZE
- 1 1/4 cup powdered sugar
- 1 teaspoon pure vanilla extract
- 2 teaspoons milk, (dairy-free use unsweetened almond, cashew or coconut milk)
Instructions
-
Preheat oven to 350°F (175°C).
-
Spray a full-sized donut pan with gluten-free nonstick cooking spray.
-
In a large bowl, combine flour, baking powder, baking soda, salt, brown sugar and whisk to combine the ingredients.
-
Add the egg, butter, milk, and pure vanilla extract to the flour mixture and mix until fully combined.
-
Add the batter to a large plastic storage bag or piping bag. Seal the bag and cut a corner (or tip if using a piping bag) off.
-
Squeeze the bag carefully, filling the greased donut pan with batter.
-
Bake for 10–12 minutes.
-
Place the pan on a cooling rack and cool for 1 minute. Remove donuts from the pan and place them on the rack.
-
In a small bowl, whisk together the glaze ingredients. Dip each warm donut into the glaze and place on a plate or wire rack. Serve warm.
-
Store in an airtight container at room temperature.
Notes
- I like Pillsbury gluten-free flour. Not all gluten-free flours are created equal. You may experience different baking results depending on the gluten-free flour blend you choose.
- For the dairy-free option, I used Smart Balance butter and unsweetened almond milk.
- See the recipe post for freezing instructions.
- Mama says, “check all of your labels”.
Nutrition
Calories: 131kcal
Carbohydrates: 22g
Protein: 2g
Fat: 4g
Saturated Fat: 2g
Cholesterol: 26mg
Sodium: 86mg
Potassium: 66mg
Fiber: 1g
Sugar: 15g
Vitamin A: 129IU
Calcium: 45mg
Iron: 1mg
Nutrition information is automatically calculated, so should only be used as an approximation.
Additional Info
Breakfast, Dessert
American
More Delicious Gluten-Free Breakfast Recipes To Try!
If you loved these easy gluten-free vanilla donuts, you’ll be thrilled to explore more breakfast and brunch options that are just as delightful and diet-friendly:
- Easy Gluten-Free Pancakes {Dairy-Free & Vegan Option}: Fluffy pancakes perfect for a weekend brunch.
- Gluten-Free Buttermilk Biscuits {Dairy-Free Option}: Light and tender biscuits, ideal for breakfast sandwiches or alongside gravy.
- Gluten-Free Cinnamon Rolls {Dairy-Free Option}: Sweet, gooey, and utterly irresistible cinnamon rolls.