
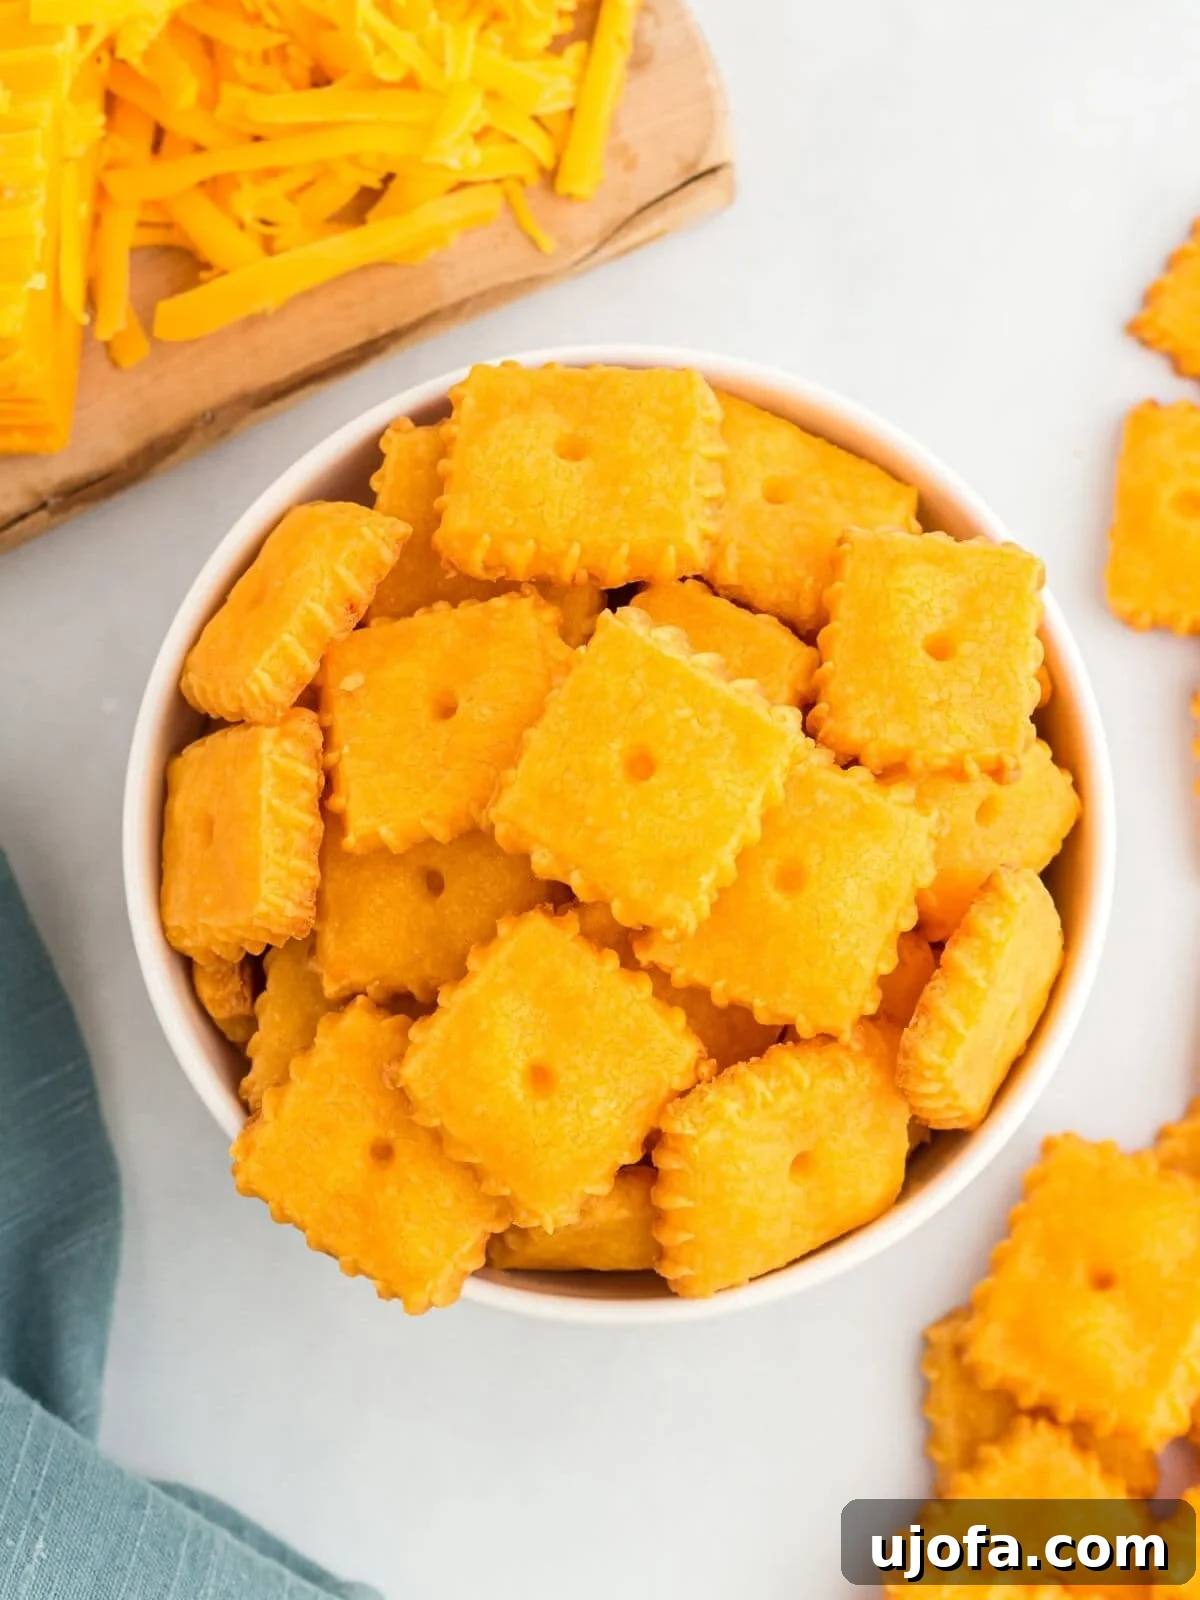
Navigating dietary restrictions shouldn’t mean sacrificing your favorite comfort foods. My personal culinary journey has been dedicated to reimagining beloved snacks into homemade, allergy-friendly versions, and I couldn’t be more excited to share this incredible gluten-free Cheez-Its copycat recipe. These crackers are everything you crave: intensely cheesy, perfectly buttery, and delightfully flaky with an irresistible crispness that rivals – and arguably surpasses – the original. What’s more, they are completely nut-free, soy-free, and contain no artificial flavors or preservatives, making them a wholesome choice for the whole family. My loved ones adore them, and I’m confident they’ll become a new staple in your home too!
Living with gluten sensitivities can often feel restrictive, especially when it comes to popular snack items. The market for gluten-free products has certainly grown, but nothing quite compares to the satisfaction and controlled ingredients of a homemade creation. This recipe empowers you to enjoy that iconic cheesy cracker experience without compromise. Imagine biting into a warm, savory cracker, freshly baked with a vibrant cheddar punch – pure bliss. This isn’t just a recipe; it’s an invitation to reclaim your snack time with a truly delicious, health-conscious alternative.
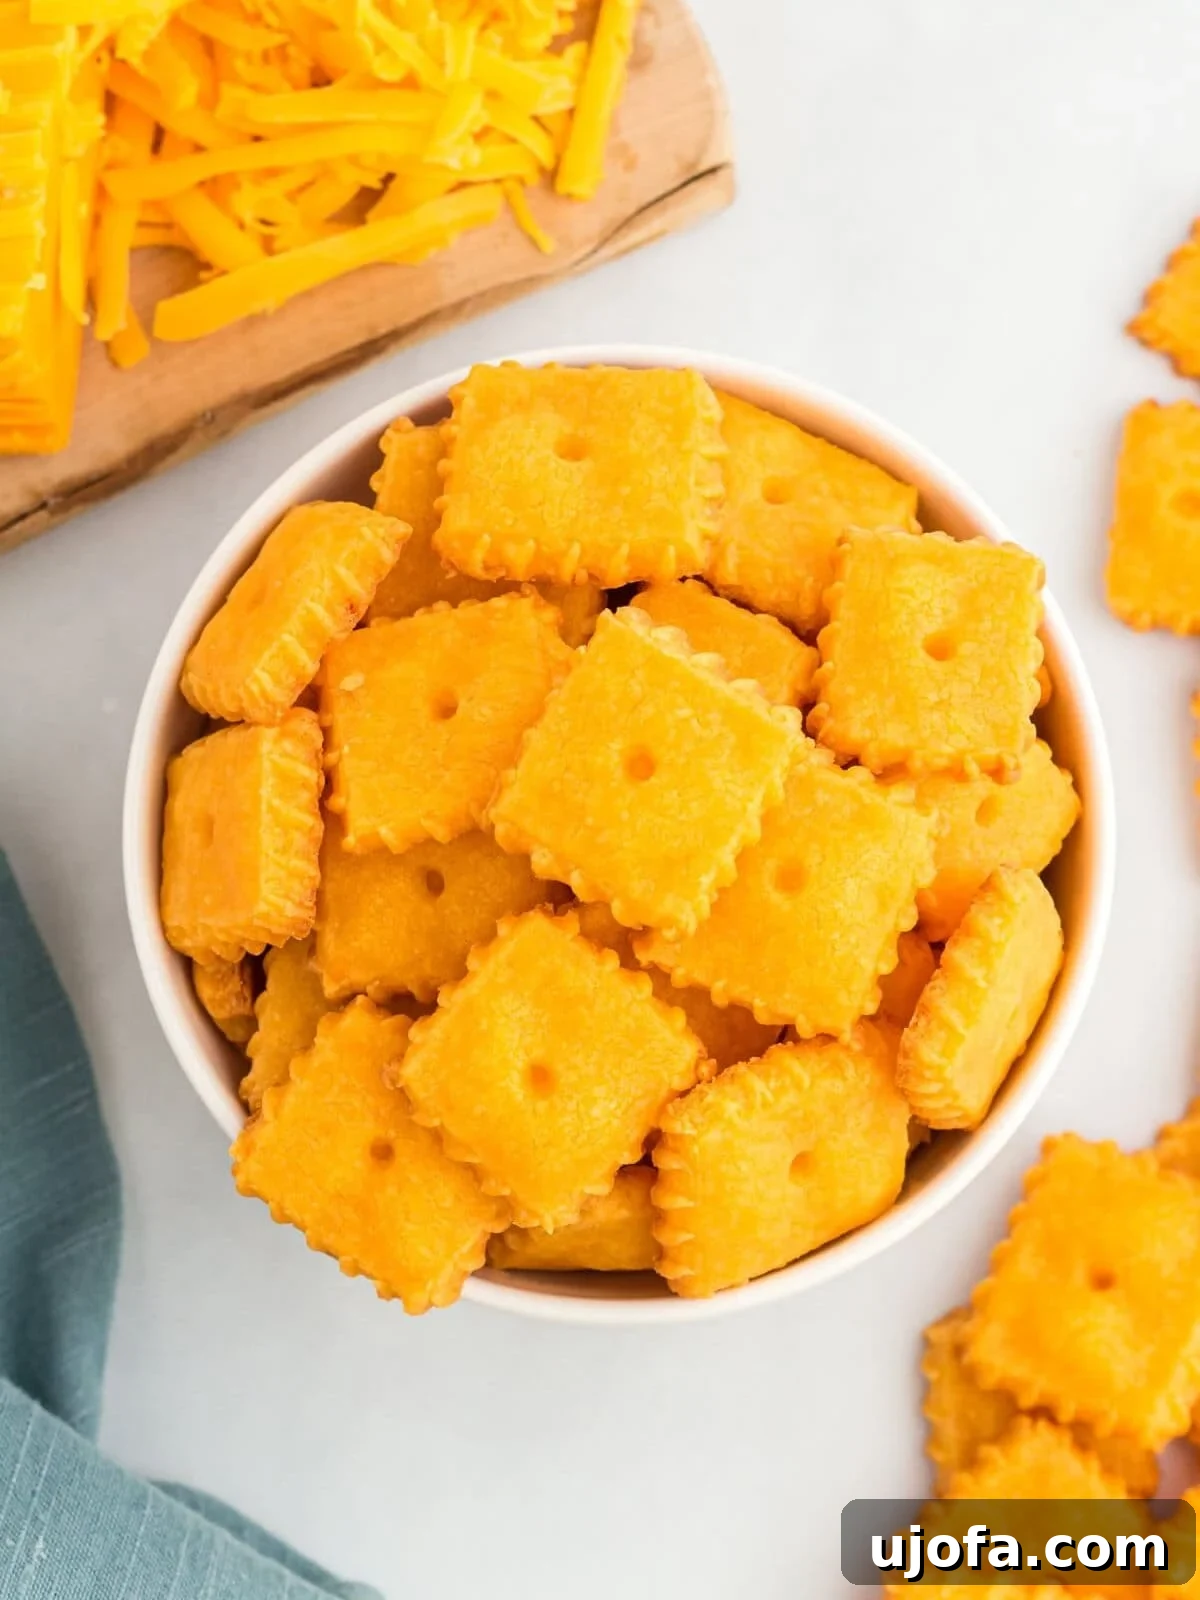
The Quest for Perfect Gluten-Free Cheez-Its
Crafting the perfect gluten-free Cheez-It replica was a labor of love, requiring meticulous testing and adjustments to achieve that signature taste and texture. The foundation of these mouthwatering crackers lies in a simple yet potent combination: sharp cheddar cheese, creamy butter, a hint of salt, and a touch of garlic powder, all masterfully blended into a specialized gluten-free flour dough. I spent considerable time refining the ingredient ratios, experimenting with various techniques until I struck culinary gold. The outcome is a cracker that boasts an unparalleled crispiness and an intense, authentic cheesy flavor that will genuinely make you forget all about the store-bought version. This recipe isn’t just gluten-free; it’s a gourmet upgrade to a classic snack.
The journey involved understanding the nuances of gluten-free flour blends and how they interact with fats and liquids, especially when aiming for a flaky, delicate cracker. The goal was to avoid the common pitfalls of gluten-free baking – dense, crumbly, or gritty textures. Instead, I focused on achieving that light, airy structure that shatters with each bite, releasing a burst of savory cheddar. The secret truly lies in the balance and the quality of ingredients, ensuring every component plays its part in delivering a superior snacking experience.
Essential Ingredients for Your Homemade Cheesy Crackers
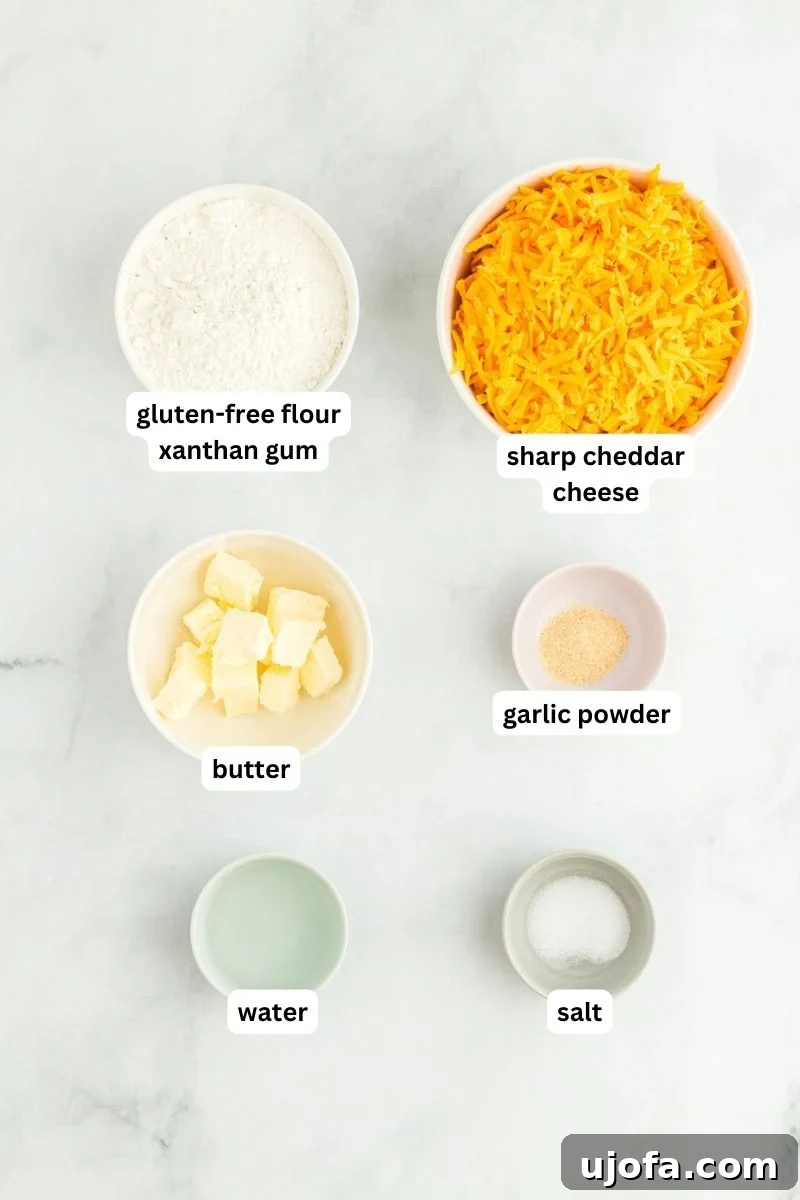
Each ingredient in this recipe plays a crucial role in achieving the perfect gluten-free Cheez-Its. Understanding their specific contributions will help you achieve outstanding results every time.
- Sharp Cheddar Cheese: This is the star of the show! For the most robust and authentic cheesy flavor, sharp cheddar is indispensable. I highly recommend purchasing a block of cheese and grating it yourself. Pre-shredded cheeses often contain anti-caking agents like cellulose or potato starch, which can prevent them from melting smoothly, result in a grainy texture, and sometimes even contain hidden gluten. Freshly grated cheese melts beautifully, integrates seamlessly into the dough, and delivers a purer, more intense cheddar punch.
- Gluten-Free Flour Blend: The type of gluten-free flour you use is critically important. Not all gluten-free flours are created equal, and their compositions vary significantly. My preferred and highly recommended brand for this recipe is Cup4Cup Multipurpose Flour. This blend is specifically formulated to behave similarly to traditional wheat flour in many recipes, yielding consistent, excellent results. Using other brands might lead to different outcomes in terms of dough consistency and cracker texture, so stick to a reliable, high-quality all-purpose gluten-free blend.
- Unsalted Butter (Cold): Butter contributes immensely to both flavor and the desired flaky texture. Using unsalted butter allows you to precisely control the overall salt content of your crackers. Crucially, the butter must be ice-cold and cut into small pieces. When cold butter is incorporated into the flour and then baked, the water in the butter rapidly turns to steam, creating pockets of air that result in those delightful layers and a wonderfully flaky crumb. Softened or melted butter will lead to a dense, tough cracker.
- Xanthan Gum: This is a common and vital ingredient in many gluten-free recipes, especially those aiming for structure and elasticity. Xanthan gum acts as a binder, mimicking the properties of gluten by providing chewiness and preventing the dough from crumbling. If your chosen gluten-free flour blend already contains xanthan gum (many do), you can omit this additional teaspoon. Always check your flour blend’s ingredient list.
- Salt: A measured amount of salt is essential not just for flavor, but also to enhance the inherent cheesiness of the crackers. It balances the richness and brings out the savory notes.
- Garlic Powder: While optional, a subtle hint of garlic powder elevates the flavor profile, adding a warm, aromatic depth that complements the sharp cheddar beautifully without overpowering it.
- Ice-Cold Water: Just like the butter, the water used in this recipe must be ice-cold. This is vital for two reasons: it helps keep the butter solid, which is essential for flakiness, and it prevents the dough from becoming overly sticky or tough. Adding water sparingly and as needed ensures you achieve the perfect dough consistency without over-hydrating.
Pro Tips for Crispy, Cheesy Perfection
Achieving bakery-quality gluten-free Cheez-Its at home is absolutely within reach with these expert tips:
- Select the Right Gluten-Free Flour: As mentioned, using a certified gluten-free all-purpose flour blend is crucial. My top recommendation remains Cup4Cup Multipurpose Flour due to its consistent performance in replicating gluten-containing textures. Different brands have varying compositions of rice flour, tapioca starch, potato starch, etc., and may require adjustments in liquid or yield different results in terms of texture and workability.
- Measure Flour with Precision (Grams are Best): Accurate flour measurement is paramount for the perfect dough consistency. Too much flour will result in a dry, crumbly dough that’s difficult to roll out and produces hard crackers. Too little flour, on the other hand, will make the dough too sticky to handle and can lead to greasy crackers. Ideally, use a food scale to measure your flour in grams (140 grams for 1 cup of Cup4Cup). If you don’t have a scale, employ the “spoon and level method”: gently spoon flour into your measuring cup until it overflows, then level off the excess with a straight edge (like a knife). Avoid scooping flour directly from the bag with the measuring cup, as this compacts the flour and can add up to 25% more than intended.
- Always Grate Your Own Cheese: This tip cannot be stressed enough. Pre-shredded cheese is often coated with anti-caking agents to prevent clumping. These additives hinder proper melting and can give your crackers a less desirable texture. More importantly, some anti-caking agents might not be gluten-free, posing a risk for those with sensitivities. Freshly grated sharp cheddar will melt beautifully, distribute evenly, and provide the purest, most intense cheese flavor. While sharp cheddar offers the boldest flavor, feel free to use mild cheddar if you prefer a less intense cheese profile.
- Maintain Cold Temperatures: It is absolutely critical that both your butter and water are ice-cold when you begin mixing your ingredients. Cold butter, when blended quickly with flour, creates tiny pockets of fat that remain distinct. During baking, the moisture in these butter pockets turns to steam, which expands and separates the dough layers, resulting in a light, flaky, and crispy cracker. If the butter is too warm, it will melt into the flour, yielding a dense, tough dough.
- Roll Dough Evenly and to the Correct Thickness: For consistent baking and texture, roll the dough out to an even thickness across the entire sheet. Aim for ⅛-inch to ¼-inch thickness. A thinner dough will produce crispier crackers, akin to the original Cheez-Its. If you prefer a slightly chewier cracker, keep the dough closer to ¼-inch. Uneven thickness will lead to some crackers burning while others remain undercooked.
- Mindful Baking for Perfect Crispness: These thin crackers bake quickly and can go from perfectly golden to burnt in a matter of seconds. Bake one tray at a time to ensure even heat distribution in your oven. It’s important to remove the crackers from the oven when they appear “set” on top but are not yet visibly browned. Remember, they will continue to crisp and set on the hot baking sheet even after being removed from the oven. Overbaking, even by a minute or two, can lead to burnt edges.
- Perforate for Authenticity: Don’t forget the signature hole in the center of each cracker! Use a skewer or a chopstick to press a hole about three-quarters of the way through the dough. A toothpick is too small and the hole will likely close during baking. This not only gives them the classic Cheez-It look but also helps with even baking.
Gluten-Free Cheez-Its Copycat Recipe Card
Get ready to create your new favorite cheesy snack with this detailed recipe.
Gluten-Free Cheez Its Copycat
These gluten-free Cheez Its copycats are cheesy, buttery, and just as flaky and crispy as the original (if not better!).
Ingredients
- 8 ounces sharp cheddar cheese, shredded
- 1 cup gluten-free flour (140 grams), I use Cup4Cup Multipurpose Flour
- ¼ cup unsalted butter (57 grams), cold and cubed
- 1 teaspoon xanthan gum, omit if your flour blend already contains it
- ¾ teaspoon salt
- ½ teaspoon garlic powder
- 2-3 tablespoons water, ice cold
You can convert to Metric units here.
Instructions
- Line two large baking sheets with parchment paper. Set aside.
- In a high-powered blender or food processor, combine the shredded cheese, gluten-free flour, cold butter, xanthan gum (if needed), salt, and garlic powder. Blend for approximately 30 seconds until the mixture takes on a dry, crumbly texture, resembling coarse breadcrumbs.
- Add 2 tablespoons of ice-cold water to the dry mixture. Blend for another 30 seconds until the mixture comes together and forms a cohesive dough. The dough should be pliable – not too sticky to handle and not so dry that it crumbles. If it’s still too dry, add the remaining 1 tablespoon of ice-cold water, one teaspoon at a time, blending briefly after each addition until the desired consistency is achieved.
- Form the dough into a ball, then flatten it into a disk about ½-inch to 1-inch thick. Wrap the dough tightly in food-safe plastic wrap and refrigerate for 20 minutes to chill.
- While the dough chills, preheat your oven to 350°F (177°C).
- Lightly dust your clean work surface (or a silicone baking mat) and a rolling pin with gluten-free flour. Remove the chilled dough from the refrigerator, unwrap it, and place it on your prepared surface. Roll the dough out evenly to a thickness of ⅛-inch to ¼-inch. Remember, a thinner dough will yield crispier crackers, while a thicker dough will result in a slightly chewier texture.
- Using a pizza cutting wheel or a fluted pastry wheel, cut the rolled dough into 1-inch squares. If you desire the classic crimped edge, a fluted pastry wheel is ideal. A sharp knife or pizza cutter will also work effectively.
- Lightly flour a spatula and carefully transfer the cut cracker squares to the prepared baking sheets, ensuring they are at least ½-inch apart to allow for slight expansion during baking.
- To create the iconic Cheez-It look, use a skewer or a chopstick (a toothpick is too small) to gently press a hole approximately three-quarters of the way through the center of each cracker.
- Place one tray of crackers into the preheated oven and bake for 14 to 15 minutes. The crackers should appear set on top but should not begin to brown. Due to their thinness, these crackers can burn very quickly if overbaked, so monitor them closely. Remove from the oven promptly.
- Allow the baked crackers to cool completely on the baking sheet before transferring them to an airtight, food-safe container for storage. This cooling process is essential for them to crisp up fully.
Notes
- Ensure all labels of ingredients are checked for gluten-free certification. “Mama says, ‘Check all of your labels!'”
- To Store: Keep these crackers in an airtight container at room temperature for 3-4 days to maintain their freshness and crispness.
Nutrition
Calories: 15 kcal
Carbohydrates: 1 g
Protein: 1 g
Fat: 1 g
Saturated Fat: 1 g
Polyunsaturated Fat: 0.04 g
Monounsaturated Fat: 0.2 g
Trans Fat: 0.02 g
Cholesterol: 3 mg
Sodium: 28 mg
Potassium: 2 mg
Fiber: 0.1 g
Sugar: 0.04 g
Vitamin A: 31 IU
Calcium: 14 mg
Iron: 0.04 mg
Nutrition information is automatically calculated, so should only be used as an approximation.
Additional Info
Are Traditional Cheez-Its Gluten-Free? Understanding the Difference
A common question among those with gluten sensitivities or Celiac disease is whether traditional Cheez-Its are safe to eat. The straightforward answer is no, classic Cheez-Its are not gluten-free. Their primary ingredient is enriched wheat flour, which contains gluten, making them unsuitable for anyone avoiding this protein. This is precisely why developing a homemade gluten-free Cheez-Its recipe like this one is so valuable!
While some brands may offer gluten-free cracker alternatives, they often fall short in replicating the distinctive flavor and texture of the original. Furthermore, store-bought options can be more expensive and may contain additives or preservatives you’d rather avoid. Making your own at home not only ensures complete control over ingredients but also offers the unparalleled satisfaction of freshly baked goodness. It’s often much easier and more rewarding than hunting down a suitable store-bought version, and the taste is undeniably superior. Embrace the joy of crafting your own snacks!
The Role of a Blender/Food Processor in Perfect Cracker Dough
While it might be tempting to mix the dough by hand, using a high-powered blender or food processor is strongly recommended for this recipe, as it yields significantly better results. The reason lies in the way these appliances efficiently break down and distribute the ingredients.
A blender or food processor excels at finely grating the sharp cheddar cheese and ensuring it’s evenly incorporated throughout the flour and butter mixture. This even distribution is key to every cracker having that consistent, intense cheesy flavor. Furthermore, the rapid processing action helps to keep the ingredients cold, which, as we discussed, is crucial for developing a flaky texture by preventing the butter from melting prematurely. The quick pulses also help to bring the dough together smoothly and efficiently, forming a uniform consistency without overworking it.
If you absolutely do not have a blender or food processor, you could attempt to combine the ingredients using a hand-held pastry blender or by cutting the butter into the flour with two knives. However, be aware that the cheese may not be as finely grated or evenly distributed, and it will require more effort to keep the butter cold. While still possible, the resulting crackers might not achieve the same delicate texture and uniform flavor as those made with mechanical assistance.
How to Make Gluten-Free Cheez-Its Step-by-Step
Follow these detailed steps, complete with visual guidance, to create your perfect batch of gluten-free Cheez-Its.
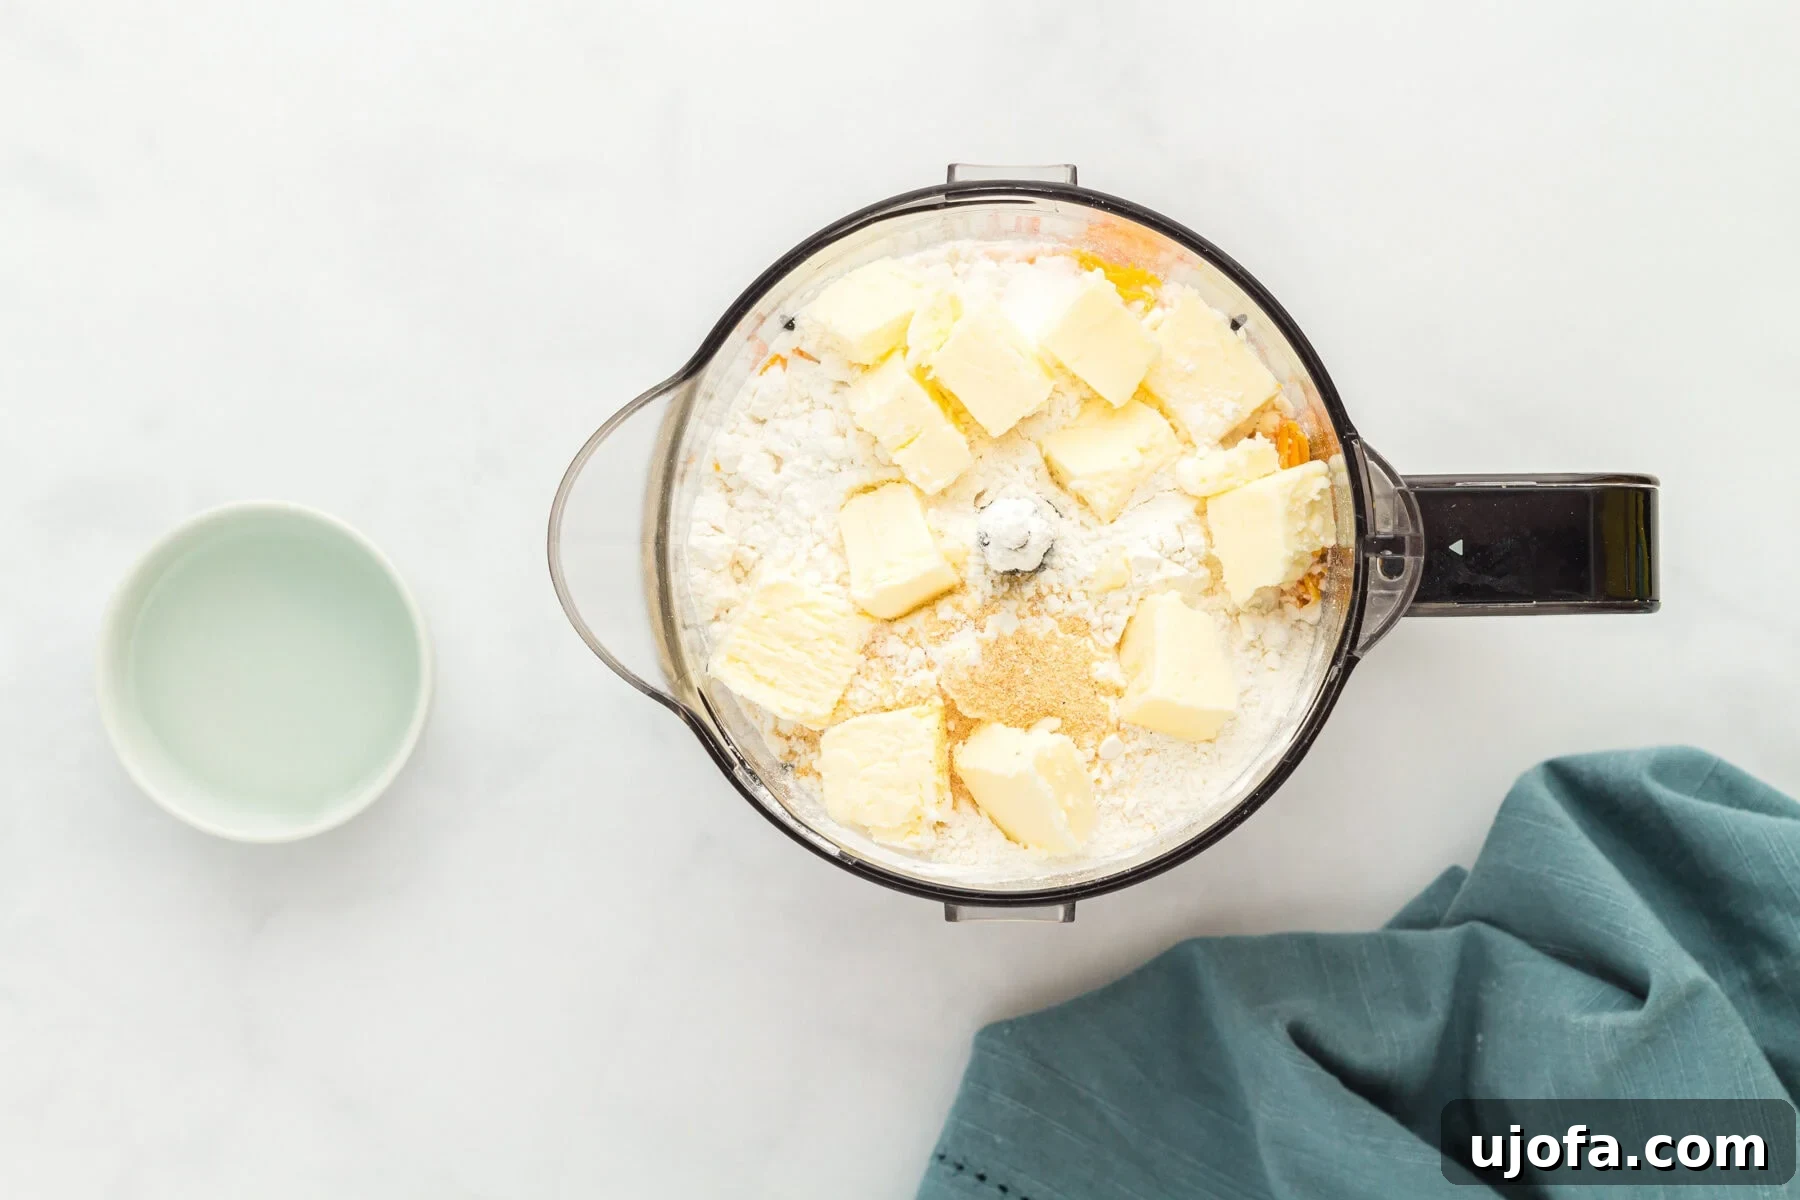
Begin by preparing two large baking sheets, lining them with parchment paper. Set them aside for later. Into the bowl of a high-powered blender or food processor, add 8 ounces of freshly shredded sharp cheddar cheese, 1 cup (140 grams) of your chosen gluten-free flour (Cup4Cup Multipurpose Flour is recommended), ¼ cup (57 grams) of cold, cubed unsalted butter, 1 teaspoon of xanthan gum (if your flour blend doesn’t already contain it), ¾ teaspoon of salt, and ½ teaspoon of garlic powder. This initial combination will form the flavor base of your crackers.
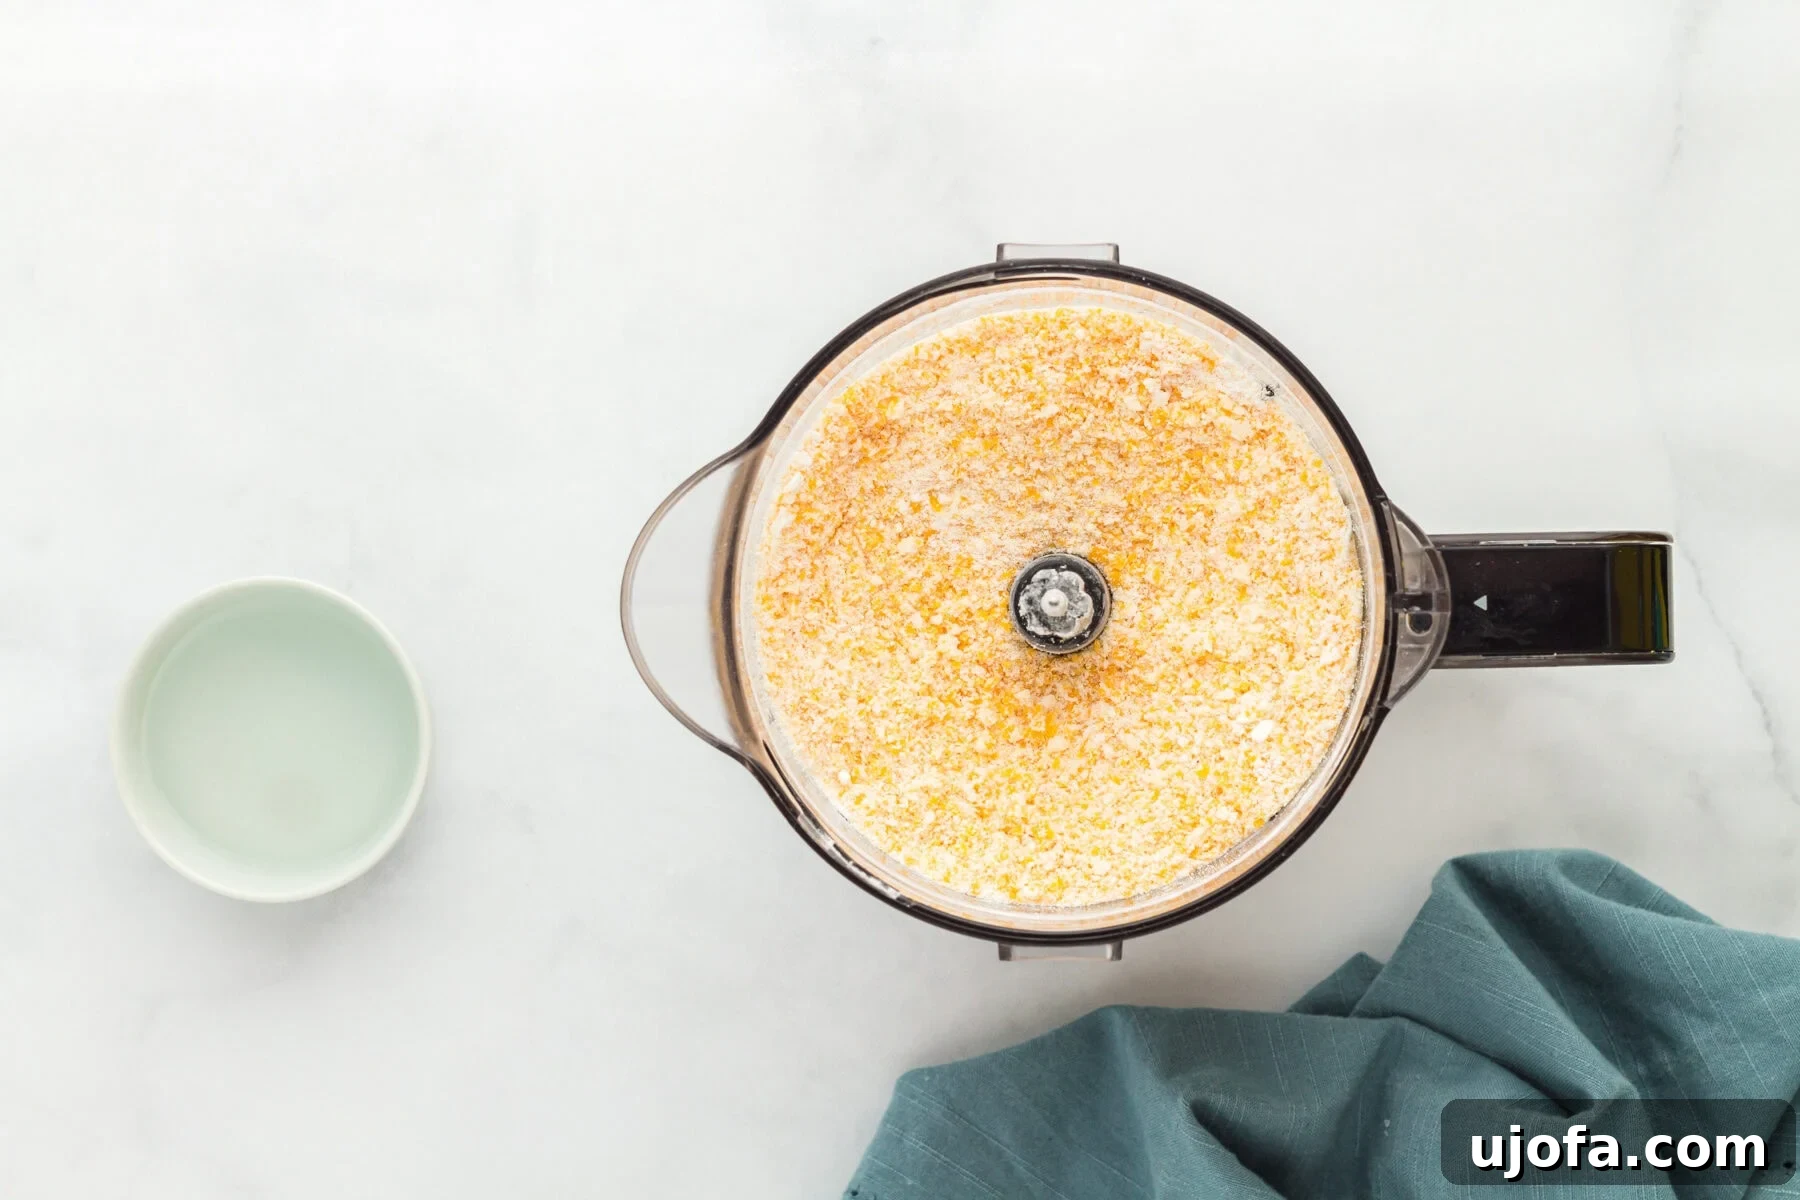
Pulse the ingredients in the blender or food processor for about 30 seconds. The mixture should transform into a dry crumble, with the cheese finely broken down and evenly distributed, resembling coarse breadcrumbs. Ensure there are no large chunks of butter remaining; it should be well integrated into the flour mixture.
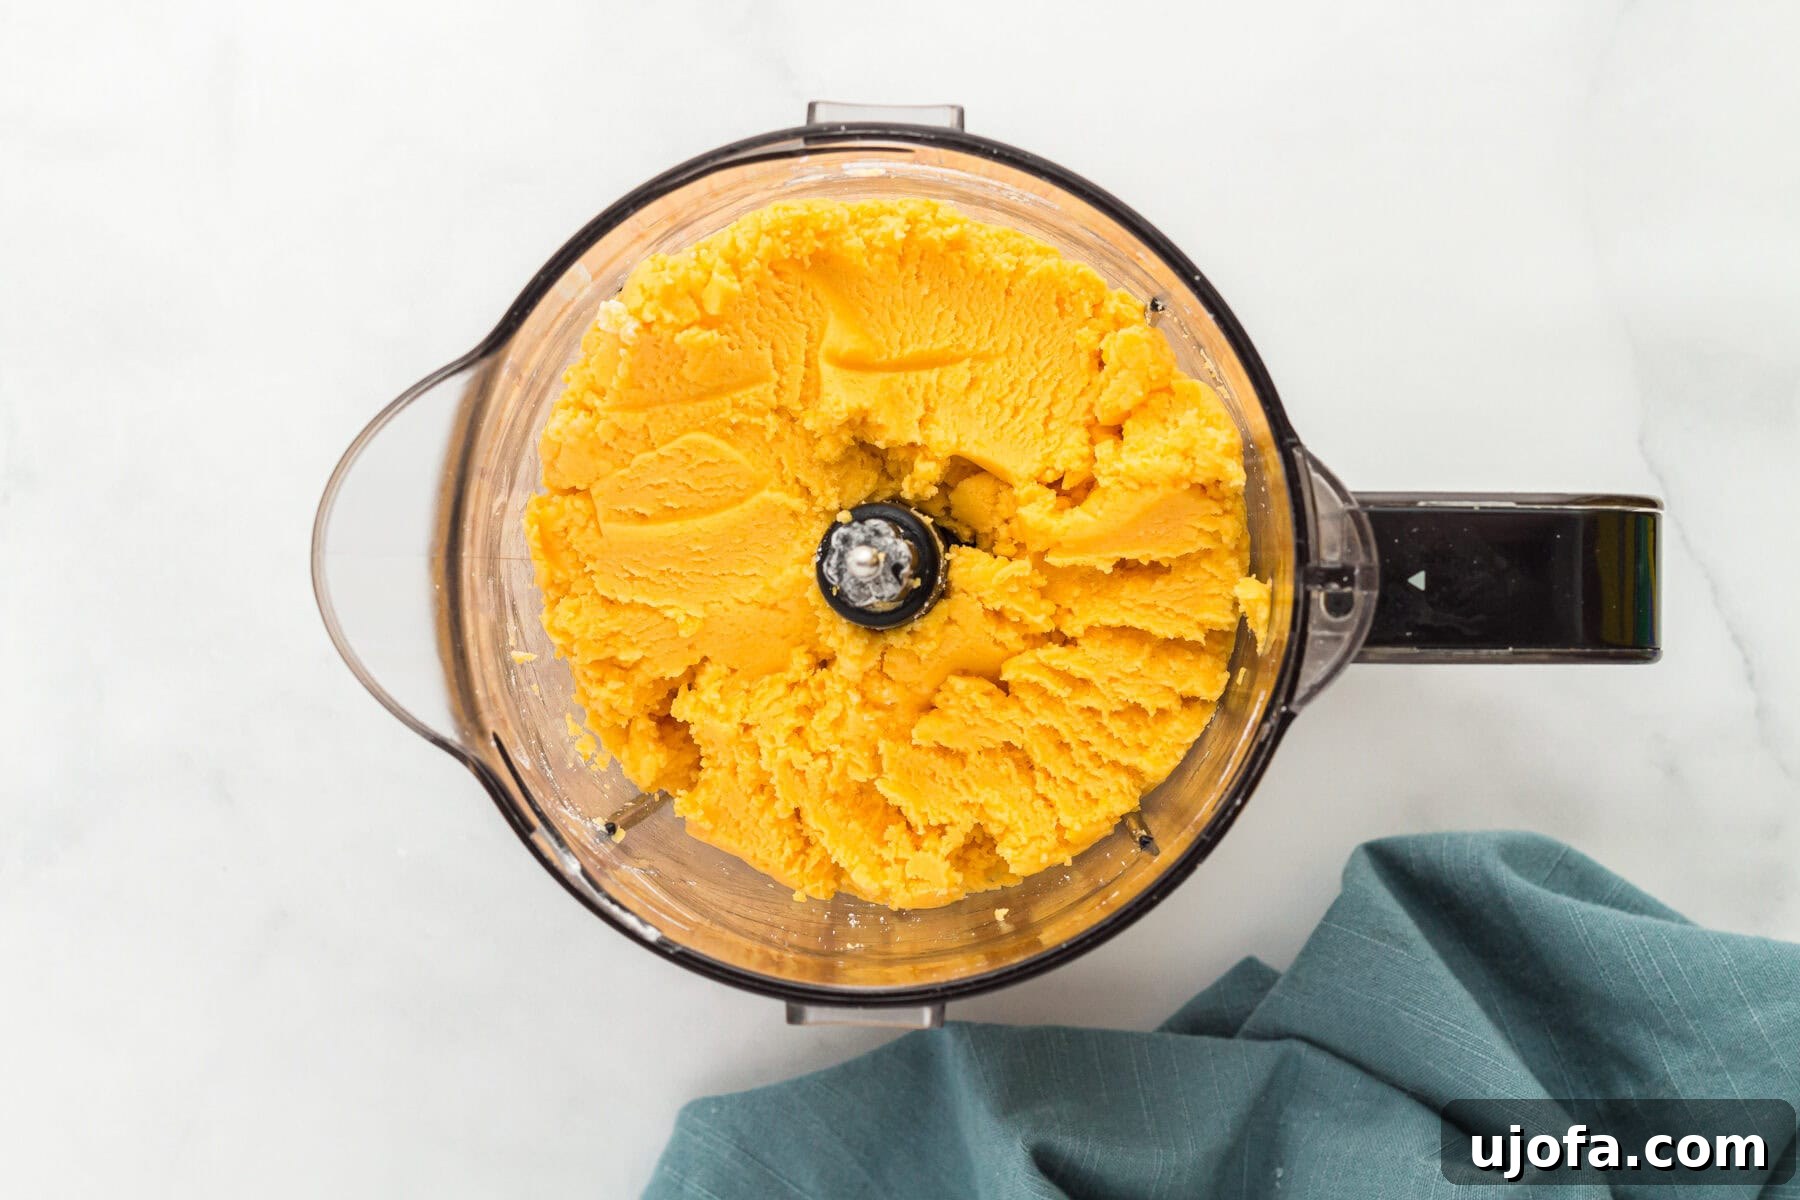
Now, add 2 tablespoons of ice-cold water to the dry crumble mixture. Blend for another 30 seconds. The mixture should begin to come together and form a cohesive dough. It should be easy to work with—not overly sticky when touched and not so dry that it crumbles apart. If, after 30 seconds, the dough still feels too dry, add the remaining 1 tablespoon of ice-cold water, one teaspoon at a time, pulsing briefly after each addition until the dough reaches the ideal consistency. The key is to add just enough water for the dough to hold together.
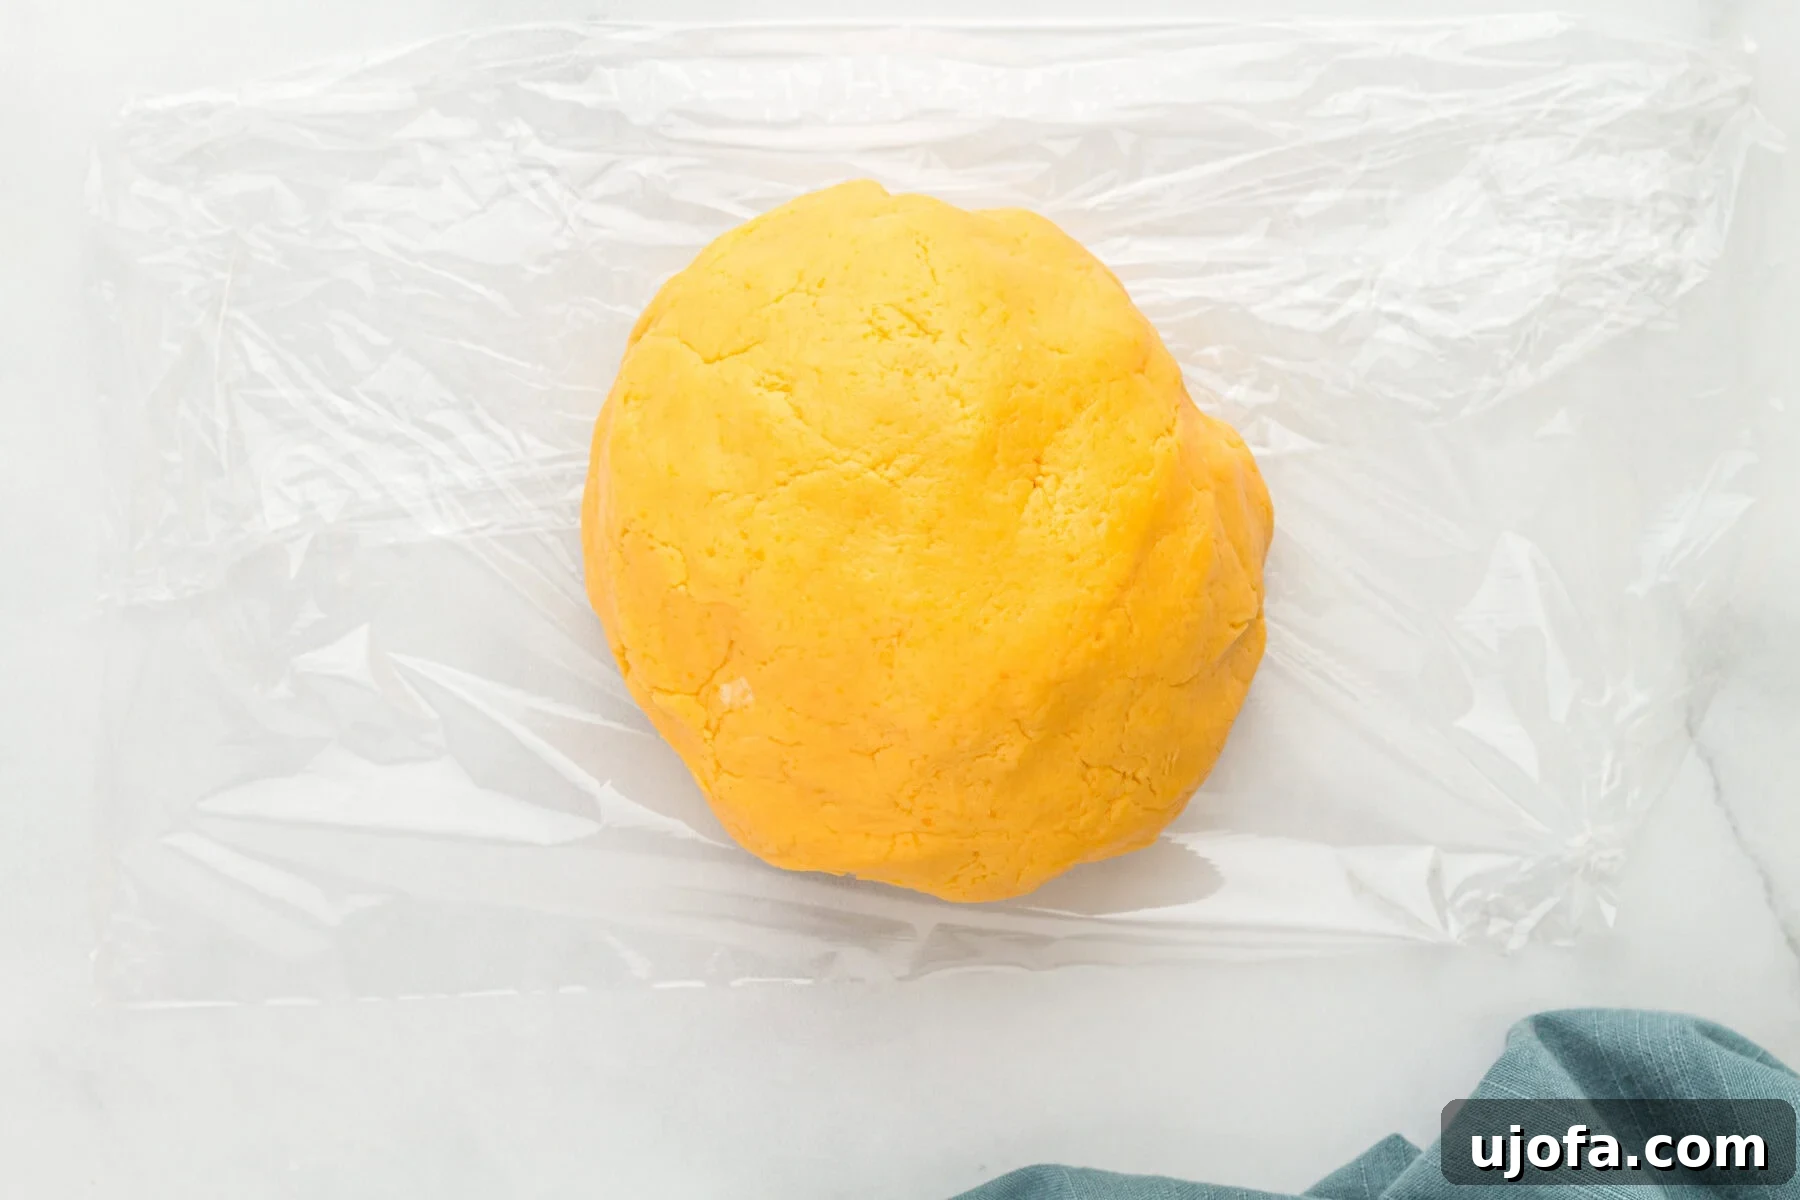
Once your dough is perfectly formed, transfer it from the blender to a clean surface and use your hands to gently roll it into a neat ball. This step helps to consolidate the dough and prepares it for chilling.
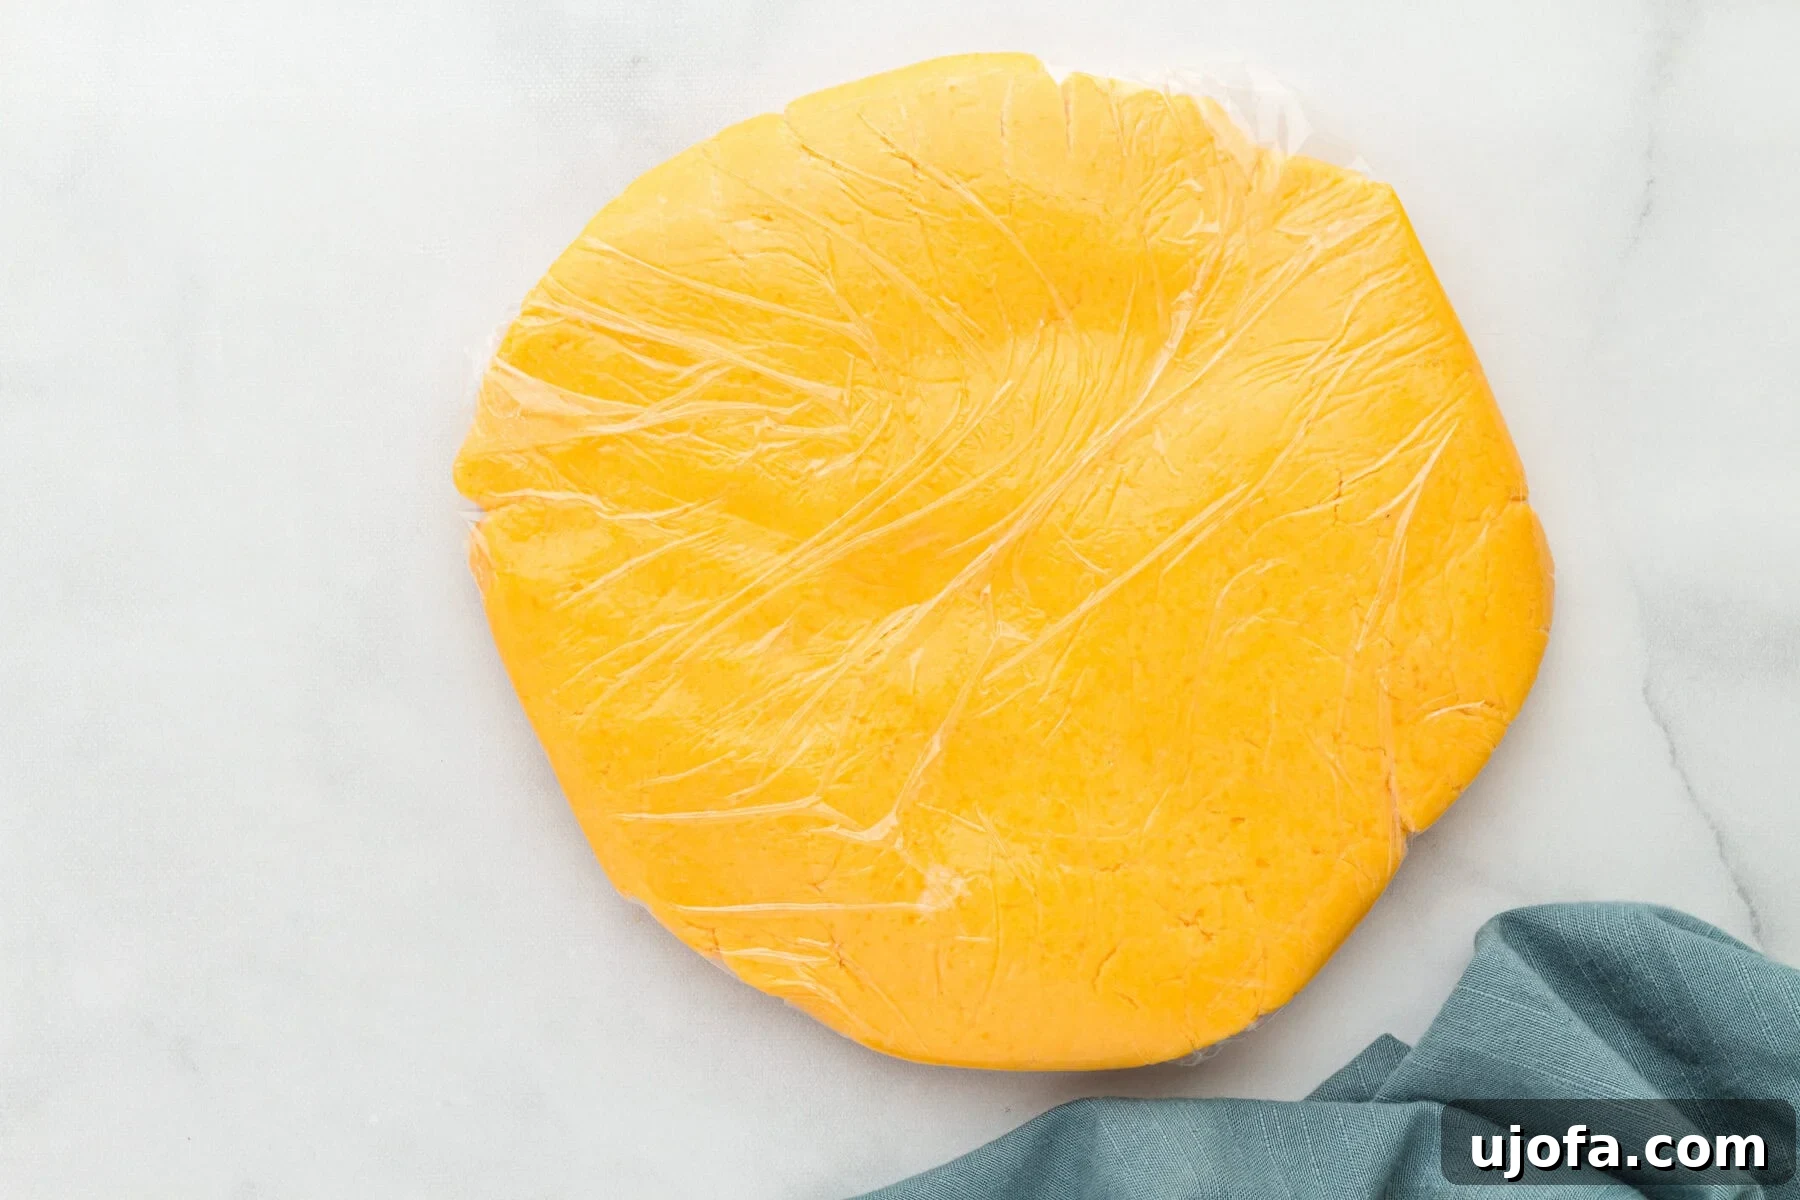
Flatten the dough ball into a disk, aiming for about ½ an inch to 1 inch in thickness. Then, wrap the flattened dough disk securely in food-safe plastic wrap. Place it in the refrigerator for approximately 20 minutes to chill. This chilling period is crucial as it allows the butter to firm up again, making the dough easier to roll and contributing to the desired flaky texture. While the dough is chilling, preheat your oven to 350°F (177°C), ensuring it’s ready when your dough is.
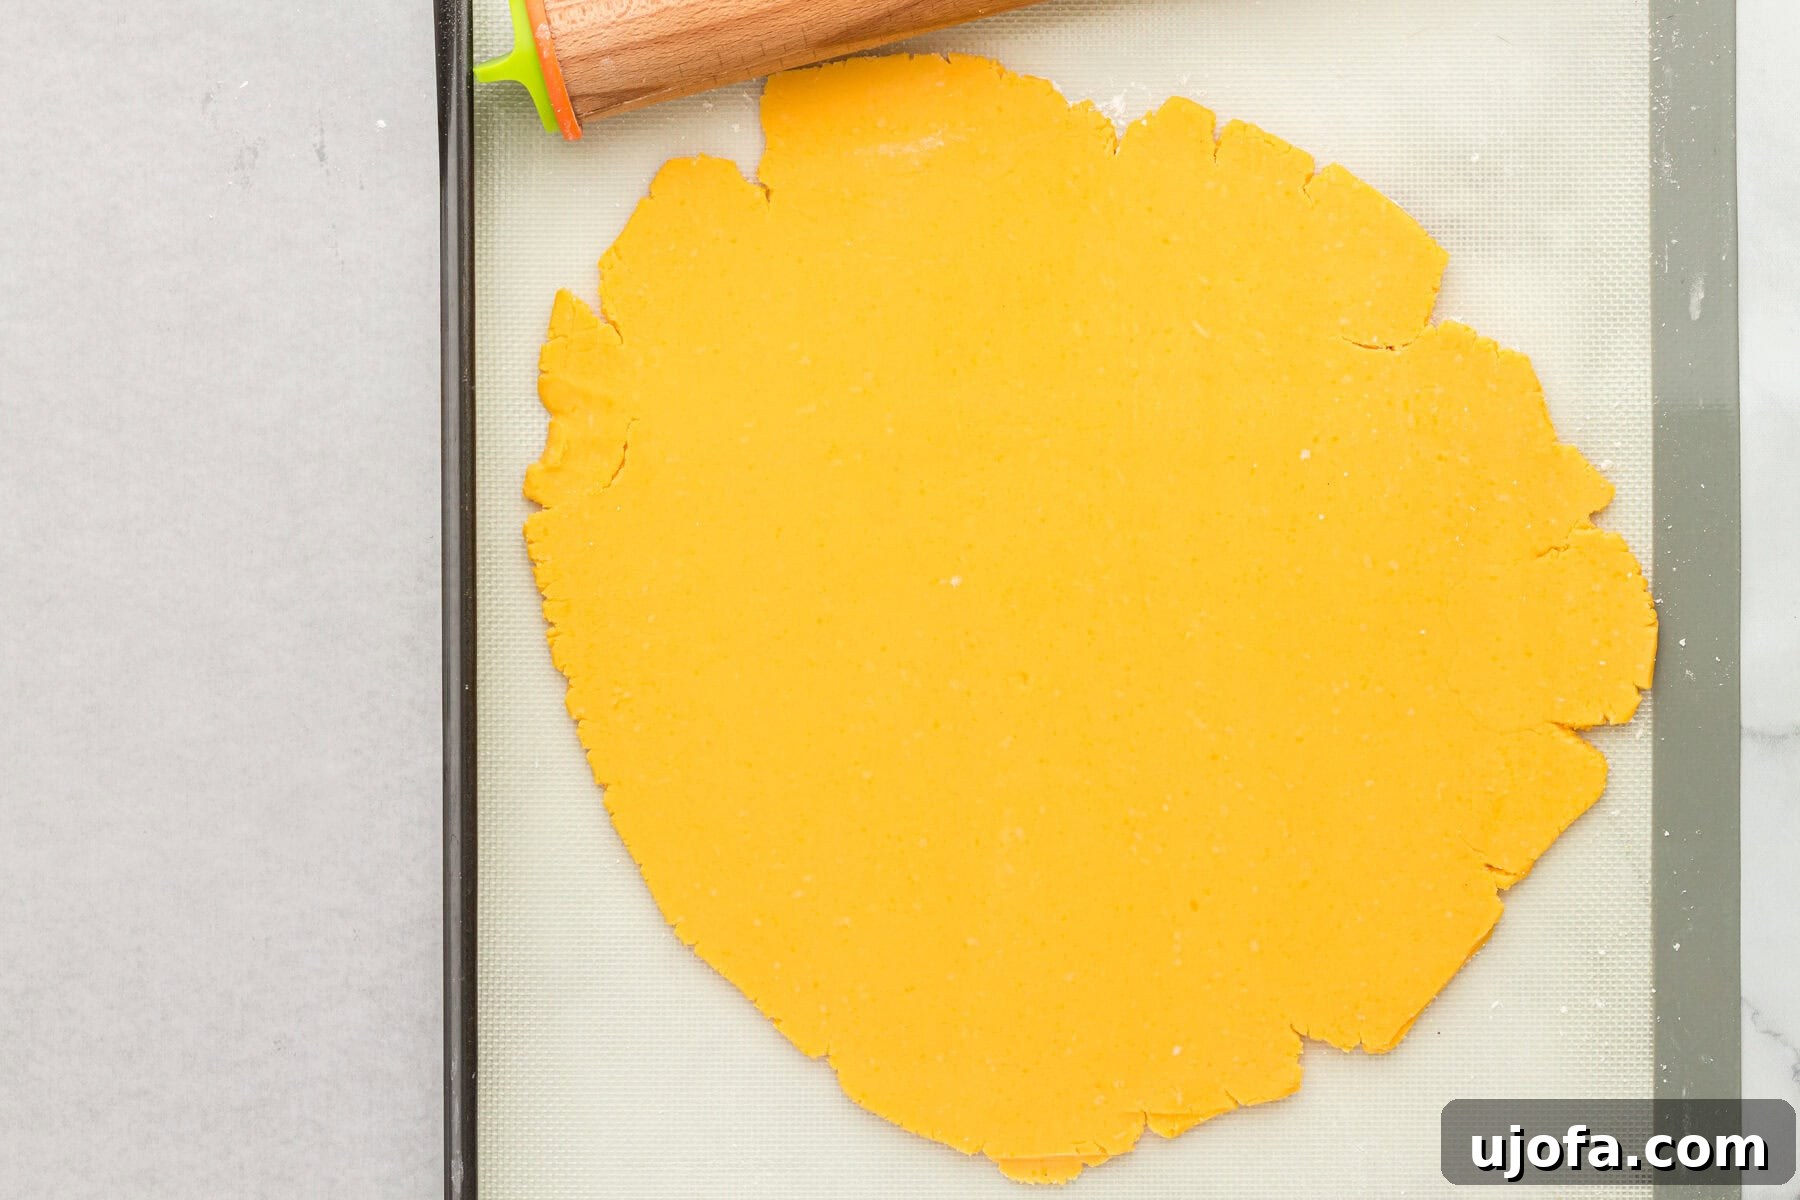
Once chilled, remove the dough from the fridge and unwrap it. Lightly dust your work surface (a silicone baking mat is highly recommended for easy handling) and your rolling pin with a small amount of gluten-free flour. This prevents sticking. Roll out the dough evenly until it reaches a uniform thickness of ⅛ inch to ¼ inch. Remember, a thinner dough will yield wonderfully crispy crackers, while a slightly thicker dough will result in a chewier texture, so adjust to your preference.
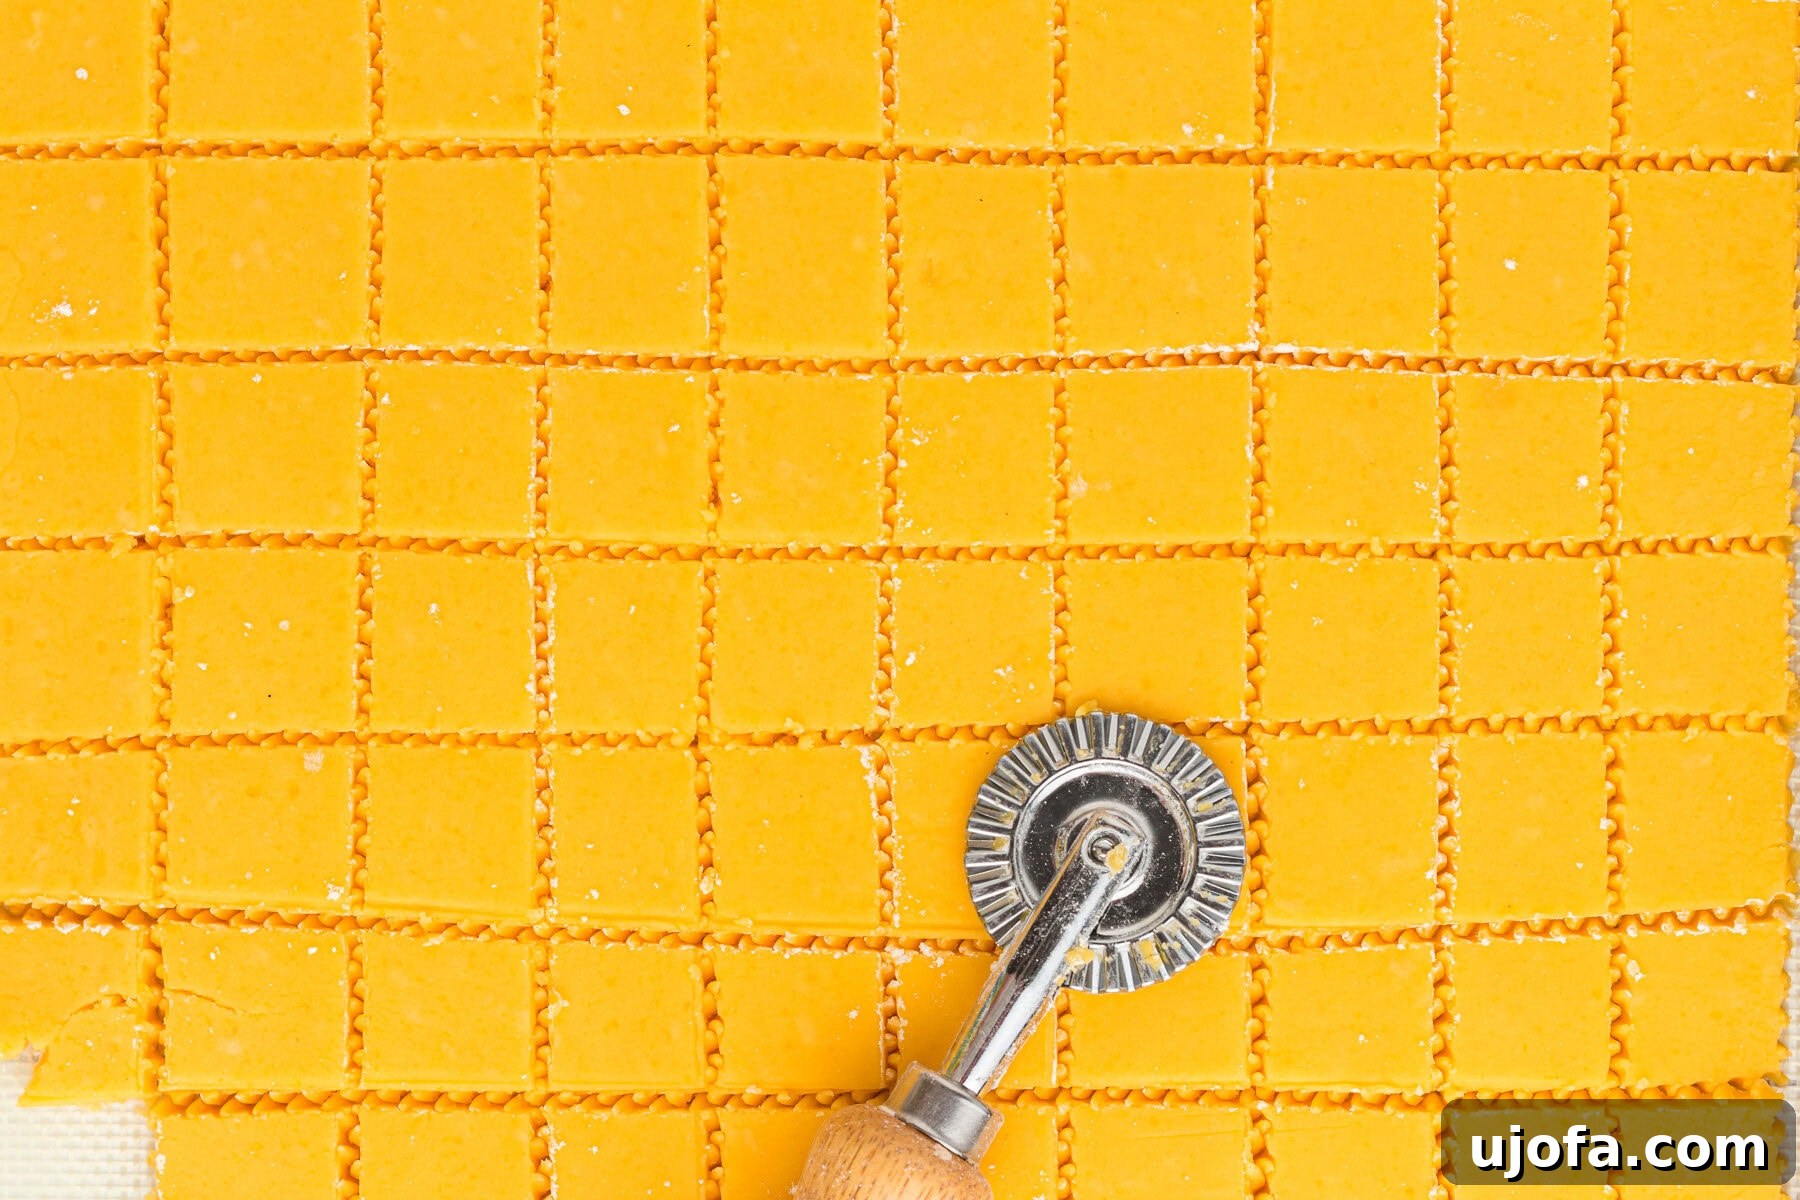
Now it’s time to give your crackers their classic shape! Use a fluted pastry wheel to cut the rolled-out dough into precise 1-inch squares. The fluted edge gives them that recognizable crimped border, just like original Cheez-Its. If you don’t have a fluted pastry wheel, a standard pizza cutter or a sharp knife will work perfectly well to create neat squares.
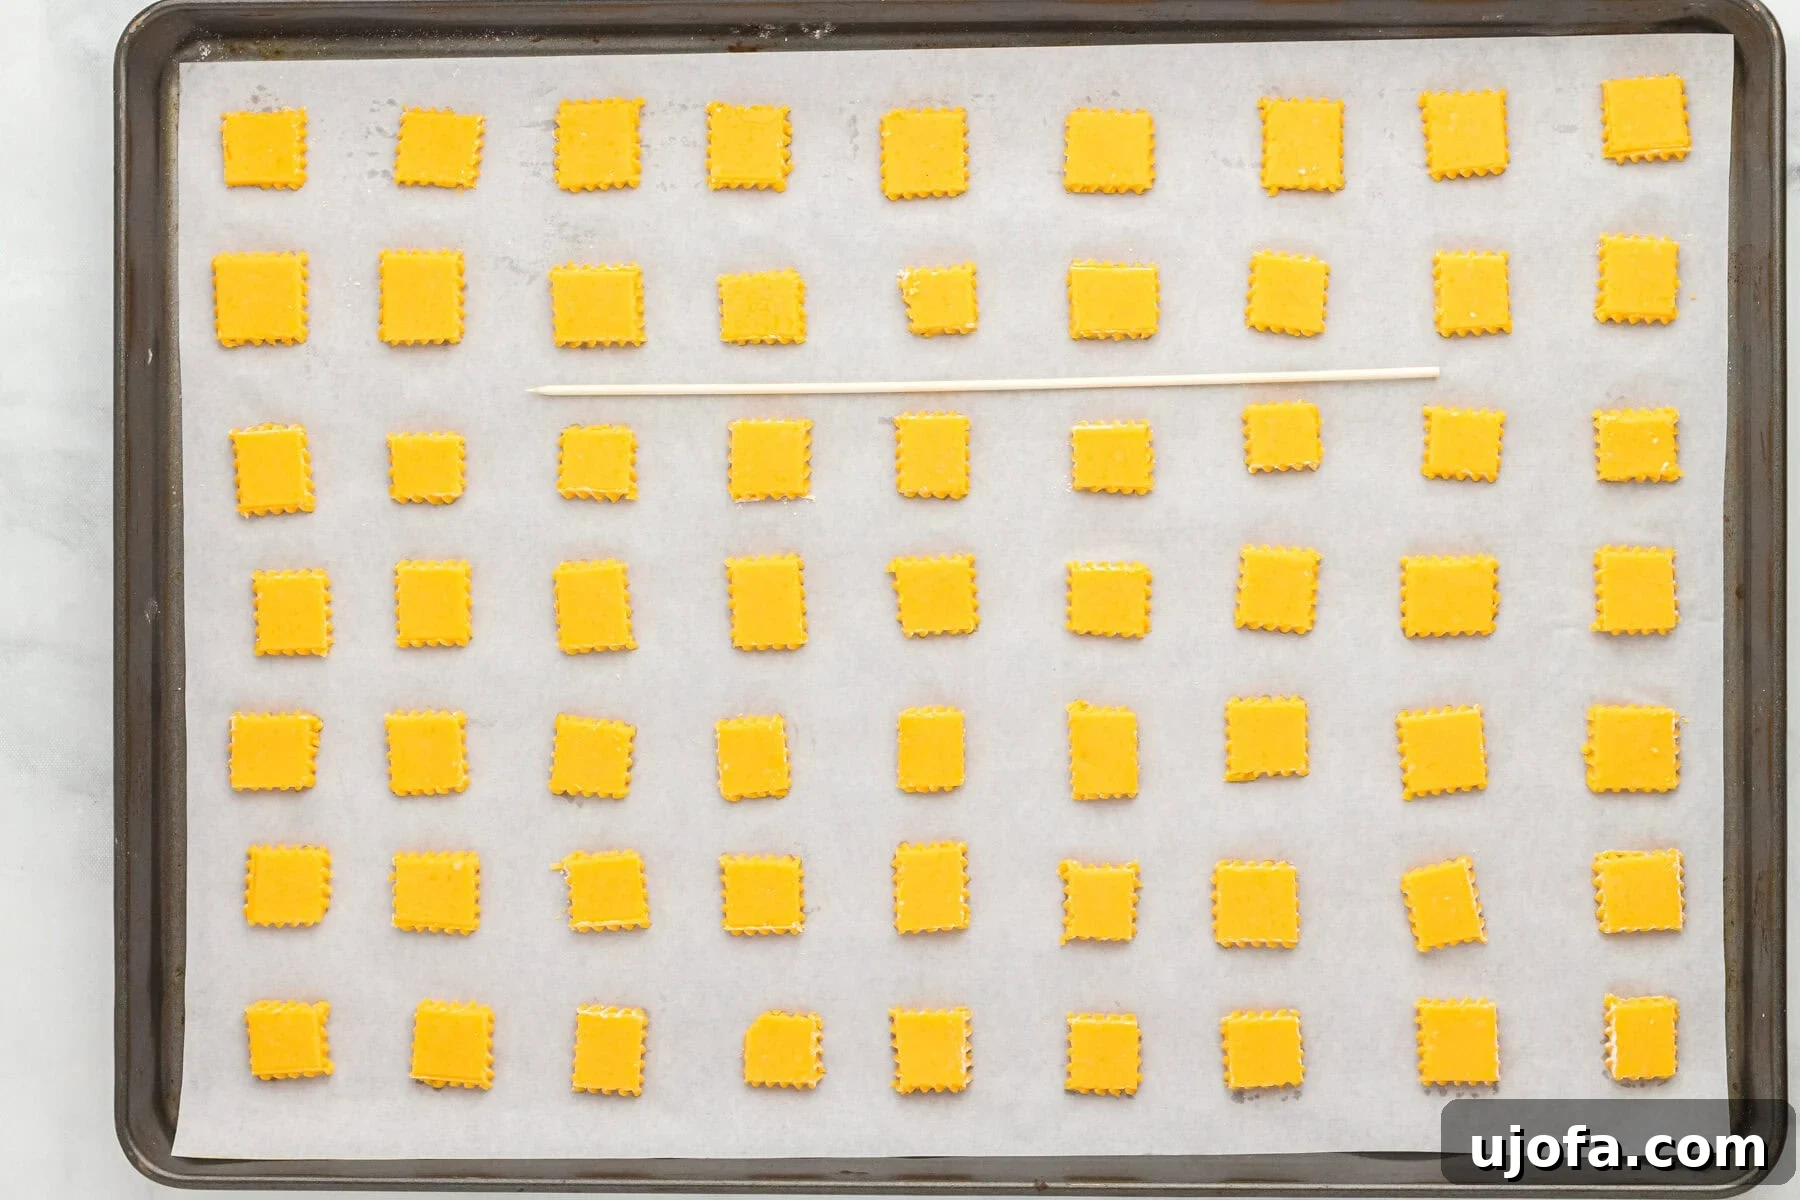
To transfer your delicate cracker squares to the baking sheet without damage, lightly sprinkle some gluten-free flour over a spatula. Carefully lift each cutout cracker and arrange them onto your parchment-lined baking sheets. The flour on the spatula will act as a non-stick agent. Arrange the crackers with about ½ inch of space between each one. This spacing is important because the gluten-free Cheez-Its will expand slightly during baking, and adequate room ensures they bake evenly and crisp up properly without sticking together.
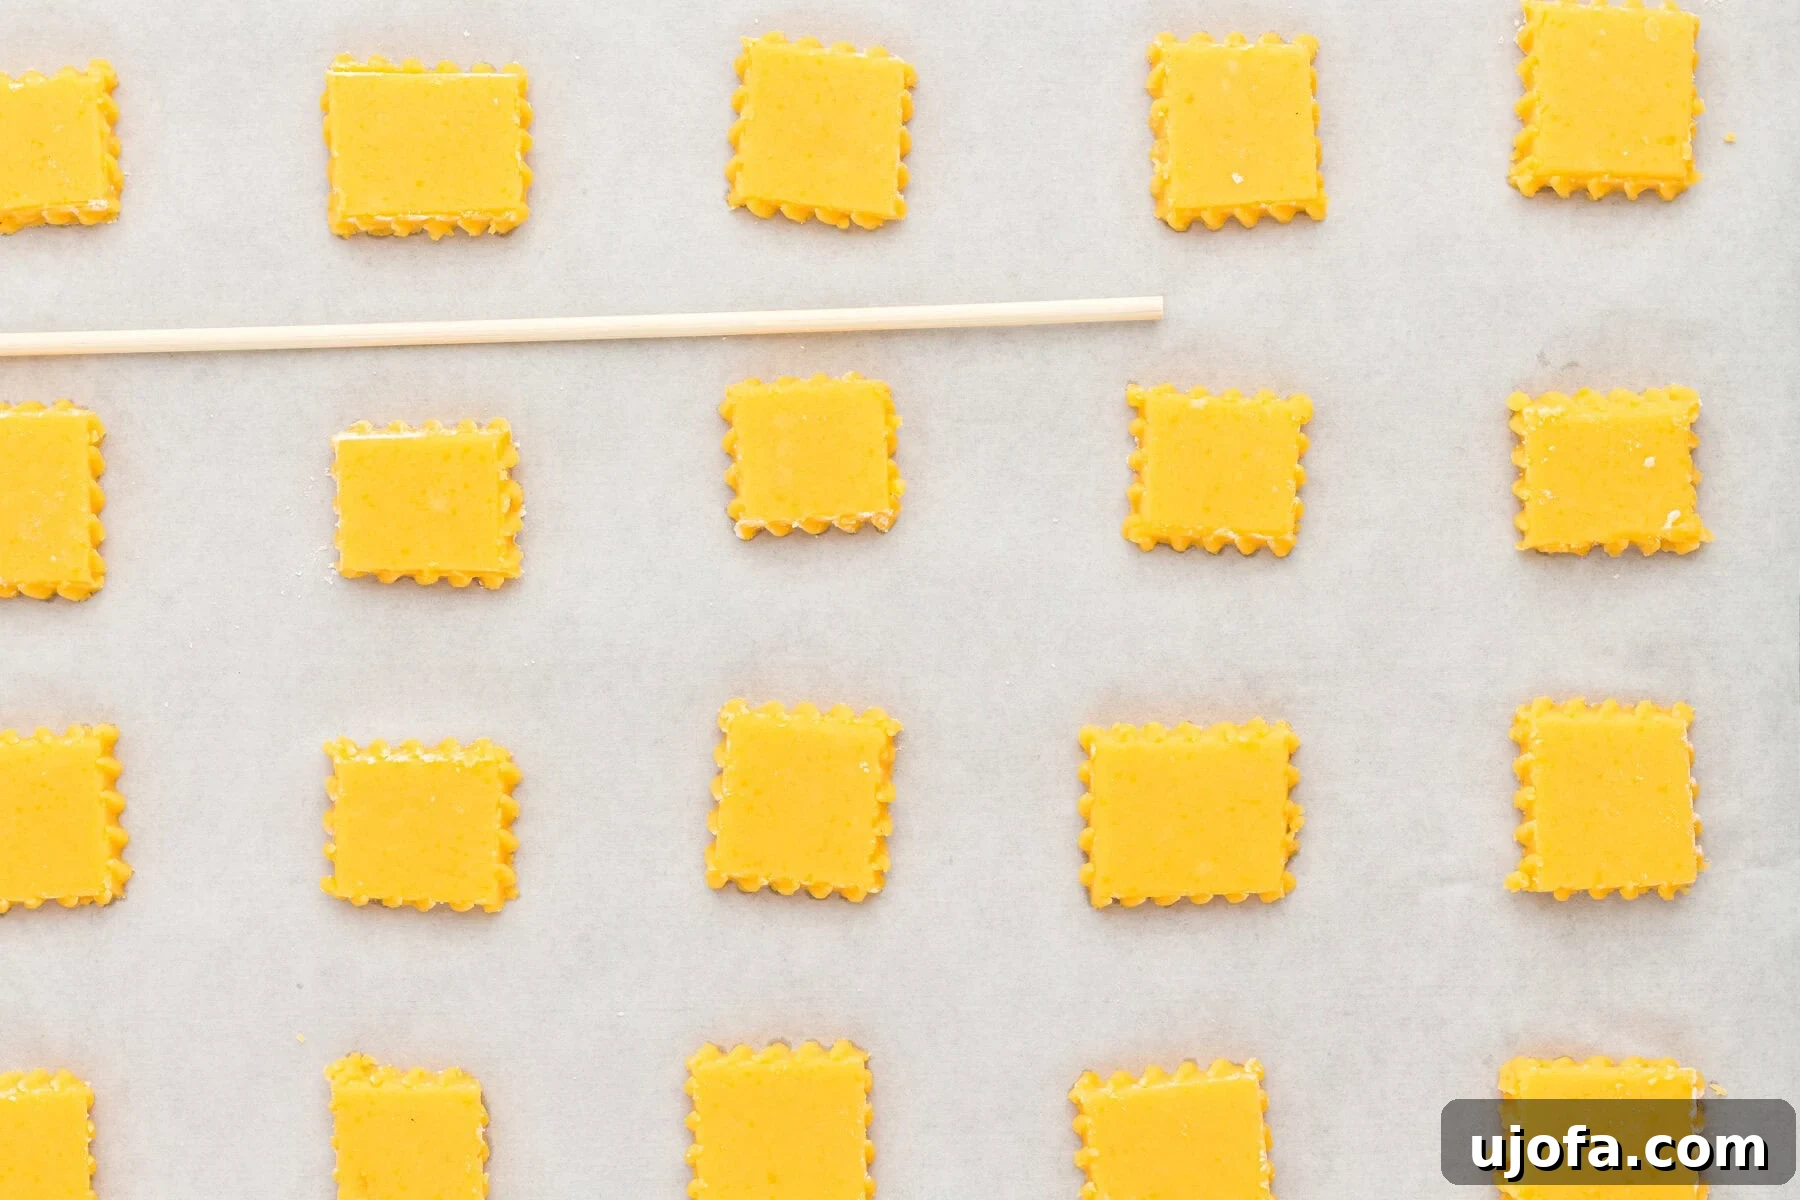
For that authentic Cheez-It appearance and to promote even baking, take a chopstick or a skewer and gently press a hole into the middle of each cracker. Make sure to press about ¾ of the way through the dough. Avoid using a standard toothpick for this step, as the hole created would be too small and likely close up during baking, losing the iconic look and potentially affecting the cracker’s texture.
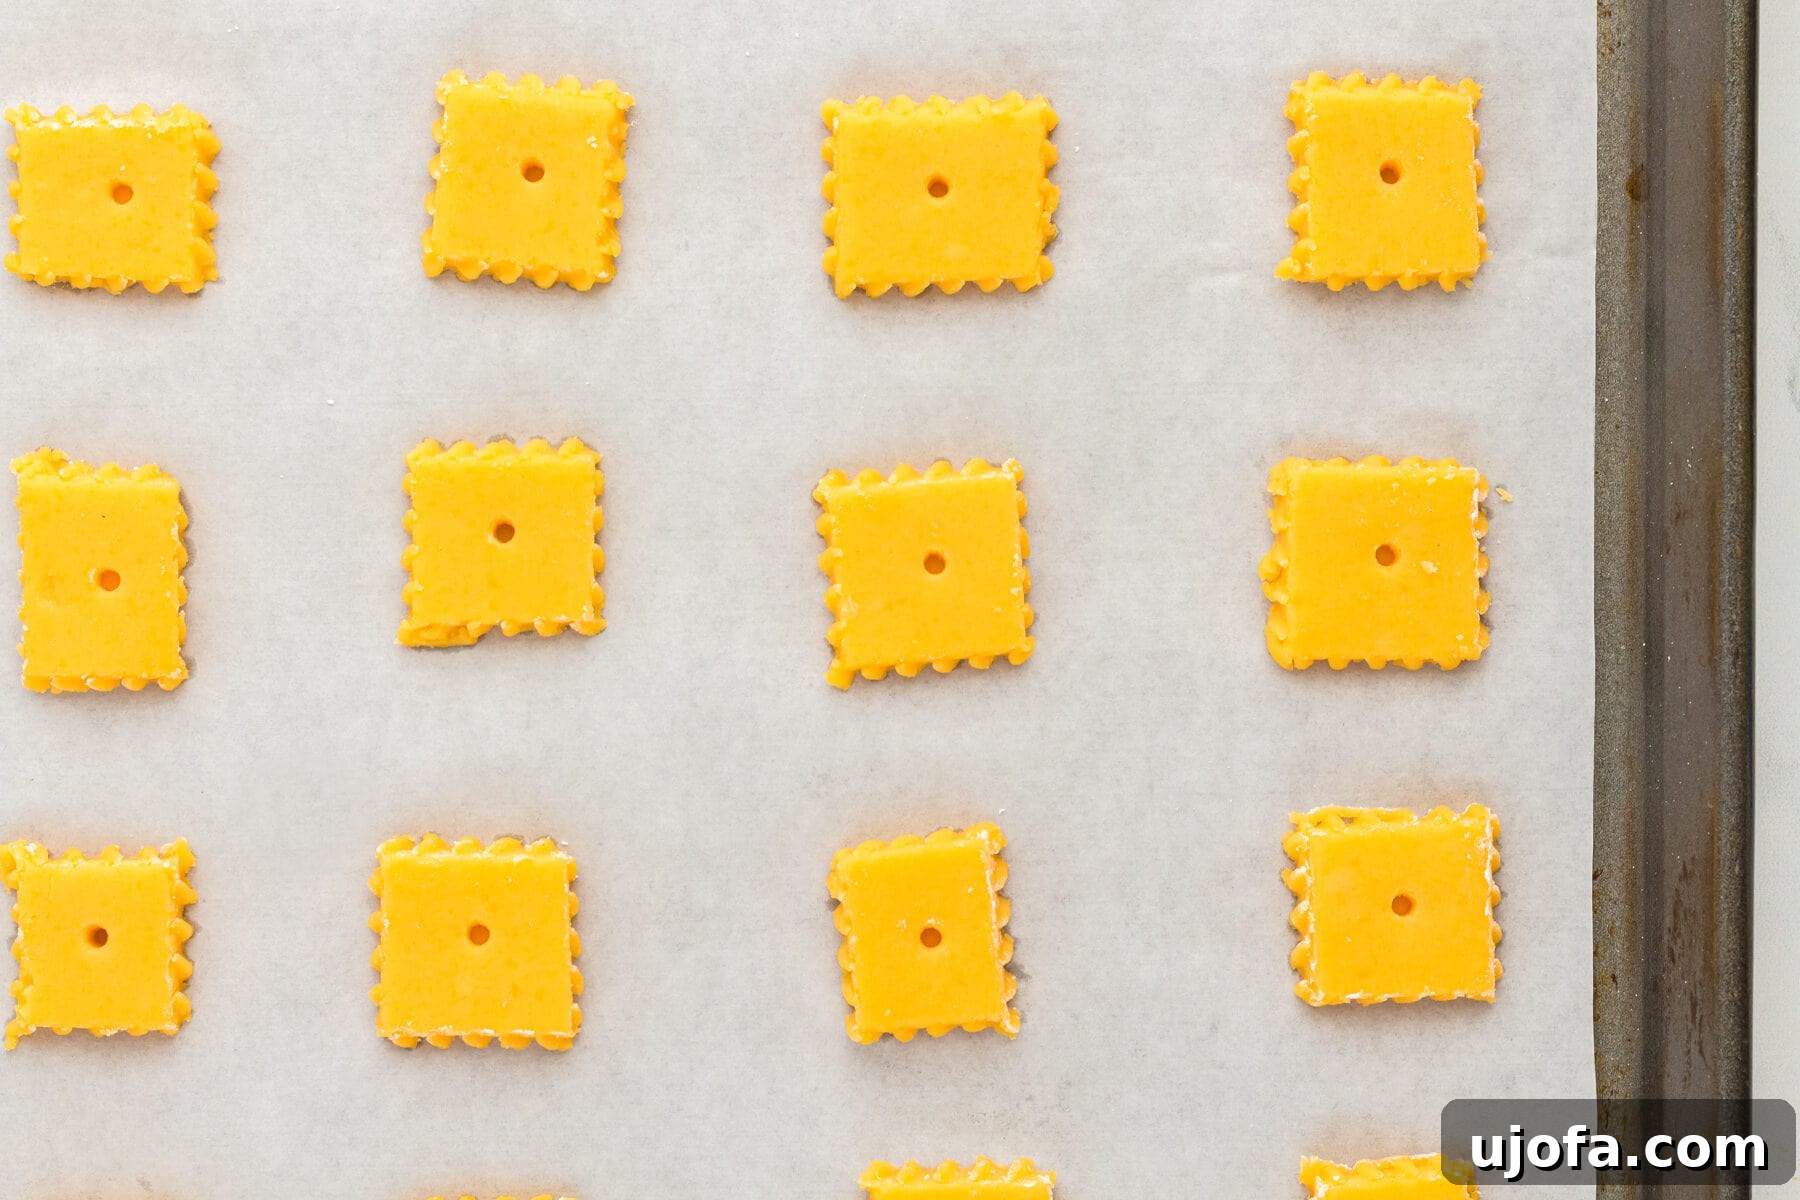
Now, carefully place one tray of prepared crackers into your preheated oven. Bake for approximately 14 to 15 minutes. It is crucial to monitor them closely during this time. The crackers should look set and firm on top but should not have started to brown. Because these crackers are so thin, they can transition from perfectly baked to burnt very quickly. Erring on the side of slightly undercooked is better than overcooked, as they will continue to crisp up as they cool. Remove the tray from the oven promptly at the 14-15 minute mark or when they are just set. Let the crackers cool completely on the baking sheet before transferring them to an airtight container. Once cool and crispy, they’re ready to be enjoyed!
Creative Serving Suggestions and Flavor Variations
These homemade gluten-free Cheez-Its are incredibly versatile and can be enjoyed in countless ways beyond just snacking straight from the bowl. Their savory, cheesy profile makes them a fantastic accompaniment to a variety of meals and dips.
For a delightful kid-friendly lunch, serve these crispy crackers alongside a homemade gluten-free uncrustable. Add a handful of colorful baby carrots or some crisp apple slices to round out the meal, ensuring little bellies stay full and happy throughout the afternoon. But why stop there?
Consider pairing your Cheez-Its with a creamy gluten-free spinach artichoke dip or a zesty salsa for an elevated appetizer experience. They are also perfect crumbled over a bowl of warm tomato soup or a fresh garden salad, adding a satisfying crunch and burst of cheesy flavor. For an elegant touch, arrange them on a gluten-free charcuterie board with cured meats, olives, and fresh fruit.
Feeling adventurous? Experiment with flavor variations! Before baking, you could sprinkle a tiny pinch of cayenne pepper for a spicy kick, a dash of smoked paprika for depth, or some dried Italian herbs for an aromatic twist. You could even try incorporating different types of hard cheese, like Parmesan or Asiago, in combination with cheddar to create unique flavor profiles. The possibilities are endless when you’re crafting homemade snacks!
Storage Tips for Maximum Freshness
To ensure your delicious gluten-free Cheez-Its retain their optimal crispness and flavor, proper storage is key. Always allow the crackers to cool completely to room temperature before transferring them. Once cool, place them in an airtight, food-safe sealed container. Stored this way, your homemade crackers will remain fresh and wonderfully crispy for 3-4 days at room temperature. Avoid refrigerating them, as the moisture can make them soft.
Discover More Delicious Gluten-Free Snacks
If you’ve enjoyed making these gluten-free Cheez-Its, you’ll love exploring other allergy-friendly snack recipes. Here are some more fantastic options to try:
- Gluten-Free Onion Rings
- Gluten-Free Soft Pretzels
- Gluten-Free Mozzarella Sticks
- Gluten-Free Granola Bars
- Gluten-Free Mini Corn Dog Bites
- Gluten-Free Chex Mix
- Gluten-Free Rice Krispies Treats recipe