
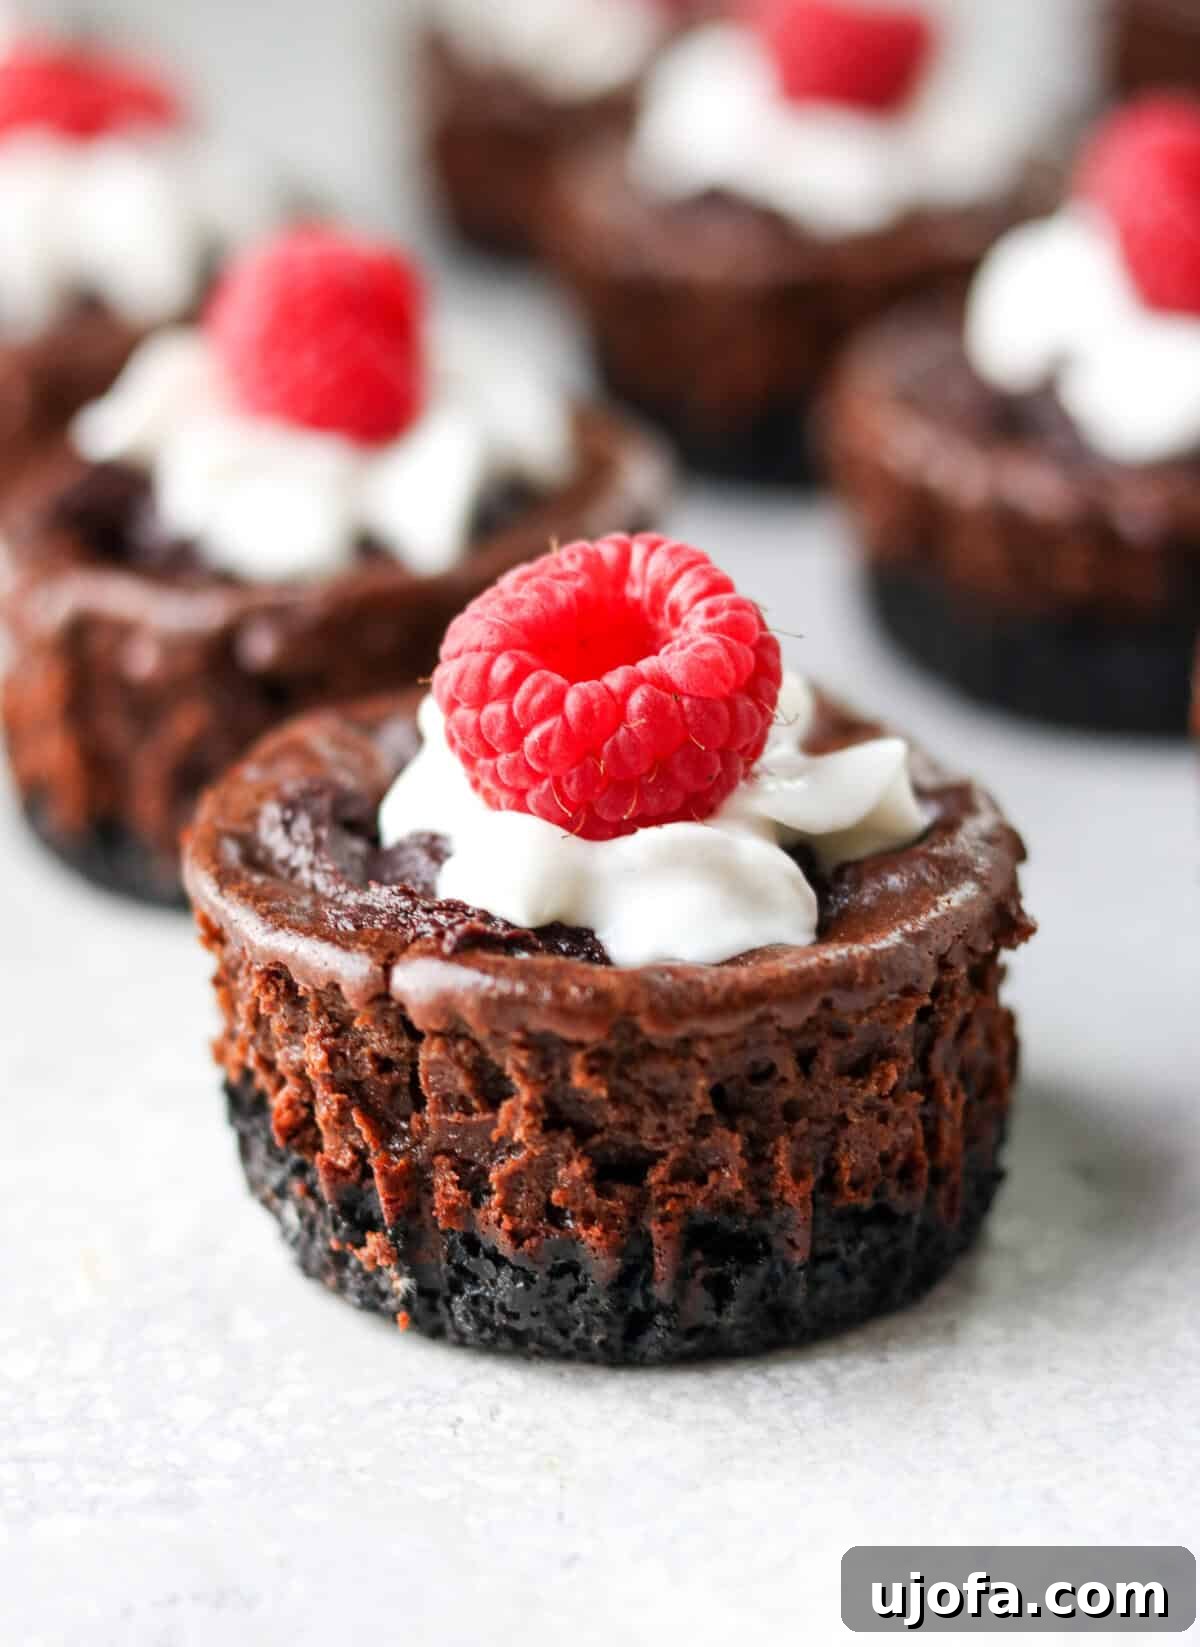
Indulge in these rich, decadent mini chocolate cheesecakes featuring a delightful gluten-free Oreo crust and a smooth, luscious chocolate ganache topping. This **lighter, healthier, and protein-packed cheesecake recipe** delivers all the delicious flavor of a classic cheesecake, but innovatively uses cottage cheese instead of traditional cream cheese. The result is a dessert that’s not only **packed with protein** but also incredibly delicious, making it the perfect gluten-free treat that even your kids will adore!
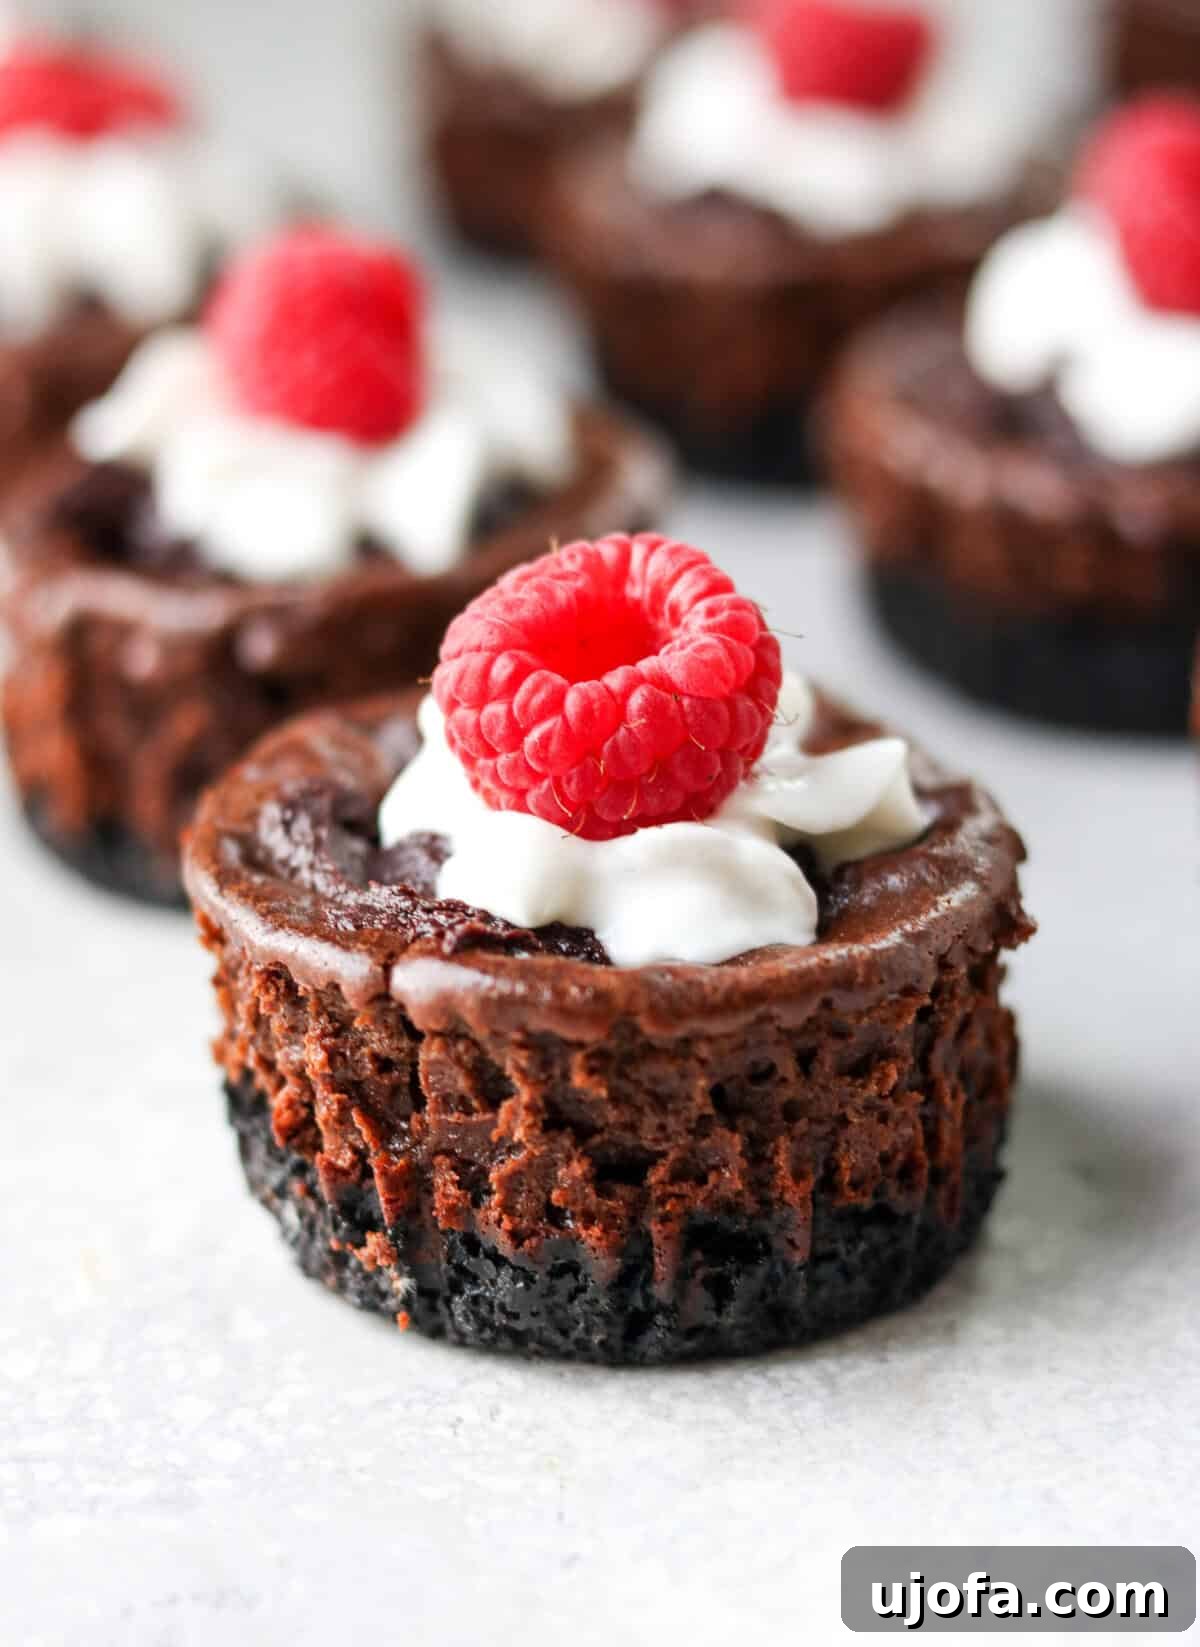
High-Protein Chocolate Cheesecake: Your New Favorite Healthy Dessert
In the world of health-conscious eating, finding desserts that satisfy your sweet tooth without derailing your nutritional goals can be a challenge. But what if you could enjoy a rich, creamy, and utterly delicious chocolate cheesecake that also provides a significant protein boost? Welcome to the revolutionary world of high-protein desserts! This recipe transforms the beloved classic into a healthier, more nutrient-dense treat, perfect for anyone looking to enjoy their sweets guilt-free.
We’ve proven that protein powder isn’t just for post-workout smoothies. Here on our site, we’re passionate about discovering innovative ways to incorporate protein powder into genuinely tasty and wholesome foods. From our Vegan Baked Oats to our delightful Protein Mug Cake and fluffy Protein Pancakes, we’re all about creating protein-packed dishes that are both amazing in flavor and incredibly satisfying. The next exciting addition to our repertoire? This incredible protein cheesecake!
This chocolate protein cheesecake recipe features individual, decadent mini cheesecakes, bursting with all the familiar flavors of a classic cheesecake, but with a clever, healthier twist. Complete with a crunchy gluten-free Oreo crust and an optional, silky chocolate ganache topping, these tiny morsels are a gift that keeps on giving. Not only are they an impressive dessert, but they also serve as a fantastic, nutrient-rich snack to keep you feeling full and energized.
What makes them even better? They are entirely gluten-free, surprisingly kid-friendly, and boast a high-protein content, making them a dessert you can truly feel good about. With minimal active prep and bake time – ready in just about 30 minutes, followed by a crucial chilling period for maximum deliciousness – these cheesecakes are as convenient as they are scrumptious. Let’s get baking and transform your dessert experience!
Why You’ll Love This Healthy Protein Cheesecake Recipe
This isn’t just another dessert; it’s a smart choice for a balanced lifestyle. Here’s why this protein cheesecake will become a staple in your kitchen:
- **Rich in Protein:** The star ingredient, cottage cheese, combined with protein powder, significantly boosts the protein content, helping you feel fuller for longer and supporting muscle repair and growth.
- **Gluten-Free Perfection:** Using gluten-free sandwich cookies for the crust ensures that those with gluten sensitivities or preferences can enjoy this delightful treat without compromise.
- **Decadent Chocolate Flavor:** Despite being a healthier option, we don’t skimp on flavor. The deep chocolate notes from the crust, filling, and optional ganache make this an intensely satisfying dessert for any chocolate lover.
- **Lighter and Healthier:** By swapping cream cheese for cottage cheese and using coconut sugar, we reduce the fat and refined sugar content without sacrificing taste or texture.
- **Kid-Friendly:** The familiar taste of chocolate and the fun mini size make these cheesecakes a hit with children, offering a nutritious alternative to traditional sweets.
- **Easy to Make:** With simple steps and readily available ingredients, this recipe is accessible for bakers of all skill levels, from beginners to seasoned pros.
- **Perfect for Meal Prep:** These mini cheesecakes are ideal for making ahead of time. Their individual portions make them convenient for grab-and-go snacks or desserts throughout the week.
- **Guilt-Free Indulgence:** Enjoying a delicious dessert doesn’t have to come with a side of guilt. This recipe allows you to indulge wisely, knowing you’re nourishing your body with quality ingredients.
Dive into a world where healthy meets heavenly with these incredible chocolate protein cheesecakes!
Ingredient Notes for Your Protein Cheesecake
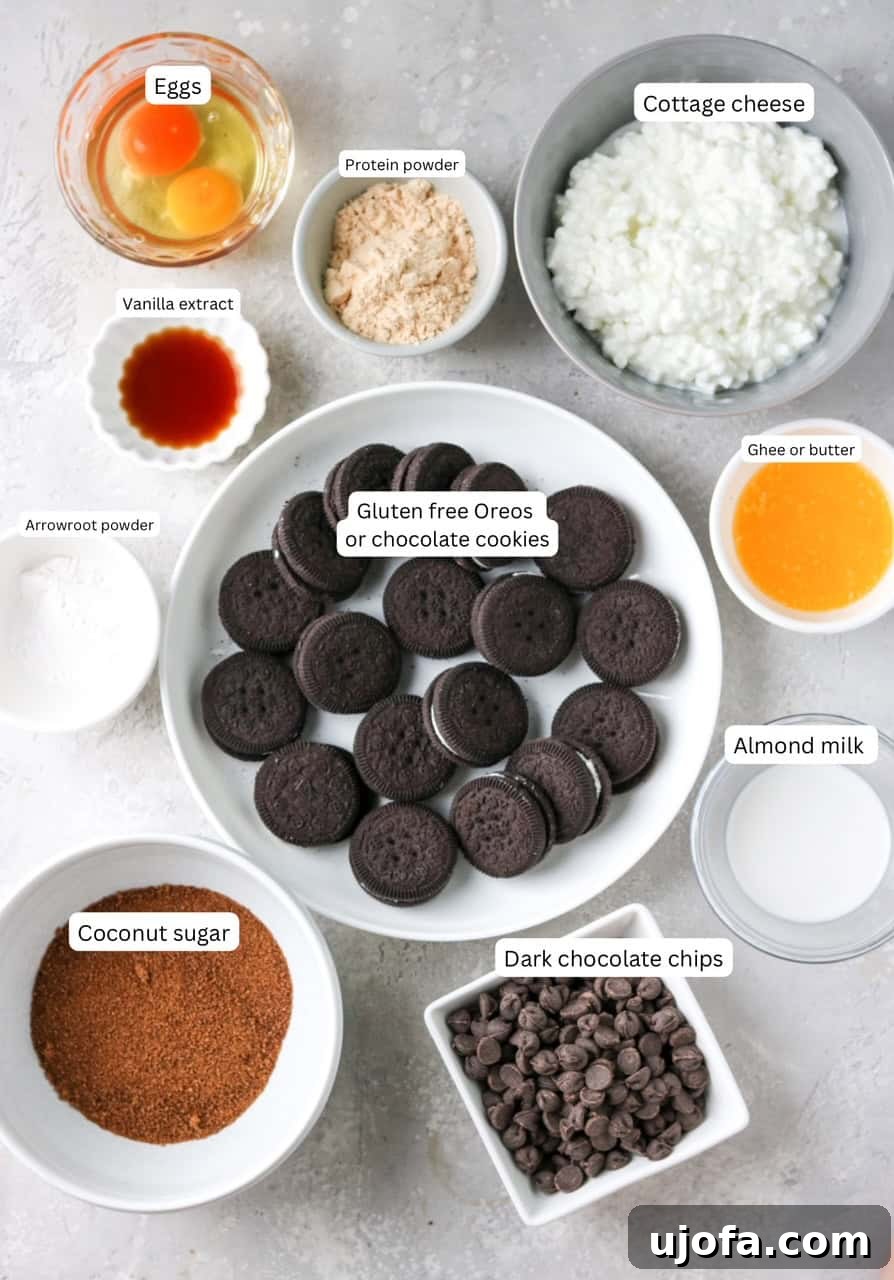
Creating an exceptional protein cheesecake starts with understanding the role of each ingredient. Here’s a detailed look at what you’ll need:
Gluten-Free Crust
- Gluten-Free Sandwich Cookies: The foundation of our delicious crust. Brands like Gluten-Free Oreos or Kinnikinnick are excellent choices, providing that classic chocolate cookie flavor and satisfying crunch without any gluten. These cookies are easily processed into fine crumbs, creating the perfect base for our mini cheesecakes.
- Ghee: Ghee, or clarified butter, offers a rich, nutty flavor and a wonderful binding agent for the cookie crumbs. If you prefer a vegan option or have dietary restrictions, melted vegan butter works equally well, ensuring the crust is firm and holds its shape beautifully.
Cheesecake Filling
- Cottage Cheese: This is the secret ingredient that makes these cheesecakes lighter and higher in protein. Instead of traditional cream cheese, 1% milkfat cottage cheese provides a creamy texture and a significant protein boost. Don’t worry about the curds; blending it thoroughly will create a perfectly smooth, luscious filling. For those seeking dairy-free options, while a direct dairy-free cottage cheese alternative can be hard to find, Good Culture offers a fantastic lactose-free version.
- Eggs: Essential for structure and richness, eggs act as a binding agent, helping the cheesecake filling set properly and achieve that classic creamy texture. They also contribute to the smooth consistency when blended.
- Coconut Sugar: A natural, unrefined sweetener that provides a caramel-like depth of flavor. Coconut sugar is a great alternative to white sugar, offering a lower glycemic index and a more complex sweetness that complements the chocolate beautifully.
- Vanilla Extract: A crucial flavor enhancer, vanilla extract brings warmth and depth to the chocolate and cheese flavors, creating a well-rounded and comforting taste profile.
- Protein Powder: This is where the protein punch comes in! I personally love using Be Well By Kelly Vanilla protein powder, but the beauty of this recipe is its flexibility. Feel free to use your favorite vanilla or unflavored protein powder, whether it’s whey, casein, or a plant-based option like pea or rice protein. Choose a flavor that complements chocolate well.
- Arrowroot Powder: A natural, gluten-free thickener that helps stabilize the cheesecake filling, preventing cracks and ensuring a smooth, firm texture. If you don’t have arrowroot powder, tapioca starch is an excellent one-to-one substitute.
- Dark Chocolate Chips: The heart of our chocolate cheesecake! Dark chocolate chips provide an intense chocolate flavor. Enjoy Life offers my favorite gluten-free chocolate chips, and Hu is another fantastic brand known for its high-quality, clean ingredients. Using good quality chocolate will significantly impact the final taste.
- Almond Milk: Used to adjust the consistency of the filling and to create the ganache. Unsweetened almond milk is a great choice, but you can also use coconut milk or any other preferred non-dairy milk.
Chocolate Ganache Topping (Optional)
- Dark Chocolate Chips: For that extra layer of luxurious chocolate. As with the filling, choose high-quality gluten-free dark chocolate chips for the best flavor and texture.
- Almond Milk: Combined with chocolate chips, almond milk creates a smooth, pourable ganache that adds a beautiful sheen and an additional boost of chocolate goodness.
Recipe Step-by-Step: Crafting Your Mini Protein Cheesecakes
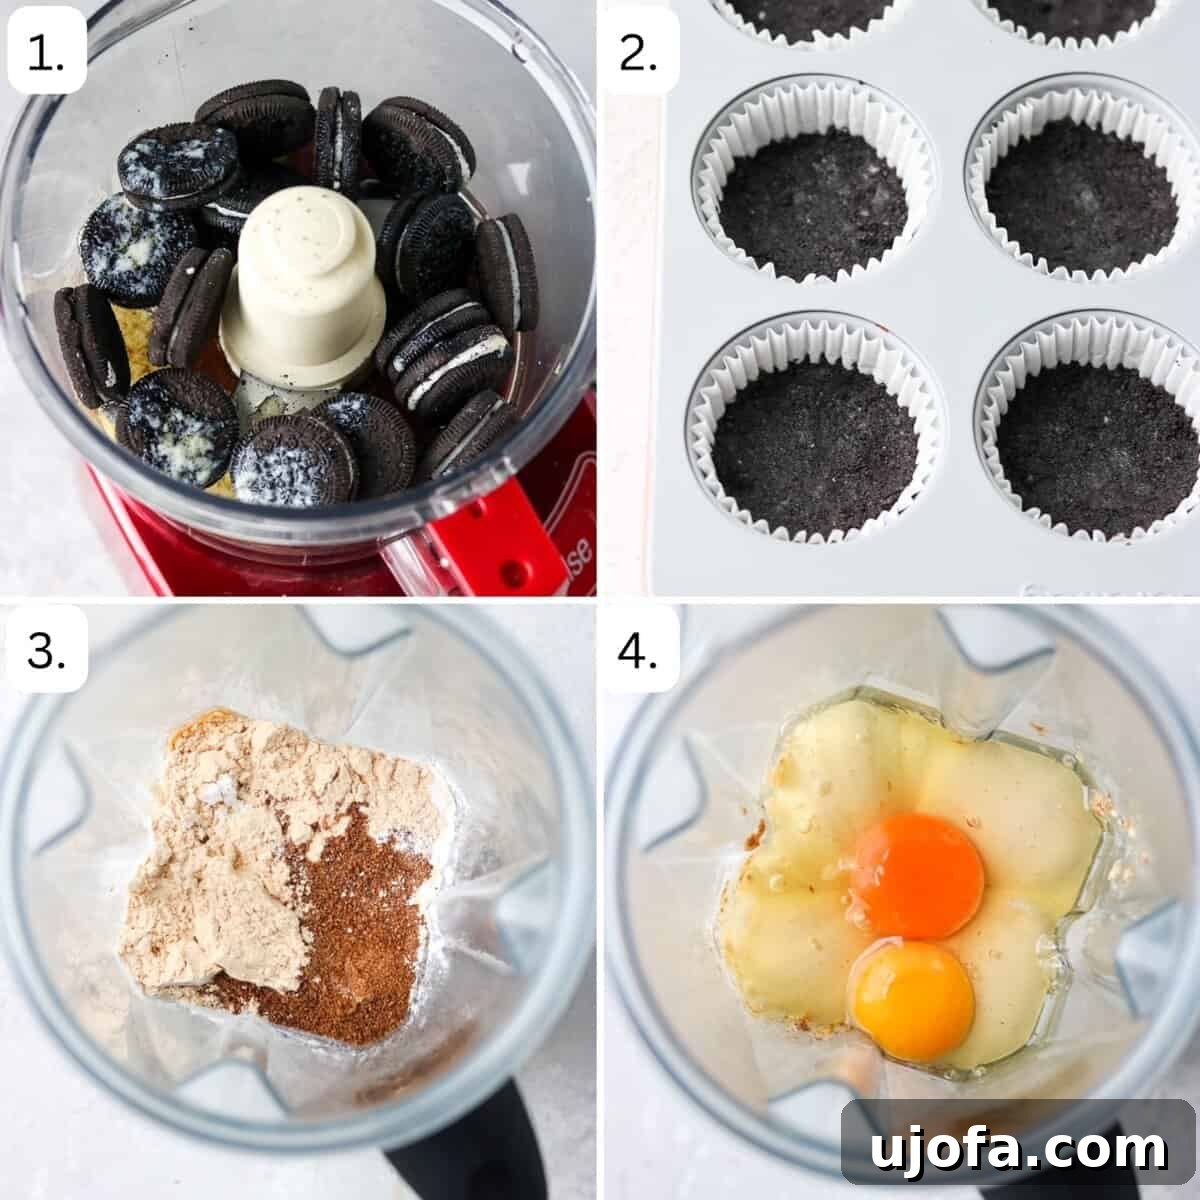
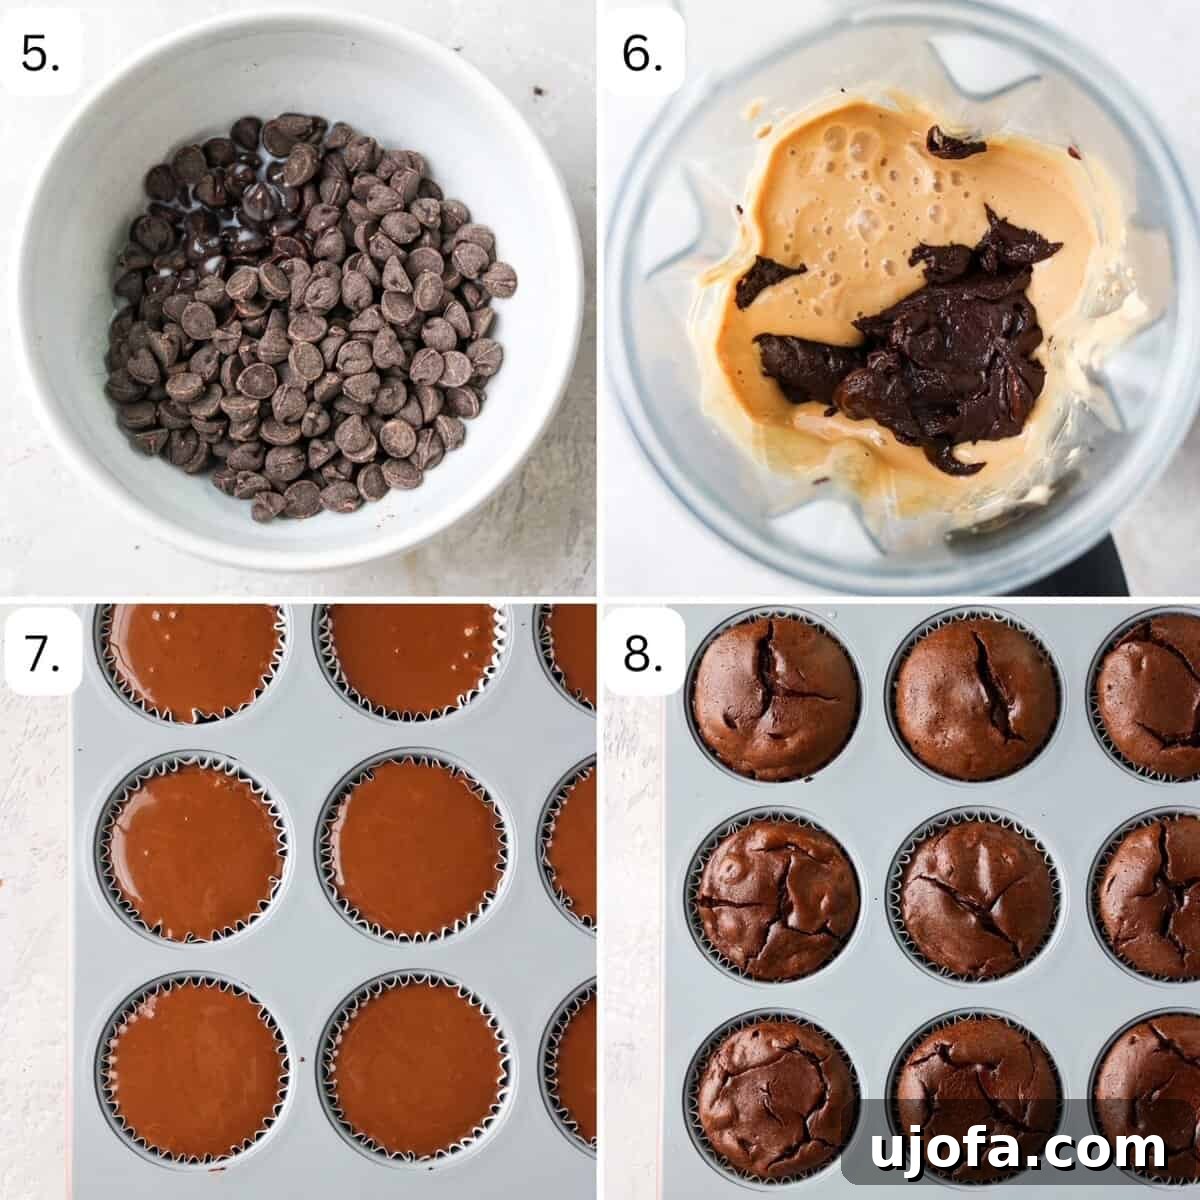
Follow these detailed steps to create perfectly delightful mini chocolate protein cheesecakes:
- Prepare Your Oven: Begin by preheating your oven to 375°F (190°C). This ensures the oven is at the correct temperature when your crusts are ready to bake, leading to even baking.
- Craft the Gluten-Free Crust: In a food processor, combine your gluten-free sandwich cookies and melted ghee (or vegan butter). Pulse until the mixture forms fine, sand-like crumbs. The goal is a consistent texture that will press together firmly. If you don’t have a food processor, simply place the cookies in a sturdy plastic bag, crush them with a meat tenderizer or rolling pin, and then stir in the melted butter or ghee.
- Bake the Crusts: Line a 12-cup muffin pan with paper muffin liners. Spoon an equal amount of the cookie mixture into each cup, typically about 1-2 tablespoons per liner. Use your fingers or the back of a spoon to firmly press the mixture down to create an even, compact crust at the bottom of each liner. Bake these crusts for 7 minutes. This pre-baking step helps the crust set and become slightly crisp, preventing it from becoming soggy.
- Prepare the Protein-Packed Filling: While the crusts are baking, add the cottage cheese, eggs, coconut sugar, vanilla extract, protein powder, and arrowroot powder to a high-speed blender or food processor. Blend for at least 1 minute, or until the mixture is completely smooth and all the cottage cheese curds have disappeared. You may need to stop and scrape down the sides of the blender with a long spoon halfway through to ensure everything is fully incorporated. For an even smoother consistency and to minimize air bubbles, add the eggs one at a time and blend on low speed for about 30 seconds after each addition.
- Incorporate Chocolate and Bake: In a microwave-safe dish, combine the 1 cup of dark chocolate chips and 1 tablespoon of almond milk. Microwave in 30-second increments, stirring well after each, until the chocolate is fully melted and smooth. Pour this melted chocolate mixture into the blender with the cheesecake filling and continue blending on low speed for another minute, ensuring the chocolate is evenly distributed. Carefully pour the chocolate cheesecake mixture evenly into the muffin tins, directly on top of the pre-baked crusts. Return the pan to the oven and bake for an additional 20-22 minutes, or until the tops of the cheesecakes are firm to the touch and just beginning to show small cracks around the edges.
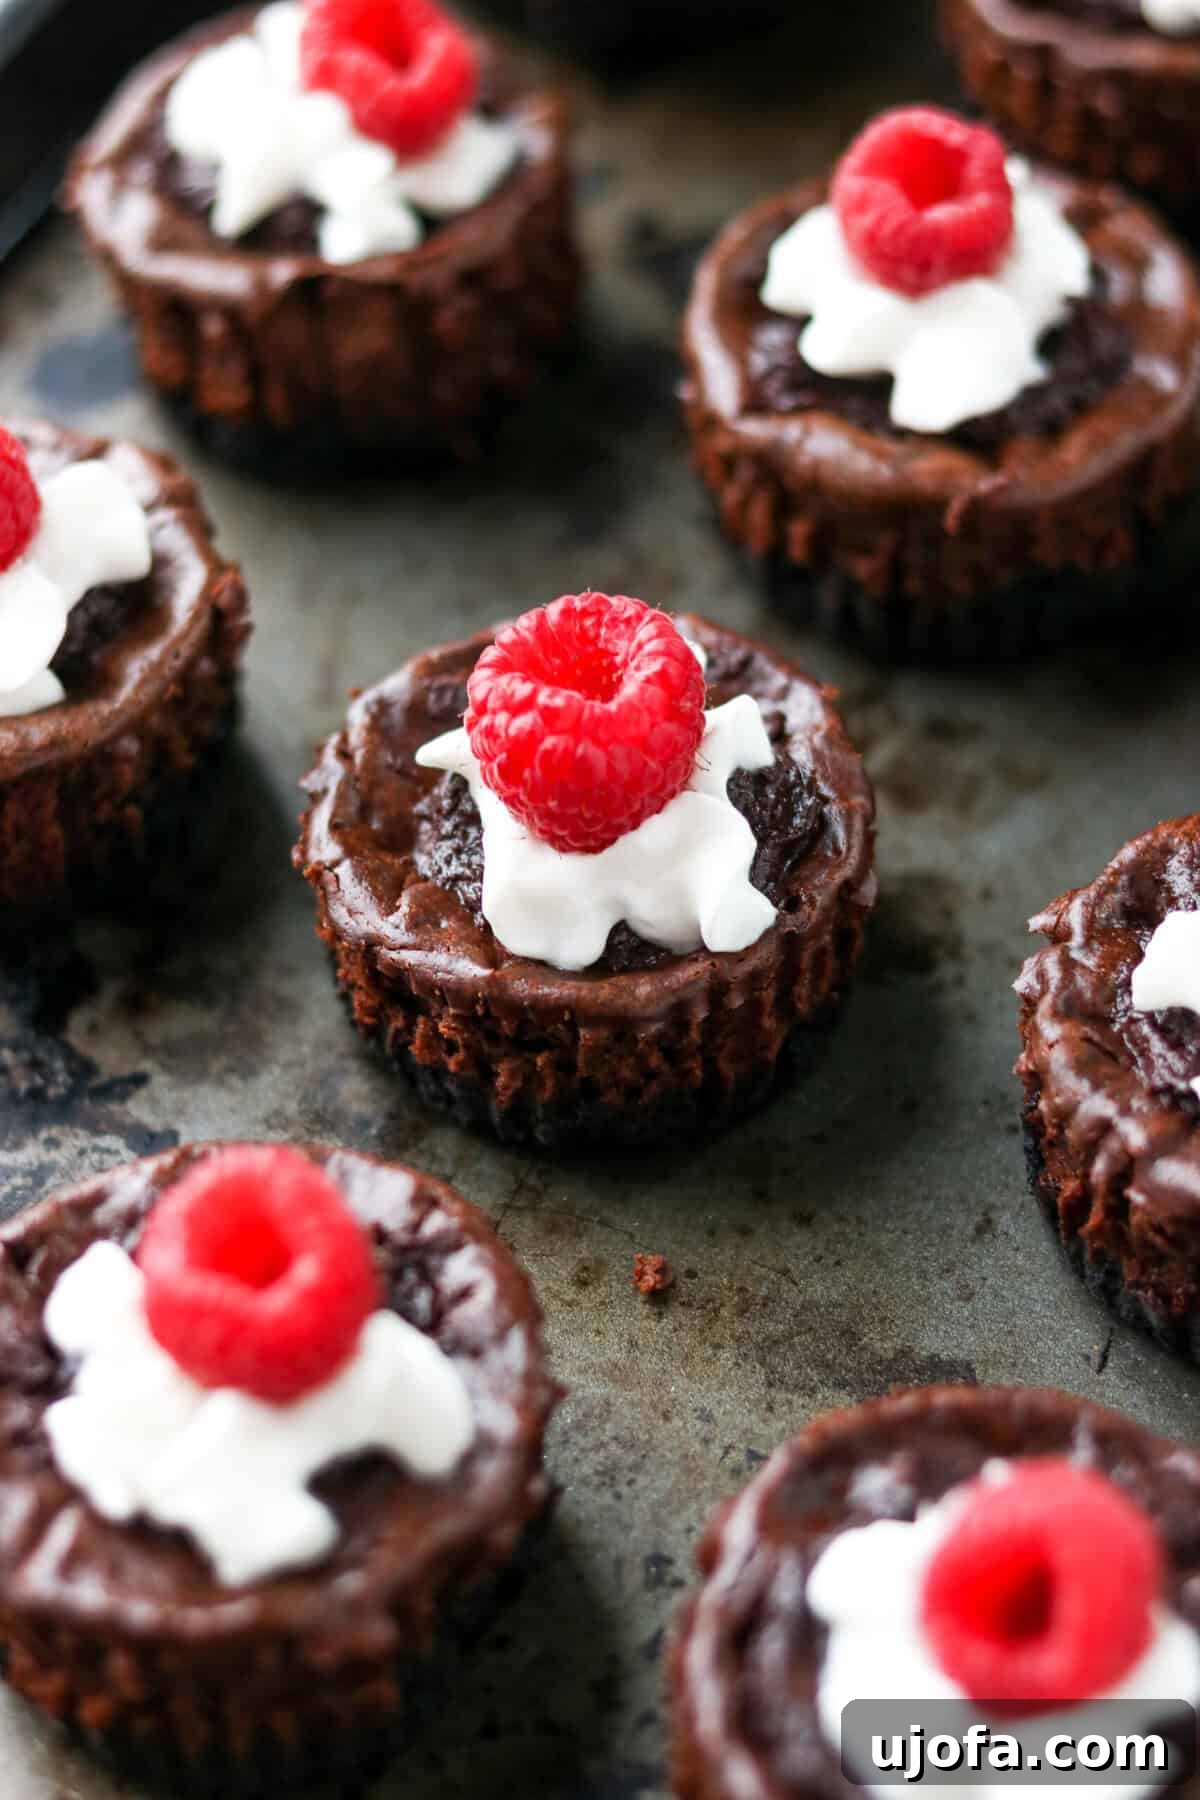
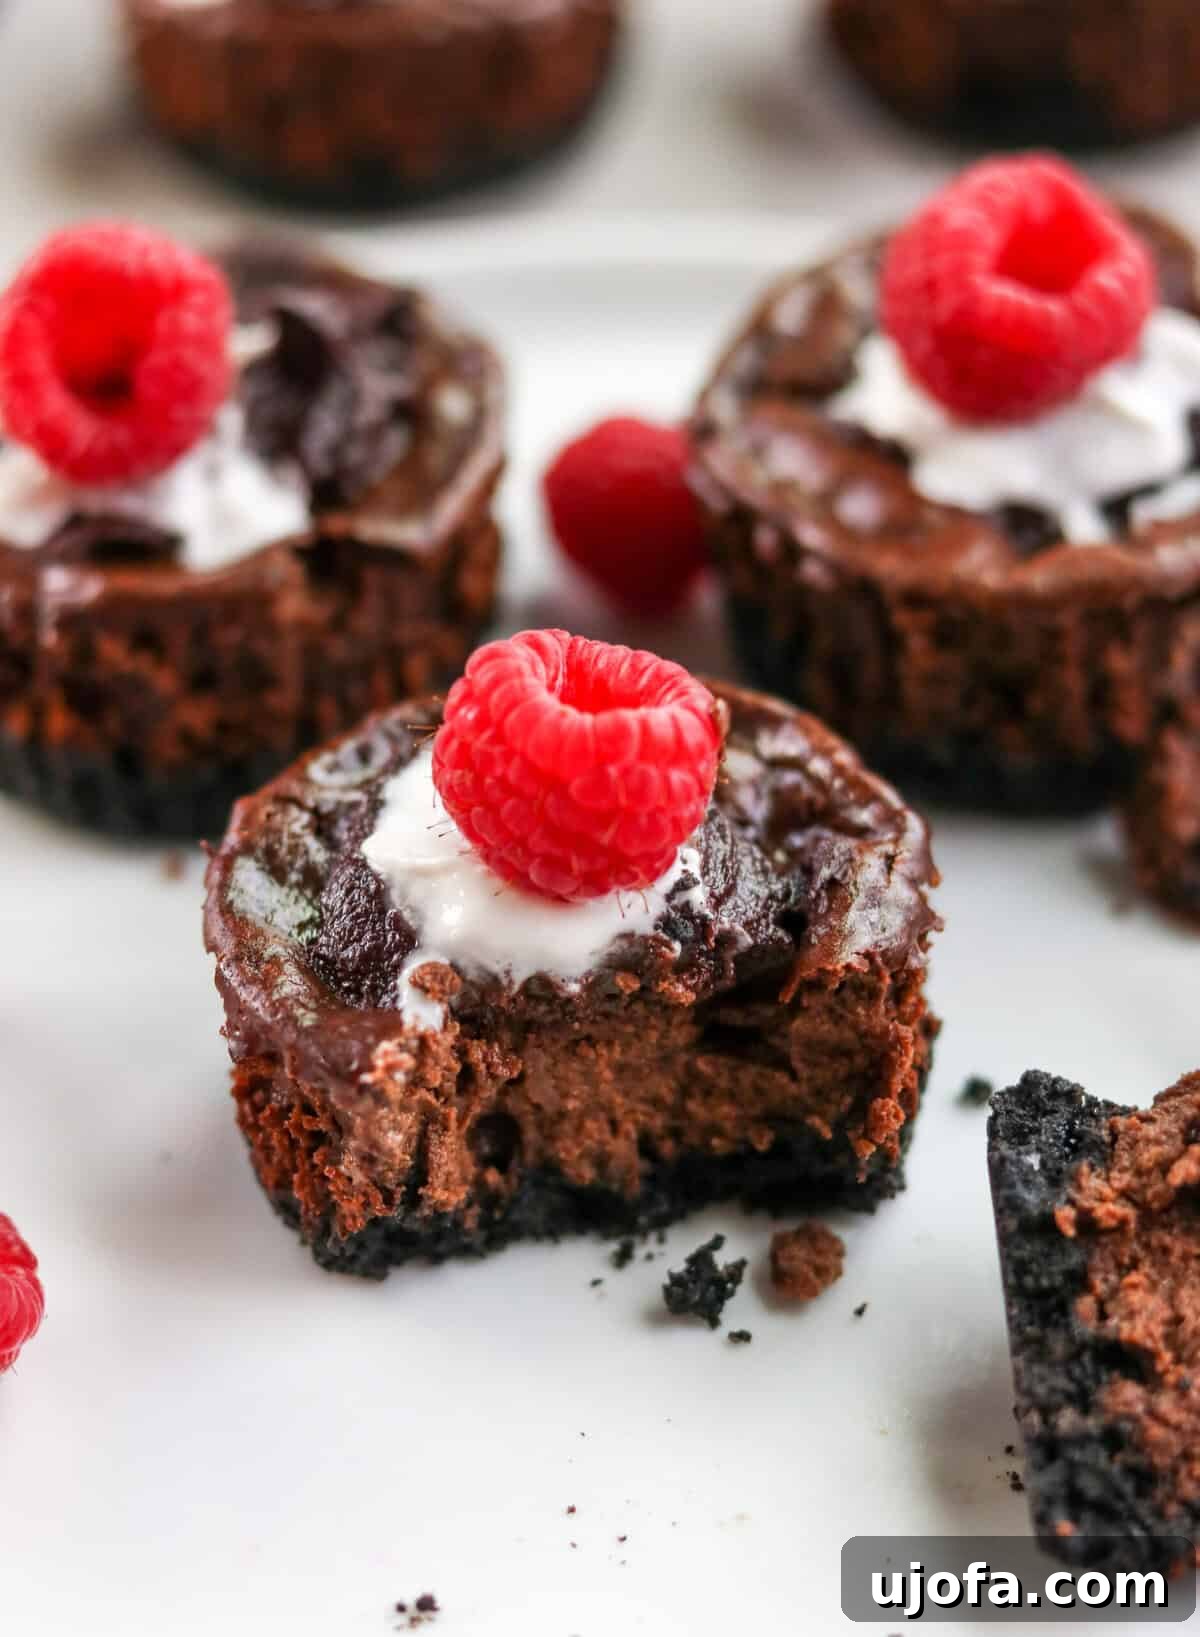
- Cool, Chill, and Garnish: Once baked, remove the muffin pan from the oven and allow the mini cheesecakes to cool completely at room temperature. This gradual cooling is essential to prevent them from sinking or cracking further. Once cooled, transfer the cheesecakes (still in their liners) to the refrigerator and chill for at least 2-3 hours, or ideally overnight. Chilling is crucial for the cheesecake to fully set and achieve its perfect creamy texture. Before serving, top your chilled protein cheesecakes with the optional chocolate ganache topping (prepared by melting ½ cup dark chocolate chips with 1 tbsp almond milk in the microwave or over a double boiler until smooth), a dollop of whipped cream, and fresh berries for an extra touch of elegance and flavor. Enjoy your healthy, delicious creations!
Mary’s Expert Tips & Tricks for Perfect Protein Cheesecakes
- **Choosing Your Protein Powder:** The type of protein powder you use can slightly affect the texture and flavor. Depending on your lifestyle and allergies, you can opt for vegan protein powder (like pea, rice, or a blend), gluten-free protein powder, or traditional whey protein powder. Each type absorbs liquid differently, so you might need to slightly adjust the amount of almond milk in the filling if your mixture seems too thick or too thin. Always choose a protein powder with a flavor that complements chocolate, such as vanilla or unflavored.
- **Cottage Cheese Fat Content:** While 1% milkfat cottage cheese is recommended for a lighter version, you can certainly use full-fat cottage cheese if you prefer a richer, more decadent cheesecake. The higher fat content will yield a creamier texture, very similar to traditional cream cheese cheesecake.
- **Flavor Variations – Chocolate Peanut Butter:** For a delightful twist, transform these into chocolate peanut butter protein cheesecakes! Simply add a couple of tablespoons of your favorite smooth peanut butter (or almond butter) to the cheesecake batter during the blending step. This adds an extra layer of flavor and protein that is simply irresistible.
- **Preventing Cracks:** To help prevent cracks in your cheesecakes, avoid over-baking. The tops should be set and firm, but a slight jiggle in the center is perfectly fine as they will continue to set as they cool. Also, allowing them to cool gradually at room temperature before chilling is key. Sudden temperature changes can cause cracking.
- **Sweetness Adjustment:** If you prefer a less sweet dessert, you can slightly reduce the amount of coconut sugar in the filling. Taste the batter before adding the eggs (raw egg batter should not be consumed) to get an idea of the sweetness level, then adjust the sugar if desired.
Serving Tips for the Ultimate Enjoyment
- **The Importance of Chill Time:** For the best possible texture and flavor, allow your mini cheesecakes to cool completely at room temperature, then chill them in the refrigerator for a minimum of 2-3 hours. Ideally, chilling them overnight will result in a perfectly set, creamy consistency that truly enhances the cheesecake experience.
- **Elegant Toppings:** Elevate your protein cheesecakes with optional toppings. The homemade chocolate ganache (made by melting dark chocolate chips and almond milk together in the microwave or over a double boiler) adds a beautiful shine and intensified chocolate flavor. A dollop of light whipped cream and a sprinkle of fresh berries like raspberries, strawberries, or blueberries add freshness and a pop of color, making them visually appealing and extra delicious.
- **Serve Cold:** These cheesecakes are best served cold directly from the refrigerator. The firm, creamy texture is at its peak when thoroughly chilled.
Storage Tips to Keep Your Cheesecakes Fresh
- **Refrigerator Storage:** Store any leftover mini protein cheesecakes in an airtight container in the refrigerator for up to 5 days. This will keep them fresh and maintain their delightful texture.
- **Freezing for Later:** These cheesecakes freeze beautifully, making them perfect for future cravings or meal prep. To freeze, individually wrap each protein cheesecake tightly in plastic wrap, then place them in a freezer-safe container or a heavy-duty freezer bag. They can be stored in the freezer for up to 1-2 months.
- **Thawing Instructions:** When you’re ready to enjoy a frozen cheesecake, simply thaw it in the refrigerator overnight or at room temperature for approximately one hour. Once thawed, you can add your preferred toppings and serve.
Recipe FAQs
Absolutely! Many traditional baked goods can be calorie-dense but lack substantial nutritional value, often leaving you feeling sluggish and craving more. By incorporating protein powder into your desserts, you infuse them with essential nutrients that promote satiety, help stabilize blood sugar levels, and provide sustained energy. This means you can enjoy a delicious treat that not only satisfies your cravings but also contributes positively to your overall well-being, helping you avoid that “empty calorie” feeling.
Traditional cheesecakes, even gluten-free ones, typically rely on full-fat cream cheese and significant amounts of added sugar in both the crust and filling. While cream cheese does contain some protein, it’s often not the primary focus. This particular protein cheesecake recipe makes several healthy swaps: it replaces most of the cream cheese with high-protein cottage cheese and incorporates additional protein powder, substantially increasing its protein content. This makes it a much more robust source of protein compared to conventional versions, all while maintaining a delicious taste and being gluten-free.
While this recipe uses cottage cheese, which is dairy, you can explore dairy-free alternatives. Some brands now offer plant-based cream cheese or even dairy-free cottage cheese (though it’s less common). If using a dairy-free cream cheese, ensure it has a firm consistency suitable for baking. For the crust, use vegan butter. For the ganache and filling, use plant-based milk and dairy-free chocolate chips. Results may vary slightly in texture and flavor with these substitutions.
Arrowroot powder acts as a natural thickener and stabilizer for the cheesecake filling. If you don’t have it on hand, an equal amount of tapioca starch (also known as tapioca flour) can be used as a direct substitute. Cornstarch can also work, but use about half the amount as it’s a stronger thickener, and ensure it’s gluten-free if that’s a dietary requirement.
Yes, you can adapt this recipe for a full-sized cheesecake! You would need a 9-inch springform pan. Increase the baking time significantly (likely 45-60 minutes or more) and bake in a water bath to prevent cracking and ensure even cooking. The cooling and chilling steps remain crucial. Note that the nutritional information would change per slice.
Explore More Healthy Dessert Recipes…
If you loved these protein-packed mini cheesecakes, be sure to check out our other wholesome and delicious dessert creations:
- Healthy Apple Crumble
- Paleo Lemon Bars
- Dairy-Free Key Lime Pie Bars
- Paleo Chocolate Chip Banana Bread Muffins
- Vegan Berry Crisp
Love this recipe? Please leave a 5-star 🌟🌟🌟🌟🌟 rating in the recipe card below & a review in the comment section. Or, follow me on Facebook, Pinterest or Instagram today!
Easy Chocolate Protein Cheesecake Recipe
By: Mary Smith
Rating: 4.91 from 10 votes
Prep Time: 15 mins
Cook Time: 32 mins
Total Time: 2 hrs 47 mins (including chilling)
Yield: 12 cheesecakes
This lighter, healthier, protein cheesecake recipe features a gluten-free Oreo crust, a protein-packed cottage cheese filling, and an optional chocolate ganache topping. It’s a delicious and satisfying treat!
Equipment
- 12-cup muffin tin
- 12 paper muffin liners
- High speed blender
- Food processor
Ingredients
Crust
- 18 gluten-free chocolate sandwich cookies (e.g., Gluten-Free Oreos or Kinnikinnick brand)
- 4 tbsp ghee, or melted vegan butter
Filling
- 2 cups cottage cheese (1% milkfat recommended)
- 2 eggs
- ½ cup coconut sugar
- 1.5 tsp vanilla extract
- 2 tbsp protein powder (e.g., Be Well By Kelly Vanilla)
- 1 tbsp arrowroot powder (or tapioca starch)
- 1 cup dark chocolate chips (e.g., Enjoy Life or Hu)
- 1 tbsp almond milk (or coconut milk)
Optional Chocolate Ganache Topping
- ½ cup dark chocolate chips
- 1 tbsp almond milk (or coconut milk)
Instructions
- Preheat oven to 375°F (190°C).
- Add the cookies and butter into a food processor and pulse until a crumb-like mixture is formed, resembling sand. Alternatively, smash cookies in a plastic bag with a meat tenderizer and stir in butter.
- Place 12 muffin liners in a muffin pan. Spoon an equal amount of the cookie mixture into each cup, then press down using your fingers to form the crusts. Bake for 7 minutes.
- Meanwhile, add the cottage cheese, eggs, coconut sugar, vanilla, protein powder, and arrowroot powder to a blender or food processor. Blend for 1 minute until completely smooth. Scrape down the sides if necessary. Add eggs one at a time and mix on low speed for 1 minute to remove air bubbles.
- Combine 1 cup dark chocolate chips and 1 tbsp almond milk in a microwave-safe dish. Microwave in 30-second increments, stirring until melted and smooth. Pour into the blender with the filling and blend on low for 1 minute until fully combined.
- Pour the chocolate cheesecake mixture evenly into the muffin tins on top of the baked crusts. Bake for an additional 20-22 minutes, or until the tops are firm and just starting to crack.
- Let them cool completely at room temperature before removing from the pan. Chill in the refrigerator for 2-3 hours (or overnight) until fully set. Top with optional ganache (melt ½ cup dark chocolate chips with 1 tbsp almond milk), whipped cream, and fresh berries. Enjoy!
Notes
For additional tips on protein powder variations, cottage cheese options, and flavor twists like chocolate peanut butter, please refer to the “Mary’s Expert Tips & Tricks” section above in the main article.
Ensure cheesecakes are thoroughly chilled for the best texture and taste. Store leftovers in an airtight container in the refrigerator for up to 5 days, or freeze for longer storage.
Nutrition Information (Estimate per serving)
Serving: 1 cheesecake | Calories: 350kcal | Carbohydrates: 37g | Protein: 9g | Fat: 19g | Saturated Fat: 12g | Polyunsaturated Fat: 0.5g | Monounsaturated Fat: 2g | Trans Fat: 0.003g | Cholesterol: 50mg | Sodium: 241mg | Potassium: 197mg | Fiber: 2g | Sugar: 22g | Vitamin A: 97IU | Vitamin C: 0.1mg | Calcium: 112mg | Iron: 1mg
All nutrition facts are an estimate and automatically calculated. While I fact check them using My Fitness Pal, please note that they may not always be 100% accurate and depend on ingredients used. For the most accurate grams per serving size, weigh your total and divide by the number of servings.
Did you make this? Rate & comment below, and tag me on Instagram @maryswholelife