
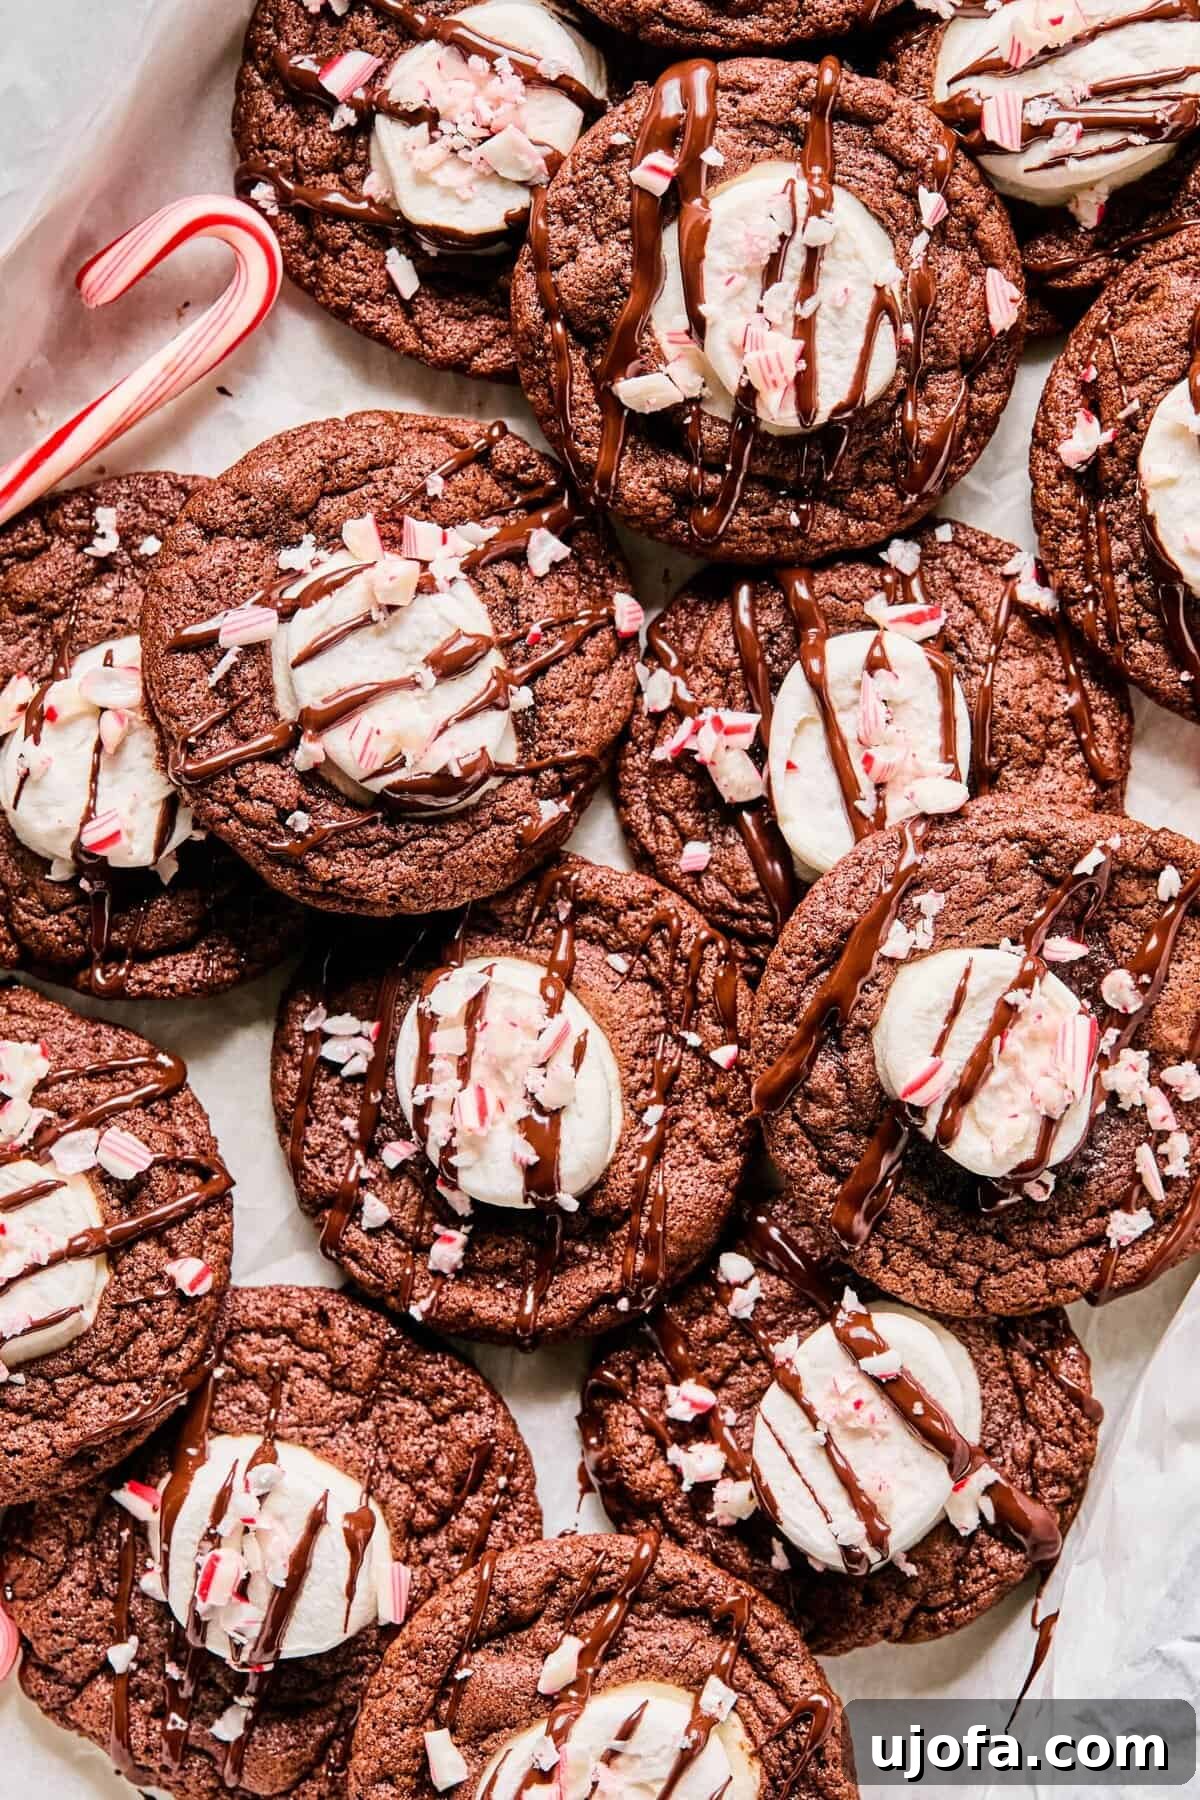
Irresistibly Chewy Gluten-Free Hot Cocoa Cookies with Melted Marshmallows and Peppermint Crunch
There’s nothing quite like the warmth and comfort of a mug of hot chocolate on a chilly winter day. Now, imagine transforming all those delightful elements into a cookie: rich cocoa, soft and chewy centers, gooey melted marshmallows, and a festive hint of peppermint. These gluten-free hot cocoa cookies deliver exactly that magical experience! They’re the ultimate winter treat, perfect for baking when the snow falls, the holiday lights twinkle, and you’re craving something warm, comforting, and utterly delicious straight from the oven.
Crafted to be incredibly simple yet deeply satisfying, this recipe ensures everyone can enjoy a taste of holiday cheer, regardless of dietary needs. Each bite offers a harmonious blend of intense chocolate, a pillowy marshmallow surprise, and a delightful crunch from crushed candy canes, making them a standout addition to any cookie plate or festive gathering.
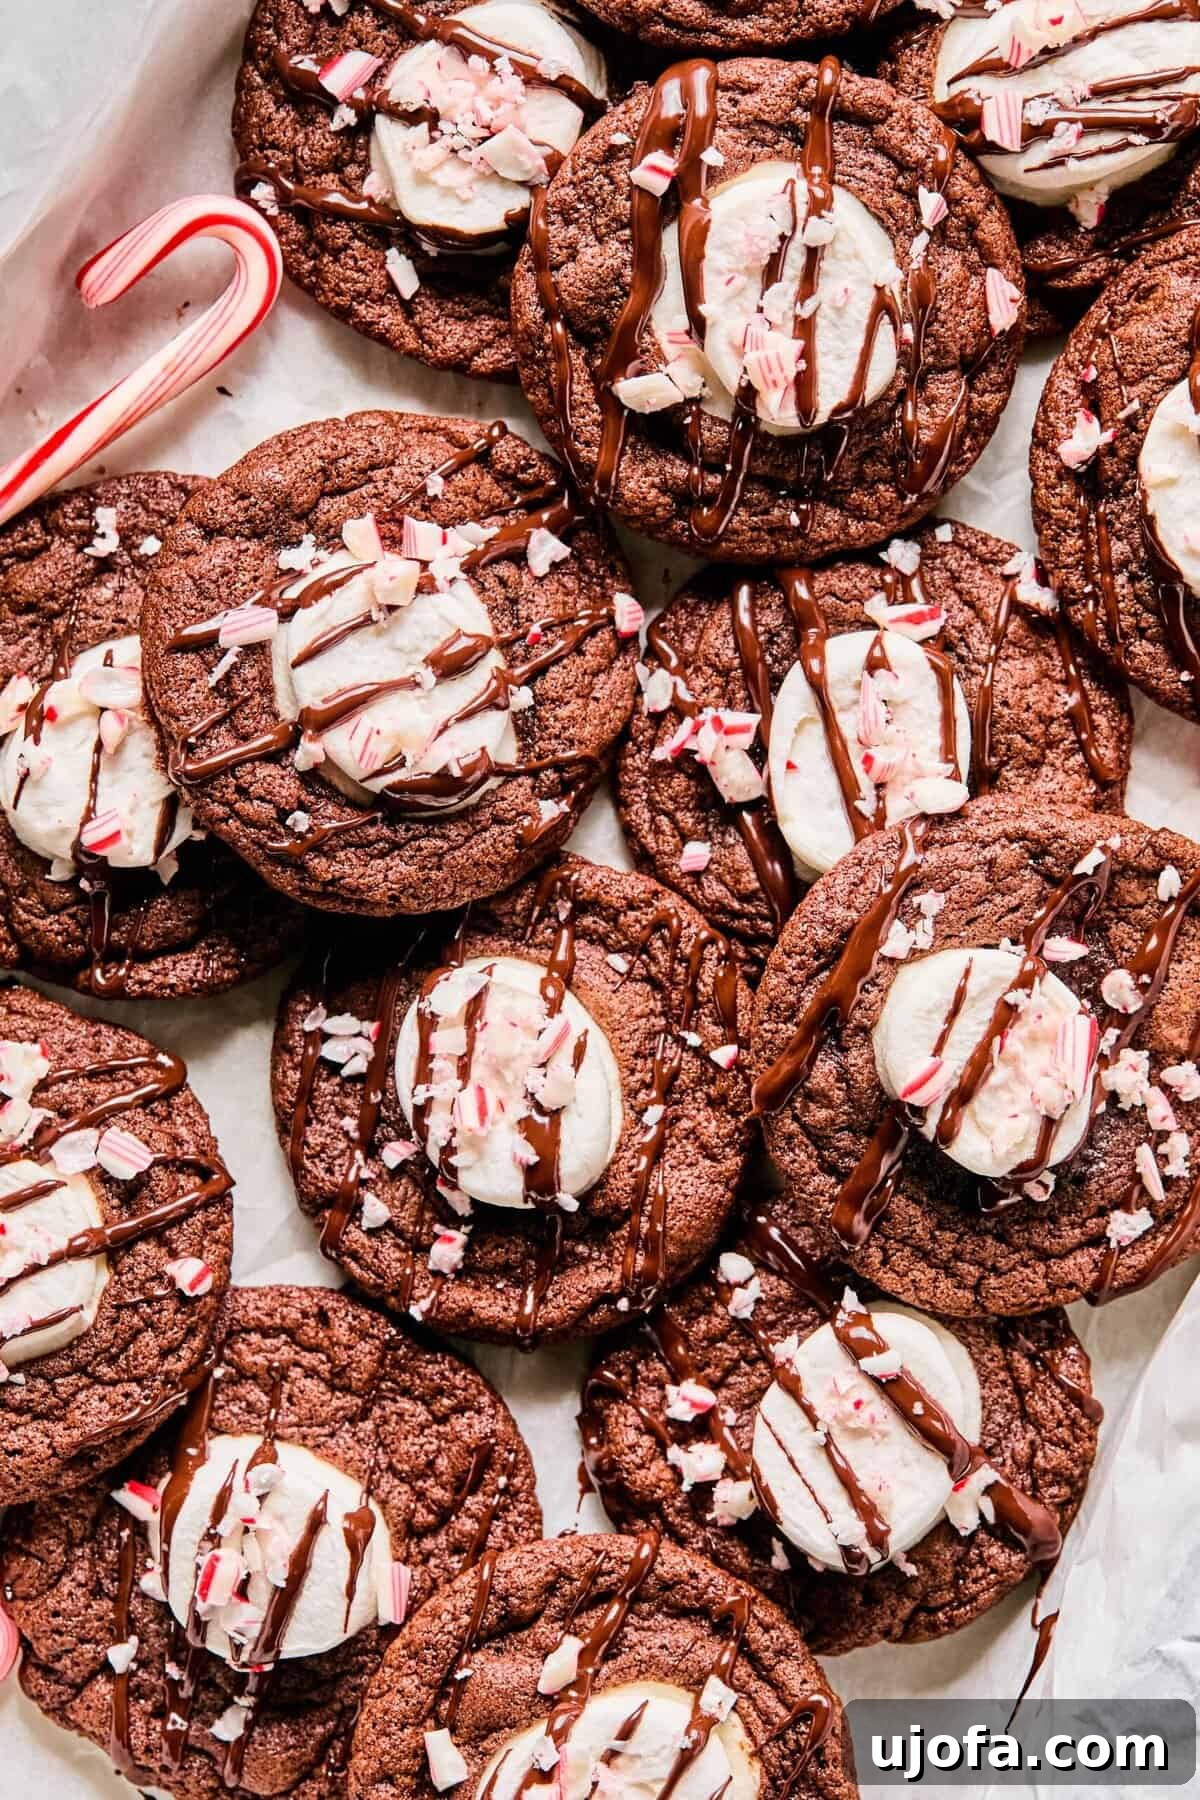
Quick Look: Gluten-Free Hot Cocoa Cookies
Get ready to bake a batch of these irresistible cookies with ease! Here’s a snapshot of what you need to know:
- ⏱️ Prep Time: 15 minutes
- 🍳 Cook Time: 12-13 minutes (in two stages)
- 🕒 Total Time: Approximately 1 hour (including chilling)
- 👥 Servings: 24 delightful cookies
- 📊 Calories: ~241 kcal per serving (estimated)
- 🔥 Cook Method: Oven-baked at 350 °F (175 °C)
- 👩🍳 Flavor Profile: Deep cocoa, sweet melted marshmallow, vibrant peppermint, and decadent dark chocolate.
- ⭐ Difficulty: Easy, making them ideal for beginners and seasoned bakers alike, especially for holiday cookie exchanges.
Why You’ll Fall in Love with These Hot Cocoa Cookies
These isn’t just another gluten-free cookie recipe; it’s an experience, hitting that perfect sweet spot between nostalgic comfort and indulgent decadence. If you’re tired of dry, crumbly gluten-free treats, prepare to be amazed. This recipe truly shines, creating cookies that are:
- Wonderfully Soft and Chewy: With a texture akin to a fudgy brownie in the center and gently crisp edges, these cookies offer a delightful contrast in every bite. The careful balance of butter, brown sugar, and raw cacao powder ensures the dough remains tender and moist, preventing the common dryness found in many gluten-free alternatives.
- Gooey Marshmallow Magic: The marshmallows melt just enough to create that iconic hot cocoa “top,” becoming beautifully soft and slightly toasted without completely disappearing into the dough. This creates pockets of warm, gooey sweetness that elevate the entire cookie.
- Double Chocolate Decadence: Dark chocolate chips are generously folded into the dough, providing rich, melty bursts of chocolate in every mouthful. This complements the deep cocoa flavor of the cookie base, making them truly irresistible for any chocolate lover.
- Festive Peppermint Twist: A hint of peppermint extract gives these cookies a vibrant holiday chocolate cookie vibe, perfectly paired with the crunch of crushed candy canes on top. It’s a classic winter flavor combination that’s both refreshing and comforting.
- Reliably Gluten-Free: We’ve specifically chosen and tested ingredients to ensure these cookies hold their shape beautifully and bake evenly. Chilling the dough is a crucial step that prevents gluten-free flour from spreading too thin, guaranteeing perfectly shaped, soft cookies every time.
- Perfect for Any Occasion: While they scream “holiday season,” these hot cocoa cookies are wonderful for any gathering, a cozy night in, or simply as a pick-me-up treat. They’re also fantastic for cookie exchanges, school events, or gifting to friends and family.
If you enjoy exploring new gluten-free cookie recipes, you might also adore my Chocolate Chipless Cookies, Raspberry and White Chocolate Cookies, or my Gluten-Free Almond Butter Chocolate Chip Oatmeal Cookies – all beloved by readers for their ease and deliciousness. For another festive delight, consider my Christmas Puppy Chow or these delightful Peanut Butter Balls!
Essential Ingredients for Your Gluten-Free Hot Cocoa Cookies
Gathering your ingredients is the first step to baking bliss! Here’s a closer look at what you’ll need and the role each plays in creating these magical cookies:
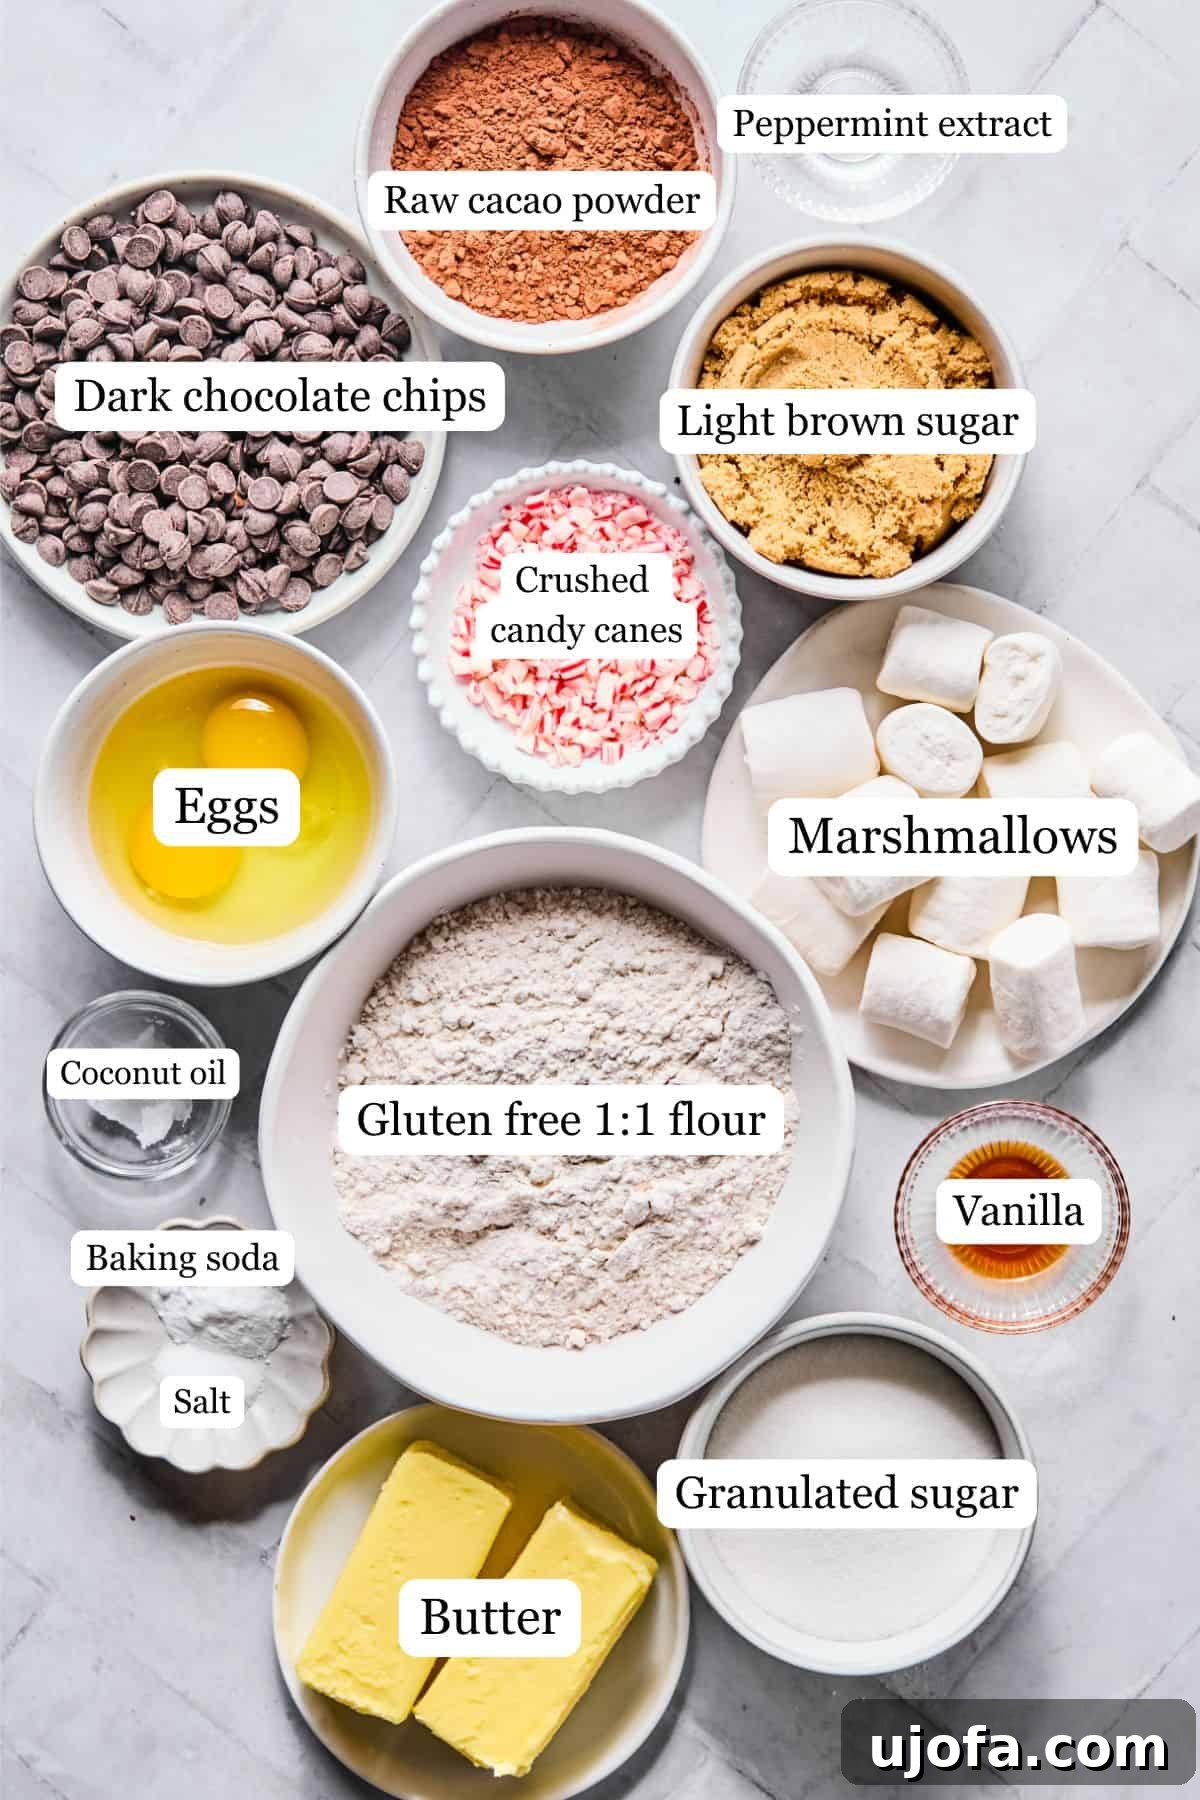
- Unsalted Butter: This is the foundation of our chewy, rich cookie base. Using unsalted butter allows you to control the overall saltiness of the recipe. Ensure it’s slightly softened at room temperature for optimal creaming with the sugars. For those needing dairy-free hot cocoa cookies, a high-quality vegan butter substitute works perfectly.
- Light Brown Sugar & Granulated Sugar: The combination of both sugars is key! Light brown sugar adds a wonderful depth of moisture and subtle caramel notes, contributing to the cookie’s chewiness. Granulated sugar, on the other hand, helps with structure, spreads, and contributes to those slightly crisp edges.
- Large Eggs: Eggs act as a binder, holding the dough together, and contribute significantly to the fudgy, rich texture of these chocolate cookies. Make sure they are at room temperature for better incorporation into the butter and sugar mixture.
- Vanilla Extract & Peppermint Extract: Vanilla extract is a non-negotiable for deepening any chocolate flavor, enhancing the overall hot chocolate cookie experience. The peppermint extract adds that delightful, cooling kick, giving these a distinct holiday chocolate cookie charm. You can adjust the amount of peppermint to your preference or omit it entirely for a classic hot cocoa flavor.
- Gluten-Free 1:1 Flour Blend: This is crucial for gluten-free baking success. A 1:1 blend (also known as “cup-for-cup” or “all-purpose gluten-free flour blend”) typically contains xanthan gum, which mimics the elasticity of gluten. We highly recommend a reliable brand like King Arthur Baking’s blend, as it consistently delivers a sturdy yet soft cookie that avoids the crumbly texture often associated with gluten-free chocolate cookies.
- Raw Cacao Powder: For a deep, intense chocolate flavor that truly evokes hot cocoa, raw cacao powder is essential. It provides a richer, less processed chocolate taste compared to regular cocoa powder. Ensure you use unsweetened varieties.
- Baking Soda & Salt: These leavening agents work together to provide the perfect lift and spread, resulting in tender, airy cookies. Salt balances the sweetness and enhances all the flavors, making the chocolate taste even more prominent.
- Dark Chocolate Chips: Adding another layer of chocolate, these chips melt into rich pockets within the cookie dough, creating a delightful double chocolate effect. We love the Enjoy Life brand for its excellent flavor and allergen-friendly profile.
- Marshmallows: The star ingredient for that authentic hot cocoa look and taste! Using regular marshmallows cut in half creates flatter, round pieces that melt beautifully without completely disappearing. Dandies brand is a fantastic vegan option if you’re looking to keep these cookies dairy-free and vegan.
- Chocolate Drizzle and Crushed Candy Canes: These are the finishing touches that bring the true Christmas cocoa cookies feel. The chocolate drizzle adds a final layer of sweetness and visual appeal, while crushed candy canes provide a delightful crunch and that signature festive touch.
Step-by-Step Guide: Crafting Your Hot Cocoa Cookies
Baking these gluten-free hot cocoa cookies is a fun and straightforward process. Follow these steps for perfect results every time:
Step 1: Prepare Your Baking Sheet. Line a large baking sheet with parchment paper. This prevents sticking and makes cleanup a breeze.
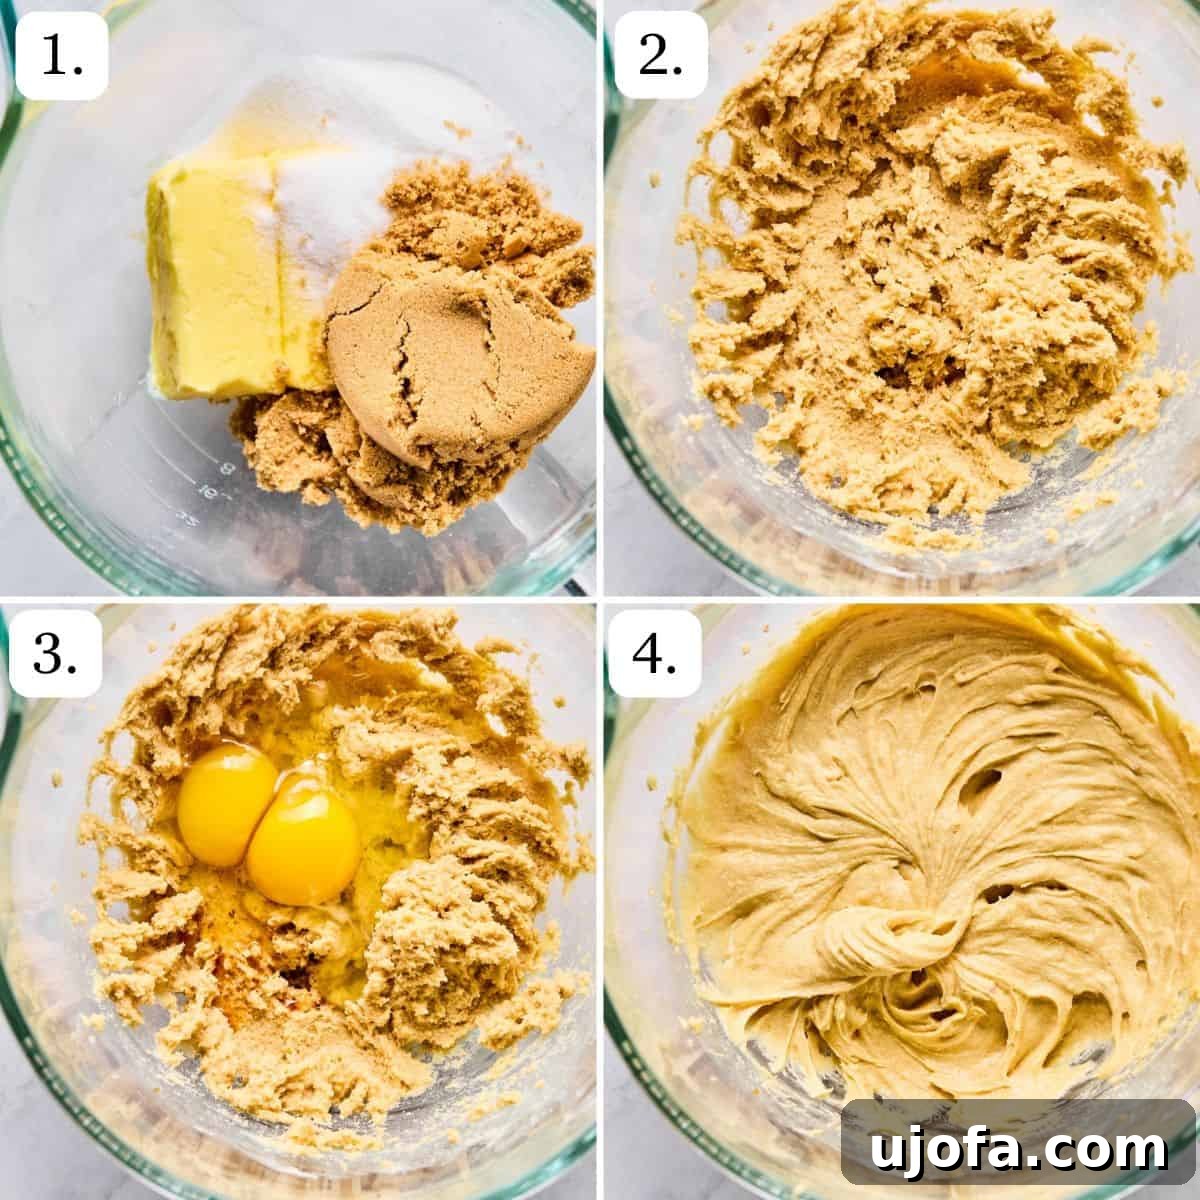
Step 2: Cream Butter and Sugars. In a large mixing bowl (or the bowl of a stand mixer), combine the softened unsalted butter, light brown sugar, and granulated sugar. Beat them together on medium speed until the mixture is light, fluffy, and pale in color, usually 2-3 minutes. This creaming process incorporates air, contributing to the cookies’ soft texture.
Step 3: Add Wet Ingredients. Introduce the eggs, vanilla extract, and peppermint extract to the creamed butter and sugar. Ensure your eggs are at room temperature for better emulsion.
Step 4: Combine Thoroughly. Mix again until all the wet ingredients are fully incorporated into the sugar mixture. Scrape down the sides of the bowl to ensure everything is evenly combined.
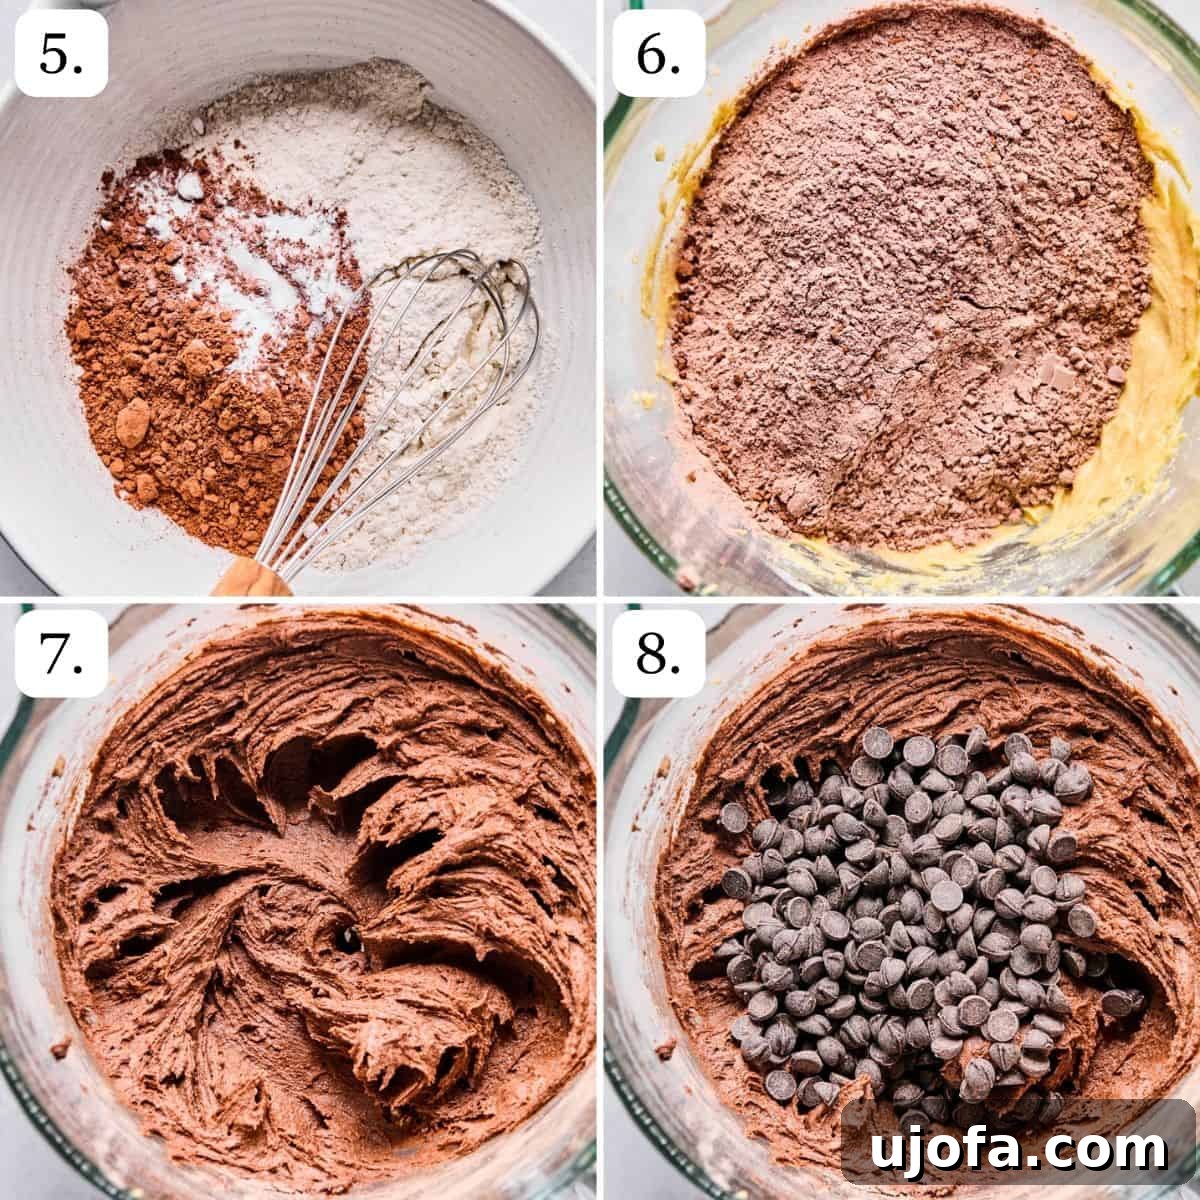
Step 5: Prepare Dry Ingredients. In a separate, medium-sized bowl, whisk together the gluten-free 1:1 flour, raw cacao powder, baking soda, and salt. Whisking ensures these dry ingredients are evenly distributed, preventing pockets of leavening or salt in your cookies.
Step 6: Combine Wet and Dry. Gradually add the dry ingredient mixture to the wet ingredients. Start on low speed if using a mixer, then increase slightly until just combined.
Step 7: Form the Dough. Continue mixing until a thick, sticky dough forms. Be careful not to overmix, as this can lead to tougher cookies, even with gluten-free flour. Stop as soon as no dry streaks remain.
Step 8: Fold in Chocolate Chips. Gently stir in the dark chocolate chips by hand using a spatula. This ensures they are evenly distributed throughout the dough.
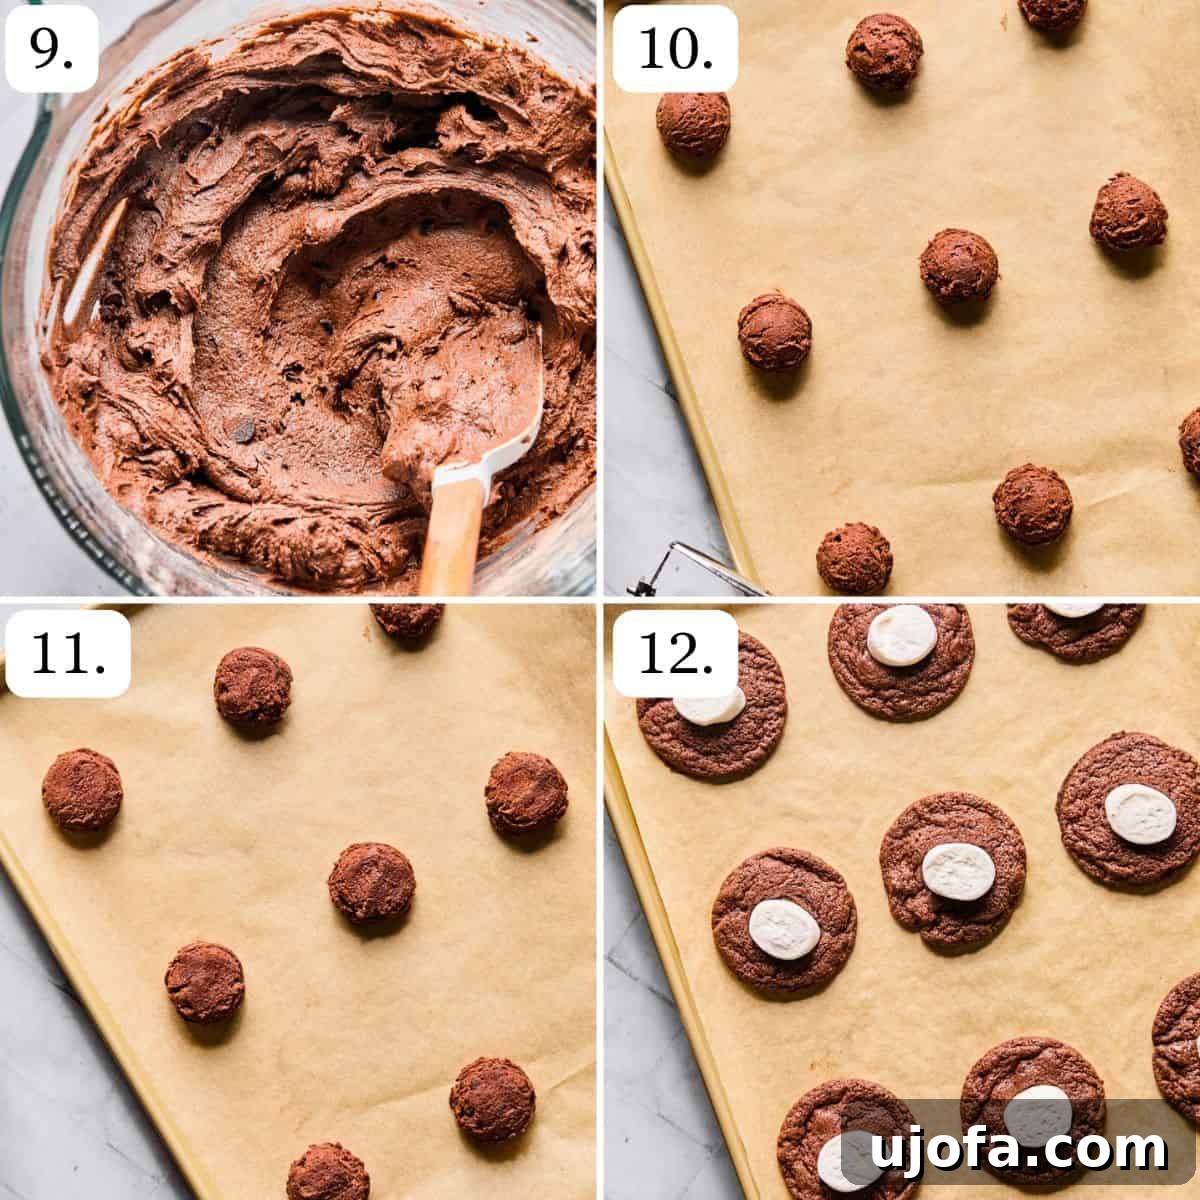
Step 9: Chill the Dough. Cover the bowl with plastic wrap and chill the dough in the refrigerator for 30-60 minutes, or up to overnight. This step is vital for gluten-free cookies as it prevents excessive spreading and ensures a softer, chewier final product.
Step 10: Preheat Oven and Scoop Dough. While the dough chills, preheat your oven to 350°F (175°C). Once chilled, use a 1.5-2-inch cookie scoop to form uniform dough balls. Place them about 2 inches apart on your prepared baking sheet.
Step 11: Lightly Flatten Dough Balls. Gently press down on the top of each dough ball with the palm of your hand or a spatula. This slight flattening helps them bake into perfect cookie shapes.
Step 12: Initial Bake & Marshmallow Addition. Bake the cookies for 9 minutes. At this point, they will be set around the edges but still soft in the center. Carefully remove the baking sheet from the oven and, working quickly, gently press half a marshmallow into the center of each warm cookie. Be careful not to flatten the cookie completely.
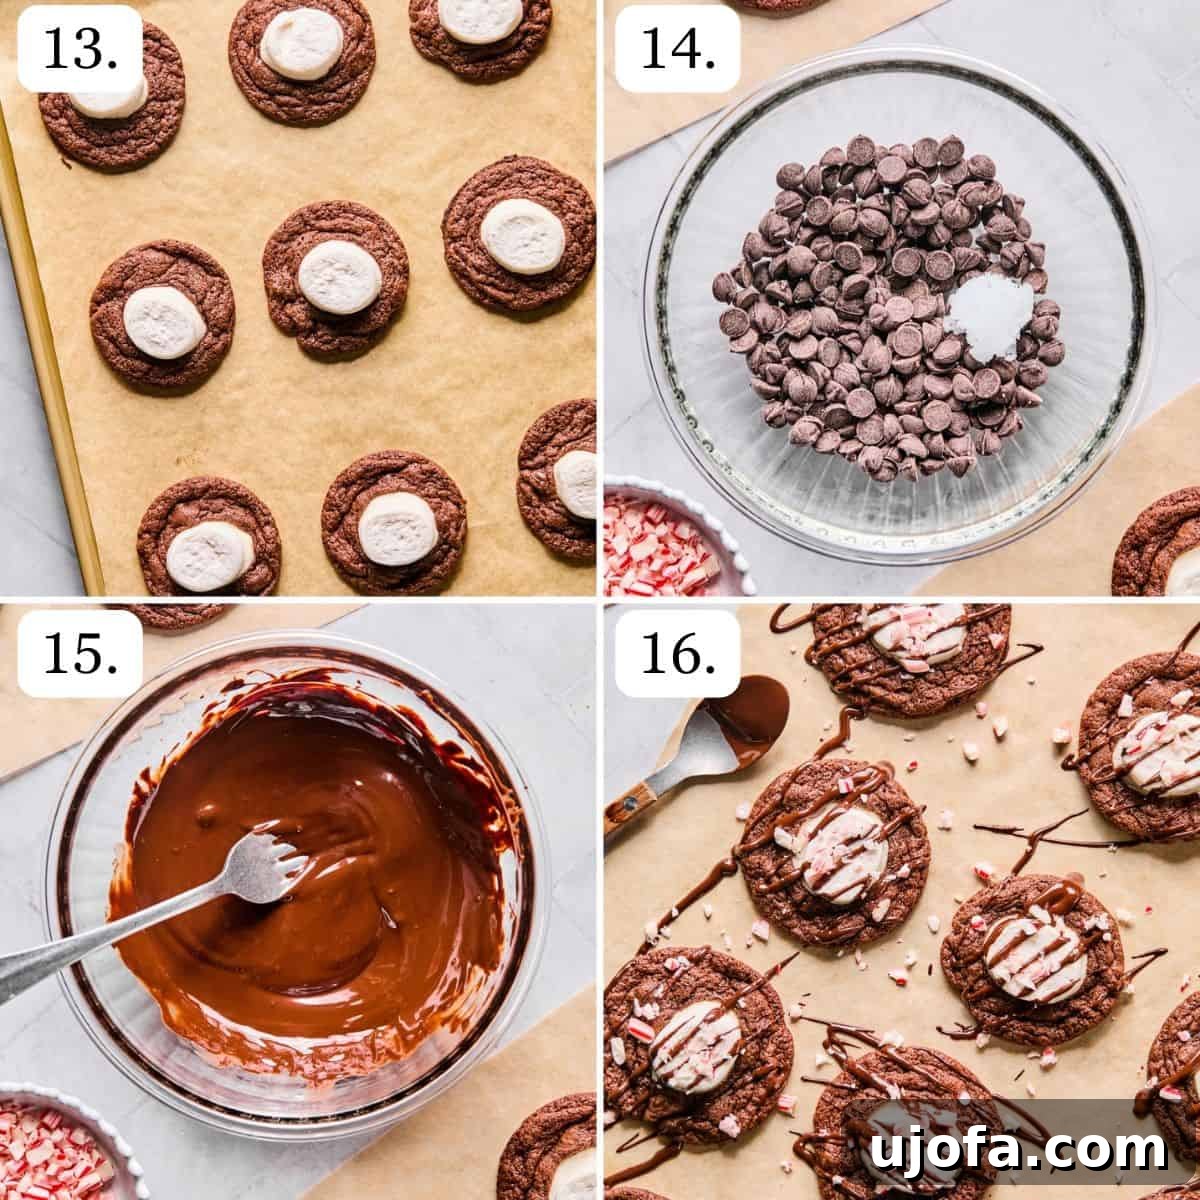
Step 13: Second Bake. Return the cookies to the oven for another 3-4 minutes. Keep a close eye on them; you want the marshmallows to melt slightly and become soft and gooey, and the cookie edges to be just set. Overbaking can lead to dry cookies.
Step 14: Prepare Chocolate Drizzle. While the cookies are cooling, prepare your chocolate drizzle. In a microwave-safe bowl, combine the additional dark chocolate chips and coconut oil. Microwave in 30-second increments, stirring well after each, until smooth and fully melted. Alternatively, you can melt them using a double boiler on the stovetop for a more controlled melt.
Step 15: Cool and Decorate. Allow the cookies to cool completely on the baking sheet or a wire rack. Once cooled, drizzle generously with the melted chocolate. Immediately sprinkle with crushed candy canes before the chocolate sets. For a quick set, you can refrigerate them briefly (about 15-20 minutes).
Step 16: Enjoy! Your beautiful and delicious gluten-free hot cocoa cookies are now ready to be savored! Enjoy them with a hot mug of coffee, tea, or, of course, hot chocolate!
Storage & Freezer Tips for Gluten-Free Hot Cocoa Cookies
These delicious cookies are wonderful for making ahead, and they store beautifully. Here’s how to keep them fresh and delicious:
- Room Temperature Storage: Store cooled cookies in an airtight container at room temperature for 3-4 days. To prevent the marshmallow tops from sticking or becoming messy, place a layer of parchment paper between stacked cookies.
- Freezing the Dough: This is an excellent method for having fresh-baked cookies on demand!
- Scoop the dough into 1.5-2-inch balls as instructed in Step 10.
- Lightly flatten each dough ball.
- Arrange the dough balls on a baking sheet lined with parchment paper, ensuring they don’t touch.
- Freeze until solid, typically 1-2 hours.
- Once frozen, transfer the dough balls to a freezer-safe bag or airtight container. They can be stored for up to 3 months.
- When ready to bake, place frozen dough balls on a parchment-lined baking sheet. Add 1-2 minutes to the initial bake time (Step 12) before adding the marshmallows.
- Freezing Baked Cookies: You can also freeze fully baked cookies to enjoy later.
- Bake the cookies according to the recipe, but skip the chocolate drizzle and crushed candy cane topping.
- Allow the cookies to cool completely on a wire rack.
- Arrange the cooled cookies on a baking sheet and freeze until solid.
- Transfer the frozen cookies to a freezer-safe bag or airtight container. They will keep for up to 2 months.
- When ready to serve, thaw the cookies at room temperature. Once thawed, add the chocolate drizzle and crushed candy canes for the best presentation and texture.
Hot Cocoa Cookie Recipe FAQs
Absolutely! Simply omit the peppermint extract and increase the vanilla extract to 1.5 teaspoons for a classic, rich hot cocoa flavor that’s just as delicious.
Mini marshmallows can be used, but they tend to melt faster and can sometimes disappear into the cookie. If you opt for minis, we recommend tucking a few into the center of each cookie right after the first bake (Step 12) to ensure they hold their shape and create that iconic gooey top.
Yes, chilling the dough is a highly recommended step, especially for gluten-free cookies. Gluten-free flours benefit greatly from resting time, which allows the flour to fully hydrate. This prevents the cookies from spreading too thin in the oven and helps them retain their soft, chewy texture. A minimum of 30 minutes is ideal, but an hour or even overnight can yield even better results.
Absolutely! These cookies are perfect for making ahead. Both the dough (scooped and frozen) and the fully baked cookies (without the topping) freeze beautifully. Refer to our “Storage & Freezer Tips” section for detailed instructions on how to best prepare and store them for future enjoyment.
A 1:1 gluten-free flour blend is a pre-mixed combination of various gluten-free flours (like rice flour, sorghum flour, tapioca starch, etc.) often with added xanthan gum. It’s specifically formulated to be used as a direct substitute for wheat flour in recipes, making gluten-free baking much simpler and more reliable. Always check the label to ensure it contains xanthan gum.
Yes, you can! To make these hot cocoa cookies dairy-free, simply substitute the unsalted butter with your favorite high-quality vegan butter sticks (e.g., Miyoko’s Kitchen, Earth Balance sticks). Ensure your dark chocolate chips are dairy-free (like Enjoy Life brand) and use a vegan marshmallow brand (like Dandies) if you want to keep them fully dairy-free.
These gluten-free hot cocoa cookies bring the cozy charm of a winter drink straight to your dessert table, with soft centers, perfectly melted marshmallows, and a festive peppermint chocolate drizzle. They are sure to become a cherished part of your holiday baking traditions. For another delightful seasonal favorite, you might enjoy my soft baked pumpkin cheesecake cookies next!
Discover More Gluten-Free Sweet Treats
Fudgy Protein Brownies (7g Protein + No Weird Aftertaste!)
Gluten Free Chocolate Chip Almond Butter Oatmeal Cookies
Easy Gluten Free Peanut Butter Blossoms Recipe
The Best Italian Wedding Cookies Made Gluten Free
Love these gluten-free hot cocoa cookies? We’d be thrilled if you could leave a 5-star rating 🌟🌟🌟🌟🌟 in the recipe section below and a review in the comment section. You can also follow me on Facebook, Pinterest or Instagram for more delicious recipes!

Print Recipe
Irresistibly Chewy Gluten-Free Hot Cocoa Cookies
Mary Smith
15
13
1
23
24
cookies
Equipment
-
Large Cookie Sheet
-
Cookie Scoop
Ingredients
- 1 cup unsalted butter, slightly softened
- ¾ cup light brown sugar
- ¾ cup granulated sugar
- 2 large eggs
- 1 tsp vanilla extract
- ¾ tsp peppermint extract
- 1 ¾ cups gluten free 1:1 flour (King Arthur Baking brand recommended)
- ½ cup raw cacao powder
- 1 tsp baking soda
- ½ tsp salt
- 1 cup dark chocolate chips (Enjoy Life brand recommended)
- 12 marshmallows, cut in half horizontally to make 24 flatter round pieces (Dandie’s brand recommended)
For Chocolate Drizzle & Topping
- ¾ cup dark chocolate chips
- 1 tsp coconut oil
- ½ cup candy canes, crushed into fine pieces
Instructions
- Line a large baking sheet with parchment paper.
- Add the softened butter and sugars to a large bowl and mix until light and fluffy using a stand mixer or a fork by hand.
- Add in the eggs, vanilla extract, and peppermint extract and stir until combined.
- In a separate bowl, combine the GF flour, cocoa powder, baking soda, and salt. Whisk until combined.
- Add the dry ingredients into the bowl with the wet ingredients and stir until a thick, sticky dough forms. Stir in the dark chocolate chips. Refrigerate for 30-60 minutes (up to overnight).
- Preheat oven to 350 degrees F (175 C) 15 minutes before baking.
- Use a cookie scoop to form 1.5-2-inch wide balls. Space them 2 inches apart on the baking sheet and press down slightly with your hand. This recipe makes 22-24 cookies.
- Bake for 9 minutes. Remove the pan from the oven and gently press a ½ of a marshmallow into the center of each cookie (being careful not to flatten or squish the cookie completely). Return the cookies to the oven for 3-4 more minutes until the cookies are done and the marshmallows begin to melt and become slightly gooey.
- Let the cookies cool completely (either on the baking sheet or on a cooling rack) before drizzling.
- Combine the chocolate and coconut oil in a bowl and melt in 30-second increments in the microwave, stirring after each, until smooth. Alternatively, use a double boiler on the stove to melt.
- Drizzle some of the melted chocolate over each cookie, then immediately sprinkle with crushed candy canes before the chocolate sets. Refrigerate for 30 minutes to help the chocolate set. Enjoy!
Notes
Store the cookies in an airtight container at room temperature for 3-4 days. If you want the marshmallow tops to stay neat, keep a layer of parchment between stacked cookies. They also freeze well without the drizzle; add the topping after thawing for the best result!
You can freeze these two ways:
- Freeze the dough: Scoop, flatten slightly, and freeze on a sheet pan. Bake from frozen, adding 1-2 minutes to the first bake time before adding marshmallows.
- Freeze the baked cookies: Skip the drizzle, freeze on a tray, then transfer to a freezer bag. Thaw and decorate when ready.
Nutrition
Serving: 1 cookie | Calories: 241kcal | Carbohydrates: 31g | Protein: 3g | Fat: 13g | Saturated Fat: 9g | Polyunsaturated Fat: 0.5g | Monounsaturated Fat: 2g | Trans Fat: 0.3g | Cholesterol: 34mg | Sodium: 120mg | Potassium: 128mg | Fiber: 2g | Sugar: 20g | Vitamin A: 257IU | Vitamin C: 0.1mg | Calcium: 58mg | Iron: 1mg
All nutrition facts are an estimate and automatically calculated. While I fact-check them using My Fitness Pal, please note that they may not always be 100% accurate and depend on the specific ingredients used. For the most accurate grams per serving size, weigh your total batch and divide by the number of servings.