
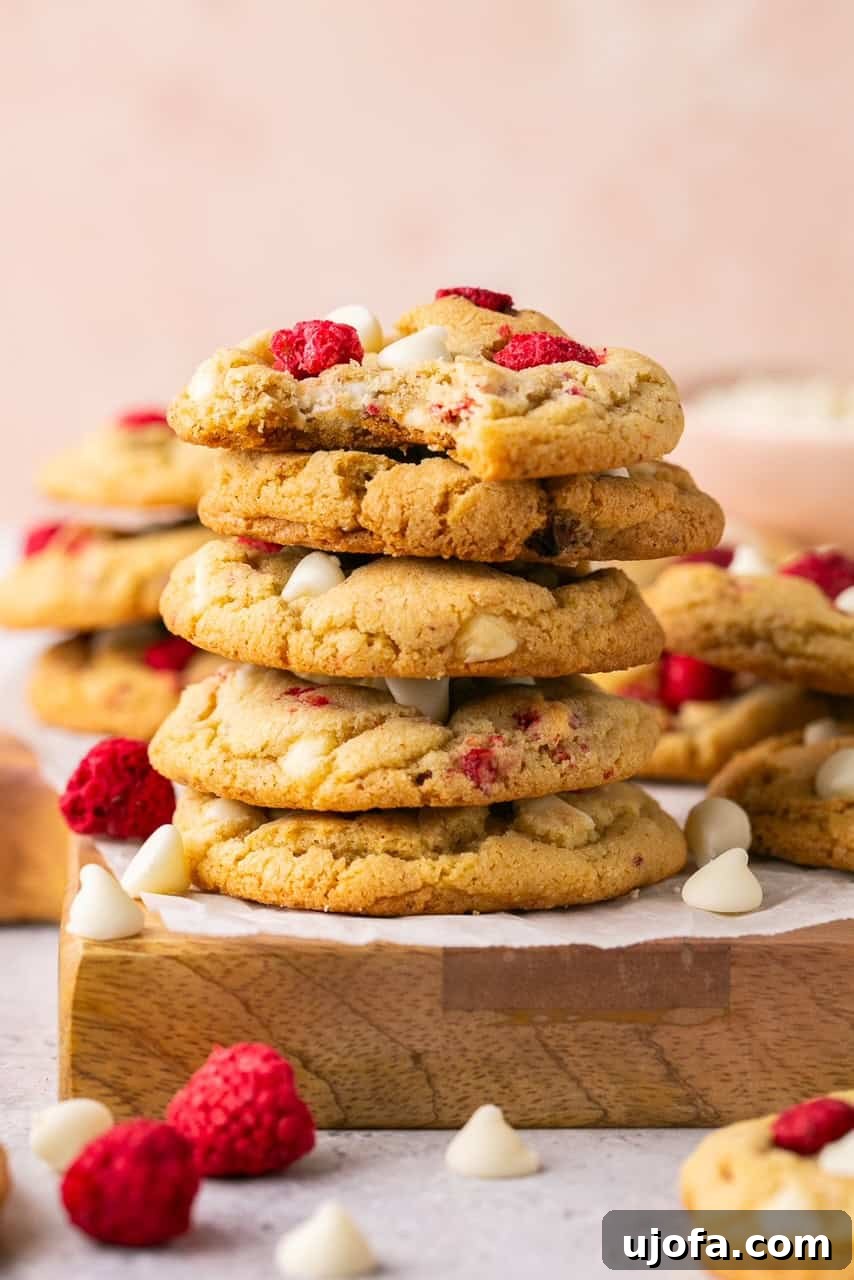
Indulge in the perfect harmony of sweet and tart with these exquisite gluten-free **Raspberry and White Chocolate Cookies**. Imagine a cookie that’s wonderfully soft, delightfully chewy, and absolutely bursting with flavor in every bite. This recipe delivers just that – a truly irresistible treat that everyone, regardless of dietary needs, will adore. Whether you’re a seasoned baker or just starting your gluten-free journey, these homemade cookies are destined to become a staple in your repertoire.
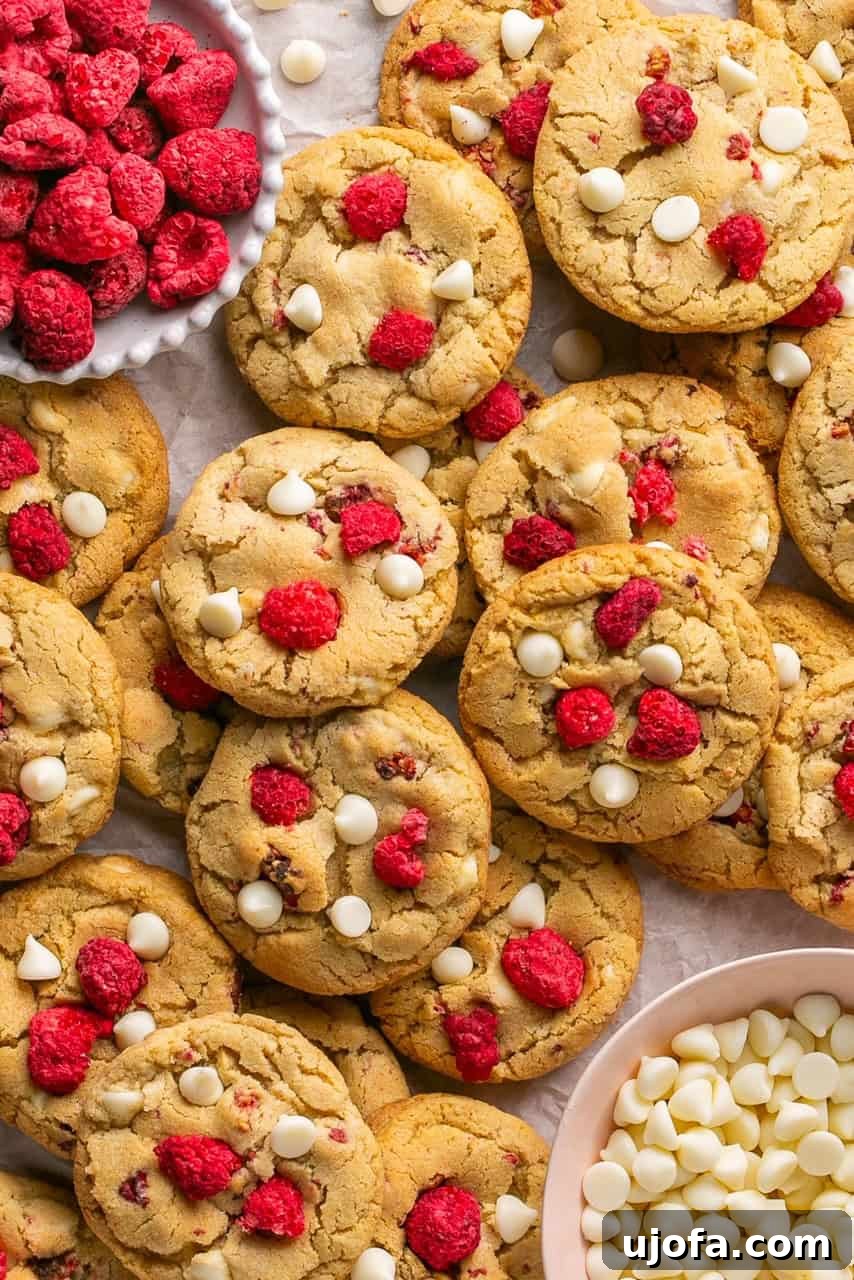
Why You’ll Adore These Gluten-Free Raspberry White Chocolate Cookies
There’s simply no better combination than the rich, creamy sweetness of white chocolate paired with the bright, tangy burst of fresh or freeze-dried raspberries. These aren’t just any cookies; they are specifically crafted to be gluten-free, ensuring that everyone can enjoy their soft, chewy texture and undeniably delicious flavor. They are incredibly versatile, making them a fantastic choice for any occasion, from a casual afternoon snack to a special holiday gathering. Their vibrant appearance, particularly with the red raspberries and white chocolate, makes them an especially festive and popular choice for Valentine’s Day or during the Christmas season.
This recipe for homemade gluten-free cookies stands out as one of the most beloved and frequently requested treats I’ve ever shared. Beyond their amazing taste, they are incredibly straightforward to prepare, making them accessible even for novice bakers. The beauty of this recipe also lies in its adaptability: if white chocolate isn’t your preference, feel free to experiment with dark chocolate or classic milk chocolate chips. The core sweet and tart flavor profile, a signature of these raspberry cookies, remains spectacular regardless of your chocolate choice. Get ready to experience a cookie that’s truly a cut above the rest, delivering pure joy with every bite.
Seeking more delightful gluten-free treats? Don’t miss my recipe for gluten-free Italian wedding cookies for another special occasion!
Key Features of This Easy Cookie Recipe
These **Gluten-Free Raspberry White Chocolate Cookies** boast an impressive list of highlights, making them a standout dessert:
- **Gluten-Free & Dairy-Free Option:** Thoughtfully developed to be naturally gluten-free, with easy adjustments for a dairy-free version, ensuring more people can enjoy them.
- **Perfect Sweet & Tart Balance:** The harmonious blend of creamy white chocolate and tangy raspberries creates a flavor explosion that’s both comforting and exciting.
- **Irresistibly Soft & Chewy:** Achieving that ideal soft, chewy texture is key for any great cookie, and this recipe absolutely nails it.
- **Effortlessly Easy to Make:** With simple steps and common ingredients, these cookies are perfect for bakers of all skill levels, from beginners to experienced home cooks.
- **Freezer-Friendly Convenience:** Prepare a batch ahead of time and freeze for future cravings, making them ideal for meal prep or unexpected guests.
- **Visually Appealing & Festive:** Their vibrant colors make them a beautiful addition to any dessert spread, especially perfect for special occasions like Valentine’s Day or holiday celebrations.
Essential Ingredient Notes for Perfect Gluten-Free Cookies
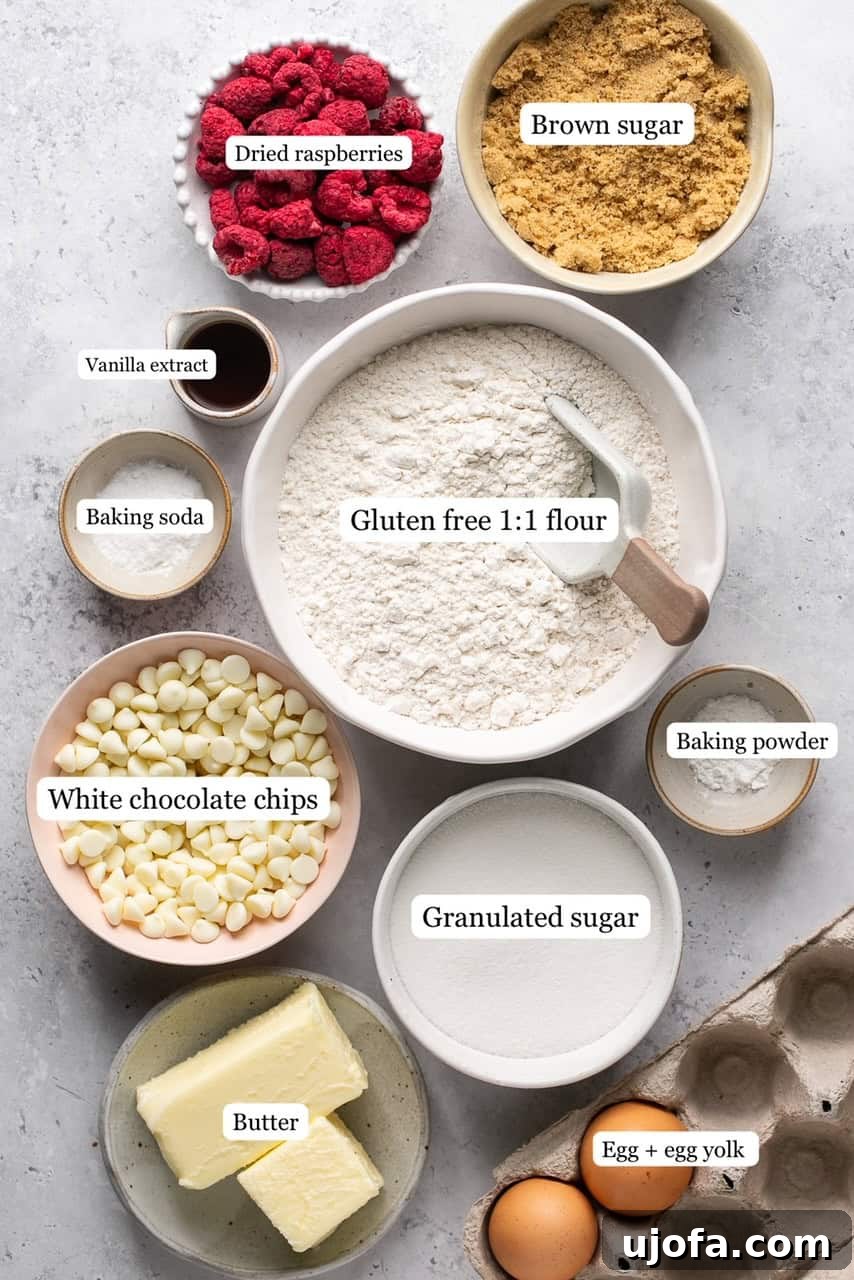
Crafting the perfect batch of **Gluten-Free Raspberry White Chocolate Cookies** starts with understanding each ingredient’s role. Here’s a detailed look at what you’ll need and some crucial tips for the best results:
- Butter: Use softened salted butter for the best flavor and texture. If you’re making these cookies dairy-free, vegan butter is an excellent substitute. Brands like Miyoko’s or Kite Hill are highly recommended for their creamy texture and reliable baking performance, closely mimicking traditional butter. Ensure it’s at room temperature for optimal creaming with the sugars, which is vital for a light, airy cookie.
- Granulated Sugar: This classic white sugar contributes to the crispness of the cookie edges and helps spread during baking. It also provides a foundational sweetness that beautifully balances the tartness of the raspberries.
- Brown Sugar: Light brown sugar is key for achieving that desirable soft, chewy center and a lovely, moist texture. Its molasses content adds a deeper flavor profile. Always remember to pack it firmly into your measuring cup to ensure accuracy – a loosely packed cup won’t provide enough moisture or sweetness.
- Egg + Egg Yolk: This specific combination of one whole egg and an additional egg yolk is a game-changer for cookie texture. The extra egg yolk adds richness, tenderness, and chewiness, resulting in a more indulgent cookie compared to using two full large eggs, which can sometimes make cookies too cake-like.
- Gluten-Free 1:1 Flour: The success of gluten-free cookies heavily relies on a high-quality 1:1 gluten-free baking blend. My personal favorite is King Arthur Baking brand Measure for Measure Gluten-Free Flour because it consistently delivers excellent results without needing additional xanthan gum. Other reputable brands designed for 1:1 substitution may also work, but results can vary.
- Vanilla Extract: A touch of pure vanilla extract enhances all the flavors in the cookie dough, adding warmth and depth to both the chocolate and raspberry notes. Don’t skip this essential flavor booster!
- Raspberries: This is where the magic happens! I’ve thoroughly tested these cookies with both freeze-dried/dehydrated raspberries (which are pictured and highly recommended) and fresh berries.
- **Freeze-Dried Raspberries:** These are the preferred choice. They offer an intense burst of tangy raspberry flavor without adding excess moisture to the dough. They also maintain their vibrant red color beautifully during baking, ensuring your cookies look as good as they taste. You can often find great quality freeze-dried raspberries at stores like Target (Good & Gather brand works wonderfully).
- **Fresh Raspberries:** While delicious, fresh raspberries can pose a few challenges. They tend to make the cookies turn a slightly purple/gray color due to a chemical reaction with the baking soda and baking powder. Additionally, their high moisture content can sometimes make the cookie dough a bit too wet when the berries break apart, leading to a slightly softer cookie. If you opt for fresh, be prepared for potential color variations.
- **Frozen Raspberries:** These can also be used, but similar to fresh, they introduce more moisture and may result in an unexpected green hue due to the acidity reacting with leavening agents. They will still taste fantastic, but their appearance might be a surprise!
- White Chocolate: The creamy sweetness of white chocolate is crucial for balance. For gluten-free options, many popular brands are safe, including Tollhouse, Good & Gather, Lily’s, Pascha, and Enjoy Life. If you require a dairy-free option, specifically look for Enjoy Life or Pascha brands, as they offer excellent dairy-free white chocolate chips or chunks. Using white chocolate chunks from a chopped bar can also provide a delightful texture.
- Baking Soda & Baking Powder: These leavening agents are vital for giving your cookies their perfect lift and texture. Always ensure you are using gluten-free and aluminum-free baking powder. The baking soda helps with spread and tenderness, while baking powder contributes to the cookie’s rise and chewiness.
Mastering the Art of Gluten-Free Raspberry White Chocolate Cookies
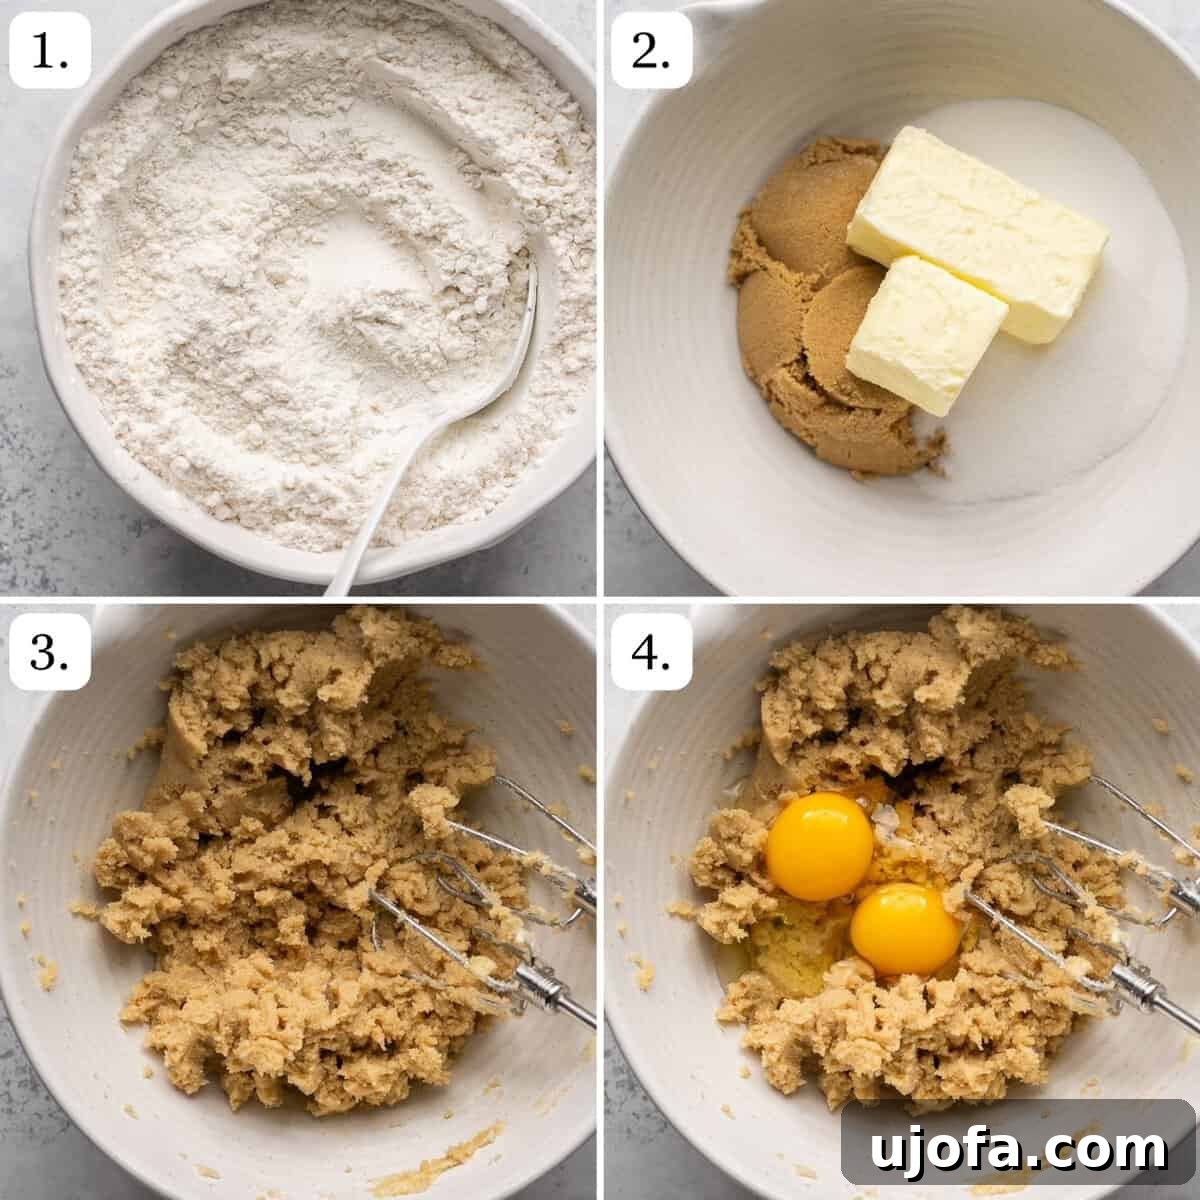
Baking these delightful **Gluten-Free Raspberry White Chocolate Cookies** is a straightforward process that yields impressive results. Follow these simple steps for a batch of soft, chewy perfection:
Step 1: Prepare Your Baking Environment
Begin by preheating your oven to 375°F (190°C). This ensures your oven is at the correct temperature for even baking as soon as your cookies are ready. Line two baking sheets with parchment paper. This prevents sticking and makes for easy cleanup, ensuring your cookies bake perfectly without burning on the bottom.
Step 2: Combine Dry Ingredients
In a medium-sized mixing bowl, whisk together the gluten-free 1:1 flour blend, baking soda, baking powder, and a pinch of salt. Whisking ensures all the leavening agents and salt are evenly distributed throughout the flour, which is crucial for uniform rise and flavor in your cookies.
Step 3: Cream Butter and Sugars
In a separate, larger bowl (preferably the bowl of a stand mixer or a large bowl for a hand mixer), add the softened butter, granulated sugar, and light brown sugar. Cream these ingredients together on medium speed until they are light, fluffy, and well combined. This process incorporates air into the mixture, which contributes to the cookies’ soft texture.
Step 4: Incorporate Wet Ingredients
Once your butter and sugars are perfectly creamed, add in the egg, the extra egg yolk, and the vanilla extract. Continue to beat the mixture until everything is thoroughly incorporated and smooth. The mixture should appear creamy and slightly pale.
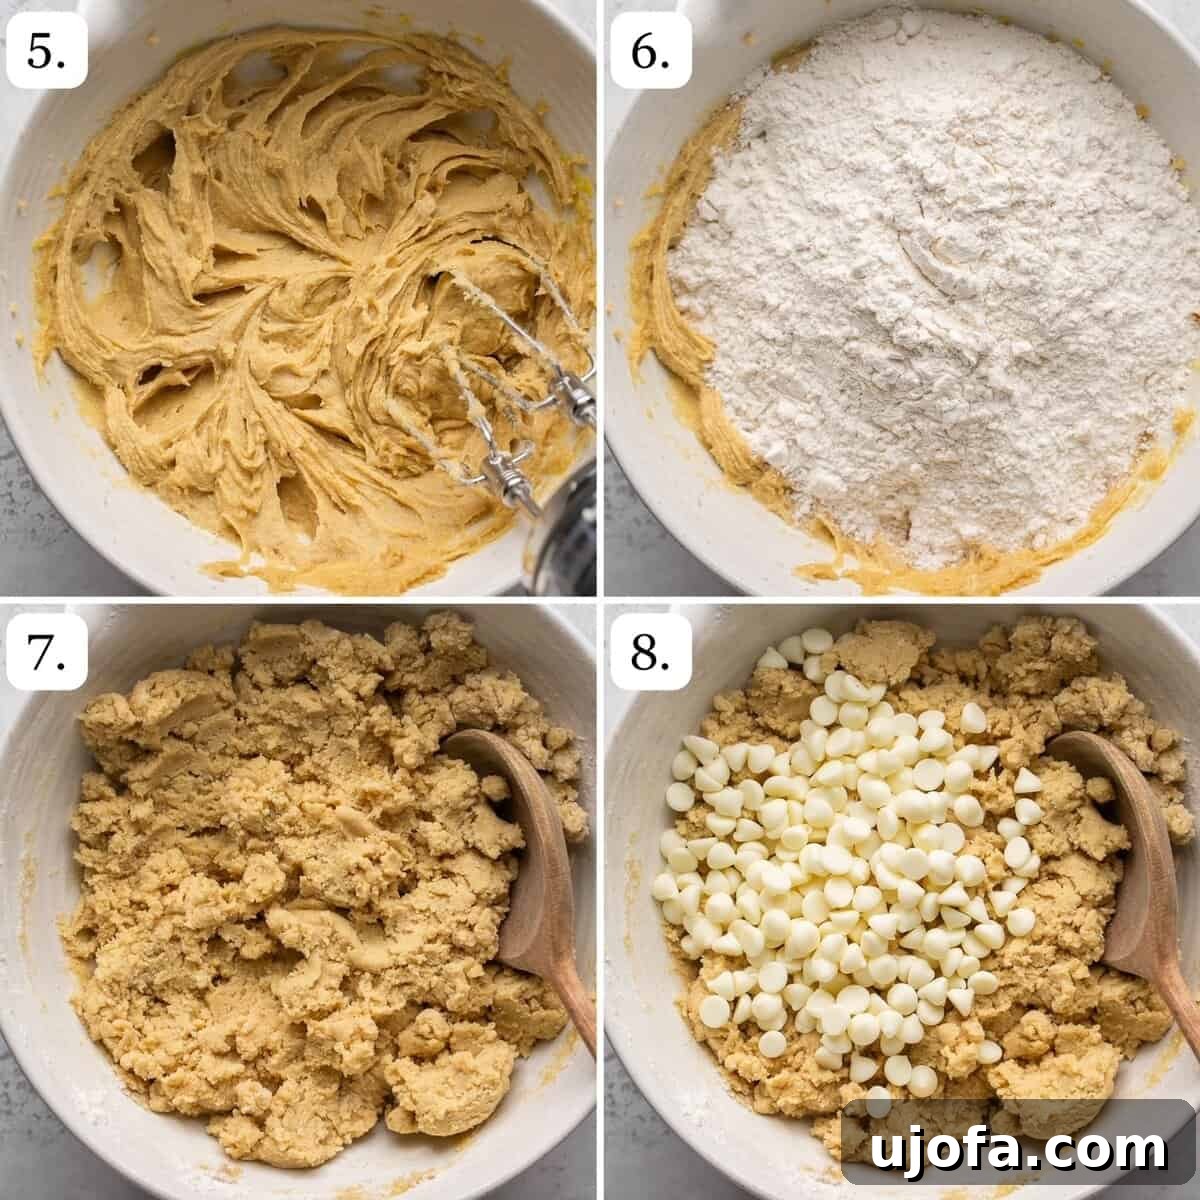
Step 5: Beat Until Smooth and Creamy
Continue to beat the wet ingredients until the mixture is completely smooth and creamy. This ensures proper emulsification and distribution of fats and liquids, leading to a consistent cookie dough.
Step 6: Gradually Add Dry Ingredients
Slowly add the prepared dry ingredients (flour mixture) into the bowl with the wet ingredients. It’s best to add them in two or three batches to prevent a cloud of flour and to allow for easier mixing.
Step 7: Mix to Combine
Mix the dry and wet ingredients together on low speed until just combined. Be careful not to overmix, as this can develop the gluten in regular flour (though less of a concern with GF flour, it’s still good practice) and lead to tough cookies. You may need to use a bit of “elbow grease” or switch to a sturdy spatula towards the end to ensure all flour pockets are incorporated and the dough comes together nicely.
Step 8: Fold in White Chocolate Chips
Once the dough is uniformly mixed, gently fold in the white chocolate chips. Distribute them evenly throughout the dough without crushing them.
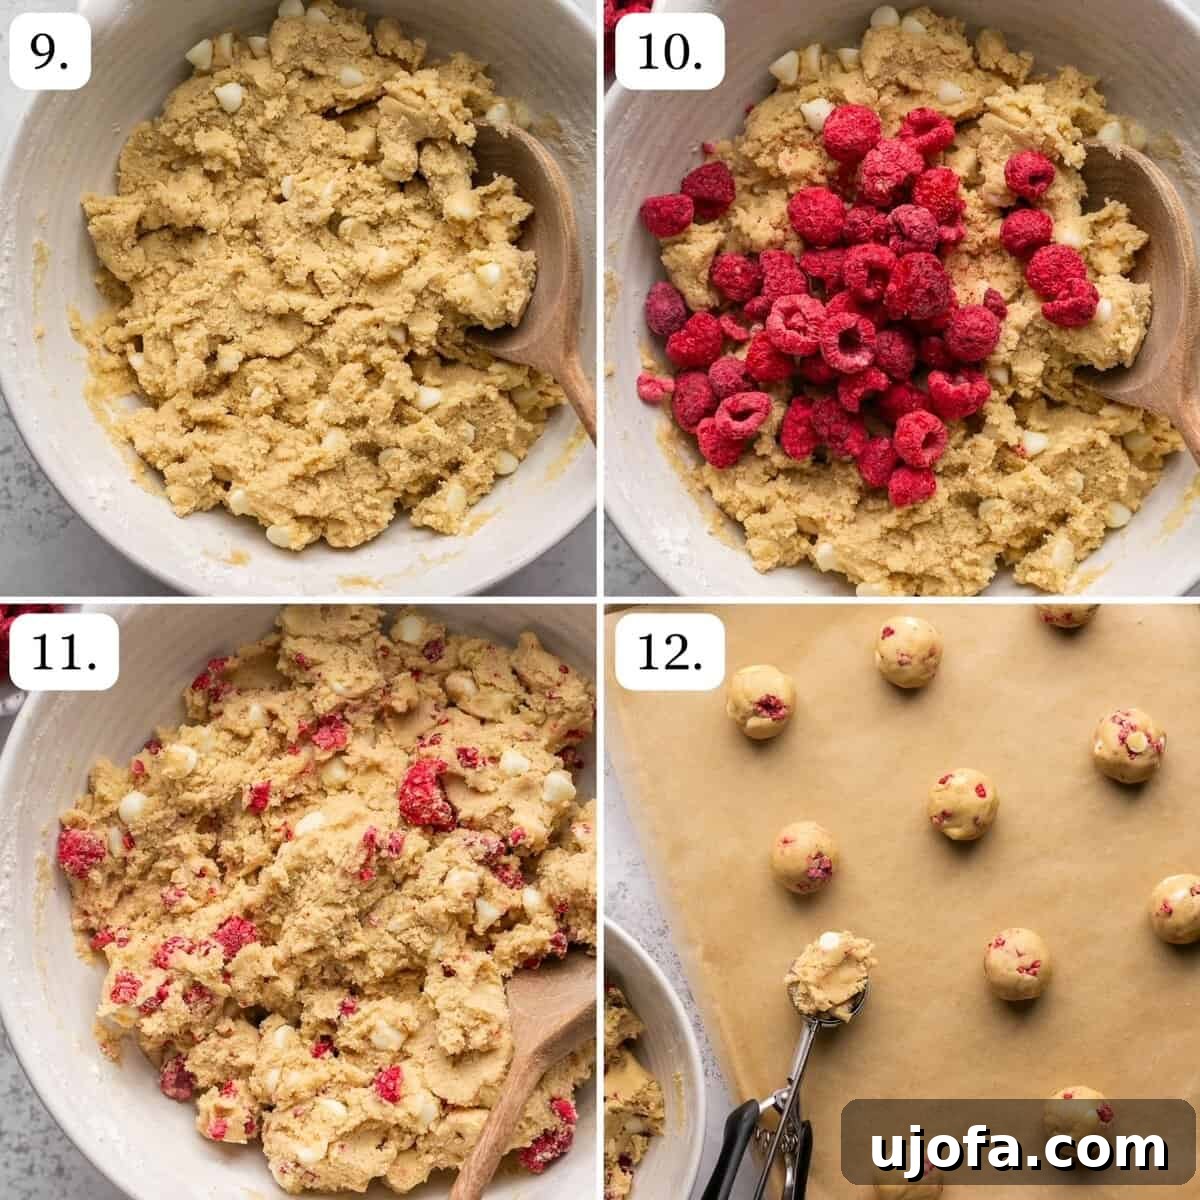
Step 9: Gently Stir in Raspberries
Add the freeze-dried raspberries to the dough. Using a spatula, gently fold them in until they are evenly distributed. It’s perfectly fine if some of the raspberries break into smaller pieces; this will only enhance the flavor distribution throughout the cookies.
Step 10: Chill the Cookie Dough
Cover the bowl with plastic wrap and chill the cookie dough for at least 30 minutes in the refrigerator. This step is crucial for flavor development and to prevent the cookies from spreading too much during baking, resulting in a thicker, chewier cookie.
Step 11: Scoop and Arrange Cookies
Once the dough is chilled, use a 1.5 tablespoon cookie scoop to portion out the dough. Roll each portion into a smooth ball. Place the cookie dough balls about 1-2 inches apart on your parchment-lined baking sheets to allow for proper air circulation and spreading. This recipe yields approximately 24 delicious cookies.
Step 12: Bake to Golden Perfection & Cool
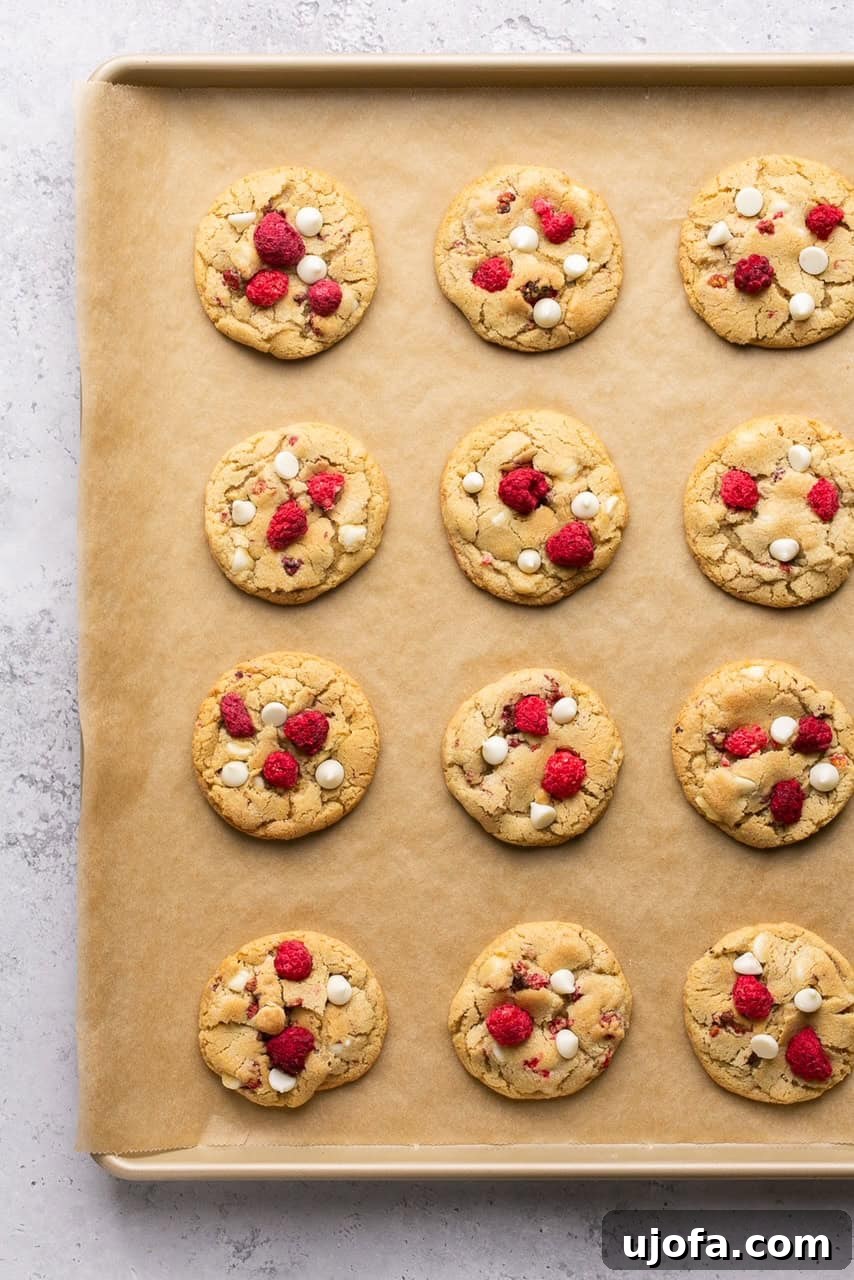
Bake the cookies for 10-12 minutes, or until the edges are just beginning to turn a light golden brown and the centers are still slightly soft. Do not overbake! Overbaking will result in dry cookies. Remove the baking sheets from the oven and let the cookies cool on the sheets for 5 minutes. This allows them to set properly before carefully transferring them to a wire rack to cool completely. For an extra aesthetic touch, press a few additional white chocolate chips and freeze-dried raspberries into the tops of the warm cookies immediately after removing them from the oven for a bakery-worthy finish. Enjoy your perfectly baked **Gluten-Free Raspberry White Chocolate Cookies**!
Expert Tips, Smart Tricks & Delicious Variations for Your Cookies
Enhance your baking experience and customize your **Gluten-Free Raspberry White Chocolate Cookies** with these helpful tips and creative variations:
The Importance of Chilling the Dough: While it might be tempting to skip this step, chilling the cookie dough for at least 30 minutes is highly recommended for achieving wonderfully chewy cookies. Chilling allows the fats to solidify, preventing the cookies from spreading too thin in the oven, and helps the flavors meld together more deeply. Cookies baked from unchilled dough tend to be flatter and may have a harder texture. The duration of chilling can significantly impact the final texture, ranging from soft and chewy with a shorter chill to denser and chewier with a longer chill.
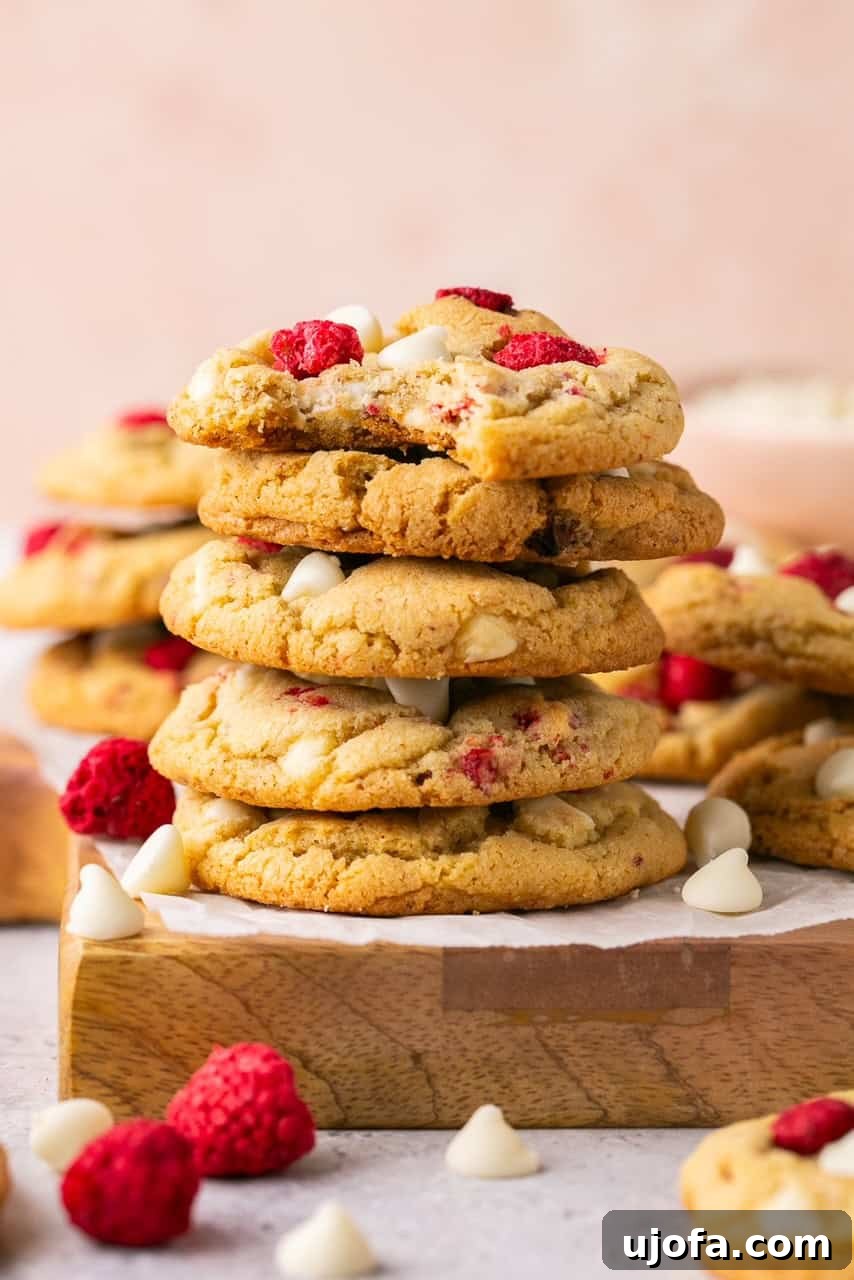
Proper Storage for Freshness: To keep your delicious cookies fresh and soft, store them in an airtight container at room temperature. They will maintain their quality and delightful texture for up to 5 days. For optimal freshness, consider placing a slice of bread in the container; it helps keep the cookies moist.
Freezing Baked Cookies for Later Enjoyment: These cookies are remarkably freezer-friendly! Once completely cooled, place the baked cookies in a single layer on a baking sheet and freeze for about an hour until solid. Then, transfer them to an airtight freezer-safe container or a heavy-duty freezer bag. They will keep beautifully in the freezer for up to 6 months. When ready to enjoy, simply thaw them at room temperature or warm them slightly in the microwave for a fresh-baked feel.
Freezing Cookie Dough for Future Cravings: You can also freeze the unbaked cookie dough balls! Scoop the dough into balls, place them on a parchment-lined baking sheet, and freeze until solid. Transfer the frozen dough balls to a freezer-safe bag. When you want fresh cookies, simply bake them from frozen, adding an extra 2-4 minutes to the baking time. This is perfect for portion control or having warm cookies on demand!
Exciting Additional Mix-ins: Don’t limit yourself to just white chocolate and raspberries! These cookies are a fantastic canvas for other flavors.
- **Nuts:** Macadamia nuts are an exceptional addition, offering a buttery crunch that complements the white chocolate beautifully. Toasted pecans or walnuts would also provide a lovely depth of flavor.
- **Coconut:** Shredded or flaked coconut can add a delightful chewy texture and tropical note. For best results, lightly toast the coconut before adding it to the dough.
- **Other Berries:** If you’re a fan of the freeze-dried method, freeze-dried strawberries make an excellent alternative to raspberries, offering a similar tangy flavor and vibrant color. You could even try a mix of different freeze-dried berries!
- **Citrus Zest:** A teaspoon of lemon or orange zest could brighten the flavor profile even further, adding a subtle aromatic touch.
Troubleshooting Common Cookie Issues:
- **Cookies Spreading Too Much:** This is usually due to butter being too warm, not chilling the dough enough, or too much leavening. Ensure butter is softened, not melted, and always chill the dough.
- **Cookies Are Too Hard/Dry:** Likely overbaked. Keep an eye on the edges turning golden, but the centers should still look slightly soft.
- **Inconsistent Sizing:** Use a cookie scoop for uniform sizes, ensuring even baking.
Frequently Asked Questions About These Gluten-Free Cookies
It can be quite surprising to see your beautifully baked cookies turn an unexpected shade of greenish-blue! This phenomenon typically occurs when using fresh or frozen raspberries. The natural acidity present in these berries can react with the alkaline ingredients in the dough, specifically baking soda and baking powder. This chemical interaction results in a color change. While the cookies remain perfectly safe and delicious to eat, the color can be a bit off-putting. This is precisely why freeze-dried raspberries are highly recommended for this recipe, as they maintain their vibrant red hue and prevent any unwanted color shifts.
Absolutely, 100%! The combination of white chocolate and raspberries is a classic for a reason, creating a truly irresistible flavor profile. The rich, sweet, and creamy notes of white chocolate act as the perfect counterbalance to the bright, tangy, and slightly tart essence of raspberries. In these chewy gluten-free cookies, this dynamic duo creates a harmonious and unforgettable taste experience that will leave you craving more. It’s a pairing that’s both comforting and exciting, making every bite a delight.
Yes, this particular recipe for **Gluten-Free Raspberry White Chocolate Cookies** is naturally nut-free! The base recipe does not call for any nuts, making them a safe and delicious option for those with nut allergies, assuming all your ingredients (like gluten-free flour and chocolate chips) are certified nut-free and processed in nut-free facilities. Always double-check ingredient labels if severe allergies are a concern. If you wish to add nuts, such as macadamia, you can do so, but then they would no longer be considered nut-free.
Yes, absolutely! Making these cookies dairy-free is quite simple. Just substitute the regular butter with your preferred brand of vegan butter. As mentioned in the ingredient notes, brands like Miyoko’s or Kite Hill perform exceptionally well in baking. Additionally, ensure you use dairy-free white chocolate chips. Brands like Enjoy Life or Pascha offer excellent dairy-free white chocolate options that will seamlessly integrate into the recipe, allowing you to enjoy all the flavor without the dairy.
For consistent baking results, especially with gluten-free flour, the most accurate method is to weigh your flour using a kitchen scale. If you don’t have a scale, use the “spoon and level” method: gently spoon the flour into your measuring cup until it overflows, then use a straight edge (like the back of a knife) to level off the top. Avoid scooping the flour directly from the bag with your measuring cup, as this can compact it and lead to using too much flour, resulting in dry or dense cookies.

Explore More Gluten-Free Dessert Recipes
If you loved these **Gluten-Free Raspberry White Chocolate Cookies**, you’re in for a treat! Discover more delightful gluten-free desserts that are just as easy and delicious:
- Classic Chocolate Chipless Cookies
- No-Bake Mini Cheesecakes (Gluten-Free & Dairy-Free Option)
- Irresistible Pretzel Crack (Gluten-Free)
- Fluffy Cranberry Orange Scones (Gluten-Free & Dairy-Free Option)
- Tangy Key Lime Pie (Gluten-Free)
Loved this recipe? Please leave a 5-star 🌟🌟🌟🌟🌟 rating in the recipe card below & a review in the comment section. Or, follow me on Facebook, Pinterest or Instagram today for more delicious recipes!

Print Recipe
Raspberry and White Chocolate Cookies (Gluten Free)
Equipment
-
Mixing bowls
-
Electric Mixer
-
Cookie Sheets
-
Cookie Scoop
Ingredients
- ¾ cup salted butter, softened (or vegan butter for dairy-free)
- ¾ cup granulated sugar
- ¾ cup light brown sugar, packed
- 1.5 tsp vanilla extract
- 1 large egg
- 1 egg yolk
- 2 ¼ cups gluten free 1:1 Measure for Measure flour, I like King Arthur Baking brand
- 1 tsp baking soda
- ½ tsp baking powder
- ¾ cup white chocolate chips, + more for topping (use dairy-free for dairy-free option)
- ½ cup freeze-dried raspberries*, + more for topping. (See notes below regarding fresh/frozen raspberries)
- ¼ tsp salt
Instructions
-
Preheat oven to 375°F (190°C). Line 2 baking sheets with parchment paper.
-
In a medium bowl, whisk together the gluten-free flour, baking soda, baking powder, and salt.
-
In a separate larger bowl, cream the softened butter and both sugars together until light and fluffy. Beat in the egg, egg yolk, and vanilla extract until well combined and creamy.
-
Gradually add the dry ingredients into the wet ingredients bowl. Mix on low speed until just combined, being careful not to overmix. Add in the white chocolate chips and gently stir to distribute. Then, add the freeze-dried raspberries and delicately fold them into the dough. It’s okay if some raspberries break into smaller pieces. The dough will be thick; you might need some effort to combine it fully!
-
Cover the dough and refrigerate for at least 30 minutes. This chilling step is essential for cookie texture and to prevent excessive spreading during baking.
-
Use a 1.5 tablespoon cookie scoop to form uniform dough balls. Place them 1-2 inches apart on your parchment-lined baking sheets. You should yield approximately 24 cookies.
-
Bake for 10-12 minutes, or until the edges are just set and lightly golden brown, but the centers still appear slightly soft. Do not overbake.
-
Remove the cookies from the oven and let them cool on the baking sheets for 5 minutes. This allows them to firm up before transferring. Then, carefully move them to a wire rack to cool completely. For a prettier presentation, gently press a few extra white chocolate chips and freeze-dried raspberries onto the tops of the warm cookies immediately after baking. Enjoy your perfect **Gluten-Free Raspberry White Chocolate Cookies**!
Notes
Storage: Store your baked cookies in an airtight container at room temperature for up to 5 days to maintain their softness and flavor.
Freezing: These cookies freeze beautifully! Once completely cooled, place the baked cookies in an airtight freezer-safe container or bag. They can be stored for up to 6 months. Thaw at room temperature when ready to enjoy. You can also freeze scooped, unbaked cookie dough balls for bake-on-demand treats.
Additional Mix-ins: Feel free to customize this recipe! Macadamia nuts or coconut would be excellent additions, providing extra texture and flavor. If you prefer, freeze-dried strawberries can be substituted for raspberries for a similar sweet and tart profile.
Nutrition
All nutrition facts are an estimate and automatically calculated. While I fact check them using My Fitness Pal, please note that they may not always be 100% accurate and depend on ingredients used. Weigh your total and divide by the number of servings for the most accurate grams per serving size.