
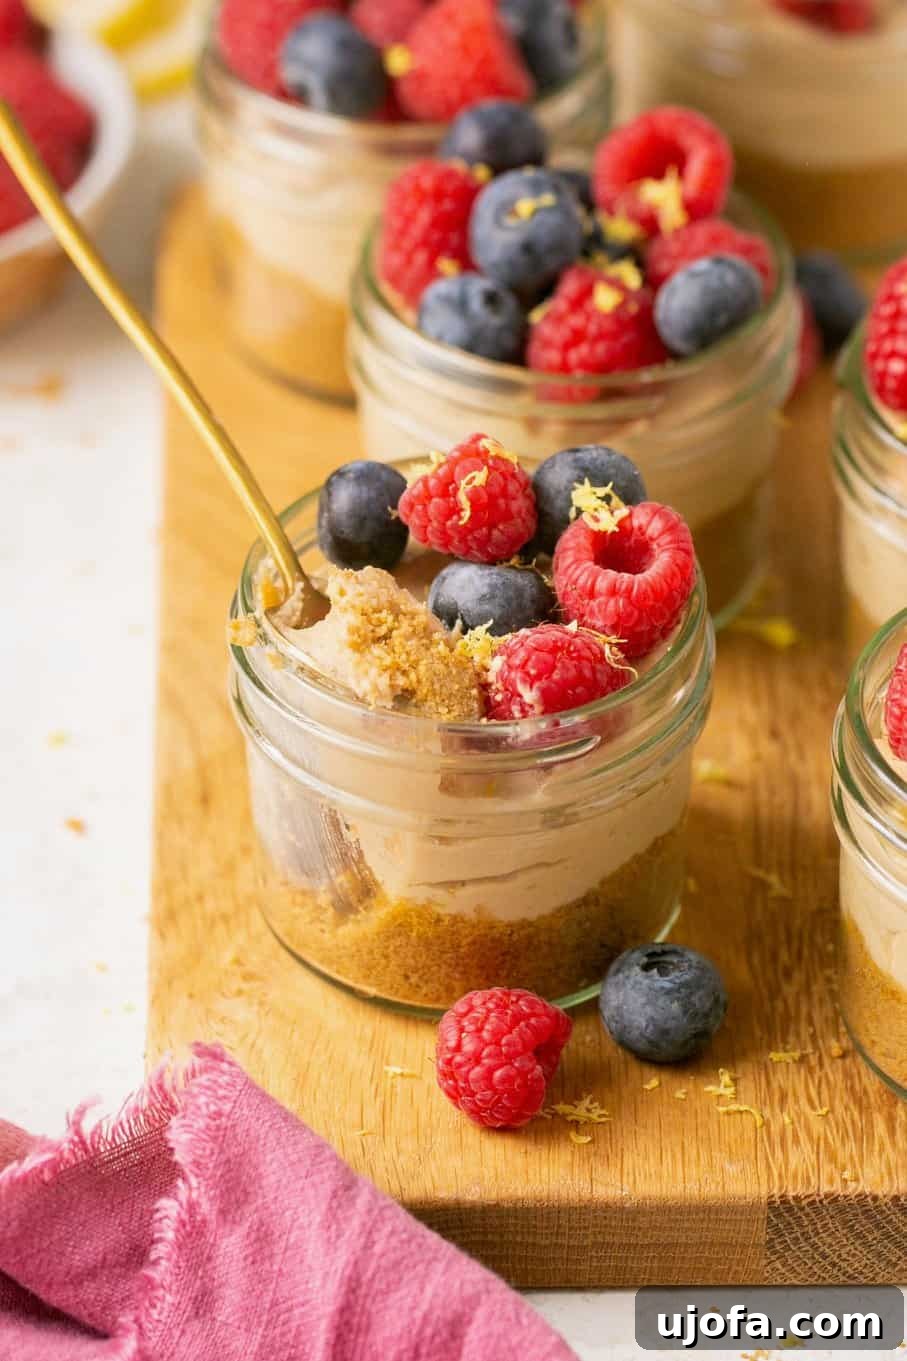
Indulge in the ultimate fuss-free dessert with these delightful **No-Bake Mini Cheesecakes**! Boasting a luxuriously creamy, dairy-free filling nestled atop a perfectly crisp, gluten-free graham cracker crust, this recipe is a dream come true for cheesecake lovers with dietary restrictions or those simply seeking a quick and effortless sweet treat. Ready in just 15 minutes of active prep time, these individual delights are an ideal option for holiday gatherings, special occasions, or a delightful everyday indulgence. Garnish with a dollop of dairy-free whipped cream and a sprinkle of fresh berries for an irresistible finish that will impress everyone.
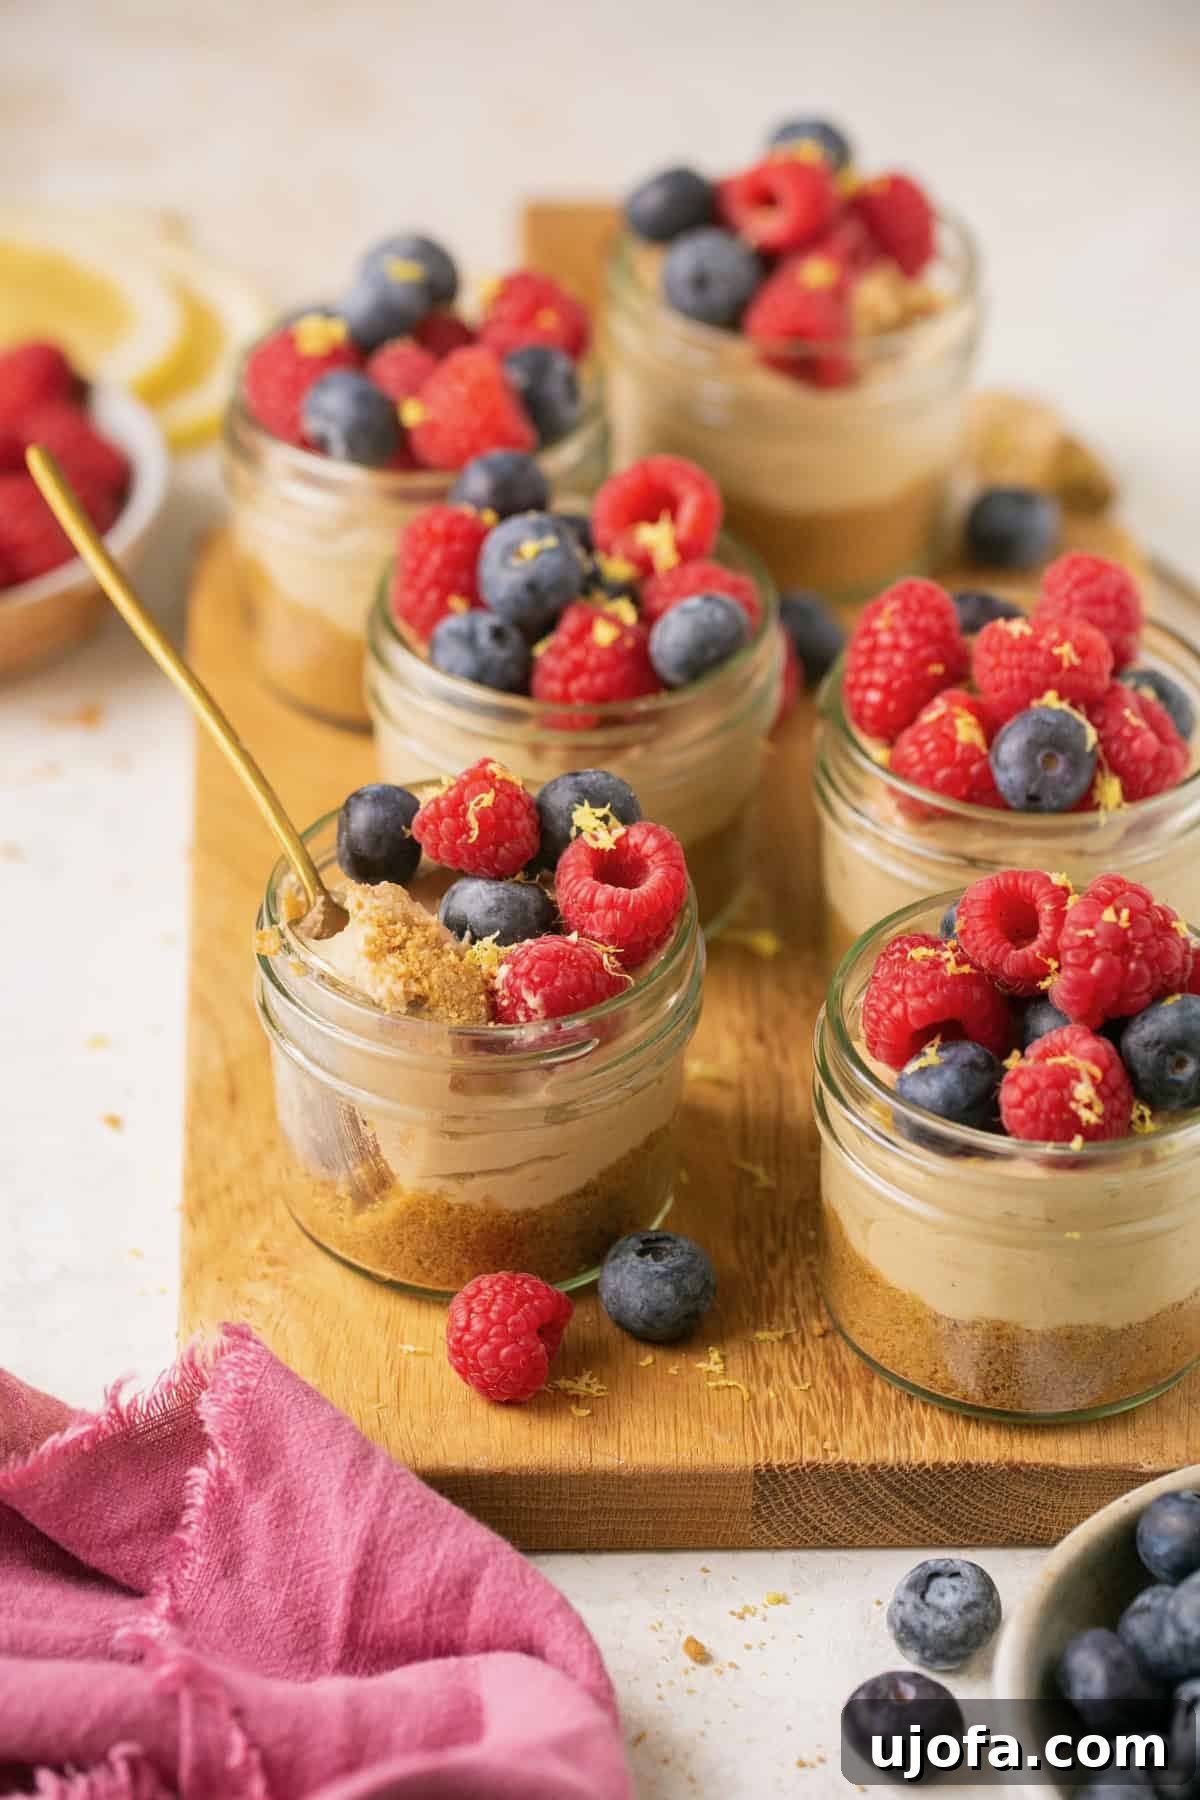
Why These No-Bake Mini Cheesecakes Are a Must-Try
Cheesecake has always been a beloved dessert, but traditional recipes often come with a long list of ingredients and complicated steps, not to mention the challenge of making it dairy-free or gluten-free. That’s where these **No-Bake Mini Cheesecakes** shine! They capture all the rich, tangy flavor and creamy texture of a classic cheesecake without any of the fuss, making them an absolute game-changer for anyone craving this iconic dessert.
Forget the intimidating springform pans, delicate water baths, and lengthy baking times. This recipe simplifies the entire process, allowing you to whip up a batch of perfect individual cheesecakes in record time. The genius lies in its simplicity: no oven required, and the ingredients are thoughtfully chosen to deliver an authentic cheesecake experience without dairy or gluten. This makes it a fantastic choice for those managing allergies, accommodating guests with dietary needs, or simply seeking a lighter, more accessible dessert option. What’s even better is the incredible versatility of this base recipe. With just a few simple adjustments, you can easily transform these into decadent Oreo mini cheesecakes or bright and fruity blueberry mini cheesecakes, offering endless possibilities for customization.
Beyond their ease of preparation and dietary benefits, these little no-bake desserts offer an irresistibly creamy texture that melts in your mouth. They are also a fantastic make-ahead option, allowing you to prepare them in advance and simply chill until serving time, perfect for stress-free entertaining. Serve these elegant individual portions in charming 4 oz Ball mason jars, or any similarly sized containers, jars, or cups, for a presentation that’s as delightful as the dessert itself.
Recipe Highlights: Why You’ll Adore Them
- **Effortless & Oven-Free:** Absolutely no baking required, making them perfect for hot days or when your oven is busy.
- **Dietary-Friendly Delight:** Features a completely dairy-free cheesecake filling and a gluten-free crust, suitable for various dietary needs.
- **Simple Prep, Delicious Results:** Requires no complicated kitchen equipment, just a food processor and a blender.
- **Perfectly Portioned:** Individual servings eliminate guesswork and make for easy serving and enjoyment.
- **Customizable Creations:** Easily adaptable to create exciting variations like Mini Blueberry or Oreo cheesecakes.
- **Make-Ahead Marvel:** Ideal for preparing in advance, freeing up your time closer to serving.
Essential Ingredients for Your No-Bake Mini Cheesecakes
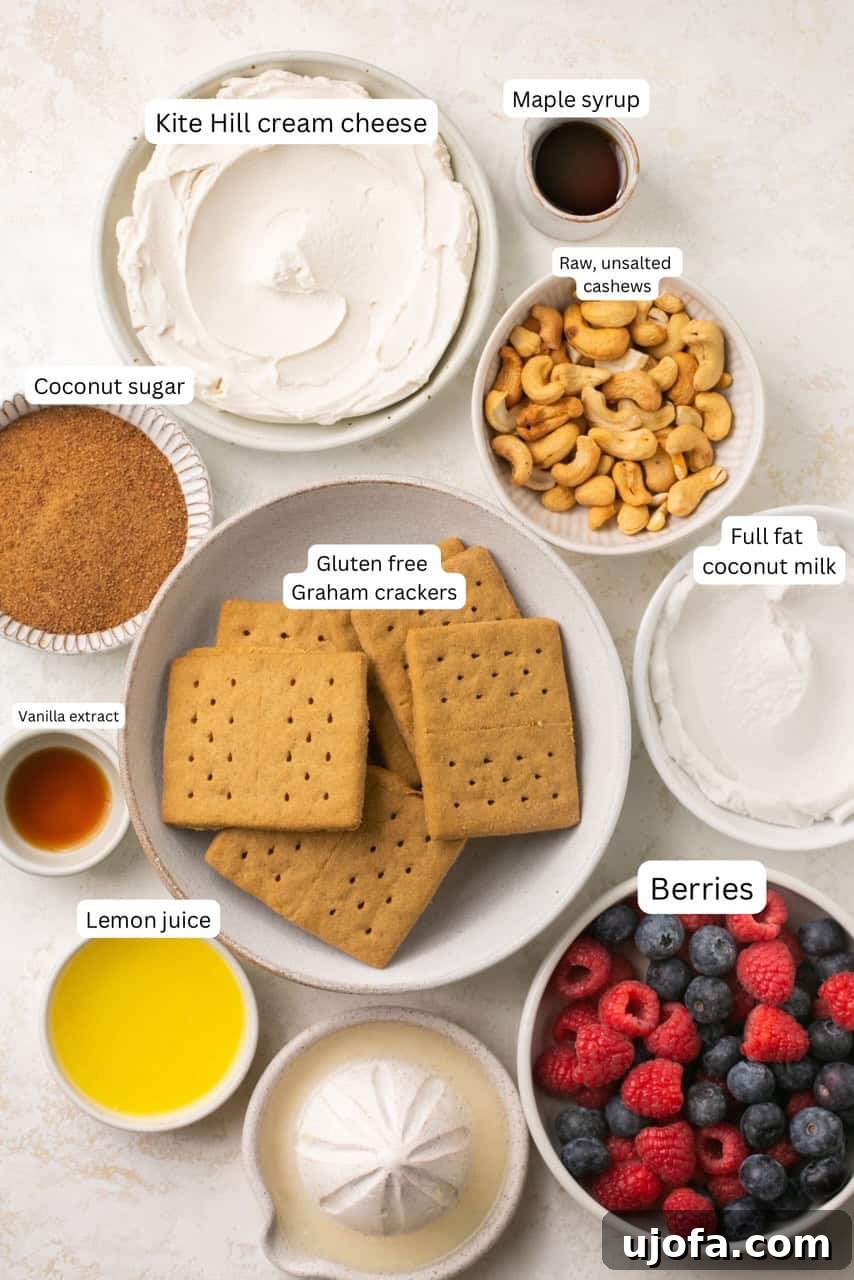
Crafting these delicious no-bake cheesecakes requires a selection of simple yet powerful ingredients that come together to create an unforgettable taste and texture. Each component plays a vital role in achieving that perfect creamy, tangy, and sweet balance, all while adhering to dairy-free and gluten-free principles. Below, we’ll dive into the specific ingredients you’ll need and offer some helpful notes to ensure your success. For precise measurements, always refer to the full recipe card.
For the Irresistibly Creamy Dairy-Free Cheesecake Filling
- Raw, Unsalted Cashews: These are the star of our dairy-free filling, providing a rich, buttery, and incredibly creamy base that mimics traditional cream cheese. If your blender isn’t a high-speed model, it’s crucial to soak the cashews first. Submerge them in hot water for at least 30 minutes (or overnight in cold water) to soften them completely. This step ensures a silky-smooth texture with no gritty bits. Always drain and rinse them thoroughly before blending!
- Dairy-Free Cream Cheese: Essential for that authentic cheesecake tang and body. I’ve had great success with the Kite Hill brand, known for its excellent texture and flavor. For the best results, allow it to sit at room temperature for a while to soften, making it much easier to blend into a smooth consistency. You can typically find dairy-free cream cheese alongside traditional cream cheese in most grocery stores. If dairy isn’t a concern for you, feel free to substitute with regular full-fat cream cheese.
- Coconut Cream: This provides a luxurious richness and helps achieve the ideal cheesecake consistency. Coconut cream is the thick, solid part that separates at the top of a chilled can of full-fat coconut milk. For best results, chill your can of full-fat coconut milk overnight and then carefully scoop out only the thick cream. Brands like Thai Kitchen Organic or Native Forest are excellent choices for their high-quality coconut cream.
- Lemon Juice: A splash of fresh lemon juice is non-negotiable! It provides that quintessential bright, tangy flavor that elevates a cheesecake from merely sweet to truly sublime, balancing the richness of the other ingredients.
- Maple Syrup: To sweeten our filling naturally, we use 100% pure maple syrup. Its distinct flavor complements the other ingredients beautifully and helps achieve a smooth texture. Avoid using imitation or processed syrups, as they contain different sugars and thickeners that can alter the consistency and flavor of your cheesecake.
- Coconut Sugar: As an alternative to refined white or brown sugar, coconut sugar offers a natural sweetness with a subtle caramel note. It’s a fantastic 1:1 substitute for granulated sugars, ensuring your cheesecake remains naturally sweetened.
- Pure Vanilla Extract: A touch of pure vanilla extract enhances all the flavors, adding warmth and depth to the cheesecake filling.
- Fresh Berries (Optional): While not part of the filling, fresh berries are a perfect, vibrant topping that adds natural sweetness and a beautiful pop of color right before serving.
For the Perfect Gluten-Free Cheesecake Crust
- Gluten-Free Graham Crackers: The foundation of any great cheesecake, these gluten-free graham crackers create a wonderfully crumbly and buttery base. Many excellent gluten-free brands are available, so choose your favorite. I typically use about 10 crackers to yield enough crumbs for six individual cheesecake cups.
- Ghee (or alternative): This acts as the binder for our crust, holding the graham cracker crumbs together. Ghee provides a rich, buttery flavor, but you can easily substitute it with melted unsalted butter, vegan butter, or coconut oil, depending on your dietary preferences. Whichever you choose, ensure it’s melted before combining with the crumbs for an even consistency.
Simple Step-by-Step Guide to Your Mini Cheesecakes
Creating these no-bake mini cheesecakes is surprisingly straightforward. Follow these easy steps to assemble your delicious individual desserts, from the crunchy crust to the creamy filling. You’ll be amazed at how quickly these come together!
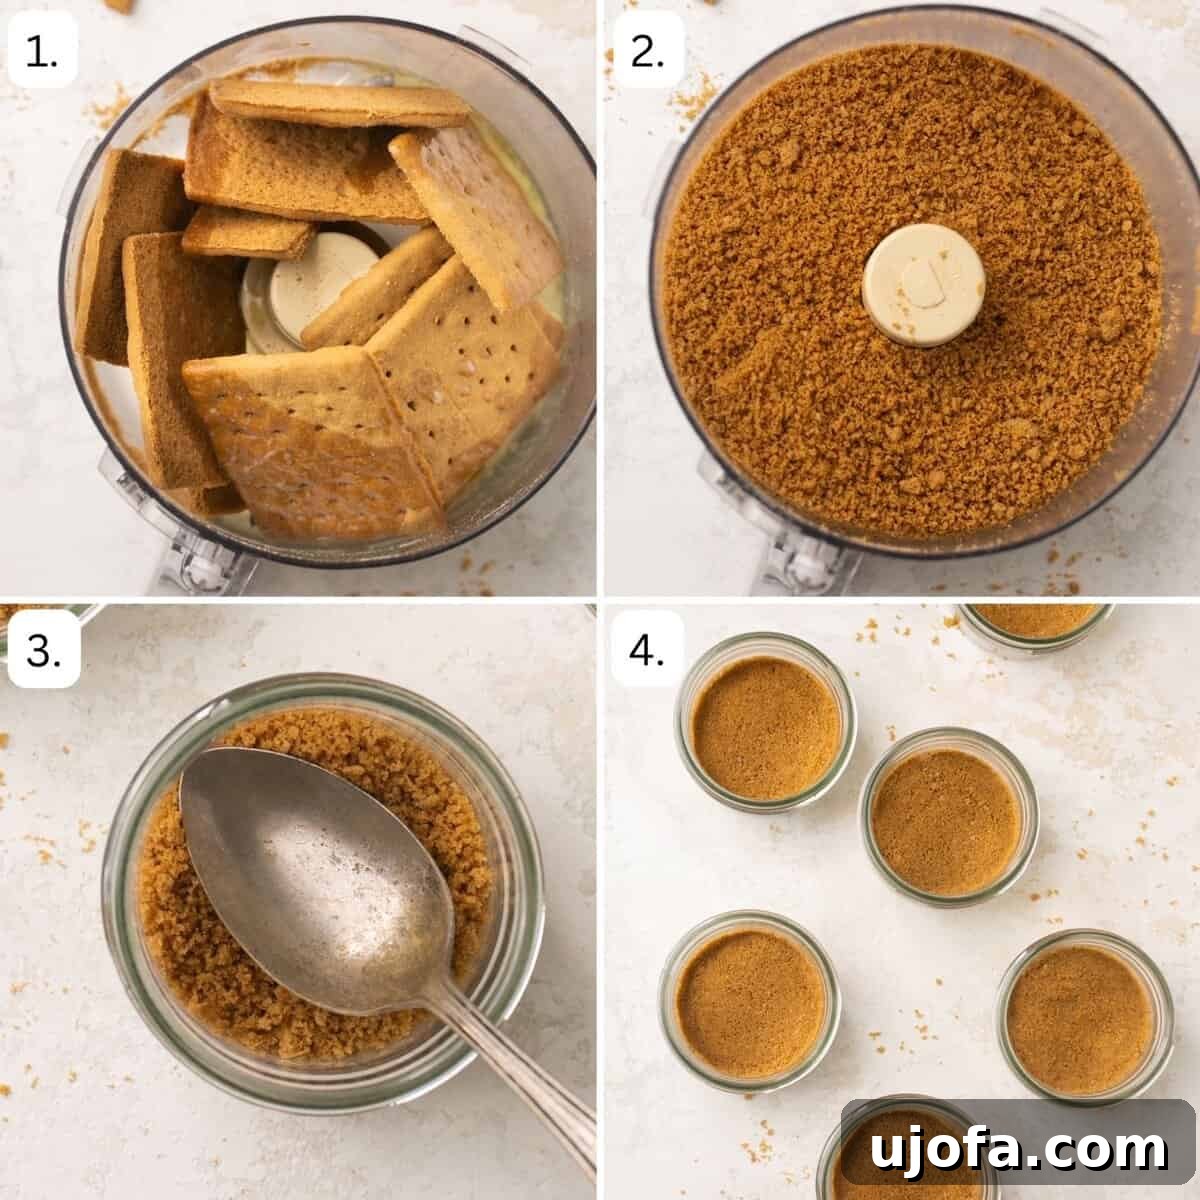
- **Prepare the Crust:** In the bowl of a food processor, combine your gluten-free graham crackers (broken into pieces if large) and the melted binder of your choice (butter, ghee, or coconut oil).
- **Pulse to Crumbs:** Pulse the mixture a few times until the graham crackers are finely crushed and evenly coated by the melted fat, resembling coarse, wet sand.
- **Form the Crusts:** Evenly divide this crumb mixture among six 4-ounce mason jars, dessert cups, or any small containers. Use the back of a spoon or the bottom of a shot glass to gently and firmly press the crumbs into an even layer at the bottom of each container, forming your crust. Set these prepared jars aside.
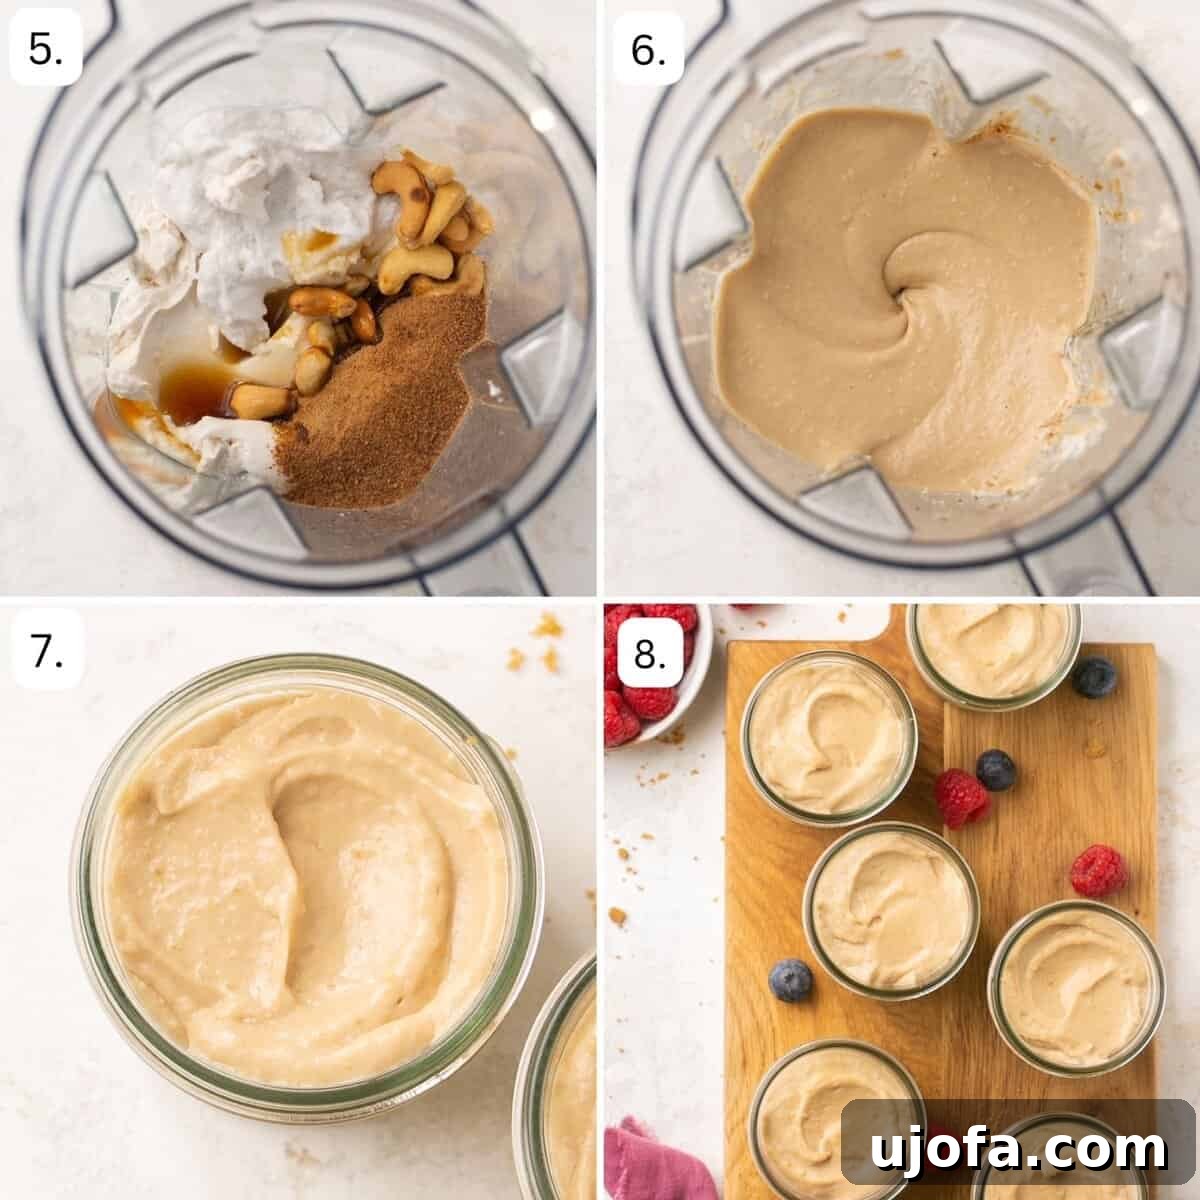
- **Blend the Filling:** In a high-speed blender, combine the pre-soaked and drained cashews, dairy-free cream cheese (softened), coconut cream, fresh lemon juice, pure vanilla extract, maple syrup, and coconut sugar.
- **Achieve Creamy Perfection:** Blend on high speed for approximately 1 minute, or until the mixture is incredibly smooth, thick, and completely creamy. There should be absolutely no cashew chunks remaining; if needed, stop and scrape down the sides, then blend again.
- **Fill the Jars:** Carefully divide the smooth cheesecake filling mixture among the six prepared jars, pouring it over the graham cracker crusts. Gently tap the jars on the counter a few times to release any air bubbles and settle the filling.
- **Chill to Set:** Place the filled jars into the freezer for at least 30 minutes to allow the cheesecakes to set quickly. Alternatively, if you’re not in a hurry, you can chill them in the refrigerator for a minimum of 2 hours, or until firm.
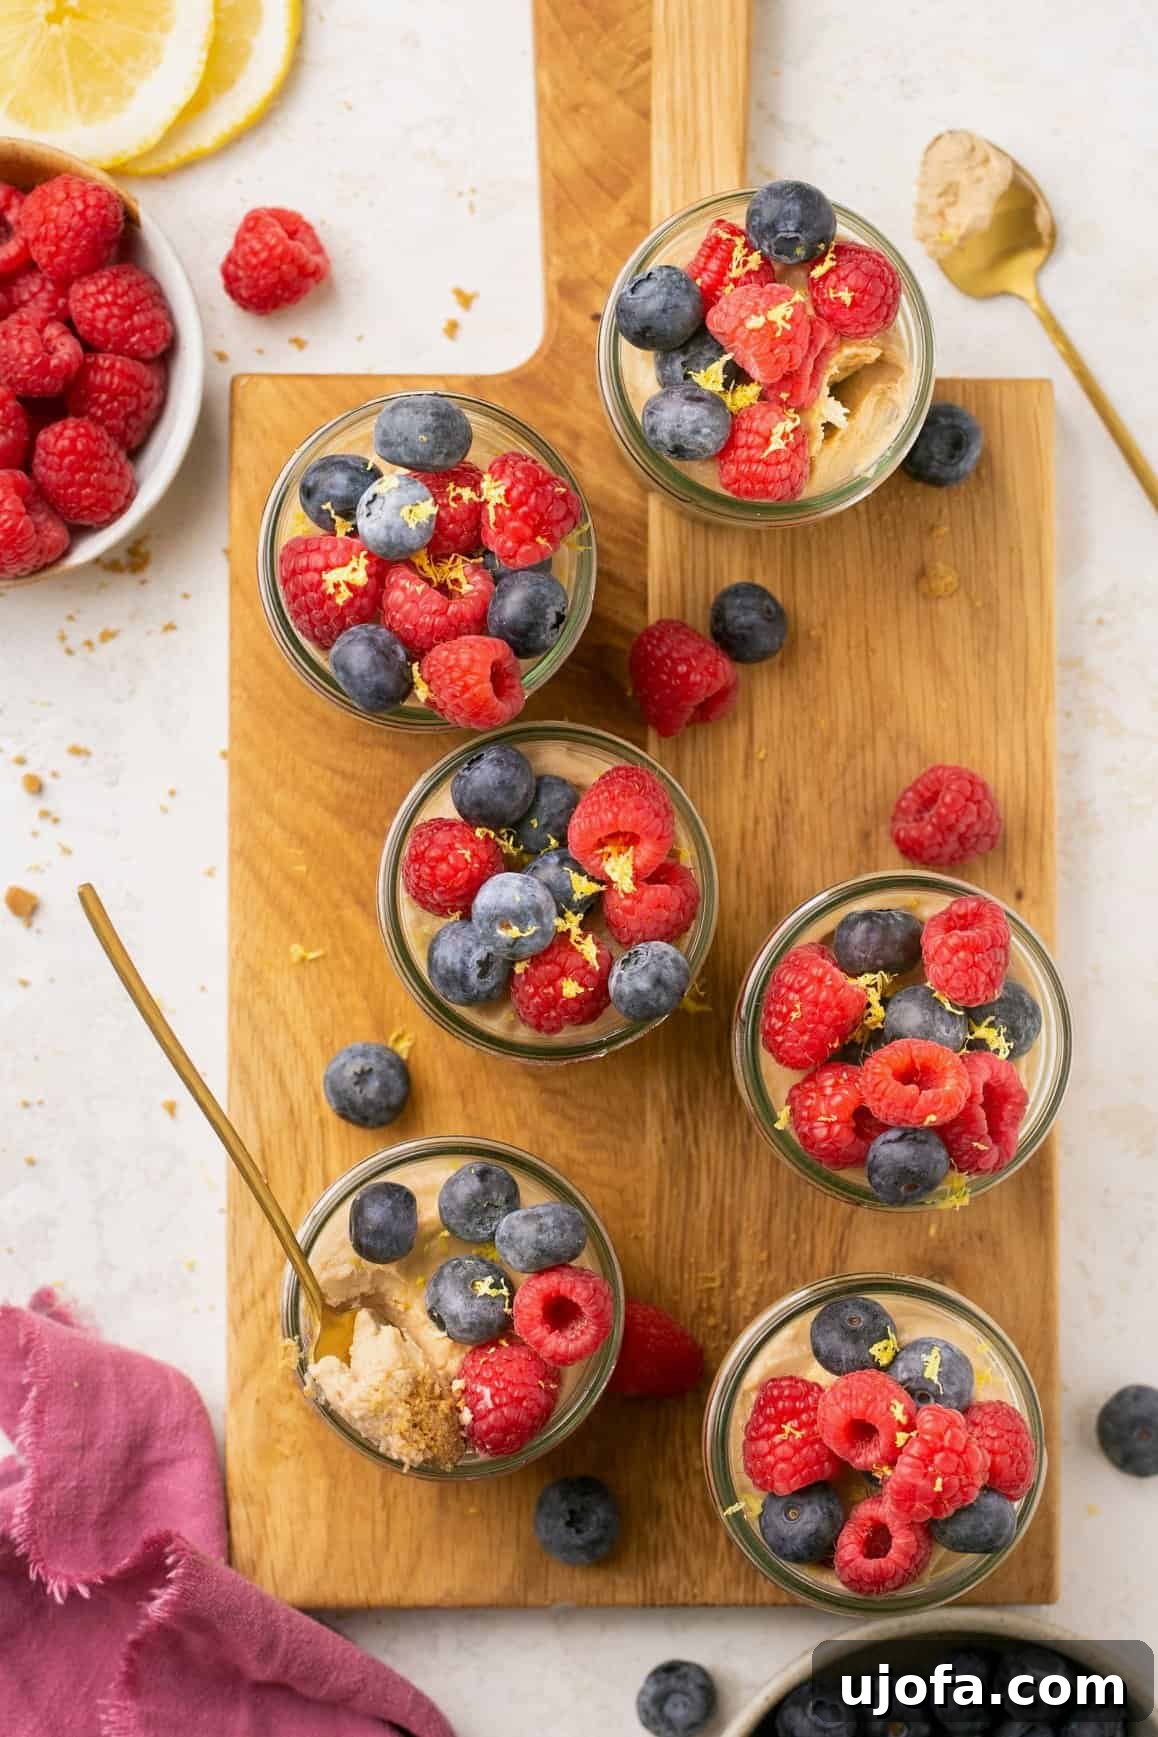
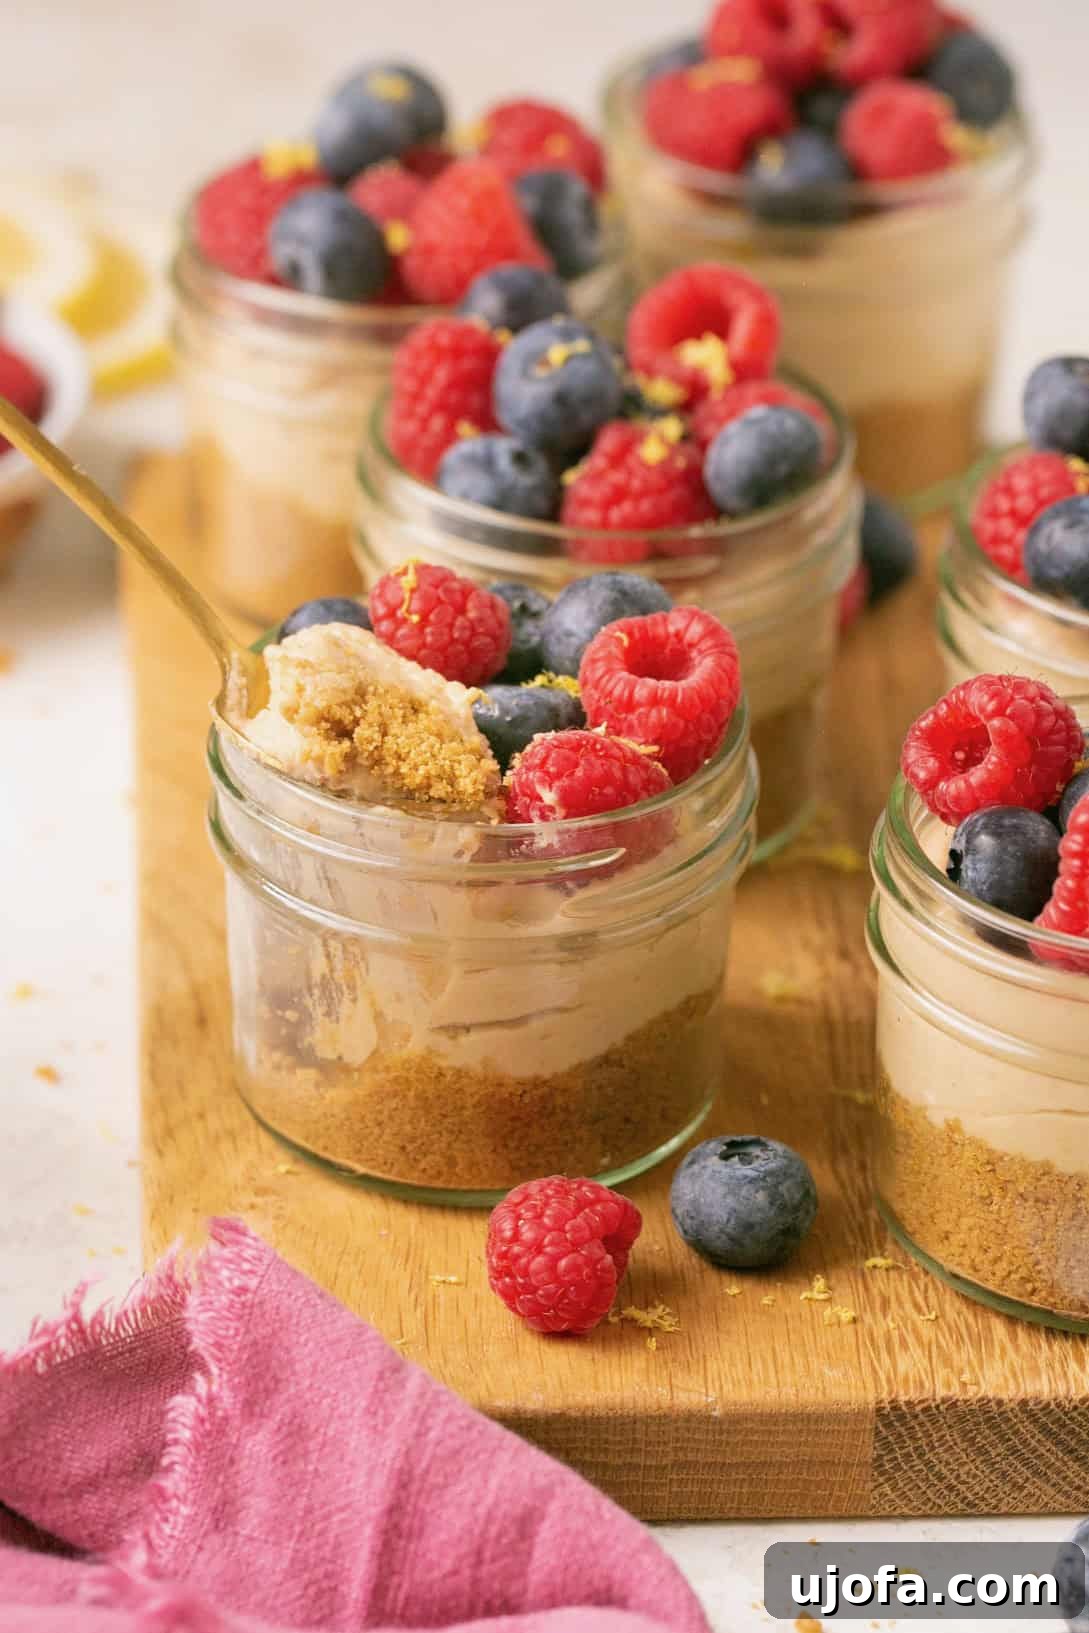
- **Serve and Enjoy:** Once set, these mini cheesecakes are ready to be topped and served. Garnish with your favorite fresh berries, a dollop of dairy-free whipped cream, or any other desired toppings, and savor every delicious bite!
Delicious Mini Cheesecake Variations
While the classic no-bake mini cheesecake is a treat in itself, this recipe offers a versatile base for culinary creativity. Here are two popular variations to inspire your next batch, adding exciting new dimensions of flavor and texture:
Decadent Mini Oreo Cheesecakes
Transform your dairy-free, gluten-free cheesecakes into a cookies-and-cream fantasy by swapping the traditional graham cracker crust for one made with gluten-free Oreo crumbs. It’s an easy and incredibly satisfying modification. Remember, many Oreo cookies are naturally vegan, but always double-check the packaging to ensure you select the gluten-free variety.
Mini Oreo Cheesecake Crust Ingredients:
- 15 Gluten-Free Oreos: Crucially, do not remove the cream filling! The cream helps bind the crust together, reducing the need for excess butter and contributing to a rich flavor. For best results, avoid “double-stuff” or “thin” Oreos, as their proportions can affect the crust’s consistency.
- 1 Tablespoon of Butter: You can use melted vegan butter, ghee, or regular unsalted butter. This helps create a cohesive and firm crust.
Oreo Crust Instructions:
- **Combine & Pulse:** Place the gluten-free Oreos (with their cream filling) and the melted butter in a food processor. Pulse a few times until the cookies are reduced to fine, moist crumbs.
- **Assemble:** Follow the same instructions for filling preparation and assembly as outlined in the main recipe card. Press the Oreo crumb mixture into your jars, then add the dairy-free cheesecake filling.
- **Garnish:** For an extra flourish, top your mini Oreo cheesecakes with additional crushed Oreo pieces or a whole mini Oreo before serving.
Fresh and Fruity Mini Blueberry Cheesecakes
For a burst of fruity freshness, effortlessly convert your standard mini cheesecakes into delightful blueberry versions. The beauty of this variation is that you’ll follow all the original gluten-free cheesecake crust and filling instructions, with just one simple addition to infuse that wonderful blueberry flavor.
Blueberry Variation Instructions:
- **Infuse with Blueberries:** After preparing your dairy-free cheesecake batter, simply **add ¼ cup of mashed fresh blueberries** to the mixture in the blender. Blend for just a few more seconds until the blueberries are evenly incorporated, giving the filling a beautiful purple hue and natural fruit flavor.
- **Garnish:** Once the mini blueberry cheesecakes are set, top them generously with fresh, whole blueberries and a swirl of dairy-free whipped cream for a stunning and delicious presentation.
Pro Tips for Perfect Mini Cheesecakes Every Time
- **Dairy Swap Options:** While this recipe is designed to be dairy-free, if you don’t have dietary restrictions, you can certainly substitute traditional dairy products. Feel free to use regular full-fat cream cheese instead of the dairy-free version, and regular unsalted butter in place of ghee or vegan butter for the crust. The cooking method remains the same.
- **Smart Storage Solutions:** The 4-ounce mason jars are not only charming for serving but also incredibly practical for storage. Their airtight lids make them ideal for keeping your mini cheesecakes fresh. When stored in these jars, your no-bake mini cheesecakes will maintain their perfect texture and flavor in the refrigerator for up to 3 days. If you’re not using jars, transfer any leftover cheesecakes to an airtight container before refrigerating.
- **Elegant Serving Suggestions:** Elevate your mini cheesecakes with a variety of toppings! Beyond fresh berries and dairy-free whipped cream, consider a drizzle of rich dairy-free chocolate ganache, a swirl of homemade caramel sauce, a sprinkle of toasted shredded coconut, or even a scattering of mini dark chocolate chips. The possibilities are endless, allowing you to tailor them to any occasion or preference.
- **Alternative Serving Vessels:** If mason jars aren’t available or preferred, you have other options. Line a standard muffin tin with cupcake liners or paper liners, and assemble your individual cheesecakes in these. This method works just as well and makes them easy to transport. Alternatively, you can make a single large cheesecake in a small springform pan lined with parchment paper, though the chilling time will be longer.
- **Crust Firmness Trick:** If you find your crust isn’t sticking together well, it’s usually a sign that it needs a little more melted fat. Add an extra ½ tablespoon of melted butter, ghee, or coconut oil to your crumb mixture, stir well, and then press firmly into the jars. This extra binding agent will help create a stable, delicious base.
- **Chilling is Key:** Don’t rush the chilling process! The setting time is essential for the cheesecake filling to firm up and achieve its characteristic creamy, yet solid, texture. Adequate chilling ensures your cheesecakes hold their shape beautifully and are easy to eat.
Frequently Asked Questions (FAQs)
Why isn’t my cheesecake crust sticking together?
The most common reason for a crumbly crust is insufficient binder. Ensure you’ve used enough melted butter, ghee, or coconut oil. If your crust feels too dry after mixing, try adding an additional ½ tablespoon of melted fat at a time until the mixture resembles wet sand and can be pressed together easily with your fingers. Pressing firmly into the jars also helps create a solid base.
Can I double or triple this recipe for a larger gathering?
Absolutely! This no-bake mini cheesecake recipe is wonderfully scalable. You can easily double or triple the ingredients to accommodate a larger crowd. Simply multiply all the ingredient amounts by your desired factor. Just ensure you have enough jars or containers for the increased yield. These truly make a perfect individual dessert for any party or potluck.
What other variations can I make with this gluten-free cheesecake recipe?
This dairy-free cheesecake filling serves as an excellent foundational base for a wide array of flavors. Feel free to experiment with your favorite additions! Consider stirring in some cocoa powder for a chocolate cheesecake, a swirl of pumpkin puree and spices for a seasonal treat, or even a hint of mint extract. The gluten-free graham cracker crust is equally versatile; you could use crushed gluten-free ginger snaps or shortbread cookies for a different flavor profile. Don’t be afraid to get creative with both mix-ins and toppings!
Can I make these cheesecakes ahead of time?
Yes, absolutely! These no-bake mini cheesecakes are an ideal make-ahead dessert. You can prepare them up to 2-3 days in advance and store them, covered, in the refrigerator. In fact, chilling them longer often enhances their flavor and ensures a perfectly set, creamy texture. This makes them fantastic for entertaining, as they free up your time on the day of your event.
Can I freeze these mini cheesecakes?
Yes, you can freeze these cheesecakes! Once fully set, cover the jars tightly or transfer the cheesecakes to an airtight container. They can be frozen for up to 1 month. To serve, simply transfer them to the refrigerator to thaw for a few hours, or enjoy them slightly frozen for a refreshing, almost ice-cream-like treat.
More Delicious No-Bake & Gluten-Free Recipes You’ll Love!
If you enjoyed these easy mini cheesecakes, be sure to explore more of our fantastic no-bake and gluten-free dessert creations:
No Bake Paleo Vegan Strawberry Cheesecake Bars
No Bake Paleo Vegan Key Lime Cheesecake Bars
Vegan Paleo Berry Crisp
Paleo Strawberry Shortcake
Love this recipe? Please leave a 5-star 🌟🌟🌟🌟🌟 rating in the recipe card below and a review in the comment section. Or, follow me on Facebook, Pinterest or Instagram today for more delicious recipes!
5 from 5 votes
Easy No Bake Mini Cheesecakes
Equipment
-
Food Processor
-
High-Speed Blender
Ingredients
Crust
- 10 Gluten Free Graham Crackers, I used Kinnikinnick brand found at Wegmans!
- 2 tbsp butter, ghee or coconut oil, melted
Cheesecake Filling
- ½ cup raw, unsalted cashews
- 1 tub Kite Hill almond milk cream cheese , (8 oz total)
- ⅔ cup coconut cream, (only the thick part of a can of full-fat coconut milk)
- 1 tbsp lemon juice
- 1 tsp vanilla extract
- 2 tbsp maple syrup
- ¼ cup coconut sugar
Topping (Optional)
- 1 cup fresh berries of choice , I used blueberries and raspberries!
Instructions
- Combine the gluten-free graham crackers and the butter, oil, or ghee in a food processor. Pulse it a few times until the crackers resemble crumbs.
- Divide the mixture evenly between six 4-oz mason jars or cups. Use a spoon or the bottom of a shot glass to press down gently to form the crusts. Set the jars aside while you make the filling.
- Combine the cashews, cream cheese, coconut cream, lemon juice, vanilla, maple syrup, and coconut sugar in a high-speed blender. Blend on high for 1 minute or until the mixture is very smooth and creamy. There should not be any chunks of cashews remaining.
- Divide the mixture between the 6 cups and pour it over the graham cracker crust. Place the jars into the freezer for at least 30 minutes to set, or in the refrigerator for 2+ hours.
- Add the fresh berries on top right before serving. Enjoy!
Notes
Dairy: If you are not dairy free, feel free to substitute regular dairy products for cream cheese and butter.
Storage: I like using the 4 oz mason jars because the lids allow for easy, airtight storage. These no bake mini cheesecakes will last in the refrigerator for up to 3 days.
Serving: Serve your no bake mini cheesecakes with whipped topping, fresh berries, dark chocolate chips, or another favorite topping.
No Bake Mini Cheesecakes Variations
Mini Oreo Cheesecakes
To make mini oreo cheesecakes, simply swap out the crust for a gluten free cheesecake crust made from Oreo crumbs. Oreos are naturally vegan, but make sure to get the gluten-free package.
Mini Oreo Cheesecakes Crust
15 Gluten-Free Oreos: Do not remove the cream filling. This will help keep the crust together and requires less butter. Do not use double stuff or thin Oreos.
1 Tbsp of butter: You can use vegan butter, ghee, or regular butter.
- Combine the gluten-free Oreos and the melted butter in a food processor. Pulse it a few times until the crackers resemble crumbs.
- Follow all of the same instructions for the filling and assembly in the recipe card.
- Add crushed Oreo or a whole Oreo to the top for garnish.
Mini Blueberry Cheesecakes
To make mini blueberry cheesecakes, follow all the same gluten free cheesecake crust and filling instructions.
- Simply add ¼ cup of mashed blueberries to the cheesecake batter.
- Top the mini blueberry cheesecakes with fresh blueberries and dairy-free whipped cream to serve.
Nutrition
Calories: 380kcal | Carbohydrates: 38g | Protein: 4g | Fat: 25g | Saturated Fat: 15g | Cholesterol: 28mg | Sodium: 106mg | Potassium: 190mg | Fiber: 2g | Sugar: 18g | Vitamin A: 12IU | Vitamin C: 2mg | Calcium: 31mg | Iron: 2mg
All nutrition facts are an estimate and automatically calculated. While I fact check them using My Fitness Pal, please note that they may not always be 100% accurate and depend on ingredients used. Weigh your total and divide by the number of servings for the most accurate grams per serving size.
Did you make this?
Rate & comment below, and tag me on Instagram @maryswholelife
This post was originally published on May 27, 2021 and updated with new photos and copy on November 21, 2022. Updated again with new content on November 28, 2023.