
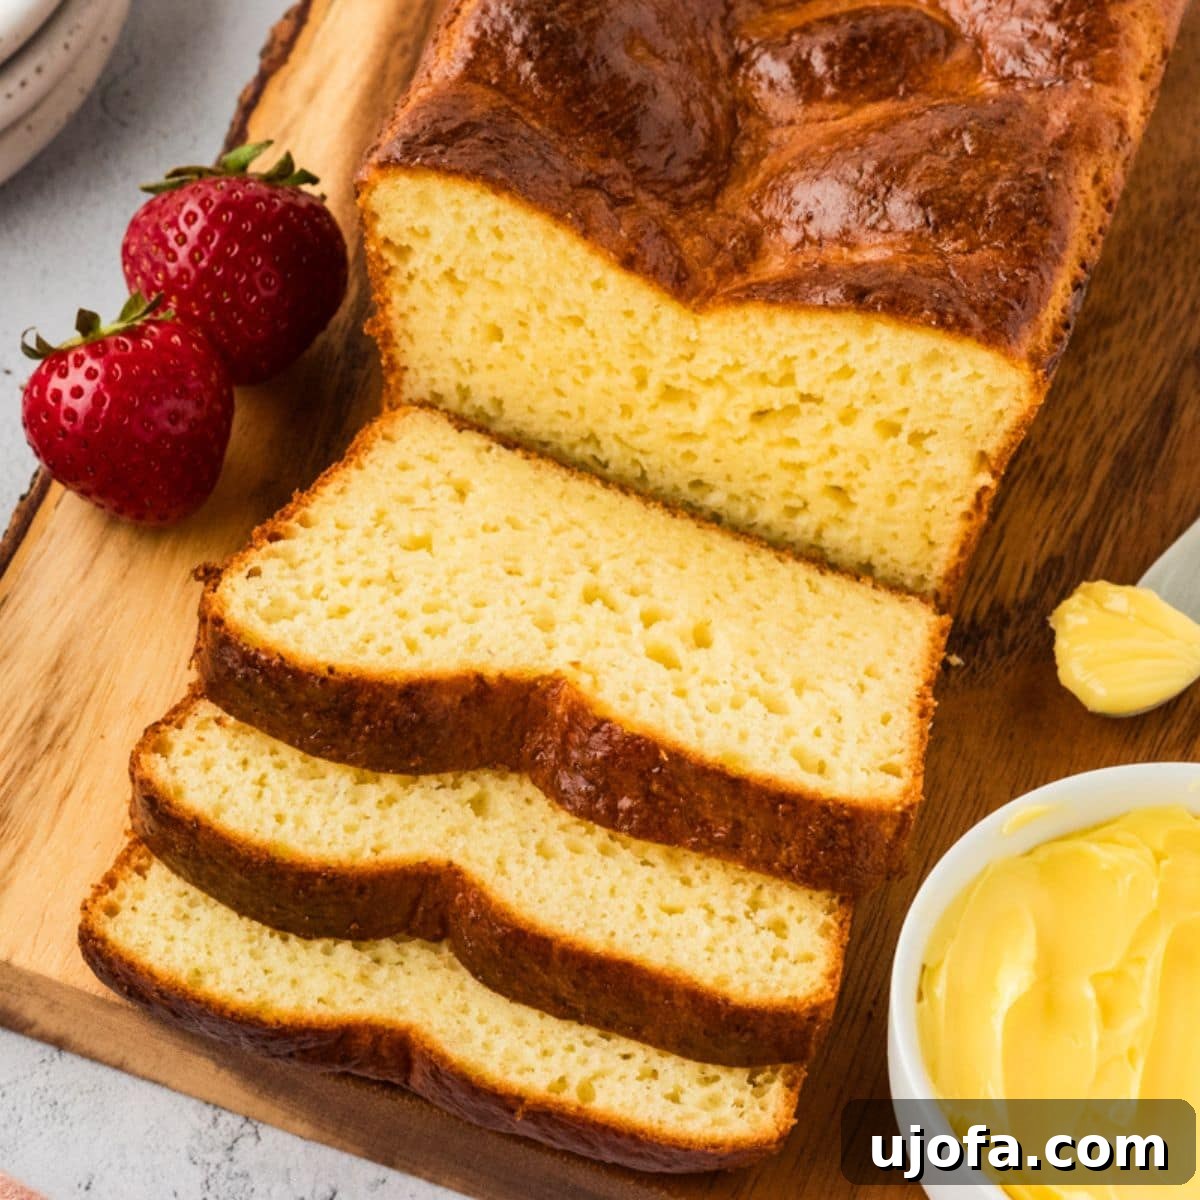
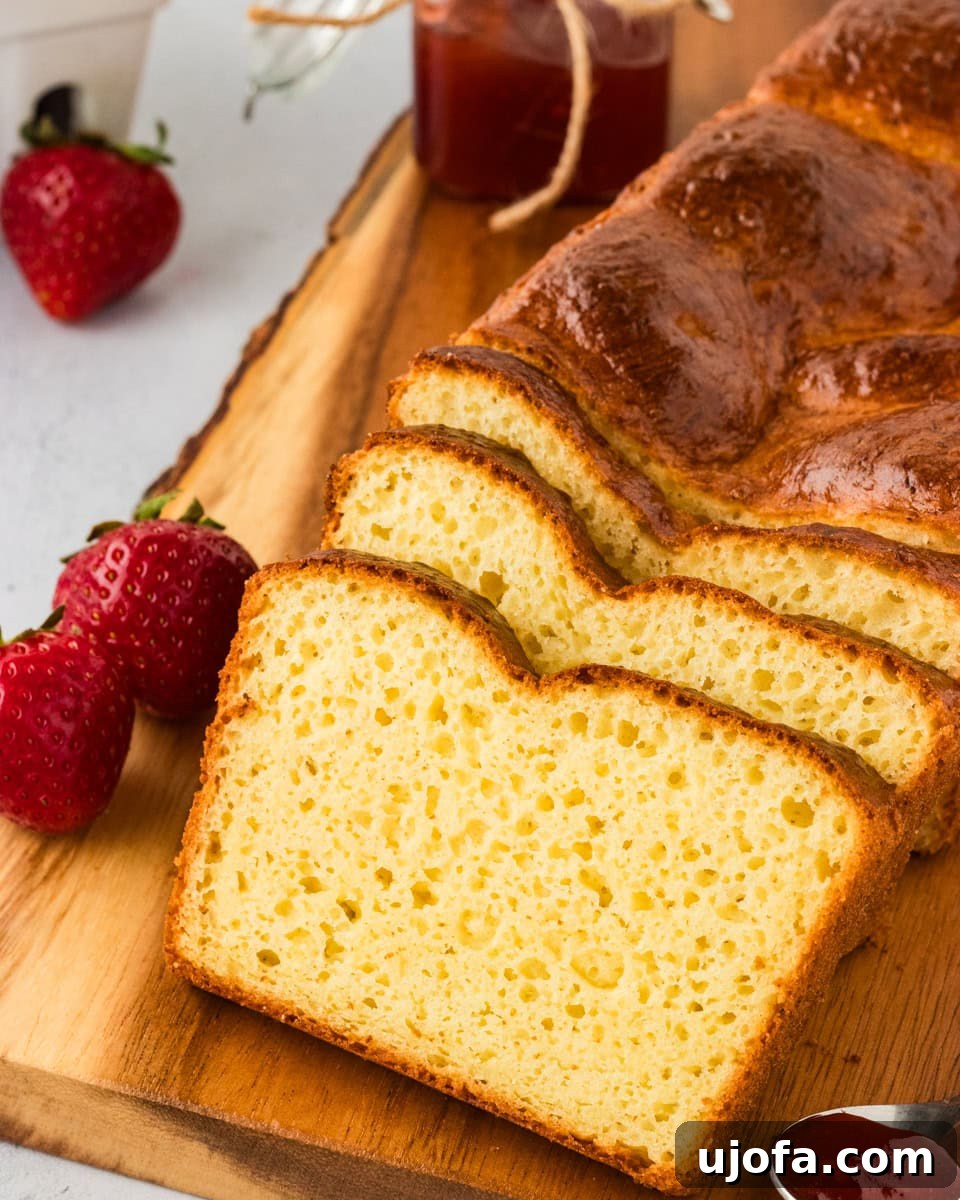
Discover the ultimate indulgence with this simple yet sublime gluten-free brioche recipe! Imagine sinking your teeth into a tender, rich loaf, boasting a delicate crumb and a perfectly golden, shiny crust. This isn’t just any bread; it’s a buttery, subtly sweet masterpiece that rivals its traditional gluten-containing counterparts. Far more opulent than our everyday homemade gluten-free bread, this brioche transforms ordinary breakfasts into extraordinary culinary experiences. Picture it as the foundation for a decadent French toast or the star of a luscious bread pudding. I personally can’t resist toasting a thick slice and drizzling it with golden honey or a spoonful of homemade jam – it’s a pure moment of bliss, and one slice is rarely enough! Prepare to be amazed by this bakery-style bread; its rich flavor and satisfying texture make it impossible to tell it’s entirely gluten-free.
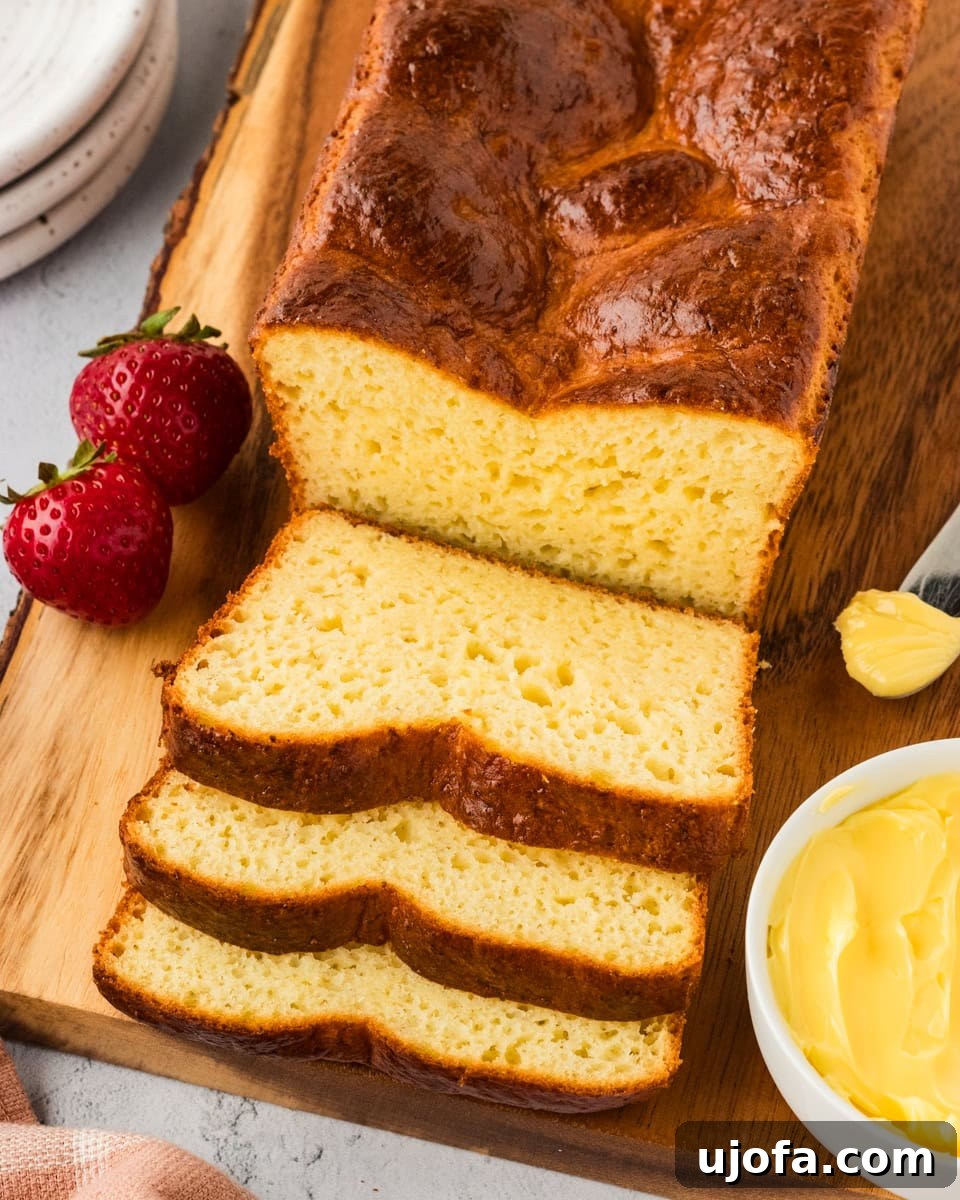
Crafting the Perfect Homemade Gluten-Free Brioche
For years after going gluten-free, the absence of a truly authentic brioche left a void in my heart. The thought of a buttery, light, and airy sweet bread seemed like a distant dream. However, after countless hours of experimentation and refinement in my kitchen, I’ve finally perfected a gluten-free brioche recipe that not only meets but exceeds my expectations. This classic French sweet bread is renowned for its enriched dough, characterized by a generous amount of butter and eggs. My recipe meticulously recreates that iconic flavor and texture using a carefully selected blend of gluten-free flour, essential psyllium husk powder, sugar, instant yeast, and, of course, an abundance of rich butter and fresh eggs. The beauty of this recipe lies in its surprising simplicity, making the art of homemade brioche accessible to every gluten-free baker.
Creating gluten-free versions of enriched breads like brioche presents unique challenges, primarily due to the absence of gluten, which typically provides structure and elasticity. This recipe overcomes these hurdles by strategically using ingredients that mimic gluten’s properties, ensuring a loaf that’s both tender and stable. The high fat content from butter and the protein from eggs are crucial for richness and a beautiful golden hue, while psyllium husk acts as a vital binder, preventing the bread from becoming crumbly. This harmonious combination of ingredients results in a brioche that feels just as luxurious and satisfying as its traditional counterpart, proving that a gluten-free diet doesn’t mean sacrificing gourmet delights.
Essential Ingredients for Gluten-Free Brioche Perfection
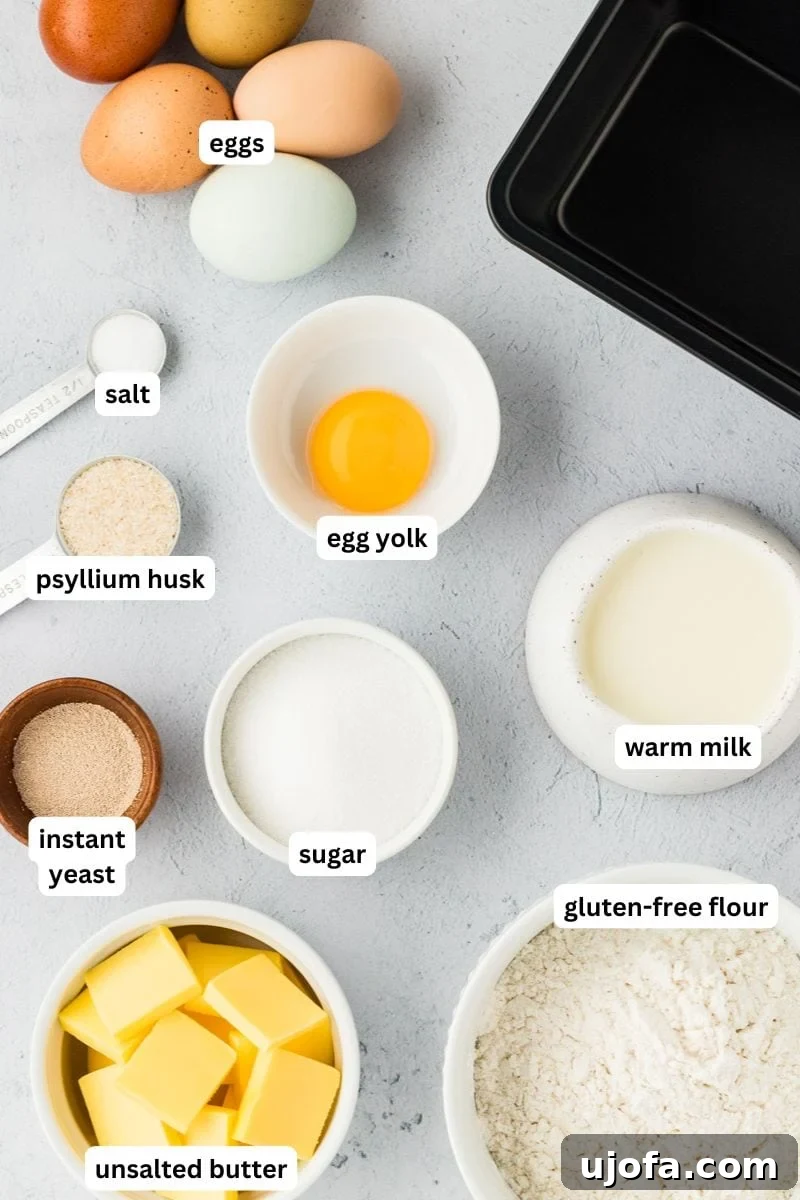
Achieving a truly exceptional gluten-free brioche begins with the right ingredients. Each component plays a specific role in creating the bread’s signature texture and flavor. Here’s a closer look at what you’ll need and why:
- Gluten-Free All-Purpose Flour with Xanthan Gum: The foundation of our brioche! I highly recommend a high-quality gluten-free flour blend that already contains xanthan gum, such as Pillsbury gluten-free flour. Not all gluten-free flours are formulated for yeast baking, so choosing a suitable blend is critical for success. Xanthan gum is indispensable in gluten-free baking; it acts as an emulsifier and binder, replicating the elasticity and structure that gluten would typically provide. If your chosen blend doesn’t include xanthan gum, add approximately ¼ teaspoon per cup of flour to ensure the correct consistency.
- Sugar: More than just a sweetener, sugar is vital for activating the instant yeast, giving it the fuel it needs to produce carbon dioxide and help the dough rise beautifully. It also contributes to the brioche’s characteristic golden-brown crust and delicate sweetness.
- Psyllium Husk Powder: This is an absolute game-changer in gluten-free baking and a non-negotiable ingredient for this brioche. Psyllium husk powder is a fantastic binder, absorbing moisture and providing the necessary structure and elasticity to the dough. It mimics gluten’s ability to trap air, leading to a lighter, more tender crumb that holds its shape without collapsing.
- Instant Yeast: For ease and reliability, instant yeast is the preferred choice for this recipe. Unlike active dry yeast, instant yeast does not require prior activation in warm liquid, allowing for a more straightforward and efficient baking process. Always double-check that your yeast is fresh and not expired for optimal rising.
- Unsalted Butter: Brioche is defined by its rich butter content. You’ll need 6 tablespoons of unsalted butter, softened to perfection and cut into small pads or slices. Ensure your butter is extremely soft, almost at room temperature, but not melted, as this allows it to incorporate seamlessly into the dough, contributing to its tender texture and exquisite flavor. I have not personally tested this recipe with dairy-free butter, so results may vary with substitutions.
- Salt: A small amount of salt is essential to balance the sweetness, enhance the overall flavor profile, and regulate yeast activity. It prevents the brioche from tasting flat and brings out the subtle richness of the other ingredients.
- Eggs: True to traditional brioche, this gluten-free version is enriched with a generous quantity of eggs—four whole eggs plus an additional egg yolk. Eggs are crucial for adding richness, moisture, and a beautiful golden color to the crumb. They also contribute to the loaf’s structure and overall decadent mouthfeel. I do not recommend substituting the eggs in this recipe.
- Milk: Warm milk serves a dual purpose: it helps activate the instant yeast and adds crucial moisture to the dough, creating a soft and pliable consistency. Heat the milk gently until it’s warm to the touch (ideally between 95-100°F), but never hot, as excessively high temperatures can kill the yeast.
Expert Tips for Gluten-Free Brioche Success
Baking gluten-free brioche can be an incredibly rewarding experience, and these expert tips will help ensure your loaf turns out perfectly every time:
- Softening Butter with Ease: Forgotten to take your butter out of the fridge in advance? No problem! For a quick fix, slice the butter into smaller pieces and microwave it for 10-second intervals, flipping after each, until it’s wonderfully soft but not melted. Alternatively, place the sliced butter in a sealed ziploc bag and submerge it in a bowl of warm water for a few minutes. This ensures the butter integrates smoothly into the dough.
- The Power of a Stand Mixer: Due to its high fat and egg content, brioche is an enriched dough that can be quite sticky and challenging to mix by hand. I strongly recommend using a stand mixer equipped with a paddle attachment. This allows for thorough incorporation of ingredients, especially the butter and eggs, creating a consistent and smooth dough texture crucial for brioche.
- Gentle Milk Integration: When adding the warm milk to your dough, do so slowly and gradually. Observe the dough’s consistency; once it resembles a smooth, thick cake batter, stop mixing. Overmixing gluten-free dough can lead to a dense and tough final product, so a gentle hand is key. Refer to the step-by-step photos below for visual guidance on the ideal consistency.
- Achieving that Signature Look: To replicate the beautiful, rustic, and uneven top of traditional bakery-style brioche, use a large cookie scoop or a spoon to dollop the batter into your prepared loaf pan. This technique creates charming peaks and valleys that bake into a visually appealing crust.
- Knowing When It’s Done: Your gluten-free brioche is perfectly baked when it achieves a gorgeous golden-brown color and a cake tester or toothpick inserted into the center comes out completely clean. This indicates that the inside is fully cooked and set.
Troubleshooting: Why Didn’t My Gluten-Free Brioche Bread Rise?
The rising process is critical for any yeast bread, and gluten-free brioche is no exception. If your bread isn’t rising as expected, there are typically two main opportunities for it to do so: during the initial proofing stage and then again in the oven. Several factors can affect a proper rise:
- Yeast Activity: The most common culprit is inactive or expired instant yeast. Always check the expiration date on your yeast packet. If it’s old, it won’t be able to properly leaven the dough. For best results, use fresh yeast.
- Temperature of Liquids: The milk you add needs to be just right—warm enough to activate the yeast (around 95-100°F or 35-38°C) but not too hot, which can kill the yeast, or too cold, which will inhibit its activity. A kitchen thermometer is a useful tool here.
- Oven Temperature: Ensure your oven is preheated to the correct temperature before baking. An oven that’s too cool won’t provide the necessary heat burst for the final oven spring, resulting in a flatter loaf.
- Patience During Proofing: Gluten-free dough can sometimes take longer to rise than traditional dough. Be patient and allow your dough ample time during the proofing stage. A warmer and slightly more humid environment is ideal for rising. If your kitchen is on the cooler side, consider placing the covered dough in a slightly warmer room or a turned-off oven with the light on (which provides gentle warmth) to encourage a better rise.
Troubleshooting: Why Did My Loaf Sink in the Middle?
A sunken middle in your beautiful brioche loaf is often a clear sign of over-proofing. This occurs when the dough is left to rise for too long during the initial proofing stage. While yeast produces beneficial air bubbles that make the bread light and airy, there’s a delicate balance. If too much air accumulates, the delicate structure of the gluten-free dough can’t sustain itself, leading to a collapse. The excessive expansion weakens the dough’s framework, causing it to deflate, often dramatically, during or shortly after baking.
To prevent this from happening, vigilant observation during the proofing stage is key. You want the dough to nearly reach the top of your loaf pan, but not extend significantly beyond it. Keep a close eye on its progress, especially during the last 15-20 minutes of proofing time. A tell-tale sign of over-proofing is when the surface of the dough appears pockmarked or pitted, indicating that the air bubbles are starting to burst. If you notice these signs, don’t despair! Simply gently deflate the dough, reshape it, and begin the rising process again. This second rise will usually be quicker, so monitor it even more closely.
Delightful Serving Suggestions for Your Gluten-Free Brioche
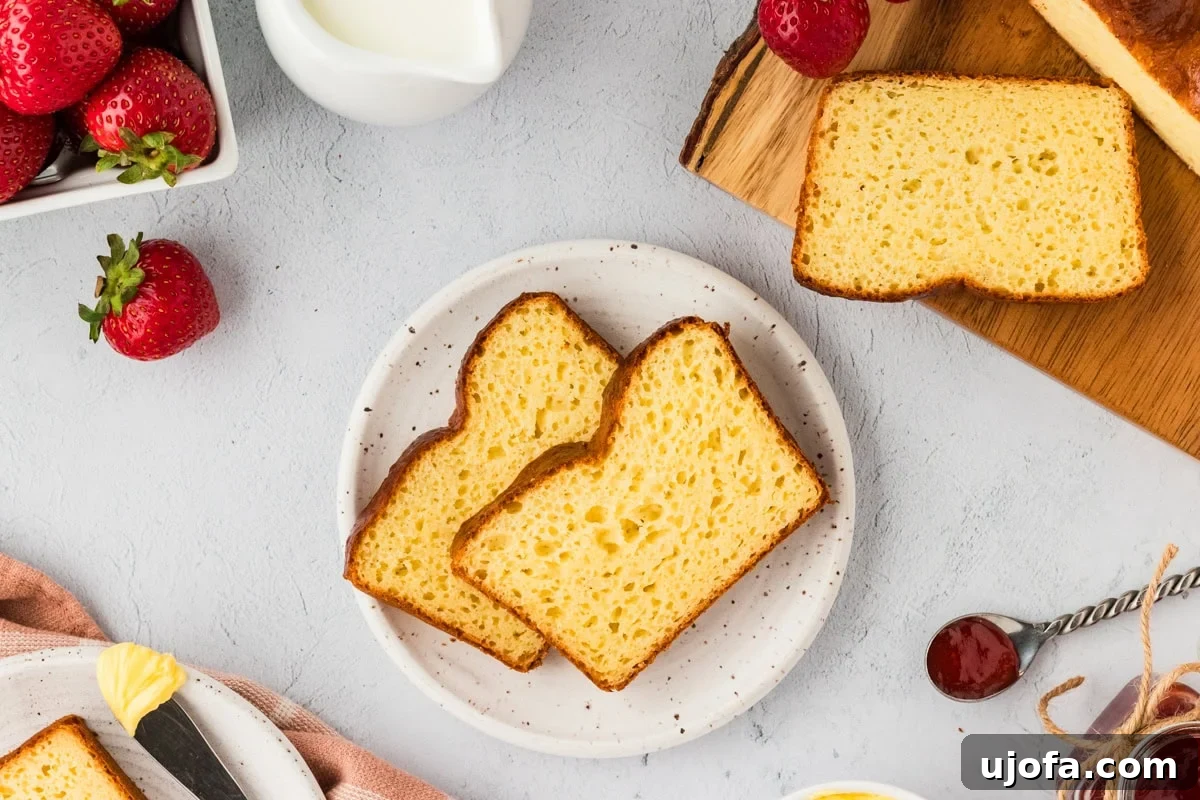
This homemade gluten-free brioche is an exquisitely eggy, soft, and subtly sweet bread that lends itself beautifully to a variety of culinary applications. Its tender texture makes it particularly wonderful for classic dishes. I adore using it to make gluten-free French toast; while it might be slightly more delicate than conventional bread, its flavor is absolutely incredible! Here are even more ways to enjoy your freshly baked brioche:
- Simple Pleasures: Toast slices lightly and spread them with creamy butter, your favorite fruit jam, or a generous drizzle of golden honey. It’s perfect for a luxurious breakfast or an afternoon treat.
- Brunch Casseroles: Elevate your brunch game by incorporating brioche into comforting baked dishes. It’s fantastic in our gluten-free pumpkin French toast casserole for a seasonal delight or our cinnamon roll French toast casserole for a truly decadent start to the day.
- Elegant Desserts: Transform stale brioche into a rich and comforting gluten-free bread pudding. The brioche’s inherent sweetness and tender crumb make it an ideal base for this classic dessert, soaking up custards beautifully.
- Savory Pairings: While sweet, the richness of brioche can also complement certain savory dishes. Consider using it for gourmet mini sandwiches with smoked salmon and cream cheese, or as a side for a light soup.
- Sweet Toppings: Experiment with different toppings like chocolate hazelnut spread, fresh berries and whipped cream, or a dusting of powdered sugar.
Storage Instructions to Keep Your Brioche Fresh
Proper storage is essential to maintain the freshness and delicate texture of your gluten-free brioche. Once your loaf has completely cooled to room temperature, slice it according to your preference. Store the slices in an airtight container or a sealed bag at room temperature for up to 5 days. For extended freshness, you can keep it in the refrigerator for up to a week, though it’s always best enjoyed as fresh as possible. For longer-term storage, freezing is an excellent option. Wrap individual slices tightly in plastic wrap to prevent them from sticking together and store them in a freezer-safe bag or container for up to 3 months. When you’re ready to enjoy a slice, simply let it thaw at room temperature, then toast lightly for a nearly fresh-baked experience.
Explore More Gluten-Free Bread Recipes!
If you’ve fallen in love with the joy of baking gluten-free bread, there’s a whole world of delicious possibilities waiting for you. Expand your baking repertoire with these other fantastic gluten-free bread recipes that are sure to impress:
- Effortless Gluten-Free Bread Machine Bread
- Rustic Gluten-Free Sourdough Bread
- Hearty Gluten-Free Potato Bread
- Crispy Gluten-Free Baguette
Gluten-Free Brioche Recipe
By: Julia Elizabeth
Servings: 1 loaf
Prep Time: 10 mins | Cook Time: 30 mins | Proof Time: 1 hr | Total Time: 1 hr 40 mins
This easy recipe for gluten-free brioche creates a loaf with a tender crumb and shiny crust, perfect for French toast or bread pudding!
Ingredients
- 1 ⅓ cups gluten-free all-purpose flour blend with xanthan gum (Pillsbury Gluten-Free flour recommended)
- ¼ cup sugar
- ½ teaspoon salt
- 1 ½ teaspoon psyllium husk powder
- 1 packet instant yeast
- 6 tablespoons unsalted butter, very soft and cut into small pads, plus extra for greasing the loaf pan
- 4 eggs, divided
- 1 egg yolk
- ½ cup milk, warm (around 95°-110°F)
Instructions
- To the bowl of a stand mixer, add your gluten-free flour, sugar, salt, psyllium husk, and instant yeast. Whisk by hand until everything is mixed together.
- Fit your bowl onto the stand mixer with the paddle attachment and turn on low speed. Add in your softened unsalted butter cut into pads one at a time, then add 3 eggs and the extra egg yolk, also one at a time.
- Once mixed, slowly pour in your warm milk and allow the mixer to continue to stir gently until everything is incorporated.
- Mix on medium speed until your dough, which will resemble cake batter, looks smooth.
- Butter an 8 ½ x 4 ½ loaf pan. Use a large cookie scoop or spoon to scoop the batter into the loaf pan, creating lumps and valleys, which create that signature look on the top of brioche bread.
- Cover with plastic wrap and allow the bread to rise on the counter until it almost reaches the top of the loaf pan. The time will depend on many factors, such as temperature and humidity, but try 45 minutes to an hour first and then check on it in 10-minute intervals until it reaches the correct height. (Typically takes about an hour to rise.)
- Preheat the oven to 350°F (175°C), and while it’s preheating, gently brush the top of your loaf with an egg wash made from the remaining egg.
- Bake your bread for 30 minutes, until a cake tester comes out clean. Allow it to rest and cool in the loaf pan for about 30 minutes before removing it.
- Allow the loaf to rest until completely cool, then cut and enjoy with butter, jam, honey, or all of the above!
Notes
- Egg Wash: Make an egg wash by beating one egg and brushing it evenly over the top of the loaf before baking. This gives the brioche its characteristic shiny, golden crust.
- To Store: Store the cooled brioche in an airtight container or bag at room temperature for up to 5 days. For longer freshness, refrigerate for up to 7 days.
- To Freeze: For long-term storage, wrap individual slices in plastic wrap to prevent sticking, then place them in a freezer-safe bag. Freeze for up to 3 months. Defrost at room temperature before serving.
- Always Check Labels: For any gluten-free recipe, it’s crucial to always check all ingredient labels to ensure they are certified gluten-free.
Nutrition (Approximate per loaf)
- Serving: 1 loaf
- Calories: 1763 kcal
- Carbohydrates: 183 g
- Protein: 49 g
- Fat: 100 g
- Saturated Fat: 53 g
- Polyunsaturated Fat: 8 g
- Monounsaturated Fat: 28 g
- Trans Fat: 3 g
- Cholesterol: 1044 mg
- Sodium: 1481 mg
- Potassium: 536 mg
- Fiber: 24 g
- Sugar: 62 g
- Vitamin A: 3507 IU
- Vitamin C: 0.02 mg
- Calcium: 425 mg
- Iron: 10 mg
Nutrition information is automatically calculated and should be used as an approximation.
Additional Info
Course: Baking, Side Dish
Cuisine: French
Tried this recipe? Share your creations! Mention @mamaknowsglutenfree or tag #mamaknowsglutenfree on Instagram!
How to Make Gluten-Free Brioche: A Step-by-Step Visual Guide
Follow these detailed steps to create a beautiful gluten-free brioche loaf:
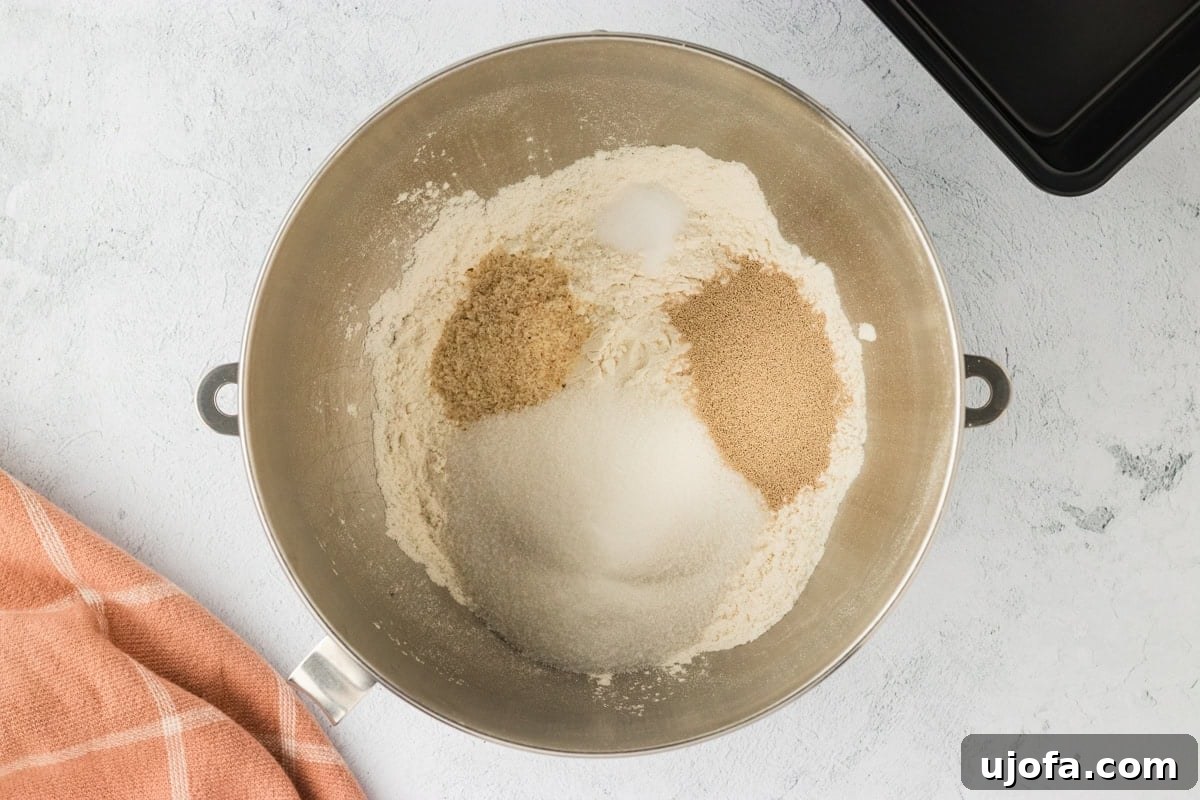
Step 1: Combine Dry Ingredients. In the bowl of a stand mixer, add 1 ⅓ cups gluten-free all-purpose flour, ¼ cup sugar, ½ teaspoon salt, 1 ½ teaspoon psyllium husk powder, and 1 packet of instant yeast.
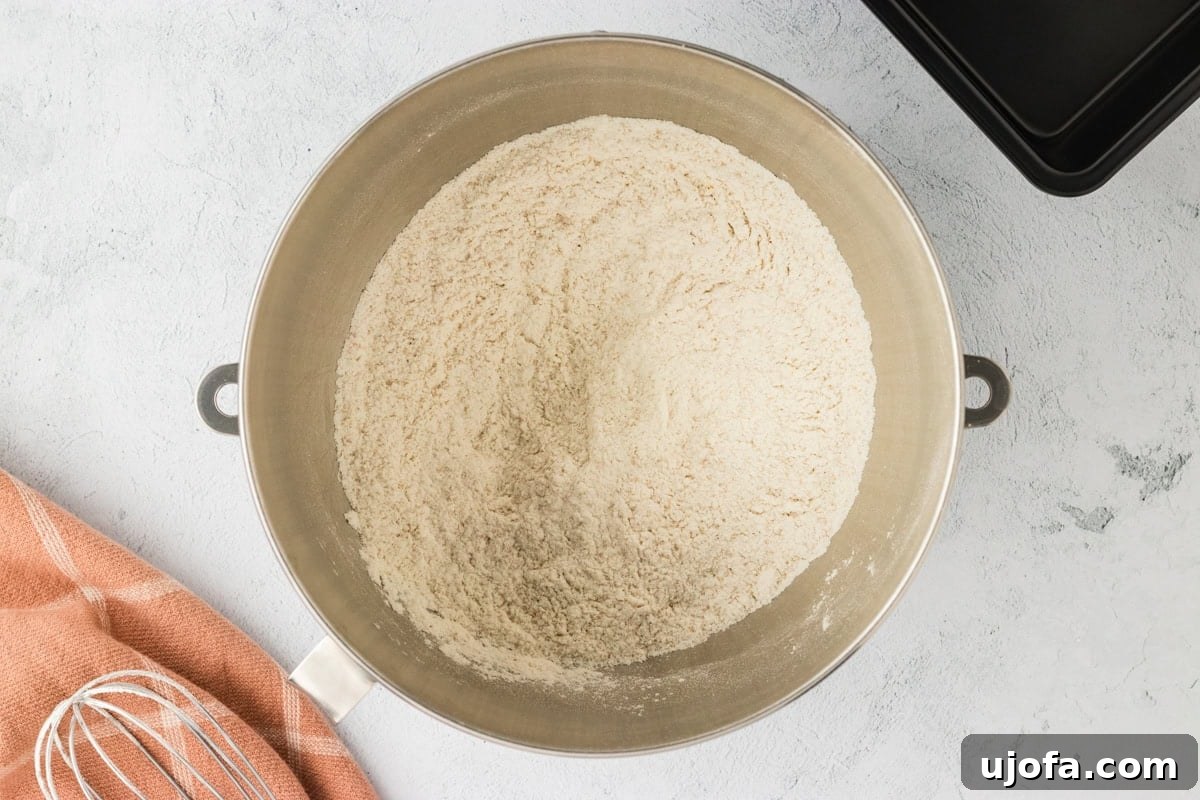
Step 2: Whisk Thoroughly. Whisk the dry ingredients by hand until they are uniformly combined and no lumps remain.
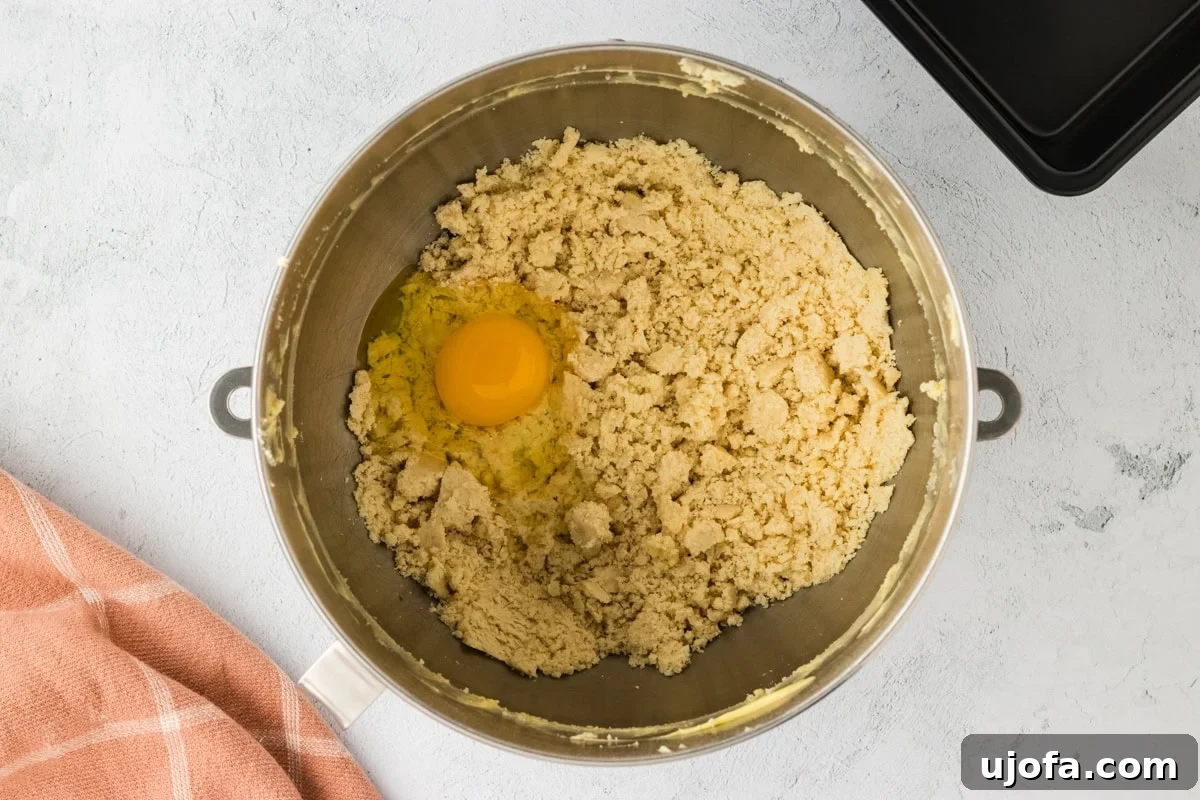
Step 3: Incorporate Wet Ingredients (Part 1). Attach the bowl to your stand mixer and fit it with the paddle attachment. Turn the mixer on low speed. Add 6 tablespoons of very soft, unsalted butter (cut into small pads) one piece at a time. Once the butter is mostly incorporated, add 3 eggs and 1 extra egg yolk, also one at a time, allowing each to fully mix before adding the next.
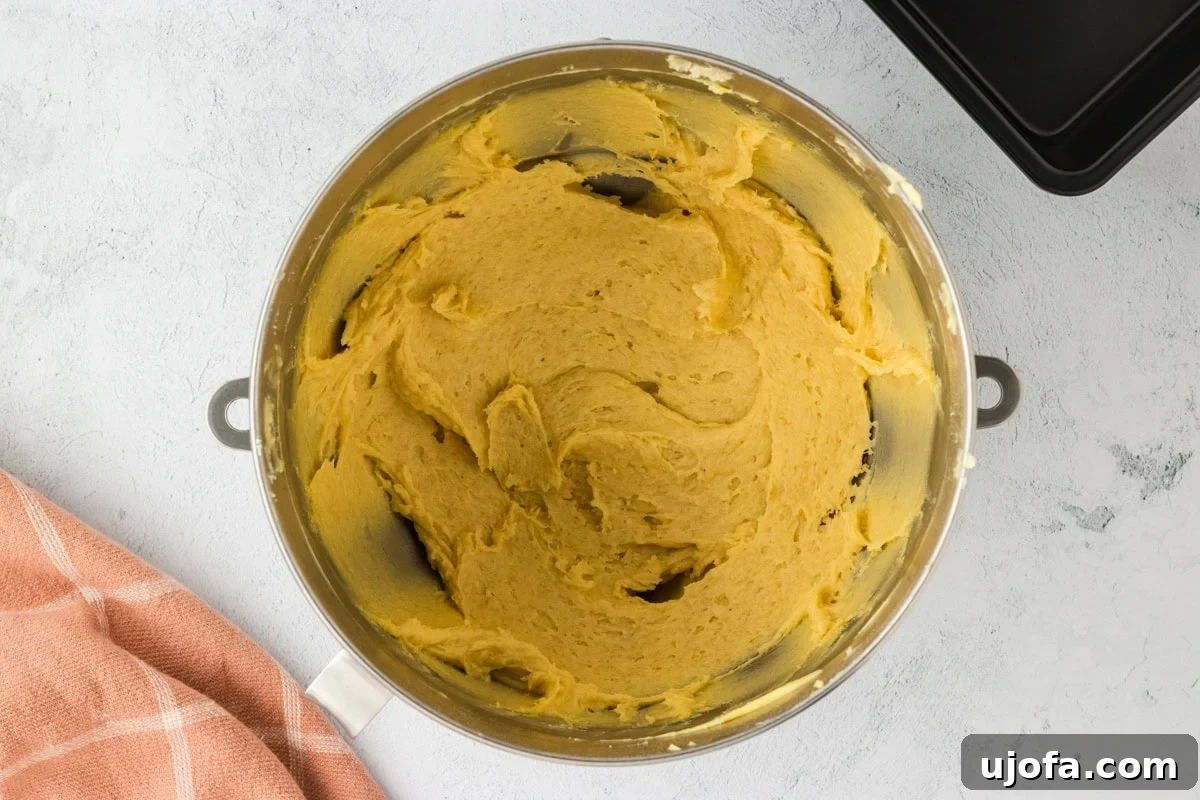
Step 4: Incorporate Wet Ingredients (Part 2). With the mixer still on low speed, slowly pour in ½ cup of warm milk. Continue to stir gently until all ingredients are fully incorporated and the mixture starts to come together.
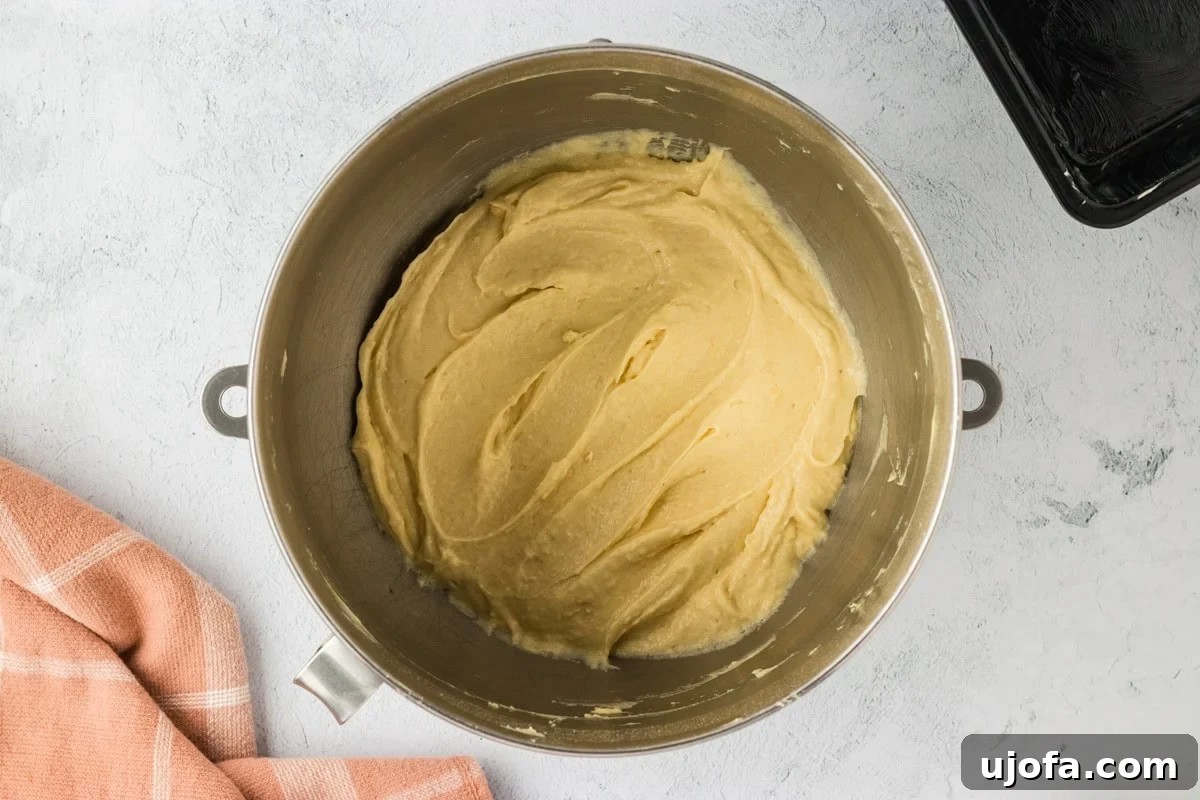
Step 5: Achieve Smooth Dough. Increase the mixer speed to medium and mix until your dough achieves a smooth consistency, closely resembling a thick cake batter. Avoid overmixing once smooth.
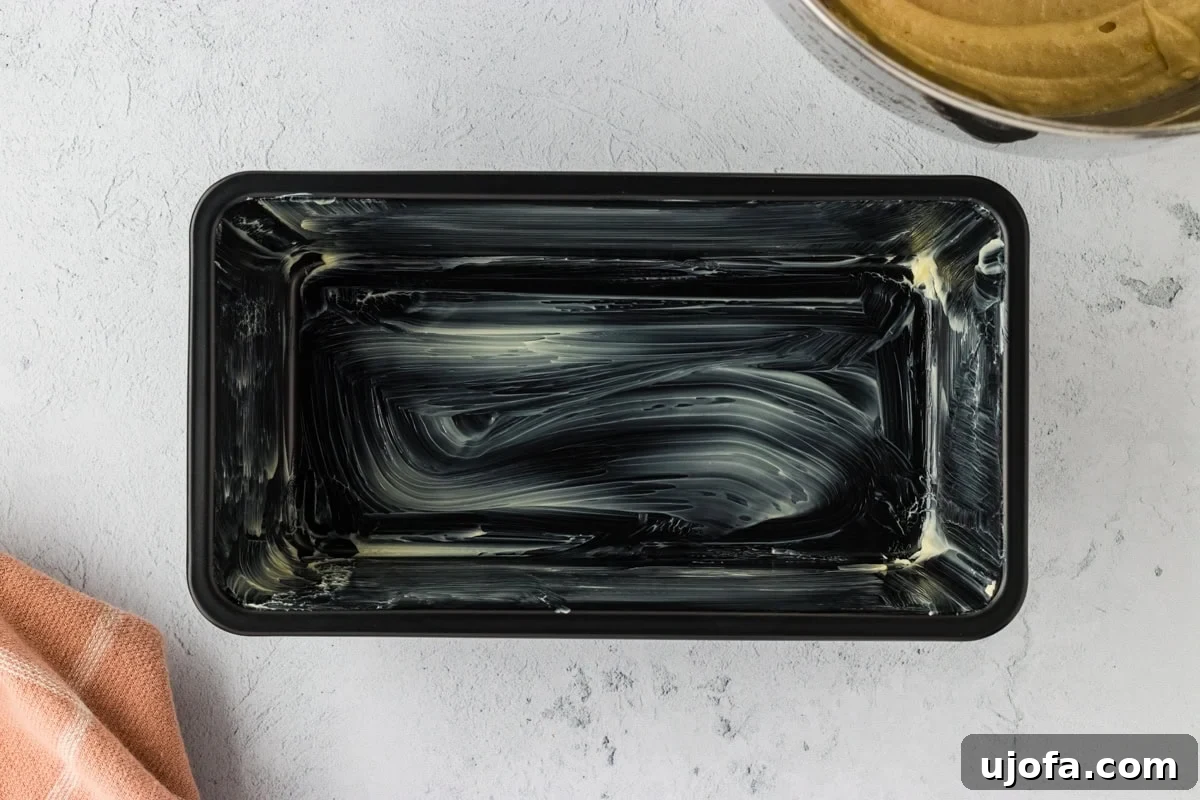
Step 6: Prepare the Loaf Pan. Generously butter an 8 ½ x 4 ½ inch loaf pan. Ensuring the pan is well-greased will prevent sticking and help achieve a beautiful crust.
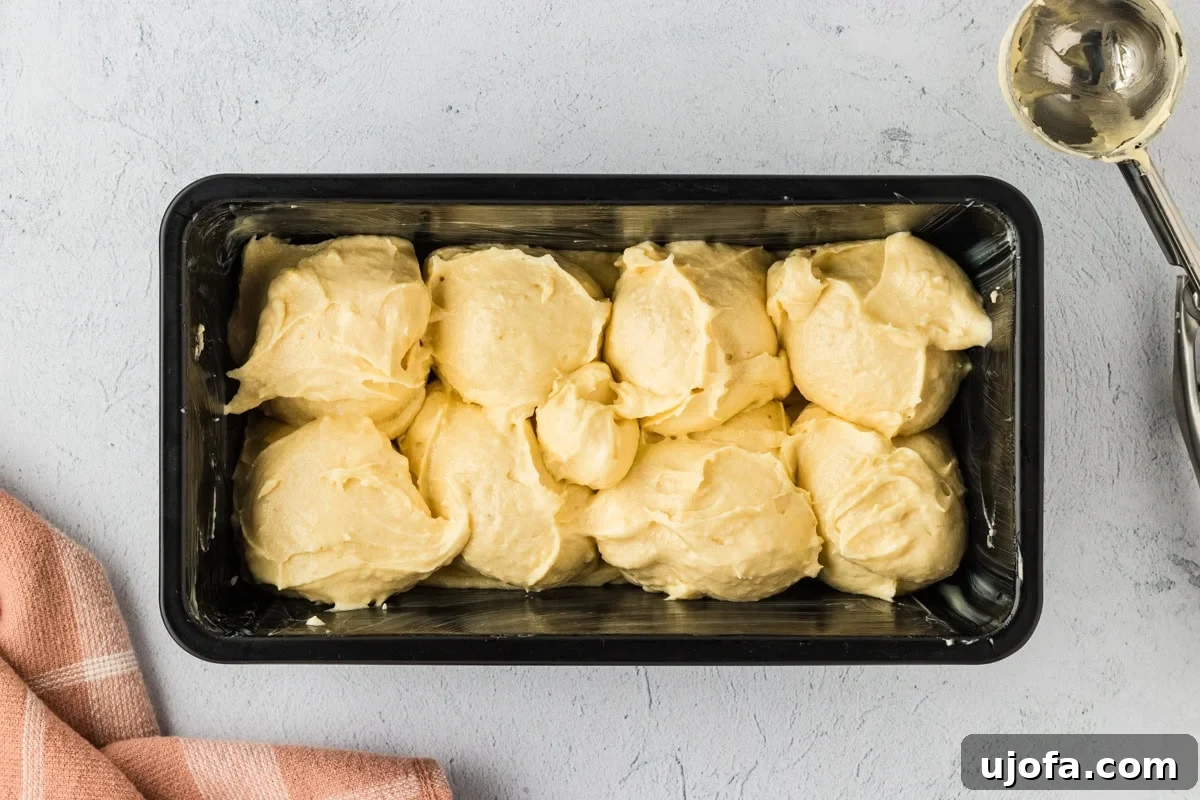
Step 7: Fill the Loaf Pan. Use a large cookie scoop or a spoon to dollop the batter into the prepared loaf pan. This technique creates intentional lumps and valleys on the surface, which will develop into the signature, rustic appearance of traditional brioche once baked.
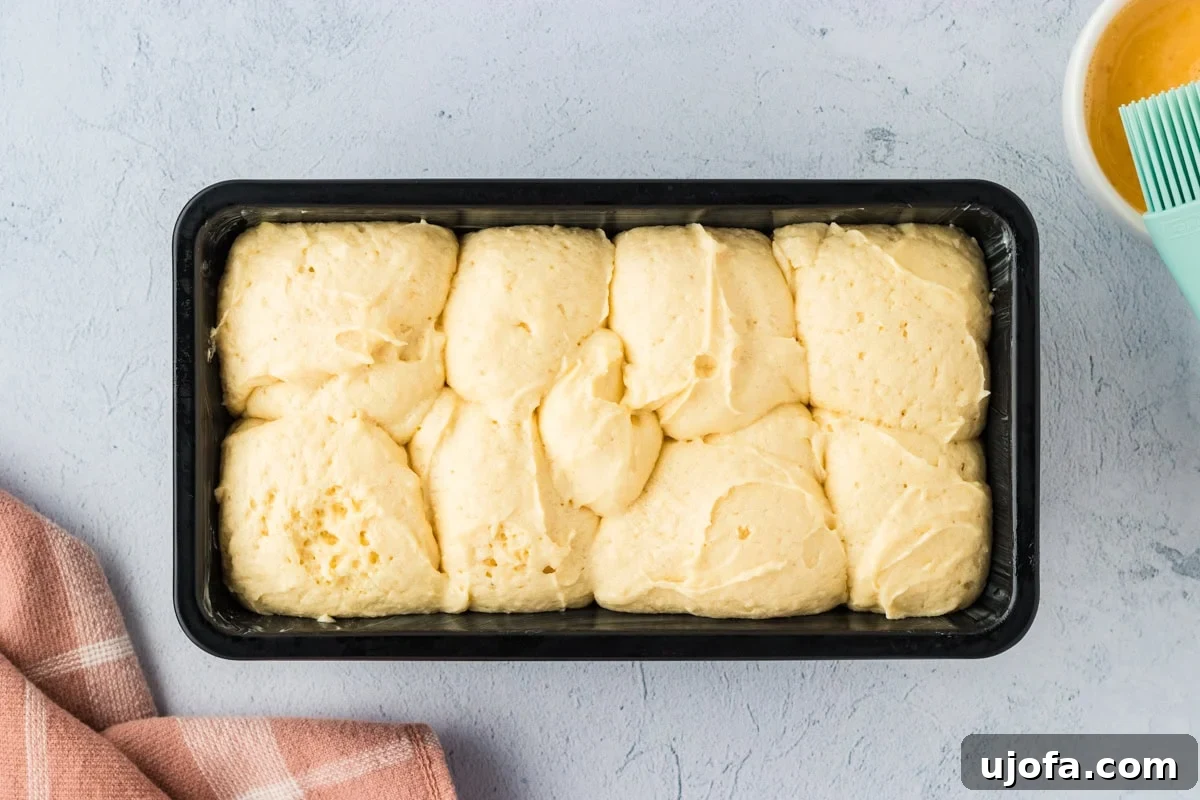
Step 8: First Rise (Proofing). Cover the loaf pan loosely with plastic wrap. Allow the bread to rise on your counter in a warm spot until it almost reaches the very top of the loaf pan. The exact rising time can vary based on ambient temperature and humidity. Start checking after 45 minutes to an hour, and then in 10-minute intervals until it reaches the ideal height. In my experience, it took approximately one hour to rise sufficiently.
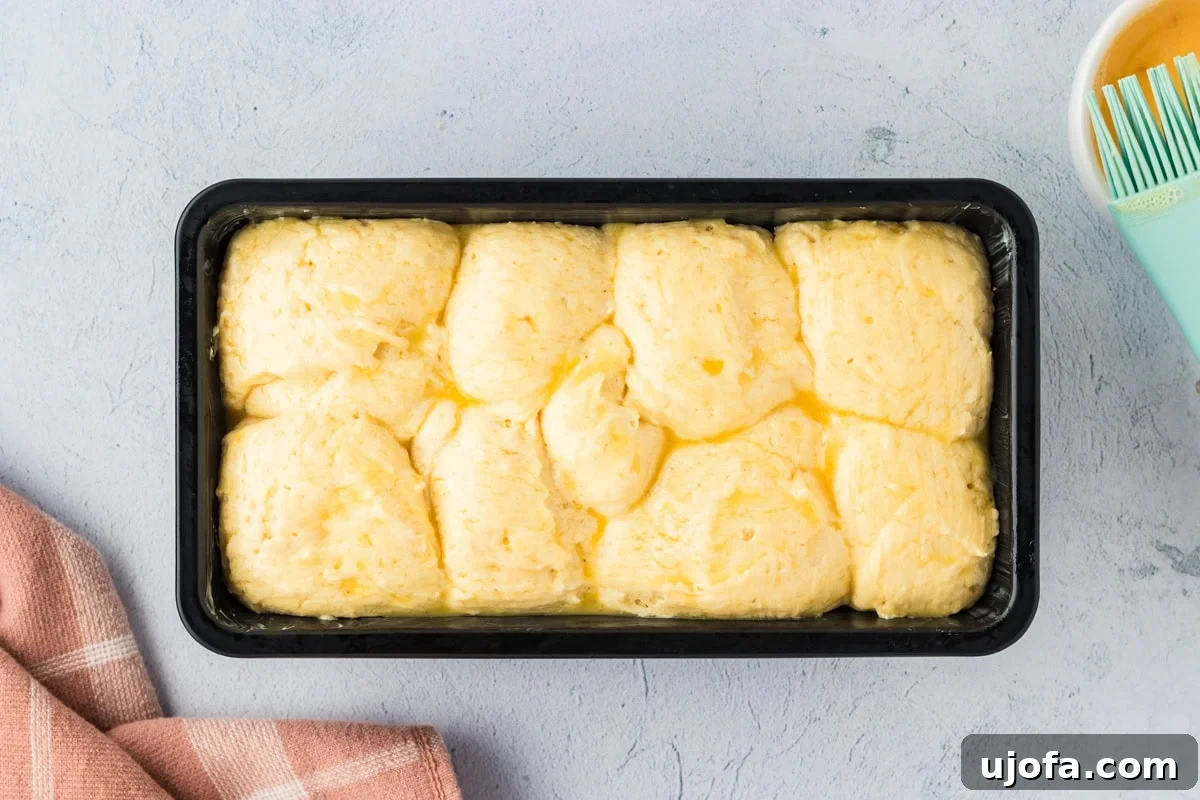
Step 9: Preheat Oven and Apply Egg Wash. Preheat your oven to 350°F (175°C). While the oven is heating, gently brush the entire top surface of your proofed brioche loaf with an egg wash, prepared by beating the remaining egg. This step is crucial for achieving that characteristic shiny, golden-brown crust.
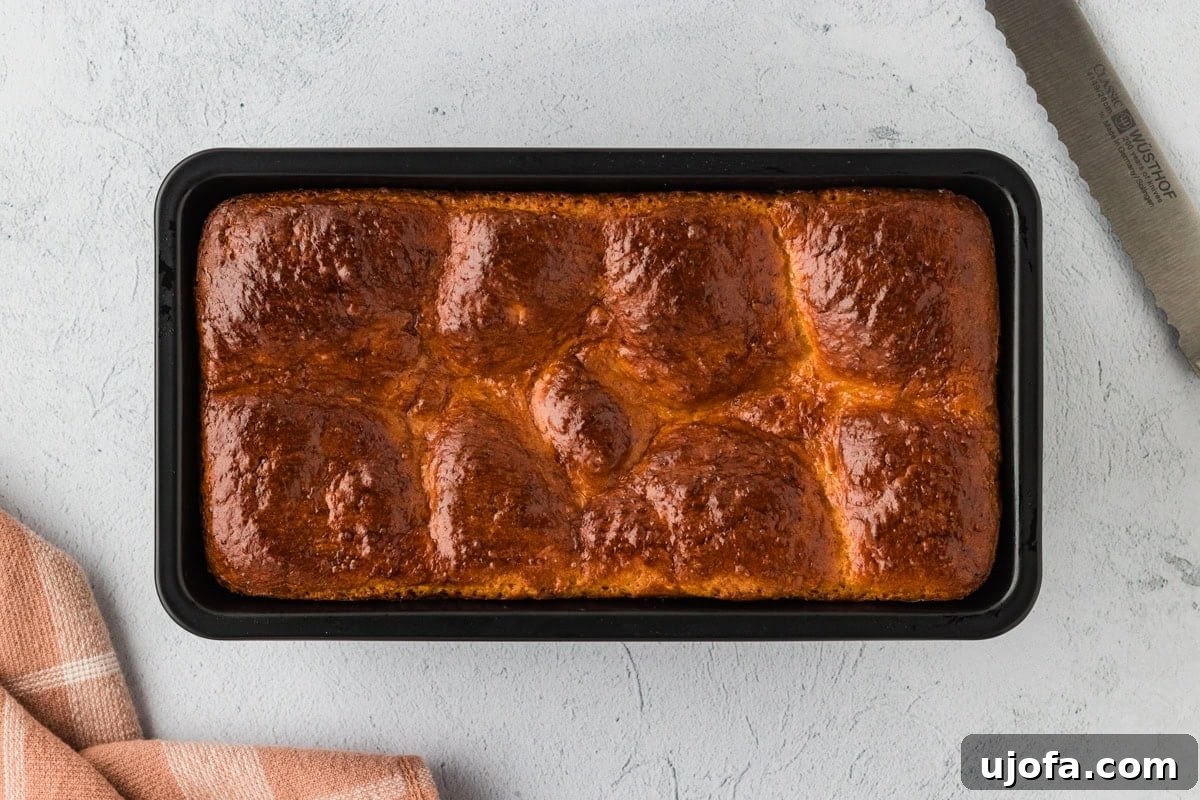
Step 10: Bake and Cool. Bake your brioche for approximately 30 minutes, or until a cake tester (or toothpick) inserted into the center comes out clean. Once baked, allow the loaf to rest and cool in the loaf pan for about 30 minutes before carefully removing it. Let the loaf cool completely on a wire rack before slicing and enjoying. Serve it warm with butter, jam, honey, or any combination of your favorite toppings!