
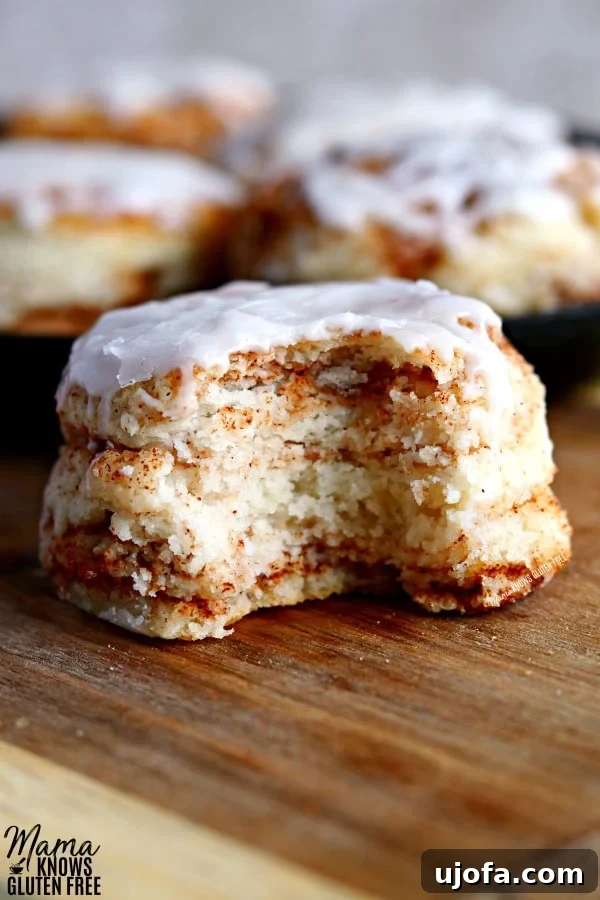
Irresistible Gluten-Free Cinnamon Biscuits: A Flaky, Sweet Treat for Everyone
Are you ready to elevate your breakfast or brunch game with a truly delightful, comforting classic? Introducing our incredibly tender and flaky Gluten-Free Cinnamon Biscuits, lavishly layered with cinnamon and sugar, and crowned with a luscious vanilla glaze. These aren’t just any biscuits; they’re a revelation for anyone navigating a gluten-free diet, offering all the joy and none of the compromise. We even include options to make them dairy-free and vegan, ensuring everyone can indulge in this sweet, buttery perfection.
Imagine biting into a warm, soft biscuit, each layer infused with aromatic cinnamon and sweet brown sugar, perfectly complemented by a smooth vanilla glaze that melts in your mouth. This recipe transforms the humble biscuit into a luxurious experience, reminiscent of a cinnamon roll but with the unique texture and ease of a biscuit. It’s an ideal treat for a leisurely weekend morning, a special holiday breakfast, or simply a comforting snack any time you crave something sweet and satisfying.
If you’ve previously enjoyed our popular Gluten-Free Buttermilk Biscuits, prepare to be amazed as we take that beloved recipe to an entirely new level. These cinnamon-infused marvels are not just an improvement; they’re a standout creation that promises to become a new favorite in your gluten-free repertoire. They’re surprisingly simple to make, proving that gluten-free baking can be both easy and utterly delicious!
Click HERE to save this recipe to Pinterest!
Why You’ll Love These Gluten-Free Cinnamon Biscuits
These gluten-free cinnamon biscuits are more than just a breakfast item; they are a delightful experience. They bring together the best qualities of a classic biscuit—flakiness, tenderness, and a rich, buttery flavor—with the irresistible sweetness and spice of a cinnamon roll. They are perfect for those who miss traditional baked goods after going gluten-free, offering a texture and taste that rivals their gluten-containing counterparts.
The inspiration for this recipe comes from a beloved classic: the cinnamon raisin biscuits my husband adores. Knowing how much he enjoys cinnamon-infused treats, I was determined to create a gluten-free version that could stand up to any bakery offering. And honestly, these biscuits surpassed all expectations! They are incredibly satisfying and have become a new household favorite. If you’re a fan of cinnamon rolls, you’ll also love our other recipes like Gluten-Free Cinnamon Roll Cake, Gluten-Free Cinnamon Roll Muffins, Gluten-Free Cinnamon Biscuit Balls, and Gluten-Free Cinnamon Roll Cookies!
The Magic Behind Flaky Gluten-Free Biscuits
Achieving truly flaky biscuits, especially in gluten-free baking, requires a few key techniques. The secret lies in cold ingredients, careful mixing, and a unique folding method that creates those desirable layers. By cutting cold butter into the flour mixture, you create pockets of fat that release steam during baking, resulting in a light, airy, and incredibly tender crumb. Our folding technique further enhances this, building multiple layers of dough and cinnamon-sugar that separate beautifully when baked. This methodical approach ensures your gluten-free cinnamon biscuits will be anything but dense or tough; they will be wonderfully soft and pull apart with ease.
Crafting Your Perfect Gluten-Free Cinnamon Biscuits: A Step-by-Step Guide
Making these gluten-free cinnamon biscuits is a rewarding process that doesn’t require extensive baking experience. Follow these detailed steps to ensure perfectly tender, flaky, and flavorful results every time.
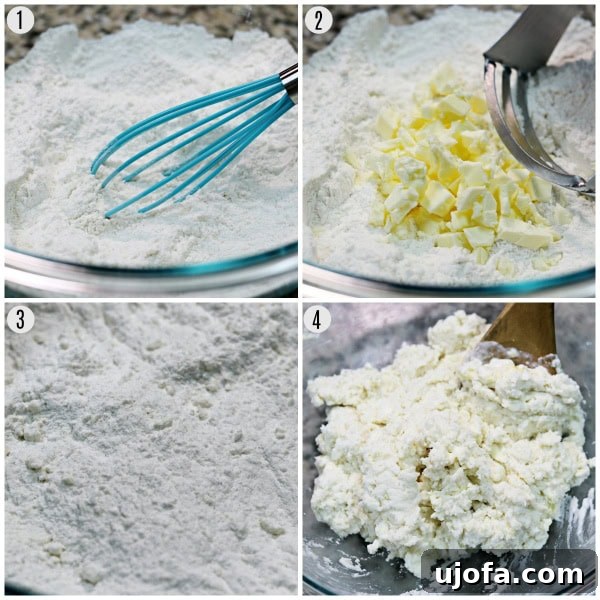
- Prepare Your Oven and Butter: Preheat your oven to a hot 450°F (232°C). This high temperature helps the biscuits rise quickly and create a beautiful crust. Next, cut your cold butter (or shortening for dairy-free) into small pieces and place them in the freezer for at least 10 minutes. Keeping the butter very cold is crucial for achieving that desirable flaky texture.
- Combine Dry Ingredients: In a large mixing bowl, combine the gluten-free all-purpose flour, xanthan gum (omit if your chosen flour blend already contains it, like Pillsbury Gluten-Free Flour), baking powder, salt, and granulated sugar. Give these ingredients a quick whisk or stir to ensure they are thoroughly combined.
- Incorporate the Cold Fat: Retrieve the chilled butter from the freezer. Using a pastry cutter or a fork, cut the cold butter into the flour mixture. Work quickly to prevent the butter from warming up too much. Continue until the mixture resembles coarse meal with pieces of butter no larger than small peas.
- Add Wet Ingredients: In a separate small bowl, whisk the egg into the buttermilk. If you don’t have buttermilk, you can easily make your own by adding 1 tablespoon of white vinegar or lemon juice to 1 cup of regular milk (or dairy-free milk) and letting it sit for 5-10 minutes in the refrigerator to keep it cold. Pour the buttermilk-egg mixture into the dry ingredients and stir gently until a soft, sticky dough forms. It’s important not to overmix the dough, as this will lead to tough, flat biscuits.
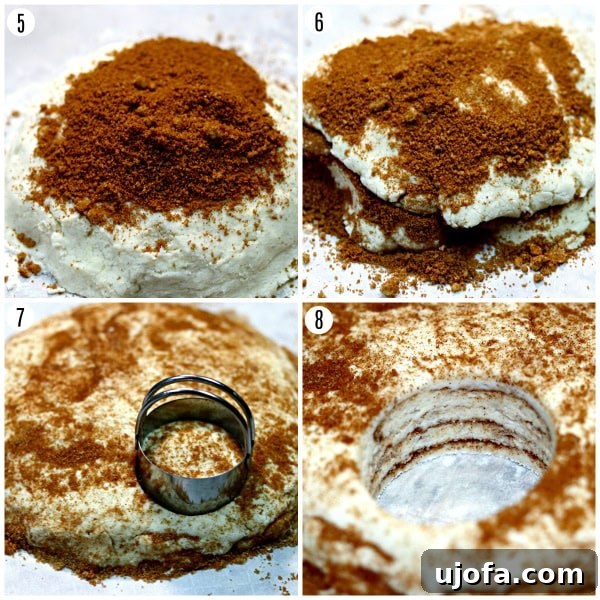
- Prepare for Layering: Lay a large piece of parchment paper on your work surface and sprinkle it with about a tablespoon of gluten-free flour. This prevents the sticky dough from adhering.
- Form and Layer the Dough: Place the sticky dough onto the floured parchment paper. Using your hands, gently form the dough into a round shape, approximately 7 inches in diameter and 1 inch thick. Avoid using a rolling pin, as this can compress the dough and lead to hard, flat biscuits. In a small separate bowl, combine the brown sugar and ground cinnamon for the filling. Sprinkle 2 tablespoons of this cinnamon-sugar mixture evenly over the top of your dough round.
- First Fold: Carefully fold the dough in half over itself, creating a semi-circle. Gently press it down. Sprinkle another 2 tablespoons of the cinnamon-sugar mixture over the newly exposed surface of the dough.
- Second Fold & Reshaping: Fold the dough over on itself once more, effectively folding it twice in total. Again, gently form the dough back into a round shape about 7 inches in diameter and 1 inch thick using your hands. Sprinkle the remaining cinnamon and sugar mixture over the top.
- Cut the Biscuits: Using a 2-inch biscuit cutter (or the rim of a glass or a mason jar lid), cut out the biscuits. Important: Push straight down and lift the cutter; do not twist it. Twisting seals the edges of the biscuit, preventing a good rise. You can also opt for a larger biscuit cutter for “Grands” style biscuits; my family often prefers the larger size for cinnamon biscuits. Gather any dough scraps, gently reform them into a round, and cut out additional biscuits until all dough is used.
- Bake to Perfection: Arrange the cut biscuits on a lightly greased large cast iron pan or a greased baking sheet. You should yield about 12 biscuits. Bake for 15-20 minutes at 450°F (232°C). Begin checking your biscuits at the 15-minute mark; they are done when they are golden brown on top and have risen beautifully. Keep an eye on them, as oven temperatures can vary.
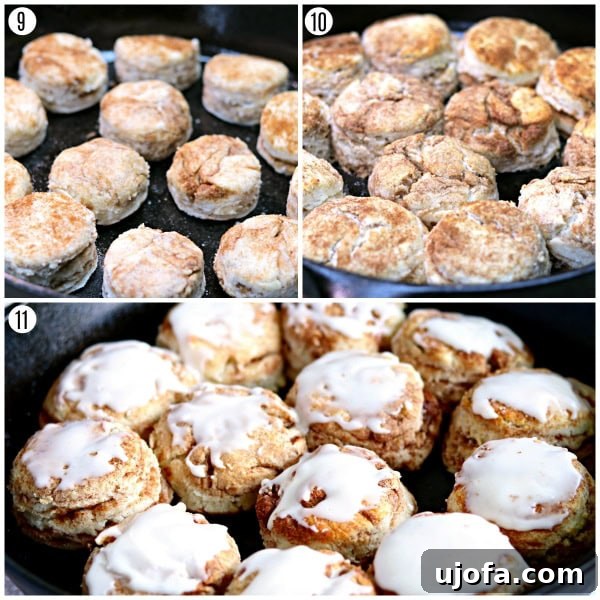
- Prepare the Vanilla Glaze: While the biscuits are baking, prepare the glaze. In a small bowl, whisk together the powdered sugar, pure vanilla extract, and milk (dairy-free milk if preferred) until smooth and creamy. Adjust the consistency by adding more sugar for a thicker glaze or more milk for a thinner one.
- Glaze and Serve: Once the biscuits are out of the oven and still warm, generously spread the vanilla glaze over them. The warmth of the biscuits will allow the glaze to melt slightly, creating a beautiful, sweet coating. Serve them immediately and savor every tender, cinnamon-laced bite!
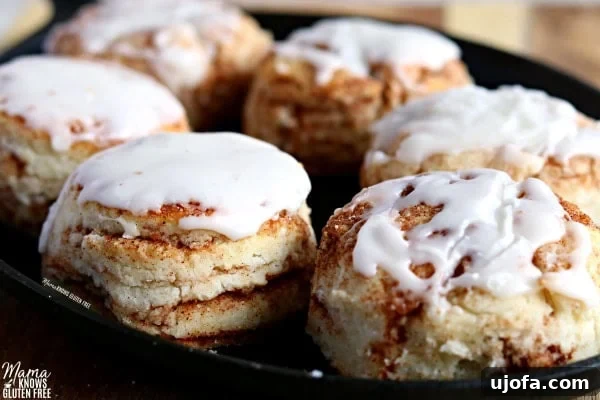
When these golden beauties emerged from the oven, filling the kitchen with their sweet, spicy aroma, my husband’s verdict was simple yet profound: “You’ve got something really special here!” I couldn’t agree more. Those layers of cinnamon and brown sugar, combined with the soft, flaky texture, truly make these biscuits exceptional.
Essential Tips for Gluten-Free Biscuit Success
Baking gluten-free can sometimes feel daunting, but with a few key techniques and considerations, you can achieve results just as spectacular as traditional baking. Here are some pro tips specifically tailored for these gluten-free cinnamon biscuits:
Choosing Your Gluten-Free Flour Blend
The type of gluten-free flour blend you use is paramount. Not all gluten-free flours are created equal, and results can vary significantly. I’ve found Pillsbury gluten-free all-purpose flour to yield excellent results in this recipe. During testing, I also tried Bob’s Red Mill 1-to-1 Baking Flour and Great Value Gluten-Free Flour. Both of these contain sorghum flour, which gives them a different texture compared to the Pillsbury blend. Biscuits made with Bob’s Red Mill and Great Value flours tended to be less fluffy and the dough was noticeably wetter. For optimal flakiness and rise, stick with a blend known for its consistent performance in biscuit recipes.
Mastering Buttermilk and Butter for the Best Texture
Cold butter is your best friend for flaky biscuits. The small pieces of cold butter create steam pockets during baking, which separate the dough into distinct layers. If your butter is too warm, it will melt into the flour too soon, resulting in a denser biscuit. Similarly, cold buttermilk helps keep the butter cold. If you don’t have buttermilk on hand, don’t fret! You can easily make your own by adding 1 tablespoon of white vinegar or lemon juice to 1 cup of milk (dairy or dairy-free) and letting it sit for 5-10 minutes until it slightly curdles. This homemade buttermilk works perfectly to create that tangy flavor and tender crumb.
The Art of Folding for Layers
The unique folding method in this recipe is what gives these cinnamon biscuits their incredible layers, similar to a cinnamon roll. Instead of rolling the dough flat, which can compact gluten-free dough and make it tough, we gently press and fold. This technique incorporates the cinnamon-sugar filling throughout the dough without overworking it. Remember, the key is to avoid overmixing and over-handling the dough. Gluten-free dough can become stiff if overworked, leading to flat and tough biscuits – a baker’s worst nightmare! Gentle handling and careful folding ensure a light, airy, and layered biscuit.
Making Them Your Own: Dairy-Free and Vegan Options
One of the best aspects of this recipe is its adaptability. We understand that dietary needs vary, which is why we’ve carefully tested and included options for both dairy-free and vegan versions of these delectable cinnamon biscuits. My husband, youngest son, and I are all dairy-free, so creating inclusive recipes is a priority!
Dairy-Free Adaptations
For a dairy-free version, simply swap out the traditional unsalted butter for a dairy-free alternative. I’ve had great success testing this recipe with both vegetable shortening and plant-based butter alternatives like Smart Balance or Earth Balance. Both yield fantastic results, maintaining the flaky texture and rich flavor. For the buttermilk, you can use almond milk, cashew milk, or even coconut milk to create your homemade dairy-free buttermilk (using the vinegar or lemon juice method mentioned earlier). These substitutions seamlessly integrate into the recipe, ensuring your dairy-free cinnamon biscuits are just as delicious.
Egg-Free and Vegan Perfection
(Recipe updated December 2018)
After discovering my husband’s egg sensitivity, it became essential to create an egg-free option for his beloved biscuits. I’m happy to report that these cinnamon biscuits can be made completely egg-free! I used Bob’s Red Mill Egg Replacer, which is also gluten-free, and the results were wonderful. While the egg-free biscuits weren’t quite as fluffy as the original version, they retained all the flakiness and delicious flavor we love. To make them truly vegan, combine the egg-free option with the dairy-free substitutions (using an egg replacer, shortening or plant-based butter, and dairy-free milk). This means that whether you’re egg-free, dairy-free, or fully vegan, you can still enjoy these delightful gluten-free cinnamon biscuits!
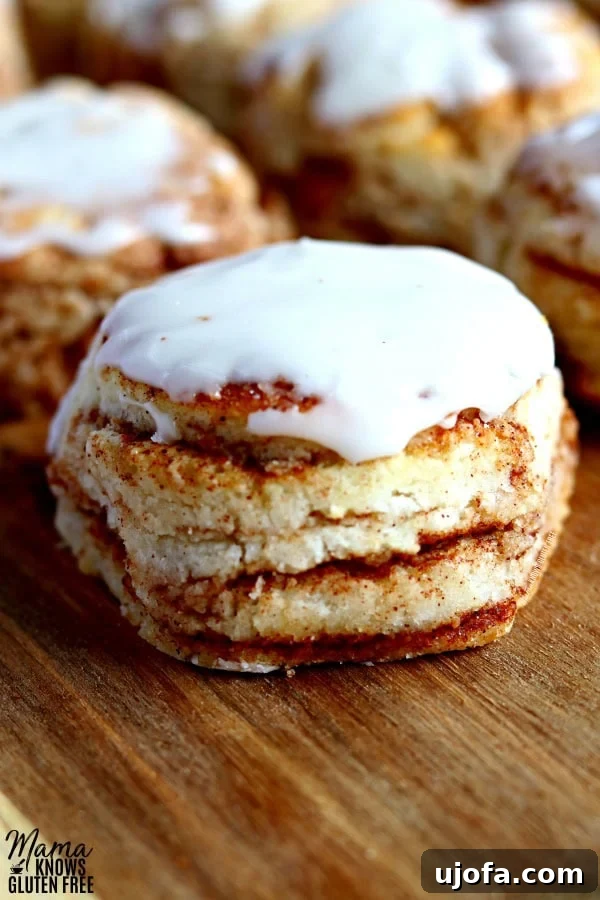
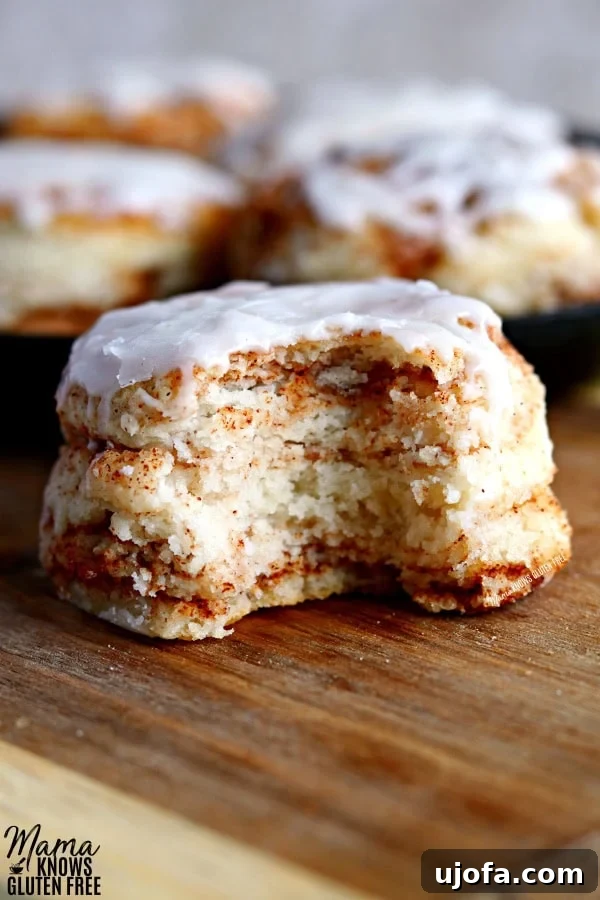
Just look at those beautiful layers of cinnamon and brown sugar peeking through! These tender and flaky gluten-free buttermilk biscuits are truly elevated with their cinnamon-sugar filling and decadent vanilla glaze, much like a classic cinnamon roll.
Serving Suggestions and Storage
These gluten-free cinnamon biscuits are best enjoyed warm, fresh out of the oven, when the glaze is slightly melted and the biscuits are at their most tender. They make a fantastic breakfast, a delightful dessert, or a comforting snack with a cup of coffee or tea. Store any leftover biscuits in an airtight container at room temperature for up to 2-3 days. For best results, gently warm them in the microwave or oven before serving to restore their tender texture.
Frequently Asked Questions about Gluten-Free Cinnamon Biscuits
Can I prepare the dough ahead of time?
While biscuits are best baked fresh, you can prepare the dough up to the cutting stage and refrigerate the cut biscuits on a baking sheet for an hour or two before baking. This can even help them rise better. For longer storage, freeze the cut raw biscuits on a baking sheet until solid, then transfer to an airtight freezer bag for up to 2-3 weeks. Bake from frozen, adding a few extra minutes to the baking time.
Why are my gluten-free biscuits tough or flat?
Tough or flat biscuits are usually a result of overworking the dough or using warm butter. Gluten-free dough doesn’t have the elastic properties of gluten, so it’s crucial to handle it minimally. Ensure your butter is very cold and work quickly. Also, avoid twisting the biscuit cutter, as this can crimp the edges and prevent rising.
What is xanthan gum and do I really need it?
Xanthan gum acts as a binder in gluten-free baking, mimicking the elasticity and structure that gluten provides. If your chosen gluten-free flour blend (like Pillsbury’s) already includes xanthan gum, you can omit the additional 1/2 teaspoon from the recipe. If your flour blend does not contain it, adding it is highly recommended for the best texture and structure.
Can I add nuts or dried fruit to these biscuits?
Absolutely! For an added twist, you can gently fold in about 1/2 cup of chopped pecans, walnuts, or raisins along with the cinnamon-sugar mixture during the layering steps. Just be careful not to overmix the dough when adding them.
More Delicious Gluten-Free Breakfast Recipes
If you loved these cinnamon biscuits, be sure to explore our other fantastic Gluten-Free Breakfast Recipes for more delightful morning treats!
Let’s Connect! You can FOLLOW ME on Facebook, Instagram, or Pinterest!
★Did you make this recipe? Please give it a star rating below in the comments!★
Gluten-Free Cinnamon Biscuits {Dairy-Free Option}
By: Audrey from Mama Knows Gluten Free
Servings: 12
Prep: 15 mins | Cook: 15 mins | Total: 30 mins
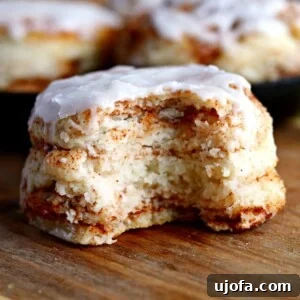
Gluten-Free Cinnamon Biscuits. Tender and flaky gluten-free buttermilk biscuits layered with cinnamon and sugar and topped with a vanilla glaze. Recipe with a dairy-free and Vegan option.
Ingredients
Cinnamon Biscuits
- 2 cups gluten-free all-purpose flour, I like Pillsbury gluten-free. Not all gluten-free flours are created equal. You may experience different baking results depending on the gluten-free flour blend you choose.
- 1/2 teaspoon xanthan gum, leave out if your flour already contains it
- 1 tablespoon gluten-free baking powder
- 1 teaspoon salt
- 2 tablespoons granulated sugar
- 1 cup buttermilk , dairy-free use almond, cashew, or coconut milk. Make your own buttermilk by adding 1 tablespoon of white vinegar or lemon juice to the cup of milk and let stand 5-10 minutes in the refrigerator to stay cold.
- 6 tablespoons unsalted butter, dairy-free use shortening, Smart Balance or Earth Balance butter
- 1 egg room temperature, egg-free use Bob’s Red Mill Egg Replacer
- 1 tablespoon gluten-free all-purpose flour, I Like Pillsbury gluten-free
- 1/4 cup brown sugar, packed
- 1 tablespoon ground cinnamon
Glaze
- 1 cup powdered sugar
- 1 teaspoon pure vanilla extract
- 2 teaspoons milk, dairy-free use almond, cashew, or coconut milk.
Instructions
- Preheat oven to 450° F (232°C).
- Cut the butter into small pieces and put in the freezer for 10 minutes. If you do not have buttermilk, make your own by adding 1 tablespoon of white vinegar or lemon juice to 1 cup of milk (dairy or dairy-free) and let stand 5-10 minutes in the refrigerator to keep cold.
- In a large bowl, add the gluten-free flour, baking powder, salt, sugar, and give it a quick whisk or stir to combine the ingredients. (Remember to omit xanthan gum if your flour blend already contains it).
- Cut in the chilled butter (or shortening for dairy-free) into the flour mixture with a pastry cutter or fork until it resembles small peas.
- Add in the buttermilk and the whisked egg (whisk the egg directly into the buttermilk) and stir until a soft, sticky dough forms. The key is to not overmix the dough, as over-mixing causes the dough to yield tough biscuits.
- Add one tablespoon of gluten-free flour to a large piece of parchment paper on your work surface.
- Place the sticky dough on top of the floured parchment paper.
- With your hands, gently form a dough round that is about 7 inches in diameter and 1 inch thick. Please do not roll out the dough, as this can make the biscuits hard and flat.
- In a small bowl, add the brown sugar and cinnamon and stir to combine. Sprinkle 2 tablespoons of this cinnamon-sugar mixture evenly all over the top of the dough round.
- Gently fold the dough over on itself (creating a half-moon shape). Sprinkle another 2 tablespoons of the cinnamon-sugar mixture over the folded dough.
- Gently fold the dough over on itself again (you will have folded the dough 2 times by now). With your hands, re-form a dough round that is about 7 inches in diameter and 1 inch thick. Sprinkle the rest of the cinnamon and sugar mixture over the dough round.
- Cut out 2-inch biscuits using a biscuit cutter, the mouth of a glass, or the lid of a mason jar. Do not twist the cutter when cutting; this will crimp the edges of the biscuit, preventing it from rising well. Reform any dough scraps into a round and cut out more biscuits.
- Put the biscuits in a greased large cast iron pan or a greased baking sheet. You will have approximately 12 cinnamon biscuits to bake.
- Bake the biscuits for 15-20 minutes at 450° F (232°C). At the 15-minute mark, check your biscuits to see if they are golden brown. Please watch your cinnamon biscuits carefully, as all ovens are different.
- In a small bowl, stir together the glaze ingredients until smooth. Spread the glaze over the warm cinnamon biscuits. Serve warm and enjoy!
- The biscuits can be stored in an airtight container at room temperature. They are best enjoyed warm.
Notes
- Gluten-Free Flour: I like Pillsbury gluten-free flour for this recipe. Not all gluten-free flours are created equal. You may experience different baking results depending on the gluten-free flour blend you choose.
- Flour Blend Testing: I test baked with Bob’s Red Mill 1-to-1 Baking Flour and Great Value Gluten-Free Flour. Both contain sorghum flour, which gave different results from the Pillsbury blend. The biscuits made with Bob’s Red Mill and Great Value brands were not as fluffy, and the dough was wetter with Bob’s Red Mill.
- Dairy-Free Option: Use shortening or a plant-based butter (like Smart Balance or Earth Balance) and almond, cashew, or coconut milk.
- Egg-Free Option: Use Bob’s Red Mill Egg Replacer.
- Vegan Option: If vegan, use an egg replacer, shortening/plant-based butter, and dairy-free milk.
- Pro Tip for Buttermilk: If you do not have buttermilk, you can make your own by adding 1 tablespoon of white vinegar or lemon juice to 1 cup of milk (dairy or dairy-free) and letting it stand 5-10 minutes in the refrigerator to keep cold.
- Dough Handling: The key is to not overmix the dough because over-mixing causes the dough to yield tough biscuits. There is nothing worse than a flat, tough biscuit! Please do not roll out the dough.
- Tools: I have the K&S Artisan Complete Pastry Cutter Set.
- Mama says, “Check all of your labels!”
Nutrition
Nutrition information is automatically calculated, so should only be used as an approximation.
Additional Info
Course: Breakfast
Cuisine: American
Tried this recipe? Mention @mamaknowsglutenfree or tag #mamaknowsglutenfree!