
Easy Gluten-Free Oat Flour Bread: A Hearty, Quick, and Delicious Loaf
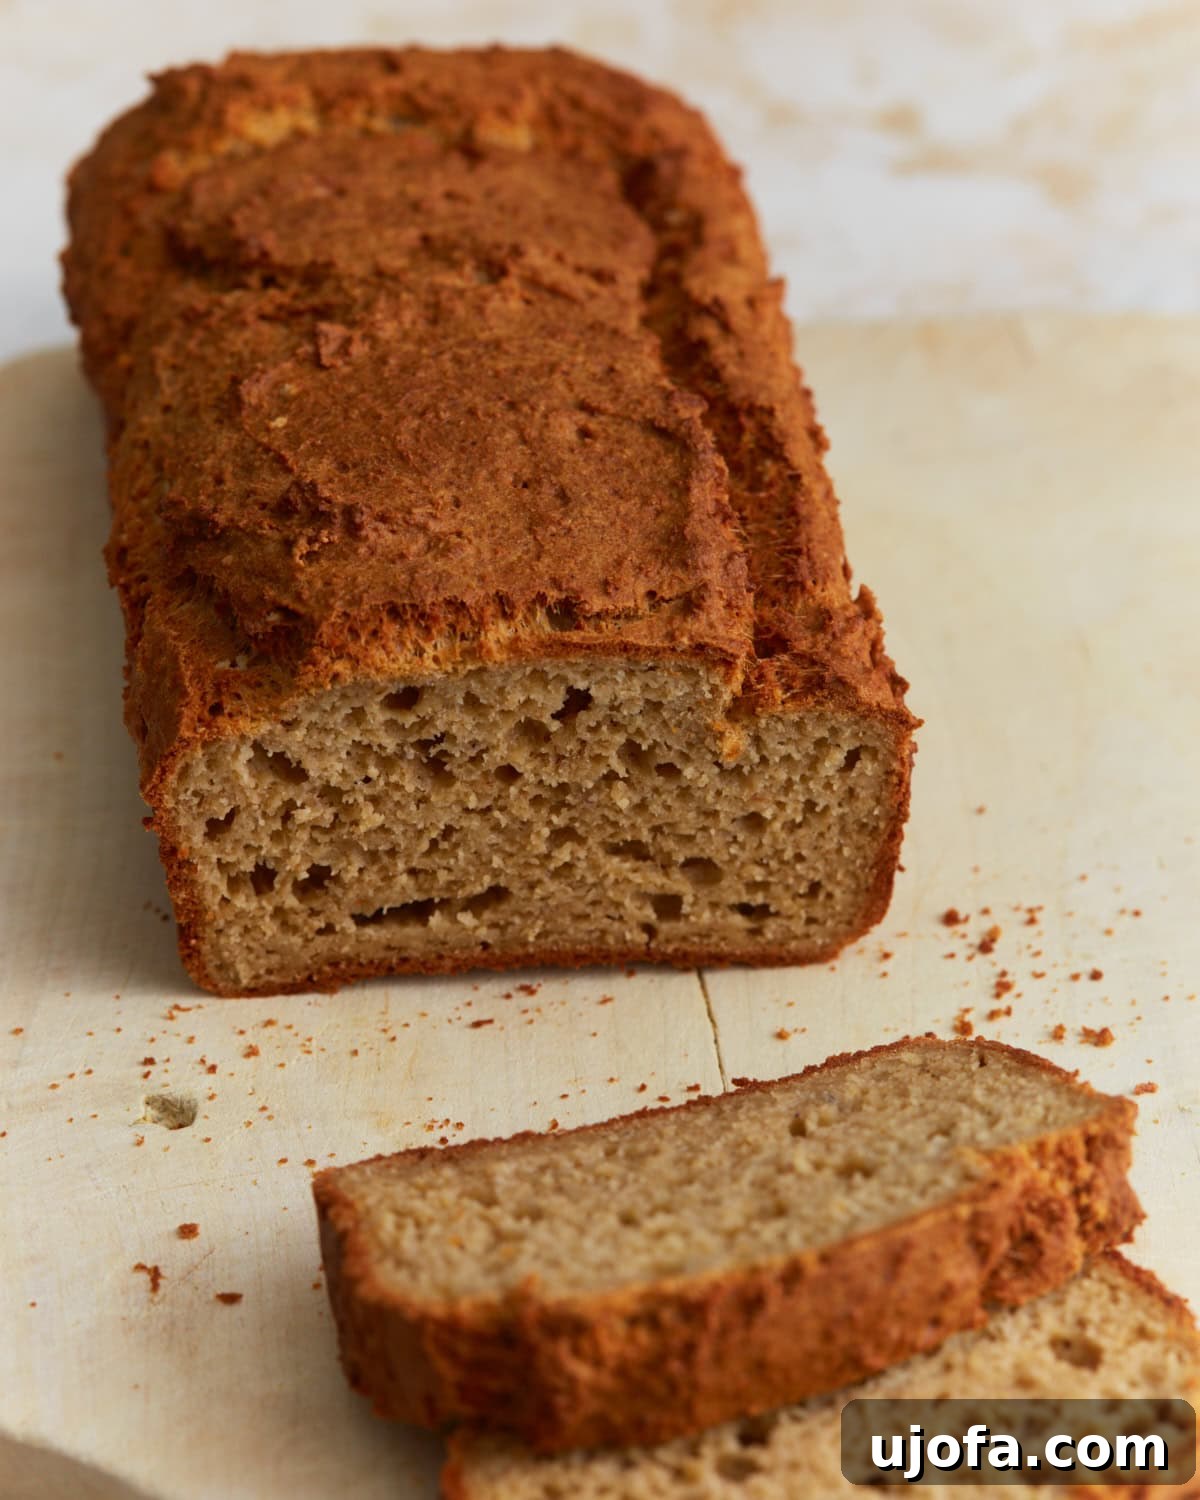
Craving a wholesome, satisfying bread that’s naturally gluten-free and comes together without the fuss of yeast or extensive proofing? Look no further than this incredible oat flour bread recipe. This quick bread is made with finely blended oats, eggs, and creamy yogurt, resulting in a delightfully moist and tender texture that’s simply irresistible. It bakes into a slightly dense yet perfectly sliceable loaf, making it an ideal choice for a nutritious breakfast, a quick afternoon snack, or a comforting addition to any meal. Simple ingredients and straightforward steps mean you can enjoy homemade bread goodness in no time.
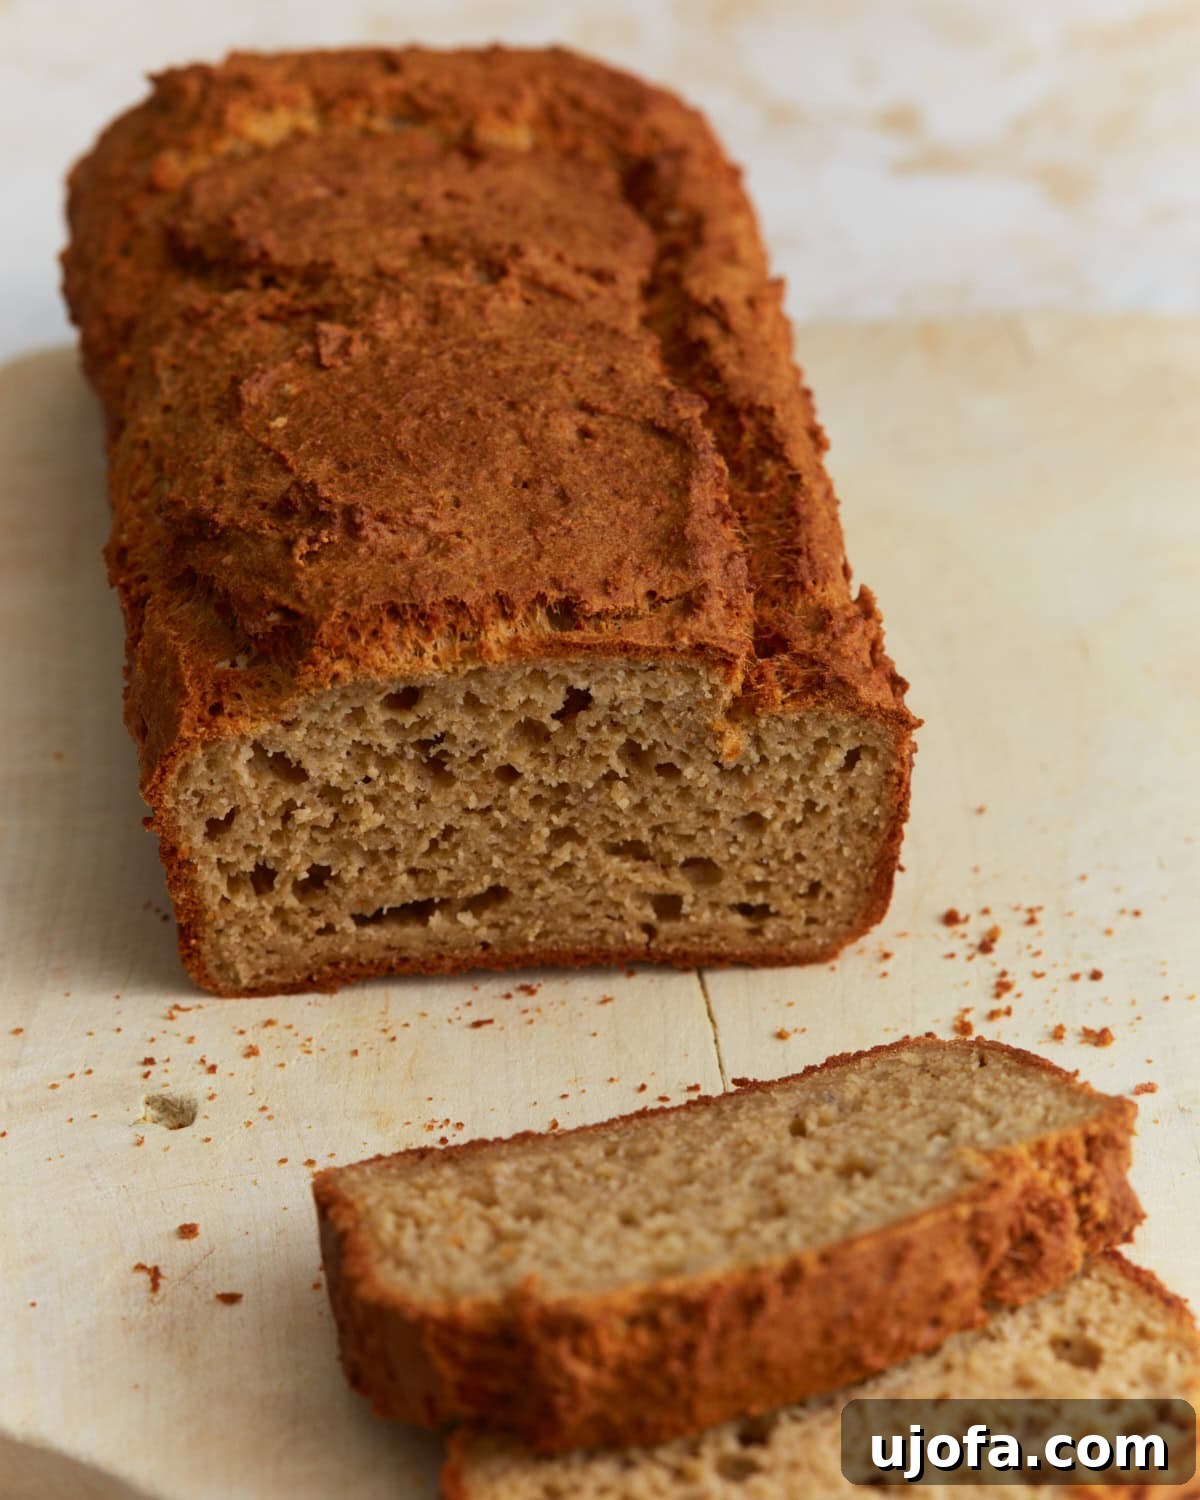
For those who love the aroma and comfort of freshly baked bread but often find themselves short on time or dealing with gluten sensitivities, this oat flour bread is a game-changer. I frequently bake at home, but there are days when I simply need a dependable, quick loaf that doesn’t demand yeast activation or lengthy proofing periods. This recipe has become my absolute favorite because of its simplicity, consistent results, and the fact that it uses ingredients I always have stocked in my pantry. The base of this bread is homemade oat flour, which I prepare by blending rolled oats until they reach a very fine consistency. This crucial step contributes significantly to the bread’s wonderfully soft texture and uniform crumb. The harmonious blend of Greek yogurt, eggs, and melted butter ensures an incredibly moist loaf, while a touch of psyllium husk provides essential structure, allowing for clean, beautiful slices every time. While it’s naturally a denser bread, it’s dense in a hearty, satisfying way, making it perfect for toasting and topping with your favorite spreads. Through repeated testing, I’ve discovered that allowing the batter to rest before baking and patiently cooling the loaf completely are key factors in achieving that ideal texture. It’s truly the kind of bread I reach for with my morning coffee or as a quick, fulfilling snack later in the day.
Why Choose Oat Flour Bread?
Oat flour bread offers a fantastic alternative to traditional wheat-based loaves, especially for those seeking gluten-free options. Unlike many gluten-free breads that can be dry or crumbly, this recipe leverages the natural moisture-retaining properties of oats, combined with yogurt and eggs, to create a beautifully tender crumb. Its yeast-free nature means no waiting for dough to rise, making it a much quicker bake. The mild, slightly nutty flavor of oats also lends itself well to both sweet and savory applications, making this bread incredibly versatile. It’s a wholesome choice, packed with fiber from the oats, contributing to a satisfying and nutritious eating experience.
Understanding Oat Flour and its Benefits
Oat flour is simply oats that have been finely ground into a powder, similar to wheat flour. It’s a popular choice for gluten-free baking because it offers a soft texture and a slightly sweet, mild flavor. When using oat flour, it’s essential to ensure your oats are certified gluten-free if you have celiac disease or a severe gluten intolerance, as oats can sometimes be cross-contaminated during processing. You can easily make your own oat flour at home by blending rolled oats in a food processor or high-speed blender until very fine. This homemade approach often yields a fresher flavor and allows for control over the fineness of the flour, which directly impacts the final texture of your bread.
Beyond being gluten-free, oat flour is rich in soluble fiber, particularly beta-glucan, which is known for its heart-healthy benefits, including lowering cholesterol and stabilizing blood sugar levels. It also contains protein, vitamins, and minerals, making it a nutritious addition to your diet. Incorporating oat flour into your baking can increase the nutritional value of your homemade goods while providing a delightful taste and texture.
Key Ingredients and Their Role
Every ingredient in this oat flour bread recipe plays a vital role in achieving its perfect texture and flavor:
- Rolled Oats: The star of the show! When blended into a fine flour, oats provide the primary structure and characteristic wholesome flavor. Use old-fashioned rolled oats for the best results; quick oats might result in a slightly different texture, and steel-cut oats are too hard to blend finely enough.
- Psyllium Husk: This fibrous ingredient is crucial for gluten-free baking. It acts as a binder, mimicking the elasticity of gluten and preventing the bread from becoming too crumbly. It helps absorb moisture, contributing to the loaf’s overall structure and sliceability.
- Baking Powder & Baking Soda: These are the leavening agents responsible for giving the bread its lift and airy pockets, especially since this is a yeast-free recipe. Baking soda reacts with the acidic components (like Greek yogurt) to produce carbon dioxide, while baking powder provides consistent rise.
- Salt: Essential for enhancing all the other flavors in the bread and balancing its sweetness.
- Large Eggs: Eggs contribute to both the structure and moisture of the bread. They act as a binder, helping to hold the loaf together, and their fat content adds richness and tenderness.
- Milk: Adds liquid to the batter, helping to hydrate the dry ingredients and create a smooth consistency. Any milk (dairy or non-dairy) can be used.
- Greek Yogurt: A secret weapon for moisture and tenderness! Greek yogurt adds a lovely tang, and its thickness provides crucial moisture without making the batter watery. It also interacts with the baking soda for added lift. For a dairy-free option, use a thick, plain dairy-free yogurt.
- Melted Butter: Contributes richness, flavor, and a tender crumb. Unsalted butter is preferred so you can control the salt content. For a dairy-free version, use vegan butter.
- Honey (or Maple Syrup): A natural sweetener that also helps with browning and adds subtle flavor. Maple syrup is an excellent alternative for a vegan option or different flavor profile.
Achieving Perfection: Key Insights from Testing
Through numerous trials and adjustments, I’ve honed this recipe to deliver consistent, delicious results. Here are the critical lessons I’ve learned that will ensure your oat flour bread turns out perfectly every time:
- Blend Oats Very Finely: This step cannot be overstated. For a soft and smooth texture, it is imperative to blend your rolled oats into an extremely fine, flour-like powder. If the oats remain too coarse, your bread will unfortunately turn out slightly gritty rather than the desired tender and delicate crumb. Take your time with this step, ensuring no visible oat flakes remain.
- Allow the Batter to Rest Before Baking: After combining all ingredients, let the batter sit undisturbed for approximately 10 minutes. This resting period is crucial as it allows the oat flour and psyllium husk to fully absorb the liquids. Skipping this step can lead to a gummy texture and uneven baking, as the dry ingredients won’t be adequately hydrated. The batter will visibly thicken during this time, which is exactly what you want.
- Bake Until Fully Set in the Center: Oat flour breads can be deceptive; they often look golden and done on the outside before the center is completely cooked. To avoid a raw or underbaked middle, I highly recommend using an instant-read thermometer. Bake the bread until its internal temperature consistently reaches around 200°F (95°C). This removes any guesswork and guarantees a thoroughly cooked loaf.
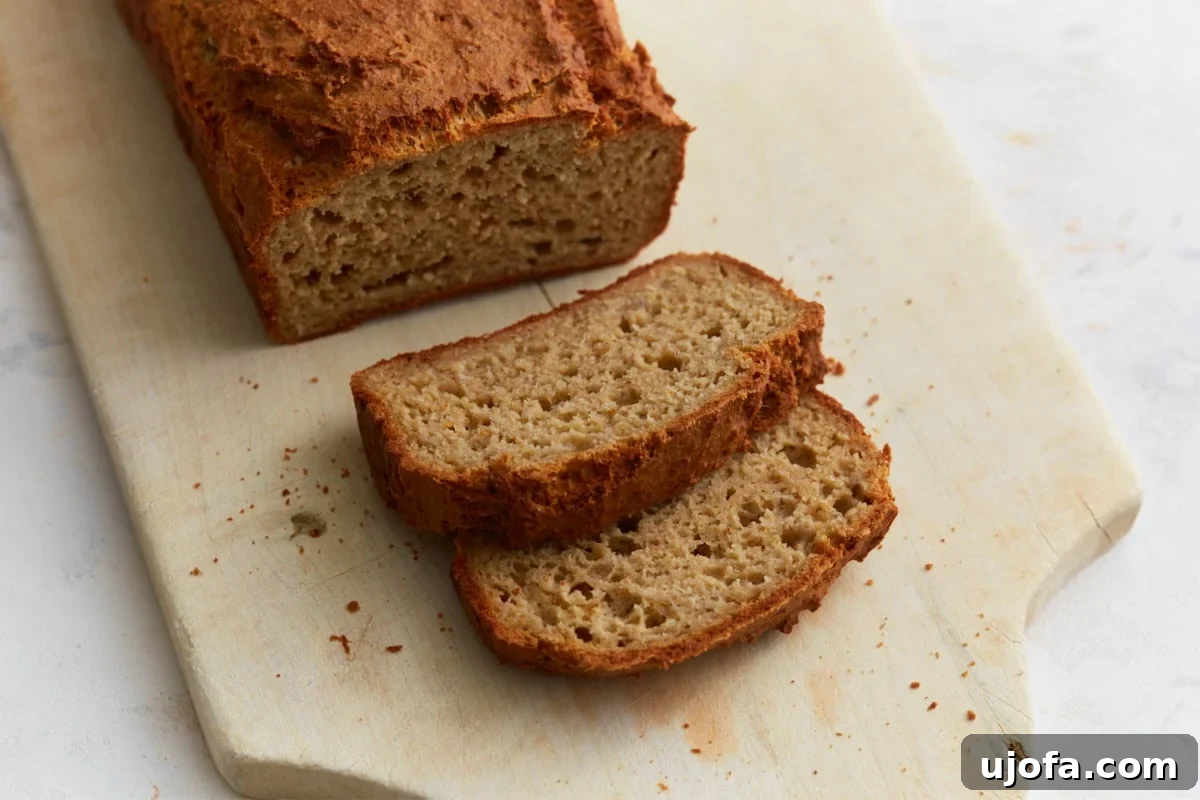
- Cool Completely Before Slicing: This is arguably the most challenging but essential step. Resist the urge to slice into the warm bread! Although it may appear ready, cutting it too early will result in a dense, gummy texture. Allowing the bread to cool completely, ideally for at least 2 hours on a wire rack, gives the crumb ample time to set properly. This patience is rewarded with clean, firm, and perfectly textured slices.
Oat Flour Bread
Sabine Venier
10
slices
15
45
1
Pin Recipe
Email Recipe
Print Recipe
Equipment
-
1 8×4-inch loaf pan
Ingredients
- 2 ½ cups rolled oats
- 1 tbsp psyllium husk
- 2 tsp baking powder
- ¼ tsp baking soda
- ½ tsp salt
- 2 large eggs
- ½ cup milk
- ½ cup Greek yogurt
- ¼ cup melted butter
- 2 tbsp honey, substitute with maple syrup
Instructions
-
Preheat oven to 350°F (175°C). Line an 8×4-inch loaf pan with parchment paper, leaving an overhang on the sides for easy removal, and lightly grease it to prevent sticking.
-
In a food processor or high-speed blender, add the rolled oats and psyllium husk. Process until you achieve a very fine, flour-like consistency. Ensure there are no large oat pieces remaining for the best texture.
-
In a large mixing bowl, combine the freshly processed oat-psyllium husk flour, baking powder, baking soda, and salt. Whisk these dry ingredients thoroughly until they are evenly distributed. Next, add the wet ingredients: eggs, milk, Greek yogurt, melted butter, and honey (or maple syrup). Whisk everything together until the batter is smooth, thick, and sticky. It should be too thick to pour. Let the batter rest for 10 minutes; this allows the oat flour to fully absorb the liquid, preventing a gummy texture and ensuring a more even bake. The batter will thicken further during this rest.
-
Spoon the thickened batter into your prepared loaf pan. Use a spatula to spread and smooth the top evenly.
-
Bake for 45–50 minutes, or until the top of the bread is beautifully golden brown, the center feels set, and a toothpick inserted into the middle comes out clean. For ultimate precision, the internal temperature of the loaf should register around 200°F (95°C).
-
Once baked, let the bread cool in the loaf pan for 15 minutes. This initial cooling helps it firm up. Then, carefully transfer the loaf to a wire rack to cool completely. This full cooling process, which takes approximately 2 hours, is critical. Do not slice the bread while it is still warm, as it will likely be gummy and dense before it has fully set.
Notes
- For Add-ins: If you’d like to customize your loaf, feel free to incorporate about 1/3 to 1/2 cup total of mix-ins such as chopped nuts, seeds, or dried fruit. Adding too many can make the bread too heavy or dense. Stir them into the batter after it has rested for 10 minutes, just before you transfer it to the loaf pan. This timing helps maintain the batter’s consistency and prevents it from becoming overly thick too early.
- Dairy-Free Substitutes: This recipe is highly adaptable for dairy-free diets. Simply use a thick, plain dairy-free yogurt (like coconut or almond-based), your preferred vegan butter, and any dairy-free milk alternative (almond, soy, or oat milk work well).
Nutrition
Calories: 161 kcal
Carbohydrates: 19g
Protein: 5g
Fat: 7g
Saturated Fat: 4g
Polyunsaturated Fat: 1g
Monounsaturated Fat: 2g
Trans Fat: 0.2g
Cholesterol: 47mg
Sodium: 287mg
Potassium: 122mg
Fiber: 3g
Sugar: 5g
Vitamin A: 210 IU
Vitamin C: 0.02mg
Calcium: 93mg
Iron: 1mg
Nutrition information is automatically calculated and should be used as an approximation.
Additional Info
Baking
American
How to Make Oat Flour Bread: A Visual Guide
Follow these step-by-step instructions to bake your perfect loaf of oat flour bread:
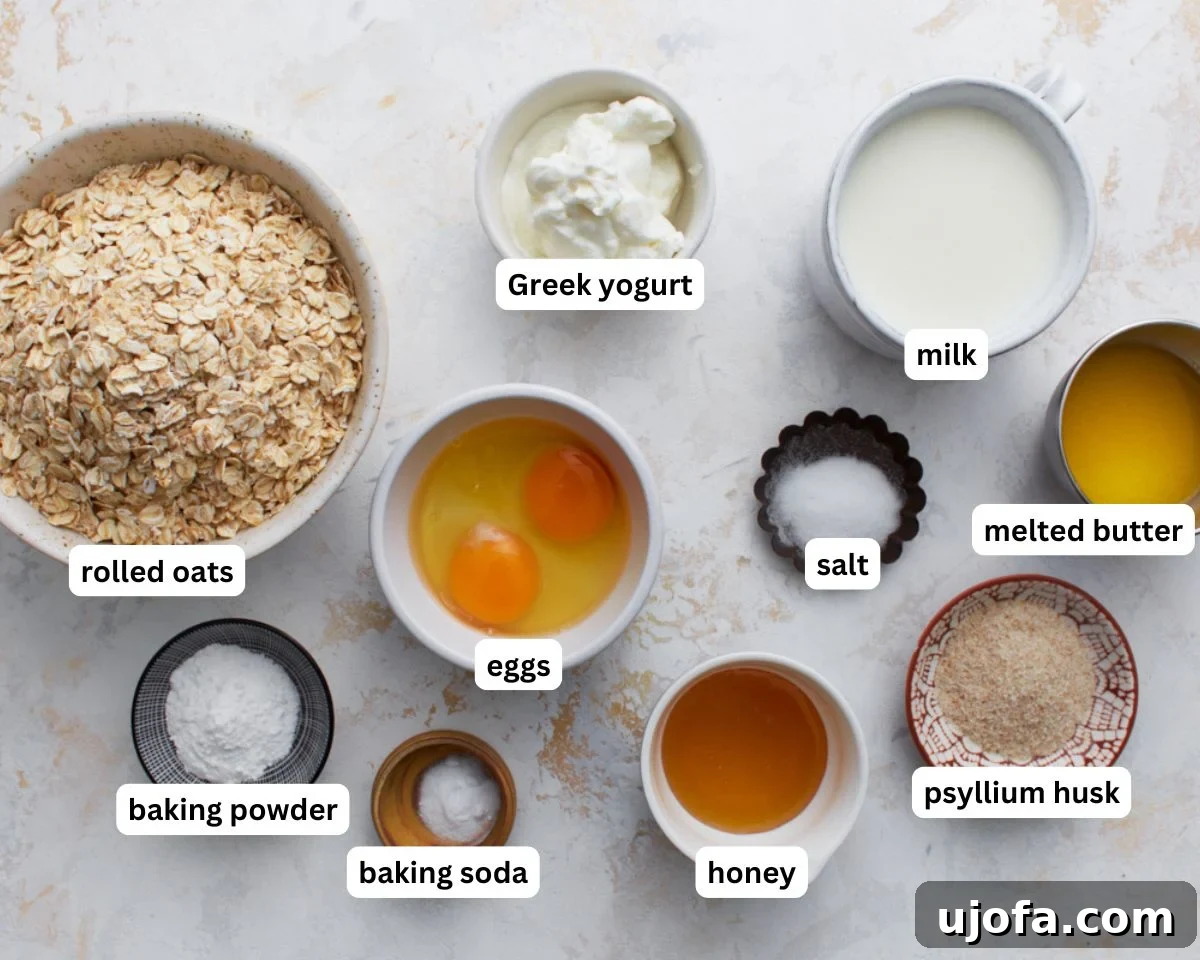
Step 1: Gather Ingredients and Prepare Pan. Begin by gathering all your required ingredients to ensure a smooth baking process. Preheat your oven to 350°F (180°C). Prepare an 8×4-inch loaf pan by lining it with parchment paper, allowing some overhang on the longer sides. This will make it much easier to lift the baked bread out of the pan. Lightly grease the parchment paper to prevent any sticking.
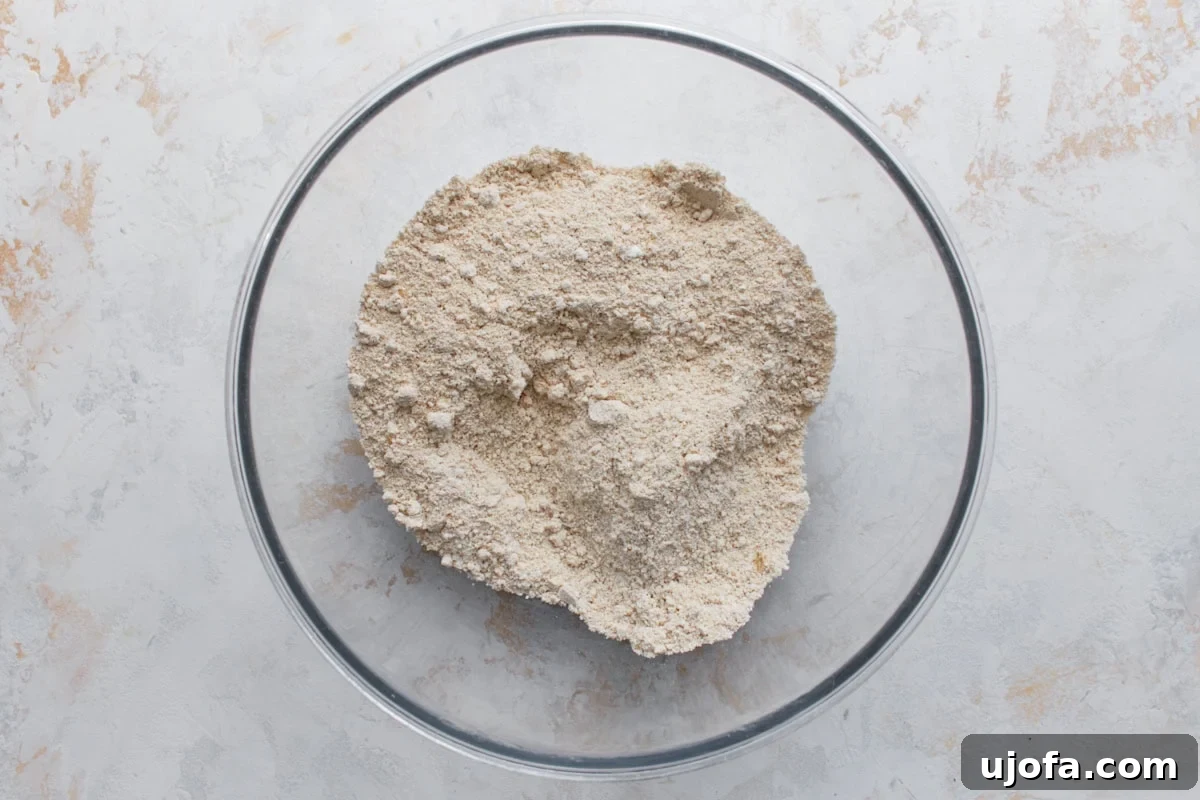
Step 2: Prepare Oat Flour and Mix Dry Ingredients. Add 2½ cups (250g) of rolled oats and 1 tbsp (10g) of psyllium husk to a food processor or a powerful high-speed blender. Blend these ingredients until they form a very fine, flour-like consistency. It’s crucial that there are no visible oat flakes left, as this ensures a smooth bread texture. Transfer the homemade oat flour mixture to a large mixing bowl. To this, add 2 tsp (8g) of baking powder, ¼ tsp (1.5g) of baking soda, and ½ tsp (3g) of salt. Whisk these dry ingredients together thoroughly until they are uniformly combined.
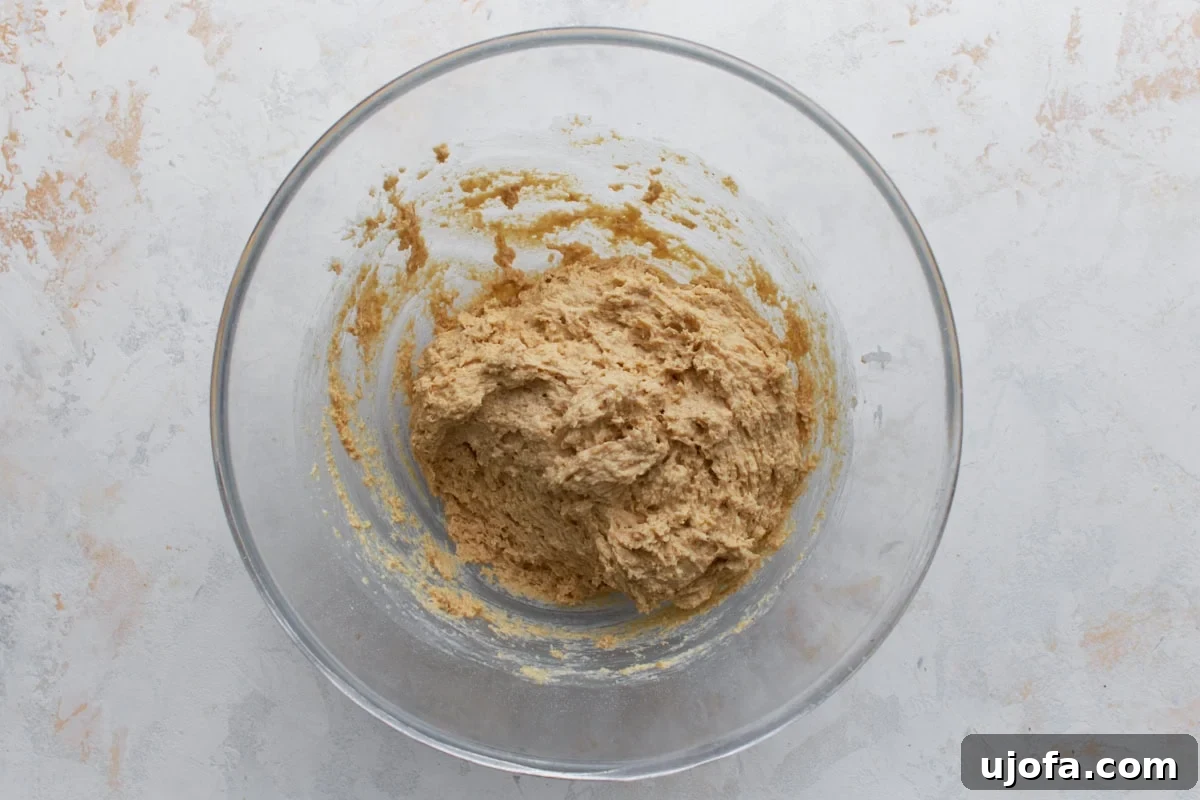
Step 3: Add Wet Ingredients and Rest the Batter. Now, introduce the wet components to your dry mixture. Add 2 large eggs, ½ cup (120ml) of milk, ½ cup (120g) of Greek yogurt, ¼ cup (54g) of melted butter, and 2 tbsp (40g) of honey (or maple syrup if preferred). Whisk all these ingredients until the batter becomes smooth, thick, and distinctly sticky. Do not expect a pourable batter – its dense consistency is normal. Once thoroughly mixed, let the batter sit undisturbed for 10 minutes. This resting period is vital, allowing the oat flour and psyllium husk to fully hydrate and absorb the liquids, which will prevent a gummy texture in the final loaf and aid in even baking. You will notice the batter becoming even thicker during this time.
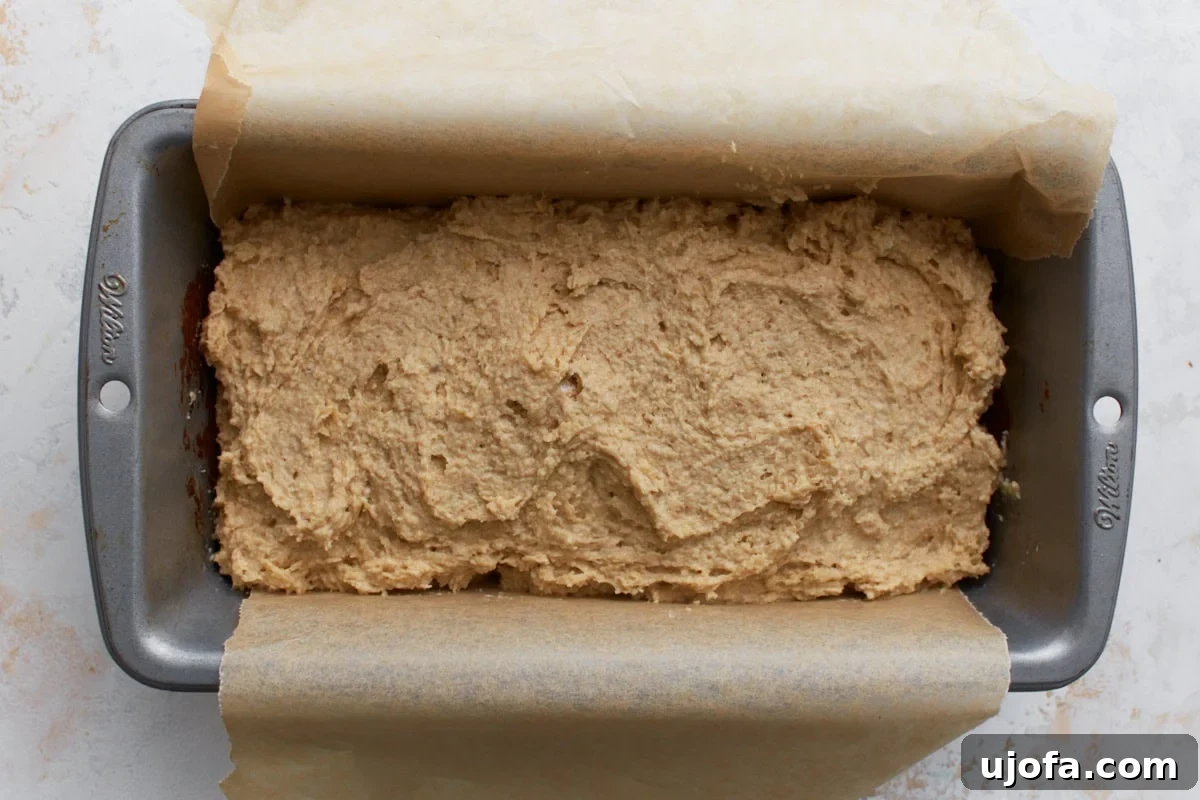
Step 4: Spoon Batter into Loaf Pan. Gently spoon the now-thickened batter into the parchment-lined loaf pan. Use a spatula or the back of a spoon to spread and smooth the top of the batter evenly. This ensures a uniform rise and a beautiful crust.
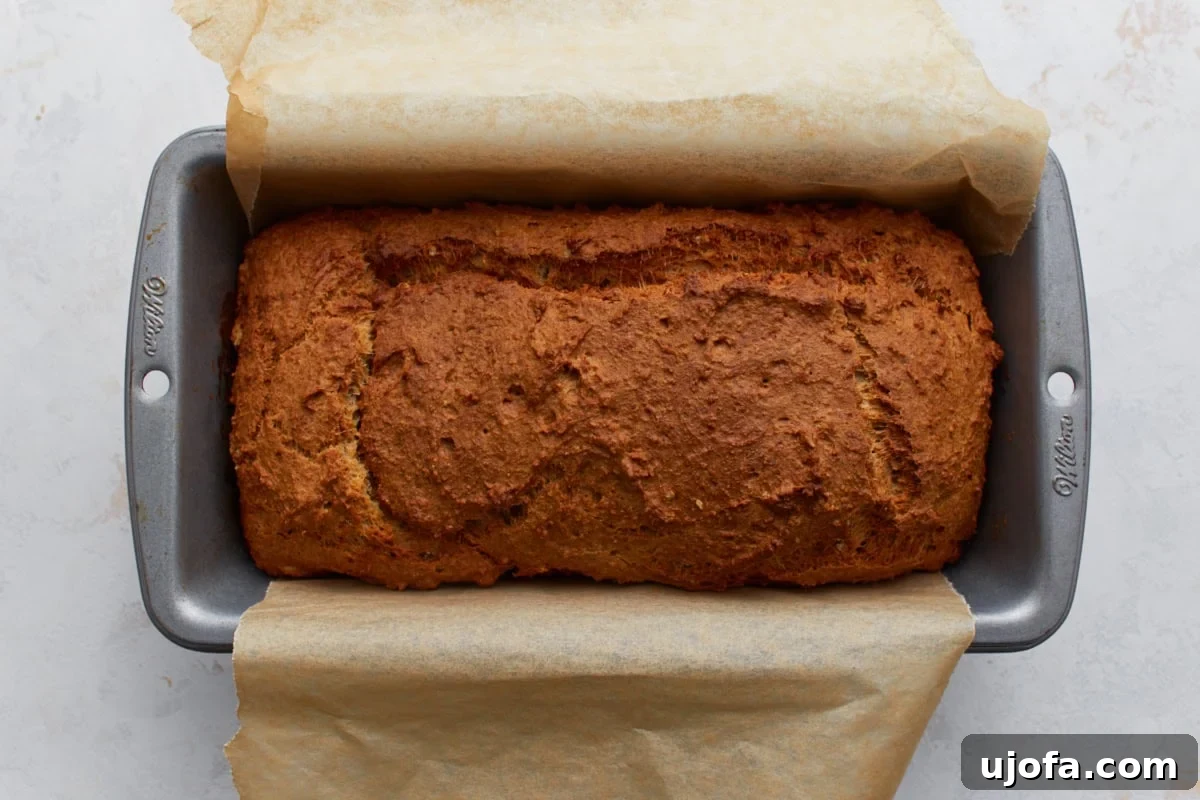
Step 5: Bake the Loaf to Perfection. Place the loaf pan into your preheated oven. Bake for approximately 45–50 minutes, or until the top of the bread turns a lovely golden brown, the center appears set, and a wooden toothpick inserted into the middle comes out clean. For the most accurate result and to guarantee it’s fully cooked through, measure the internal temperature of the bread with an instant-read thermometer; it should reach around 200°F (95°C).
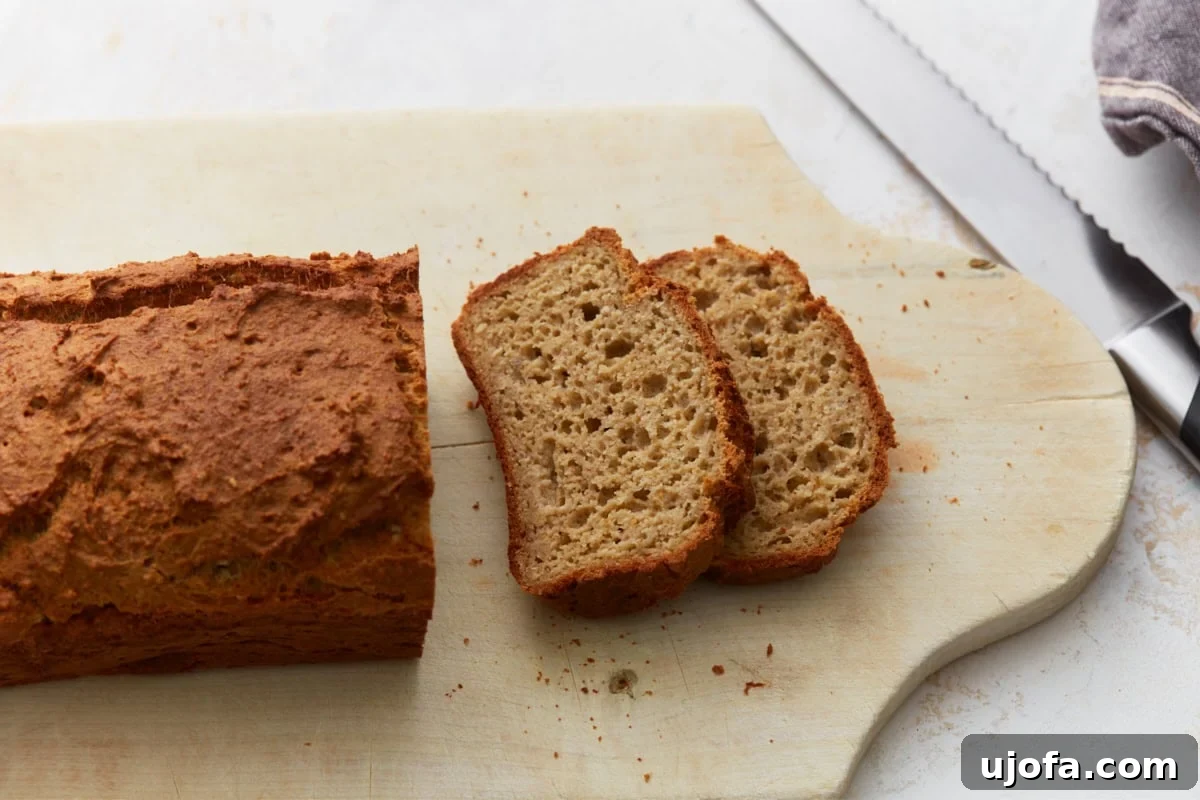
Step 6: Cool Completely Before Slicing. This is a crucial step for the best texture. After baking, allow the bread to cool in its pan for about 15 minutes. This helps the loaf to firm up and makes it easier to handle. Then, carefully transfer the bread out of the pan and onto a wire rack to cool completely. This cooling process typically takes around 2 hours. It is imperative not to slice the bread while it is still warm; attempting to do so will result in a gummy and overly dense texture. Allowing it to cool fully lets the internal structure set properly, giving you clean, perfect slices.
Tips for a Perfect Oat Flour Bread Every Time
- Use Quality Ingredients: Fresh eggs, good quality Greek yogurt, and certified gluten-free rolled oats make a noticeable difference in flavor and texture.
- Room Temperature Ingredients: Ensure your eggs, milk, and yogurt are at room temperature. This helps them incorporate more smoothly into the batter, leading to a more uniform crumb.
- Measure Accurately: Especially with gluten-free baking, precise measurements are critical. Use a kitchen scale for oats if possible, as cup measurements can vary.
- Don’t Overmix: Once the wet and dry ingredients are combined, mix just until smooth. Overmixing can develop the starches in the oats too much, potentially leading to a tougher bread.
- Adjust for Pan Size: This recipe is designed for an 8×4-inch loaf pan. If using a different size, you may need to adjust baking time. A wider pan might require less time, while a narrower, taller pan might require more.
Frequently Asked Questions (FAQs)
Is this bread truly gluten-free?
Yes, this recipe is naturally gluten-free as long as you use certified gluten-free rolled oats. Standard oats can be cross-contaminated with wheat, barley, or rye during processing. Always check the label if gluten-free is a necessity.
Can I substitute the psyllium husk?
Psyllium husk is highly recommended for its binding and structural properties in gluten-free baking. It’s difficult to find a direct substitute that performs exactly the same way. Flaxseed meal or chia seeds can sometimes be used as a binder, but they may alter the texture and color of the bread slightly, potentially making it denser or gummier. For best results, stick with psyllium husk.
Can I make this bread vegan?
Absolutely! The “Notes” section provides guidance: substitute eggs with flax eggs (1 tbsp ground flaxseed meal + 3 tbsp water per egg, let sit for 5 minutes), use a thick dairy-free yogurt, vegan butter, and dairy-free milk. The honey can be replaced with maple syrup or agave nectar.
How can I make the bread sweeter or more savory?
For a sweeter loaf, you can increase the honey/maple syrup to 3-4 tablespoons, or add a handful of chocolate chips or dried fruit. For a savory twist, reduce the sweetener or omit it entirely, and consider adding herbs like rosemary, garlic powder, or nutritional yeast, along with a sprinkle of everything bagel seasoning on top before baking.
My bread turned out too dense/gummy. What went wrong?
The most common reasons for a dense or gummy texture are not blending the oats finely enough, skipping the 10-minute batter rest, or slicing the bread before it has completely cooled. Ensure your baking powder and soda are fresh and active, as expired leavening agents can also lead to a dense loaf.
Serving Suggestions
This versatile oat flour bread is delicious in countless ways. A toasted slice in the morning, spread with a generous pat of salted butter, is simply divine. It also pairs wonderfully with a drizzle of sweet honey or a rich vegan nutella for a treat. For breakfast, serve it alongside scrambled eggs, avocado, or fresh fruit. It’s also a fantastic accompaniment to a cozy bowl of gluten-free potato soup or your favorite chili for a comforting lunch. Whether you’re in the mood for something sweet or savory, this bread adapts beautifully to your cravings. Try it with jam, cream cheese, or even as a base for open-faced sandwiches.
Storage Instructions
To keep your oat flour bread fresh, store the cooled loaf in an airtight container at room temperature for up to 2 days. For extended freshness, you can refrigerate it for up to 5 days. Ensure it’s well-sealed to prevent drying out.
For longer storage, freezing is an excellent option. I recommend slicing the cooled loaf first, then wrapping each slice individually in plastic wrap or parchment paper. Place the wrapped slices into a freezer-safe bag or container, and they will keep well for up to 2 months. When you’re ready to enjoy a slice, you can toast it directly from frozen or gently warm it in the microwave for 20–30 seconds until heated through. While the texture remains quite good after thawing, you might notice it’s slightly denser than when fresh.
More Gluten-Free Oat Recipes You’ll Love
If you enjoy the wholesome goodness of this oat flour bread, you’ll love exploring these other delightful gluten-free oat-based recipes:
- Banana Oatmeal Muffins: These muffins are wonderfully soft, moist, and bursting with sweet banana flavor complemented by hearty oats. They make an excellent grab-and-go breakfast or a satisfying snack. If you appreciate the wholesome texture of oat flour bread, these muffins provide a lighter, more portable option with a similar comforting taste.
- Banana Oatmeal Pancakes: Light and fluffy, these pancakes are crafted from simple ingredients like oats and ripe bananas, blended into a smooth, delightful batter. They offer a fantastic alternative if you’re looking for an oat-based flavor similar to the bread, but in a quicker, more traditional breakfast format.
- Oat Flour Banana Bread: This oat flour banana bread is incredibly soft, moist, and naturally sweetened by ripe bananas, making it a perfect companion recipe to our oat flour bread. It utilizes similar core ingredients but offers a sweeter profile and a more tender crumb, ideal for a special breakfast or a delightful dessert.
- Oat Flour Chocolate Chip Cookies: Indulge in these soft, chewy chocolate chip cookies made with simple pantry staples for an effortless gluten-free treat. If you enjoy baking with oat flour, this recipe is a fun and delicious way to use it in a dessert, maintaining that satisfying wholesome texture.
This easy, yeast-free oat flour bread recipe is a testament to how simple and delicious gluten-free baking can be. With its moist crumb, hearty texture, and wholesome ingredients, it’s sure to become a staple in your kitchen. Enjoy the comforting taste of homemade bread with every slice!
Tried this recipe?
Mention @mamaknowsglutenfree or tag #mamaknowsglutenfree!