
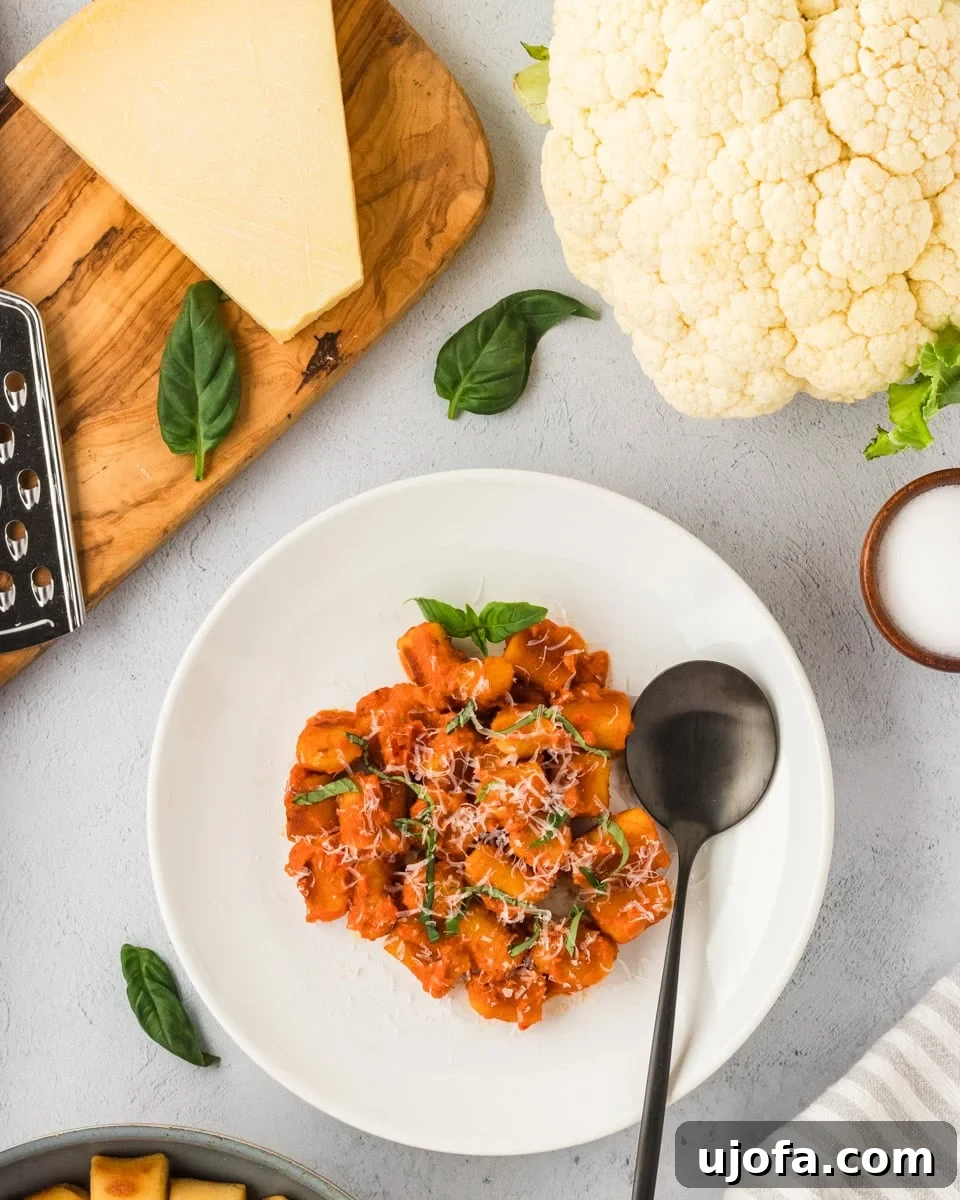
I used to believe that crafting homemade gluten-free gnocchi was an overly complicated endeavor, reserved only for seasoned chefs. However, my perspective completely shifted once I discovered the incredible simplicity and deliciousness of this 3-ingredient cauliflower gnocchi recipe. It’s a game-changer – naturally gluten-free, boasting a delightful pillowy softness on the inside with an irresistibly crispy exterior, and it pairs perfectly with virtually any sauce you can imagine, from a rich, robust marinara to a subtly elegant butter and sage combination. This recipe has not only simplified my cooking but also opened up a world of healthy, versatile meal possibilities, proving that gluten-free doesn’t have to mean compromising on flavor or texture.
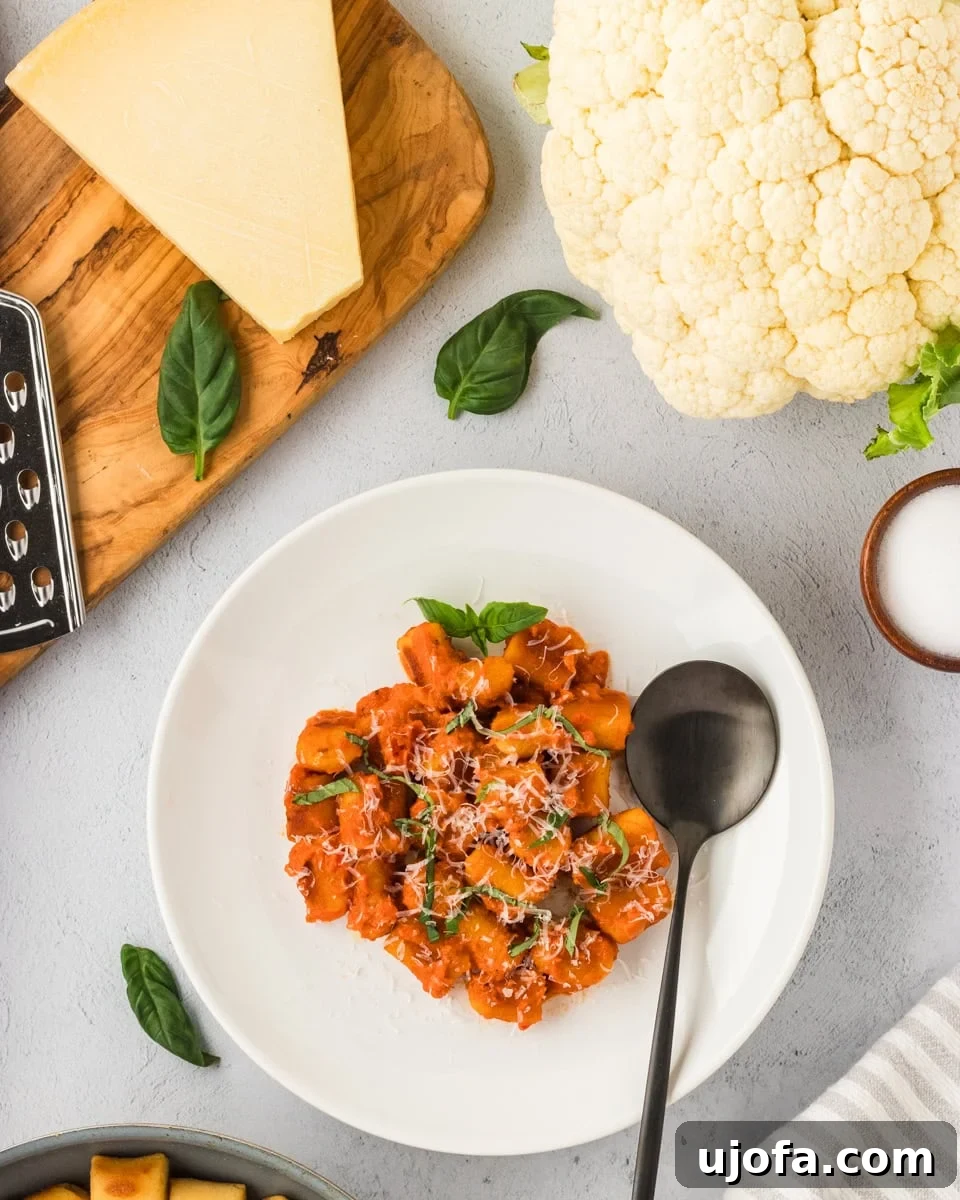
Effortless Gluten-Free Cauliflower Gnocchi: A Healthy & Delicious Twist
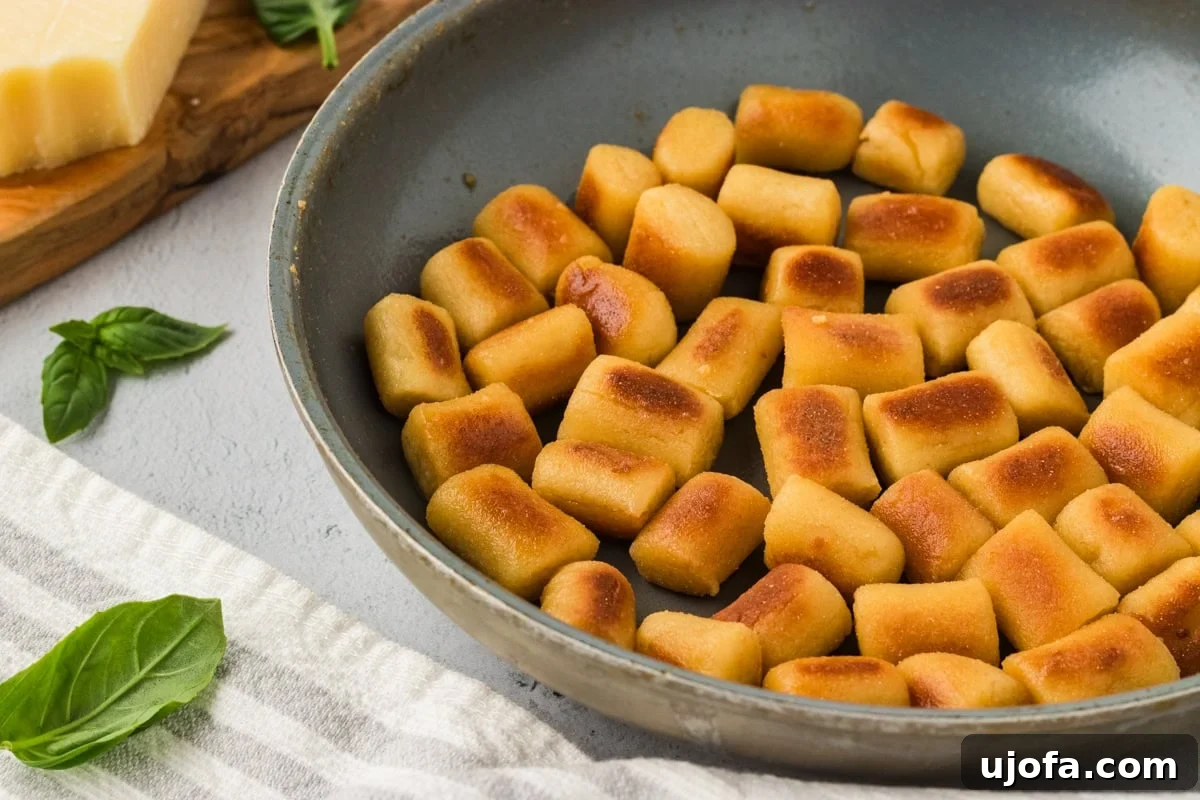
These homemade cauliflower gnocchi are a true culinary delight, offering a superior texture and taste experience. Once cooked, they achieve a tender, pillowy consistency on the inside, while their exterior crisps up beautifully when sautéed. The secret to their incredibly smooth, lump-free texture lies in the use of a food processor, which transforms the cooked cauliflower into a perfectly uniform dough. Beyond their delightful mouthfeel, these gnocchi possess a subtle, savory umami flavor with a hint of saltiness, making them exceptionally versatile. I often prepare a large batch to keep stored in the freezer, ready to be tossed with my favorite pasta sauce for a quick and satisfying meal. Alternatively, they make an exquisite savory snack when pan-fried until golden and crunchy, then coated in fragrant garlic butter and a sprinkle of Parmesan. Each bite delivers a perfect contrast between the tender center and the irresistibly golden, crunchy exterior, elevating a simple vegetable into a gourmet experience.
Why You’ll Fall in Love with This Cauliflower Gnocchi Recipe
This gluten-free cauliflower gnocchi isn’t just a recipe; it’s a revelation. Here’s why it will quickly become a staple in your kitchen:
- Naturally Gluten-Free: Say goodbye to heavy, dense gluten-free alternatives. This recipe utilizes the natural goodness of cauliflower and a simple gluten-free flour blend, making it perfect for those with celiac disease, gluten sensitivities, or anyone looking to reduce their gluten intake without sacrificing flavor.
- Incredibly Versatile: From hearty main courses to delightful appetizers, these gnocchi can do it all. They absorb sauces beautifully, making them ideal for traditional pasta dishes, yet they’re equally delicious pan-fried for a crispy texture that stands alone as a snack or side.
- Surprisingly Simple & Quick: Don’t be intimidated by the idea of homemade gnocchi. This recipe uses just three core ingredients and a food processor, streamlining the process significantly. You can have fresh, delicious gnocchi ready in about 30 minutes!
- Healthy & Nutritious: Cauliflower is a powerhouse vegetable, rich in vitamins, minerals, and fiber. Swapping out traditional potato gnocchi for a cauliflower base lightens the dish, offering a healthier, lower-carb option without compromising on satisfaction.
- Delightful Texture Contrast: The magic of these gnocchi lies in their dual texture. Boiled, they are wonderfully tender and pillowy. Pan-fried, they develop a crispy, golden crust that provides an exquisite contrast to their soft interior, making every bite an exciting experience.
The Magic of Homemade vs. Store-Bought Cauliflower Gnocchi
While store-bought cauliflower gnocchi has gained popularity for its convenience, nothing quite compares to the fresh, vibrant taste and superior texture of homemade. Crafting your gnocchi from scratch allows you to control the quality of ingredients, ensuring a wholesome and additive-free meal. You avoid any unnecessary preservatives, starches, or thickeners often found in commercial versions. Furthermore, homemade gnocchi boasts a truly unique softness and flavor that can be customized to your preference, from the exact level of seasoning to the perfect crispy sear. The process itself is surprisingly therapeutic and rewarding, yielding a product that feels both gourmet and incredibly comforting. Plus, the satisfaction of serving a dish you’ve made with your own hands is unparalleled, especially when it’s as delicious and healthy as this gluten-free cauliflower gnocchi.
Homemade Cauliflower Gnocchi
Email Recipe
Print Recipe
These homemade cauliflower gnocchi offer a delightful culinary experience: soft and pillowy on the inside, with a perfectly smooth texture thanks to the food processor. Their subtle umami and salty flavor make them incredibly versatile, pairing beautifully with rich pasta sauces or even enjoyed as a crispy, savory snack when pan-fried.
Ingredients
- 16 ounces cauliflower florets, about 5 cups
- ½ cup gluten-free all-purpose flour, plus more for rolling
- 1 teaspoon salt
Instructions
-
Steam or boil your cauliflower until very soft and tender, about 15 minutes. Allow the cauliflower to drain and cool completely before handling.
-
Transfer your cooked cauliflower to a cheesecloth or a clean, sturdy kitchen towel. Use it to firmly press and squeeze out as much moisture as possible. This step is crucial for achieving the right gnocchi consistency.
-
Add the well-drained cauliflower to a food processor along with ½ cup gluten-free all-purpose flour and 1 teaspoon salt. Pulse until all ingredients are thoroughly combined and form a soft, slightly sticky dough. If the dough seems excessively wet, add an additional tablespoon of gluten-free flour at a time until it reaches a manageable consistency.
-
Lightly flour a clean work surface. Transfer the dough onto it and gently form it into a ball. Divide the dough into 4 equal sections. Take each section and roll it into a long, uniform log, approximately ¾ inch thick.
-
Using a sharp knife or dough scraper, cut each log into 1-inch pieces. For the classic gnocchi aesthetic, gently roll each piece down the back of a fork’s prongs to create distinctive ridges.
-
To cook, you have two primary options:
- Boiling: Bring a large pot of salted water to a rolling boil. Carefully drop the gnocchi into the boiling water. Once they float to the surface, cook for an additional 1-2 minutes until tender. Remove with a slotted spoon.
- Pan-Frying: Heat 2 tablespoons of olive oil or butter in a large skillet over medium heat. Add the gnocchi in a single layer, ensuring not to overcrowd the pan. Sauté for 2-3 minutes per side, or until they turn beautifully golden brown and crispy.
Serve immediately with your favorite pasta sauce, tossed into soup, or as a savory snack.
Expert Tips for Perfect Cauliflower Gnocchi
- Thoroughly Drain Cauliflower: This is the single most important step! Excess moisture will result in a sticky, unmanageable dough that requires too much flour, leading to dense gnocchi. Squeeze vigorously with a cheesecloth or a sturdy kitchen towel until almost no liquid remains.
- Chill the Dough: If your dough feels too sticky or soft to handle, wrap it in plastic wrap and chill it in the refrigerator for 20-30 minutes. This will firm it up, making it easier to roll and shape.
- Add Flour Gradually: The amount of flour needed can vary based on cauliflower moisture content and your specific gluten-free blend. Start with ½ cup, and if the dough is still too wet after pulsing, add 1 tablespoon at a time until it forms a soft, cohesive dough that’s slightly sticky but workable.
- Seasoning is Key: Don’t underestimate the power of salt! Taste your cauliflower puree before adding flour. You can also enhance the flavor of the gnocchi dough by adding a pinch of garlic powder, onion powder, or even some nutritional yeast for a cheesy umami boost.
- Don’t Overcook: Whether boiling or pan-frying, gnocchi cook quickly. Overcooked boiled gnocchi can become mushy, while overcooked pan-fried gnocchi can become too hard.
- Freezing Uncooked Gnocchi: To freeze, arrange cut gnocchi in a single layer on a parchment-lined baking sheet and freeze until solid. Once frozen, transfer to an airtight freezer bag for up to 3 months. Cook directly from frozen in boiling water or a hot skillet.
Nutrition Information
Serving: 1 serving | Calories: 157kcal | Carbohydrates: 33g | Protein: 7g | Fat: 2g | Saturated Fat: 0.3g | Polyunsaturated Fat: 0.2g | Monounsaturated Fat: 0.2g | Sodium: 1231mg | Potassium: 678mg | Fiber: 8g | Sugar: 5g | Vitamin C: 109mg | Calcium: 71mg | Iron: 2mg
Nutrition information is automatically calculated, so should only be used as an approximation.
Additional Recipe Details
Tried this recipe?Mention @mamaknowsglutenfree or tag #mamaknowsglutenfree!
Step-by-Step Guide to Crafting Perfect Cauliflower Gnocchi
Creating these delightful gluten-free cauliflower gnocchi is a straightforward and enjoyable process. Follow these detailed steps to achieve light, tender, and perfectly shaped gnocchi every time:
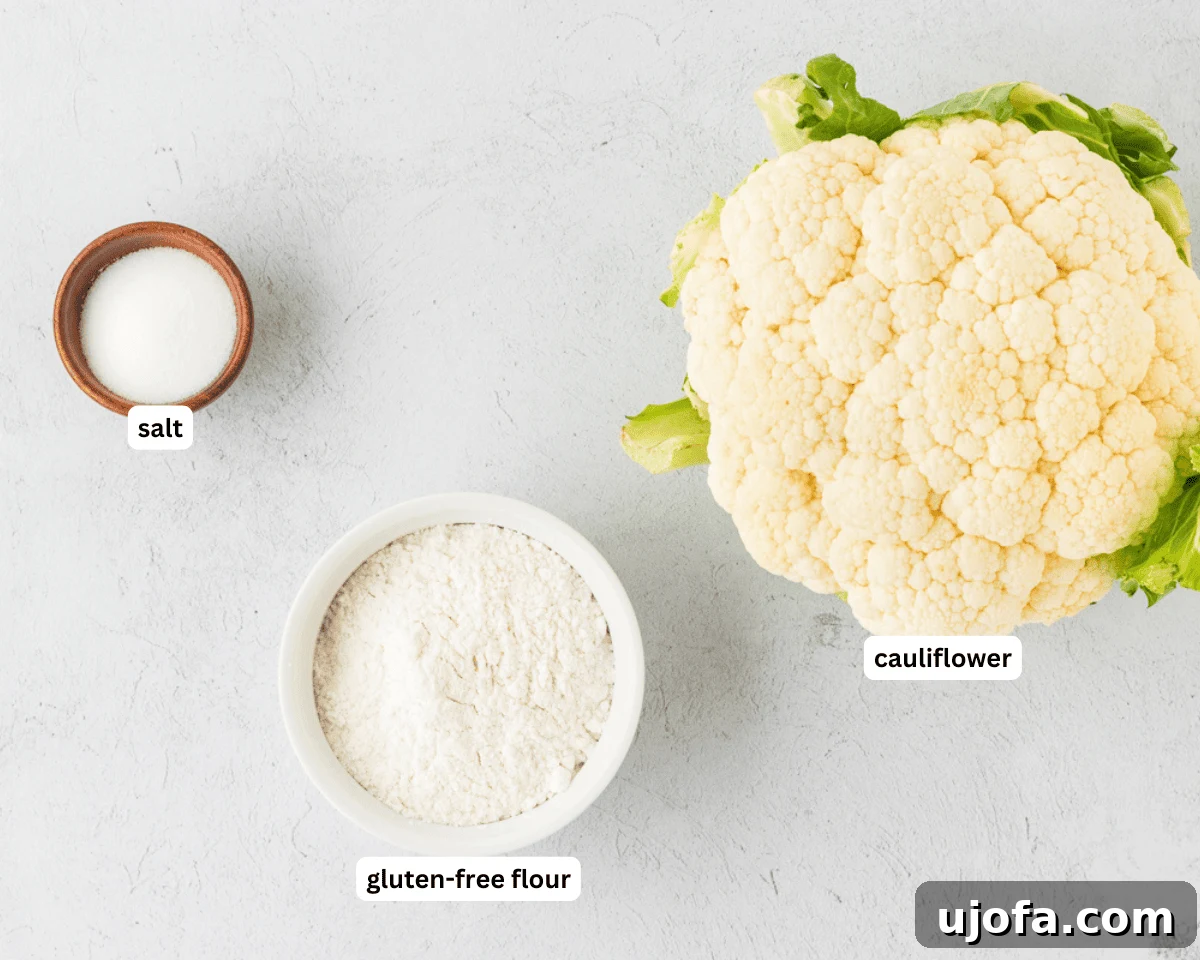
1. Gather Your Essential Ingredients and Equipment
Before you embark on your gnocchi-making journey, it’s always best practice to have all your ingredients prepped and measured, and your necessary kitchen tools at the ready. For this recipe, you’ll need fresh cauliflower florets, a high-quality gluten-free all-purpose flour blend, and a dash of salt. Essential equipment includes a food processor to achieve that smooth cauliflower puree, a large pot for steaming or boiling, a sturdy cheesecloth or clean kitchen towel for moisture removal, and a clean, lightly floured work surface for shaping. This mise en place will ensure a seamless and enjoyable cooking experience.
2. Cook the Cauliflower to Perfection
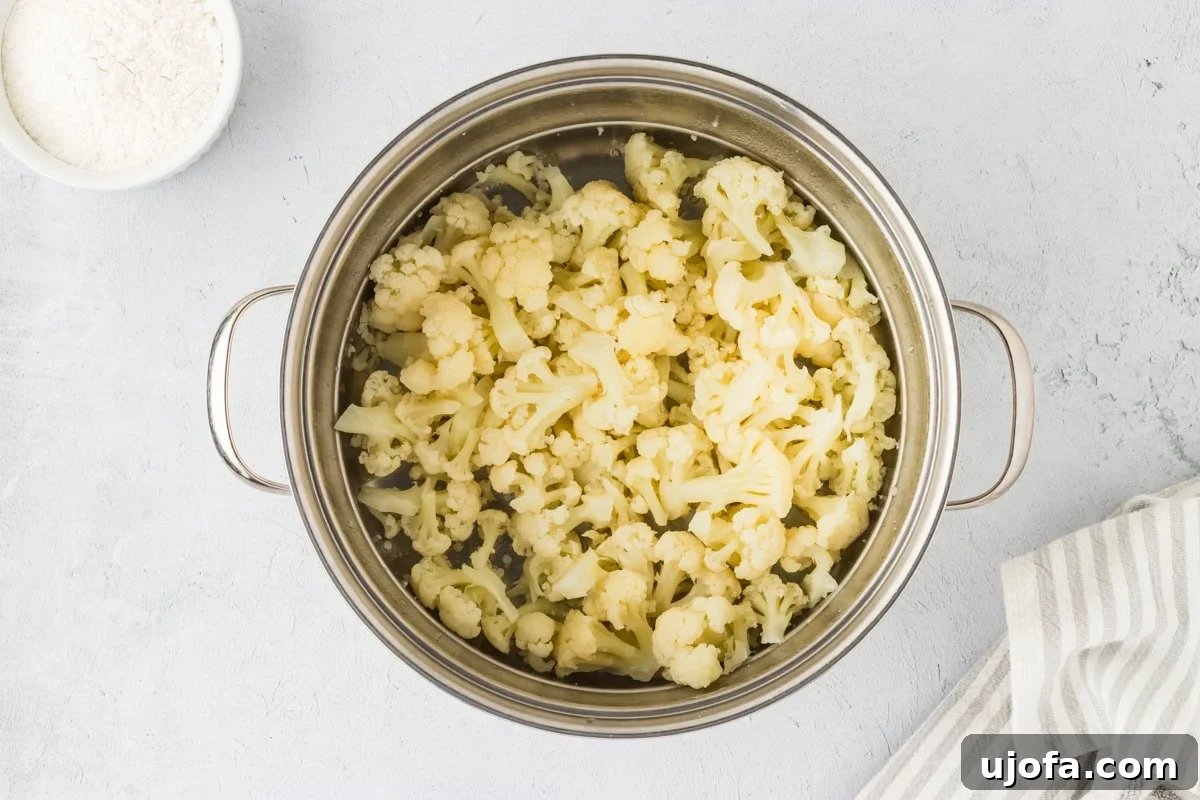
The success of your cauliflower gnocchi heavily relies on how well your cauliflower is cooked. Begin by bringing a generous amount of water to a rolling boil in a spacious pot. Add your 16 ounces (approximately 5 cups) of cauliflower florets. You have the option to either steam them using a steamer basket positioned over the boiling water or boil them directly in the water. Cook until the florets become exceptionally soft and tender – this usually takes around 15 minutes. This ensures they will effortlessly blend into a silky-smooth puree. Once cooked, thoroughly drain the cauliflower and spread it out on a tray or large plate to allow it to cool completely. Cooling is a crucial step to prevent the dough from becoming too sticky in subsequent stages.
3. Master the Moisture Removal (Crucial Step!)
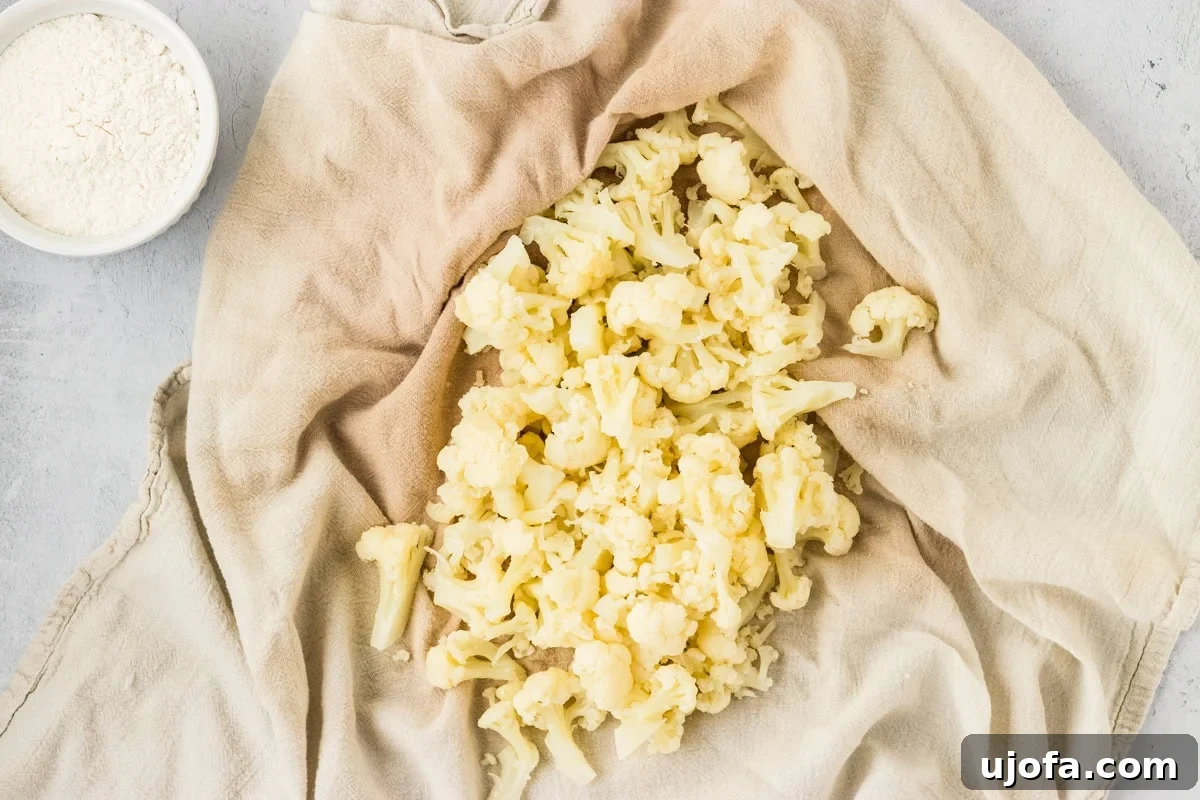
This is arguably the most vital step for achieving truly successful cauliflower gnocchi. Transfer all your cooked and completely cooled cauliflower into a cheesecloth or a clean, sturdy kitchen towel. Gather the edges of the cloth or towel and twist them tightly, pressing down with as much strength as you can muster to squeeze out every single drop of moisture. You will likely be amazed by the amount of liquid that comes out! The drier your cauliflower is at this stage, the less gluten-free flour you’ll need to incorporate, which directly translates to lighter, more tender gnocchi that hold their shape beautifully. Do not skip or rush this step; it’s the key to preventing a sticky, unmanageable dough that can lead to dense gnocchi.
4. Craft Your Gluten-Free Gnocchi Dough
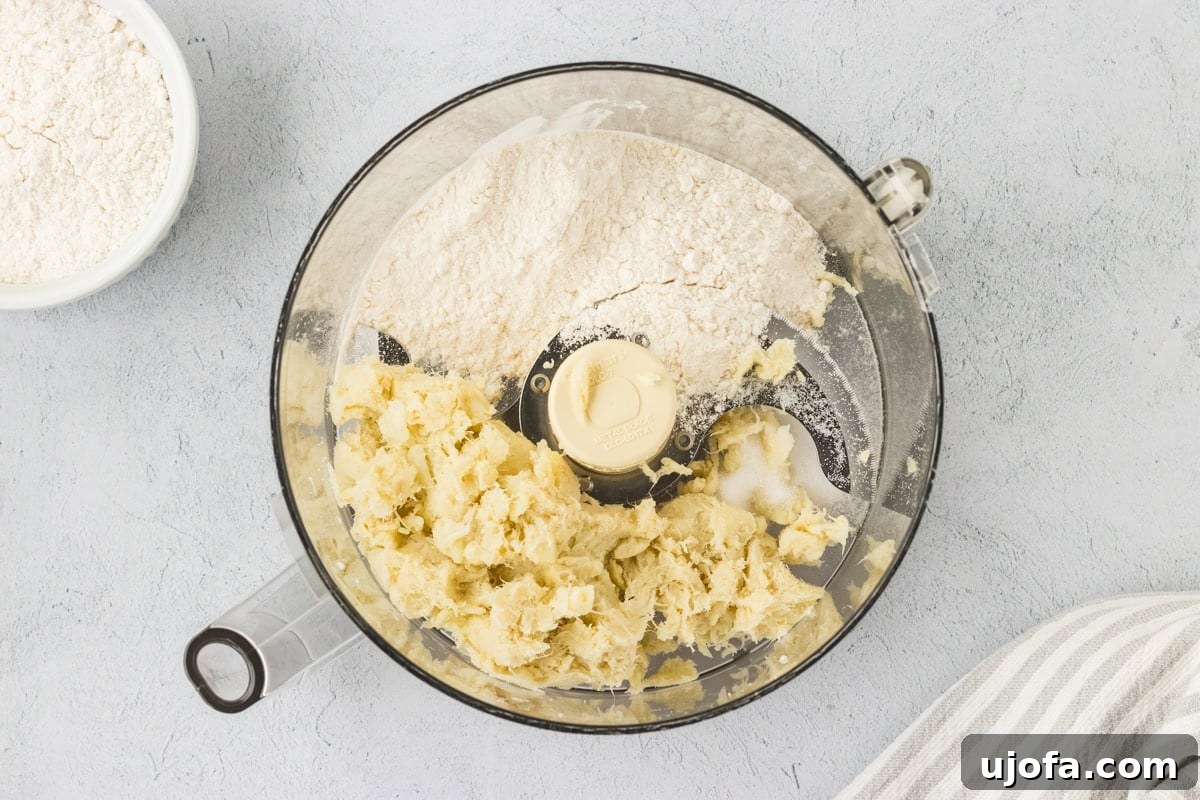
Once your cauliflower is impeccably drained and cooled, transfer it into the bowl of a food processor. Add ½ cup of gluten-free all-purpose flour and 1 teaspoon of salt. Pulse the ingredients repeatedly until they are thoroughly combined and begin to form a soft, cohesive dough. The dough should feel slightly sticky to the touch but should be manageable and hold together when pressed. If the mixture appears too wet or stubbornly refuses to come together as a dough, add additional gluten-free flour one tablespoon at a time, pulsing after each addition, until the desired soft but workable consistency is achieved. Be cautious not to over-process, as this can lead to a tougher dough.
5. Prepare the Dough for Shaping
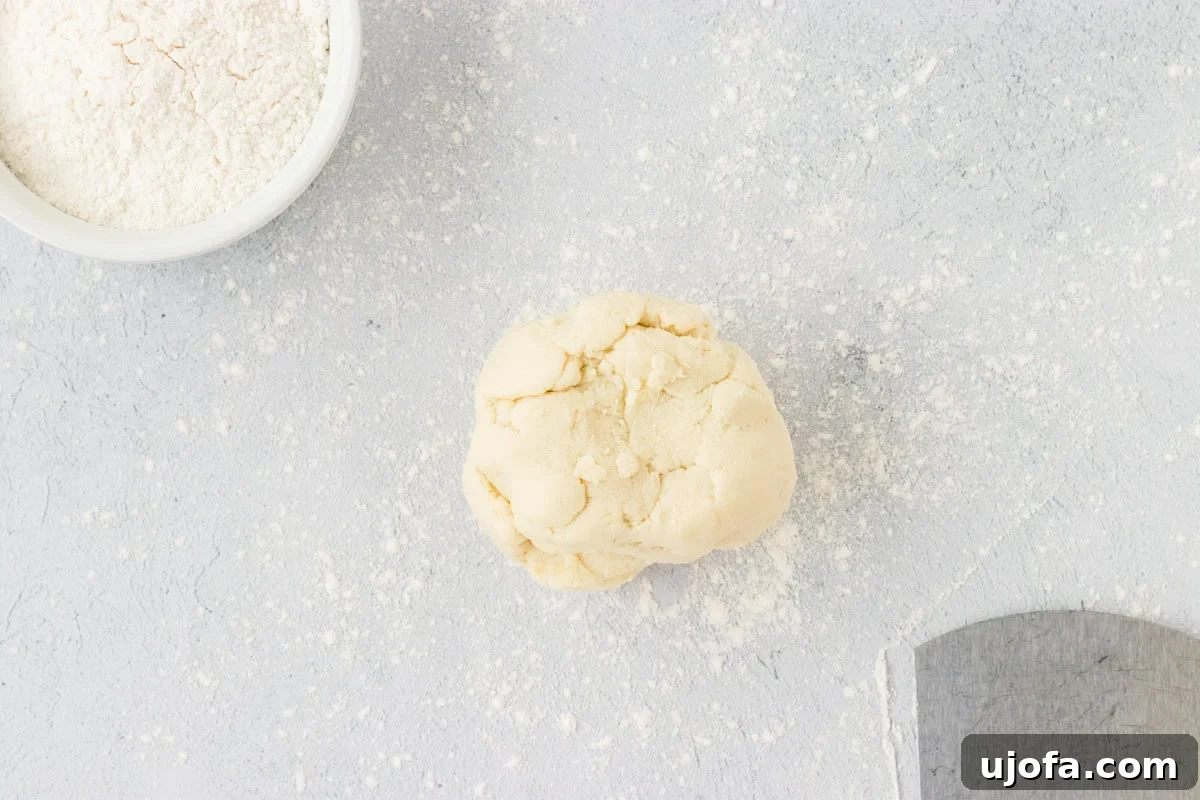
Lightly dust a clean, flat work surface (like a countertop or large cutting board) with a small amount of gluten-free flour. Carefully transfer the soft cauliflower gnocchi dough from the food processor onto this floured surface. Using gentle movements, bring the dough together with your hands and form it into a unified, round ball. It’s important to handle the dough as little as possible during this stage to ensure the gnocchi remain tender and delicate after cooking. If the dough feels a bit too sticky, a few minutes in the refrigerator can help firm it up.
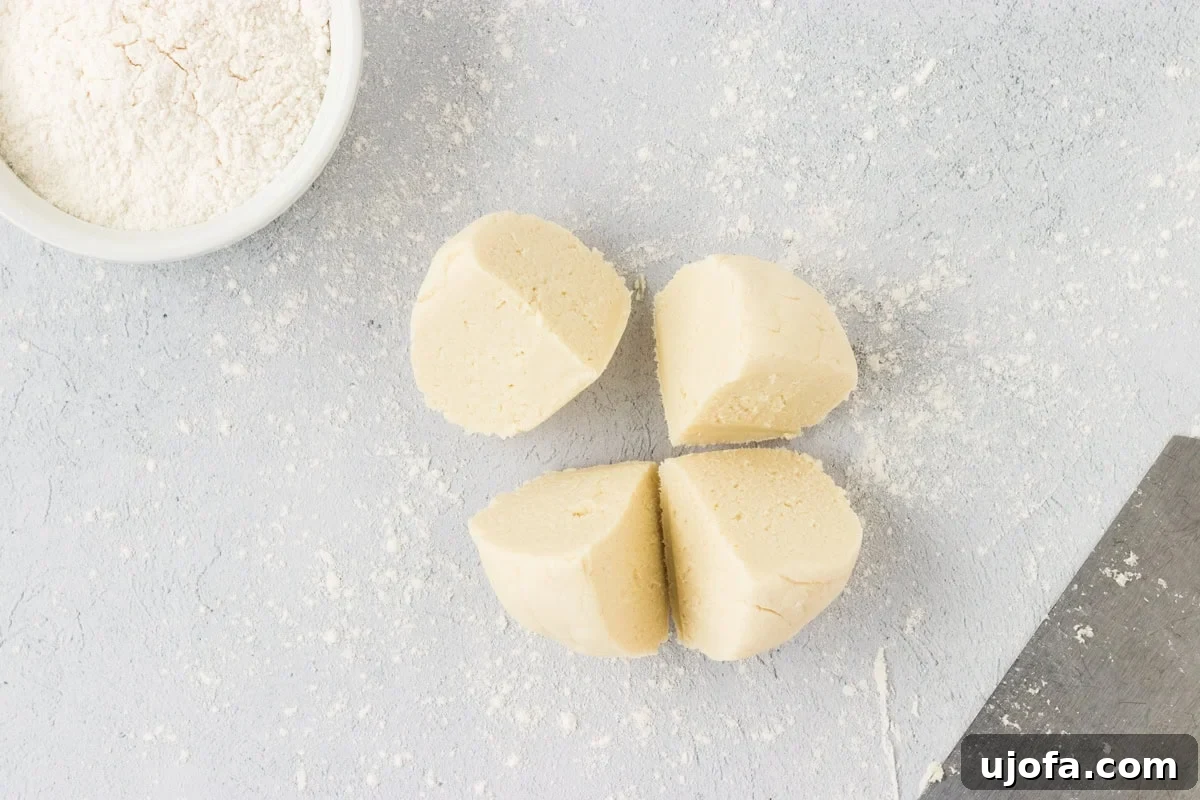
6. Divide and Conquer: Portioning the Dough
With your dough ball formed, the next step is to divide it into more manageable sections for shaping. Using a sharp knife or a bench scraper, carefully cut the large dough ball into four roughly equal portions. This approach makes the subsequent rolling process much easier and helps to maintain a consistent size and shape for your gnocchi. As you work with one section, it’s a good idea to keep the other portions covered with a clean kitchen towel to prevent them from drying out, ensuring they remain pliable and easy to work with.
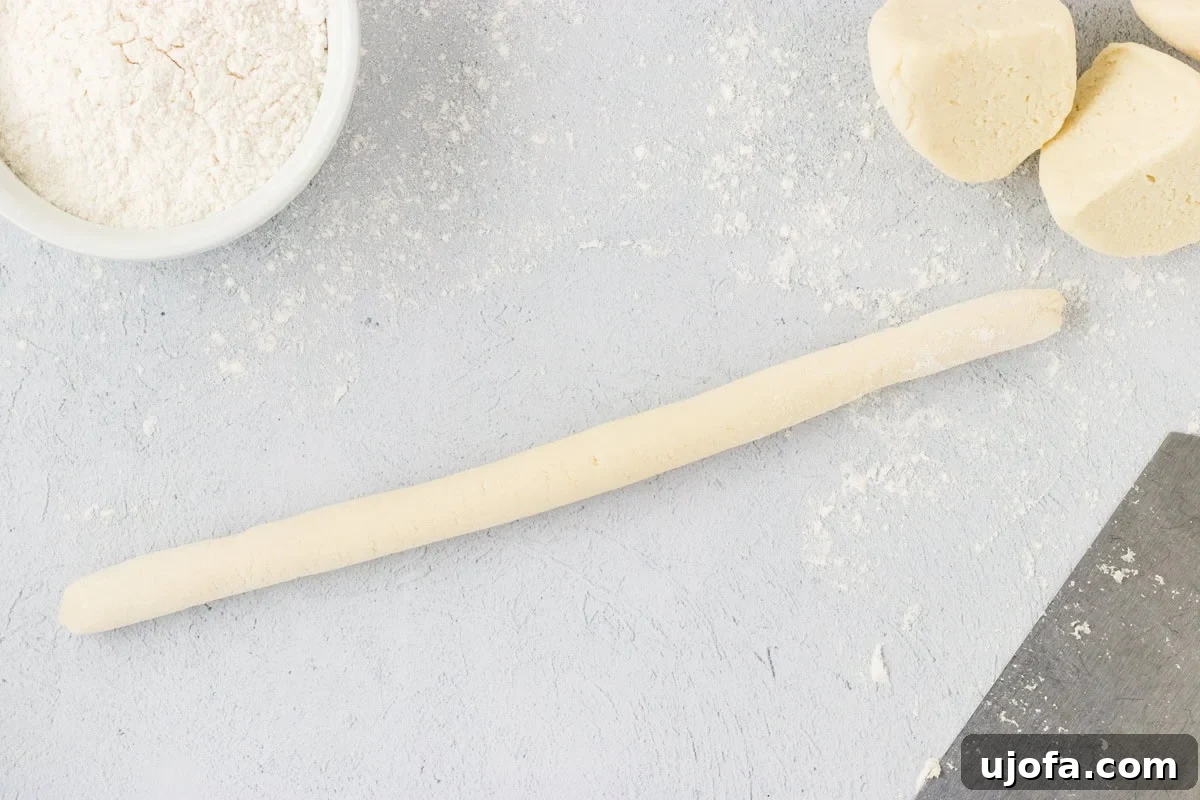
7. Roll into Even Logs
Take one of the divided dough sections and place it on your lightly floured work surface. With gentle, even pressure applied by the palms of your hands, roll the dough back and forth. Your goal is to create a long, uniform log that is approximately ¾ inch thick. Maintaining consistency in thickness is paramount, as it ensures that all your gnocchi pieces will cook evenly. Repeat this precise rolling process for each of the remaining three dough sections, taking your time to achieve perfect logs.
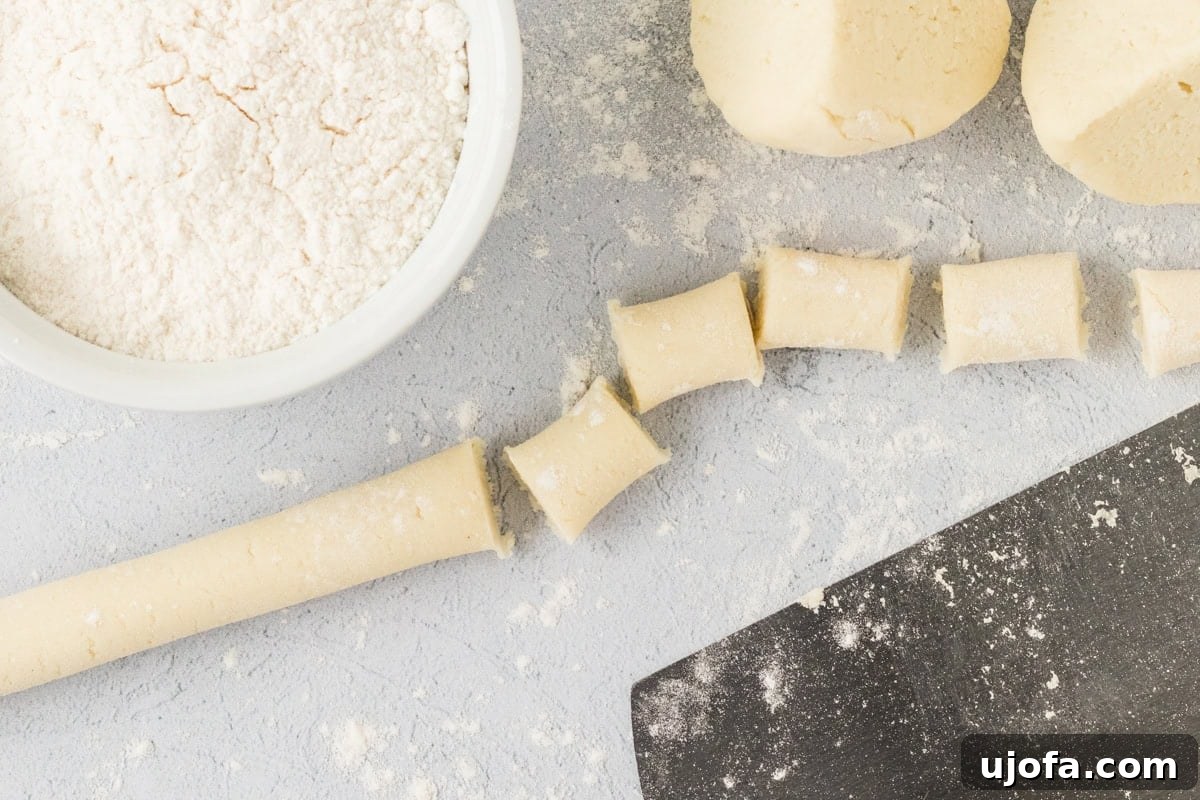
8. Cut into Bite-Sized Gnocchi
Once you have successfully created your uniform dough logs, it’s time to transform them into individual gnocchi pieces. Using a sharp knife or a bench scraper, carefully cut each log into small, 1-inch sections. At this stage, you can choose to leave them as smooth, elegant pillows, or you can proceed to the next step if you desire to add the classic ridged texture that helps sauces cling beautifully to each piece. Precision here helps ensure even cooking and a pleasing presentation.
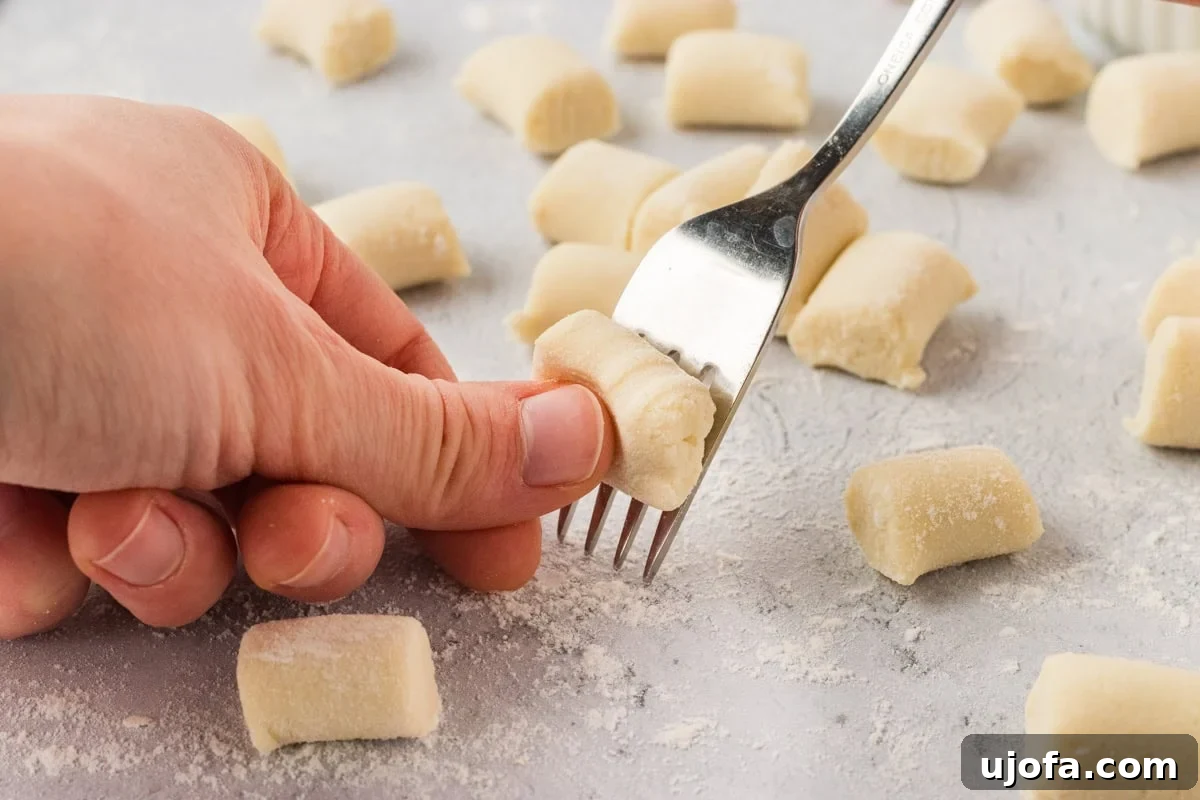
9. Add the Signature Gnocchi Ridges (Optional but Recommended)
To achieve the traditional gnocchi look and, more importantly, to create grooves that help sauces adhere better, gently roll each cut piece down the back of a fork’s prongs. Apply light pressure with your thumb as you roll, allowing the tines of the fork to create those characteristic, appealing ridges. While this step is entirely optional, it adds a touch of authenticity and enhances the overall gnocchi experience. As you finish shaping each piece, place your prepared gnocchi on a lightly floured surface or a parchment-lined baking sheet, ensuring they don’t touch each other.
10. Cook Your Delicious Cauliflower Gnocchi
Now, for the most rewarding part: cooking and savoring your homemade gnocchi! You have two fantastic primary options, each offering a distinct texture:
- Pan-Frying for a Crispy Exterior: For gnocchi with an irresistible golden brown and crispy crust, heat 2 tablespoons of olive oil (or butter for a richer flavor) in a large skillet over medium heat. Carefully add the gnocchi in a single layer, making sure not to overcrowd the pan, which could prevent even crisping. Cook for 2-3 minutes per side, turning them gently, until they develop a beautiful golden, slightly charred crust. This method creates a delightful textural contrast with the tender interior.
- Boiling for Classic Pillowy Gnocchi: If you prefer the traditional pillowy-soft texture, bring a large pot of generously salted water to a vigorous rolling boil. Carefully drop the gnocchi into the boiling water. They are quite delicate and will float to the surface within a minute or two. Once they float, allow them to cook for an additional 1-2 minutes until they are perfectly tender throughout. Promptly remove them from the water using a slotted spoon to avoid overcooking.
Remember, gnocchi cook relatively quickly, so keep a close eye on them to prevent them from becoming mushy if boiled or overly hard if pan-fried.
11. Serve and Savor Your Culinary Creation
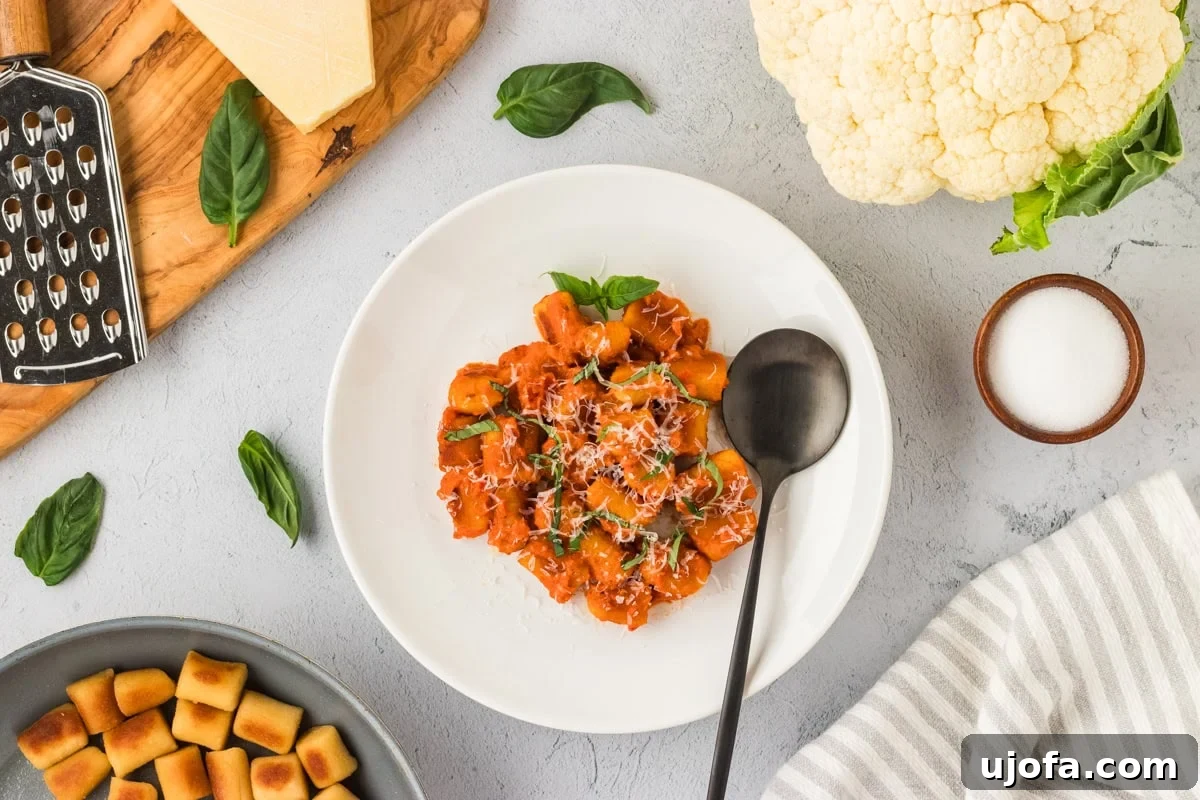
The moment you’ve been waiting for has arrived! Your homemade gluten-free cauliflower gnocchi is now ready to be enjoyed. The versatility of these delightful dumplings means you have endless serving possibilities. Toss them with your favorite pasta sauce – a vibrant marinara, a creamy pesto, or even a rich dairy-free alfredo sauce works wonderfully. They are also fantastic when stirred into a comforting bowl of soup, such as minestrone or chicken noodle, adding a delightful gluten-free and vegetable-packed element. For a simple yet incredibly satisfying snack or side dish, serve them pan-fried with a fragrant drizzle of garlic butter and a generous sprinkle of freshly grated Parmesan cheese. However you choose to serve them, prepare for a truly delicious, healthy, and satisfying meal that will impress both your family and friends!
Unleash Your Creativity: Amazing Serving Suggestions for Cauliflower Gnocchi
The inherent beauty of this gluten-free cauliflower gnocchi recipe lies in its extraordinary versatility. Once you’ve mastered the foundational technique, a boundless world of culinary possibilities opens up, allowing you to transform these delightful dumplings into everything from a comforting main course to a quick, gourmet snack. Here are some of my most cherished and creative ways to serve these fantastic little gnocchi, guaranteeing a delicious experience every time:
- Classic Italian Elegance: For a timeless meal, gently boil your gnocchi until tender, then toss them with a rich, robust homemade gluten-free spaghetti sauce or a vibrant marinara. Finish with a flourish of fresh basil leaves and a generous grating of aged Parmesan cheese for an authentic touch.
- Creamy Indulgence: Elevate your gnocchi with a luscious, velvety sauce. Smother them in a decadent dairy-free alfredo sauce for an incredibly comforting and luxurious meal that feels wonderfully indulgent.
- Bright & Herbaceous: A simple yet sophisticated option is to coat your gnocchi in a fragrant pesto sauce. Whether you opt for a traditional basil pesto or explore a dairy-free alternative, the herbaceous notes and vibrant color will beautifully complement the gnocchi.
- Butter & Sage Perfection: For an unbelievably elegant and deceptively simple dish, pan-fry your gnocchi in nutty browned butter infused with fresh sage leaves until they achieve a golden crispness. The aromatic sage and rich butter create a flavor profile that is truly unforgettable.
- Garlic & Parmesan Snack: Transform these gnocchi into an addictive savory snack or a fantastic side dish by sautéing them with minced garlic and a generous amount of freshly grated Parmesan cheese until they are deliciously crispy and fragrant.
- Hearty Soups & Stews: Introduce an added layer of texture and gluten-free goodness by dropping boiled gnocchi directly into your favorite soups, such as a hearty minestrone, a comforting chicken noodle soup, or a light vegetable broth.
- Effortless Sheet Pan Wonder: For the ultimate easy weeknight dinner, toss uncooked gnocchi with an assortment of your favorite chopped vegetables (think colorful bell peppers, tender zucchini, and sweet cherry tomatoes) and a protein of choice (like chicken sausage or chickpeas). Drizzle with olive oil, season with herbs, and roast on a single sheet pan until the gnocchi are golden and the veggies are tender.
- Roasted Vegetable Medley: Create a harmonious blend of flavors and textures by roasting the gnocchi alongside seasonal vegetables such as crisp asparagus, tender broccoli florets, or earthy mushrooms, all seasoned with a medley of herbs and a delicate drizzle of balsamic glaze.
Feel empowered to experiment with various flavor profiles, explore different ingredients, and don’t hesitate to get creative in the kitchen. This cauliflower gnocchi truly serves as a versatile and delicious foundation, offering a simple yet significant upgrade to any meal you prepare!
Effortless Storage & Reheating Tips for Your Cauliflower Gnocchi
One of the most appealing aspects of making homemade cauliflower gnocchi is its excellent suitability for meal prepping or preparing a large batch to enjoy at a later time. Implementing proper storage techniques ensures you can savor these delectable dumplings whenever the craving strikes. Here’s a comprehensive guide on how to store and reheat your gnocchi like a true culinary expert:
Storing Uncooked Gnocchi: Freezer Friendly!
If you’ve crafted a substantial batch of gnocchi and wish to preserve some for future meals, freezing the uncooked gnocchi is an outstanding and highly recommended option:
- Flour Lightly: After meticulously shaping your gnocchi, gently dust each piece with an extra sprinkle of gluten-free all-purpose flour. This crucial step acts as a protective layer, effectively preventing them from sticking together during the freezing process.
- Flash Freeze: Arrange the uncooked gnocchi in a single layer on a parchment-lined baking sheet, ensuring that no pieces are touching each other. This separation is vital. Place the entire baking sheet into the freezer for approximately 1-2 hours, or until each gnocchi piece is completely solid. This “flash freezing” method is instrumental in preventing them from clumping into an unmanageable block.
- Transfer & Store: Once the gnocchi are thoroughly frozen solid, carefully transfer them from the baking sheet into an airtight, freezer-safe bag or container. Be sure to label the container clearly with the date of freezing. Properly stored, these uncooked gnocchi can maintain their quality in the freezer for up to 3 months.
To cook from frozen: The convenience of frozen gnocchi means you can cook them directly from their frozen state, eliminating the need for thawing!
- Boiling: Drop the frozen gnocchi directly into a pot of vigorously boiling, salted water. Cook them until they float to the surface and are tender throughout, which typically takes a slightly longer time than fresh gnocchi, usually around 3-5 minutes.
- Sautéing: Heat a small amount of olive oil or butter in a pan over medium heat. Add the frozen gnocchi and sauté until they are beautifully golden brown and thoroughly cooked through, turning them occasionally to ensure even heating and crisping. This method may take a few minutes longer compared to cooking fresh gnocchi.
Storing Cooked or Leftover Gnocchi
Should you find yourself with leftover cooked gnocchi, or if you’ve prepared a batch and wish to store it for consumption within a few days, here’s how to keep them fresh and delicious:
- Refrigeration: Allow any cooked gnocchi to cool completely to room temperature before storing. Transfer them into an airtight container. They can be safely stored in the refrigerator for up to 5 days, maintaining their quality and freshness.
- Reheating for Optimal Texture:
- Pan-Fry (Recommended): For the absolute best texture, especially if you enjoy a slight crisp, reheat cooked gnocchi by pan-frying them in a little olive oil or butter over medium heat. Sauté until they are golden and slightly crispy on the exterior. This method effectively revitalizes their texture and prevents them from becoming mushy.
- Microwave (Convenient but Less Ideal): While not the optimal method for maintaining texture, you can gently microwave them for quick reheating. Exercise caution not to overcook, as microwaved gnocchi can sometimes become a bit rubbery.
- Reheating in Sauce: If you plan to reheat your gnocchi with a sauce, simply add them directly to your warm sauce on the stovetop. Gently heat them through until they are warmed to your desired temperature, stirring carefully to avoid breaking them apart.
Frequently Asked Questions About Gluten-Free Cauliflower Gnocchi
1. Is cauliflower gnocchi truly gluten-free?
Yes, absolutely! When prepared using a certified gluten-free flour blend, as specified in this recipe, cauliflower gnocchi is naturally gluten-free. This makes it a fantastic and safe alternative for individuals adhering to a gluten-free diet due to sensitivities, allergies, or celiac disease. It is always important to verify that your chosen gluten-free flour blend carries a certified gluten-free label to ensure no cross-contamination.
2. Can I adapt this recipe to be dairy-free or vegan?
Yes, this recipe is inherently dairy-free and vegan! The core ingredients—cauliflower, gluten-free flour, and salt—are all plant-based. To ensure your entire meal remains dairy-free or vegan-friendly, simply select sauces and any optional toppings (such as Parmesan cheese) that are also specifically labeled as dairy-free or vegan.
3. Why is it so important to squeeze out the moisture from the cauliflower?
Squeezing out excess moisture from the cooked cauliflower is, without a doubt, the most critical step in this recipe! Cauliflower naturally holds a significant amount of water. If this moisture is not thoroughly removed, it will result in a dough that is excessively wet and sticky. A wet dough would then require you to add a substantial amount of additional flour, which, in turn, leads to dense, heavy, and unappetizing gnocchi instead of the desired light, pillowy texture. The drier your cauliflower, the more delicate and shape-retaining your gnocchi will be.
4. My gnocchi dough is too sticky/too dry. What should I do?
- If the dough is too sticky: This common issue usually indicates that there’s still too much moisture retained in the cauliflower or insufficient flour has been incorporated. To remedy this, try adding gluten-free flour one tablespoon at a time to your food processor, pulsing briefly after each addition until the dough reaches a manageable, slightly sticky yet cohesive consistency. Alternatively, wrapping the dough in plastic wrap and chilling it in the refrigerator for 20-30 minutes can also significantly help firm it up.
- If the dough is too dry: Conversely, if your dough is too crumbly and struggles to come together, it might mean you’ve either removed too much moisture from the cauliflower or added an excessive amount of flour. In this scenario, add a very small amount (start with half a teaspoon) of water or unsweetened plant-based milk and pulse again. Be extremely cautious with added liquid, as even a tiny amount can dramatically change the dough’s consistency.
5. Can I use a different type of gluten-free flour than an all-purpose blend?
This recipe specifically calls for a “gluten-free all-purpose flour blend,” which is typically formulated with a balance of different flours and starches (e.g., rice flour, tapioca starch, potato starch) to achieve optimal texture and binding. While you can experiment, using single-source flours like almond flour or coconut flour might drastically alter the dough’s texture and absorption properties, potentially requiring significant and complex adjustments to the liquid ratios and overall recipe. For consistent and best results, it’s highly recommended to stick with a good quality, commercially available gluten-free all-purpose blend.
6. How do I achieve those classic gnocchi ridges? Do I need a special tool?
The characteristic ridges on gnocchi are traditionally created using a specialized tool called a gnocchi board (or riga gnocchi). However, you absolutely do not need to purchase one! You can easily replicate these ridges using a common kitchen utensil: the back of a fork. Simply take each cut gnocchi piece and gently roll it down the prongs of a fork while applying light pressure with your thumb. This simple technique creates those distinctive grooves that not only add to the authentic gnocchi aesthetic but also help sauces cling beautifully to each delicious dumpling.
7. Can I bake or air-fry these gnocchi instead of boiling or pan-frying?
While pan-frying and boiling are the recommended methods for achieving the best texture and flavor for these cauliflower gnocchi, you can certainly experiment with baking or air-frying as alternative cooking methods. For baking, toss the uncooked gnocchi with a light coating of olive oil and spread them in a single layer on a baking sheet. Bake in a preheated oven at 400°F (200°C) until they are golden brown and cooked through. For air-frying, toss the gnocchi with a little oil and air-fry at 375°F (190°C) for 10-15 minutes, making sure to shake the basket occasionally to ensure even cooking and crispiness. Please note that results may vary in terms of texture and crispness compared to the pan-fried method.
More Delicious Gluten-Free Pasta Alternatives You’ll Love
If you’ve found joy in exploring the world of gluten-free cooking and discovering incredible alternatives to traditional pasta, then you’re in for a treat! There’s a wealth of fantastic recipes designed to help you create satisfying, flavorful, and naturally gluten-free meals. Here are some of our top picks that we highly recommend you explore after mastering this delightful cauliflower gnocchi:
- Homemade Gluten-Free Pasta: For the culinary enthusiast who loves the art of crafting food from scratch, this recipe is an absolute must-try for producing fresh, tender, and undeniably delicious gluten-free noodles.
- Gluten-Free Baked Ziti: Indulge in a classic, comforting casserole featuring layers of rich tomato sauce, gooey melted cheese, and perfectly tender gluten-free ziti. It’s the ideal dish for a heartwarming family dinner.
- Gluten-Free Lasagna: Experience the joy of traditional lasagna layers, thoughtfully reimagined for a gluten-free diet. This version is bursting with robust flavors and hearty goodness, ensuring no one misses the gluten.
- Gluten-Free Boursin Cheese Pasta: Discover a quick, elegant, and incredibly satisfying pasta dish that highlights the luxurious creaminess of Boursin cheese, making for an effortless yet sophisticated meal.
- Sweet Potato Gnocchi: Expand your gnocchi repertoire with another delightful vegetable-based option. Sweet potato gnocchi offers a naturally sweet, earthy flavor profile and a vibrant color, providing a unique twist.
- Zucchini Noodles (Zoodles): For a refreshing and incredibly light gluten-free alternative, turn to zucchini noodles. These can be served raw or lightly cooked and pair wonderfully with vibrant pesto, light tomato sauces, or even a simple garlic and olive oil dressing.
- Spaghetti Squash: When roasted, spaghetti squash yields delicate, pasta-like strands that make an excellent low-carb and naturally gluten-free base for your cherished pasta sauces. It’s a fantastic way to enjoy a hearty meal with a vegetable twist.
Each of these gluten-free alternatives brings unique textures and distinct flavors to your table, ensuring that your gluten-free meal planning remains exciting, diverse, and far from boring. Happy and healthy cooking!