
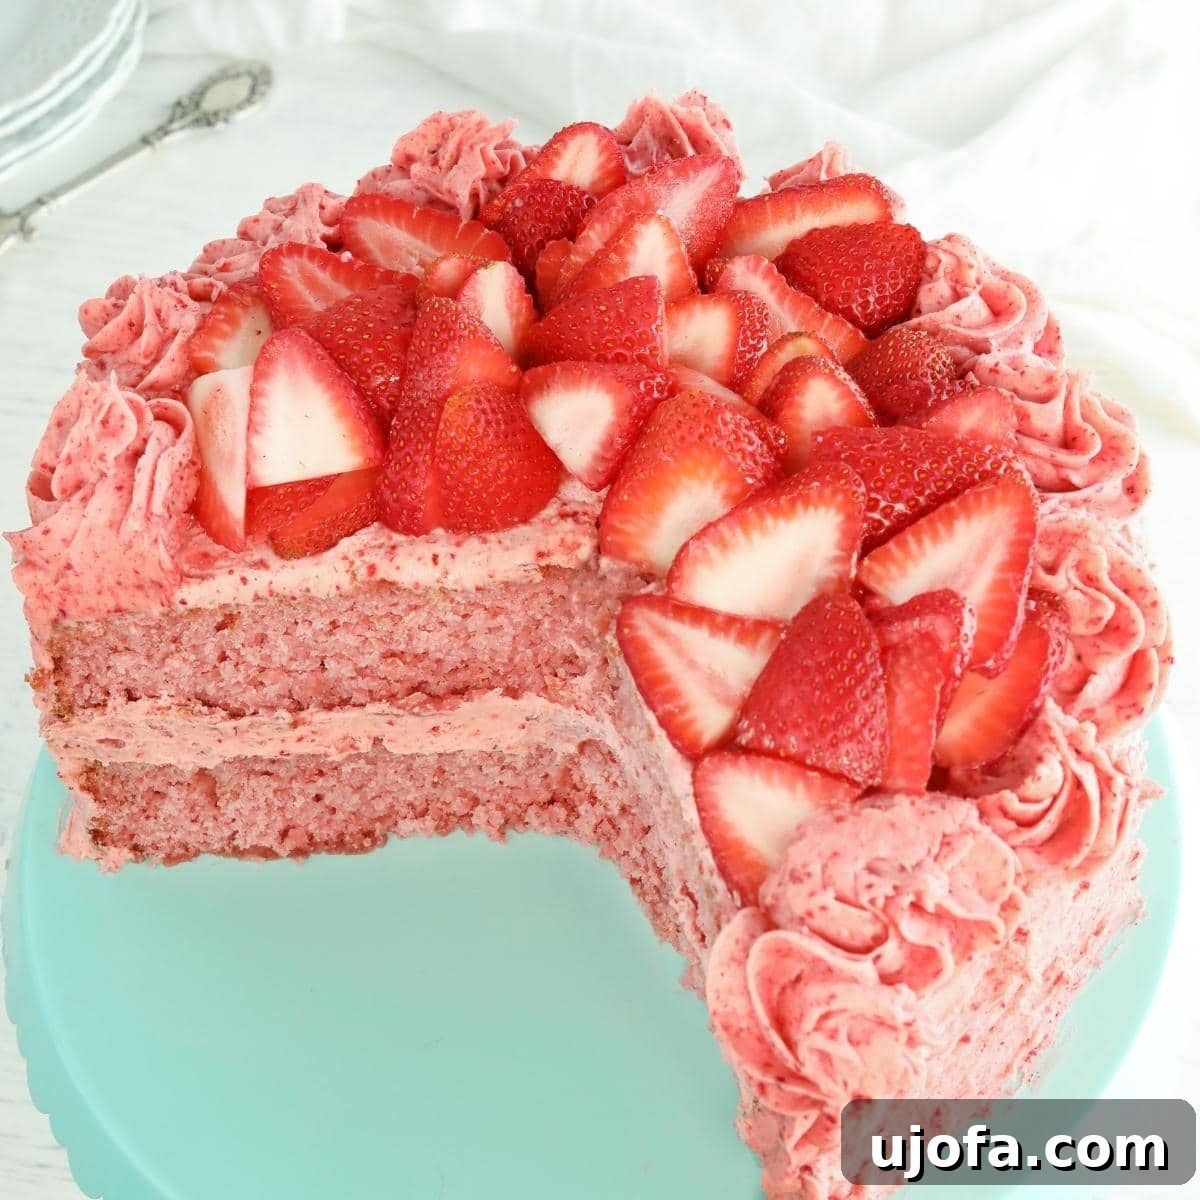
The Ultimate Gluten-Free Strawberry Cake: A Taste of Summer Perfection
Summer days bring a delightful bounty of fresh strawberries, and there’s no better way to celebrate them than with a truly exceptional dessert. This homemade gluten-free strawberry cake is the quintessential treat for any spring or summer gathering. Infused with the vibrant essence of real strawberries and crowned with a luscious strawberry buttercream frosting, it offers a light, refreshing taste that’s simply irresistible. Each bite delivers a burst of authentic berry flavor, making it a dessert that truly stands out – and one that no one will guess is entirely gluten-free.
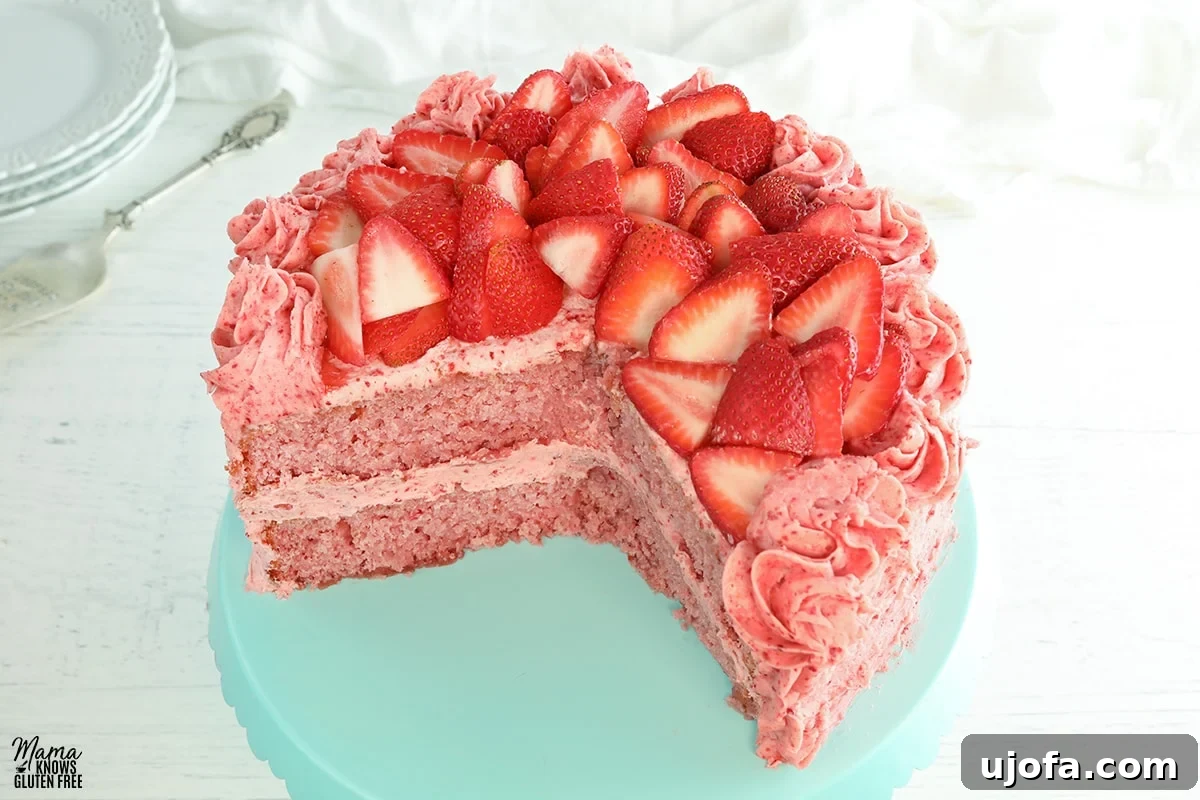
This recipe has quickly become a beloved favorite, cherished for its moist texture and rich, natural strawberry taste. The secret lies in a carefully prepared fresh strawberry reduction, which not only deepens the fruit flavor but also imparts the perfect amount of moisture to the cake batter, ensuring it remains tender without becoming overly dense. It’s the ideal dessert for summer picnics, birthday celebrations, or any special occasion where a show-stopping, yet effortlessly delicious, cake is desired. Prepare to impress your guests with this easy-to-make, crowd-pleasing gluten-free masterpiece.
Gluten-Free Strawberry Cake
Audrey Roberts
16 servings
45 minutes
32 minutes
1 hour 17 minutes
Ingredients
Strawberry Reduction
- 2 lbs fresh strawberries
- 4 tbsp granulated sugar
- 1 tbsp lemon juice, optional
Strawberry Cake
- 1/2 cup unsalted butter, For dairy-free use Smart Balance butter.
- 1 3/4 cup granulated sugar
- 1 teaspoon pure vanilla extract
- 3 large eggs, at room temperature
- 2 1/2 cups gluten-free all-purpose flour with xanthan gum, I like Pillsbury gluten-free. Not all gluten-free flours are created equal. You may experience different baking results depending on the gluten-free flour blend you choose.
- 2 teaspoons gluten-free baking powder
- 1 teaspoon baking soda
- 1/2 teaspoon salt
- 1/2 cup milk, Dairy-free use unsweetened almond milk.
- 2 teaspoons white vinegar
- 1 1/2 cups strawberry reduction
- 2 drops pink or red gel food coloring, Optional if you want the cake really pink.
Strawberry Buttercream
- 1 cup unsalted butter, softened, Dairy-free use Smart Balance butter
- 1 cup freeze-dried strawberries
- 1 teaspoon pure vanilla extract
- 2-4 tablespoons milk, Dairy-free use unsweetened almond milk
- 4 cups powdered sugar
- 1/8 teaspoon salt
Instructions
Strawberry Reduction
-
For best results and to ensure the cake batter isn’t affected by warmth, I highly recommend preparing this strawberry reduction several hours in advance, or even the night before you plan to bake. The strawberry sauce absolutely needs to be completely cooled before it’s incorporated into the cake batter.
-
Begin by carefully removing the stems from 2 pounds of fresh strawberries. Once stemmed, cut each strawberry in half to facilitate blending. Transfer the halved strawberries to a food processor or blender and process until you achieve a smooth, uniform puree. A powerful blender like the Ninja Master Prep Pro System works wonderfully for this task.
-
Pour the strawberry puree into a small saucepan. Add 4 tablespoons of granulated sugar and, if desired, 1 tablespoon of fresh lemon juice. Stir these ingredients thoroughly to combine them. Place the saucepan over medium heat and bring the mixture to a gentle simmer.
-
Once the mixture is bubbling, reduce the heat to low. Allow the strawberries to slowly reduce, stirring occasionally to prevent sticking and ensure even thickening. Continue reducing for approximately 30 minutes, or until the strawberry sauce has thickened to a consistency similar to a rich tomato sauce. This concentration of flavor is key to the cake’s deliciousness.
-
After the reduction has reached the desired thickness, remove it from the heat and allow it to cool down completely to room temperature. Once cooled, transfer the strawberry reduction into an airtight container and refrigerate until you are ready to use it for the cake. It is crucial that the reduction is cold, not warm, when added to the cake batter to maintain the cake’s proper structure and consistency.
Strawberry Cake
-
Preheat your oven to 350°F (175°C). Prepare two 9-inch round cake pans by cutting parchment paper to fit the bottom of each pan. Place the parchment paper circles in the pans and then spray both the parchment and the sides of the pans generously with a gluten-free cooking spray (coconut oil spray works great) to prevent sticking.
-
To create a homemade buttermilk substitute, pour ½ cup of milk (or unsweetened almond milk for a dairy-free option) into a measuring cup. Add 2 teaspoons of white vinegar or lemon juice and stir gently to combine. Let this mixture sit in the refrigerator for 5 minutes to allow it to curdle slightly and remain cold.
-
In a large mixing bowl, combine ½ cup of softened unsalted butter (or Smart Balance butter for a dairy-free version) and 1¾ cups of granulated sugar. Cream these together using an electric mixer on medium speed until the mixture is light, fluffy, and pale in color.
-
Add 1 teaspoon of pure vanilla extract to the creamed butter and sugar mixture, mixing until it is fully incorporated. Next, add 3 large eggs, one at a time, ensuring each egg is fully mixed into the batter before adding the next. Room temperature eggs blend more smoothly and create a more uniform batter.
-
In a separate medium bowl, thoroughly whisk together the dry ingredients: 2½ cups of gluten-free all-purpose flour (ensure it contains xanthan gum for best results, Pillsbury gluten-free is a good choice), 2 teaspoons of gluten-free baking powder, 1 teaspoon of baking soda, and ½ teaspoon of salt. Mixing dry ingredients separately ensures even distribution of leavening agents.
-
Gradually add the dry gluten-free flour mixture to the creamed butter mixture, mixing on low speed until just fully combined. Be careful not to overmix, as this can lead to a tough cake. Use a rubber spatula to scrape down the sides of the bowl as needed to ensure all ingredients are well incorporated.
-
Pour the prepared homemade buttermilk into the cake batter. Mix on low speed until the liquid is fully combined with the batter. The batter should be smooth and cohesive at this point.
-
Finally, gently fold in 1½ cups of the completely cooled strawberry reduction into the cake batter. Mix until the reduction is evenly distributed, lending a beautiful natural pink hue and intense strawberry flavor. If you desire a more vibrant pink color, you can add 2 drops of pink or red gel food coloring at this stage.
-
Divide the cake batter evenly between your two prepared and greased 9-inch cake pans. Use a spatula to smooth the tops of the batter in each pan.
-
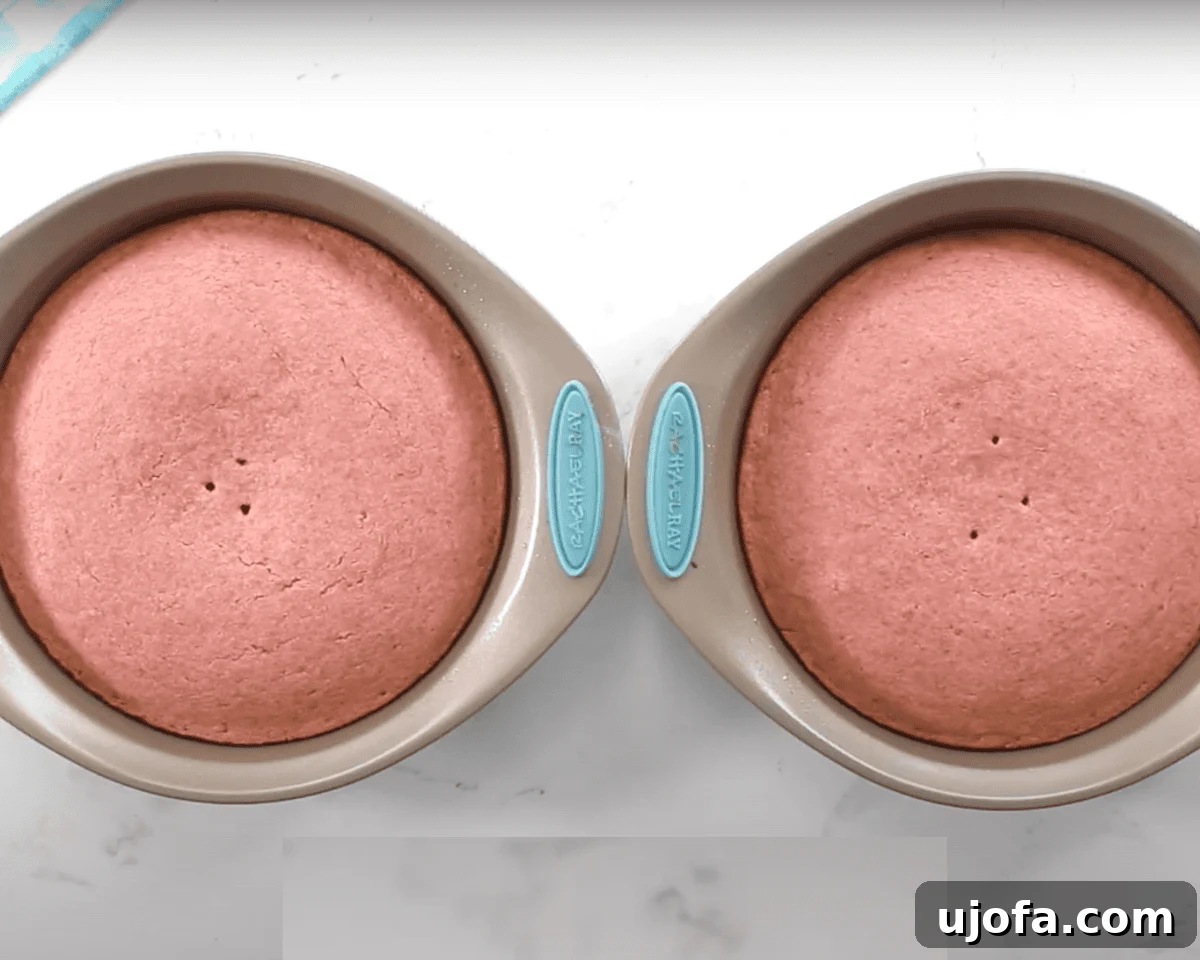
Bake the cakes in the preheated oven for 30-32 minutes. To check for doneness, insert a toothpick into the center of each cake; it should come out clean. You’ll also notice the edges of the cake gently pulling away from the sides of the pan. Keep a close eye on your cakes, as oven temperatures can vary.
-
Once baked, remove the cakes from the oven and allow them to cool completely in their pans on a wire rack before attempting to frost them. Cooling completely is essential to prevent the frosting from melting. This gluten-free strawberry cake will have a slightly denser texture compared to a traditional gluten-free vanilla cake, which contributes to its rich feel.
Strawberry Buttercream Frosting
-
Take 1 cup of freeze-dried strawberries and place them in a food processor or blender. Process until they are pulverized into a fine, flavorful strawberry powder. This powder will give your buttercream an intense natural strawberry flavor and a lovely pink hue.
-
In a large mixing bowl, cream 1 cup of softened unsalted butter (or dairy-free Smart Balance butter) using an electric mixer until it is light, fluffy, and smooth. This typically takes about 2-3 minutes on medium-high speed.
-
Add 1 teaspoon of pure vanilla extract and ⅛ teaspoon of salt to the creamed butter. Mix until these ingredients are fully combined. Before proceeding, use a spatula to scrape down the sides of the bowl, ensuring all the butter is evenly mixed.
-
Gradually add 4 cups of powdered sugar to the butter mixture, one cup at a time. Mix on low speed until each addition is incorporated, then increase speed to medium and beat until the frosting starts to become firm and creamy.
-
Add the prepared strawberry powder to the buttercream and mix until it is fully combined and evenly distributed throughout the frosting. This will give the frosting its signature strawberry flavor and color.
-
With the mixer on low speed, add 2-4 tablespoons of milk (or unsweetened almond milk for dairy-free) one tablespoon at a time, until the frosting reaches your desired smooth, spreadable consistency. Beat on medium-high for 1-2 minutes until light and fluffy.
-
To assemble the cake, place the first cooled cake layer onto your chosen serving plate or cake stand. Spread a generous amount of the strawberry buttercream over the top of this layer, creating a thick and delicious filling. Carefully place the second cake layer on top. Use the remaining frosting to generously cover the top and sides of the entire cake. For an elegant finish, I often decorate the top using a Wilton 1M tip to create beautiful swirls.
-
Any leftover cake should be stored in an airtight container or tightly covered with plastic wrap and refrigerated to maintain its freshness and flavor.
Notes
- **Strawberry Reduction Prep:** For optimal results, it is highly recommended to prepare the strawberry reduction ahead of time. Allowing it to cool completely for several hours or overnight ensures that it won’t negatively impact the cake batter’s temperature and consistency. This step is crucial for achieving a perfectly baked cake.
- **Finding Freeze-Dried Strawberries:** Look for freeze-dried strawberries in the dried fruit section of your local grocery store, often found at stores like Walmart or Aldi. It is important to use *freeze-dried* strawberries, not regular dried strawberries, as their texture and ability to be pulverized into a powder are essential for the frosting’s flavor and consistency.
- **Vibrant Color Enhancement:** While the strawberry reduction naturally tints the cake, for a more intensely pink and visually striking cake, consider adding 2-3 drops of gluten-free pink or red gel food coloring to the cake batter. I personally used 2 drops for the cake but preferred to keep the frosting its natural, subtle pink hue from the freeze-dried strawberries.
- **Preventing Cake Sticking:** To ensure your cake layers release cleanly from the pans, always trace and cut parchment paper to fit perfectly at the bottom of your cake pans. This creates a non-stick barrier that makes removal much easier.
- **Greasing Pans Effectively:** In addition to parchment paper, thoroughly grease your cake pans with a good quality gluten-free cooking spray. While any gluten-free option works, I personally find that coconut oil spray provides excellent non-stick properties and a subtle, pleasant aroma.
- **Patience in Cooling:** It is absolutely vital to allow the baked cake layers to cool completely before you begin the frosting process. Attempting to frost a warm or even slightly warm cake will result in melted, runny frosting and a messy presentation.
- **Gluten-Free Flour Choice:** The type of gluten-free all-purpose flour blend you use can significantly impact your baking results. I consistently achieve excellent outcomes with Pillsbury Gluten-Free Flour. However, as gluten-free flour blends vary widely in composition (e.g., starch-to-flour ratios, type of gums included), you may experience slightly different textures or consistencies depending on your chosen brand.
- **Accurate Flour Measurement (Spoon & Level Method):** To avoid a dense or dry cake, precise flour measurement is key. Always use the “spoon and level” method: gently spoon the gluten-free flour into your measuring cup until it overflows, then use the straight edge of a knife to level off the excess. Never scoop directly from the bag, as this compacts the flour and can result in using too much, altering the cake’s delicate texture.
Nutrition
Calories: 500kcal
Carbohydrates: 81g
Protein: 4g
Fat: 19g
Saturated Fat: 11g
Polyunsaturated Fat: 1g
Monounsaturated Fat: 5g
Trans Fat: 1g
Cholesterol: 78mg
Sodium: 231mg
Potassium: 263mg
Fiber: 4g
Sugar: 63g
Vitamin A: 594IU
Vitamin C: 193mg
Calcium: 71mg
Iron: 4mg
Nutrition information is automatically calculated, so should only be used as an approximation.
Additional Info
Baking, Dessert
American
Tried this recipe?Mention @mamaknowsglutenfree or tag #mamaknowsglutenfree!
How to Make Gluten-Free Strawberry Cake Step by Step
Let’s break down the process of creating this incredible gluten-free strawberry cake into easy-to-follow steps, complete with visual guidance to help you along the way.
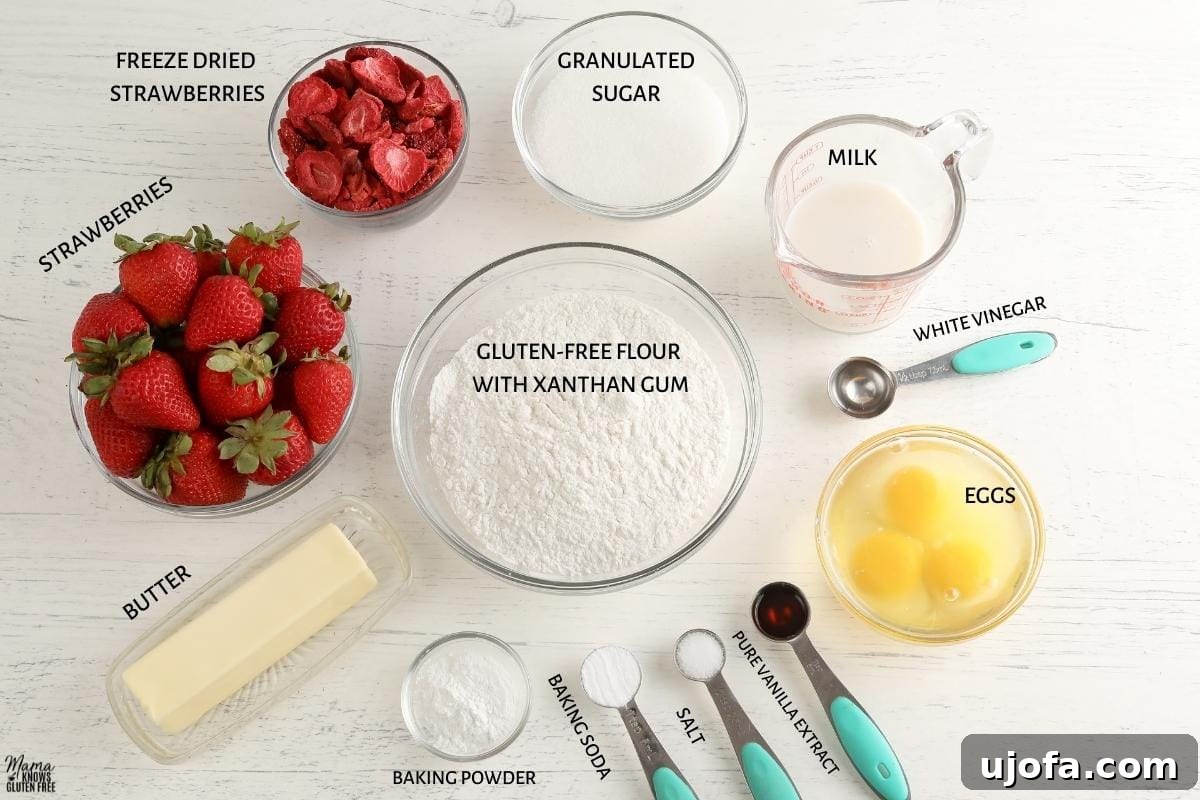
Gather Your Essential Ingredients
Before you begin, ensure all your ingredients are measured and ready. Having everything prepped makes the baking process smooth and enjoyable, especially for gluten-free recipes where precision can be key.
Crafting the Flavorful Strawberry Reduction
The strawberry reduction is the heart of this cake, providing deep, natural strawberry flavor and essential moisture.
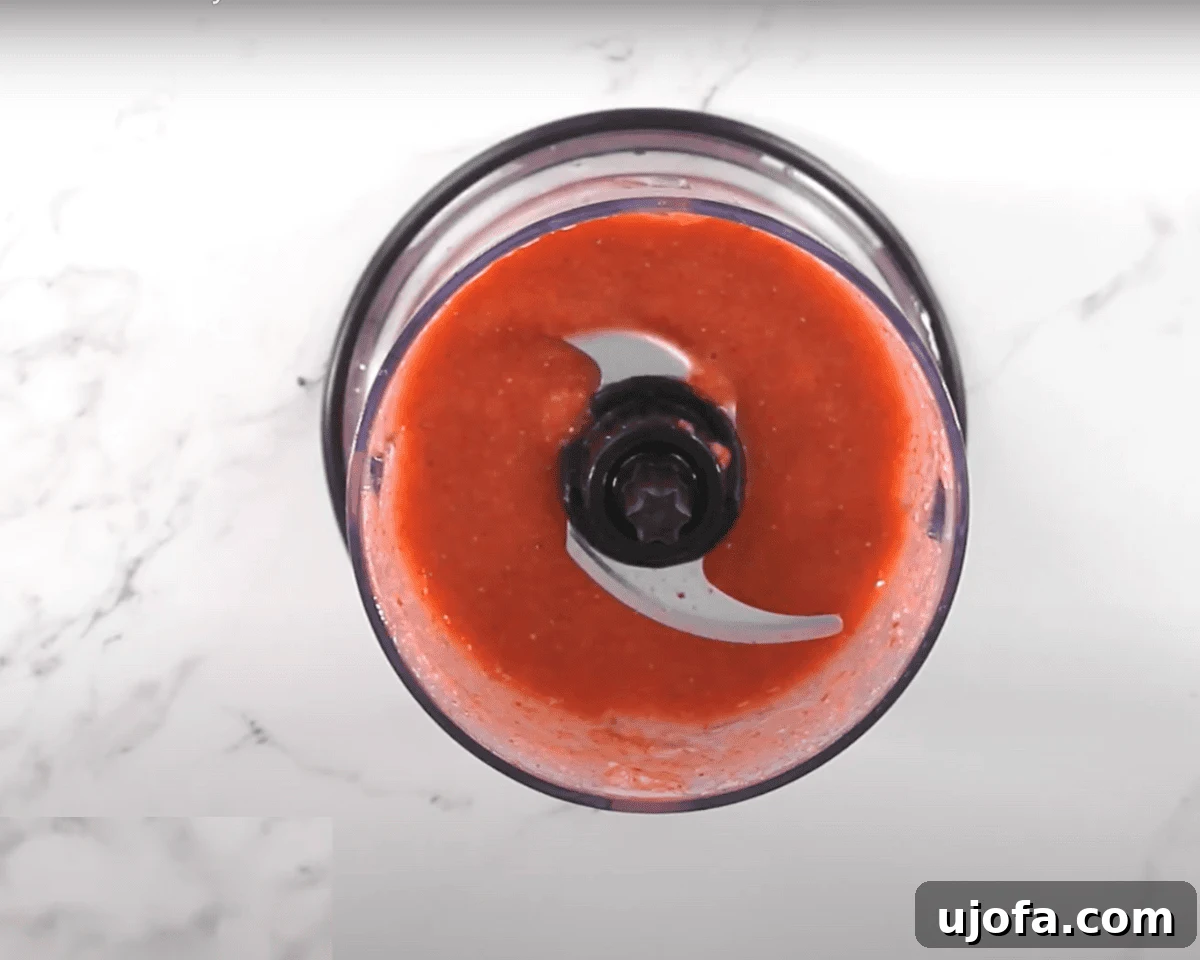
To start, remove the green stems from 2 lbs (approximately 32 ounces) of fresh, ripe strawberries. Cut each strawberry in half to prepare them for blending. Transfer these prepared strawberries into a food processor or a high-speed blender. Process until you achieve a completely smooth and uniform strawberry puree. This step ensures that the strawberry flavor is fully extracted and distributed.
Reducing the Puree to Intensify Flavor
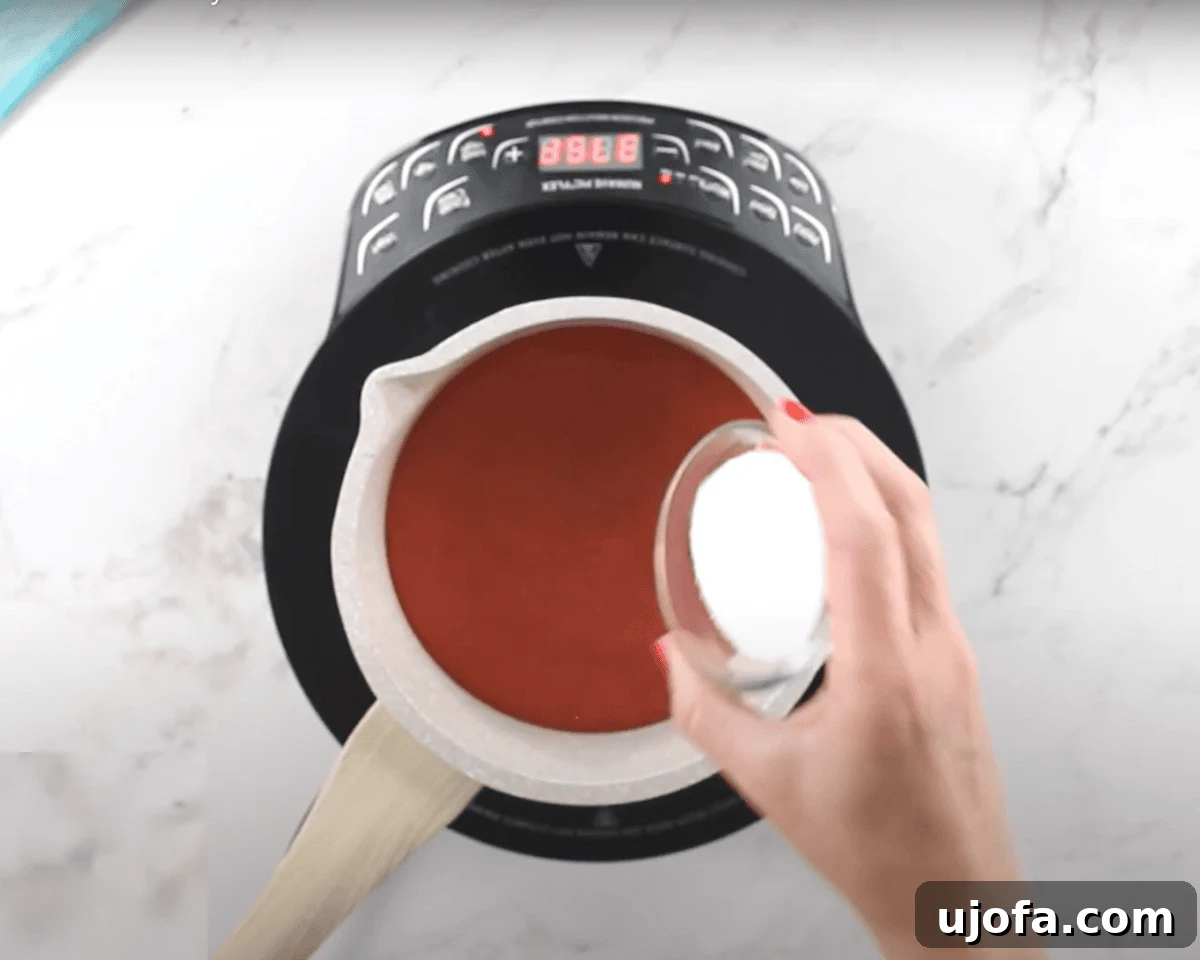
Pour the freshly pureed strawberries into a small saucepan. Add 4 tablespoons of granulated sugar and, if you prefer a slight tang to balance the sweetness, include 1 tablespoon of fresh lemon juice. Stir the mixture well to ensure all ingredients are combined. Place the saucepan over medium heat and bring the strawberry mixture to a gentle simmer. Once you see it bubbling steadily, reduce the heat to low. Allow the reduction to cook slowly, stirring occasionally to prevent sticking and encourage even thickening. This process usually takes about 30 minutes. The goal is a thick consistency, similar to a rich tomato sauce. Once achieved, remove from heat and let the reduction cool down completely before transferring it to an airtight container and refrigerating. It’s crucial for the reduction to be cold before being added to the cake batter to maintain the cake’s delicate structure.
Preparing for the Gluten-Free Strawberry Cake Layers
A well-prepared pan is the first step to a successful cake.
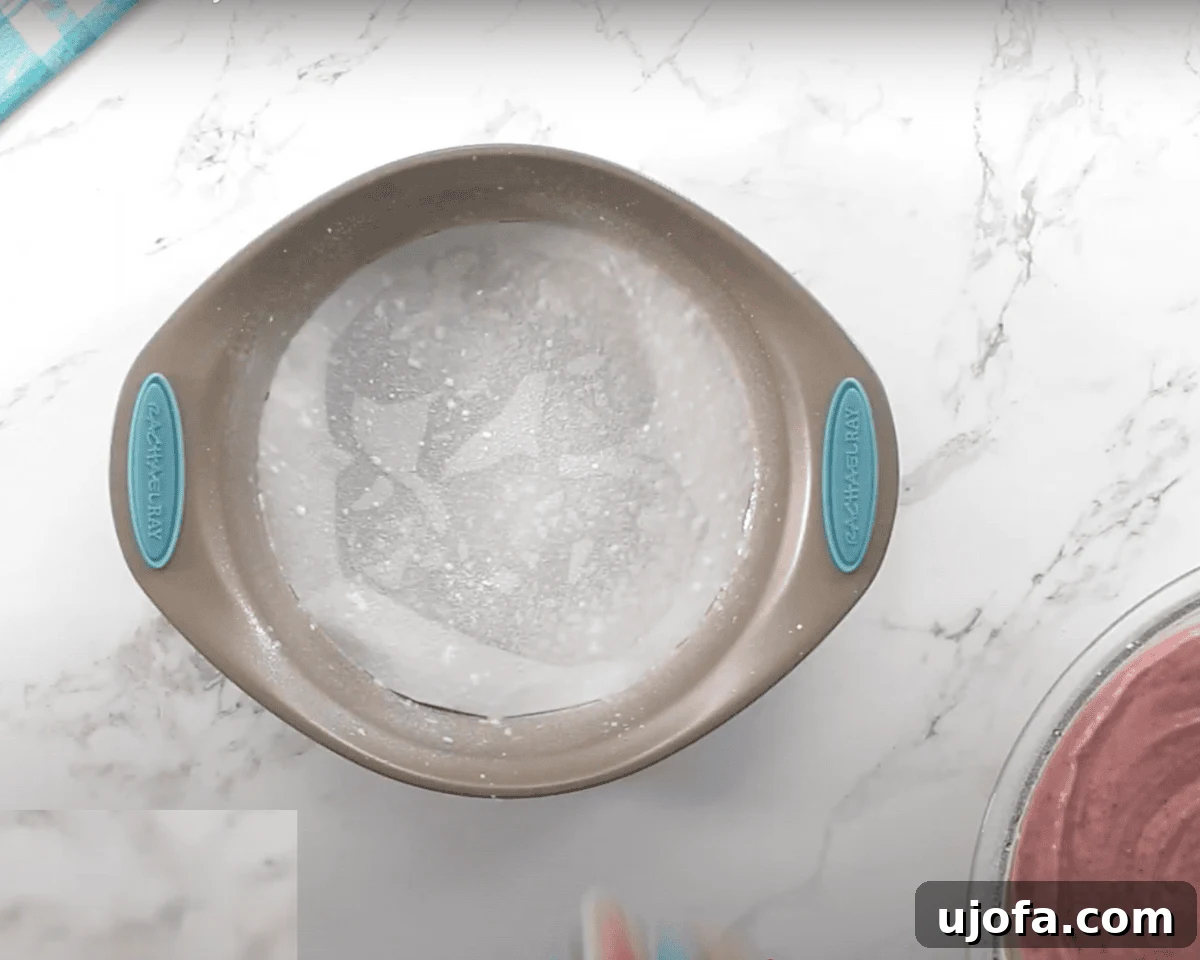
Preheat your oven to 350°F (175°C). Take two 9-inch round cake pans and prepare them thoroughly. Cut circles of parchment paper to perfectly fit the bottom of each pan. Place the parchment paper in the pans, then spray both the paper and the sides of the pans generously with a gluten-free cooking spray. This double protection ensures your cakes won’t stick. Next, in a measuring cup, combine ½ cup of milk (or unsweetened almond milk if you’re making a dairy-free version) with 2 teaspoons of white vinegar or lemon juice. Stir gently and place it in the refrigerator for 5 minutes. This simple step creates a homemade buttermilk, which adds tenderness and a subtle tang to the cake.
Creaming Butter and Sugar to Perfection
The foundation of a light and airy cake starts with proper creaming.
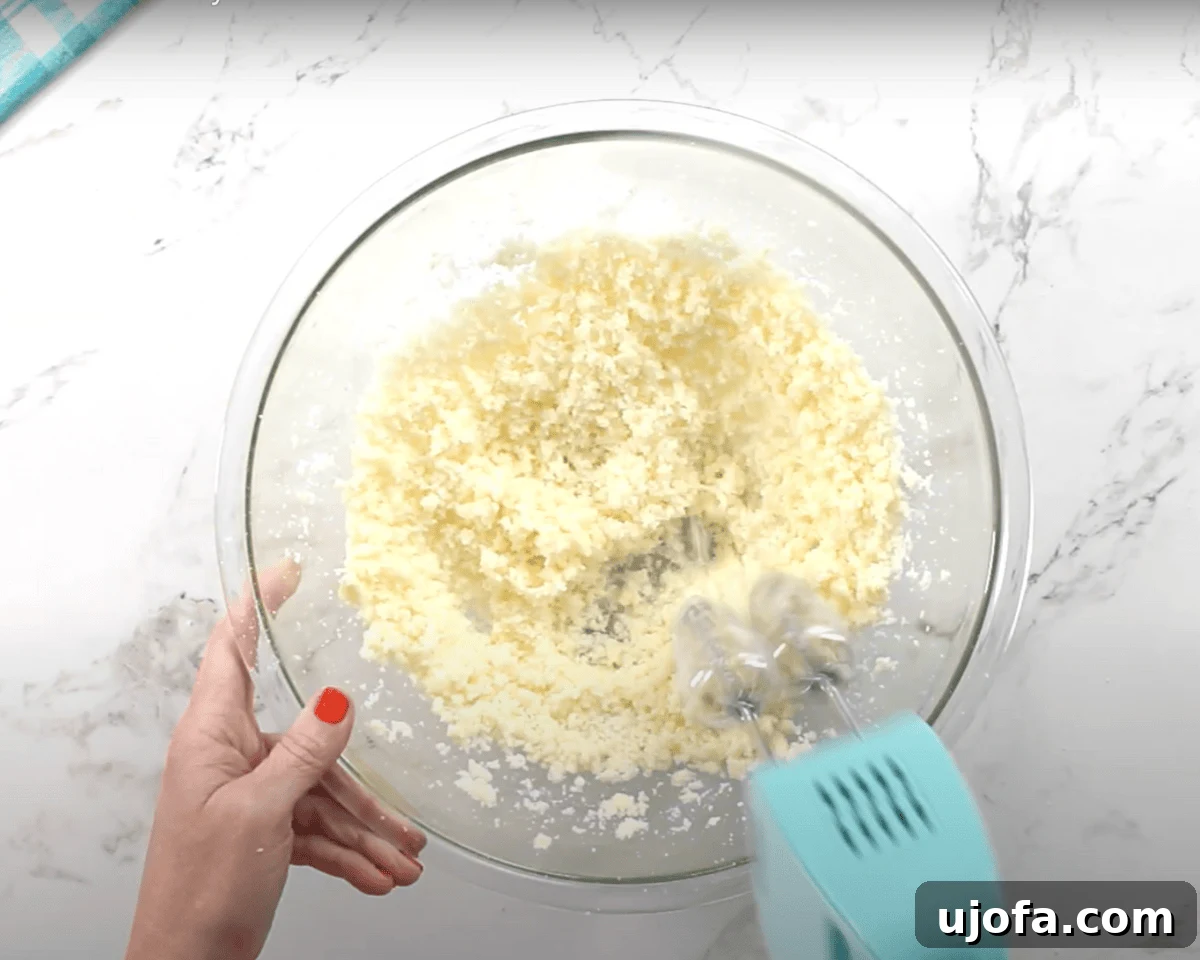
In a large mixing bowl, combine ½ cup of softened unsalted butter (or your preferred dairy-free butter alternative like Smart Balance) with 1¾ cups of granulated sugar. Using an electric mixer, cream these two ingredients together on medium speed until the mixture becomes light, fluffy, and visibly pale. This process incorporates air into the butter and sugar, contributing to the cake’s tender crumb structure.
Incorporating Vanilla and Eggs for Richness
Adding wet ingredients correctly ensures a smooth, emulsified batter.
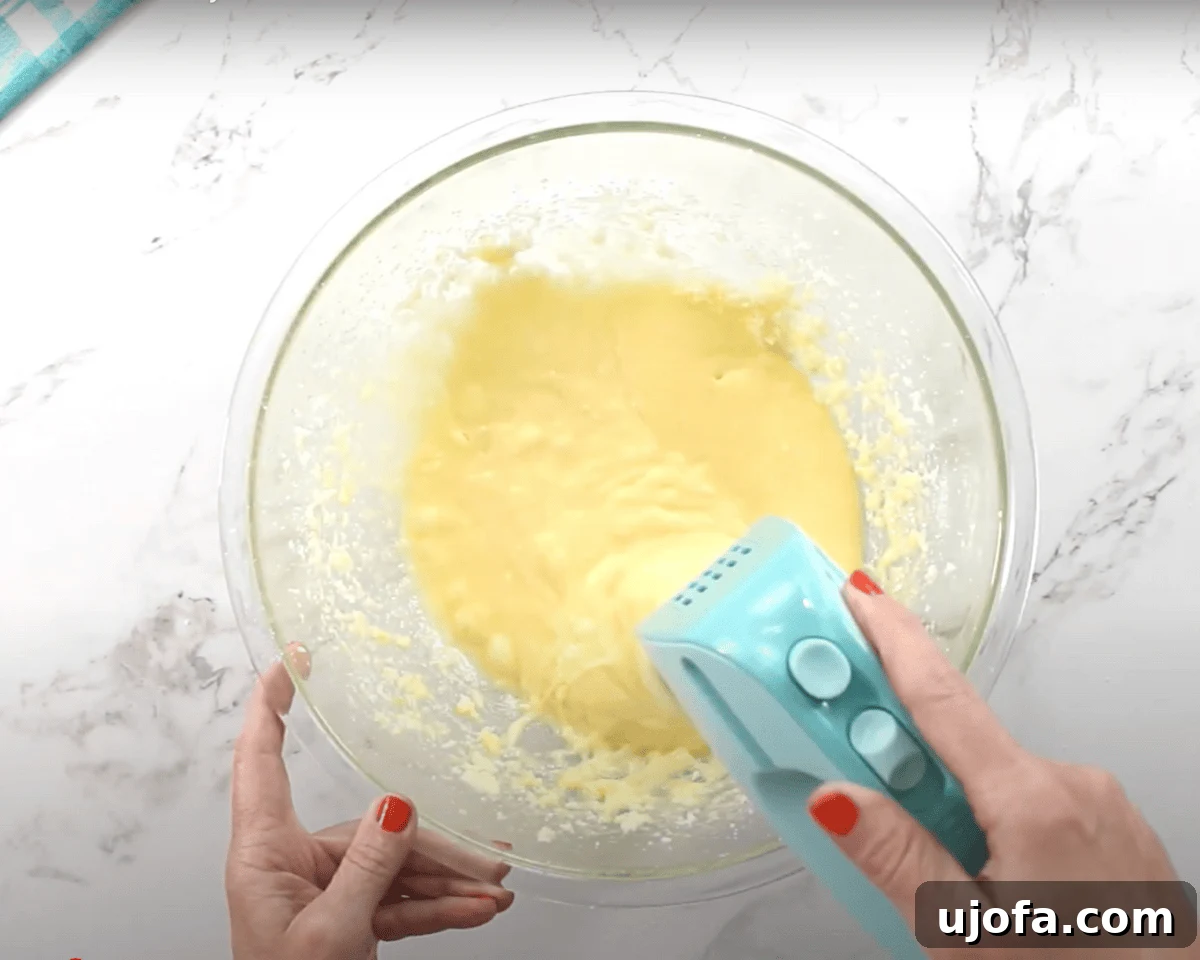
Now, add 1 teaspoon of pure vanilla extract to the creamed butter and sugar. Mix until the vanilla is fully combined, infusing the mixture with its aromatic flavor. Next, incorporate 3 large eggs, ensuring they are at room temperature. Add them one at a time, mixing well after each addition until fully incorporated. Room temperature eggs emulsify better with the butter, creating a smoother and more stable batter.
Blending the Dry Ingredients for Structure
Dry ingredients need to be uniformly mixed to ensure even leavening.
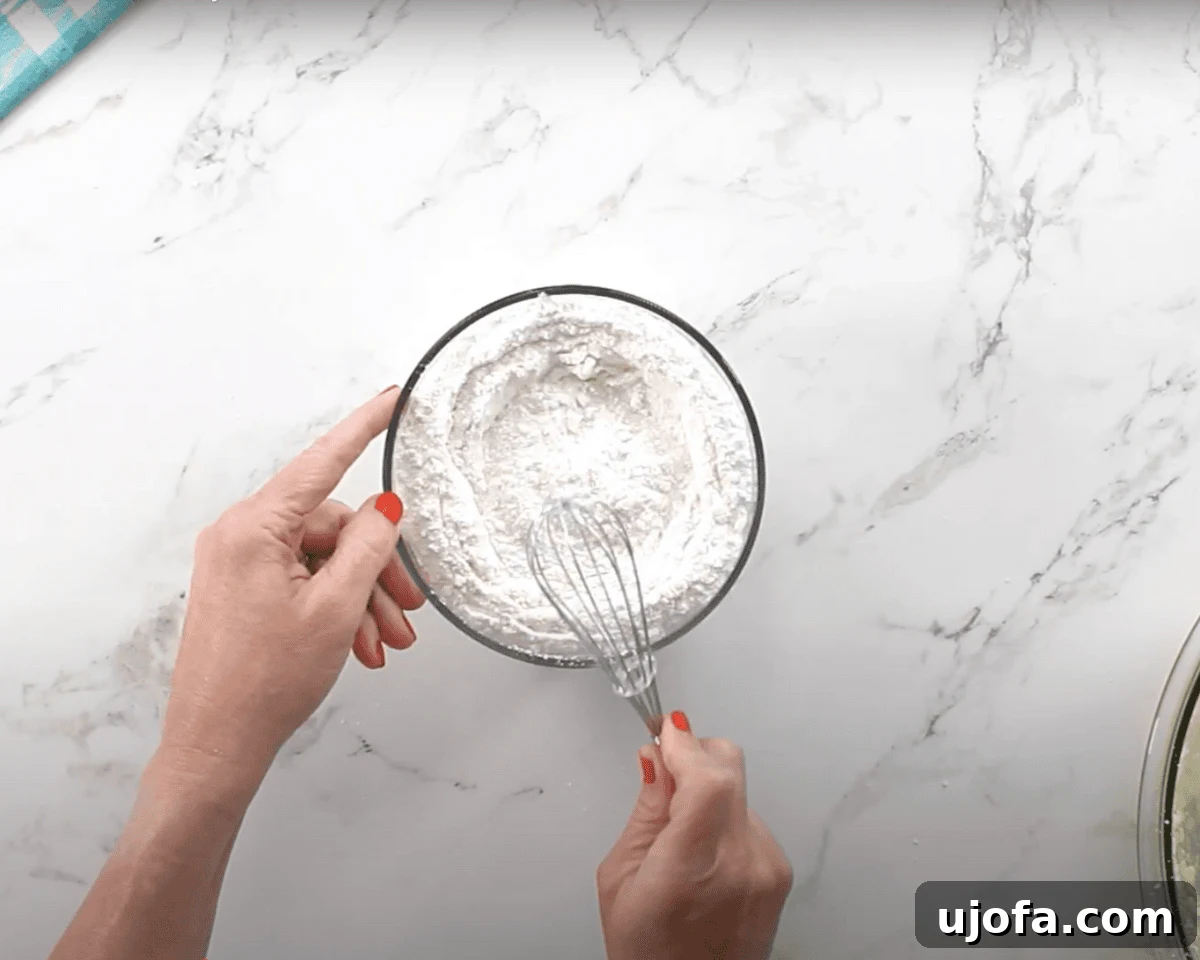
In a separate medium-sized bowl, whisk together 2½ cups of gluten-free all-purpose flour (ideally one that includes xanthan gum), 2 teaspoons of gluten-free baking powder, 1 teaspoon of baking soda, and ½ teaspoon of salt. Whisk these dry ingredients thoroughly until they are well combined. This step ensures that the leavening agents and salt are evenly distributed throughout the flour, leading to a consistent rise and flavor in your cake.
Marrying Wet and Dry: The Cake Batter
Combine your perfectly prepared wet and dry mixtures with care.
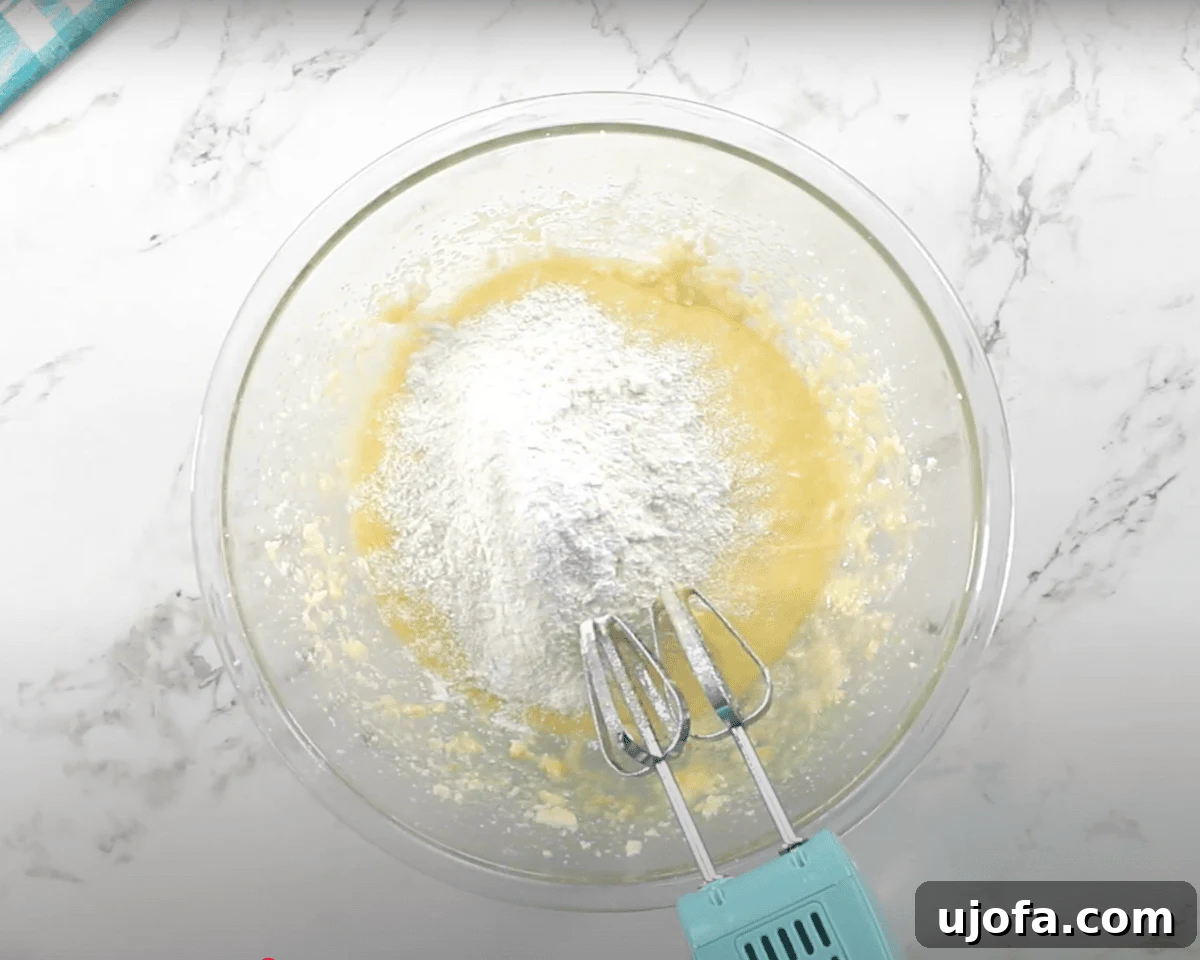
Gradually add the whisked dry ingredients to the creamed butter and egg mixture. Mix on low speed, just until the ingredients are fully incorporated and no streaks of dry flour remain. Avoid overmixing, as this can develop the starches in gluten-free flour too much, potentially leading to a tougher cake. Use a rubber spatula to scrape down the sides of the bowl periodically, ensuring all the batter is evenly mixed.
Introducing the Homemade Buttermilk
The buttermilk adds a special tenderness and moistness to the cake.
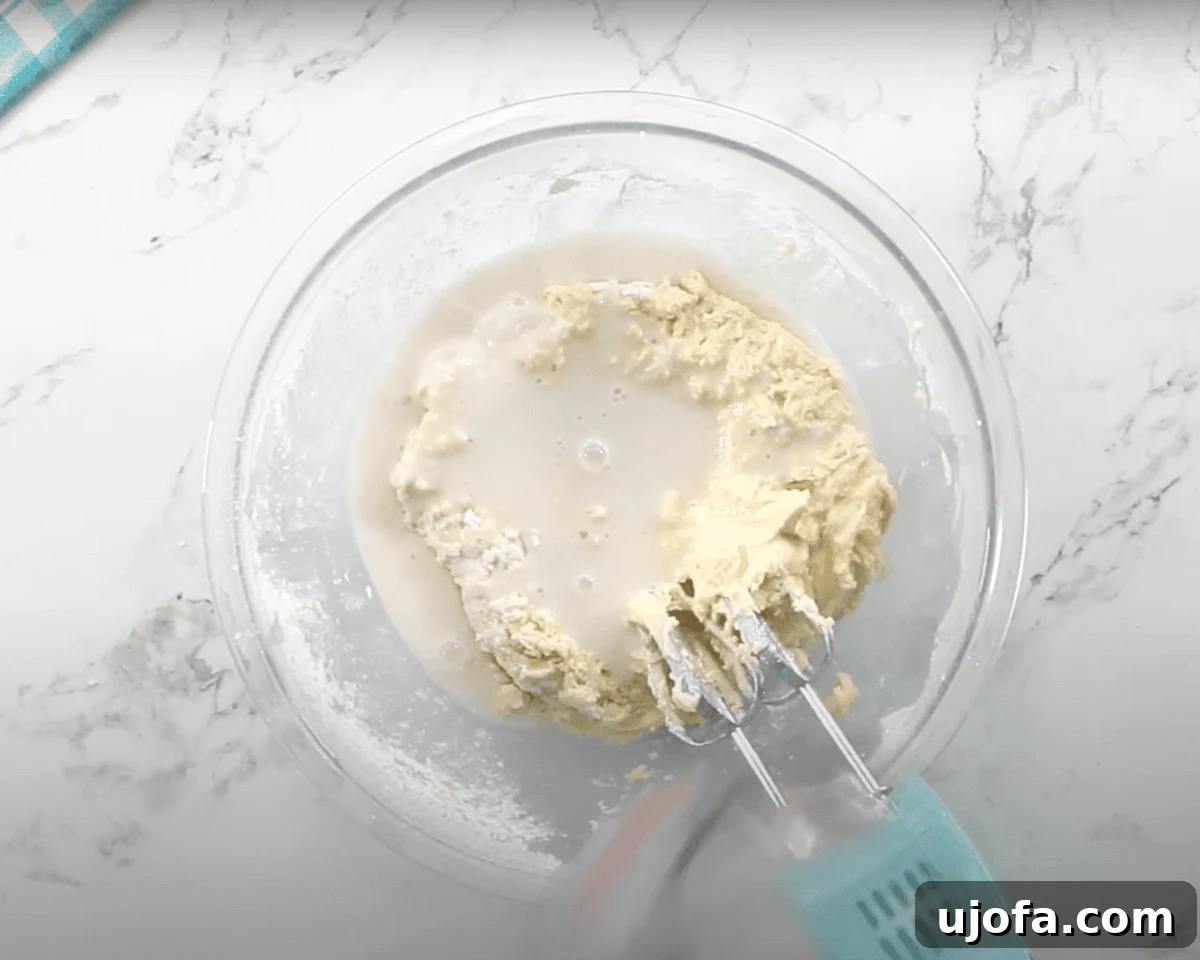
Pour the prepared homemade buttermilk into the cake batter. Mix on low speed until the liquid is fully combined and the batter appears smooth and uniform. The acidity in the buttermilk reacts with the baking soda, contributing to the cake’s rise and tender texture.
The Grand Finale: Strawberry Reduction in the Batter
This step brings the true strawberry essence to your cake.
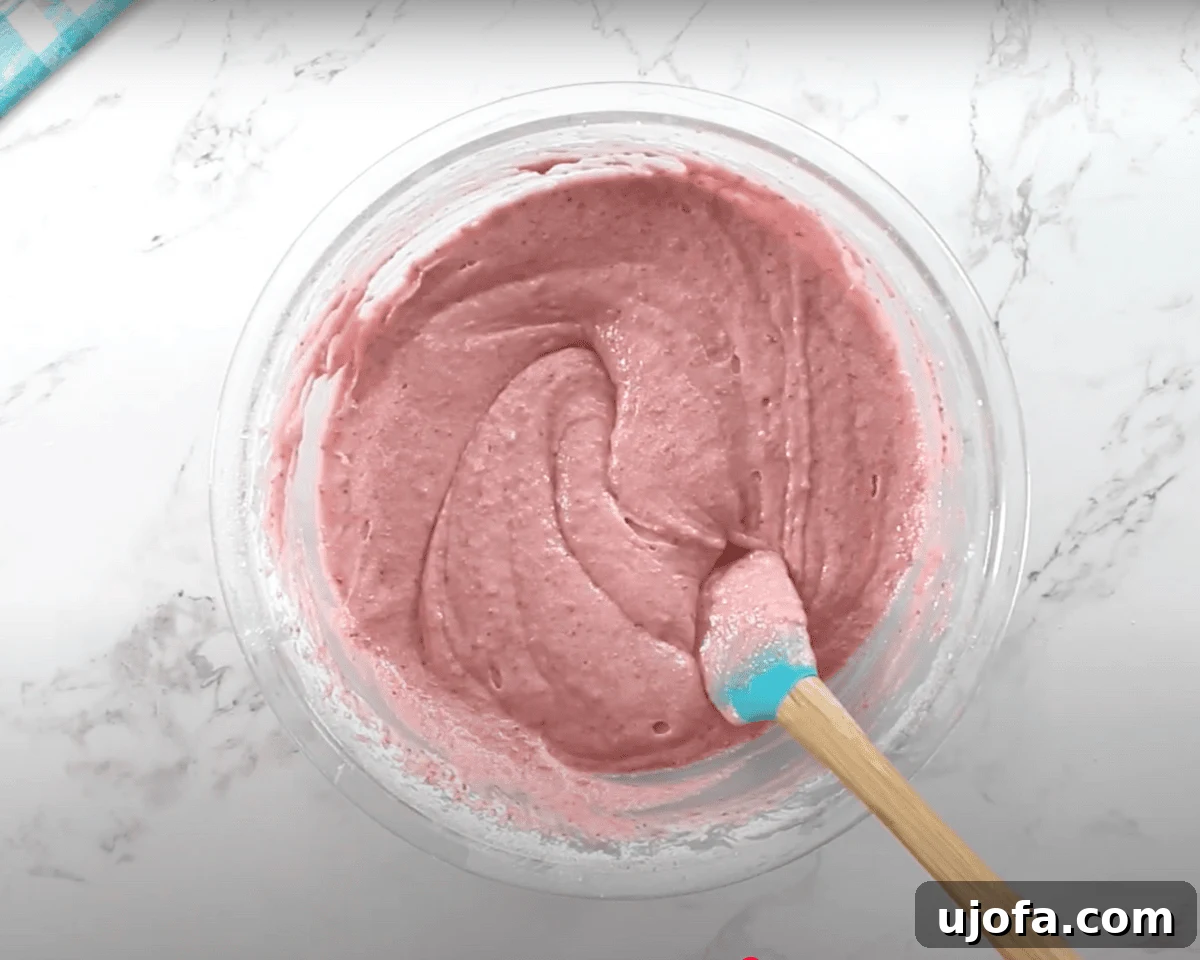
Gently fold in 1½ cups of the completely cooled strawberry reduction into the cake batter. Mix just until the reduction is evenly distributed, infusing the batter with its rich flavor and a lovely pink hue. If you desire a more vivid pink cake, you can add 2 drops of pink or red gel food coloring at this point. Be careful not to overmix; a few gentle folds are all that’s needed to achieve an even color and flavor throughout.
Filling the Cake Pans and Baking
Divide the batter evenly for perfectly balanced cake layers.
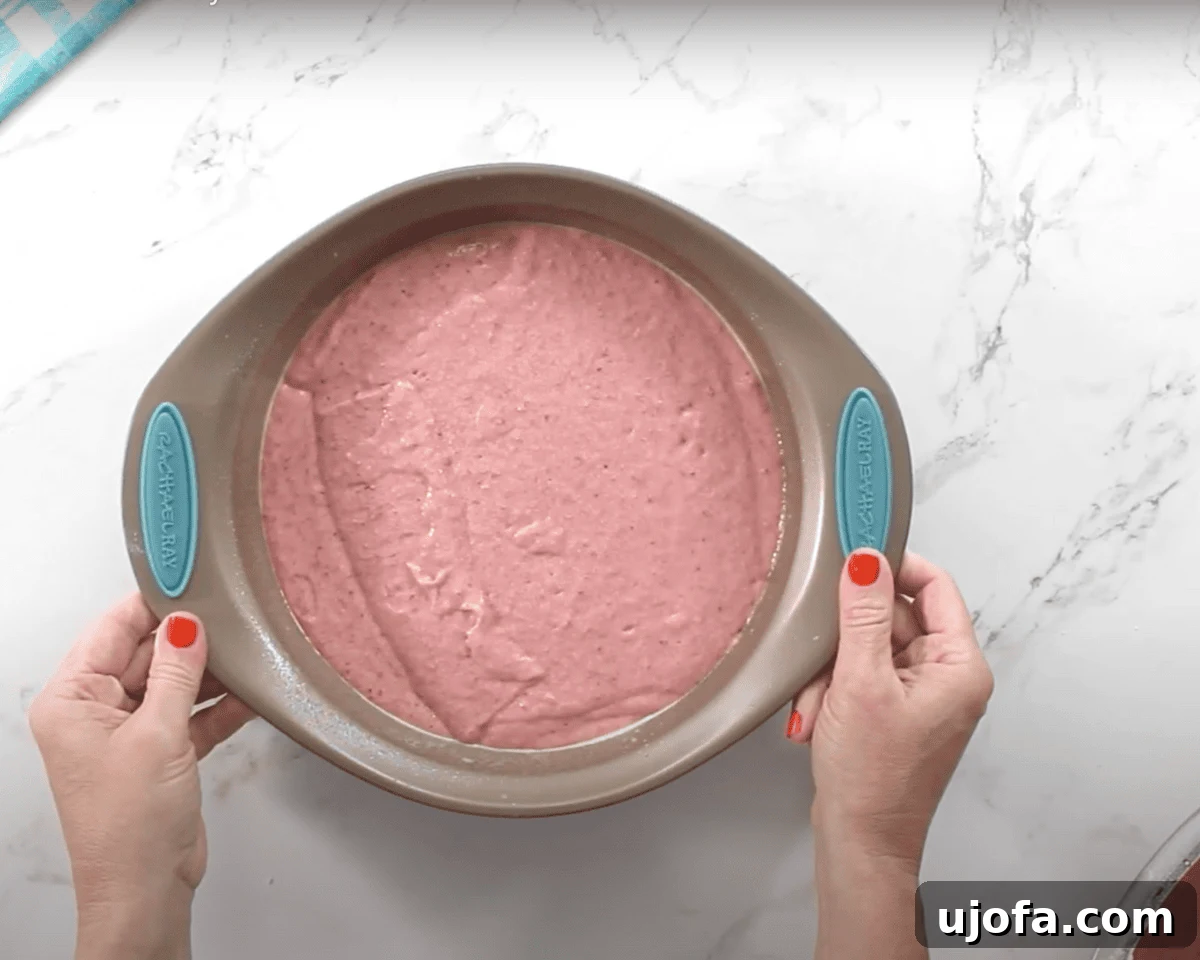
Carefully divide the glorious pink cake batter evenly between your two prepared 9-inch cake pans. Use a spatula to smooth the tops of the batter in each pan, ensuring level layers. Place the pans in your preheated 350°F (175°C) oven and bake for 30-32 minutes. You’ll know the cakes are done when a toothpick inserted into the center comes out clean, and the edges of the cake gently pull away from the sides of the pan. Remember that oven temperatures can vary, so keep a watchful eye. Once baked, remove the cakes from the oven and transfer them to a wire rack to cool completely. Patience is key here, as thoroughly cooled cakes are essential for a perfect frosting application without melting.
Creating the Luscious Strawberry Buttercream Frosting
This frosting is a delightful complement, bursting with natural strawberry flavor.
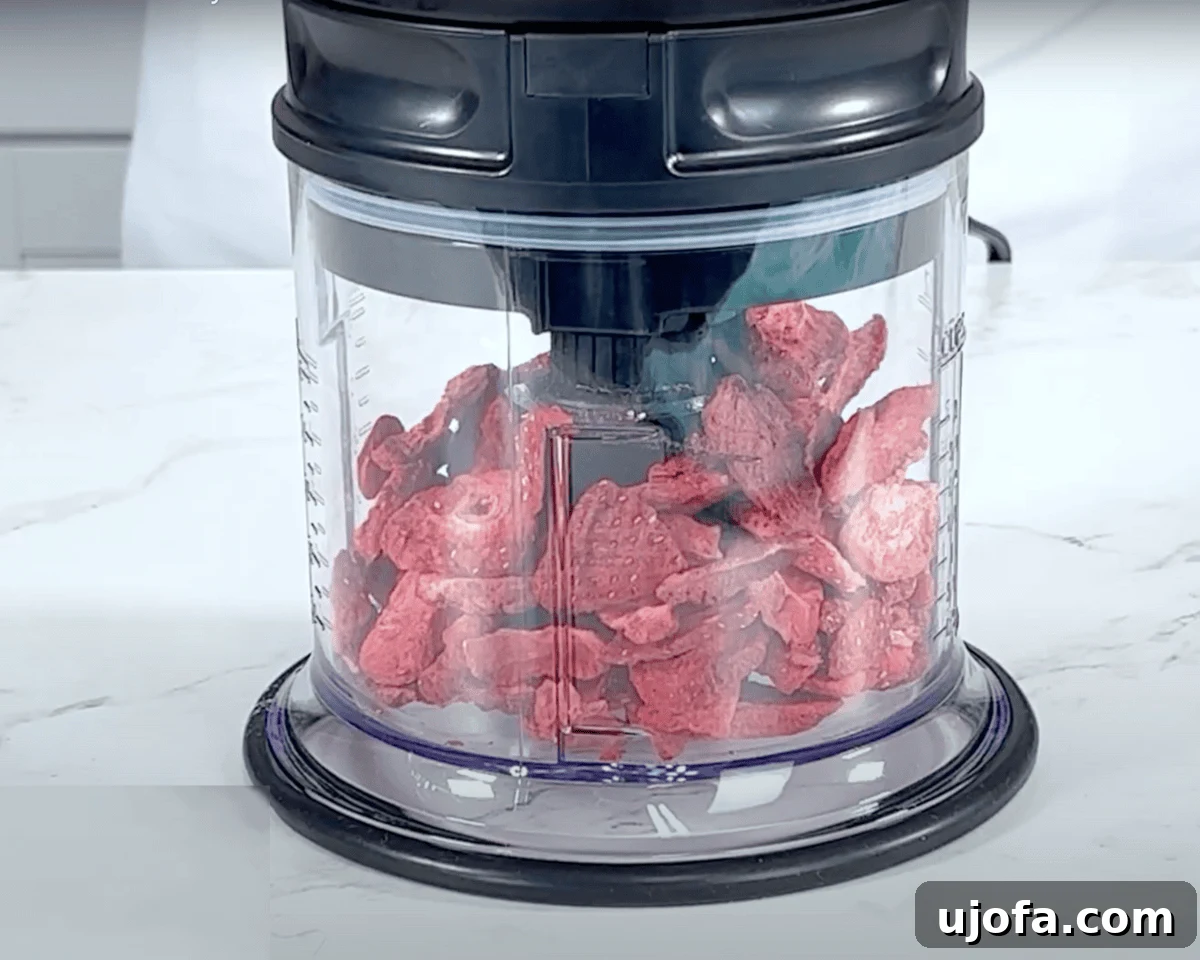
First, prepare your freeze-dried strawberries. Place 1 cup of freeze-dried strawberries into a food processor or blender and process until they are pulverized into a fine, fragrant strawberry powder. This powder will be the secret to your frosting’s intense berry flavor and natural pink tint.
Whipping the Butter to Fluffy Perfection
In a large mixing bowl, take 1 cup of softened unsalted butter (or your chosen dairy-free alternative) and cream it using an electric mixer until it is wonderfully smooth, light, and fluffy. This process incorporates air, making the buttercream light and ethereal. Once the butter is whipped, mix in 1 teaspoon of pure vanilla extract and ⅛ teaspoon of salt until fully combined. Remember to scrape down the sides of the bowl with a spatula to ensure all butter is evenly incorporated before adding the powdered sugar.
Building the Buttercream with Powdered Sugar
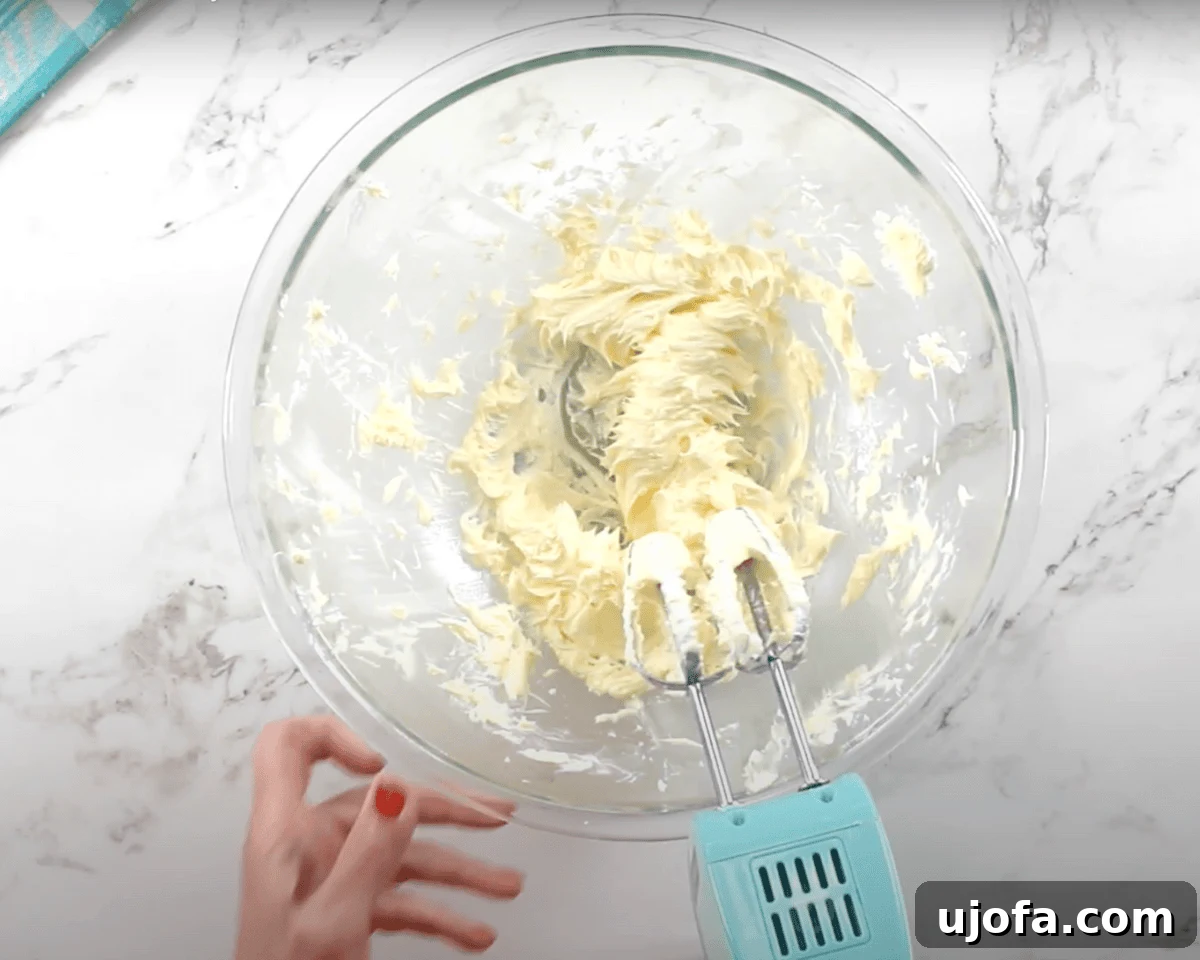
Now, it’s time to add the powdered sugar. Gradually add 4 cups of powdered sugar to the creamed butter, one cup at a time. Mix on low speed after each addition until the sugar is incorporated, then increase the speed to medium. Continue mixing until the frosting begins to thicken and achieve a firm, yet creamy, consistency. Scrape down the bowl as needed to prevent any lumps of unmixed sugar.
Finishing Touches: Strawberry Powder and Milk
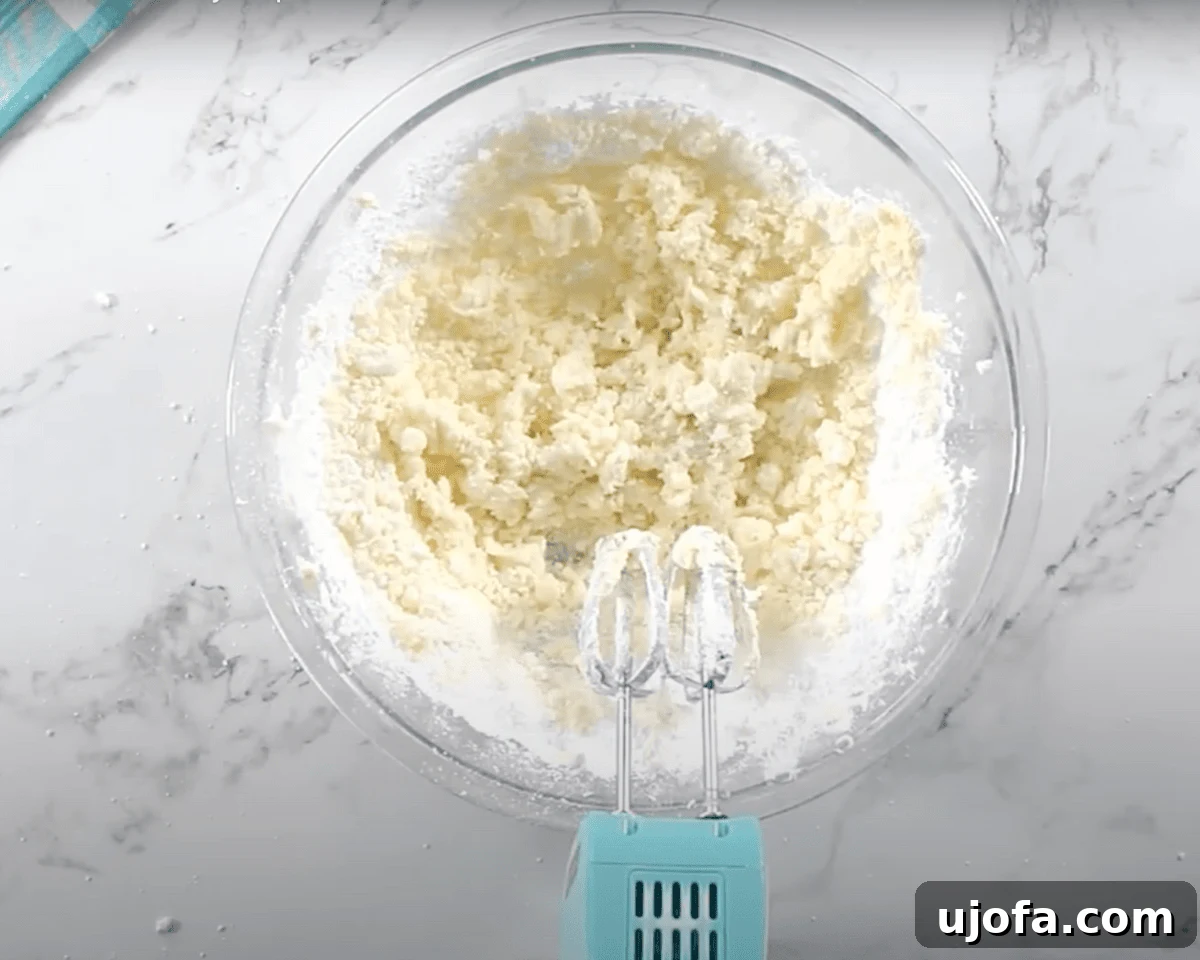
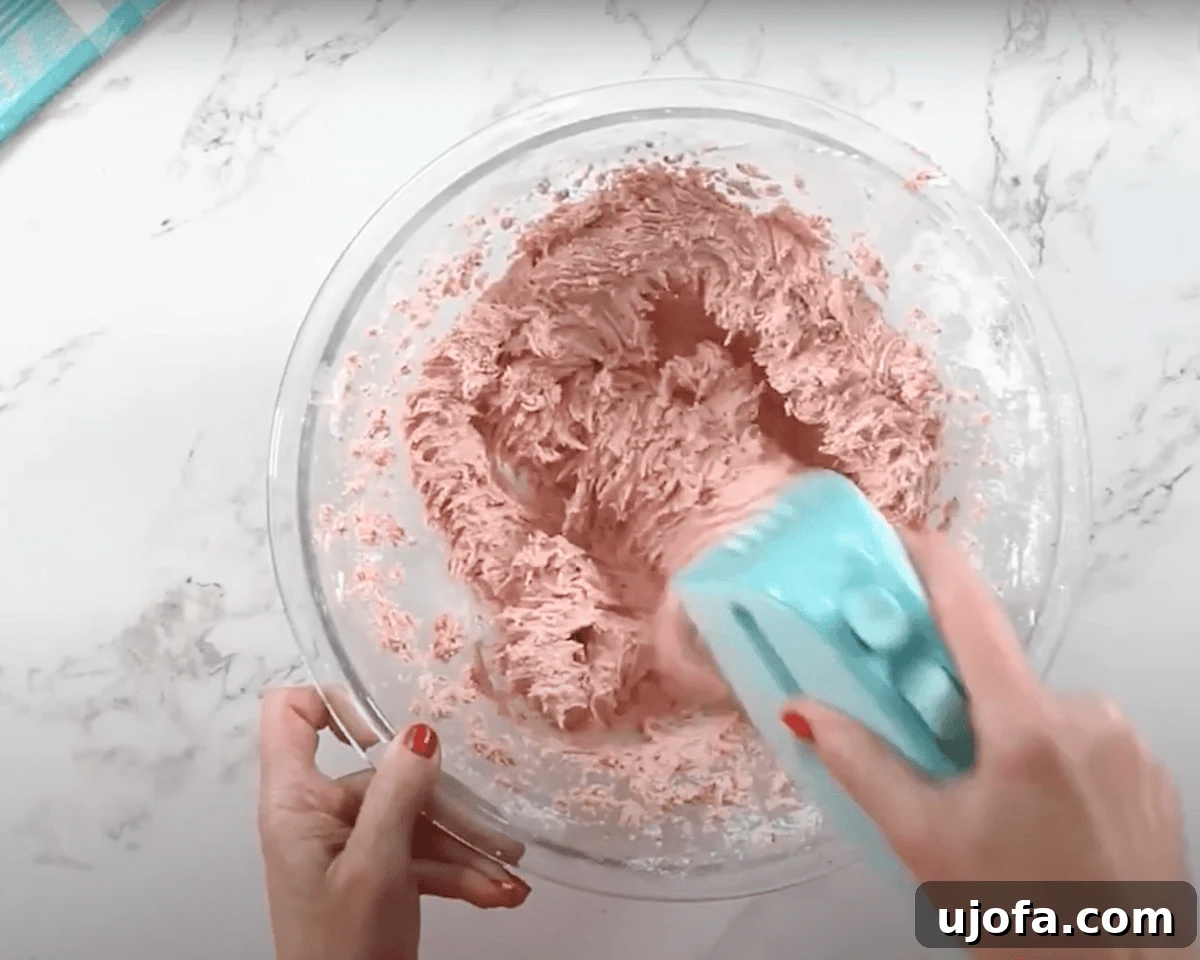
Add the prepared strawberry powder to the buttercream and mix until it is fully combined and evenly distributed. This will give your frosting a natural, delightful pink color and an intense strawberry flavor. Next, add 2-4 tablespoons of milk (or unsweetened almond milk) one tablespoon at a time, mixing after each addition, until the frosting reaches your desired smooth and spreadable consistency. Beat on medium-high speed for another 1-2 minutes until the frosting is wonderfully light and fluffy.
Assembling and Decorating Your Masterpiece
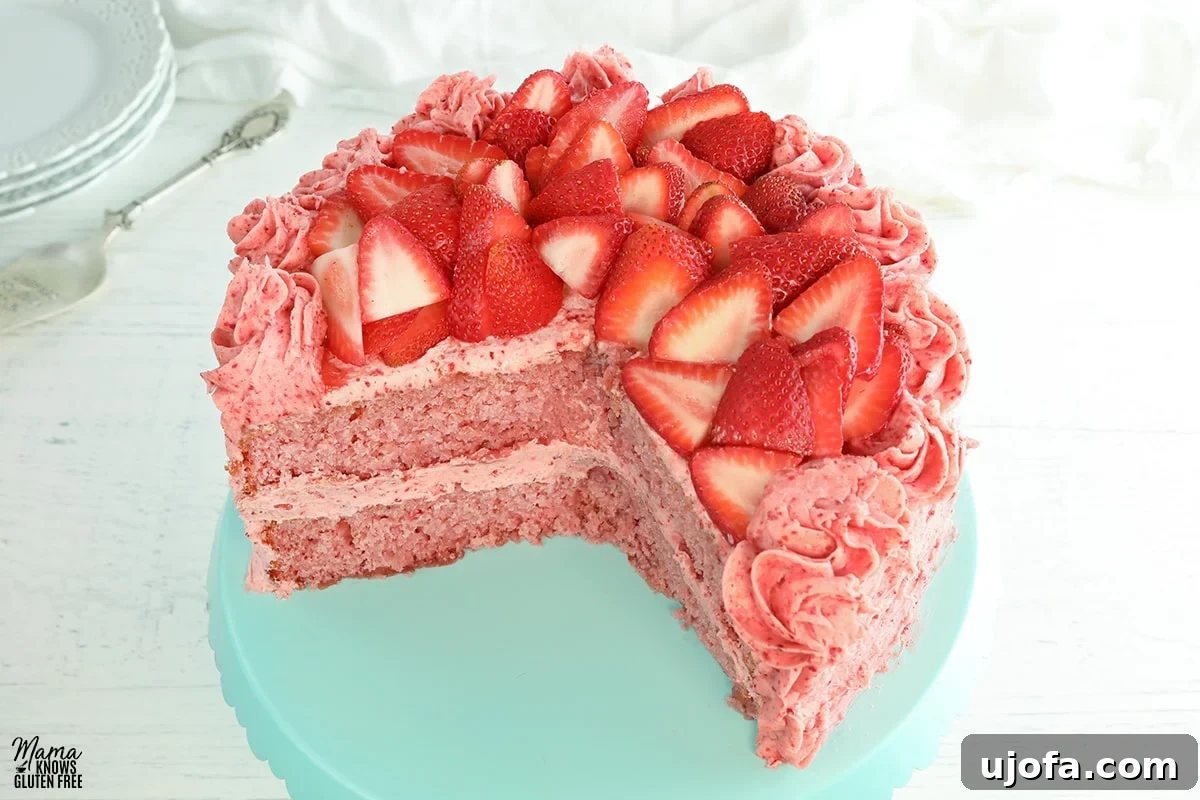
With your cakes completely cooled and your buttercream ready, it’s time for the exciting part! Place the first cake layer onto your chosen serving plate or cake stand. Spread a generous amount of the strawberry buttercream over the top of this layer; I love a thick layer in the center for extra indulgence. Carefully place the second cake layer on top of the frosted first layer. Use the remaining frosting to cover the top and sides of the entire cake, smoothing it out evenly. For a beautiful piped design, I often use a Wilton 1M tip to create elegant swirls on top. Once decorated, serve slices of this irresistible gluten-free strawberry cake and watch it disappear!
Serving Suggestions for Your Gluten-Free Strawberry Cake
This beautiful gluten-free strawberry cake is a showstopper on its own, but a few simple additions can elevate the experience even further. I love serving each slice with a generous layer of its homemade strawberry buttercream frosting. For a touch of natural elegance, a few fresh strawberry slices or whole berries perched on top make a vibrant garnish. If you’re feeling extra indulgent, a dollop of freshly whipped cream or a light dusting of powdered sugar just before serving adds a delightful finish. This cake pairs wonderfully with a warm cup of coffee for a morning treat, or a refreshing glass of iced tea on a warm afternoon. It’s truly versatile, making it a perfect dessert for anything from a casual brunch to a formal birthday celebration or a relaxed summer gathering.
Storage Instructions for Freshness
To keep your gluten-free strawberry cake tasting as fresh as possible, proper storage is essential. Any leftover slices or the entire cake should be placed in an airtight container. Alternatively, you can tightly cover the cake with plastic wrap to prevent it from drying out. Store the cake in the refrigerator. This will keep the cake moist and the frosting firm. While the cake is best enjoyed within 2-3 days, it can remain delicious for up to 5 days when stored correctly in the refrigerator.
Discover More Gluten-Free Delights
If you’ve enjoyed this delightful strawberry cake, you’ll be thrilled to explore other gluten-free baking recipes. Here are some more of our favorite gluten-free cakes that are perfect for any occasion:
- Gluten-Free Strawberry Shortcake: A classic summer dessert, light and fruity.
- Gluten-Free Carrot Cake: Moist, spiced, and topped with a decadent cream cheese frosting.
- Gluten-Free Angel Food Cake: Light as air and heavenly, perfect for berries and cream.
- Gluten-Free Chocolate Cake: A rich and indulgent chocolate lover’s dream, simple to make.
Frequently Asked Questions (FAQ) About Gluten-Free Strawberry Cake
Can I use frozen strawberries for the reduction?
Yes, you can absolutely use frozen strawberries for the reduction if fresh ones are not in season or readily available. Thaw them completely before pureeing and proceeding with the recipe. The reduction process will still work beautifully to concentrate their flavor.
My cake seems a bit dense. What might have gone wrong?
Gluten-free cakes can sometimes be denser than traditional cakes, and this recipe does lean slightly denser than a gluten-free vanilla cake due to the strawberry reduction. However, if it’s overly dense, ensure you are measuring your gluten-free flour correctly using the “spoon and level” method. Also, overmixing the batter after adding the flour can lead to a tougher texture. Lastly, make sure your leavening agents (baking powder and baking soda) are fresh and active.
Can I make this cake dairy-free?
Yes, this recipe is designed with dairy-free options! For the cake, use unsweetened almond milk instead of regular milk and Smart Balance butter (or another plant-based butter alternative) instead of unsalted butter. For the frosting, use softened Smart Balance butter and unsweetened almond milk. Always double-check ingredient labels to ensure they are certified dairy-free.
How can I achieve a brighter pink color in my cake and frosting?
For a more vibrant pink, you can add 2-3 drops of gluten-free pink or red gel food coloring to the cake batter when you add the strawberry reduction. For the frosting, if you want a deeper pink than what the freeze-dried strawberries naturally provide, you can also add a drop or two of gel food coloring after incorporating the strawberry powder.
Can I make the cake ahead of time?
Absolutely! The cake layers can be baked a day or two in advance. Once completely cooled, wrap them tightly in plastic wrap and store at room temperature or in the refrigerator. The strawberry reduction can also be made up to 3-4 days ahead and stored in an airtight container in the refrigerator. The frosting can be made a day ahead and stored in the refrigerator; just let it come to room temperature and re-whip briefly before frosting the cake.
What kind of gluten-free flour should I use?
I recommend using a gluten-free all-purpose flour blend that contains xanthan gum. Different brands can yield different results, but I’ve had great success with Pillsbury Gluten-Free All-Purpose Flour. If your blend does not contain xanthan gum, you may need to add about ½ teaspoon per cup of flour.
This Gluten-Free Strawberry Cake is a labor of love that rewards you with an incredibly fresh, flavorful, and moist dessert. Whether you’re a seasoned gluten-free baker or new to the journey, this recipe provides clear steps to ensure success. Enjoy the vibrant taste of summer in every slice!