
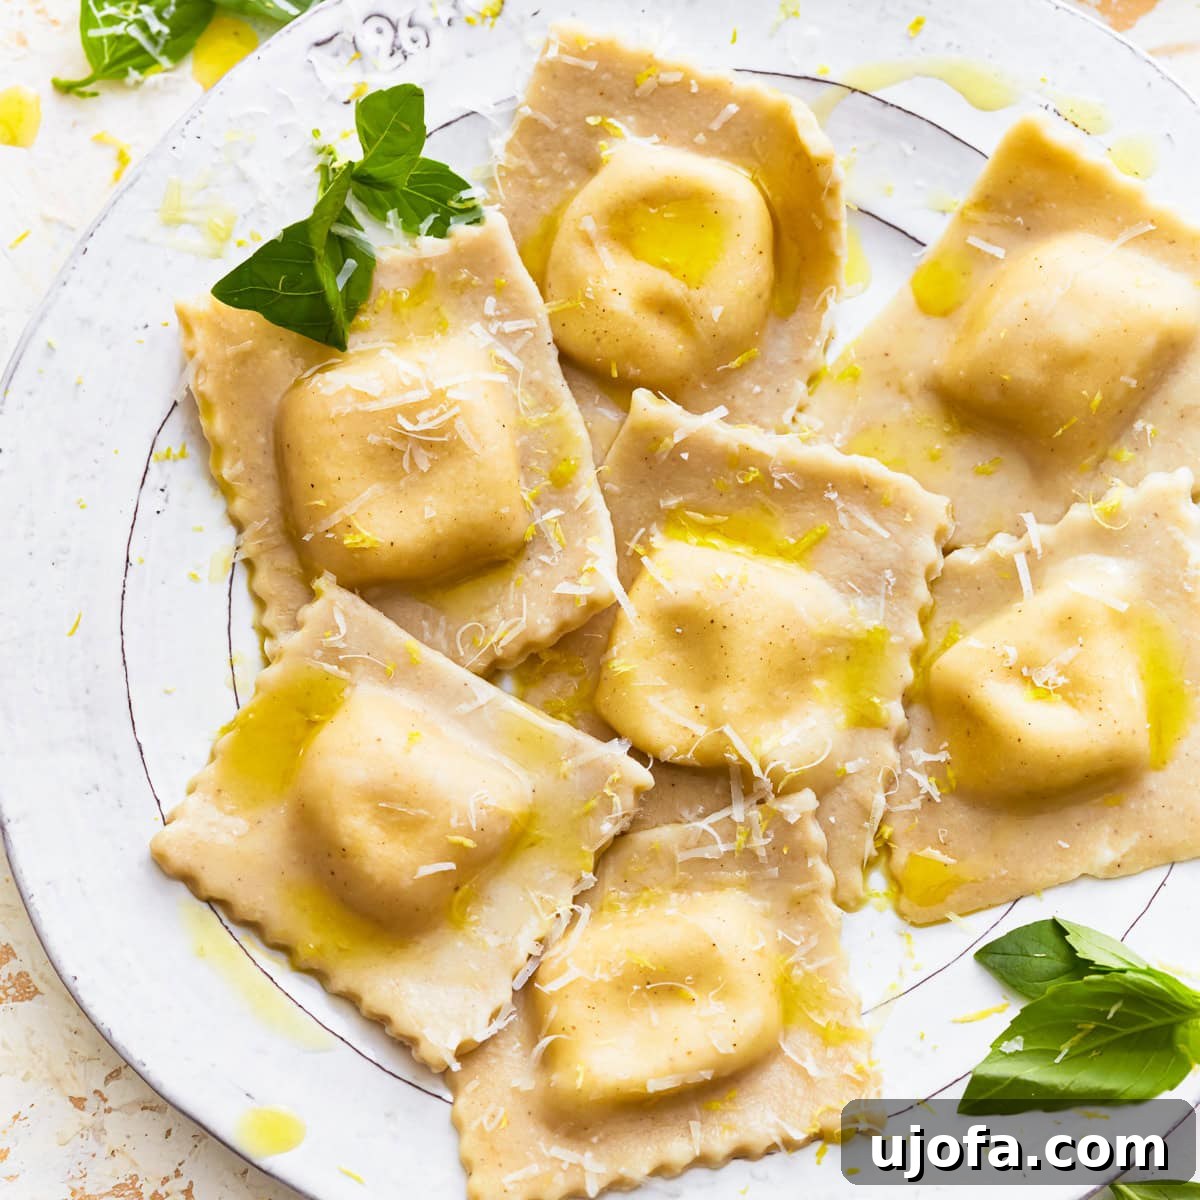
Embark on a delightful culinary journey with this incredibly simple yet utterly delicious recipe for
homemade gluten-free ravioli. Crafted using straightforward techniques, this recipe
requires no specialized equipment, making it accessible for every home cook. We’ll guide you through
creating a tender, pliable gluten-free pasta dough
and stuffing it with a rich, creamy blend of ricotta and Parmesan cheese, subtly enhanced with a
whisper of nutmeg. Once shaped, these delicate parcels cook to perfection in under 4 minutes, offering
a truly authentic al dente texture that many store-bought gluten-free options struggle to achieve.
Whether you prefer them generously coated in your favorite sauce or simply adorned with a sprinkle of
fresh cheese, these gluten-free ravioli promise a comforting and satisfying meal.
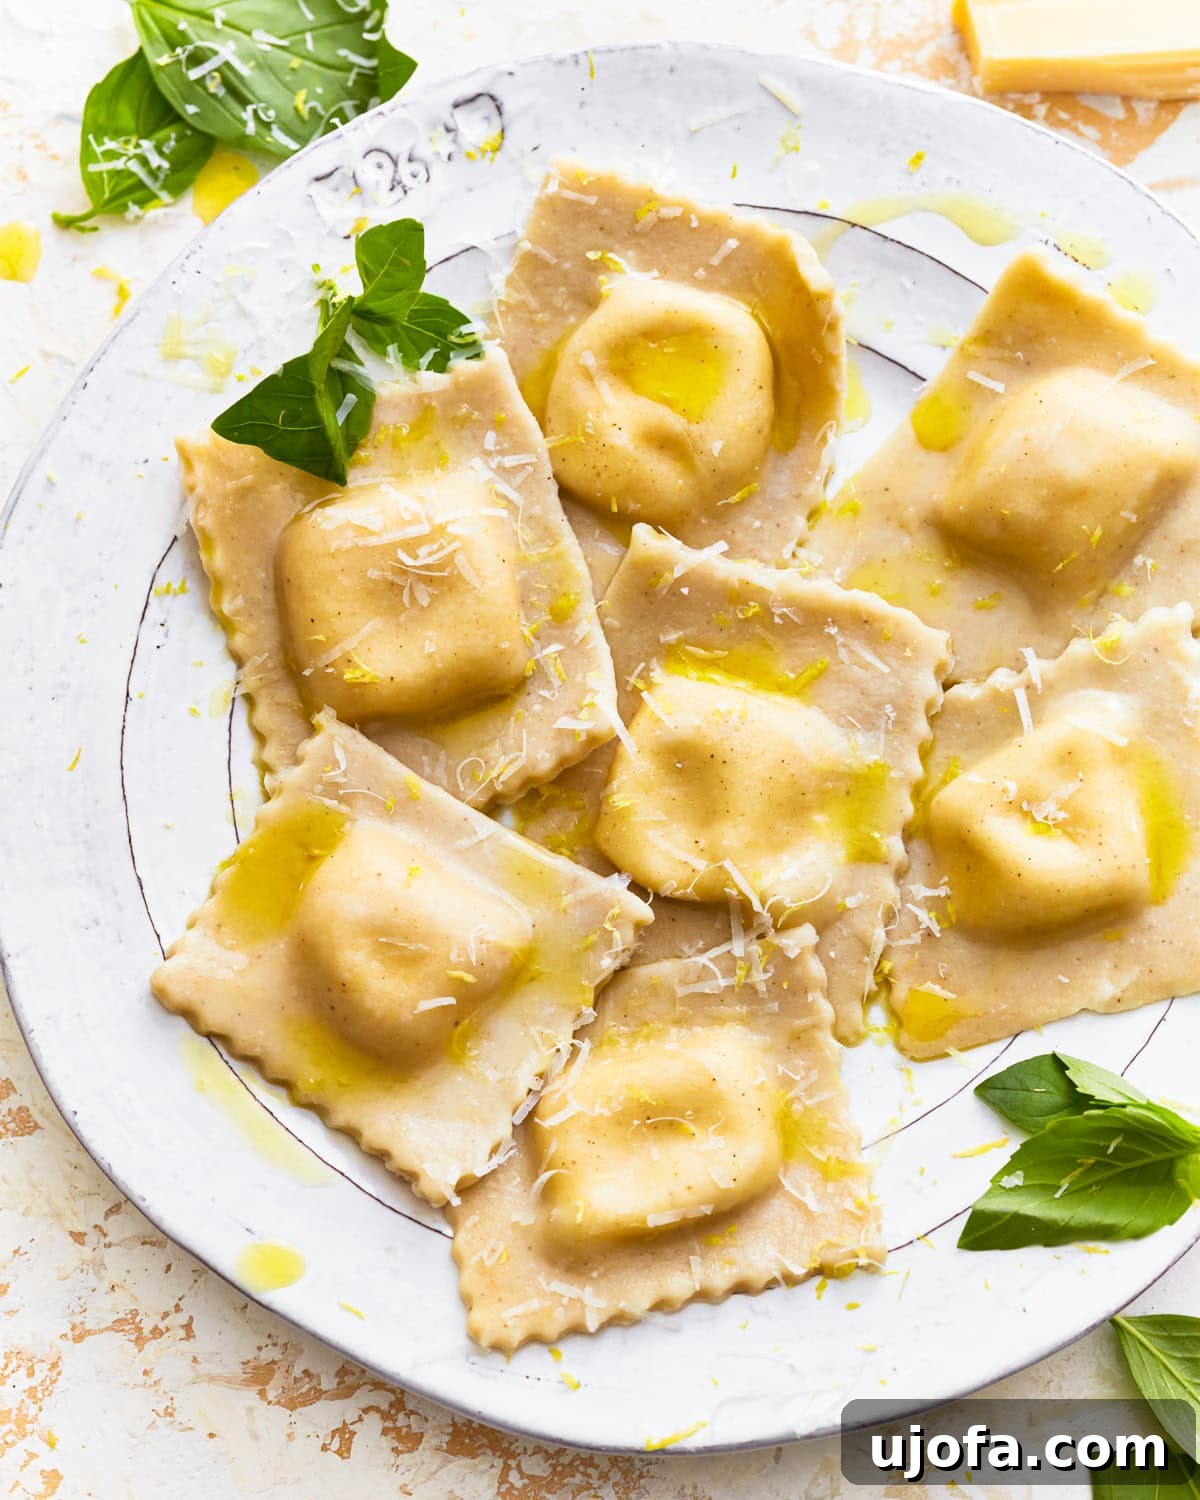
Mastering the Art of Gluten-Free Ravioli at Home
I often find myself declaring this the best gluten-free ravioli I’ve ever tasted, and I say that
as the recipe developer! Many gluten-free pasta varieties can suffer from being gummy or overly chewy,
but this recipe consistently delivers perfectly al dente results. The secret lies in a careful balance
of ingredients and a precise approach, much like the methodology I honed while perfecting my
gluten-free gnocchi. We ensure
everything is measured accurately, with optimal moisture levels, and crucially, incorporating xanthan gum
for that essential elasticity and binding power. This combination reliably works wonders, creating a pasta
that truly rivals its gluten-containing counterparts. Feel free to use your preferred all-purpose gluten-free
flour blend, and let the detailed step-by-step photos below be your visual guide to shaping these delicious
pasta pockets.
Creating homemade pasta can seem daunting, especially when navigating gluten-free flours. However, this
recipe simplifies the process, breaking it down into manageable steps that yield impressive results. The
joy of biting into a fresh, perfectly textured ravioli, knowing it’s entirely gluten-free and made by
your own hands, is truly unparalleled. It’s more than just a meal; it’s an experience of reclaiming
classic Italian comfort food for those with dietary restrictions.
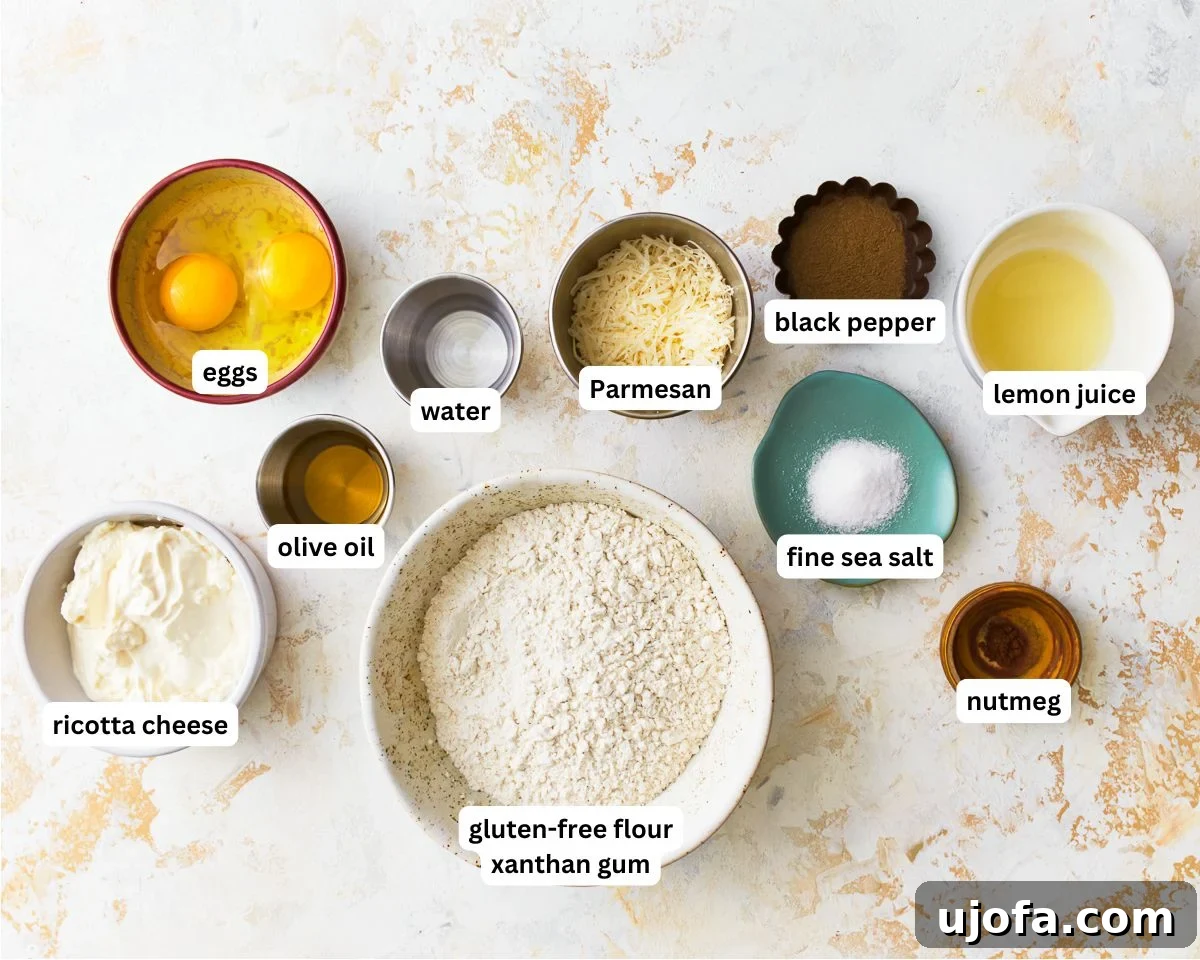
Essential Ingredients for Perfect Gluten-Free Ravioli
The success of any great recipe lies in its ingredients. For our gluten-free ravioli, each component plays
a vital role in achieving that desirable texture and rich flavor. Here’s a detailed look at what you’ll need
and why:
-
All-Purpose Gluten-Free Flour Blend: This forms the base and structure of our ravioli
dough. A good quality all-purpose blend, specifically designed for baking, will provide the best
results without compromising flavor. Look for blends that offer a balance of starches and flours. -
Xanthan Gum: A true MVP in gluten-free baking, xanthan gum is crucial for binding the
dough and imparting elasticity – qualities typically provided by gluten. It prevents the pasta from
crumbling and gives it that wonderful chew. If your chosen gluten-free flour blend already lists xanthan
gum in its ingredients, you can confidently omit it from this recipe to avoid a gummy texture. -
Eggs: Large, room-temperature eggs are essential for adding sufficient moisture and
enrichment to the dough. Using smaller or cold eggs might lead to a dry, crumbly dough that’s difficult
to work with, so ensure they are at room temperature for optimal incorporation. -
Water: Just a touch of water helps to bring all the ingredients together, ensuring the
dough reaches the right consistency – moist but not sticky. It acts as a final binder. -
Olive Oil: A drizzle of good quality olive oil adds a subtle richness to the dough and,
more importantly, makes it smoother and easier to roll out. It also contributes to a tender finished
pasta. -
Ricotta & Parmesan Cheese: These two cheeses form the heart of our classic ravioli
filling. Ricotta provides a creamy, luscious base, while freshly grated Parmesan delivers a sharp,
umami-rich flavor and excellent melt. For the best taste and texture, always opt for freshly grated
Parmesan over pre-shredded varieties, which often contain anti-caking agents. Not keen on this classic
duo? Don’t worry, we’ve got other delicious filling ideas below! -
Lemon Juice: A splash of fresh lemon juice is a game-changer for the filling. It
introduces a bright, tangy note that cuts through the richness of the cheese, elevating the overall flavor
profile and preventing it from tasting flat. -
Seasonings: Salt is added to both the ravioli dough and the filling to enhance all the
other flavors. In the cheese mixture, a pinch of nutmeg adds a warm, earthy depth that beautifully
complements the dairy, while freshly ground black pepper provides a gentle kick.
Expert Tips for Gluten-Free Ravioli Success
Achieving perfect gluten-free ravioli is easier than you might think, especially with a few key techniques
and tips in mind. Follow these suggestions to ensure your homemade pasta turns out beautifully every time:
-
Proper Kneading: Don’t underestimate the power of a good knead, even for gluten-free dough.
Knead the dough for just 2-3 minutes until it becomes smooth, cohesive, and pliable. This step helps to
distribute the xanthan gum and other ingredients evenly, developing the dough’s structure and making it
easier to roll. Over-kneading isn’t an issue here like it can be with gluten doughs, but a smooth consistency
is the goal. -
The Importance of Resting Time: This step is non-negotiable! Allowing the dough to rest
for at least 30 minutes, tightly covered, is crucial. During this time, the gluten-free flours fully
hydrate, and the xanthan gum has a chance to work its magic, resulting in a much more manageable and
less sticky dough. It will be noticeably easier to roll out thinly without tearing. Use this resting
period wisely by preparing your delicious filling or any sauces you plan to serve with the ravioli. -
Tools of the Trade: You don’t need fancy equipment to make fantastic ravioli. I always
start by bringing the eggs and flour together with a fork, then switch to my hands for the kneading process.
This hands-on approach allows you to feel the dough’s consistency and make minor adjustments. While a food
processor or pasta machine can certainly speed up the process, they are not essential. If you do use them,
be mindful not to overmix the dough. -
Working in Batches: When it comes to stuffing and shaping ravioli, efficiency is key.
I highly recommend dividing your dough into manageable portions and working with one portion at a time.
Keep the remaining dough tightly covered with a clean kitchen towel or plastic wrap. This prevents the dough
from drying out, which can make it brittle and difficult to seal, leading to cracked ravioli. -
Generous Borders for Sealing: To prevent your delicious filling from leaking out during
cooking, ensure you leave at least a 1/2-inch border around your filling when shaping the ravioli. This
provides ample space to firmly seal the edges. I find that placing the filling about 2 inches apart on the
rolled-out dough allows for enough room to work comfortably and create well-sealed ravioli. Pressing firmly
with your fingers or a fork will create a secure crimp. -
Prepare Ahead for Convenience: Life gets busy, but delicious homemade meals don’t have
to be a distant dream. Both the dough and the filling can be prepared up to 2 days in advance and stored
separately in the refrigerator. Just remember to cover them tightly. However, it’s best to assemble the
ravioli just before cooking. Assembling them too far in advance can cause the pasta to absorb moisture
from the filling, making it soggy or prone to bursting.
Unleash Your Creativity: Alternative Ravioli Fillings
While our classic ricotta and Parmesan filling is a fan favorite, the beauty of homemade ravioli lies in its
versatility! You can absolutely experiment with different fillings to suit your taste preferences or whatever
seasonal ingredients you have on hand. The key is to ensure your chosen filling isn’t too wet or overly chunky,
as this can make sealing difficult or cause the ravioli to burst. Keep the overall amount of filling per ravioli
similar to what’s recommended in this recipe to maintain structural integrity.
Here are some delightful alternative filling ideas to inspire your culinary adventures:
-
A Medley of Cheeses: Get creative with a blend of your favorite cheeses! Think creamy
mozzarella for stretch, pungent Gorgonzola for a bold flavor, or mild provolone for a balanced profile.
You could also add some aged cheddar or goat cheese for a different twist. -
Butternut Squash and Sage: A truly autumnal delight. Roast or steam butternut squash until
tender, then mash it with a touch of butter, brown sugar or maple syrup, and plenty of fresh sage. A pinch
of nutmeg here is also divine! This sweet and savory combination is incredibly comforting. -
Roasted Red Pepper and Feta Cheese: For a vibrant and tangy filling, roast red bell peppers
until charred and tender, then peel and finely chop them. Mix with crumbled feta cheese and a hint of fresh
parsley or oregano. The brininess of the feta perfectly complements the sweetness of the peppers. -
Spinach and Ricotta Cheese: A timeless classic for a reason. Sauté fresh spinach until
wilted, squeeze out all excess moisture (this is crucial!), and then chop finely. Mix it with ricotta cheese,
a touch of Parmesan, and a grating of fresh garlic for an earthy and savory filling.
Remember to always taste your filling before stuffing the ravioli and adjust seasonings as needed. The possibilities
are endless, so don’t be afraid to experiment and find your new favorite gluten-free ravioli creation!
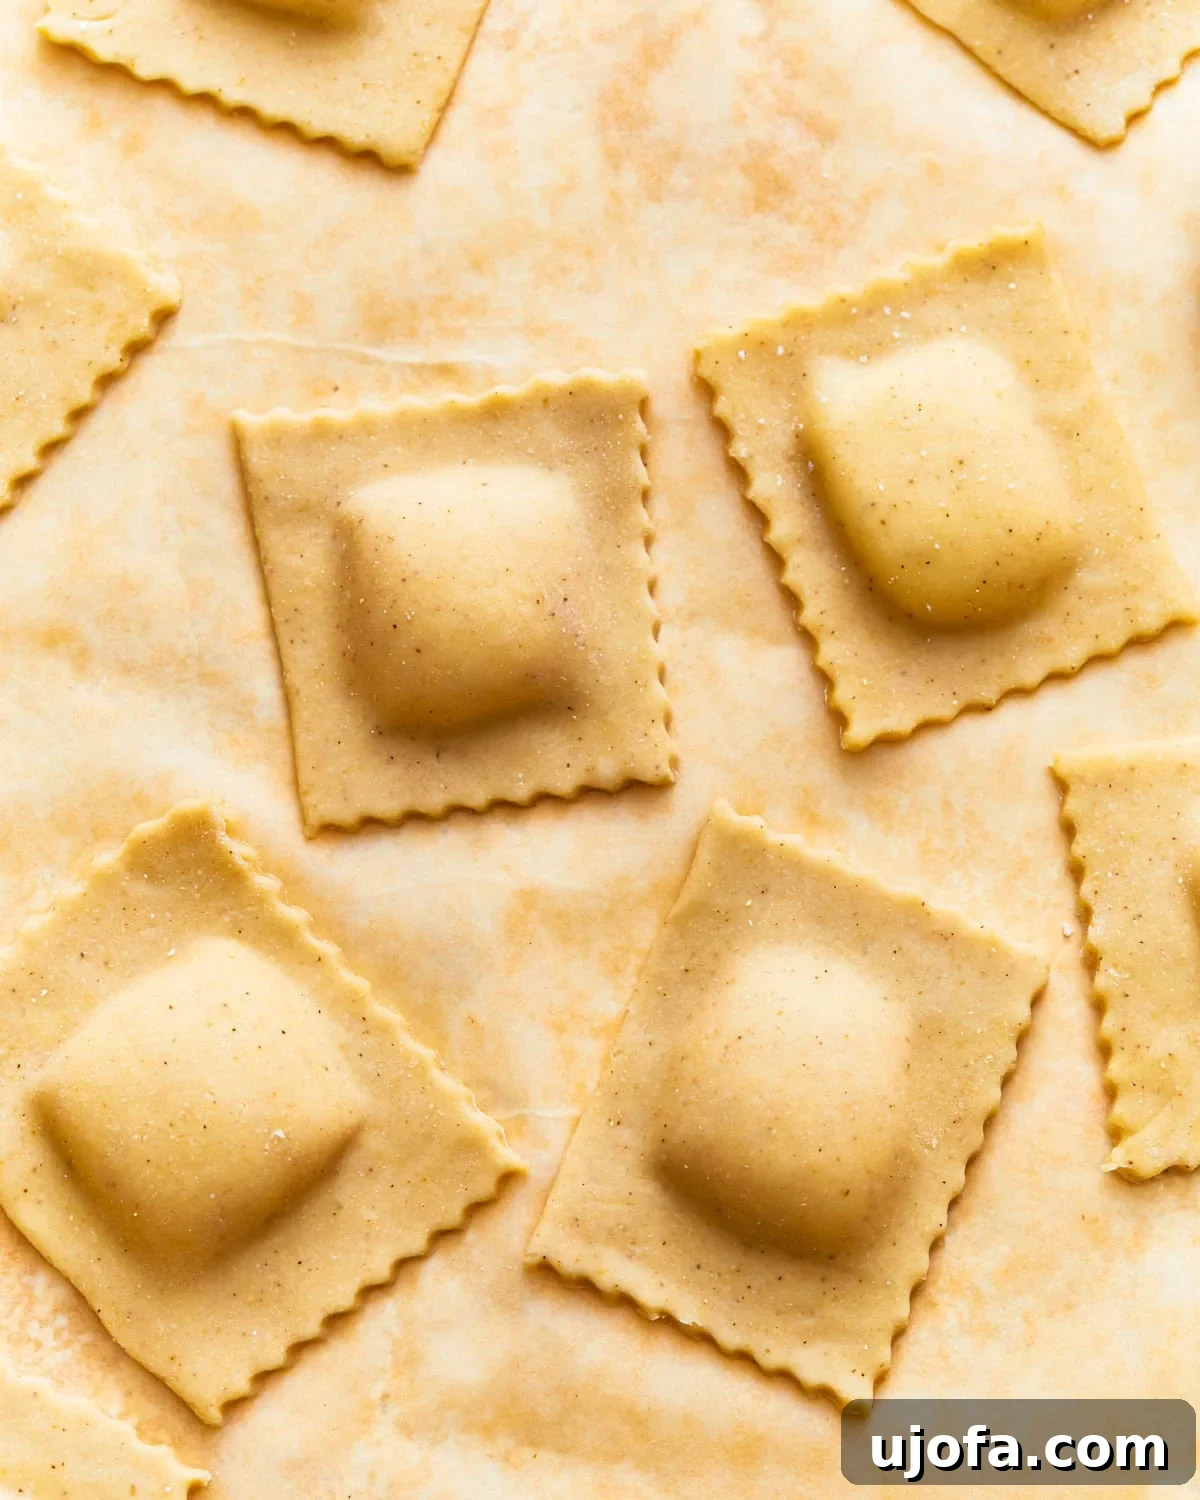
Preventing Ravioli from Bursting: A Troubleshooting Guide
One of the most common frustrations when cooking ravioli, whether shop-bought or homemade, gluten-free or
traditional, is having them burst open in the pot. This results in lost filling and a messy cooking
experience. Fortunately, with a few key precautions, you can significantly reduce the risk of this happening:
-
Proper Sealing is Paramount: The most frequent cause of bursting is inadequate sealing.
After placing the filling, ensure you press firmly and thoroughly around the edges of each ravioli to
create a strong seal. You can use your fingertips, the tines of a fork, or a ravioli cutter that crimps
the edges. The goal is to create a tight bond between the two layers of pasta dough, preventing any weak
spots. -
Eliminate Air Pockets: As you fold the dough over the filling and press to seal, be
mindful of any trapped air pockets. Air trapped inside the ravioli will expand when heated, putting
pressure on the seams and potentially causing them to burst. Gently press out any visible air bubbles
as you seal. -
Manage Filling Quantity: While it’s tempting to overfill for a richer bite, too much
filling can put undue stress on the dough and make it harder to seal effectively. Stick to the recommended
amount of filling per ravioli. -
Gentle Simmering, Not a Rolling Boil: This is a critical step for delicate pasta. Once
your salted water comes to a rolling boil, reduce the heat significantly to a gentle simmer before
introducing the ravioli. A vigorous boil will toss the ravioli around aggressively, causing them to bump
into each other and the sides of the pot, which can easily tear the delicate pasta and force the filling
out. A gentle simmer allows them to cook evenly and tenderly without undue agitation. -
Avoid Overcrowding the Pot: Cook your ravioli in batches if necessary. Overcrowding the
pot reduces the water temperature, leading to uneven cooking, and increases the chances of ravioli sticking
together or tearing as they jostle for space. Give them room to swim freely.
By paying close attention to sealing, air pockets, and the cooking environment, you can enjoy perfectly intact,
delicious gluten-free ravioli every time.
Delightful Serving Suggestions for Your Homemade Ravioli
Once your exquisite gluten-free ravioli are cooked to perfection, the possibilities for serving are boundless!
While they are truly delicious on their own, pairing them with the right sauce and garnishes can elevate
your meal to an unforgettable experience. Here are some of my favorite ways to enjoy these homemade treasures:
-
Classic & Simple: My personal favorite way to savor these ravioli is with a generous
drizzle of high-quality extra virgin olive oil, a sprinkle of fresh basil leaves (torn or chiffonaded),
and a heap of freshly shredded Parmesan cheese. This minimalist approach allows the delicate flavors of
the homemade pasta and creamy cheese filling to truly shine. -
Rich Tomato Harmony: For a more robust flavor profile, top your ravioli with our hearty
gluten-free spaghetti sauce.
The rich, tangy tomato base provides a beautiful contrast to the creamy filling. -
Creamy Indulgence: If you’re in the mood for something decadent, our velvety
dairy-free Alfredo sauce
is an excellent choice. Its smooth, rich texture coats each ravioli, creating a luxurious dish that’s
surprisingly dairy-free. -
Hearty Family Meal: For a complete and satisfying family dinner, my family absolutely
loves these ravioli served alongside tender
gluten-free turkey meatballs
and crusty gluten-free garlic bread.
This combination creates a true Italian-inspired feast that everyone can enjoy. -
Pesto Perfection: A vibrant fresh pesto (store-bought or homemade) can also be a fantastic
topping. The herbaceous notes and nutty richness of pesto complement the cheese filling beautifully. -
Brown Butter & Sage: For a sophisticated touch, gently melt butter until it browns and
develops a nutty aroma, then toss in fresh sage leaves until crispy. Drizzle this over the cooked ravioli
for an elegant and flavorful sauce.
Don’t forget a final grind of black pepper, a little more Parmesan, and perhaps some red pepper flakes for
those who enjoy a bit of heat. Enjoy customizing your gluten-free ravioli experience!
Storing and Freezing Your Gluten-Free Ravioli
Proper storage is key to enjoying your homemade gluten-free ravioli, whether you’re planning to cook them
immediately or save them for a future meal. Here’s how to ensure they remain fresh and delicious:
-
Preparing Ahead (Unassembled): While it might be tempting to assemble the ravioli
days in advance, I strongly advise against it. The moisture from the filling can cause the delicate
gluten-free pasta to become too soft and potentially break during cooking. Instead, you can prepare
the dough and the filling separately up to 2 days ahead of time. Store the dough tightly wrapped in
plastic wrap in the refrigerator, and the filling in an airtight container. When you’re ready to cook,
simply roll out the dough, fill, and proceed with the cooking instructions. -
Freezing Uncooked Ravioli: This is a fantastic option for meal prepping and enjoying
homemade ravioli on demand. To freeze uncooked gluten-free ravioli successfully:-
Arrange on a Baking Sheet: Lay the freshly formed, uncooked ravioli in a single
layer on a parchment-lined baking sheet. Ensure they are not touching each other to prevent them
from freezing together. -
Freeze Until Solid: Place the baking sheet in the freezer and freeze the ravioli
until they are completely solid, which usually takes 1-2 hours. -
Transfer to Storage: Once frozen solid, transfer the ravioli to an airtight
freezer-safe container or a heavy-duty freezer bag. Label with the date. They will keep well
for up to 3 months. -
Cooking from Frozen: There’s no need to thaw frozen ravioli before cooking!
Simply drop them directly into gently simmering salted water. You’ll need to add an extra
minute or two to the cooking time compared to fresh ravioli to ensure they are heated through
and tender.
-
Arrange on a Baking Sheet: Lay the freshly formed, uncooked ravioli in a single
-
Refrigerating Cooked Ravioli: Cooked ravioli can be stored in an airtight container
in the refrigerator for up to 3 days. Reheat gently in a pan with your desired sauce or a little butter.
By following these storage guidelines, you can always have delicious, homemade gluten-free ravioli ready to
enjoy whenever a craving strikes! As always, “Mama says, ‘Check all of your labels'” to ensure all ingredients
remain gluten-free.
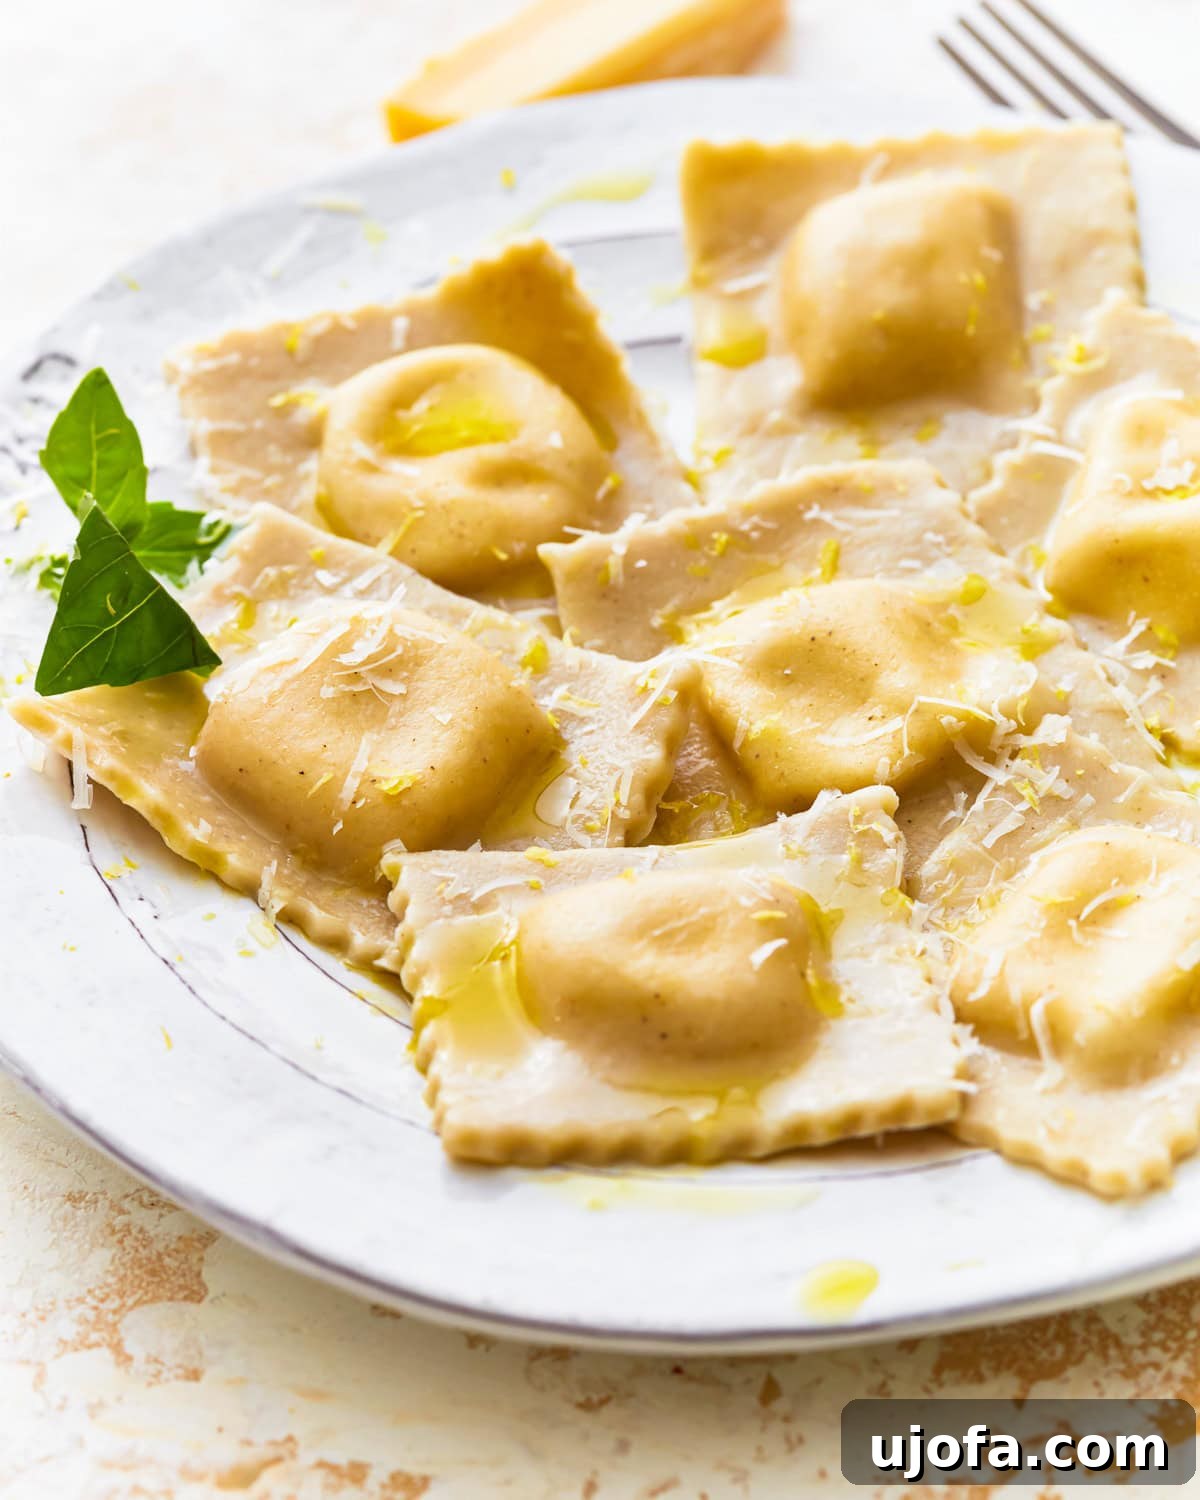
Explore More Gluten-Free Pasta Recipes!
If you’ve enjoyed making these homemade gluten-free ravioli, you’ll be thrilled to discover a world of
other delicious gluten-free pasta creations. From classic shapes to comforting casseroles, there’s
always something new to try. Expand your gluten-free repertoire with these fantastic recipes:
- Almond Flour Pasta
- Gluten-Free Gnocchi in Tomato Sauce
- Gluten-Free Tuna Casserole
- Gluten-Free Pasta Salad
- Gluten-Free Egg Noodles
Gluten-Free Ravioli
By: Sabine Venier
Servings: 4 servings
Prep: 1 hr | Cook: 4 mins | Total: 1 hr 4 mins
This recipe for gluten-free ravioli is made with easy techniques and requires no special equipment.
It’s comforting, cheesy, and gluten-free!
Ingredients
Dough Ingredients
- 1 ½ cups all-purpose gluten-free flour
- 1 teaspoon xanthan gum (omit if your blend already contains it)
- ½ teaspoon fine sea salt
- 2 large eggs
- 2 tablespoons water
- 2 tablespoons olive oil
Filling Ingredients
- 1 cup ricotta cheese
- ½ cup freshly grated Parmesan cheese
- 1 tablespoon fresh lemon juice
- ¼ teaspoon black pepper
- pinch of nutmeg
- pinch of salt
Instructions
- In a large bowl, whisk together the gluten-free flour, xanthan gum (if using), and salt. Create a well in the center and add the eggs, water, and olive oil.
- Using a fork, gradually incorporate the dry ingredients into the wet ingredients until a shaggy dough forms.
- Turn the dough onto a lightly floured surface and knead for 2-3 minutes until smooth and pliable.
- Cover with plastic wrap tightly and let rest for 30 minutes.
- In a bowl, combine the ricotta cheese, Parmesan cheese, lemon juice, black pepper, nutmeg, and salt. Mix well and set aside.
- Divide the dough into 6 equal portions. Work with one portion at a time (cover the others to prevent drying). On a lightly floured surface, roll out the dough into a thin rectangle, about 10×4-inches (25 x 10cm), and about 1/8-inch thick (32mm).
- Place heaping tablespoonfuls of the filling about 2 inches apart on one half of the dough sheet.
- Fold the other half of the dough over the filling and press gently around each filling to seal the ravioli.
- Use a ravioli cutter or a knife to cut out individual ravioli squares or rounds.
- Place the formed ravioli on a lightly floured surface while you work with the remaining dough and filling.
- To cook the ravioli, bring a large pot of salted water to a boil. Then turn the heat down to low and gently drop the ravioli into the water and cook for 3-4 minutes, or until they float to the surface and are tender.
- Remove the cooked ravioli with a slotted spoon and serve immediately with your desired sauce or toppings.
Notes
- Make sure to press the edges closed and turn the heat to a gentle simmer before adding the ravioli to avoid them bursting open.
- To Store: You can store the dough and filling separately for up to 2 days before assembling and cooking.
- To Freeze: Lay the uncooked ravioli in a single layer on a baking sheet, freeze until solid, and store in a freezer-safe bag/container. Cook from frozen and add a few minutes to the cooking time.
- Mama says, “Check all of your labels.”
Nutrition
Serving: 1 serving | Calories: 408kcal | Carbohydrates: 37g | Protein: 18g | Fat: 22g | Saturated Fat: 9g | Polyunsaturated Fat: 2g | Monounsaturated Fat: 9g | Trans Fat: 0.01g | Cholesterol: 124mg | Sodium: 651mg | Potassium: 127mg | Fiber: 5g | Sugar: 2g | Vitamin A: 504IU | Vitamin C: 1mg | Calcium: 282mg | Iron: 2mg
Nutrition information is automatically calculated, so should only be used as an approximation.
Additional Info
Course: Dinner
Cuisine: Italian
Step-by-Step Visual Guide to Gluten-Free Ravioli
Visual learners, rejoice! Below, you’ll find a detailed step-by-step guide with accompanying images, ensuring
you can confidently follow along and create perfect gluten-free ravioli from scratch. Each image illustrates
a crucial stage in the process, from mixing the dough to shaping your delicious pasta parcels.
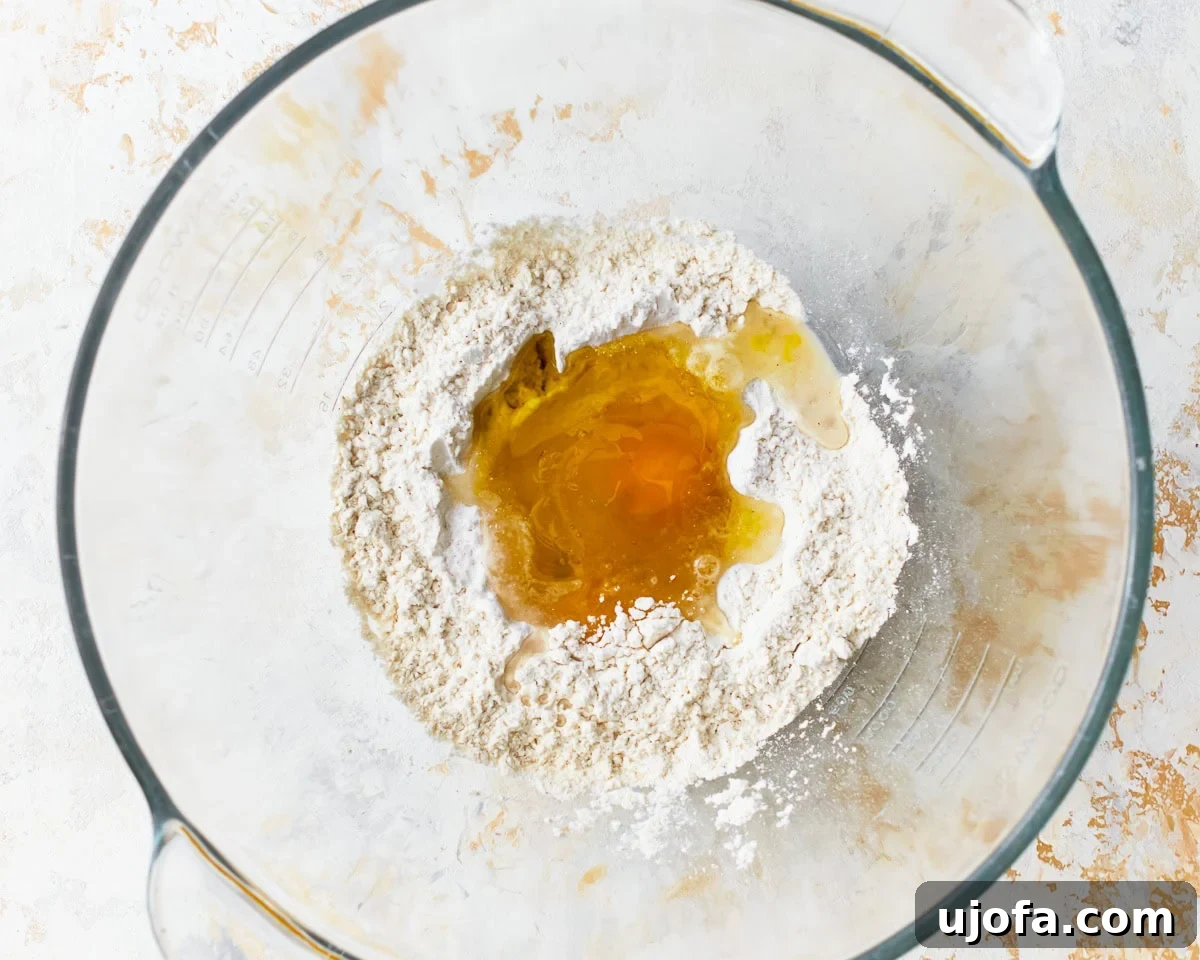
Step 1: Combine Dry and Wet Ingredients. In a spacious mixing bowl, thoroughly whisk together
1 ½ cups of your chosen all-purpose gluten-free flour blend, 1 teaspoon of xanthan gum (remember to omit
if your flour blend already contains it), and ½ teaspoon of fine sea salt. Form a slight indentation, or
“well,” in the center of the dry mixture. Into this well, carefully add 2 large, room-temperature eggs,
2 tablespoons of water, and 2 tablespoons of olive oil.
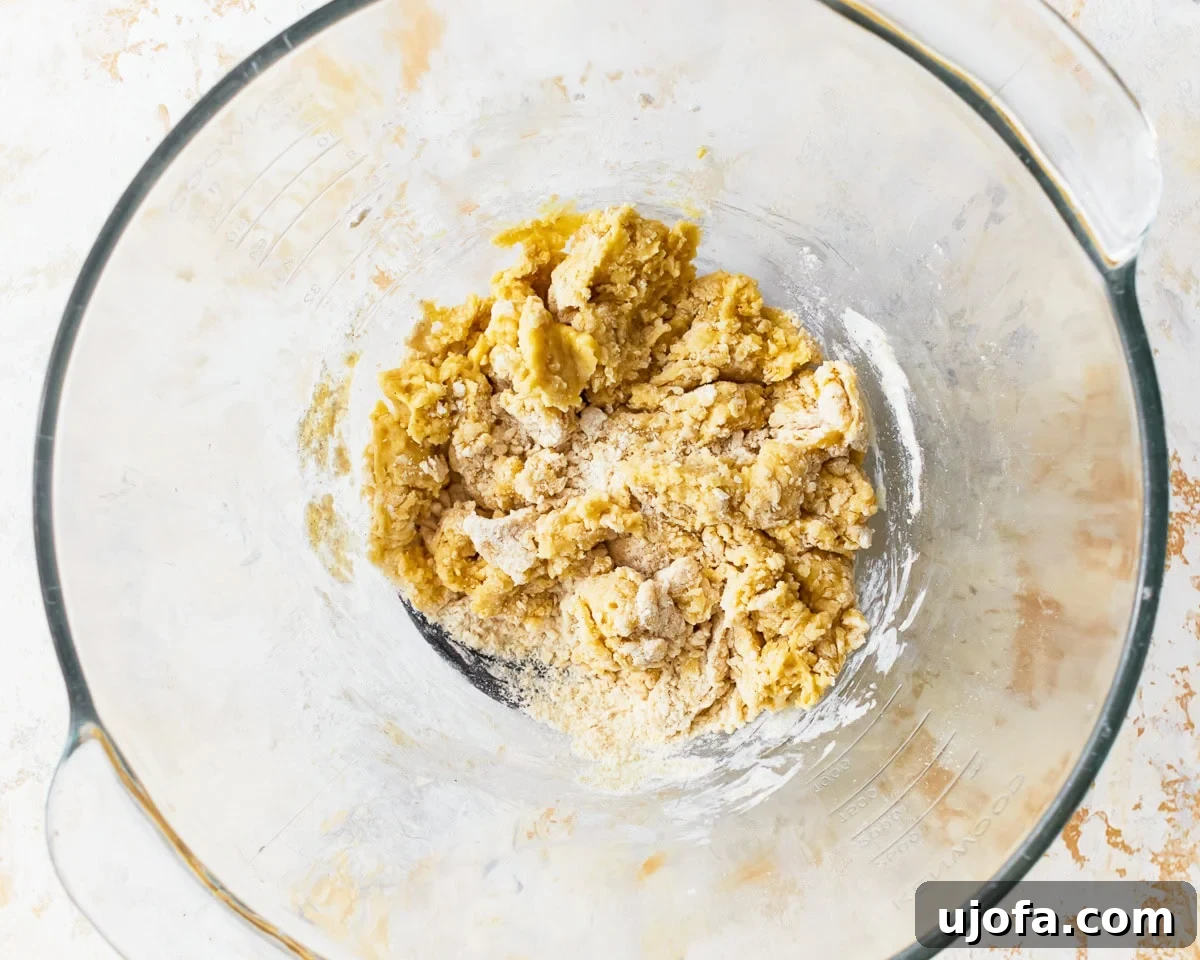
Step 2: Form a Shaggy Dough. Using a fork, begin to gradually incorporate the dry ingredients
from the sides of the bowl into the wet ingredients in the center. Continue mixing until a rough, shaggy dough
starts to form. It won’t be perfectly smooth at this stage, but it should just come together.
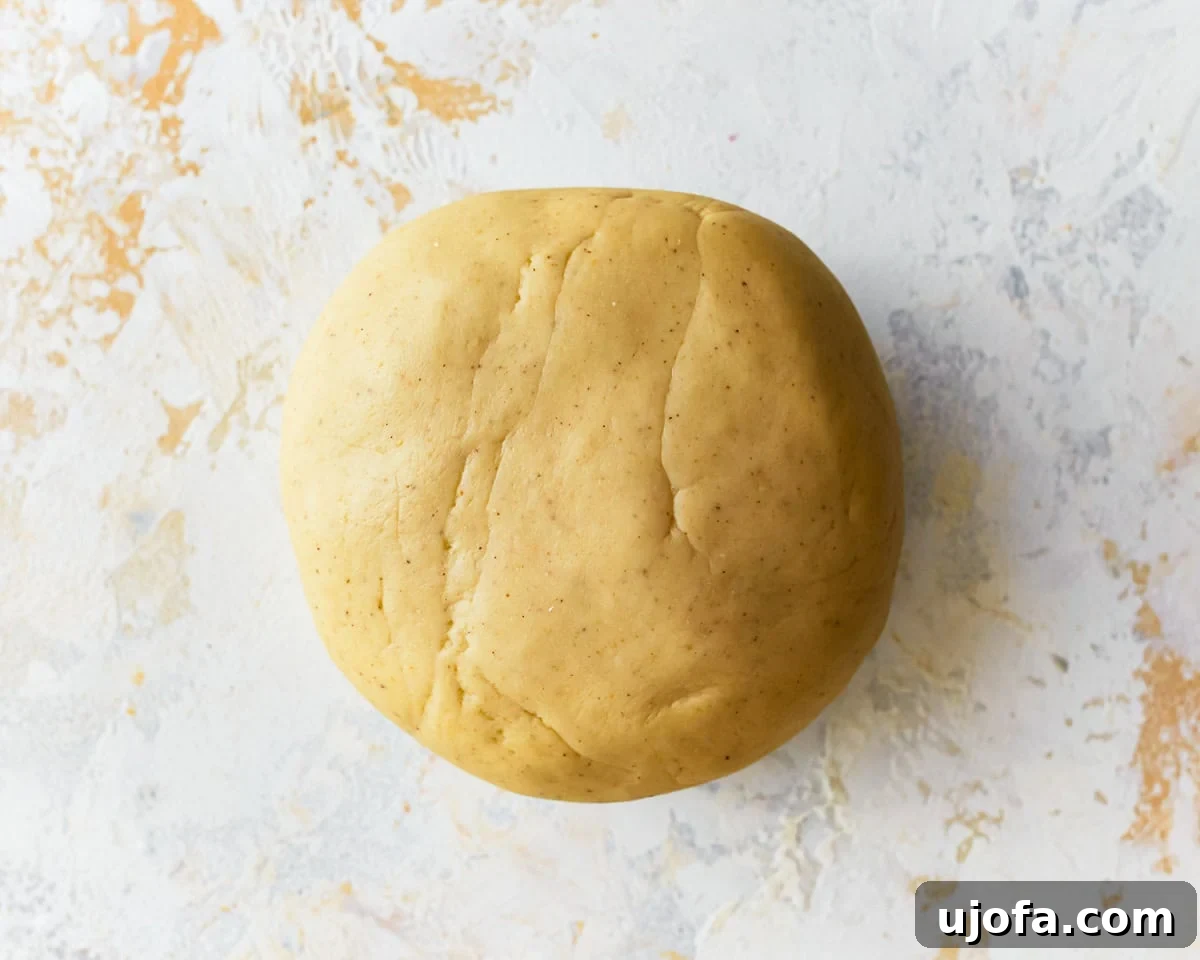
Step 3: Knead Until Smooth. Transfer the shaggy dough onto a lightly floured surface. Use
your hands to knead the dough for approximately 2-3 minutes. During this process, the dough will transform,
becoming noticeably smoother, more cohesive, and pliable. This brief kneading helps develop its structure.
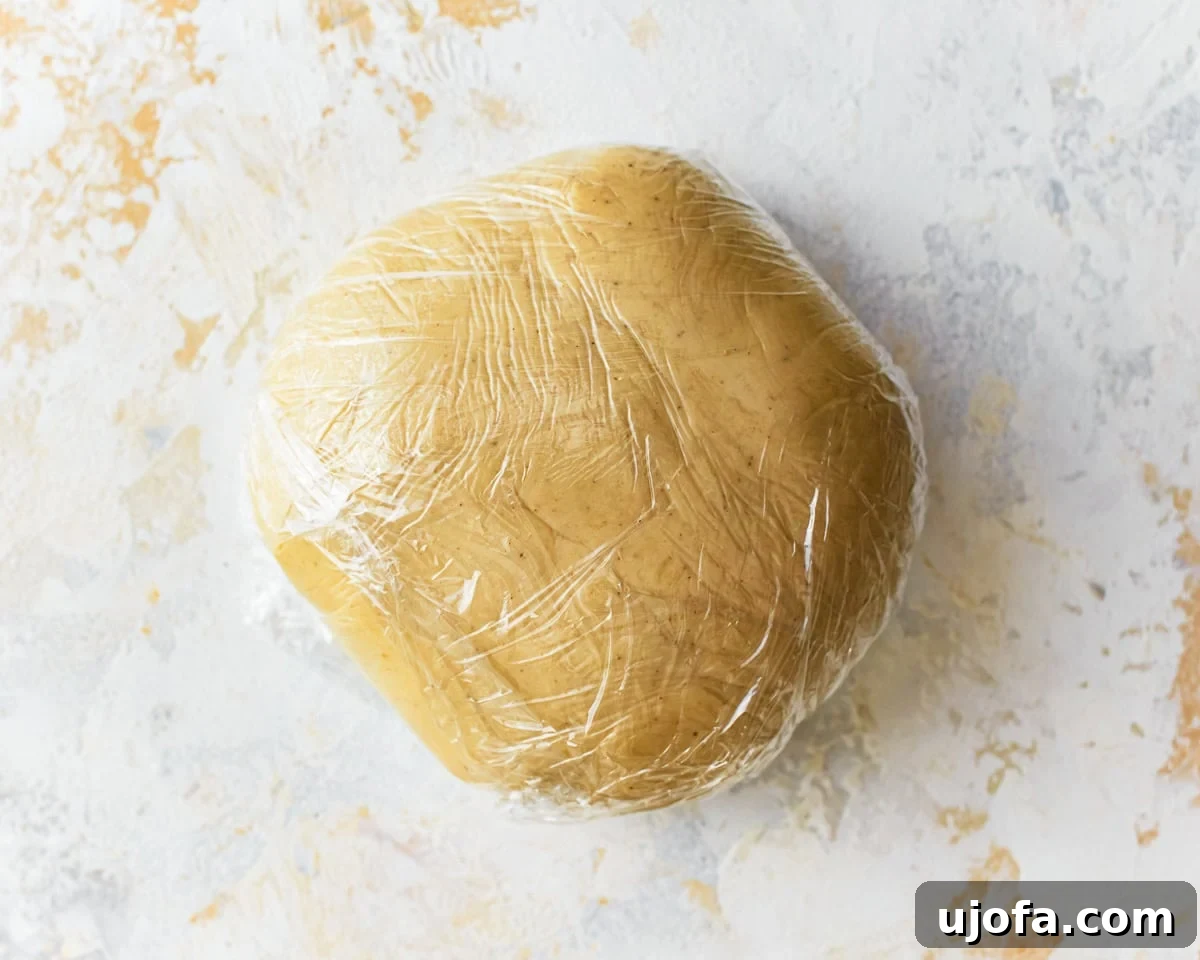
Step 4: Rest the Dough. Crucial for elasticity and workability, cover the dough ball tightly
with plastic wrap and let it rest at room temperature for a minimum of 30 minutes. This resting period allows
the flours to hydrate fully and the xanthan gum to bind effectively, making the dough much easier to roll out.
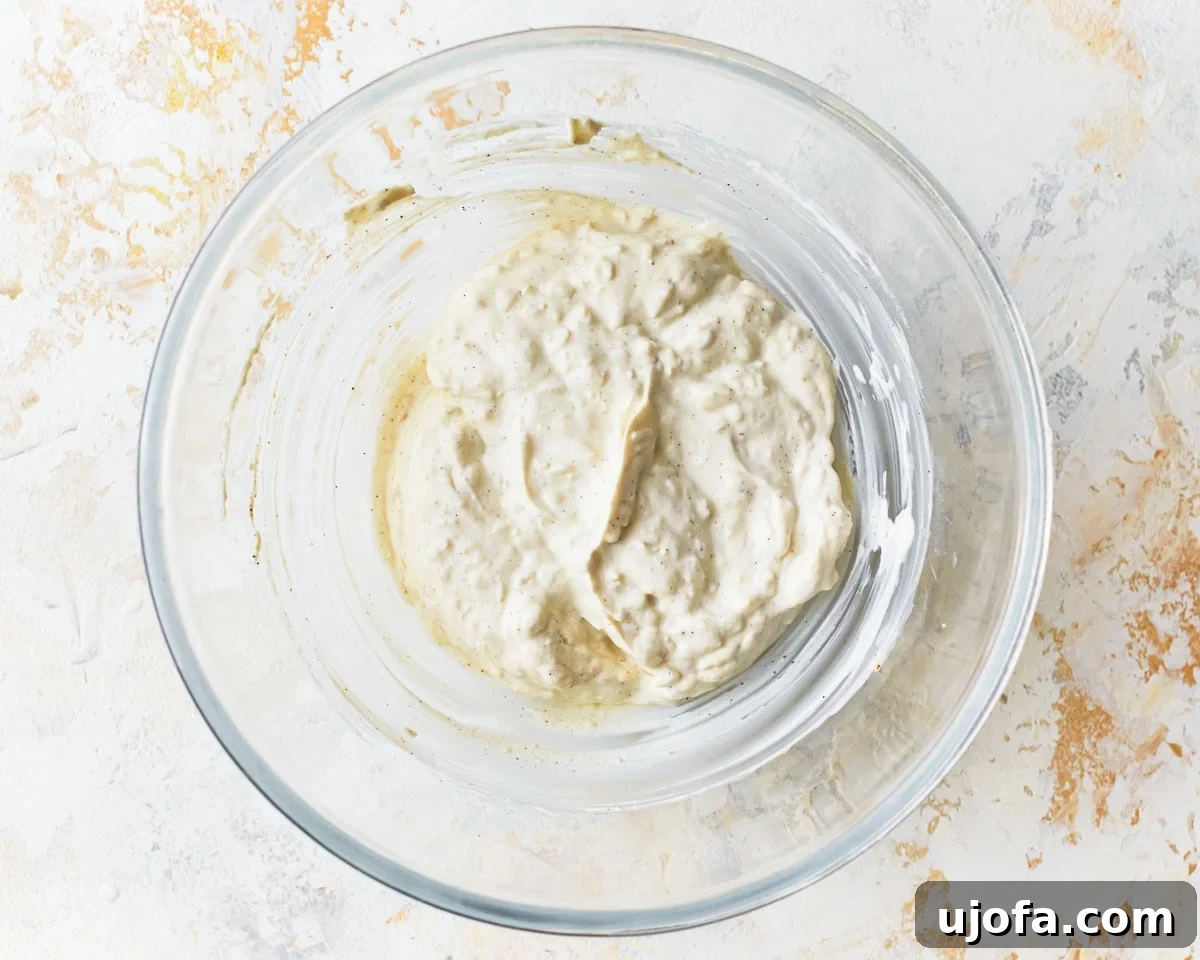
Step 5: Prepare the Filling. While the dough rests, prepare your creamy filling. In a separate
bowl, combine 1 cup of ricotta cheese, ½ cup of freshly grated Parmesan cheese, 1 tablespoon of fresh lemon juice,
¼ teaspoon of black pepper, a pinch of nutmeg, and a pinch of salt. Mix all these ingredients thoroughly until
well combined and smooth. Set the delicious filling aside.
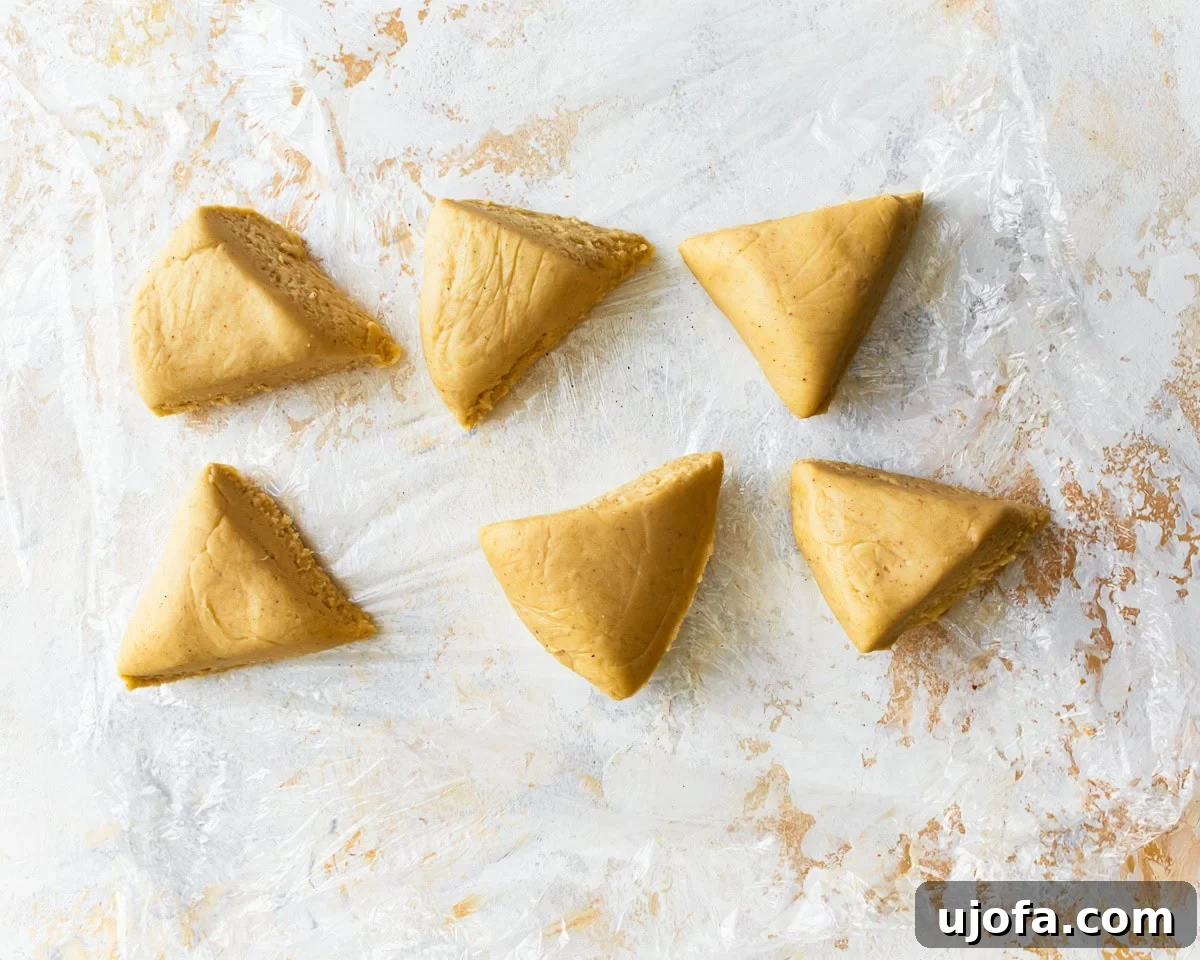
Step 6: Portion the Dough. After resting, unwrap the dough and divide it into 6 equal portions.
This makes the dough more manageable for rolling. Keep the portions you’re not immediately working with covered
with plastic wrap or a clean kitchen towel to prevent them from drying out.
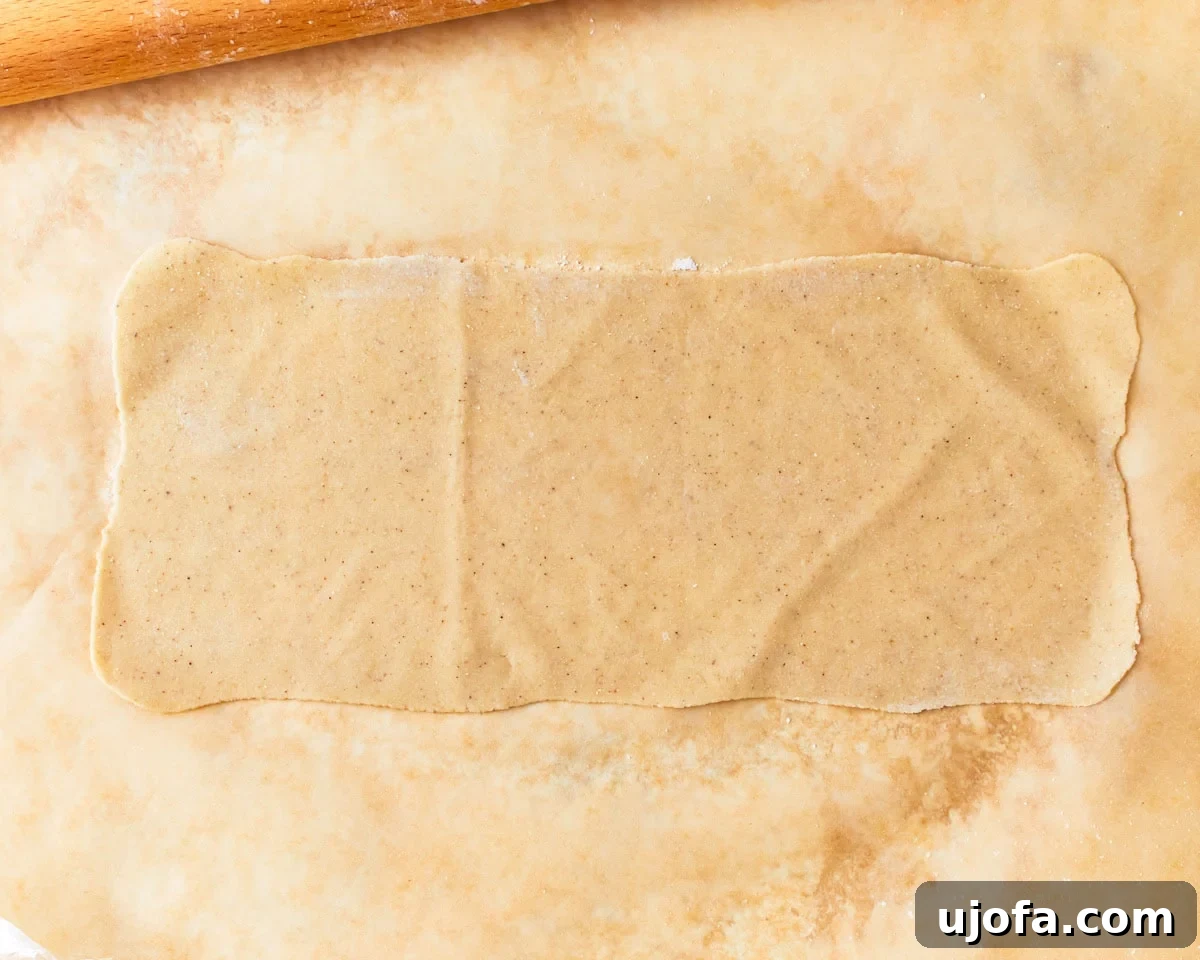
Step 7: Roll Out the Dough. Take one portion of dough. On a lightly floured surface, use a
rolling pin to roll out the dough into a thin rectangle, aiming for dimensions of approximately 10×4 inches
(25 x 10 cm) and a thickness of about 1/8-inch (32mm). The thinner the dough, the more delicate your ravioli
will be.
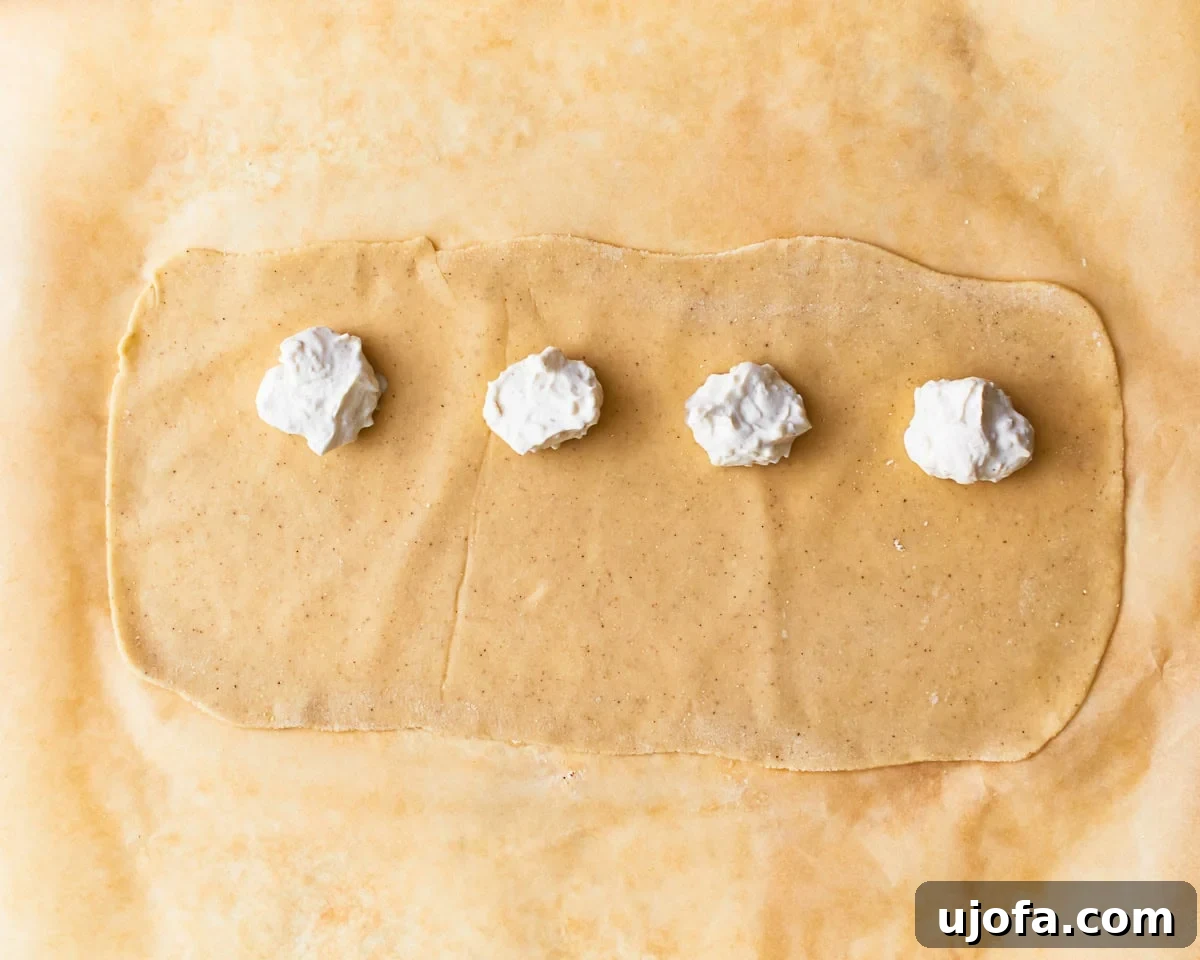
Step 8: Place the Filling. On one half of your rolled-out dough sheet, place heaping
tablespoonfuls of the cheese filling. Ensure you space them about 2 inches apart from each other and leave
a generous 1/2-inch border around the edges. This spacing is crucial for proper sealing.
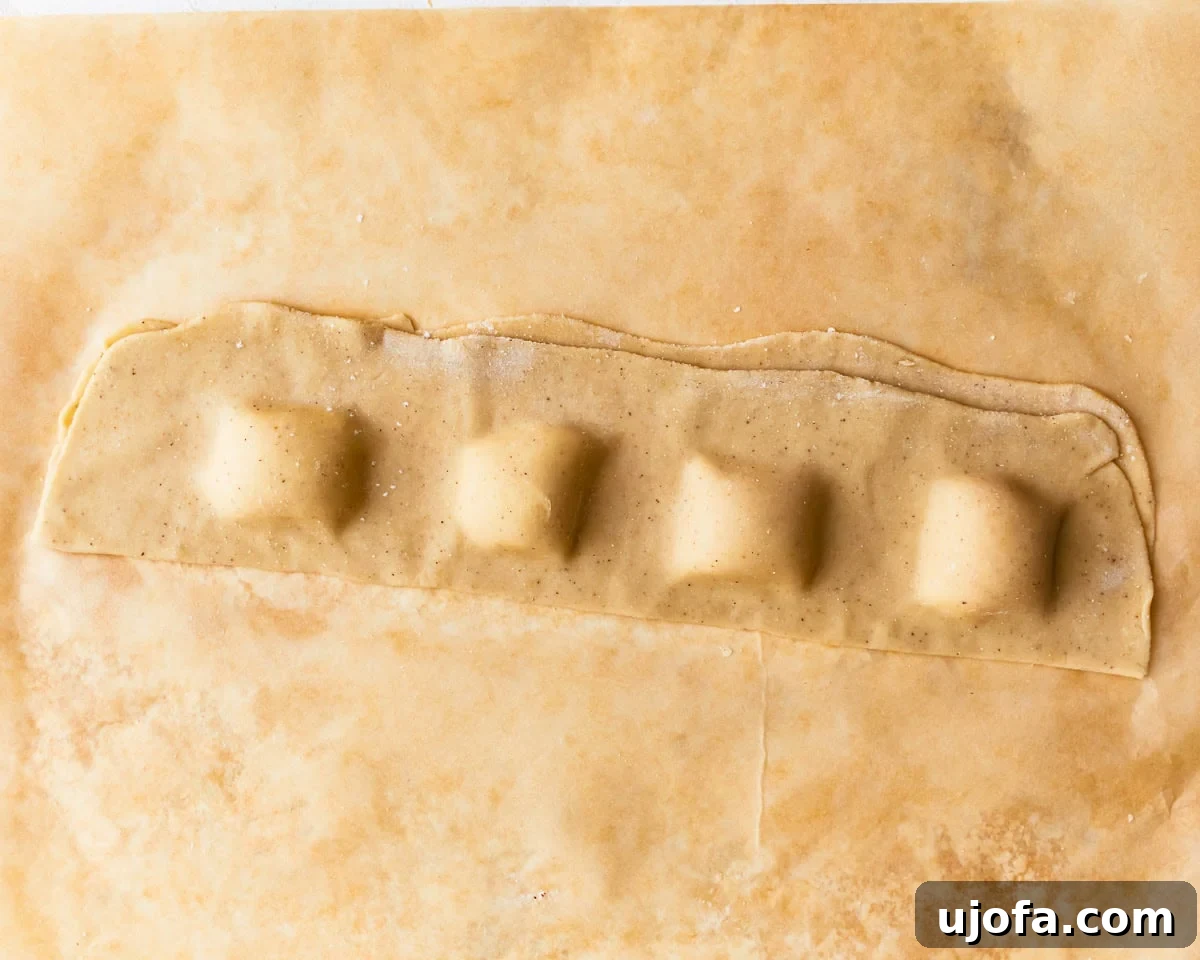
Step 9: Fold and Seal. Carefully fold the other half of the dough over the placed filling.
Gently press down around each mound of filling, working your way around the edges to seal the ravioli.
Ensure there are no trapped air pockets.
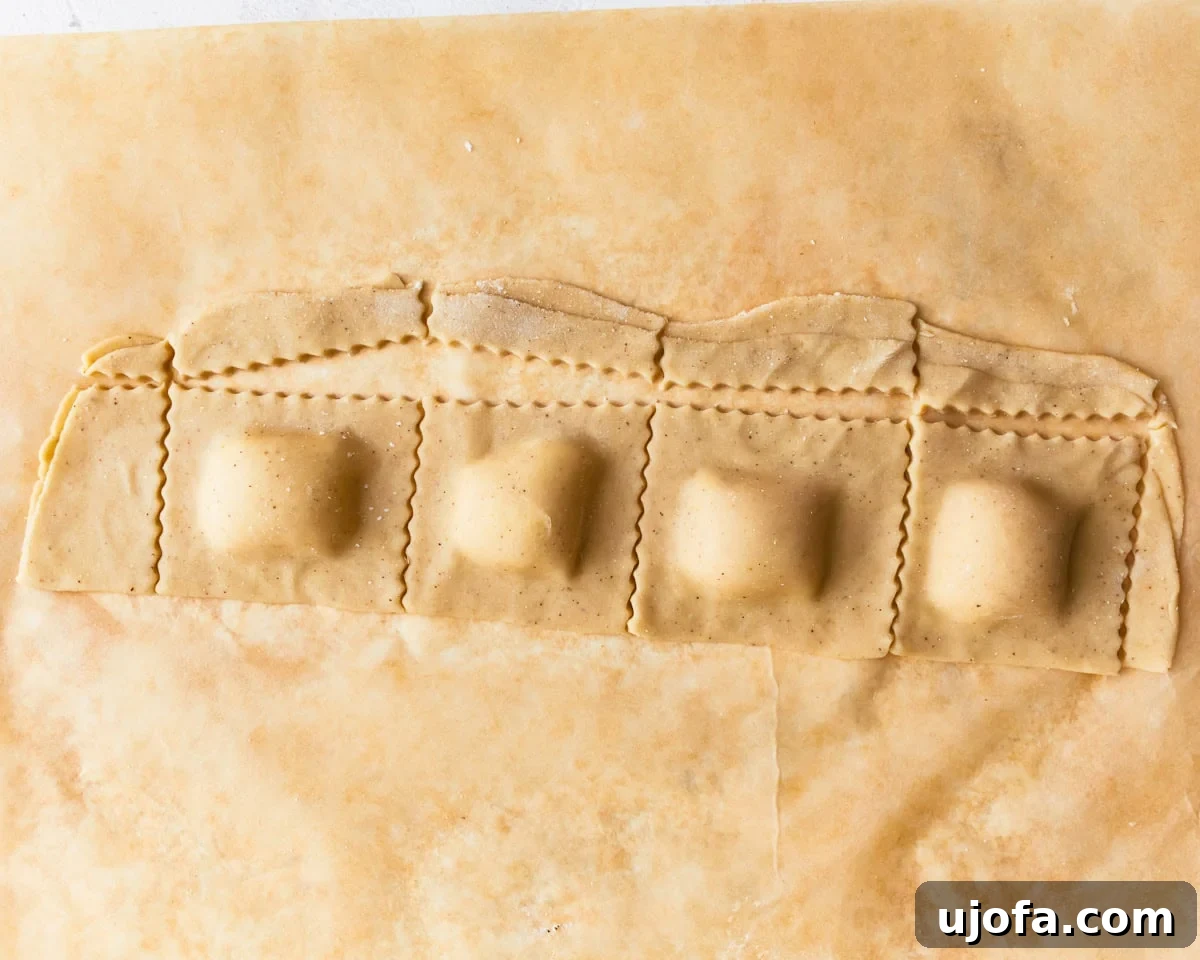
Step 10: Cut the Ravioli. Using a ravioli cutter or a sharp knife, cut out individual
ravioli squares or rounds. You can use a fork to crimp the edges further for a decorative touch and extra
security against bursting.
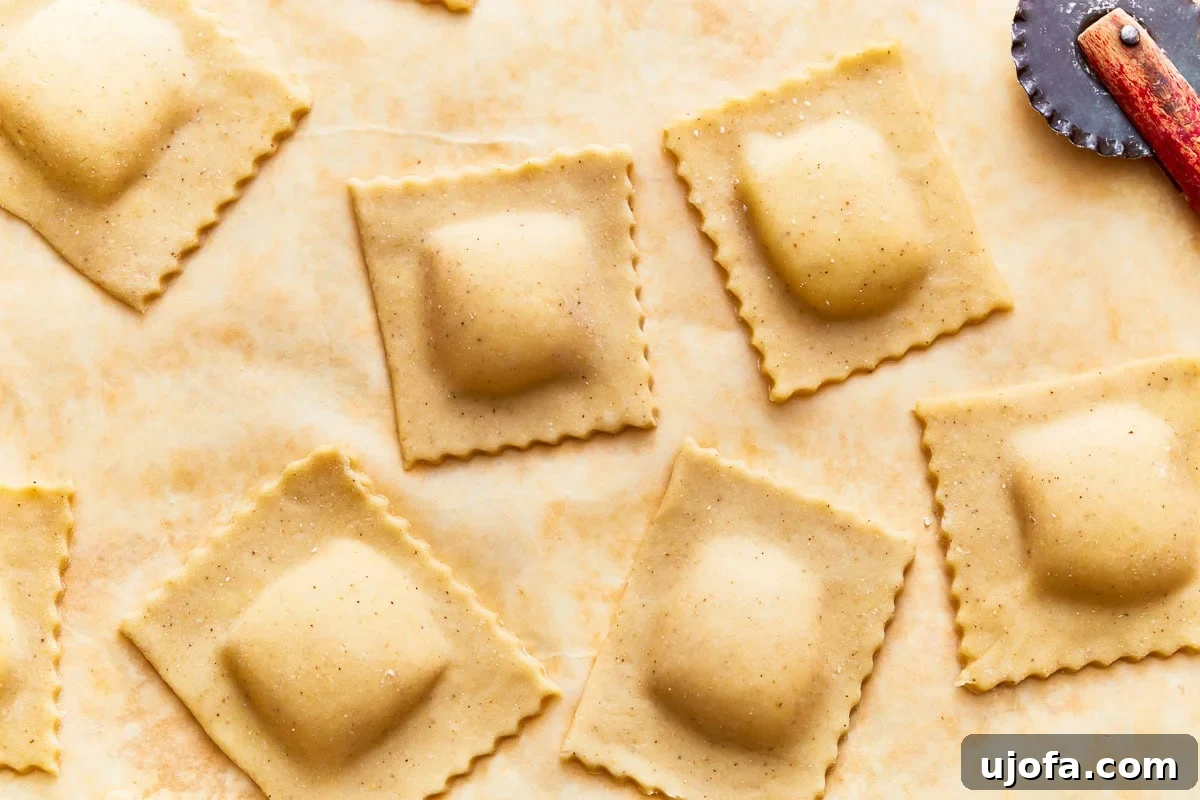
Step 11: Prepare for Cooking. As you form each batch of ravioli, place them on a lightly
floured surface or a parchment-lined baking sheet to prevent sticking. Continue working with the remaining
dough and filling until all your ravioli are shaped.
Step 12: Cook and Serve. To cook your fresh ravioli, bring a large pot of generously
salted water to a rolling boil. Crucially, reduce the heat to a low simmer before gently dropping the
ravioli into the water. Cook for 3-4 minutes, or until they float to the surface and are tender yet al dente.
Using a slotted spoon, carefully remove the cooked ravioli and serve immediately with your favorite
sauce or desired toppings. Enjoy the fruits of your labor!
If you loved this recipe, we’d be thrilled to hear about it! Share your creations on Instagram and mention
@mamaknowsglutenfree
or tag #mamaknowsglutenfree.
Your culinary successes inspire us!