
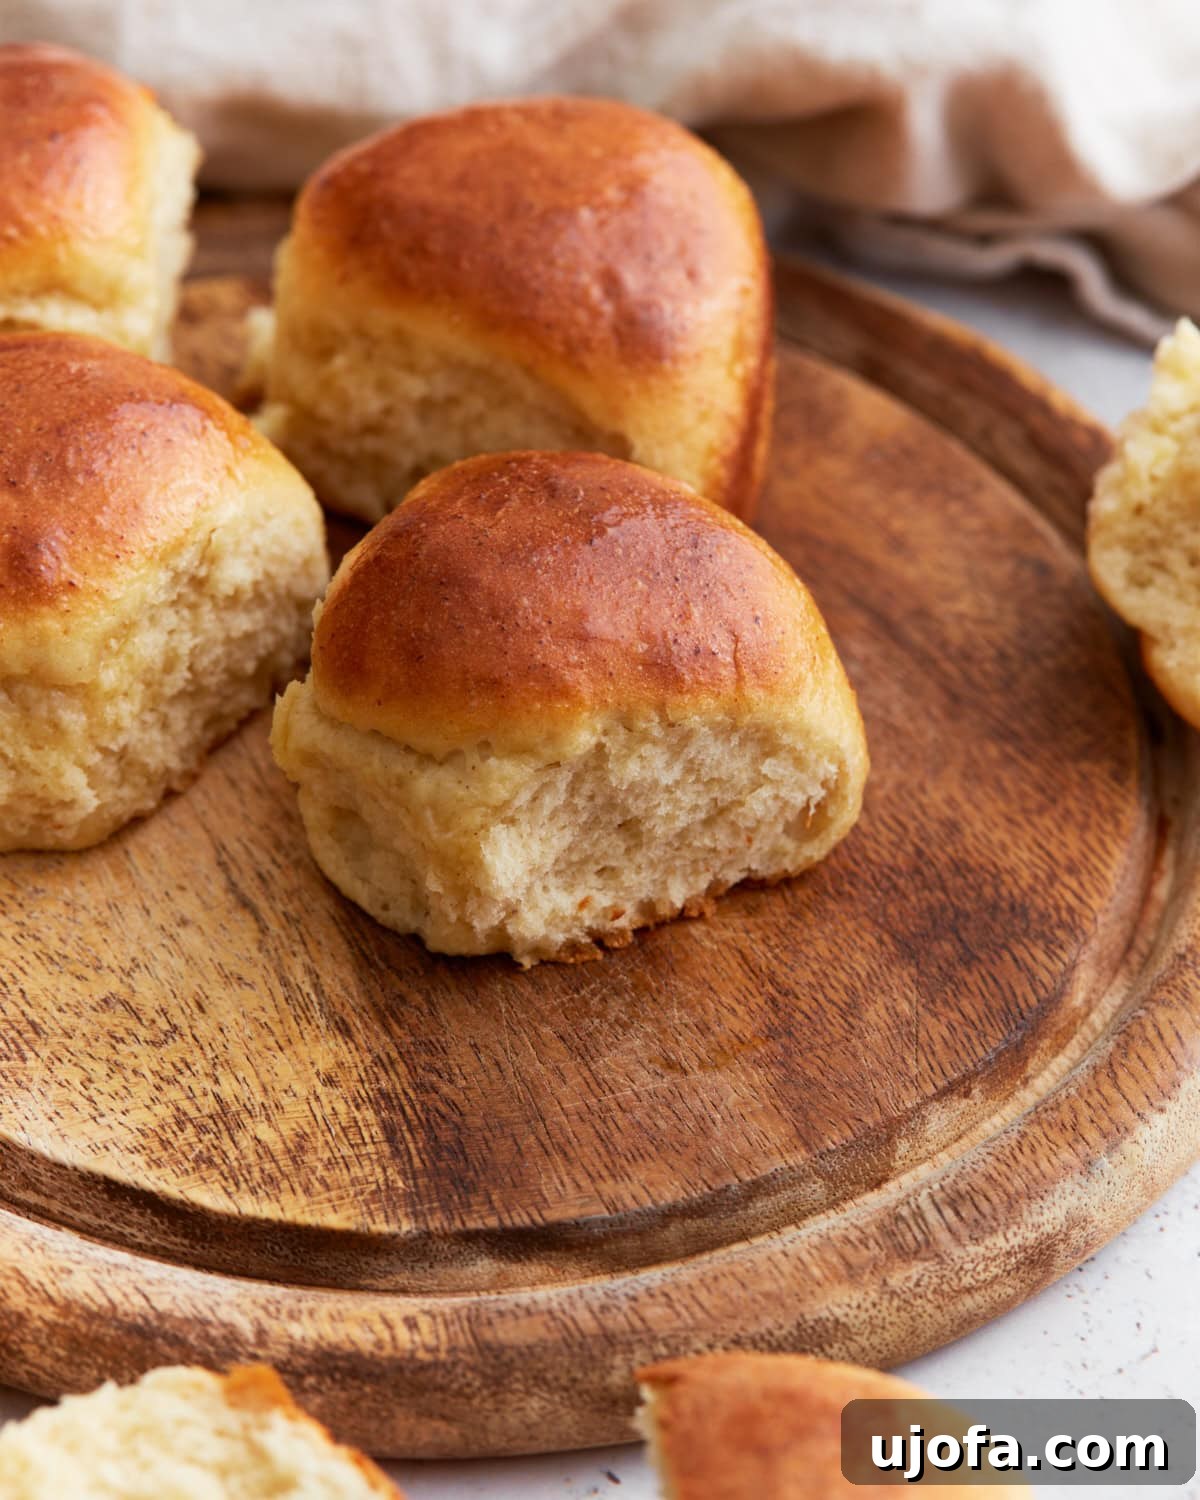
Soft & Fluffy Gluten-Free Dinner Rolls: Your New Go-To Recipe
Imagine a basket of warm, golden-brown rolls, so soft they practically melt in your mouth, infused with a hint of sweet honey and brushed with savory melted butter. This isn’t just a dream for those on a gluten-free diet; it’s a delicious reality with our incredible recipe for homemade gluten-free dinner rolls! Perfect for holiday feasts, special occasions, or simply to elevate a weeknight meal, these rolls are designed to be as simple and stress-free to make as possible, ensuring everyone at your table can enjoy them. We even include a dairy-free option, making them truly versatile and inclusive.
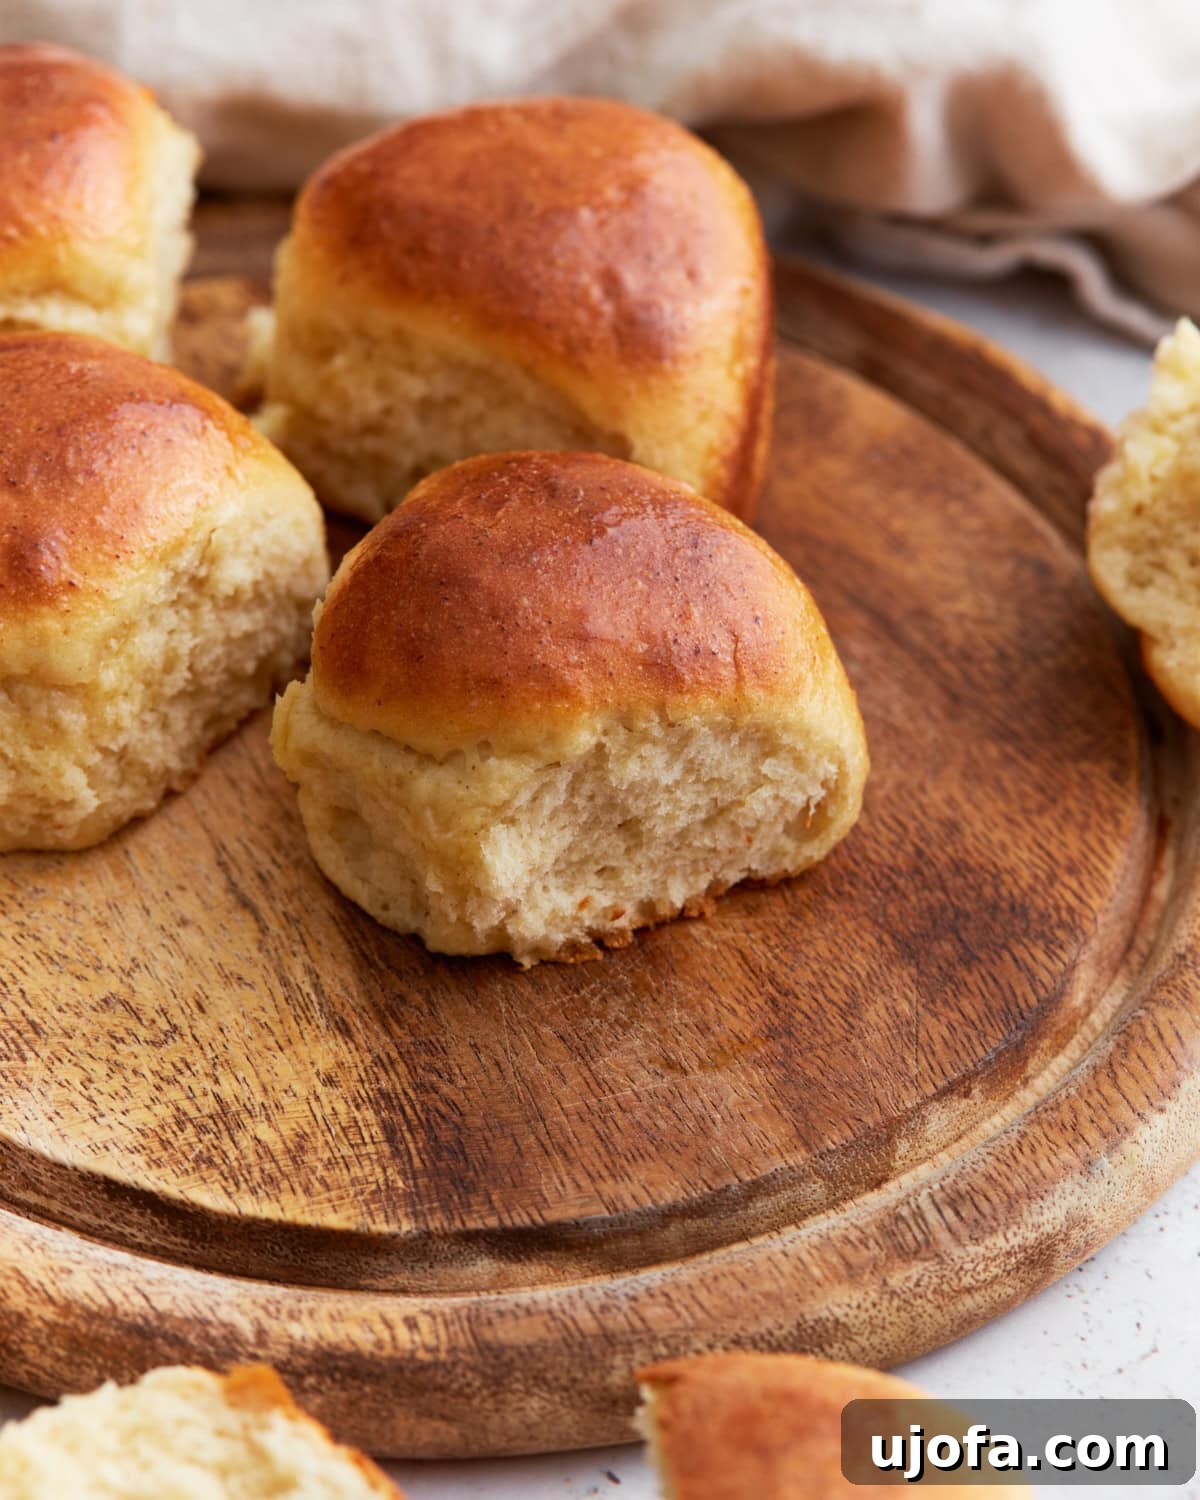
“Best GF rolls fluffy with a little sweetness and so easy!!!!”
– GA
When I first embraced a gluten-free lifestyle back in 2010, one of my biggest culinary losses was the joy of soft, pull-apart yeast rolls. I desperately missed the kind of comforting bread that graced every holiday table and Sunday dinner. After successfully perfecting my homemade gluten-free bread, I knew my next mission had to be dinner rolls. It wasn’t an easy feat; achieving that elusive light, airy texture without gluten required many attempts and adjustments. But perseverance paid off! I finally cracked the code to making truly exceptional gluten-free dinner rolls that rival their wheat-based counterparts.
These soft gluten-free rolls are crafted with a thoughtfully selected blend of gluten-free flour, rapid-rise instant yeast (no need for complicated proofing!), fresh eggs, rich milk, softened butter, and a touch of sweet honey. The beauty of this recipe lies in its adaptability: you can easily substitute dairy-free milk and butter alternatives without compromising on taste or texture. The result is consistently the same – unbelievably soft, incredibly fluffy rolls with a delightful hint of sweetness that bring back all those cherished memories of the rolls I used to love. Get ready to bake the best gluten-free dinner rolls you’ve ever tasted!
Gluten-Free Dinner Rolls
Audrey Roberts
18 rolls
10 mins
16 mins
1 hr
1 hr
26 mins
Email Recipe
Print Recipe

Ingredients
- 3-3½ cups all-purpose gluten-free flour with xanthan gum (The amount of gluten-free flour needed can vary a lot depending on the brand, age of the flour, altitude, climate, how accurately someone measures, and other factors)
- 1 tsp salt
- 1¾ tsp rapid yeast/instant yeast (I use Fleischmann’s Bread Machine Instant Yeast)
- 1¼ cups warm milk (110°F-115°F) (for dairy-free, use almond, cashew or coconut milk)
- ¼ cup unsalted butter, softened (for dairy-free, use Earth Balance or Smart Balance)
- 2 eggs, room temperature
- 1 tsp apple cider vinegar
- ½ cup honey
- 2 tbsp unsalted butter, melted (for dairy-free, I use Smart Balance buttery spread)
Watch our step-by-step video on how to make these delicious gluten-free dinner rolls!

Instructions
- In a large bowl, combine the gluten-free all-purpose flour and salt.
- Create a small well in the center of the flour mixture with your finger and pour the instant yeast into the hole.
- Warm the milk to a temperature between 110°F-115°F (43-46°C). I typically microwave the milk in a large glass measuring cup for about 1 minute and 30 seconds. Always use a thermometer to verify the temperature, as milk that is too hot will kill the yeast, preventing your rolls from rising. Once warmed, pour the milk over the yeast in the bowl.
- Add the softened butter, eggs, apple cider vinegar, and honey to the bowl with the other ingredients.
- Mix all ingredients until fully combined, which usually takes 2-3 minutes. Use a stand mixer with a dough hook or paddle attachment, scraping down the sides of the bowl periodically to ensure all flour is incorporated. The dough will be noticeably sticky, which is perfectly normal for gluten-free dough.
- Lightly spray two 9-inch cake or pie pans with a gluten-free cooking spray. Metal pans are preferred, but glass pans can also be used.
- Using an ice cream scoop (sprayed with gluten-free cooking spray to prevent sticking), portion the dough into balls. Arrange 8 dough balls around the edge of each pan and place 1 dough ball in the center. This recipe yields 18 rolls in total.
- Use a small spatula to gently smooth out the tops of the dough balls for a neat appearance.
- Cover the pans loosely with a clean kitchen towel and allow the dough to rise in a warm, draft-free place for 1 hour. The rolls should appear noticeably puffy.
- While the rolls are rising, preheat your oven to 400°F (204°C).
- Bake the rolls on the middle rack of your oven for 14-16 minutes, or until they turn a beautiful golden-light brown. Oven temperatures can vary, so keep a close eye on them. For best results, use an instant-read thermometer to ensure the internal temperature of the rolls reaches 200°F (93°C).
- Once baked, immediately brush the tops of the warm rolls with 2 tablespoons of melted butter (or dairy-free alternative) before serving. Enjoy these delightful homemade gluten-free dinner rolls!
Notes
- Xanthan Gum is Key: If your chosen gluten-free flour blend does not already include xanthan gum, it is crucial to add 1½ teaspoons of xanthan gum to your dry ingredients in step one of this recipe. Xanthan gum acts as a binder, mimicking gluten’s elasticity and helping your rolls achieve that desirable soft, chewy texture.
- Check Your Yeast: Always double-check the expiration date of your instant yeast. Expired yeast is one of the most common reasons dough fails to rise properly, alongside a too-cold proofing environment. Fresh, active yeast is vital for light and fluffy gluten-free dinner rolls.
- Accurate Flour Measurement: To ensure consistent results, use the “spoon & level method” when measuring your gluten-free flour. This technique involves using a spoon to lightly fill your measuring cup with flour, then leveling it off with the flat back of a knife. Avoid scooping directly with the measuring cup, as this can pack the flour and lead to too much dry ingredient, resulting in dense rolls.
- Flour Blend Specifics: This recipe has been thoroughly tested and perfected using Pillsbury gluten-free flour. It’s important to note that other gluten-free flours such as almond flour, coconut flour, or oat flour have different absorption rates and protein structures, and will not work as a direct substitute in this recipe. For alternative flour recipes, you might enjoy our coconut flour bread or almond flour biscuits as delicious side dish options.
- Yeast-Baking Compatible Flour: Ensure that the gluten-free flour blend you select is explicitly suitable for yeast baking. Some popular blends, such as Bob’s Red Mill 1-to-1 Baking Flour and King Arthur Measure for Measure Flour, state on their packaging or websites that they are not recommended for yeast-leavened recipes. Using a blend specifically designed for yeast baking will yield the best results for these soft gluten-free rolls.
Nutrition
Serving: 1roll
Calories: 148kcal
Carbohydrates: 23g
Protein: 3g
Fat: 5g
Saturated Fat: 2g
Cholesterol: 30mg
Sodium: 173mg
Potassium: 37mg
Fiber: 2g
Sugar: 9g
Vitamin A: 170IU
Vitamin C: 0.1mg
Calcium: 37mg
Iron: 0.8mg
Nutrition information is automatically calculated, so should only be used as an approximation.
Additional Info
Side Dish
American
Tried this recipe?
Mention @mamaknowsglutenfree or tag #mamaknowsglutenfree!
How to Make Gluten-Free Dinner Rolls: A Step-by-Step Guide
Creating these delightful gluten-free dinner rolls is simpler than you might think! Follow these detailed steps to achieve perfect, fluffy results every time.
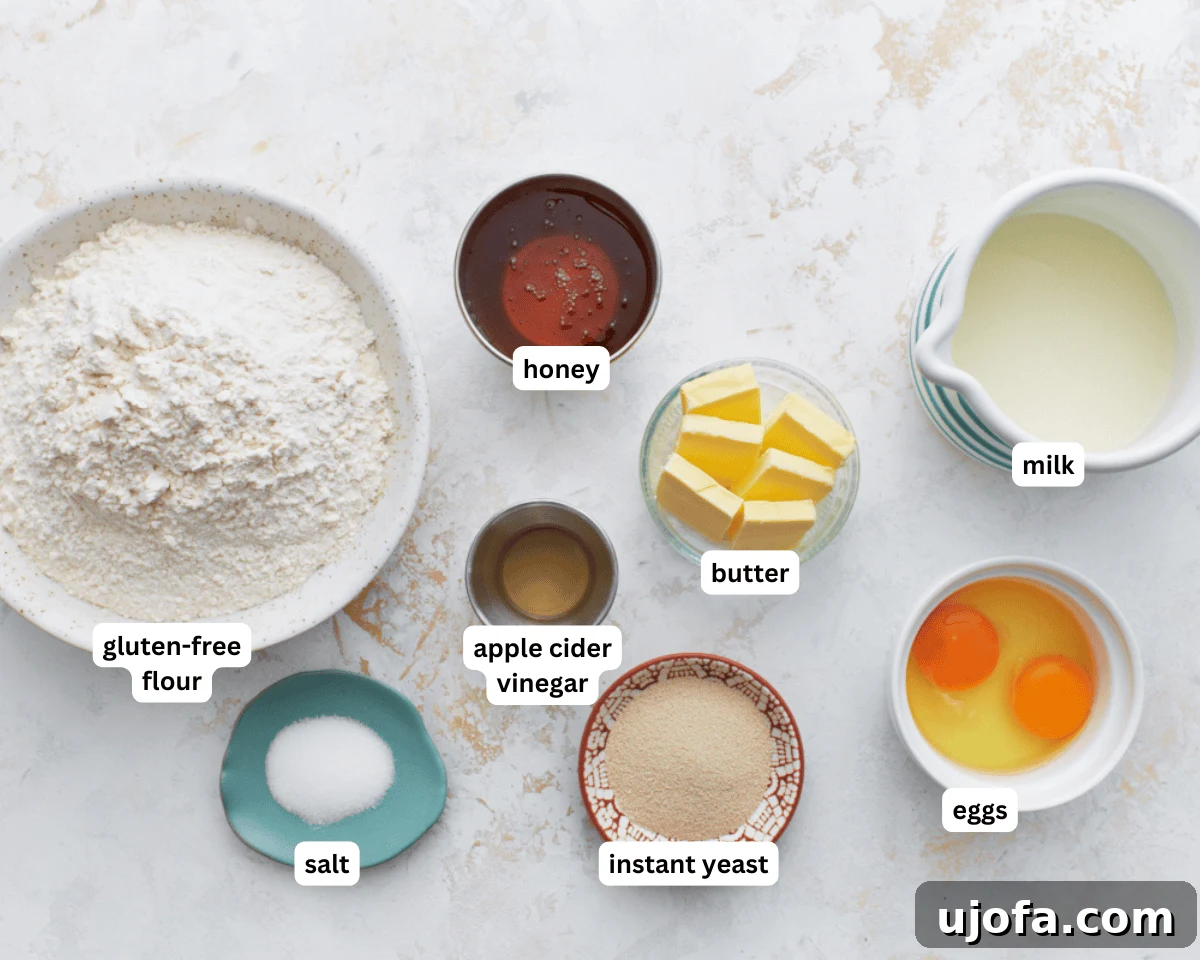
Step 1: Gather Your Ingredients and Prep Pans. Begin by laying out all your ingredients on the counter. This ensures you have everything at hand, making the baking process smooth and enjoyable. Next, lightly grease two 9-inch metal cake or pie pans with a gluten-free cooking spray. Metal pans conduct heat more evenly, which helps the rolls achieve that beautiful golden crust. Set these prepared pans aside.
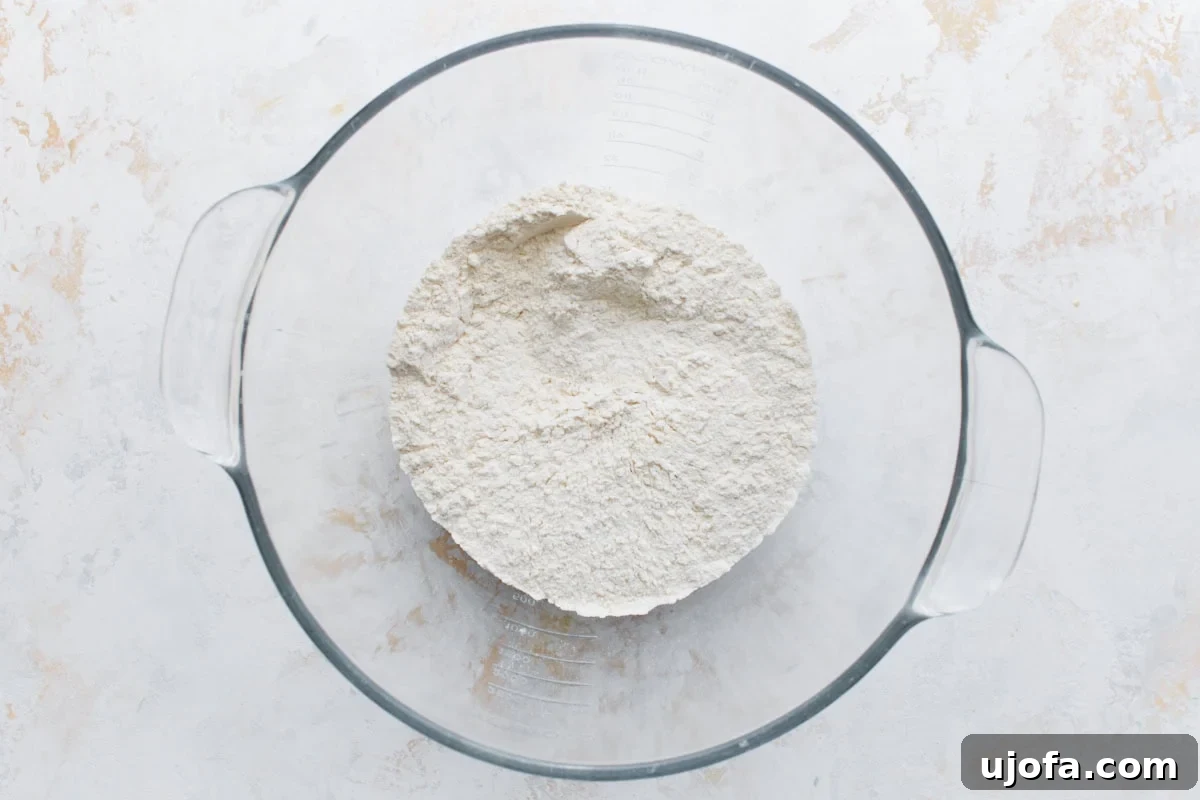
Step 2: Combine Dry Ingredients. In a large mixing bowl, whisk together the 3 to 3½ cups of all-purpose gluten-free flour and 1 teaspoon of salt. Remember, the exact amount of flour can vary based on your specific gluten-free blend and environmental factors. Create a small well or indentation in the center of the flour mixture. Carefully pour 1¾ teaspoons of rapid-rise (instant) yeast into this well. Keeping the yeast separate for a moment helps ensure it’s properly activated when the warm liquid is added.
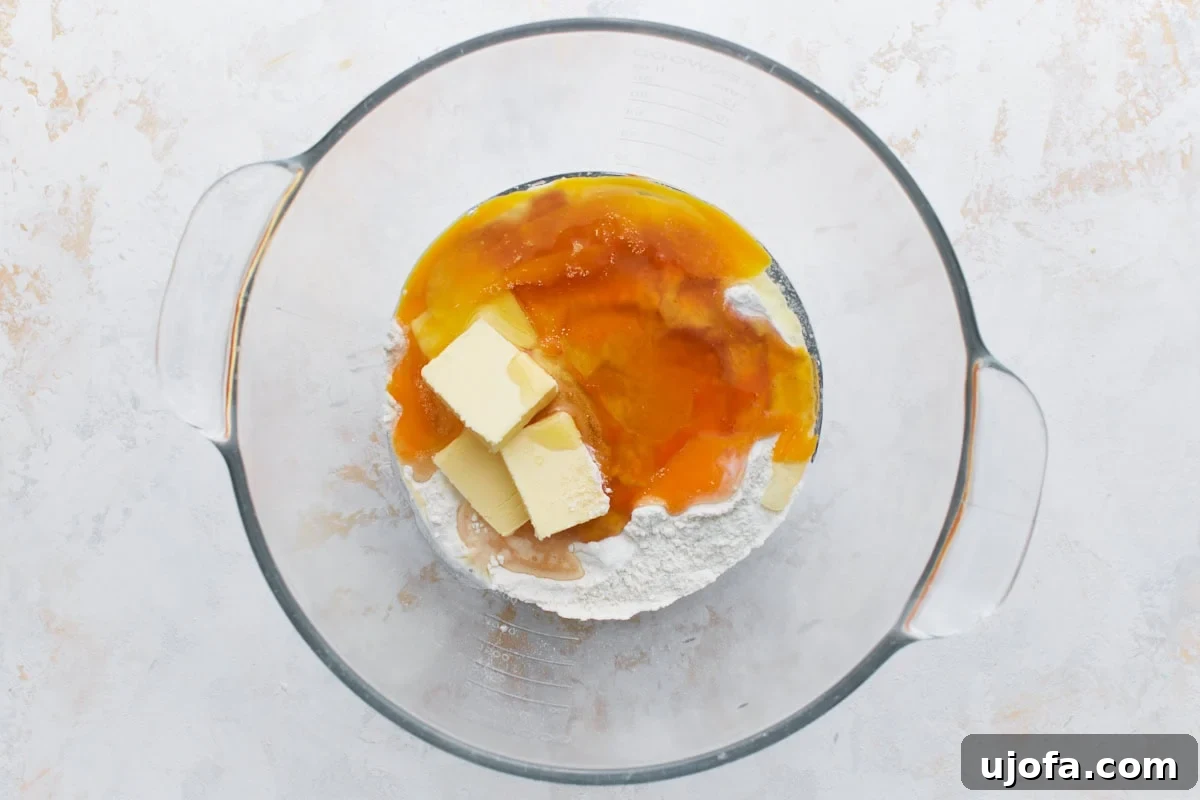
Step 3: Introduce Wet Ingredients. Gently warm 1¼ cups of milk to a temperature between 110°F and 115°F. You can do this in a microwave-safe glass measuring cup, typically for about 1 minute and 30 seconds. Always use a kitchen thermometer to check the temperature; if the milk is too hot, it will deactivate the yeast, and your rolls won’t rise. Pour the perfectly warmed milk directly over the yeast in the bowl. Then, add ¼ cup of softened unsalted butter (or dairy-free alternative), two room-temperature eggs, 1 teaspoon of apple cider vinegar, and ½ cup of honey. These ingredients contribute to the rolls’ richness, moisture, and subtle sweetness.
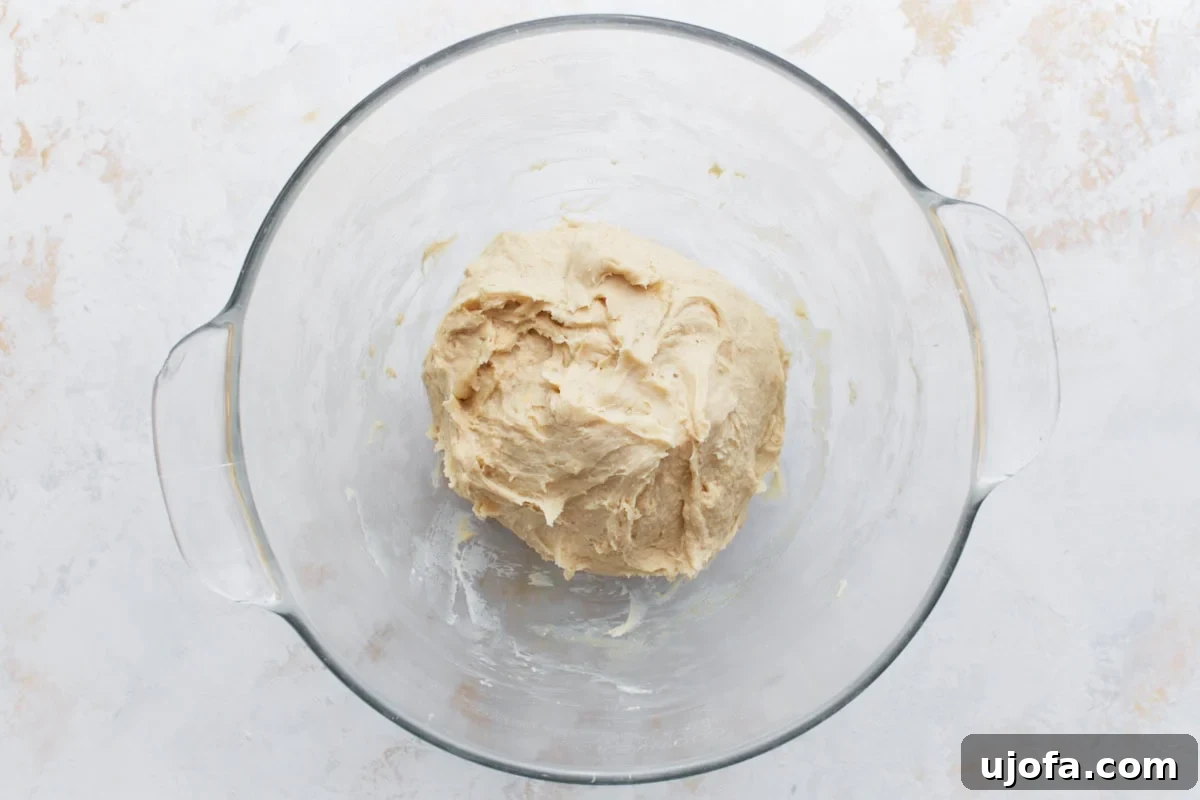
Step 4: Mix the Dough. Attach a dough hook (or a paddle attachment if you don’t have a dough hook) to your stand mixer. Mix the dough on medium speed for 2 to 3 minutes until all the ingredients are thoroughly combined. Make sure to stop and scrape down the sides of the bowl as needed to ensure no dry flour remains. Don’t be alarmed by the consistency; gluten-free dough is naturally stickier and thicker than traditional wheat dough. This sticky texture is characteristic and will result in wonderfully soft rolls.
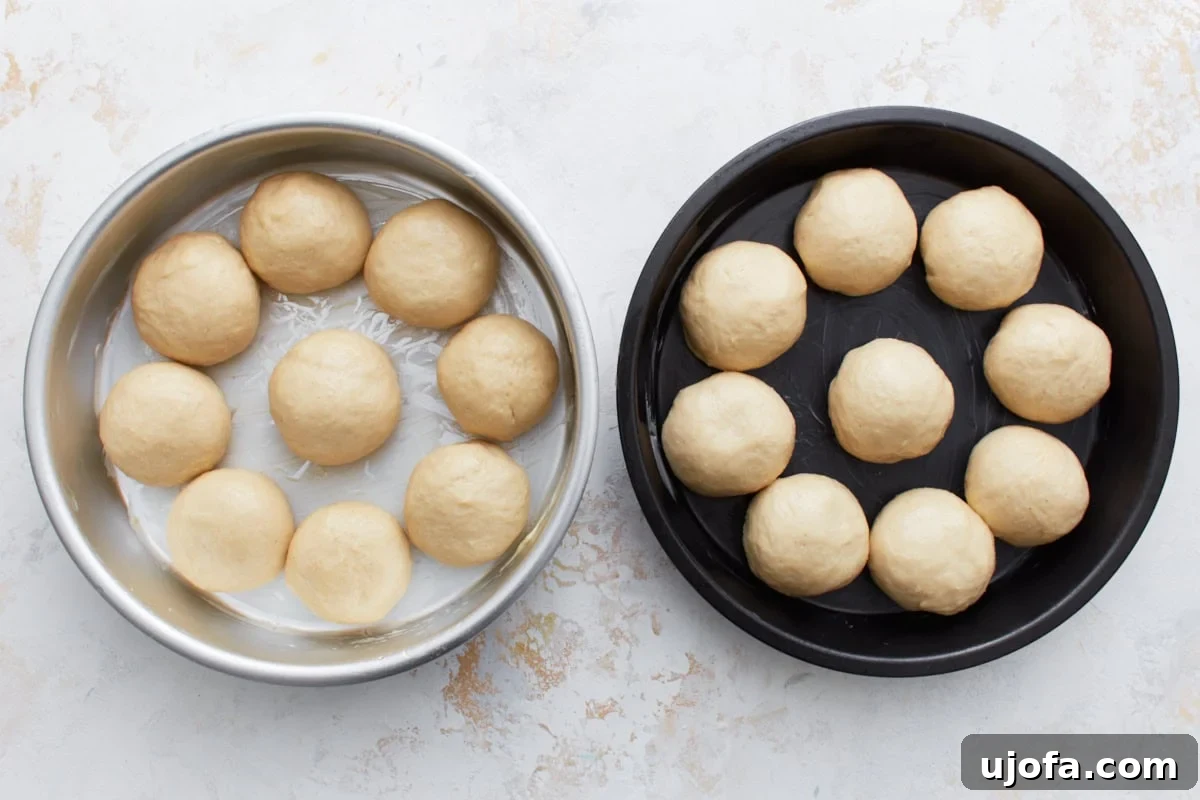
Step 5: Portion and Shape the Rolls. To make handling the sticky dough easier, lightly spray your hands or a cookie/ice cream scoop with gluten-free cooking spray. Divide the dough evenly into 18 portions. Roll each portion into a smooth ball. Arrange 8 dough balls around the outer edge of each greased pan, then place one dough ball in the center of each pan. This pattern allows the rolls to rise together beautifully. Gently use a small spatula to smooth out the tops of the dough balls, giving them a polished finish.
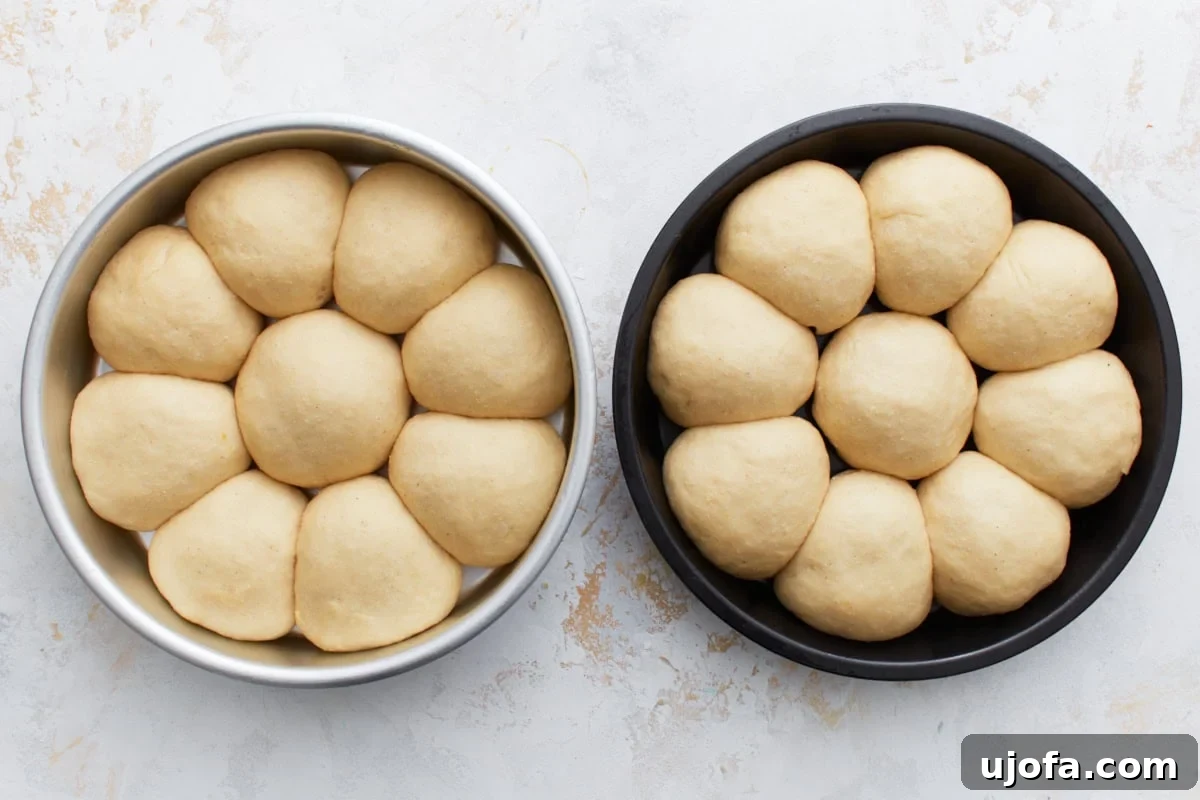
Step 6: Allow the Dough to Rise. Loosely cover both pans with a clean kitchen towel. Find a warm, draft-free spot for your dough to rise. A great tip is to preheat your oven to its lowest setting (around 100°F or 40°C), then turn it off and let the rolls rise inside for 1 hour. This creates a consistently warm environment, ideal for gluten-free yeast dough, which can sometimes be finicky. The dough should become noticeably puffy and increased in size.
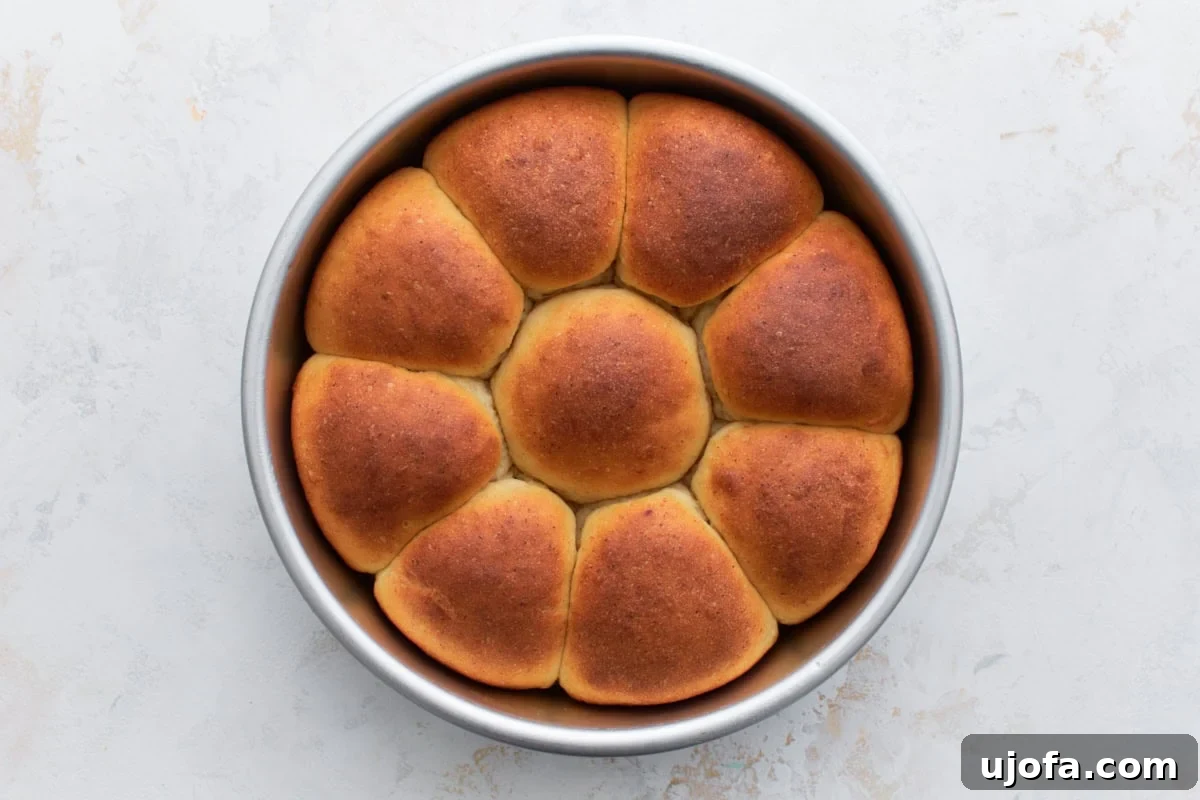
Step 7: Bake the Rolls to Golden Perfection. While your rolls are finishing their rise, preheat your oven to 400°F (204°C). Once preheated, place the pans on the middle rack of your oven. Bake for 14 to 16 minutes. Keep a close watch on them, as baking times can vary significantly between ovens. The rolls are done when they’ve turned a beautiful golden-brown color. For absolute certainty, use an instant-read thermometer to check their internal temperature, which should reach 200°F (93°C). This ensures they are cooked through and perfectly soft.
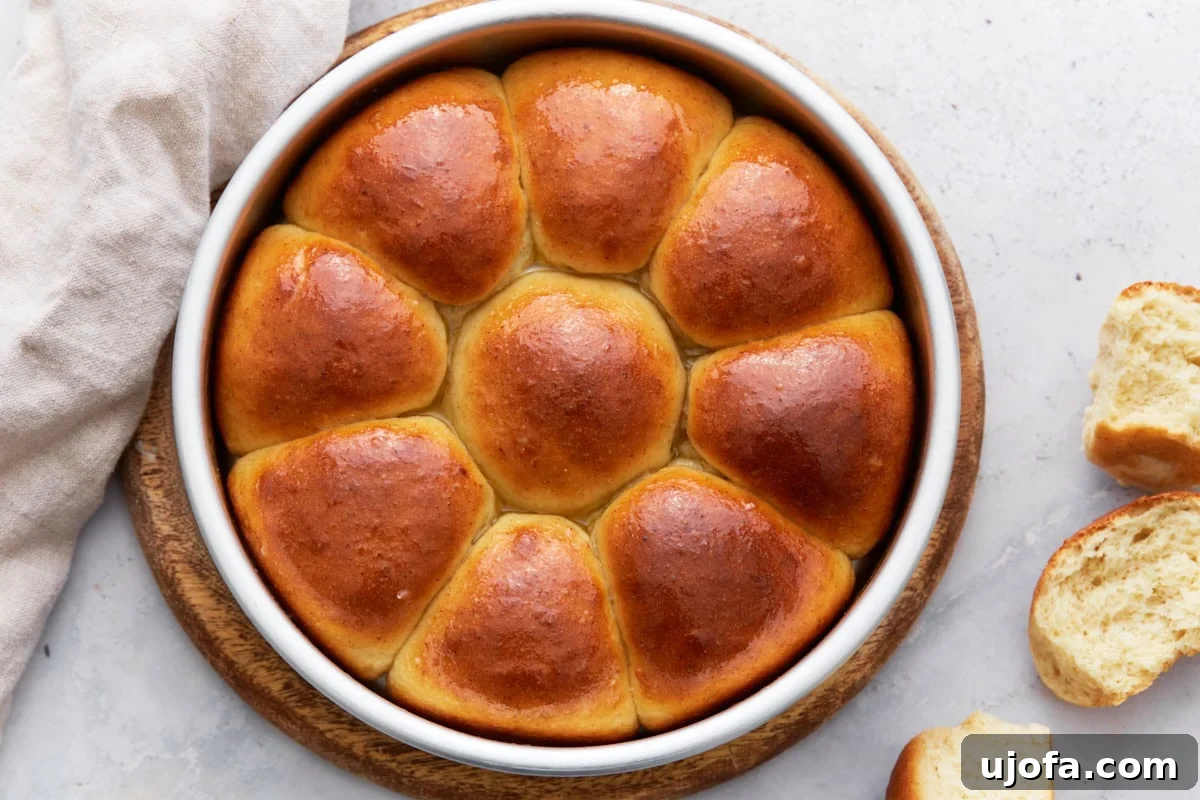
Step 8: Finish and Serve. Immediately after removing the rolls from the oven, brush their warm tops generously with the 2 tablespoons of melted butter (or dairy-free buttery spread). This adds a delectable sheen, enhances flavor, and keeps the crust tender. Serve these incredible gluten-free dinner rolls warm and fresh. Get ready for rave reviews!
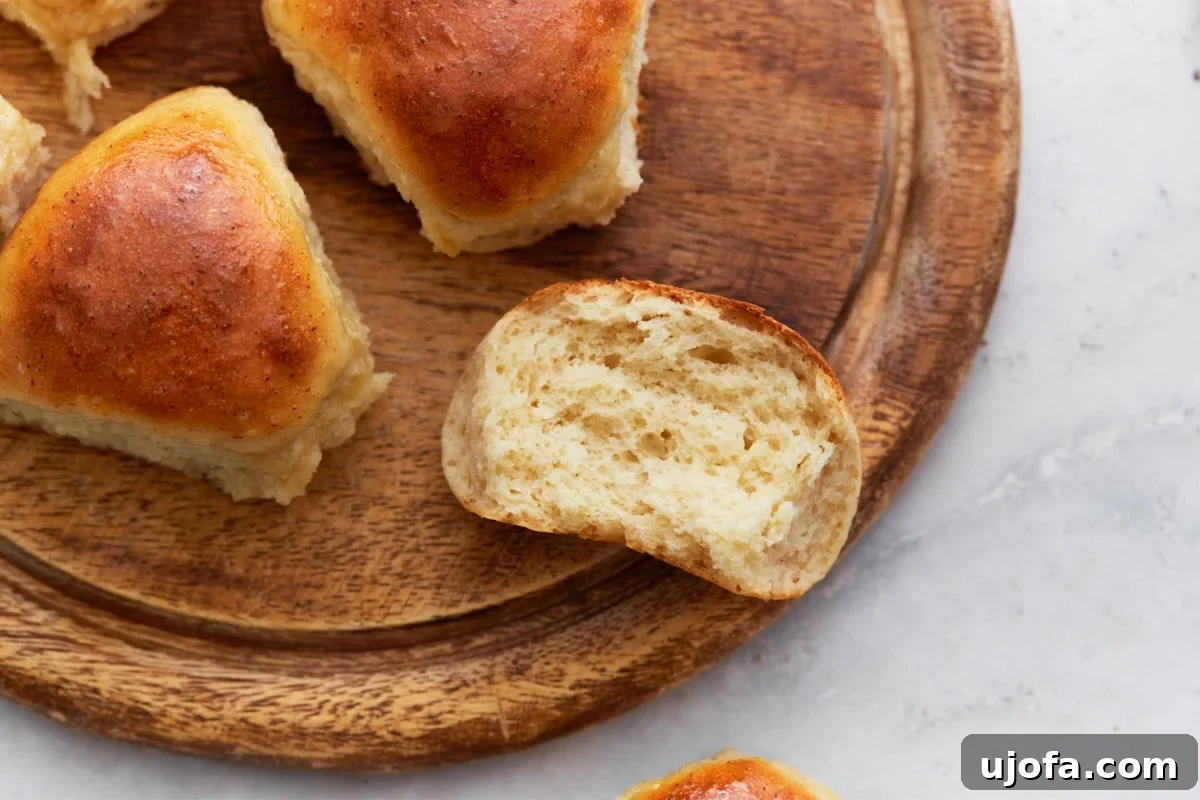
Expert Gluten-Free Baking Tips for Success
Baking gluten-free can sometimes feel daunting, but with a few key tips, you’ll be baking like a pro. These insights will help you achieve consistently perfect, soft, and fluffy gluten-free dinner rolls every single time.
- Understanding Gluten-Free Flour Blends: The world of gluten-free flour is vast and varied. Different brands use different combinations of flours (like rice flour, tapioca starch, potato starch, sorghum flour, etc.), and these variations drastically affect how your dough behaves. Factors such as the age of your flour, your climate’s humidity, and even your altitude can influence the amount of liquid a flour blend absorbs. Therefore, consider the flour quantity in this recipe as a range (3 to 3½ cups) rather than a fixed number. On my last test, an extra ⅓ cup was needed, which gave the dough more structure, making it firm enough to roll by hand instead of scooping. You’re looking for a dough that is soft but not excessively wet. It should hold its shape when gently rolled and shouldn’t slump or spread excessively once placed in the pan. If, after chilling, your dough still feels too sticky, gradually mix in 1 to 2 tablespoons of additional gluten-free flour until it’s smooth, slightly tacky, and easy to shape into perfect round rolls.
- Precision with a Kitchen Scale: For truly uniform and professional-looking rolls, a kitchen scale is your best friend. Weighing each portion of dough ensures that all your rolls are the same size, which is critical for even baking. Rolls of similar size will cook through at the same rate, preventing some from being undercooked while others are overbaked. This small extra step makes a noticeable difference, especially when you’re preparing these gluten-free rolls for holiday gatherings or when entertaining guests.
- Embrace Oiled Hands: Gluten-free dough is notoriously stickier than traditional wheat-based dough due to the lack of gluten structure. Don’t hesitate to generously oil your hands or spray your cookie/ice cream scoop with gluten-free nonstick spray. This simple trick makes shaping the rolls much faster, cleaner, and significantly less frustrating. It prevents the dough from clinging to your hands and ensures a smooth, easy shaping process.
- The Magic of Chilling Dough: If you find your dough too sticky or soft to handle comfortably, don’t despair! Refrigerating the dough for approximately 30 minutes before shaping can work wonders. Chilling helps the dough to firm up, making it much easier to roll and ensuring it holds its shape better during rising and baking. This tip is also fantastic for make-ahead preparation: you can shape the rolls, cover them, and refrigerate them for a few hours or even overnight. When you’re ready to bake, simply let the shaped rolls come to room temperature (they shouldn’t feel cold to the touch) before proceeding with the rising and baking steps.
- Achieving a Consistent, Warm Rise: A successful rise is paramount for soft, fluffy gluten-free rolls. Firstly, ensure your instant yeast is fresh and active – expired yeast is a common culprit for flat dough. Secondly, provide a warm, draft-free environment for your dough to proof. My favorite method is to preheat my oven to its lowest setting (around 100°F or 40°C), then turn it off completely. Placing the covered dough in this warm, enclosed space creates a steady, ideal environment that encourages gluten-free dough to rise consistently and beautifully. Avoid placing it in direct sunlight or a cold, drafty corner.
Delicious Serving Suggestions for Your Gluten-Free Dinner Rolls
These versatile gluten-free dinner rolls are so delicious, I honestly can’t think of an occasion where they wouldn’t be a welcome addition! Their soft, tender texture and subtle sweetness make them incredibly adaptable to a wide range of meals and moments. Here are just a few ideas to get you started:
- Classic Dinner Side: Pair them with hearty main courses like roasted chicken, pot roast, or a comforting shepherd’s pie. Their ability to soak up delicious gravies and sauces is unmatched.
- Soup & Salad Companion: Serve them alongside a warm bowl of gluten-free tomato soup or a fresh, crisp salad. They add a satisfying element to lighter meals.
- Holiday Feast Essential: These rolls are an absolute must-have on my holiday table, especially for Thanksgiving. They’re perfect alongside classics like gluten-free green bean casserole, cranberry sauce, and of course, a succulent roasted turkey.
- Potlucks & Gatherings: Bring a basket of these homemade gluten-free rolls to any potluck or family gathering. They’re always a hit, and guests will appreciate having a delicious gluten-free option.
- Breakfast Treat: My kids adore these rolls for breakfast! Spread them with a dollop of fruit jam, a drizzle of extra honey, or a smear of your favorite nut butter for a sweet start to the day. They’re also fantastic with scrambled eggs.
- Mini Sandwiches: Slice them horizontally and use them as miniature buns for sliders, pulled pork, or even a simple cheese and veggie sandwich.
Storage & Reheating Instructions for Peak Freshness
While these gluten-free dinner rolls are undeniably at their absolute best when served warm and fresh from the oven, you can certainly store and enjoy them later. It’s common for gluten-free baked goods to firm up slightly as they cool and are stored, but reheating will bring back much of their original softness.
Room Temperature Storage: If you happen to have any leftovers, store them in an airtight container at room temperature for up to 3 days. Ensure the container is truly airtight to prevent them from drying out quickly.
Freezing for Longer Shelf Life: For longer storage, these rolls freeze beautifully. Once completely cooled, place them in a freezer-safe bag or container, removing as much air as possible. They can be stored in the freezer for up to 3 months. Thaw them at room temperature for a few hours or overnight as needed.
Reheating for Best Enjoyment: I always recommend reheating these rolls before serving, even if they’ve just been stored at room temperature, to restore their wonderful soft texture. You have a couple of easy options:
- Microwave: For a quick reheat, pop a roll into the microwave for 15-20 seconds. Be careful not to overheat, as this can make them tough.
- Oven: For multiple rolls, place them on a baking sheet and warm them in a preheated 350°F (175°C) oven for a few minutes, typically 5-10 minutes, until they are warmed through and soft. This method often yields the best results, bringing back that “fresh from the oven” feel.
More Irresistible Gluten-Free Bread Recipes to Try!
If you loved these gluten-free dinner rolls, you’re in for a treat! Here are more of our favorite gluten-free bread recipes that are sure to become staples in your kitchen:
- Homemade Gluten-Free Machine Bread
- Gluten-Free Sweet Cornbread
- Gluten-Free Burger Buns
- Gluten-Free Challah Bread
- Gluten-Free Hot Cross Buns
Our Gluten-Free Dinner Rolls recipe was originally published on 11/07/24. It was retested, reworked, and republished to be better than ever on 7/4/25.