
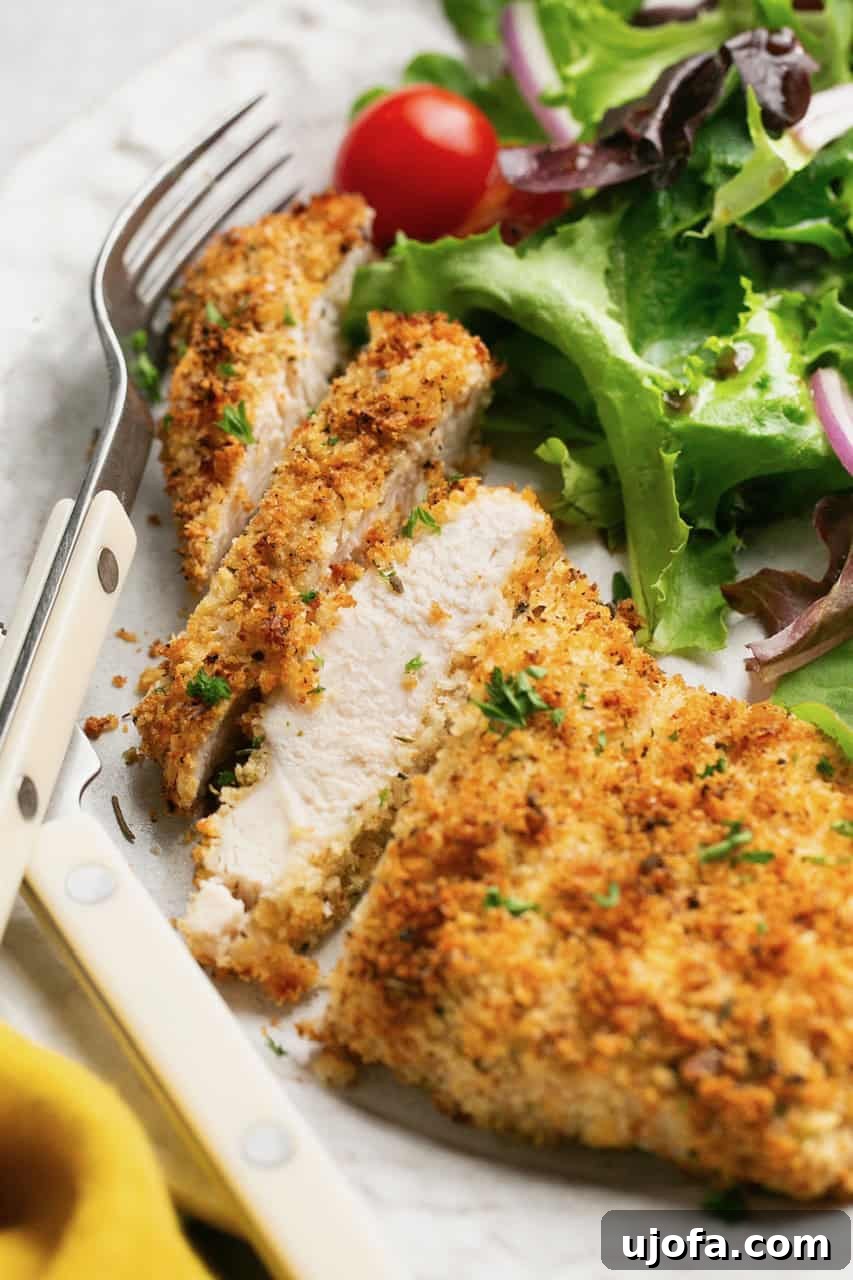
Crispy and Juicy Air Fryer Chicken Cutlets: Your New Weeknight Favorite (Gluten-Free)
Discover how to make the most incredibly crispy, tender, and juicy gluten-free chicken cutlets in your air fryer in less than 20 minutes. This versatile recipe, made with gluten-free panko breadcrumbs, is perfect for a quick family meal and pairs wonderfully with a fresh salad, creamy mashed potatoes, or your favorite roasted vegetables. Say goodbye to dry, bland chicken and hello to a flavorful, satisfying dish that everyone will love!
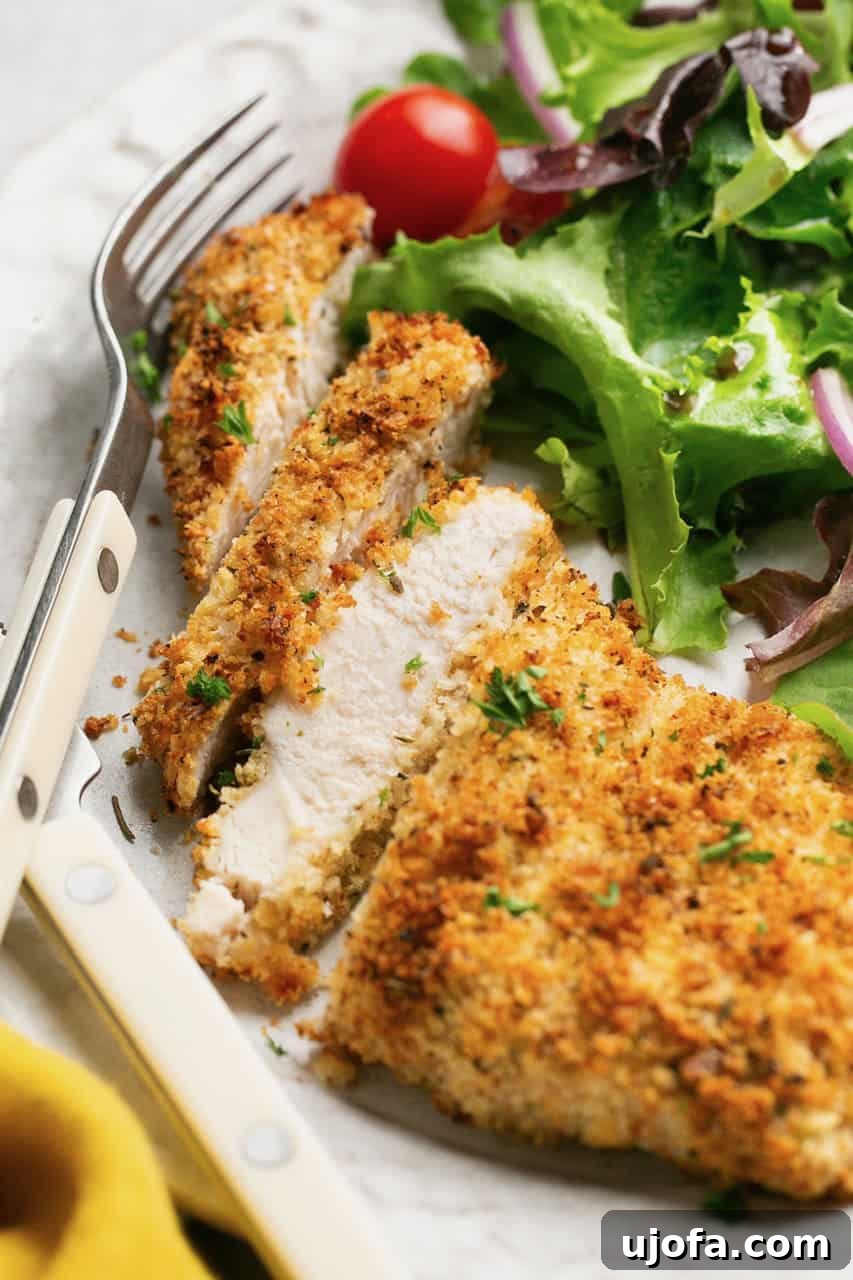
Why This Recipe Stands Out: Crispy, Flavorful, and Effortlessly Easy
Achieving perfectly crispy, tender, and juicy chicken has never been simpler, especially when you harness the power of your air fryer. These Air Fryer Chicken Cutlets are not just a meal; they’re a revelation for busy weeknights and a personal favorite in our kitchen. Forget the common misconception that gluten-free chicken recipes are destined to be dry and uninspired. Our recipe shatters that stereotype, delivering a dish that’s bursting with flavor and boasts an irresistible crunch that rivals any traditional breaded chicken.
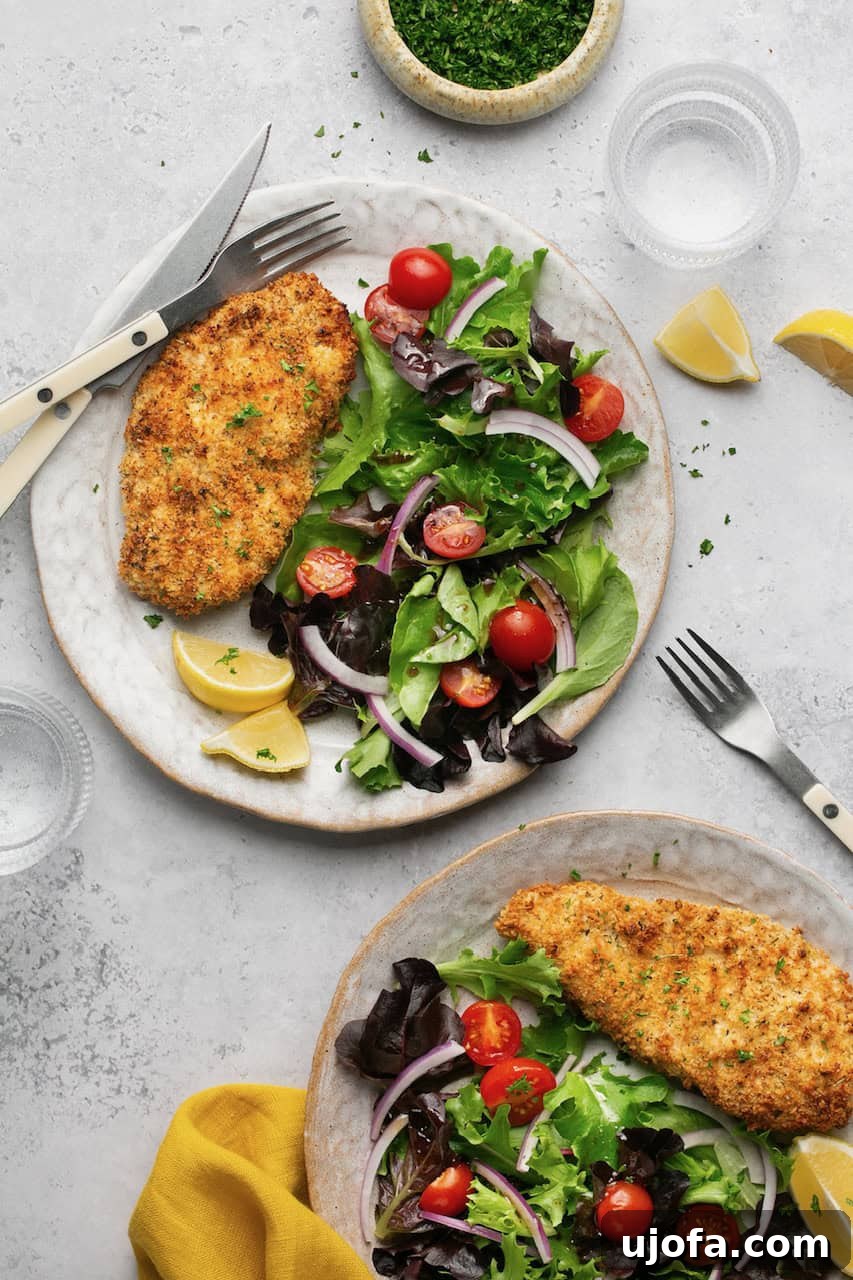
The beauty of this recipe lies in its speed and simplicity, requiring minimal prep and cooking in under 20 minutes. It’s an ideal solution for when time is short but you refuse to compromise on taste or quality. We’ve meticulously crafted this recipe to be not only delicious but also naturally gluten-free and dairy-free, catering to various dietary needs without sacrificing the classic comfort food experience. Serve these golden-brown cutlets with a light side salad for a refreshing meal, alongside creamy gluten-free mashed potatoes for ultimate comfort, or with any seasonal vegetable for a wholesome plate. They even make an excellent base for an elevated dish like the best gluten-free chicken parmesan!
Recipe Highlights & Benefits:
- Lightning-Fast & Easy: From prep to plate in under 20 minutes, perfect for hectic schedules.
- Unbeatably Crispy Texture: Gluten-free panko ensures a golden, crunchy exterior every time.
- Tender & Juicy Interior: Expert tips guarantee perfectly cooked, succulent chicken.
- Dietary Friendly: Naturally gluten-free and dairy-free, making it accessible for many.
- Rich in Protein: A fantastic source of lean protein to keep you feeling full and energized.
- Incredibly Versatile: Pairs with a multitude of sides and can be transformed into other dishes.
- Ideal for Meal Prep: Cook a batch and enjoy delicious, healthy meals throughout the week.
- Family-Friendly: A crowd-pleaser that even picky eaters will adore.
Mastering Your Ingredients for Perfect Chicken Cutlets
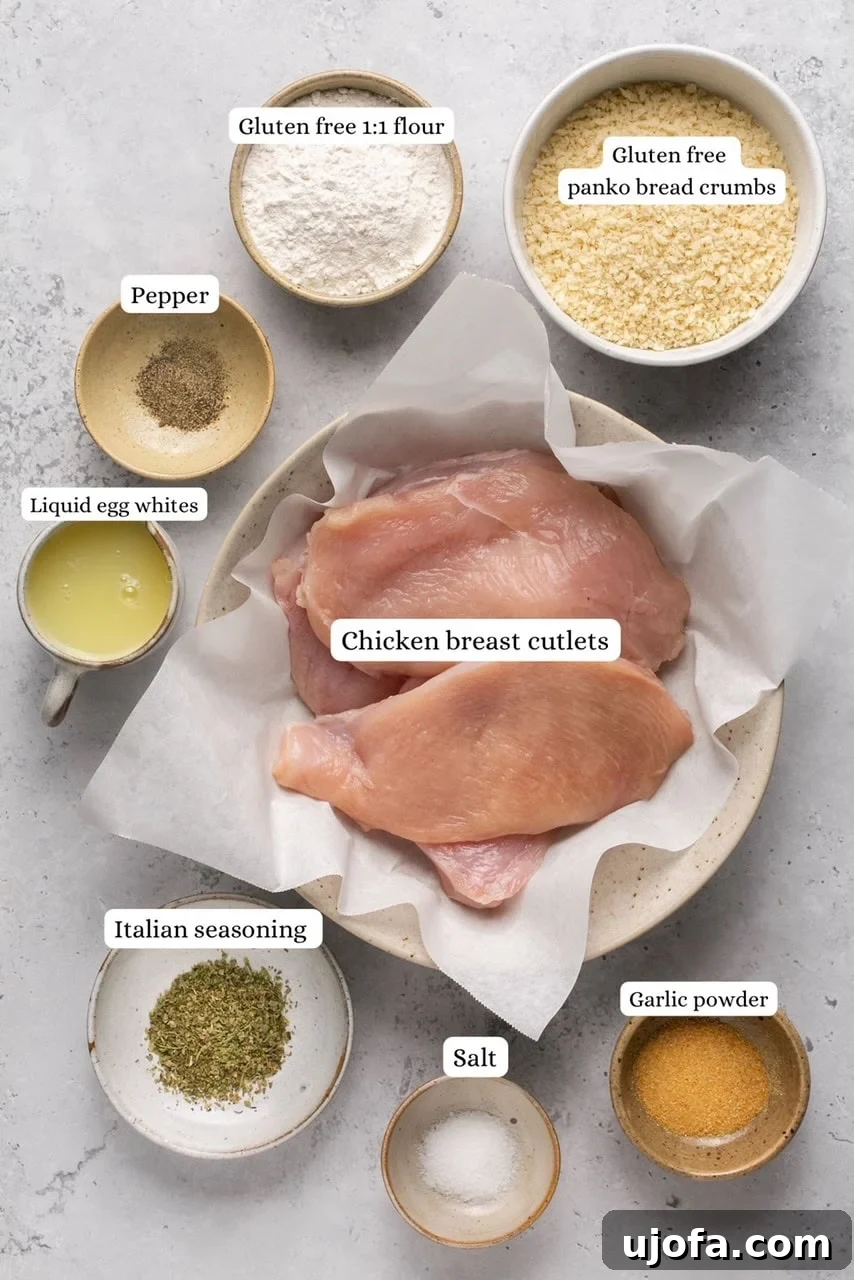
The secret to exceptional air fryer chicken cutlets begins with selecting and preparing the right ingredients. Each component plays a crucial role in achieving that perfect balance of crispy texture and juicy flavor. Here’s a closer look at what you’ll need and why:
Ingredient Notes:
- Chicken Cutlets: For optimal results, start with high-quality, skinless, boneless chicken breasts. To create perfectly thin cutlets, I recommend slicing larger chicken breasts horizontally or vertically into two thinner pieces. Afterward, use a meat mallet or tenderizer to gently pound them to an even ½-inch thickness. This not only ensures uniform cooking but also helps the cutlets absorb flavor more effectively. If you’re short on time, many grocery stores offer pre-sliced thin chicken breasts, which are a convenient alternative. Opting for organic chicken whenever possible can enhance both flavor and nutritional value.
- Gluten-Free Panko Crumbs: The star of our crispy coating! Traditional panko is made from wheat, but fantastic gluten-free alternatives are widely available. I personally use this brand, but you can find various excellent options in the gluten-free section or alongside regular breadcrumbs at your local supermarket. Gluten-free panko offers the same light, airy texture and exceptional crunch as its wheat-based counterpart, making it an indispensable ingredient for these cutlets.
- Liquid Egg Whites: Instead of whole eggs, liquid egg whites are used for two primary reasons: they contribute additional lean protein to the dish and, more importantly, act as an excellent adhesive, ensuring the gluten-free panko breadcrumbs adhere beautifully to the chicken, creating a consistent and crispy crust.
- Gluten-Free Measure for Measure Flour: A crucial component for the initial dredging step, providing a thin base layer that helps the egg wash and panko stick. King Arthur Baking’s 1:1 Gluten-Free Flour is my go-to, as it performs identically to all-purpose flour in terms of texture and binding. You can use any reliable 1:1 gluten-free flour blend.
- Essential Seasonings: A vibrant blend of Italian seasoning, robust garlic powder, savory salt, and freshly ground black pepper forms the core flavor profile. This combination infuses the chicken with aromatic depth. For a slight variation, onion powder can be substituted for or added alongside garlic powder. Feel free to experiment with other spices like paprika or a pinch of cayenne for a subtle kick!
- Cooking Oil Spray: To achieve that desired crispiness with minimal oil, a high-quality cooking oil spray is key. I prefer avocado oil spray due to its exceptionally high smoke point, which means it can withstand the air fryer’s heat without burning. Olive oil spray is another excellent and readily available option. The spray ensures an even coating, promoting browning and crispiness.
Step-by-Step Guide: How to Craft Your Air Fryer Chicken Cutlets
Making these air fryer chicken cutlets is a straightforward process that yields impressive results. Follow these simple steps for perfectly golden and delicious chicken every time:
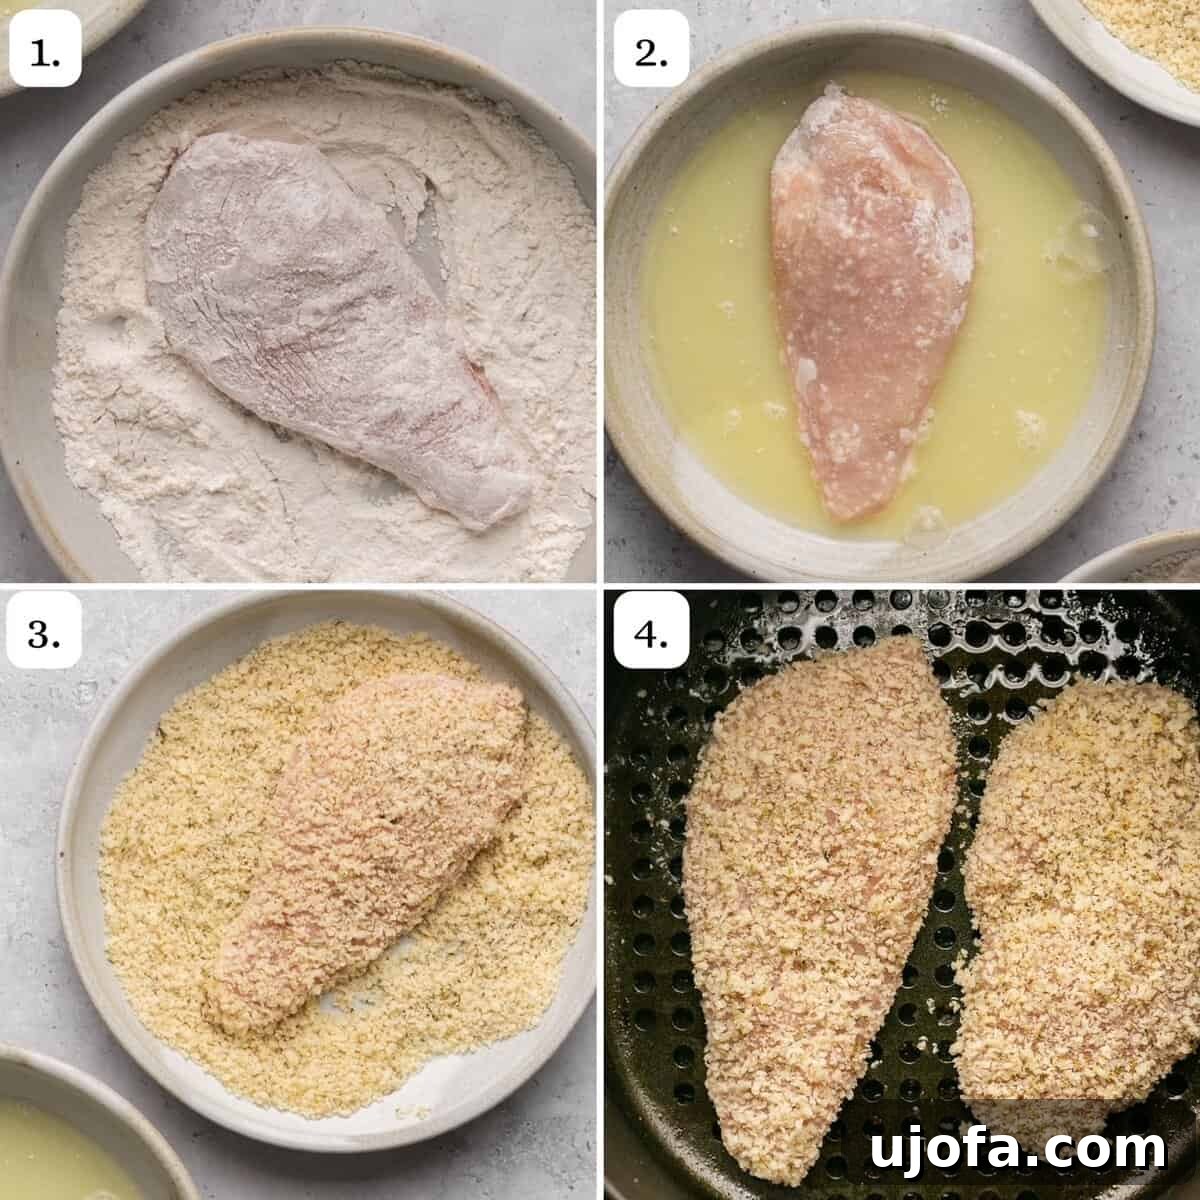
Air Frying Instructions:
- Prepare the Chicken: Begin by placing your chicken breast cutlets between two sheets of plastic wrap or in a large zip-top bag. Using a meat tenderizer or meat mallet, gently but firmly pound them until they are of uniform thickness, approximately ½ inch. This ensures even cooking. Pat the pounded cutlets thoroughly dry with paper towels to remove any excess moisture; this crucial step helps the coating adhere better.
- Set Up Your Dredging Station: Arrange three shallow bowls or plates in an assembly line.
- In the first bowl, add the gluten-free 1:1 flour.
- In the second bowl, pour the liquid egg whites.
- In the third bowl, combine the gluten-free panko breadcrumbs, Italian seasoning, garlic powder, salt, and pepper. Use a fork to mix these ingredients thoroughly until well combined. For an extra layer of savory flavor, you can stir in a tablespoon or two of grated vegan or regular parmesan cheese into the panko mixture.
- Coat the Cutlets: Now it’s time to bread the chicken. Take one chicken cutlet at a time and follow this sequence:
- First, dip it into the flour, ensuring both sides are lightly coated. Gently shake off any excess flour.
- Next, dip the floured cutlet into the liquid egg whites, allowing any excess to drip off.
- Finally, press the cutlet firmly into the seasoned gluten-free panko breadcrumb mixture, making sure it’s completely and evenly coated on all sides. Repeat this dredging process for all four chicken cutlets.
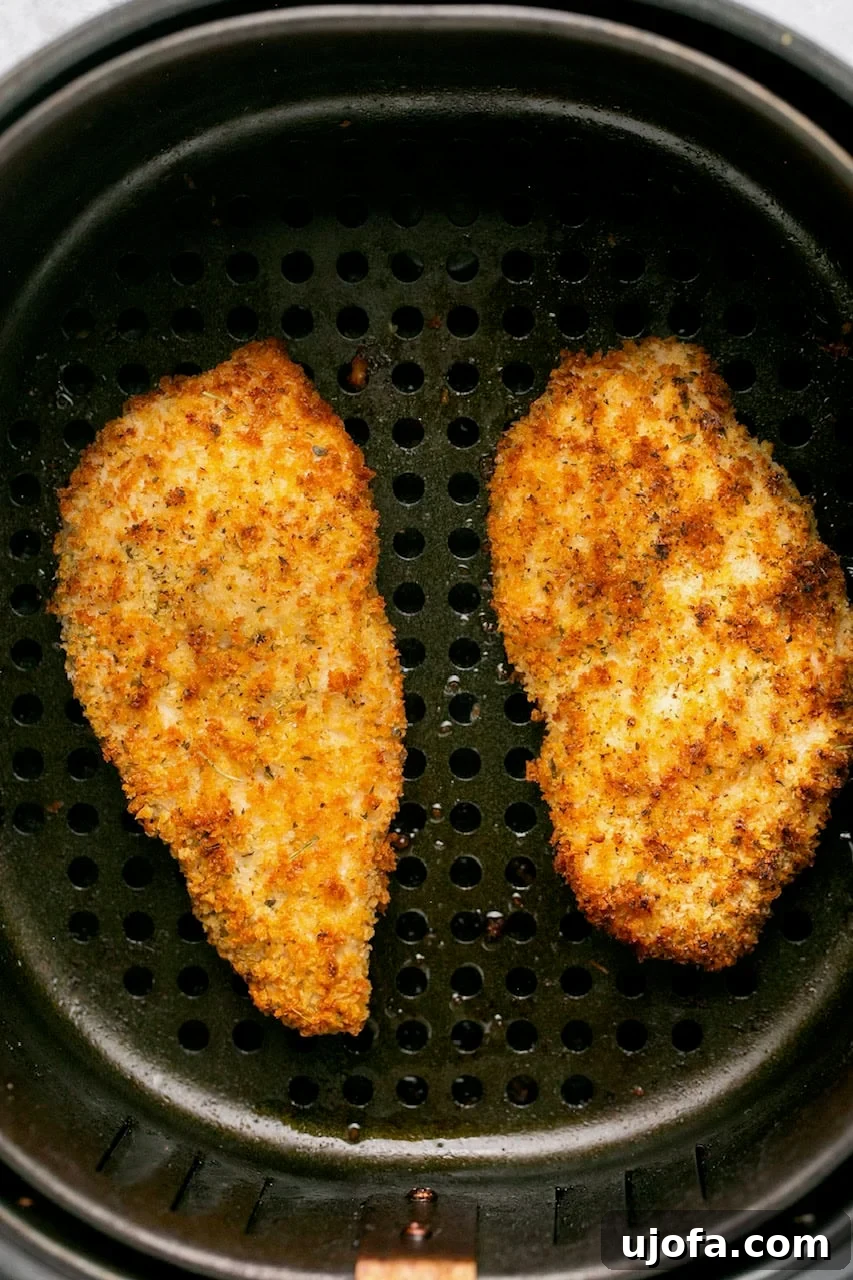
- Air Fry to Perfection: Preheat your air fryer to 390°F (199°C) for 2-3 minutes. While it preheats, lightly spray the bottom of the air fryer basket with cooking spray (avocado oil spray is recommended). Place 2 breaded cutlets into the basket in a single layer, ensuring they are not overcrowded. Overcrowding can lead to steaming instead of crisping. Lightly spray the tops of the cutlets with more oil. Air fry for 6 minutes, then carefully flip the cutlets, spray the other side with oil, and continue cooking for an additional 4-6 minutes. The chicken is done when it’s golden brown and the internal temperature reaches 165°F (74°C) as measured with a meat thermometer.
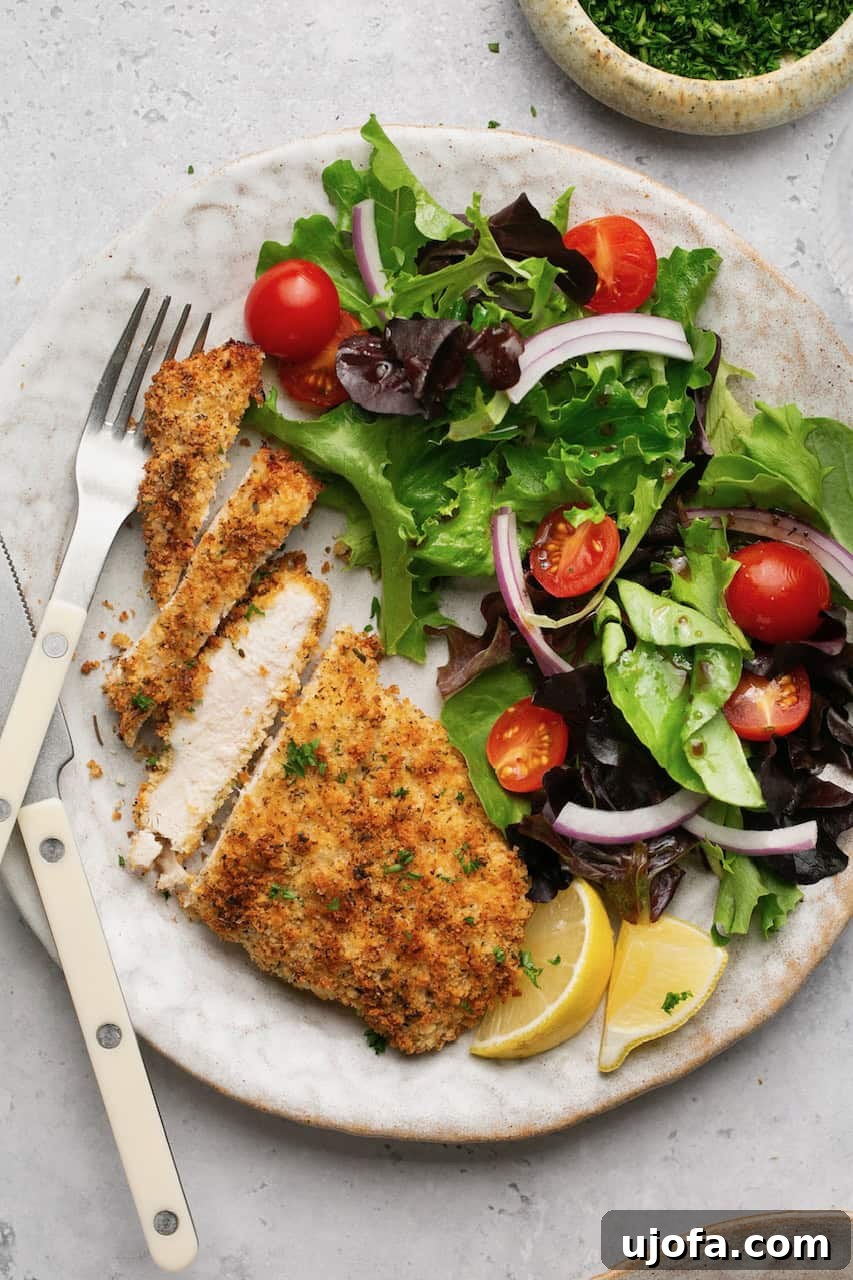
- Rest and Serve: Once cooked, transfer the chicken cutlets to a cutting board and let them rest for 2 minutes. This allows the juices to redistribute, ensuring maximum tenderness and flavor. Slice and serve immediately with your favorite accompaniments. Enjoy your perfectly crispy and juicy air fryer chicken cutlets!
No Air Fryer? No Problem! Baked Chicken Cutlets Option
If you don’t have an air fryer or simply prefer oven baking, these chicken cutlets can be equally delicious when prepared in a conventional oven. The baking method still delivers a wonderfully crispy coating and tender interior with just a few adjustments:
To make these crispy chicken cutlets in the oven, begin by preheating your oven to 400°F (200°C). Line a large baking sheet with aluminum foil or parchment paper for easy cleanup. Follow the exact instructions above for preparing and dredging the chicken cutlets. Once breaded, lightly spray the lined baking sheet with avocado oil or your preferred cooking spray. Arrange the chicken cutlets in a single, even row on the baking sheet, ensuring they are not touching. Lightly spray the tops of the cutlets with more oil to promote browning and crispiness. Bake for 18-20 minutes, then carefully flip each cutlet and continue baking for an additional 5-6 minutes, or until they are golden brown and cooked through (reaching an internal temperature of 165°F / 74°C). Just like with the air-fried version, let them rest for 2 minutes before serving to lock in the juices. Enjoy your perfectly baked chicken cutlets!
Expert Tips & Tricks for the Best Air Fryer Chicken Cutlets
Achieving consistently perfect air fryer chicken cutlets is simple with a few insider tips. These pointers will help you avoid common pitfalls and ensure your chicken is always tender, juicy, and wonderfully crispy:
- Ensure Even Thickness: This is paramount for uniform cooking. Pound your chicken cutlets to an even ½-inch thickness using a meat mallet. If you don’t have one, a heavy-bottomed pan or rolling pin can work. Placing the chicken between two sheets of plastic wrap prevents sticking and mess. Unevenly thick chicken will result in some parts being dry while others are still cooking.
- Blot Dry for Best Adhesion: Before dredging, always pat the chicken cutlets thoroughly dry with paper towels. Excess moisture on the chicken surface can prevent the flour and panko from sticking properly, leading to a less crispy and uneven coating. A dry surface is a sticky surface!
- Avoid Overcrowding the Air Fryer: Resist the urge to cram too many cutlets into the air fryer basket at once. Air fryers work by circulating hot air around the food. If the basket is overcrowded, the air can’t circulate effectively, leading to steamed rather than crispy chicken. Cook in batches if necessary, allowing enough space between each cutlet.
- Don’t Overcook: There’s truly nothing worse than rubbery, dry chicken. Chicken cutlets cook quickly due to their thinness. Start checking the internal temperature around the 10-minute mark. The safe internal temperature for chicken is 165°F (74°C). Using an instant-read meat thermometer inserted into the thickest part of the cutlet is the most reliable way to ensure it’s cooked perfectly without drying out.
- Let Them Rest: Once cooked, transfer the chicken cutlets to a cutting board and let them rest for at least 2 minutes before slicing or serving. This short resting period allows the muscle fibers to relax and the juices to redistribute throughout the meat, resulting in a significantly juicier and more tender final product. Skipping this step can lead to dry chicken.
- Generous Oil Spray: Don’t be shy with the oil spray! A good, even coating of oil on both sides of the breaded cutlets is essential for achieving that desirable golden-brown color and irresistible crispiness. Avocado oil or olive oil spray works best.
Air Fryer Chicken Cutlets: Frequently Asked Questions (FAQ)
Is panko breading gluten-free?
No, traditional panko breadcrumbs are not gluten-free as they are typically made from wheat bread. However, I am thrilled to report that many excellent gluten-free panko breadcrumb options are readily available at most grocery stores today. Brands like Kikkoman offer gluten-free panko made from rice flour and pea protein, which provides the same light, airy, and extra-crispy texture as conventional panko. Always check the label to ensure it’s certified gluten-free if you have dietary restrictions.
Do you need flour for chicken cutlets?
Yes, using flour for chicken cutlets is highly recommended if you want the breading to adhere properly and create that perfect crispy crust. The flour acts as an initial dry layer, providing a surface for the egg wash to stick to, which in turn helps the panko breadcrumbs cling to the chicken. This three-step dredging process (flour, egg, panko) is key to a successful, evenly coated cutlet. Gluten-free flour works just as effectively as all-purpose flour in this application.
What temperature should chicken be cooked in the air fryer?
After extensive testing with various temperatures, I’ve found that 390°F (199°C) is the ideal temperature for cooking chicken cutlets in the air fryer. This temperature is hot enough to achieve a beautifully golden and crispy exterior quickly, while also ensuring the interior cooks thoroughly and remains juicy. Lower temperatures can result in a less crispy crust, while excessively high temperatures might burn the breading before the chicken is fully cooked.
How long does it take to bake chicken cutlets?
For baked chicken cutlets, preheat your oven to 400°F (200°C). They typically bake for an initial 18-20 minutes, followed by a flip and an additional 5-6 minutes of cooking. This two-stage baking ensures both sides get crispy and the chicken reaches an internal temperature of 165°F (74°C) for perfect results every time.
How long should I reheat chicken cutlets in the air fryer?
Reheating leftover chicken cutlets in the air fryer is the best way to restore their crispiness. Simply add the cooked cutlets to your air fryer basket and cook at 360°F (182°C) for about 3 minutes. There’s no need to preheat the air fryer for reheating, making it a super quick option for lunch or dinner.
How do you store leftover air fryer chicken cutlets?
To maintain freshness and flavor, store any leftover cooked chicken cutlets in an airtight container in the refrigerator. Properly stored, they will remain delicious for up to 5 days, making them excellent for meal prepping throughout the week.
More Delicious Gluten-Free Air Fryer Recipes to Try
If you loved these Air Fryer Chicken Cutlets, you’ll be thrilled to discover more easy and healthy gluten-free recipes that utilize the magic of your air fryer. Expand your repertoire with these fantastic options:
- Air Fryer Turkey Meatballs
- Air Fryer Chicken Tenders
- Frozen Salmon In The Air Fryer
- Blackened Mahi Mahi
- Air Fryer Filet Mignon
- Air Fryer Eggs
- The Easiest Boneless Pork Chops
Love this recipe? Please leave a 5-star 🌟🌟🌟🌟🌟 rating in the recipe card below & a review in the comment section. Or, follow me on Facebook, Pinterest or Instagram today!
Air Fryer Chicken Cutlets (Gluten-Free)
By: Mary Smith
Rating: 5 out of 5 stars (5 votes)
Prep: 5 mins
Cook: 12 mins
Total: 17 mins
Yield: 4 servings
These Air Fryer Chicken Cutlets are super easy to make in your air fryer in less than 15 minutes. They are made with gluten-free panko breadcrumbs which helps them get nice and crispy. It is a versatile recipe that pairs well with salad, mashed potatoes, or vegetables!
Equipment
- Air Fryer
Ingredients
- 4 chicken breast cutlets (I cut 2 larger breasts in half vertically to create 2 thinner breasts)
- ⅓ cup gluten-free measure for measure flour (I like King Arthur Baking brand)
- ⅓ cup liquid egg whites
- ¾ cup gluten-free panko breadcrumbs
- 1 tsp Italian seasoning
- 1 tsp garlic powder
- ¾ tsp salt
- ¼ tsp pepper
- Avocado oil spray, or cooking spray of choice
Instructions
- Pound your chicken breast halves so they are all of even thickness (about ½ inch thick). Blot them dry with a paper towel.
- Add the gluten-free 1:1 flour to one shallow bowl. Add the liquid egg whites to another shallow bowl. Add the gluten-free panko, Italian seasoning, garlic powder, salt, and pepper to a 3rd shallow bowl and mix with a fork to combine.
- Dip each chicken cutlet first into the flour, then the egg whites, then the gluten-free panko breadcrumbs mixture to coat completely. Repeat with all 4 cutlets.
- Set your air fryer to 390°F (199°C) and preheat for 2 minutes. Spray the bottom of the air fryer with avocado oil. Lay 2 chicken cutlets (or as many as will fit in an even layer) in the basket. Spray the tops with more oil. Air fry for 6 minutes, then flip and spray with more oil again. Continue cooking for an additional 4-6 minutes, until the internal temperature reaches 165°F (74°C).
- Let them rest for 2 minutes then serve with sides of choice. Enjoy!
Notes
- Even Sizing: Make sure the chicken cutlets are all the same size and thickness to ensure even cooking.
- Blotting Dry: Blot the chicken dry with a paper towel first to remove excess moisture. This will help the gluten-free panko to stick.
- Do Not Overcook! There is nothing worse than rubbery chicken. Check the temperature of the chicken at the 10-minute cooking time mark and keep going if needed until 165°F (74°C).
- Let It Rest: Let the chicken rest for 2 minutes after cooking. This will help ensure the chicken cutlets are juicy and not dry.
- Baked Chicken Cutlets: Preheat oven to 400°F (200°C). Line a baking sheet with foil or parchment paper. Follow the instructions above for dredging the chicken. Spray some avocado oil on the baking sheet. Lay the chicken cutlets out in an even row. Spray the tops with more oil. Bake for 18-20 minutes, then flip and cook for an additional 5-6 minutes. Let them rest for 2 minutes, then serve!
- Reheating: Add leftover chicken cutlets to your air fryer and cook for 3 minutes at 360°F (182°C). No need to preheat.
Nutrition Facts
Serving: 1 cutlet | Calories: 194kcal | Carbohydrates: 4g | Protein: 36g | Fat: 4g | Saturated Fat: 1g | Polyunsaturated Fat: 1g | Monounsaturated Fat: 1g | Trans Fat: 0.02g | Cholesterol: 109mg | Sodium: 197mg | Potassium: 629mg | Vitamin A: 51IU | Vitamin C: 2mg | Calcium: 9mg | Iron: 1mg
All nutrition facts are an estimate and automatically calculated. While I fact check them using My Fitness Pal, please note that they may not always be 100% accurate and depend on ingredients used. Weigh your total and divide by the number of servings for the most accurate grams per serving size.
Did you make this?
Rate & comment below, and tag me on Instagram @maryswholelife