
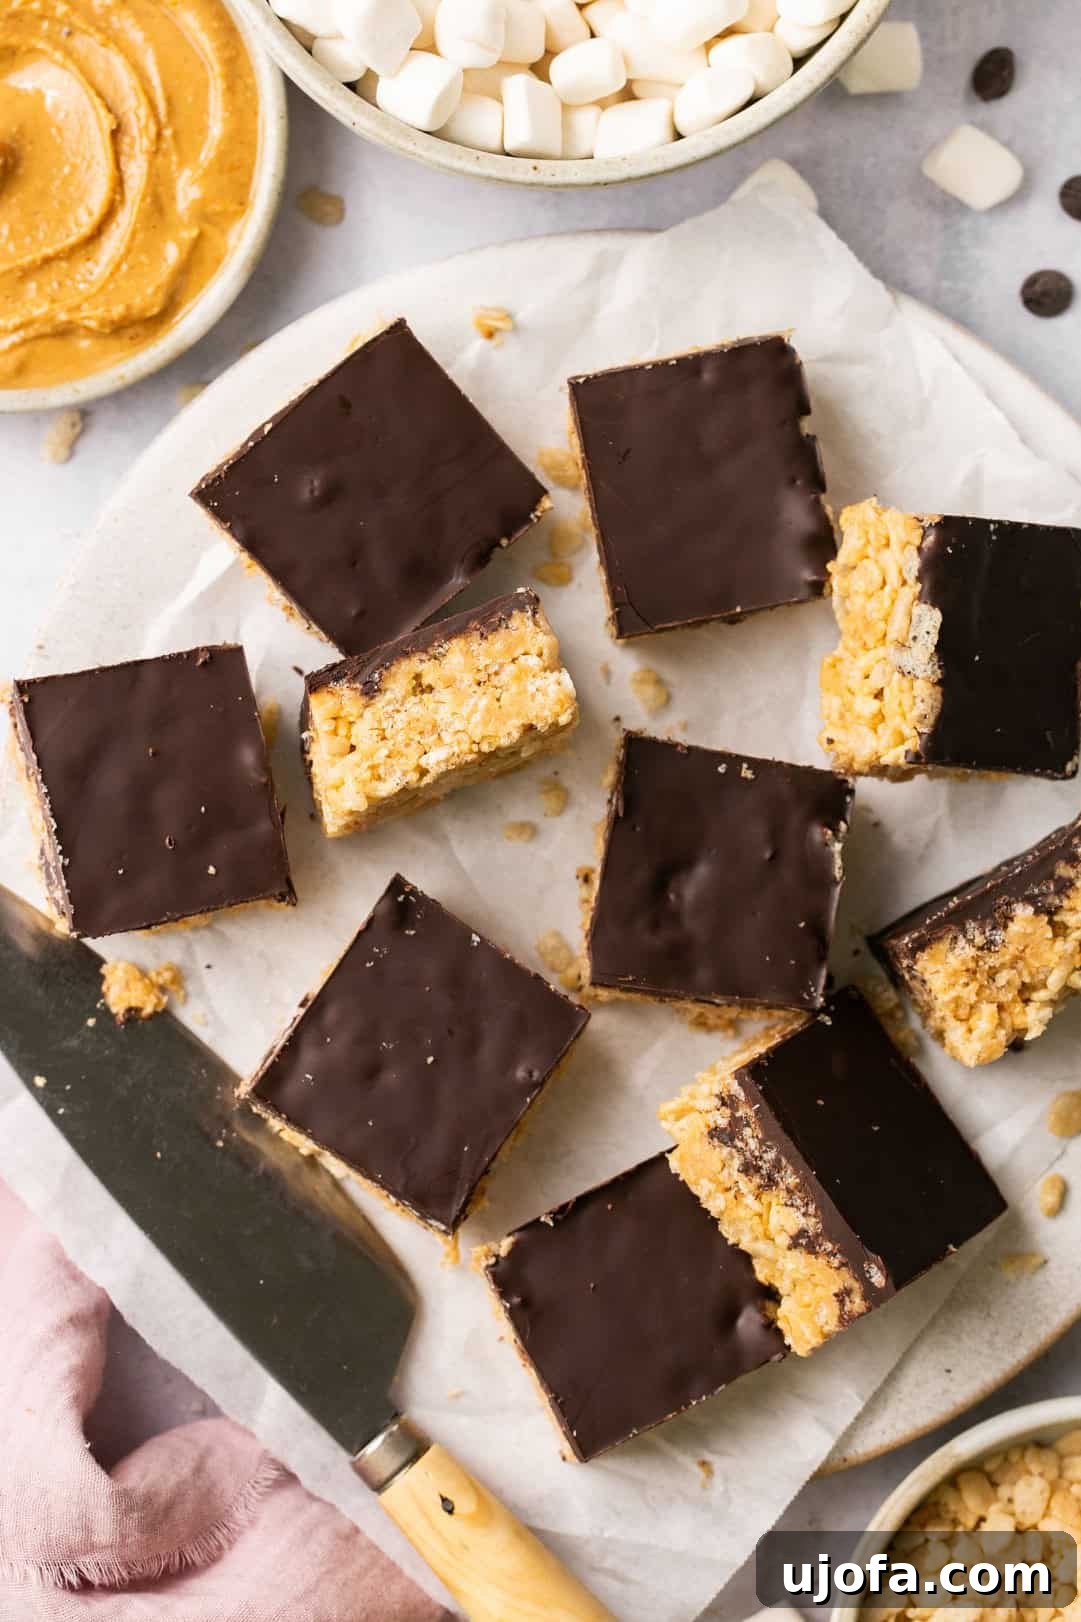
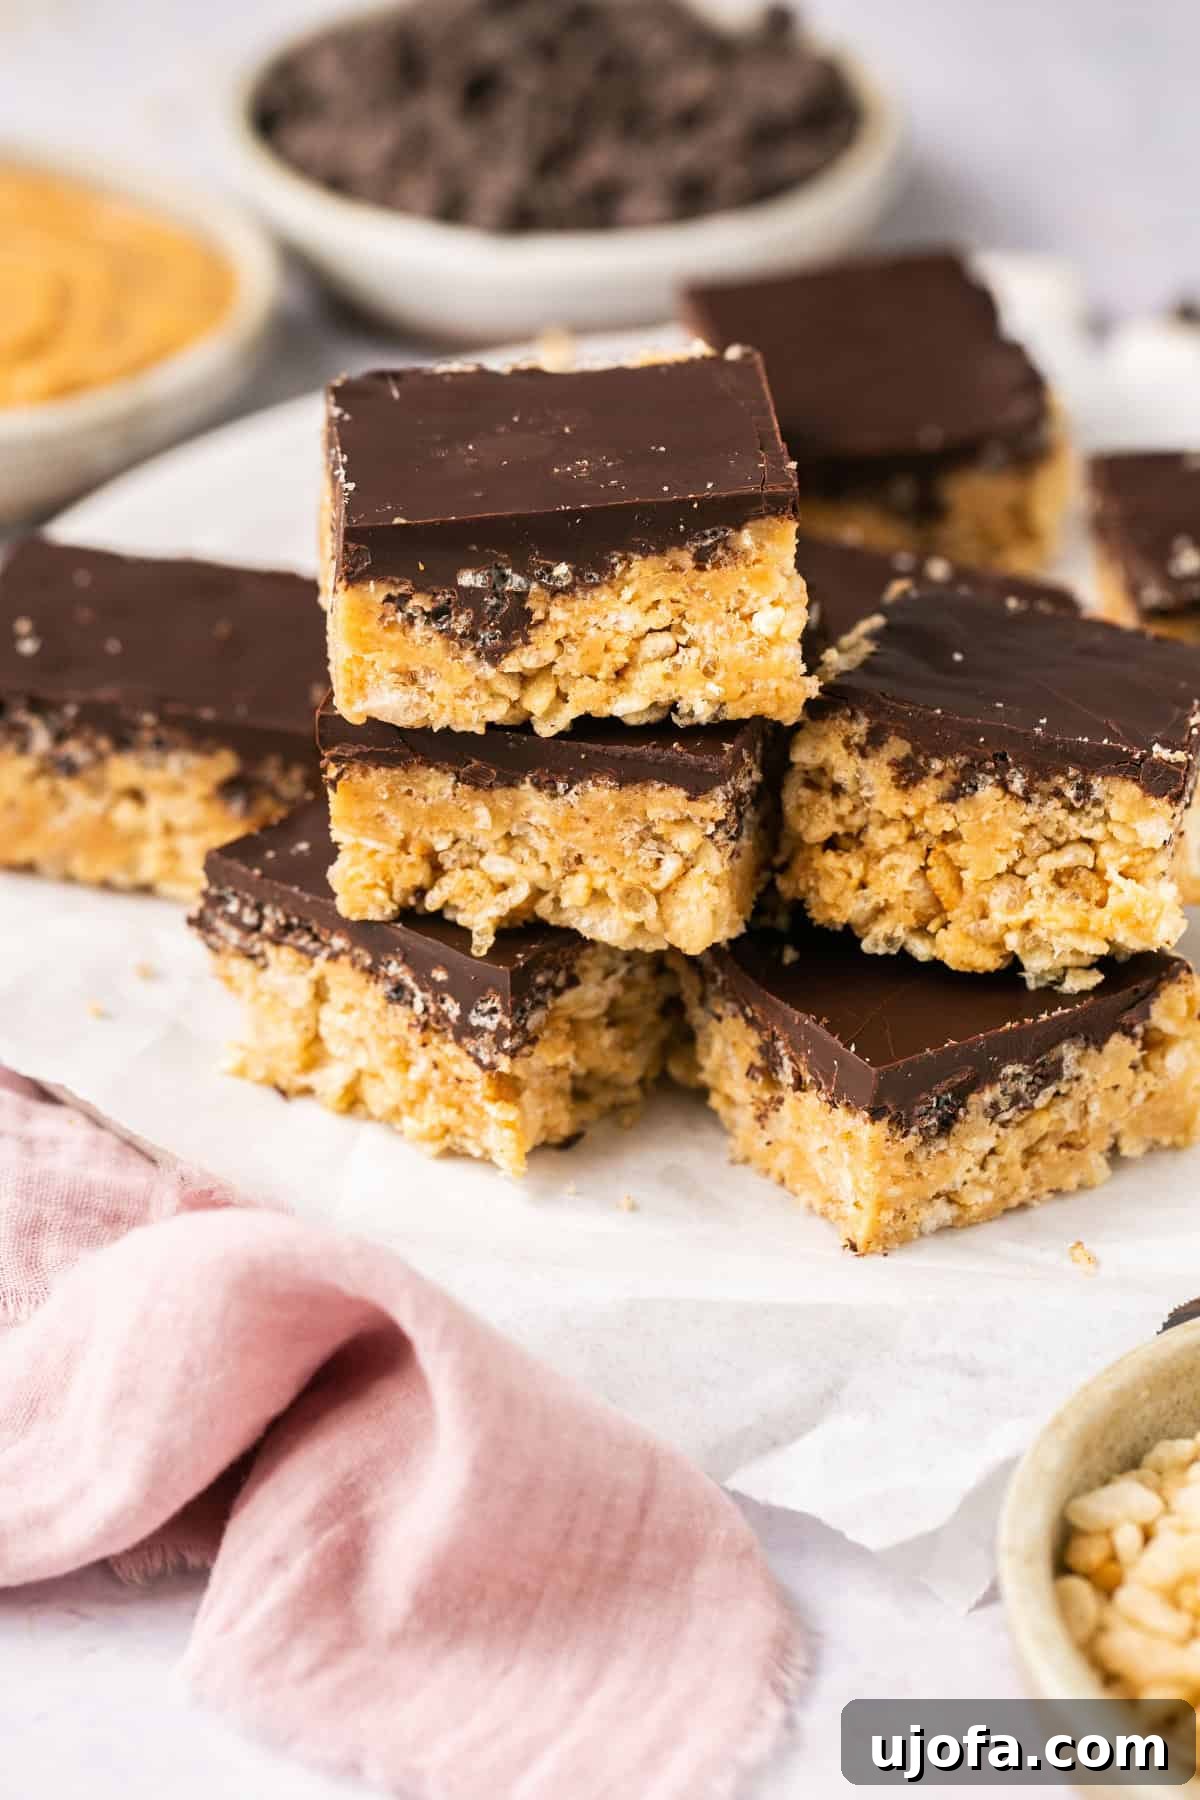
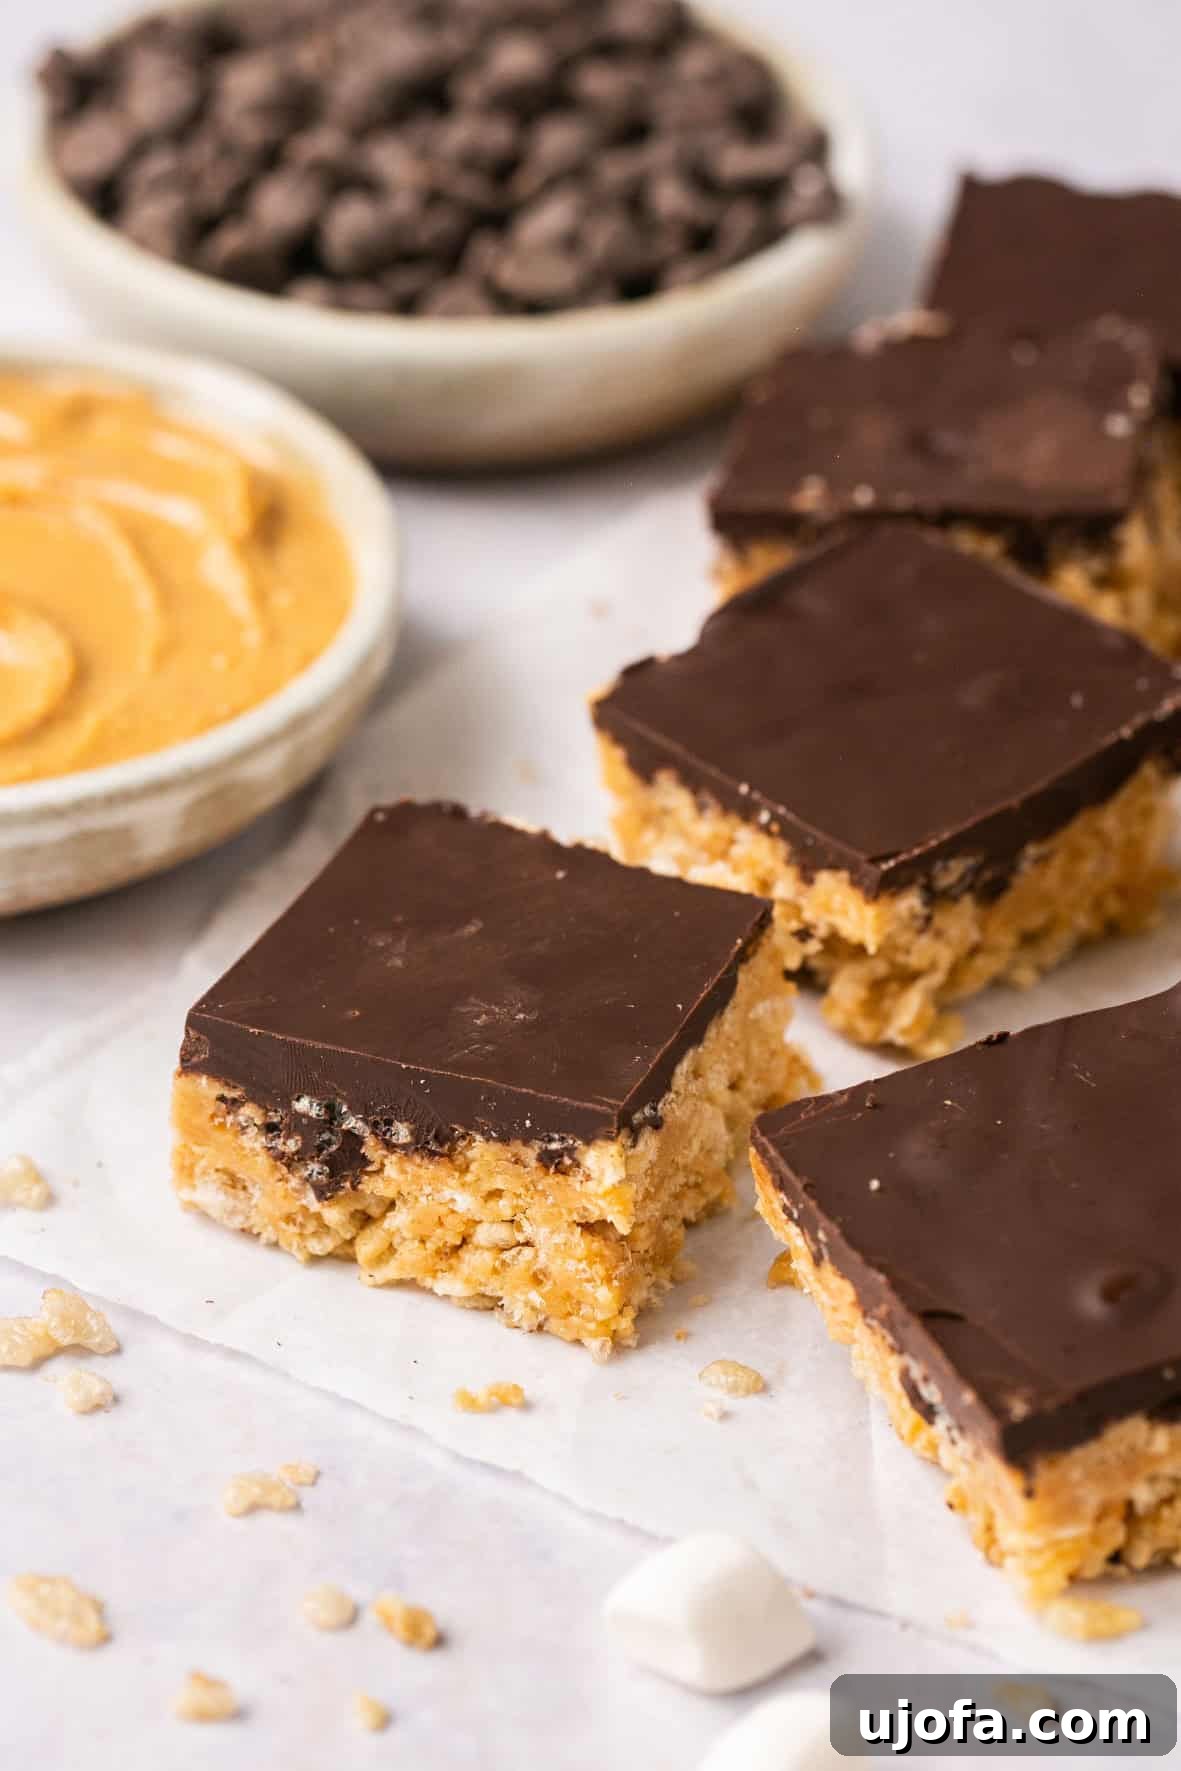
Get ready to indulge in the ultimate no-bake dessert experience with these incredible Chocolate Peanut Butter Rice Krispie Treats! This recipe is a delightful fusion of classic crispy rice cereal, irresistibly gooey marshmallows, and the timeless flavor pairing of creamy peanut butter and smooth, rich chocolate. Perfect for satisfying any sweet craving, these treats are not just easy to make but also cater to various dietary needs, being entirely gluten-free, dairy-free, and vegan. Prepare to make these your new favorite go-to dessert for any occasion!
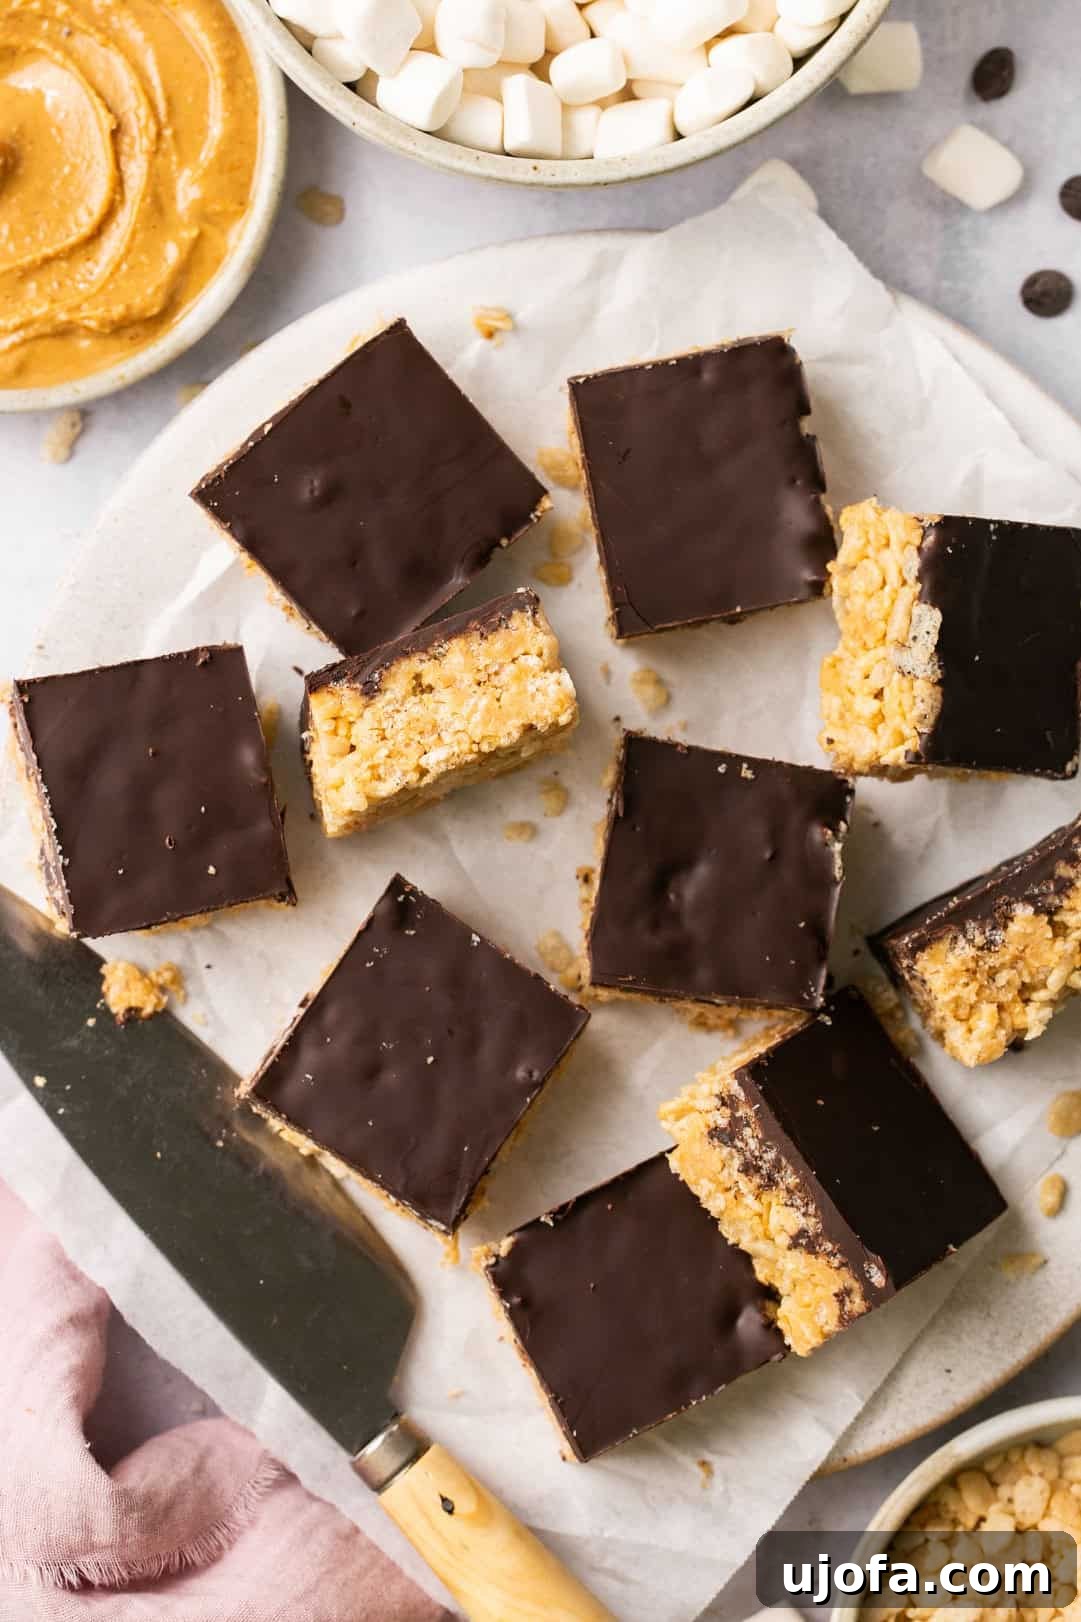
Why These Chocolate Peanut Butter Rice Krispie Treats Are a Must-Try
The combination of peanut butter and chocolate is universally loved, creating a symphony of flavors that’s simply unbeatable. This recipe takes that beloved duo and marries it with the comforting crunch of a traditional Rice Krispie treat, elevating it to an extraordinary dessert bar. But what truly sets these treats apart is their impressive adaptability and inclusive nature. They are meticulously crafted to be gluten-free, dairy-free, and vegan, ensuring that almost everyone can enjoy a bite of this deliciousness without compromise.
Imagine soft, chewy, and ooey-gooey bars that appeal to all ages. Whether you’re a devout peanut butter enthusiast or simply looking for a crowd-pleasing dessert, these bars hit all the right notes. They are incredibly versatile; whip up a single batch for a cozy family night, or double the recipe to share at parties, potlucks, or school events. The ease of preparation makes them a fantastic option for busy schedules, and the ability to make them ahead and even freeze them means you’ll always have a delightful, no-bake treat ready whenever a craving strikes. These treats are not just delicious; they are a celebration of flavor and convenience, designed to bring joy with every square.
Recipe Highlights: Quick, Delicious, and Diet-Friendly
- Effortless Preparation: From start to finish, these treats are ready in just 15 minutes, making them perfect for last-minute desserts.
- Irresistible Flavor: Enjoy the classic, beloved taste of creamy peanut butter and rich chocolate in every single bite.
- All-Inclusive: Thoughtfully crafted to be Gluten-Free, Dairy-Free, and Vegan, welcoming everyone to indulge.
- Kid-Approved: A fantastic option for children’s parties or after-school snacks, guaranteed to be a hit with the little ones.
- Beginner-Friendly: An incredibly easy recipe that requires no baking skills, ideal for novice cooks and seasoned bakers alike.
Essential Ingredient Notes for Perfect Treats
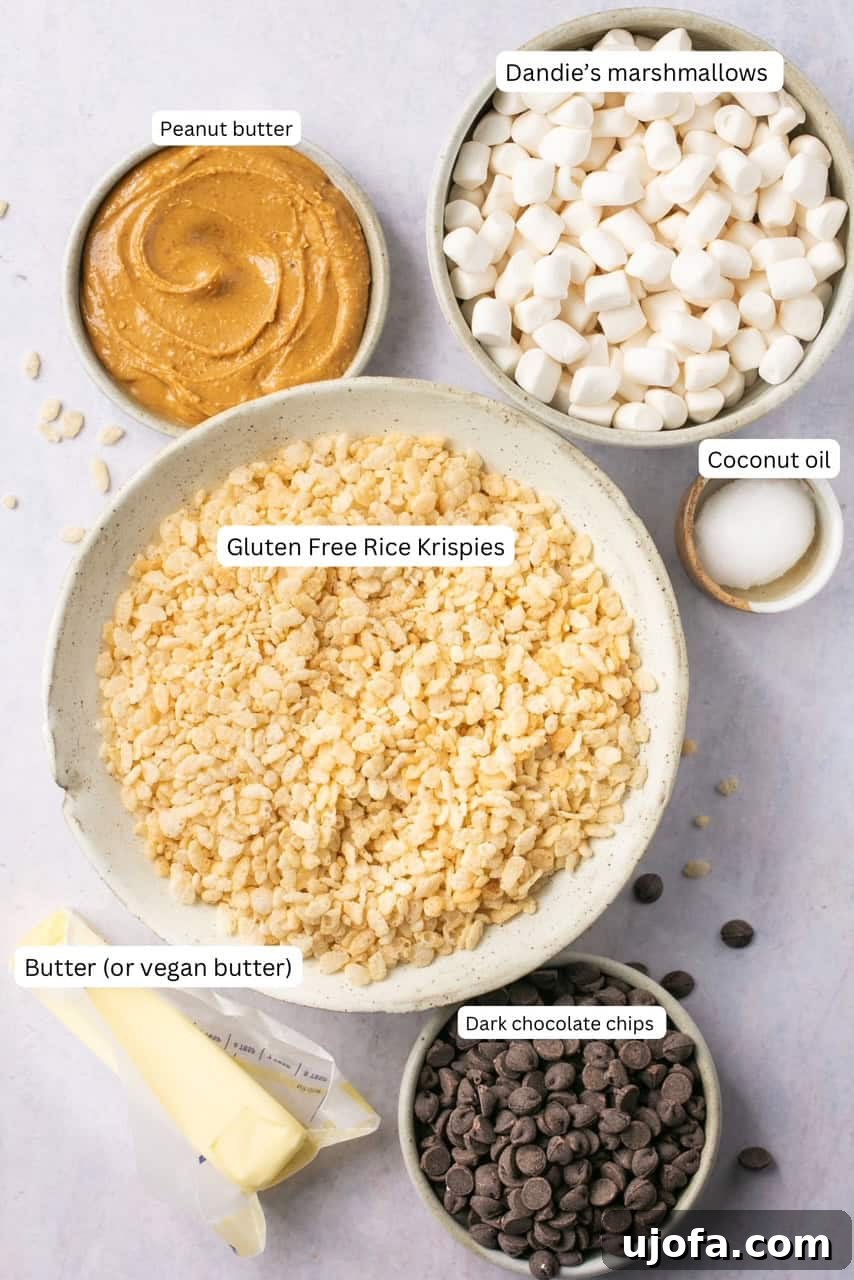
Crafting the perfect Chocolate Peanut Butter Rice Krispie Treats begins with selecting the right ingredients. Here’s a detailed look at what you’ll need and why specific choices are recommended for the best results:
- Gluten-Free Rice Krispies Cereal: It’s crucial to note that traditional Kellogg’s Rice Krispies contain malt barley, which is not gluten-free. To keep this recipe safe for those with gluten sensitivities, opt for certified gluten-free crisp rice cereal brands. Excellent alternatives include Barbara’s Organic, One Degree, Nature’s Path, and Aldi’s Crisp Rice Cereal. These can often be found at health food stores like Sprouts and Whole Foods, as well as major retailers like Amazon, Thrive Market, and Vitacost. Always double-check labels to ensure they are explicitly marked gluten-free.
- Dandies Vegan Marshmallows: To ensure these treats are dairy-free and vegan, Dandies are my top recommendation. They are a fantastic plant-based alternative to traditional mini marshmallows. While they do take a bit longer to melt than conventional marshmallows, their texture and flavor are perfect for these bars. If dietary restrictions are not a concern, feel free to use your preferred brand of regular mini marshmallows.
- Vegan Butter: The right vegan butter is key to achieving that rich, buttery flavor and smooth texture. I’ve had great success with Miyoko’s Kitchen and Kite Hill brands, both of which offer excellent dairy-free butter alternatives that melt beautifully and integrate well into the marshmallow mixture.
- Creamy Peanut Butter: For these treats, a creamy, smooth peanut butter is essential. Brands like Justin’s Honey Peanut Butter work wonderfully, providing a consistent texture and a hint of sweetness. It’s important to avoid natural peanut butters that tend to separate significantly, as their oil can make the treats greasy and prevent them from setting properly. While I haven’t personally tested crunchy peanut butter, it could add an interesting textural element if you enjoy nuts in your treats.
- Dark Chocolate Chips: For a dairy-free and gluten-free option, Enjoy Life brand dark chocolate morsels are an excellent choice, known for their high quality and allergen-friendly profile. If dairy is not an issue for you, semi-sweet chocolate chips can be used as a substitute, offering a slightly sweeter chocolate experience.
- Coconut Oil: A small amount of coconut oil helps achieve a silky-smooth, pourable chocolate topping that sets beautifully. You can use regular virgin coconut oil if you don’t mind a subtle coconut flavor, or refined coconut oil for a neutral taste that won’t impact the chocolate’s profile.
Step-by-Step Guide to Crafting Your Treats
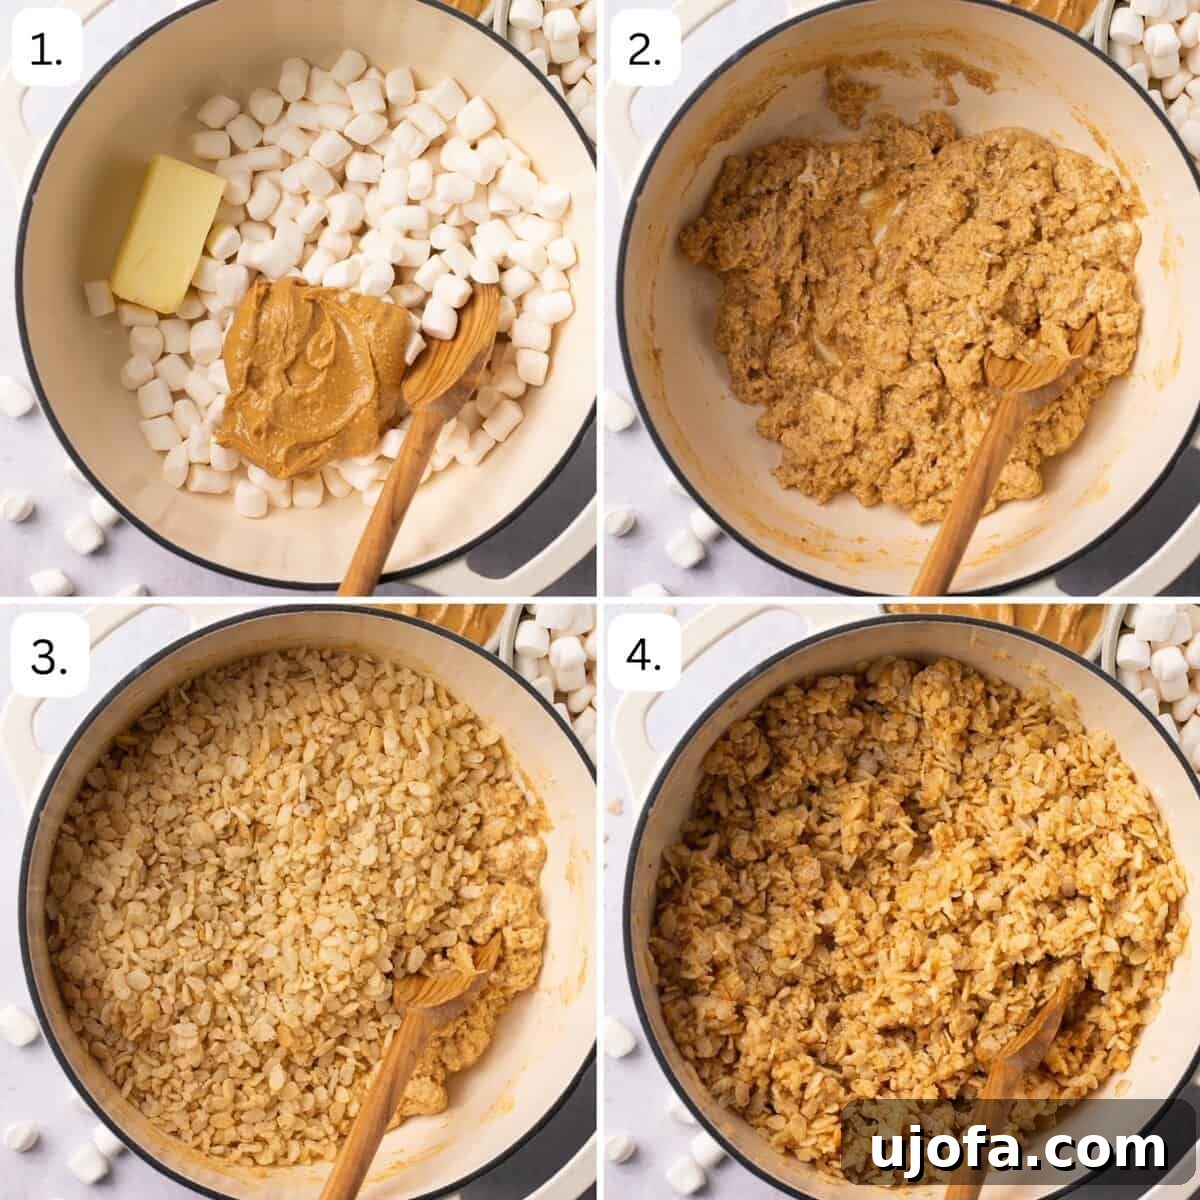

Follow these clear, detailed steps to create your perfect batch of Chocolate Peanut Butter Rice Krispie Treats:
- Prepare the Base Mixture: In a large saucepan or a spacious pot, combine the creamy peanut butter, vegan butter, and Dandies vegan marshmallows. Place the saucepan over LOW heat. It’s important to be patient during this step, as vegan marshmallows, especially Dandies, tend to melt more slowly and require gentle heat compared to conventional marshmallows.
- Melt and Stir Continuously: Continue to heat the mixture, stirring constantly with a sturdy wooden spoon or heat-resistant spatula. Keep stirring until the marshmallows have completely melted into the peanut butter and butter, forming a sticky, homogeneous mixture. If necessary, you can incrementally increase the heat to medium-low, but exercise caution as marshmallows can scorch very quickly. Maintaining a low to medium-low heat is ideal to prevent burning and achieve a smooth consistency.
- Incorporate the Cereal: As soon as the marshmallow mixture is fully melted and smooth, promptly remove the saucepan from the heat source. Immediately add the gluten-free crisp rice cereal to the warm mixture.
- Mix Thoroughly: Stir vigorously and without delay, ensuring that every single piece of crisp rice cereal is evenly coated with the rich, gooey peanut butter and marshmallow mixture. Work quickly before the mixture starts to cool and set.
- Press into Pan: Lightly spray a 9×9 inch metal square pan with avocado oil or your preferred cooking spray to prevent sticking. Carefully transfer the coated cereal mixture into the prepared pan. To make pressing easier and prevent the mixture from adhering to your hands, spray your hands lightly with oil. Gently and evenly press the peanut butter and cereal mixture down into the bottom of the pan until it forms a flat, compact layer. Alternatively, you can use the bottom of a clean, oiled cup to achieve an even press.
- Melt the Chocolate Topping: In a microwave-safe bowl, combine the dark chocolate chips and coconut oil. Microwave in short bursts, typically 30-second intervals. After each interval, remove the bowl and stir the chocolate vigorously. Continue this process until the chocolate is fully melted and beautifully smooth, with no lumps remaining.
- Apply Chocolate Layer: Pour the melted chocolate mixture evenly over the pressed Rice Krispie base in the pan. Use a spatula to gently spread the chocolate into a smooth, even layer that covers the entire surface of the treats.
- Chill and Slice: Allow the treats to cool at room temperature until the chocolate topping has completely hardened. For a quicker set, you can refrigerate them for about 30-60 minutes or place them in the freezer for approximately 15 minutes. Once hardened, use a sharp knife to slice the large slab into individual squares. For smaller, bite-sized treats, cut into 16 squares. For more substantial servings, slice into 9 larger pieces. Serve and enjoy your homemade, irresistible treats!
Mary’s Expert Tips & Clever Tricks
Achieving the perfect batch of Chocolate Peanut Butter Rice Krispie Treats is simple with these additional insights:
Optimal Storage Solutions: To maintain their signature soft and chewy texture, always store your finished chocolate Rice Krispie treats in an airtight container at room temperature. It’s crucial to avoid refrigerating them, as the cold temperature will cause them to become too hard and firm, making them much less enjoyable to eat. Properly stored at room temperature, these treats will stay fresh and delicious for up to 3-5 days.
Smart Swaps for Dietary Flexibility: If you do not have dairy sensitivities or restrictions, you can easily substitute the vegan butter with regular unsalted butter and opt for conventional semi-sweet chocolate chips instead of dairy-free versions. These simple changes will still yield a wonderfully delicious treat, adapting the recipe to your preferences.
Creating a Traditional Version: For those who are not adhering to a gluten-free or dairy-free diet, this recipe is incredibly adaptable. You can swap out the specialized ingredients for their conventional counterparts: use regular Rice Krispies cereal, traditional mini marshmallows or even marshmallow fluff for the gooey binder, and standard butter and chocolate chips. The core method remains the same, ensuring a delightful classic treat for everyone.
Flavor Enhancements: Don’t hesitate to get creative with additional toppings! A sprinkle of flaky sea salt over the melted chocolate layer can beautifully enhance the flavors, balancing the sweetness. You could also add a drizzle of extra melted peanut butter, a handful of mini chocolate candies, or colorful sprinkles for a festive touch.
Preventing Stickiness: When pressing the mixture into the pan, if spraying your hands with oil isn’t enough, try placing a piece of parchment paper or wax paper over the mixture and pressing down with your hands or a flat-bottomed glass. This creates a non-stick barrier and ensures an even, compact layer.
Frequently Asked Questions (FAQs)
Can I freeze these peanut butter Rice Krispies treats?
Absolutely! Freezing is an excellent way to prepare these treats in advance or store leftovers for a longer period. To freeze them effectively, place the completely cooled and hardened Chocolate Peanut Butter Rice Krispie Treats in a freezer-safe, airtight container. For best results and to prevent them from sticking together, separate layers with sheets of wax paper or parchment paper. When you’re ready to enjoy them, simply remove them from the freezer and let them thaw at room temperature for about 30 minutes to an hour before serving. This ensures they return to their ideal chewy texture.
Can I use natural peanut butter in this recipe?
I do not recommend using natural peanut butter for this recipe. Natural peanut butters typically separate into a thick paste and a layer of oil, and their consistency can be quite runny after stirring. This separation and thinner consistency can prevent the Rice Krispie treats from setting properly, resulting in a greasy, crumbly, and less stable bar. For the best results and a perfectly set, chewy treat, stick to a creamy, no-stir peanut butter.
Are Rice Krispies cereal gluten-free?
Contrary to popular belief, conventional Kellogg’s Rice Krispies cereal is not gluten-free. This is because they contain malt barley syrup, which is a gluten-containing ingredient. However, there are many fantastic gluten-free “crisp rice cereal” brands available that make excellent substitutions for this recipe. Look for brands such as Barbara’s Organic, One Degree Organic Foods, Nature’s Path, and even store brands like Aldi’s Crisp Rice Cereal. These can be found in the cereal aisle of most major grocery stores, health food stores like Whole Foods and Sprouts, or online retailers like Amazon and Thrive Market. Always ensure the packaging explicitly states “gluten-free” to be safe.
Can I use almond butter instead of peanut butter?
I haven’t personally tested this recipe with almond butter, but it’s certainly worth trying! Almond butter or other nut/seed butters like cashew butter or sunflower seed butter (for nut-free options) could potentially work well. The key is to use a creamy, no-stir variety, similar to the recommendation for peanut butter, to ensure the treats set correctly. The flavor profile will, of course, change, but it could offer a delicious alternative. If you experiment with other nut or seed butters, please share your results in the comments below – I’d love to hear how they turn out!
How do I prevent the treats from sticking to my hands when pressing them into the pan?
This is a common issue with sticky treats! The best way to prevent the mixture from adhering to your hands is to lightly spray your palms with cooking oil (like avocado oil) or a non-stick spray before you start pressing. Reapply oil as needed. Alternatively, you can place a sheet of parchment paper or wax paper directly over the mixture in the pan and use your hands or a flat bottom of a glass to press down. This creates a barrier and keeps your hands clean.
How long do these Chocolate Peanut Butter Rice Krispie Treats last?
When stored properly in an airtight container at room temperature, these treats are best enjoyed within 3 to 5 days. While they might still be edible after this period, their freshness, chewiness, and overall quality will start to decline. For longer storage, freezing is your best option.
Can I use milk chocolate or white chocolate for the topping?
Yes, you absolutely can! While dark chocolate offers a lovely contrast to the sweet peanut butter and marshmallows, milk chocolate or even white chocolate can be used for the topping if you prefer a different flavor profile. Just ensure you use a dairy-free version if maintaining the vegan and dairy-free status of the recipe. The melting process with coconut oil will remain the same. Experiment and find your favorite!
More Irresistible Peanut Butter and Chocolate Desserts
If you love the dynamic duo of peanut butter and chocolate, you’re in for a treat with these other delicious recipes:
Gluten Free Peanut Butter Blossoms
Vegan Millionaire Shortbread Bars
Gluten Free Chocolate Chip Almond Butter Oatmeal Cookies
Gluten Free Peanut Butter Cookies
Enjoyed this recipe? Your feedback is incredibly valuable! Please leave a 5-star 🌟🌟🌟🌟🌟 rating in the recipe card below and share your thoughts in the comment section. You can also connect with me and discover more delicious recipes by following on Facebook, Pinterest, or Instagram!

Print Recipe
Chocolate Peanut Butter Rice Krispie Treats
Equipment
-
1 9×9 metal pan
Ingredients
- 3 cups gluten free Rice Krispies cereal, see notes below for brands/where to find these!
- 10 oz bag Dandie’s vegan marshmallows, minis preferred, but the big ones will work if that is all you can find!
- ¼ cup vegan butter
- ½ cup smooth peanut butter, I love Justin’s honey PB
- 1.5 cups dark chocolate morsels, I like Enjoy Life Brand for dairy free gluten free
- 1 tbsp coconut oil
Instructions
-
Add the peanut butter, butter, & add the marshmallows to a large saucepan over LOW heat. Melting will take some time because Dandies do not melt as quickly as regular marshmallows.
-
Heat and stir the marshmallow pieces with a wooden spoon continuously until they melt into each other and become sticky. You can turn the heat up to medium heat if needed, but be careful because the marshmallows will burn quickly. Low to medium-low heat is best.
-
Remove from heat and quickly add in the Rice Krispies. Stir immediately until all Rice Krispies are coated with the marshmallow mixture.
-
Spray a 9×9 metal baking dish with avocado oil and carefully transfer the mixture into the pan. Spray your hands with oil to prevent sticking. Then, gently press down until the mixture is flat and even in the pan. You can also use the bottom of a cup to press it down evenly.
-
In a microwave-safe dish, combine chocolate and coconut oil. Microwave at 30-second intervals, stirring each time, until melted and smooth.
-
Pour the chocolate over the Rice Krispies mixture. Cool at room temperature until the chocolate is hardened, or can refrigerate or freeze them until hardened. It will take about 15 minutes in the freezer. Slice up into 16 squares for smaller treats, or 9 pieces for larger treats, and enjoy!
Notes
Swaps: If you are okay with dairy, you can use regular butter and semi sweet chocolate chips.
Nutrition
All nutrition facts are an estimate and automatically calculated. While I fact check them using My Fitness Pal, please note that they may not always be 100% accurate and depend on ingredients used.