
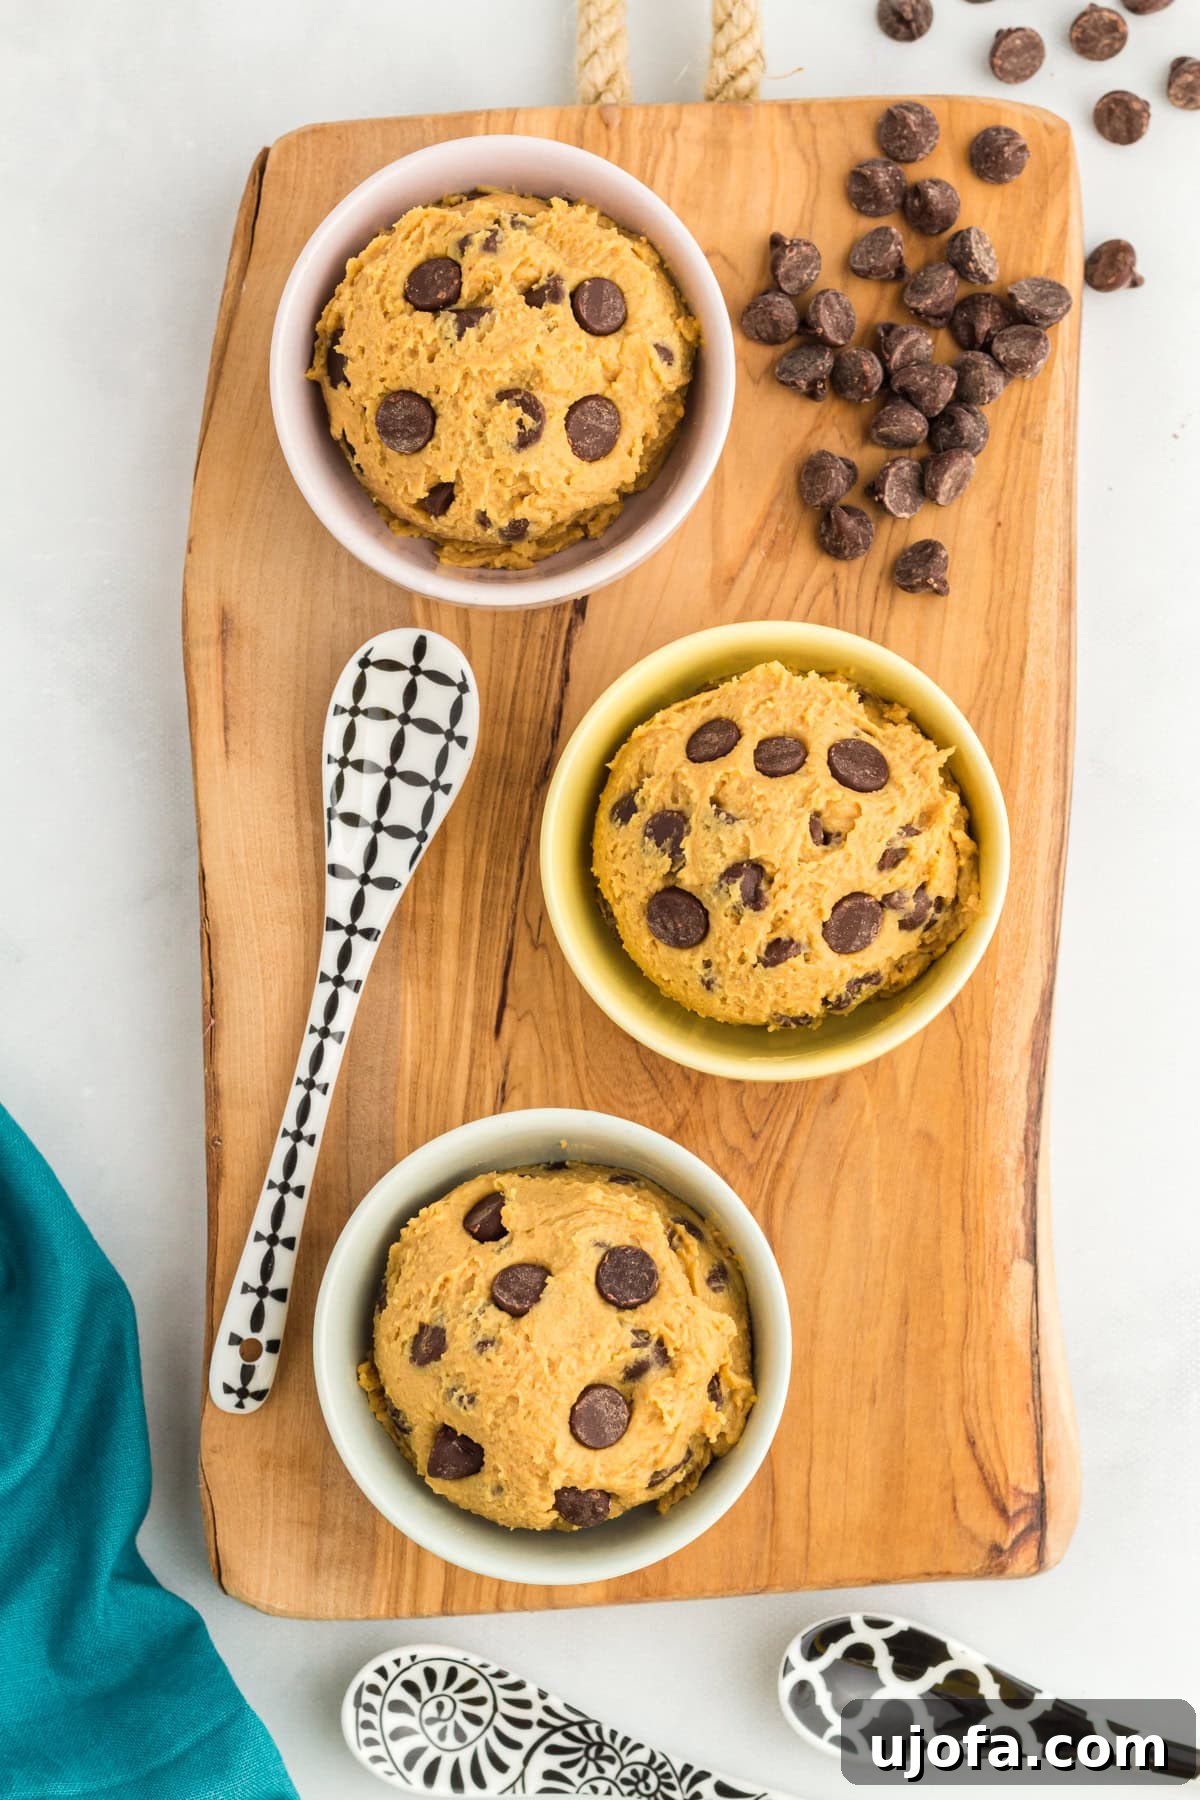
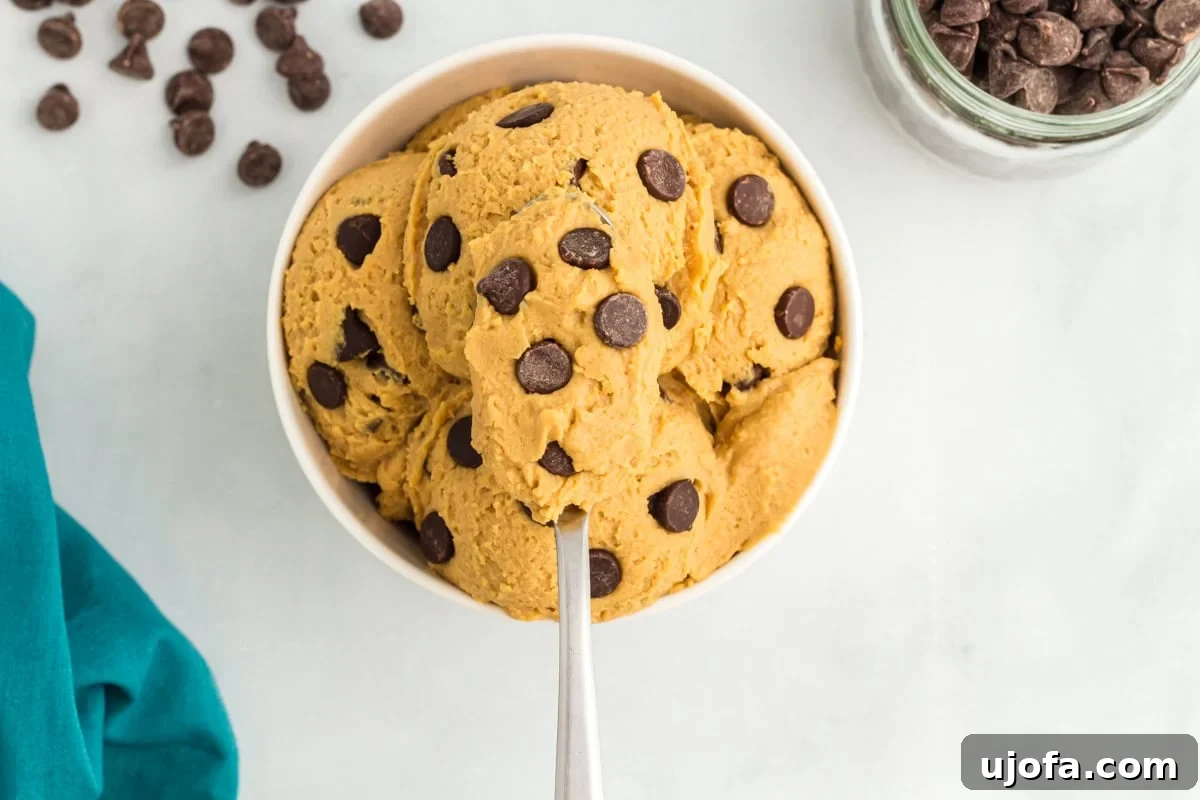
Welcome to your new obsession! This incredible chickpea cookie dough recipe is not just a dessert; it’s a revelation. Crafted with wholesome, simple ingredients, it whips up in mere minutes, offering a truly guilt-free indulgence that’s packed with protein and fiber. Whether you’re a seasoned health enthusiast or simply seeking a delicious sweet treat that aligns with your dietary needs, this edible cookie dough is a game-changer. It’s naturally gluten-free, incredibly easy to make vegan, and boasts a rich, creamy texture with just the right amount of sweetness to satisfy any craving. Prepare to dive in spoon-first and discover your ultimate healthy treat!
Why Chickpeas in Cookie Dough? A Delicious Revelation
Like many, I was initially quite skeptical about incorporating chickpeas into a dessert, especially something as beloved and comforting as cookie dough. My positive experiences with traditional gluten-free edible cookie dough had set a high standard, making me wonder if chickpeas could truly measure up. However, after just one spoonful of this chickpea-based version, all doubts vanished, and I was completely hooked.
The magic truly lies in how seamlessly the chickpeas blend. They create an incredibly smooth and luxurious base, so perfect that you would never guess they’re the star ingredient. When these creamy chickpeas are combined with rich nut butter (I often use a delicious sunflower seed butter, but peanut or almond butter work beautifully), a touch of natural sweetness from brown sugar (or maple syrup for a refined sugar-free option), a splash of warm vanilla extract, and, of course, a generous scattering of semi-sweet chocolate chips, the result is nothing short of extraordinary.
Beyond the exquisite taste and velvety texture, what I truly adore about this chickpea cookie dough is its impressive nutritional profile. It’s remarkably packed with plant-based protein and dietary fiber, transforming a typically indulgent treat into something wholesome and nourishing. This makes it a dessert I can genuinely feel good about eating, knowing it contributes to my well-being while satisfying my sweet tooth. It’s a clever and delicious way to enjoy your favorite cookie dough without any guilt!
The Undeniable Health Benefits of This Gluten-Free Cookie Dough
This isn’t just a delicious dessert; it’s a smart and mindful choice for a healthier lifestyle, especially for those navigating specific dietary requirements or simply looking for more nutritious options. Let’s delve into some of the compelling advantages that make this chickpea cookie dough a game-changer:
- Protein Powerhouse: Chickpeas are celebrated for being an excellent source of plant-based protein. Protein is vital for countless bodily functions, including muscle repair, satiety, and sustained energy levels. By incorporating chickpeas, this cookie dough helps keep you feeling full and satisfied, making it a much more substantial and nourishing snack than traditional versions.
- Fiber-Rich Goodness: High in dietary fiber, chickpeas are fantastic for digestive health. Fiber aids in regulating bowel movements, promotes a healthy gut microbiome, and helps stabilize blood sugar levels, preventing those sharp spikes and crashes often associated with sugary treats. Enjoying a dessert that actively supports your digestive system and overall well-being is truly a win-win!
- Naturally Gluten-Free: For individuals managing celiac disease, gluten sensitivity, or simply choosing a gluten-free lifestyle, finding truly satisfying and safe dessert options can often be a challenge. This recipe is inherently gluten-free, utilizing oat flour (ensure you choose certified gluten-free oats if cross-contamination is a concern) to achieve that quintessential cookie dough texture without any gluten worries. It opens up a world of guilt-free indulgence for everyone.
- Effortlessly Vegan-Friendly: One of the most appealing aspects of this recipe is its adaptability. By simply opting for your favorite plant-based milk (such as almond, soy, or oat milk) and selecting dairy-free chocolate chips (like Enjoy Life brand), this cookie dough effortlessly caters to a vegan diet. It’s a versatile and inclusive treat that almost everyone can enjoy, regardless of their dietary preferences or restrictions.
- Quick & Convenient: In today’s fast-paced world, quick and easy recipes are invaluable. With a prep time of just 10 minutes, this dessert is perfect for those spontaneous sweet cravings, last-minute gatherings, or when you need a healthy snack without much fuss. The “no-bake” aspect means less time in a hot kitchen and more time enjoying your delicious creation.
- Guilt-Free Indulgence: Because it’s crafted from wholesome, nutritious ingredients and offers significant health benefits compared to highly processed, traditional cookie dough, you can savor every spoonful without the usual guilt. It’s a smart way to indulge your sweet tooth while nourishing your body.
Pro Tips for Achieving Perfectly Smooth Chickpea Cookie Dough
The secret to truly outstanding chickpea cookie dough lies in its texture: it needs to be incredibly smooth and creamy, mimicking traditional cookie dough as closely as possible. This is where a small, extra step makes a monumental difference: peeling your chickpeas. While optional, removing the skins prevents a slightly grainy consistency and helps eliminate any subtle “beany” aftertaste, ensuring a pure, delicious cookie dough experience. Here are a few straightforward methods to prepare your chickpeas for blending:
- The Hand Pinching Method: This is a simple, mindful approach that requires no special tools. After draining and rinsing your chickpeas, take each one between your thumb and forefinger. Apply a gentle squeeze, and the thin skin will easily pop right off, leaving you with a smooth, naked chickpea. Collect the removed skins in a separate bowl and discard them. This method is surprisingly quick once you get into a rhythm, especially for a single can of chickpeas.
- The Towel Rubbing Method: For a slightly faster and less individual approach, this method is highly effective. Drain and thoroughly rinse your canned chickpeas. Spread them out in a single layer over a clean, absorbent kitchen towel. Fold the towel over the chickpeas, covering them completely. Now, gently but firmly rub the chickpeas in circular motions with your hands. The friction from the towel will help loosen and separate the skins from the chickpeas. Once most of the skins are detached, carefully pick them out and discard, leaving behind your smooth, ready-to-blend chickpeas.
- The Baking Soda Method: This technique is arguably the most effortless, particularly if you’re preparing a larger batch of chickpeas or prefer a hands-off approach. Add your drained and rinsed chickpeas to a pot of water along with 1 teaspoon of baking soda. Bring the water to a boil and let the chickpeas simmer gently for just about 2 minutes. The baking soda helps to break down the structure of the skins. Afterward, drain the chickpeas and rinse them thoroughly under cold running water. You’ll find that the skins will now slip off with minimal effort – often just a gentle rub will be enough to remove them. Ensure a good rinse to remove any lingering baking soda residue.
No matter which method you choose, investing a few extra minutes in peeling your chickpeas will significantly enhance the final taste and texture of your cookie dough, transforming it into an irresistibly silky-smooth treat every single time. This small step truly elevates the entire experience.
Delicious 10-Minute Chickpea Cookie Dough Recipe
By: Cheryl Johnson
Servings: 6 servings
Prep Time: 10 mins
Cook Time: 0 mins (No-Bake)
Total Time: 10 mins
Pin Recipe |
Email Recipe |
Print Recipe
Made with simple, wholesome ingredients, this chickpea cookie dough recipe is the perfect 10-minute, no-bake dessert. Loaded with protein, naturally gluten-free, and easy to make vegan, this edible cookie dough is a guilt-free treat you can enjoy by the spoonful.
Equipment
- 1 blender or food processor (a food processor is recommended for the smoothest texture)
Ingredients
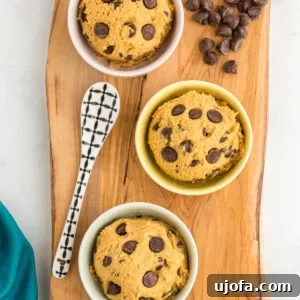
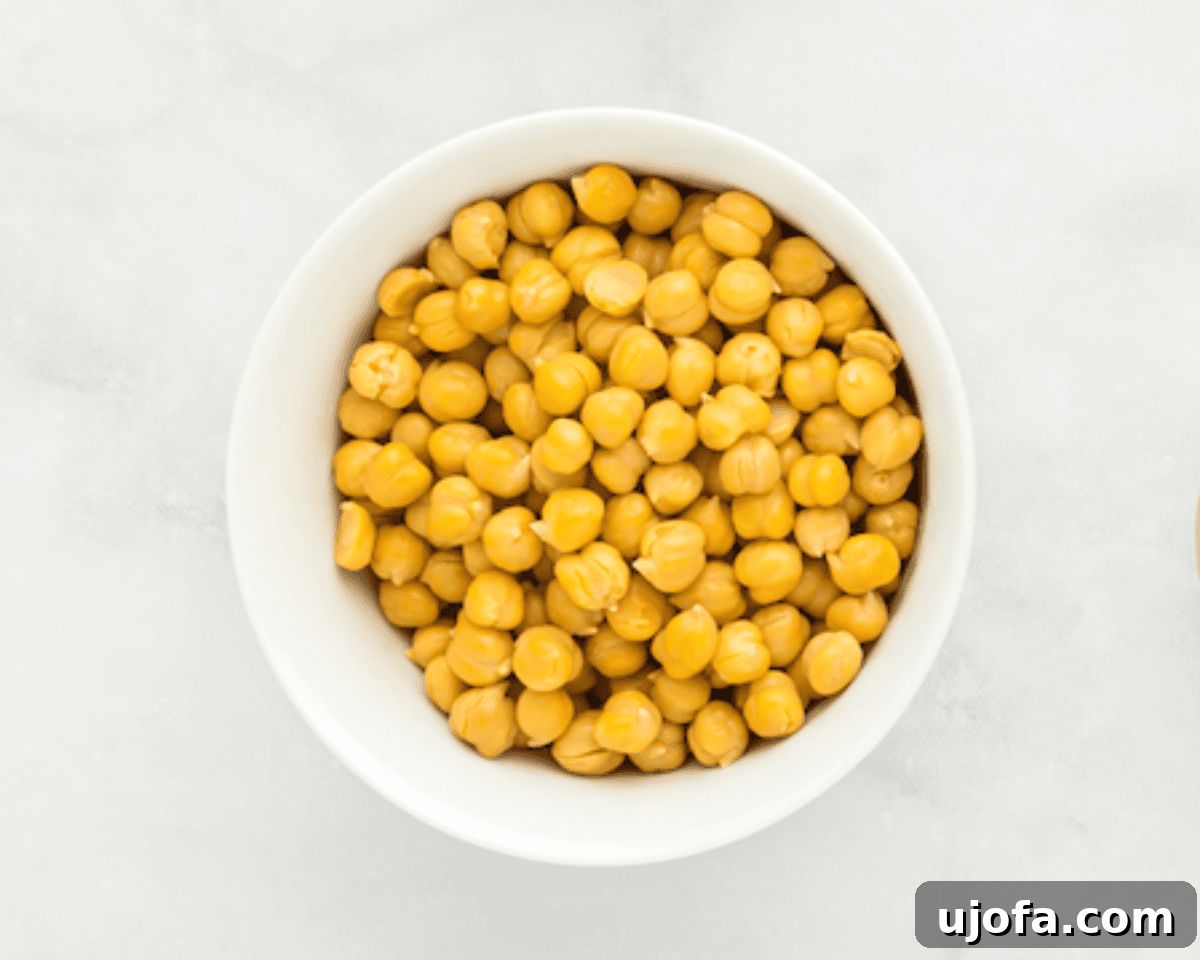
- 1 can chickpeas, 540 ml or 18 ounces, drained, peeled, and rinsed well (yields about 1 ½ cups of chickpeas or 250 grams once prepared)
- ¼ cup nut butter of choice (e.g., peanut butter, almond butter, cashew butter, or sunflower seed butter like Wow Butter for nut-free)
- ¼ cup light brown sugar, (50 grams), packed (for a refined sugar-free option, substitute with maple syrup or agave nectar to taste)
- 3 tablespoons oat flour (ensure certified gluten-free if you have a gluten sensitivity or allergy)
- 2 to 3 tablespoons milk (dairy milk or any non-dairy alternative such as almond, soy, or oat milk for a vegan option)
- 1 teaspoon pure vanilla extract (for rich flavor)
- ⅛ teaspoon salt (a small amount enhances all the sweet flavors)
- ⅓ cup semi-sweet chocolate chips (For dairy-free or vegan versions, use Enjoy Life chocolate chips or your preferred plant-based brand)
Instructions
- Prepare Chickpeas: Begin by thoroughly draining and rinsing the canned chickpeas under cold water. The most crucial step for optimal texture and taste is to peel the chickpeas. Carefully remove all the thin skins. This process eliminates any “beany” flavor and ensures a super smooth, creamy cookie dough. Refer to the “Pro Tips for Perfectly Smooth Chickpea Cookie Dough” section above for detailed peeling methods.
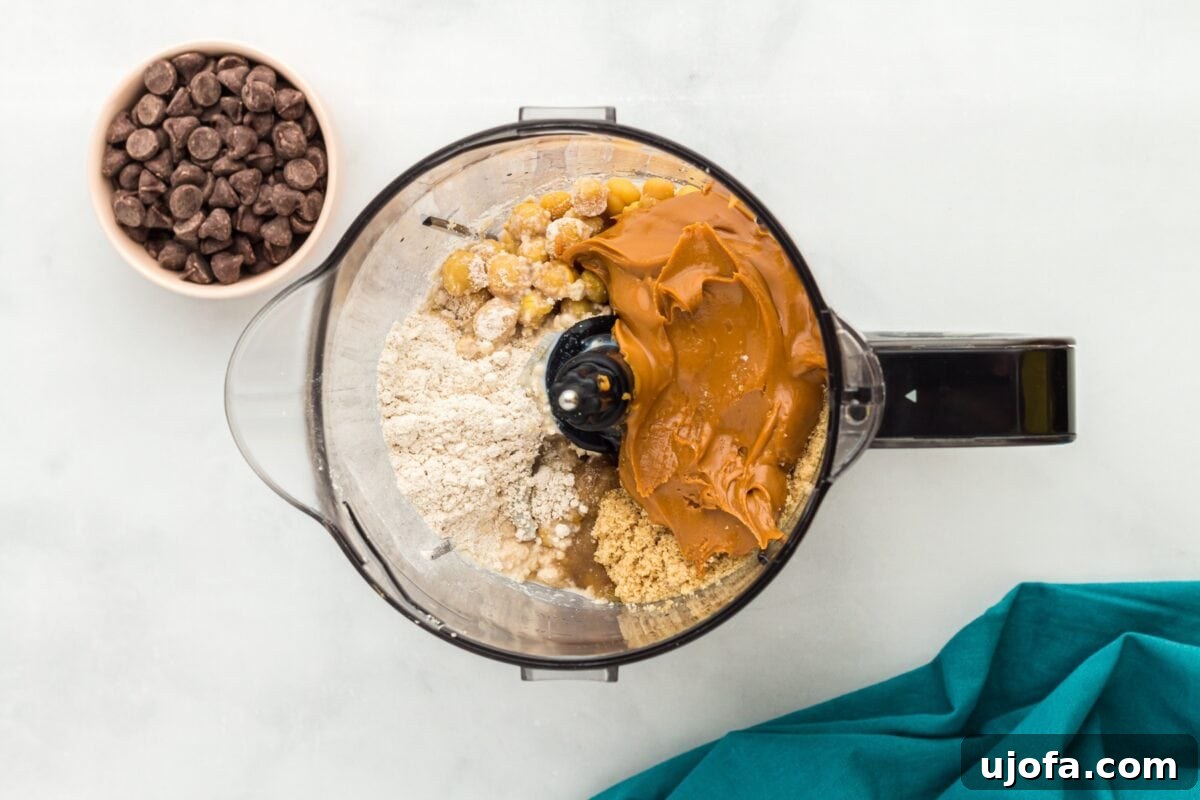
- Combine Base Ingredients: Transfer the peeled chickpeas into the bowl of a food processor or a high-powered blender. Add the nut butter of your choice, light brown sugar, oat flour, 2 tablespoons of milk, vanilla extract, and salt.
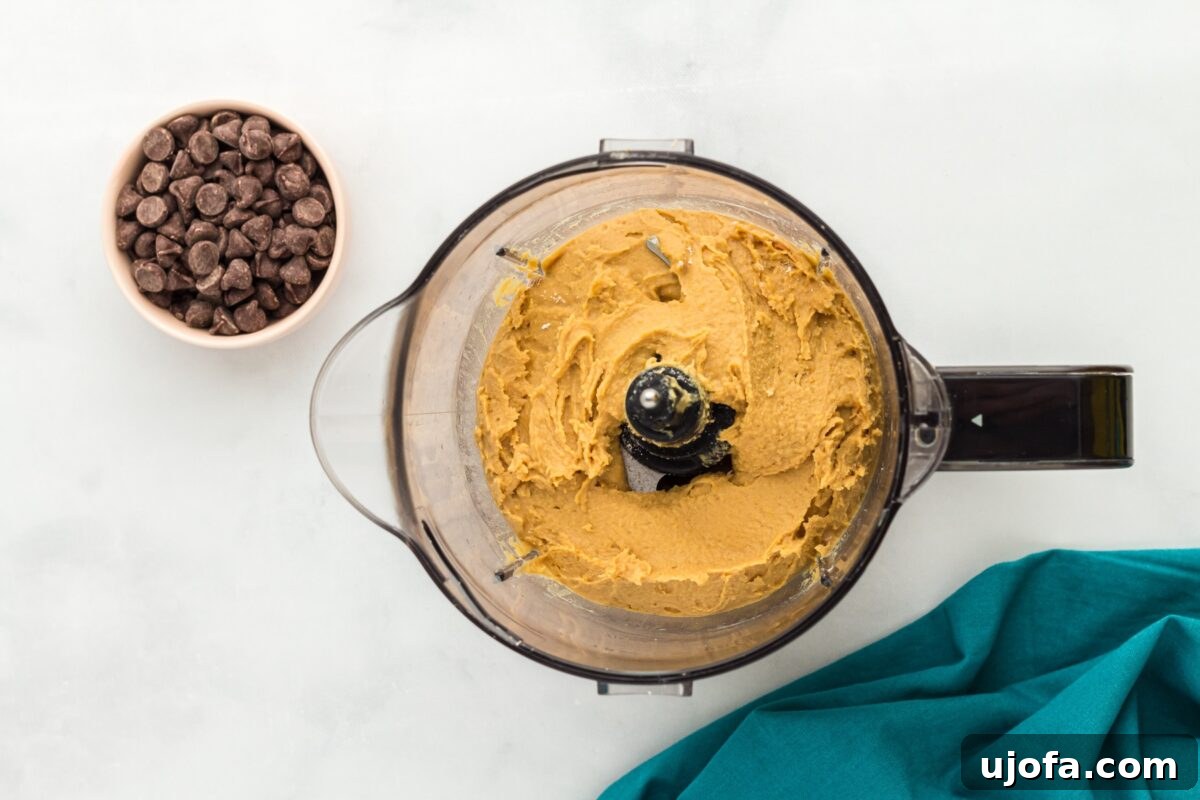
- Blend to Smoothness: Secure the lid and blend the mixture on high speed. Process until the ingredients are fully combined and the mixture becomes completely smooth and creamy. You may need to stop and scrape down the sides of the processor bowl a few times to ensure everything is incorporated evenly. If the dough appears too thick or isn’t blending easily, add the remaining 1 tablespoon of milk and continue blending until you achieve a perfect, thick yet smooth consistency.
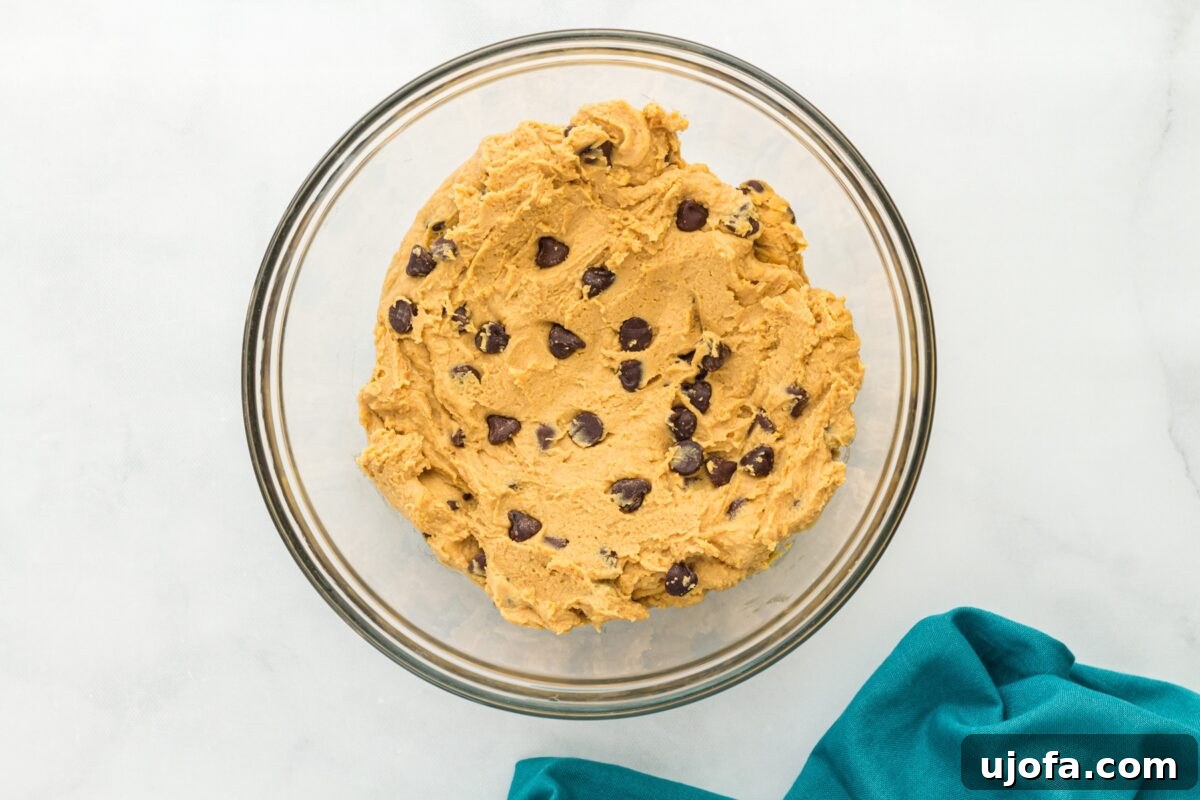
- Fold in Chocolate Chips: Once the chickpea dough base is perfectly smooth, transfer it to a separate mixing bowl. Gently fold in the semi-sweet chocolate chips using a spatula or spoon until they are evenly distributed throughout the dough. Avoid overmixing to prevent the chocolate chips from breaking up too much.
- Serve & Store: Your delectable chickpea cookie dough is now ready to enjoy! Serve it immediately as a satisfying snack or a quick dessert. Any leftovers should be stored in an airtight, food-safe container in the refrigerator for up to 4 days to maintain freshness.
Recipe Notes & Expert Tips
- Gluten-Free Assurance: Always make it a habit to meticulously check the ingredient labels of all your products, especially oat flour and chocolate chips, to ensure they are certified gluten-free. Also, be vigilant about cross-contamination warnings on packaging if you have severe allergies.
- Optimal Blending Equipment: For the absolute best results and the silkiest texture, a food processor is your ideal tool. Its powerful blades and wide bowl are perfect for breaking down the chickpeas into a smooth paste. A high-powered blender can work in a pinch, but you might need to stop more frequently to scrape down the sides. Avoid using a standard hand mixer, as it won’t have the power or blade design to effectively process the chickpeas to the desired consistency.
- Oat Flour Substitutions: Oat flour plays a crucial role in creating the authentic cookie dough texture and helping to thicken the mixture. If you need to substitute, ensure any alternative flour you use (such as almond flour or a gluten-free all-purpose blend) is explicitly safe to eat raw. Some flours require heat treatment to be safe for raw consumption.
- Beyond Edible: Baking Option: If you’re curious to transform this delicious dough into actual baked cookies, you absolutely can! To give them structure and a slight rise, stir in approximately ¼ to ½ teaspoon of baking powder (or a tiny pinch of baking soda, about ⅛ teaspoon) into the entire batch of dough. Preheat your oven to 325–350 °F (160-175 °C). Scoop 2–3 tablespoon portions onto a parchment-lined baking sheet and lightly flatten the tops. Bake for about 10–12 minutes, keeping a close eye on them as baking times can vary based on cookie size and your oven’s calibration. Let them rest on the baking sheet for a few minutes before transferring them to a wire rack to cool completely.
Nutrition Information (Approximate Per Serving)
Serving Size: 1 serving
Calories: 173 kcal
Carbohydrates: 20 g
Protein: 3 g
Fat: 9 g
Saturated Fat: 3 g
Polyunsaturated Fat: 0.2 g
Monounsaturated Fat: 1 g
Trans Fat: 0.01 g
Cholesterol: 1 mg
Sodium: 54 mg
Potassium: 92 mg
Fiber: 1 g
Sugar: 13 g
Vitamin A: 11 IU
Vitamin C: 0.3 mg
Calcium: 30 mg
Iron: 1 mg
Disclaimer: This nutrition information is automatically calculated using a third-party tool and should be considered an approximation. Individual results may vary significantly based on the exact brands, quantities, and specific types of ingredients used. It is not intended as a substitute for professional dietary advice.
Additional Recipe Info
Course: Dessert, Snack
Cuisine: American
Tried this delicious recipe? We’d love to see your creations! Share your photos and mention
@mamaknowsglutenfree or tag
#mamaknowsglutenfree on Instagram! Your feedback and shares inspire us.
How to Make Chickpea Cookie Dough: A Step-by-Step Visual Guide
Making this healthy and delicious chickpea cookie dough is incredibly straightforward, especially with a visual guide. Follow these easy, step-by-step instructions accompanied by images to ensure your batch turns out perfectly smooth, creamy, and utterly delightful.
Creative and Delicious Serving Suggestions for Your Chickpea Cookie Dough
While I’ll always advocate for the pure joy of eating this chickpea cookie dough straight from the spoon – it’s an undeniable, immediate pleasure – its versatility truly shines through in countless other delightful serving ideas. This healthy and adaptable treat can elevate various snacks and desserts, making it a fantastic and nutritious addition to your culinary repertoire.
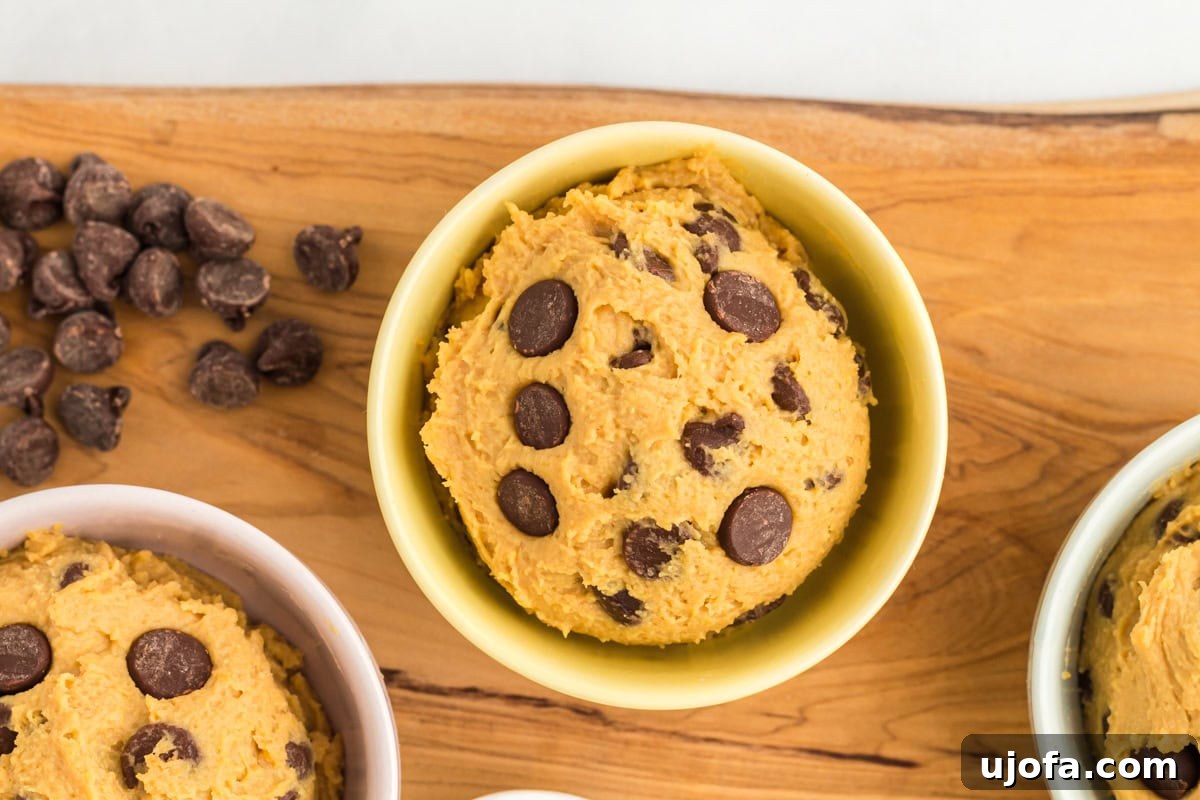
- The Classic Spoonful: Let’s be honest, for many, nothing beats digging directly into a bowl of this creamy, chocolatey goodness. It’s the ultimate comfort food for a quick snack, a satisfying post-dinner treat, or a guilt-free late-night craving. It’s the simplest and most direct way to enjoy its deliciousness.
- Protein-Packed Energy Bites: For a convenient, grab-and-go snack, a healthy pre- or post-workout fuel, or even a lunchbox treat, simply roll the dough into bite-sized balls. These chickpea cookie dough bites are perfect for meal prepping and can be easily stored in the fridge for quick access throughout the week. They’re particularly appealing to kids (and adults!) who love fun-sized, nutritious treats.
- Fruity & Crunchy Companions: Elevate your fruit or cracker experience by spreading a generous dollop of this cookie dough on slices of crisp apples, sweet pears, or even sturdy rice cakes. The natural sweetness of the fruit or the satisfying crunch of the rice cake pairs beautifully with the rich, smooth texture of the cookie dough. You can also try it on gluten-free crackers for a delightful sweet and salty combination.
- Decadent Dessert Topping: Use this edible chickpea cookie dough as a creative and indulgent topping for other desserts. It’s absolutely fantastic spooned over a scoop of vanilla ice cream (whether dairy or non-dairy), layered into elegant parfaits with your favorite yogurt and fresh berries, or even spread generously onto warm gluten-free brownies or blondies for an extra layer of flavor and texture.
- Customize with Extra Toppings & Mix-ins: Don’t hesitate to personalize your cookie dough experience! Enhance the flavor profile by sprinkling a pinch of flaky sea salt on top – it brilliantly cuts through the sweetness and amplifies the chocolate. For added crunch and healthy fats, mix in chopped nuts like walnuts, pecans, or almonds. You could also experiment with shredded coconut, dried cranberries, a swirl of melted chocolate, or even a sprinkle of cinnamon for a different twist.
How to Store Your Delicious Chickpea Cookie Dough
One of the many fantastic advantages of this edible chickpea cookie dough is its excellent shelf life, allowing you to prepare a batch and enjoy this wholesome treat over several days, making it perfect for meal prep or whenever a craving strikes.
For immediate storage, I always ensure any leftovers are placed in a sealed, food-safe, airtight container. Stored properly in the refrigerator, the cookie dough will maintain its delectable flavor and creamy texture for up to 4 days. Before serving directly from the fridge, you might find it beneficial to let it sit at room temperature for about 10-15 minutes. This brief period allows it to soften slightly, restoring that perfect scoopable consistency you love.
Freezing for Extended Freshness: If you wish to extend the shelf life of your chickpea cookie dough even further, freezing is an excellent option. To freeze, roll the dough into individual bite-sized balls or scoop it into small, uniform portions. Place these portions onto a parchment-lined baking sheet and freeze until they are completely solid (this usually takes about 1-2 hours). Once frozen firm, transfer the individual cookie dough portions into a freezer-safe airtight container or a heavy-duty freezer bag. When stored correctly, it will keep beautifully for up to 1-2 months. When you’re ready to enjoy a frozen treat, simply remove a portion and allow it to thaw in the refrigerator for a few hours or at room temperature for approximately 30 minutes until it reaches your desired softened consistency. This way, you always have a healthy, delicious snack on hand!
Explore More Wholesome & Protein-Packed Sweet Treats
If you’ve discovered the joy of this healthy chickpea cookie dough and are keen to explore more wholesome, satisfying desserts that don’t compromise on flavor, then you’re in for a treat! Here are more of my favorite protein-packed and naturally gluten-free sweet recipes that I’m confident you’ll enjoy just as much:
- Chickpea Chocolate Chip Cookies: If you’ve fallen in love with the unbaked dough, then you absolutely must try these baked versions! These cookies offer a delightful twist, harnessing the nutritional power of chickpeas to create a chewy, satisfying, and incredibly flavorful baked good. They’re a fantastic way to enjoy a classic cookie with added benefits.
- Almond Flour Banana Bread: Indulge in a wonderfully moist and richly flavorful banana bread recipe that’s made with nutritious almond flour. This alternative offers a great source of protein and healthy fats, making it a perfect choice for a hearty breakfast, a satisfying afternoon snack, or even a healthier dessert option.
- Almond Flour Banana Muffins: These light, fluffy, and incredibly tender muffins are another fantastic way to enjoy the delightful combination of ripe bananas and the goodness of almond flour. They’re ideal for quick, grab-and-go breakfasts, nutritious lunchbox treats, or a simple, sweet bite whenever you need one.
- Almond Flour Brownies: Prepare to satisfy your chocolate cravings with these incredibly rich, fudgy, and decadent brownies. Made with almond flour, they offer a gluten-free and slightly healthier option for true chocolate lovers, proving that indulgent treats can also be more wholesome.
I genuinely hope you enjoy exploring and creating these recipes as much as I enjoyed developing and sharing them with you. Happy baking (and no-baking) to a healthier, happier sweet tooth!