
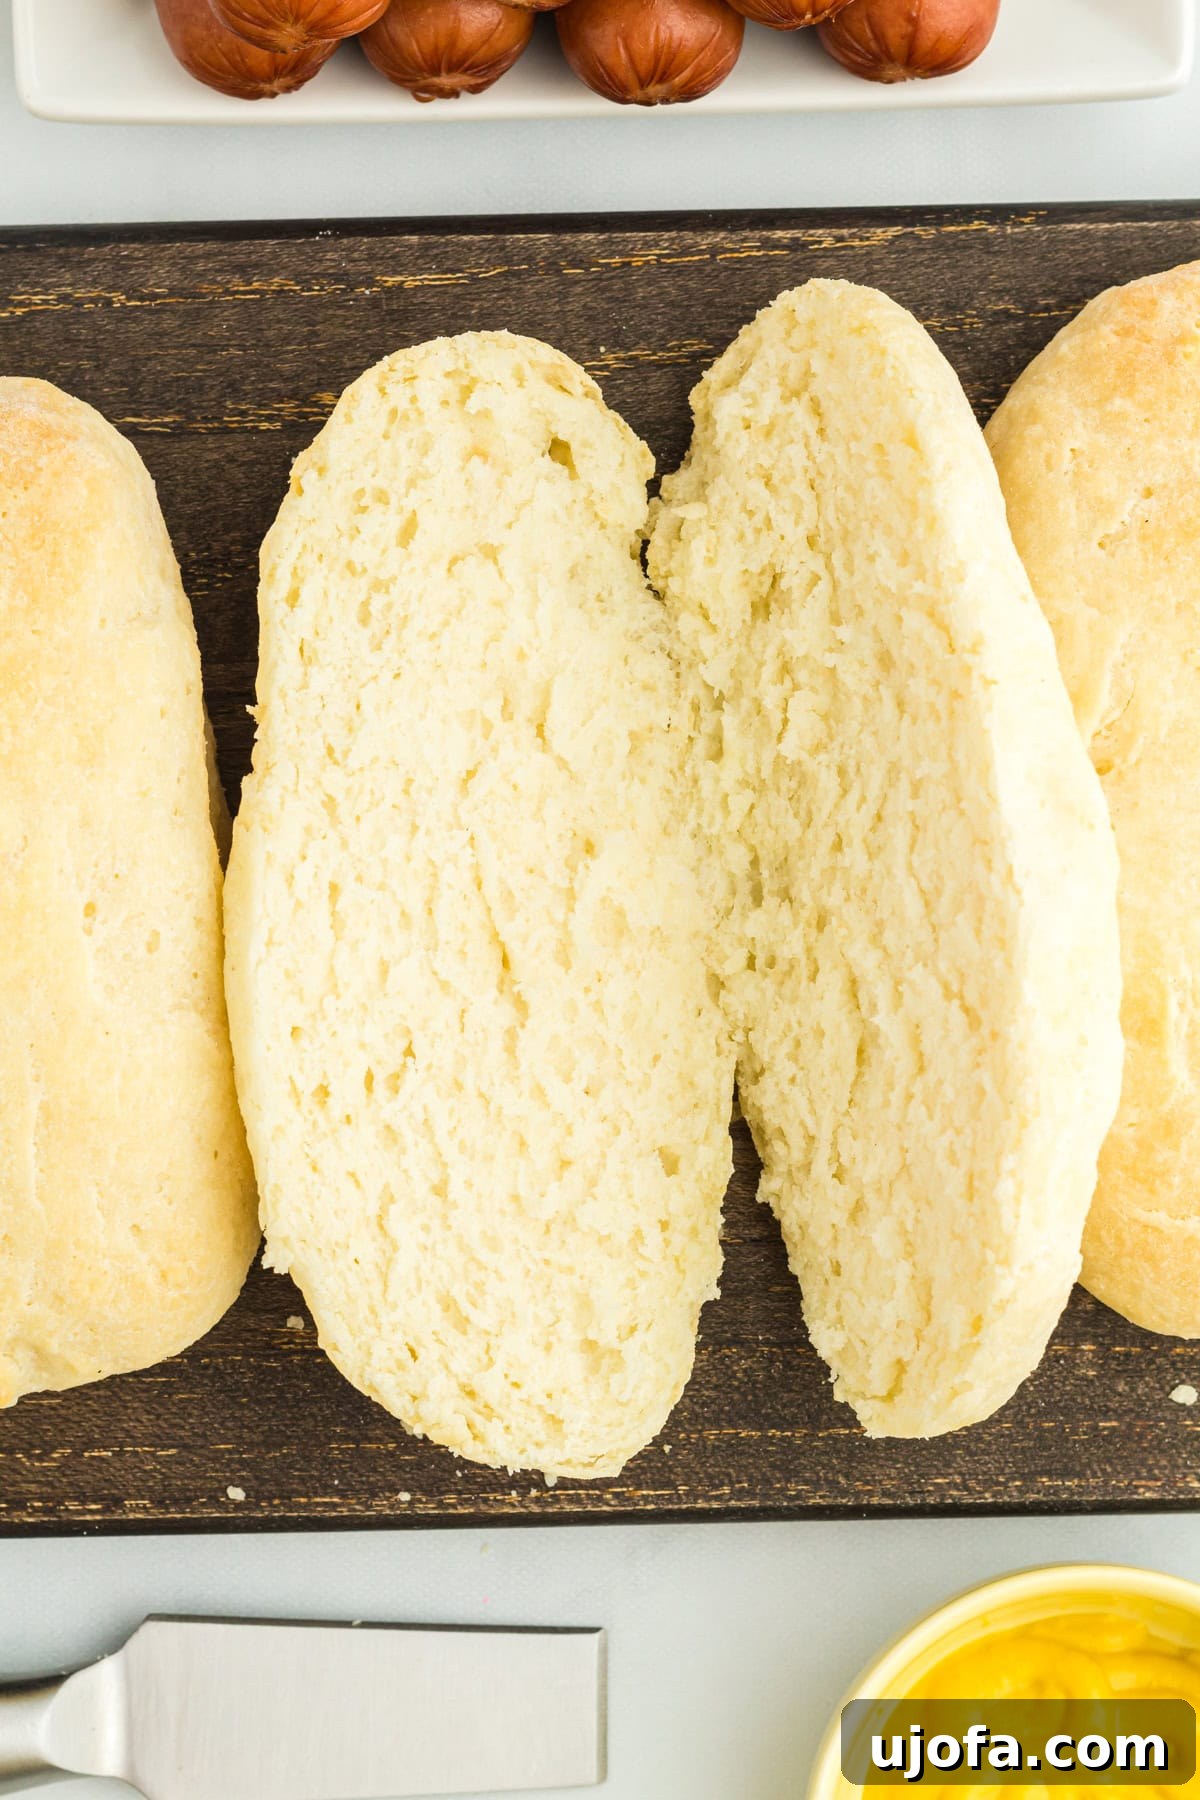
Finding truly exceptional gluten-free hot dog buns at the grocery store can often feel like an impossible quest. Many commercial options fall short, lacking the perfect texture, delicious flavor, and overall satisfaction that a good hot dog bun should deliver. They can be dense, crumbly, or simply bland, making your grilling experience less enjoyable. This frustration led to the creation of this very special homemade recipe. Designed to overcome the common challenges of gluten-free baking, this recipe provides a surprisingly quick and straightforward method to create fluffy, light, and incredibly flavorful gluten-free hot dog buns that are ideal for any occasion, especially prime grilling season!
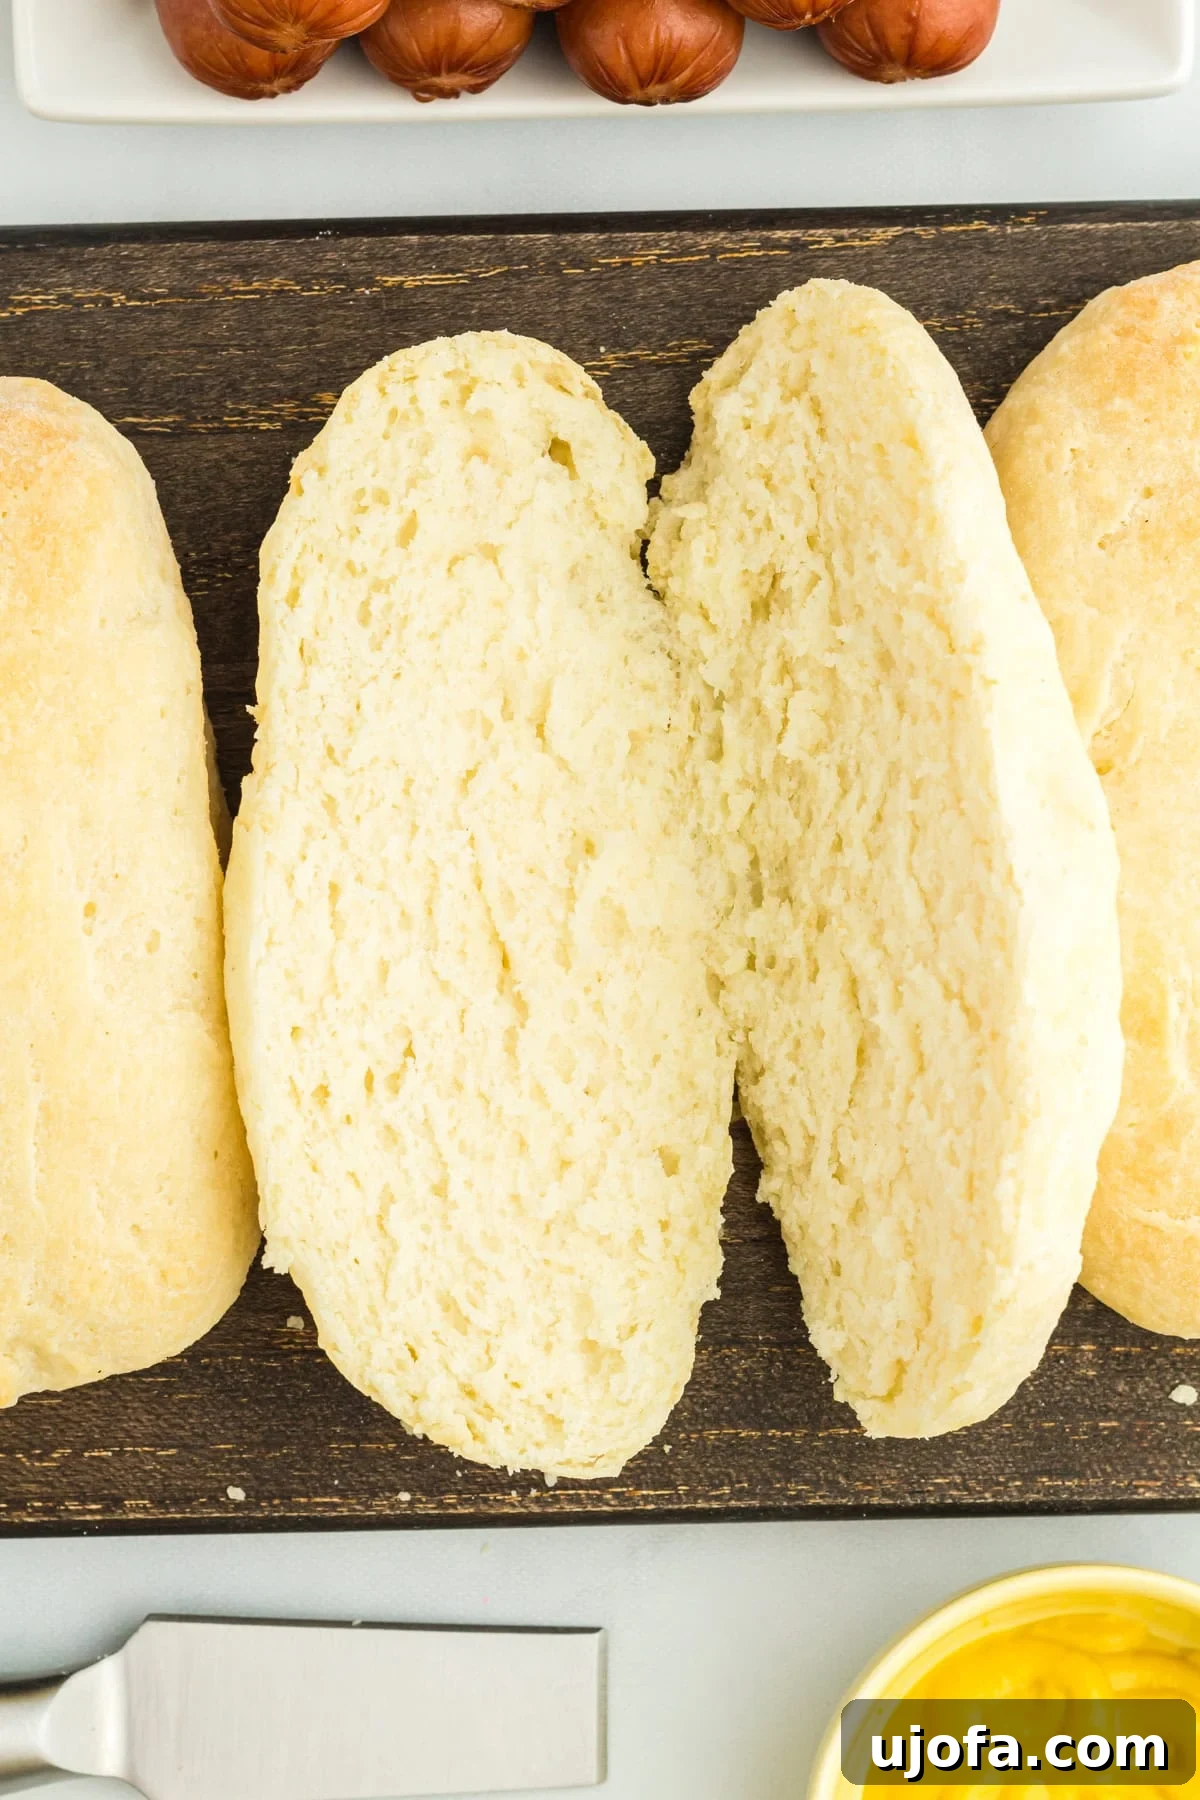
The Ultimate Homemade Gluten-Free Hot Dog Buns Recipe
There’s nothing quite like the aroma of freshly baked bread filling your home, and with this easy recipe, you can achieve that comforting experience while enjoying superior gluten-free hot dog buns. This recipe simplifies the art of baking, allowing you to whip up ultra-fluffy, perfectly golden buns that are a game-changer for your BBQ gatherings. Beyond their incredible taste and texture, these buns are also highly adaptable. You can easily modify them to be dairy-free, ensuring that everyone, regardless of dietary restrictions, can indulge in the joy of a perfectly dressed hot dog. And if your cookout also includes burgers, be sure to check out my equally amazing gluten-free hamburger buns recipe to complete your feast!
Gluten-Free Hot Dog Buns
Cheryl Johnson
6 buns
10 mins
20 mins
20 mins
50 mins
Key Ingredients for Perfect Gluten-Free Hot Dog Buns
Creating these delicious gluten-free hot dog buns requires a careful selection of ingredients that work together to mimic the texture and flavor of traditional wheat-based buns. Each component plays a vital role in achieving that desirable light, fluffy consistency and a beautiful golden crust.
- Gluten-Free All-Purpose Flour with Xanthan Gum: This is the foundation of your buns. Not all gluten-free flour blends are created equal, especially when it comes to yeast baking. It’s crucial to use a blend that already contains xanthan gum, as this gum acts as a binder, replacing the elasticity typically provided by gluten. Without it, your buns could be crumbly and lack structure. Brands like Pillsbury or Better Batter are highly recommended for their consistent results in yeast-leavened recipes. Experimentation with other blends might yield different baking outcomes.
- Tapioca Flour: Also known as tapioca starch, this ingredient is a gluten-free baker’s secret weapon. It helps bind and thicken the dough, contributing to its elasticity and chewiness. Furthermore, tapioca flour encourages rich browning, giving your buns that appealing shiny, golden crust. Its starchy properties also help create a soft, tender crumb.
- Granulated Sugar: Beyond simply adding a touch of sweetness, granulated sugar is essential for feeding the yeast. This “food” allows the yeast to activate and produce carbon dioxide, which is what makes the buns rise and become wonderfully light and fluffy. Without sugar, the yeast would struggle to perform its magic.
- Quick Rise Instant Yeast: The choice of yeast is critical for this quick recipe. Quick rise instant yeast is designed to activate faster than active dry yeast, significantly reducing proofing time. This ensures your buns rise efficiently, resulting in a light and airy texture in a fraction of the time.
- Salt: Salt isn’t just for flavor; it’s a vital component in yeast dough. It enhances the overall taste of the buns, preventing them from tasting bland. Additionally, salt helps to regulate yeast activity, ensuring a controlled rise and contributing to the dough’s strength and structure.
- Milk: Milk adds essential moisture to the dough, helping all the ingredients come together smoothly. The warmth of the milk (ideally between 100-110°F or 43-46°C) is key as it provides the optimal environment for the quick rise yeast to become active. Too cold, and the yeast won’t wake up; too hot, and it can kill the yeast.
- Butter: Unsalted butter contributes richness, flavor, and tenderness to the buns. It also assists in creating that beautiful brown crust during baking. Using melted and cooled butter ensures it incorporates smoothly into the dough without affecting yeast activity.
- Egg: A large egg plays multiple roles in this recipe. It enriches the dough, adding to its flavor and providing extra moisture. More importantly, the egg contributes significantly to the buns’ structure and helps achieve a soft, cohesive texture. Make sure it’s at room temperature for better incorporation into the dough.
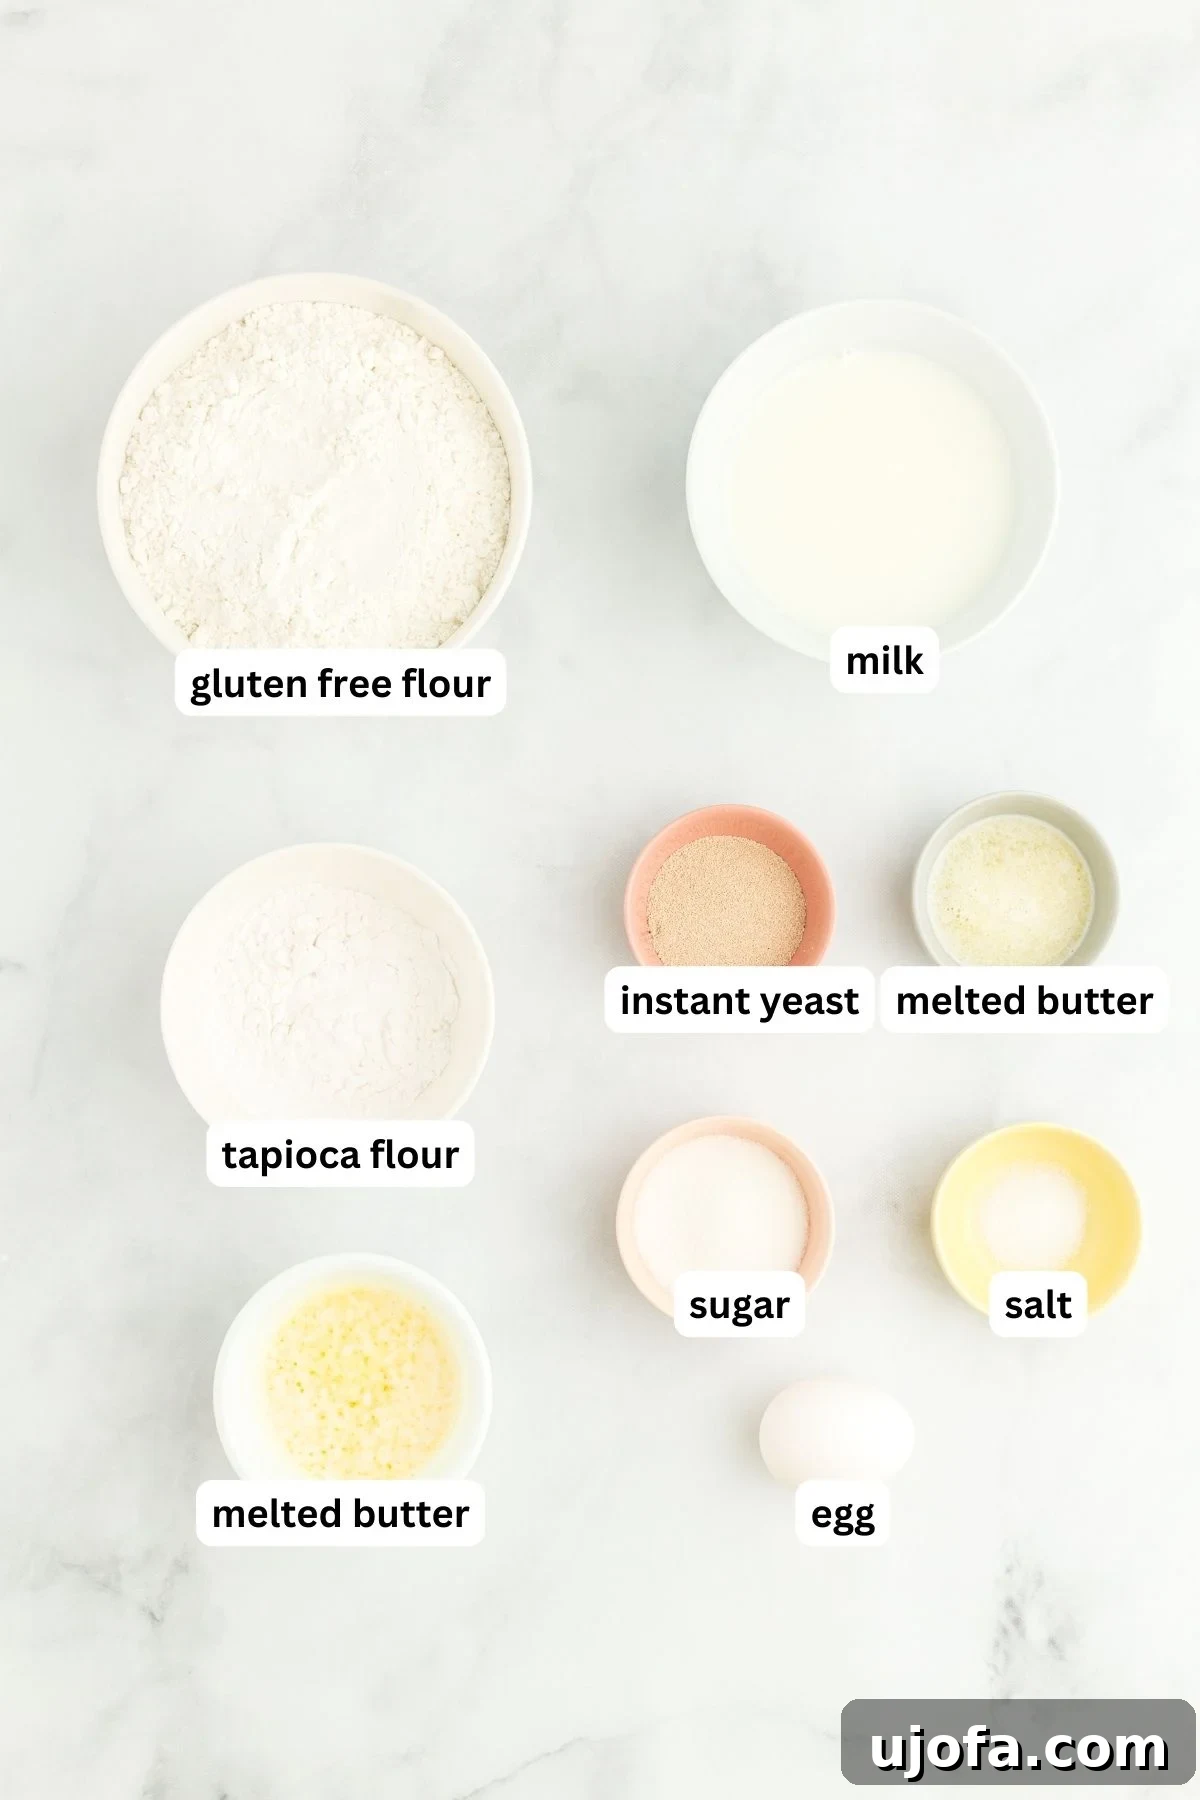
Ingredients
- 2¾ cups gluten-free all-purpose flour with xanthan gum, (see note)
- ¼ cup tapioca flour
- 2 tablespoons granulated sugar
- 1 tablespoon quick rise instant yeast
- ½ teaspoon salt
- 1 cup warm milk, (100-110°F / 43-46°C)
- 6 tablespoons unsalted butter, (melted, cooled, and divided (¼ cup + 2 tablespoons))
- 1 large egg, (room temperature)
Instructions
- Line a large baking sheet with parchment paper. Set aside.
- In a medium bowl, whisk together the gluten-free flour, tapioca flour, granulated sugar, quick rise instant yeast, and salt until well combined.
- Add the warm milk (ensuring it’s at the correct temperature for yeast activation), ¼ cup of the melted butter (reserve the remaining 2 tablespoons for later), and the room temperature egg to the dry ingredients.
- Using an electric mixer fitted with a dough hook, mix the dough on low speed. Mix just until all ingredients are combined and a soft dough forms, typically 1-2 minutes. Avoid overmixing, as this can negatively impact the final texture of gluten-free dough.
- After mixing, use a spatula to scrape down the sides and bottom of the bowl, ensuring any dry ingredients that may have settled are thoroughly incorporated into the dough.
- Lightly oil your work surface (a clean table or a silicone baking mat works best) to prevent sticking. Transfer the dough onto this prepared surface.
- Divide the dough into 6 equal portions. For precision, each bun should weigh approximately 136 grams.
- Lightly oil your hands with a non-stick cooking spray or a tiny amount of olive oil. Gently knead and shape each dough portion into a cylinder, resembling a hot dog bun. Pinch any visible seams together firmly to ensure they are sealed, then roll gently until smooth. Each shaped bun should be about 5 inches long.
- Carefully place the shaped buns onto the parchment-lined baking sheet, leaving some space between each one to allow for rising. Cover the baking sheet loosely with food-safe plastic wrap to prevent the dough from drying out.
- Allow the buns to rise at room temperature for 20 to 60 minutes. The exact rise time will depend on the ambient temperature and humidity in your home. They are ready for baking when they have increased in size by approximately 50% from their initial rolled state. It’s important not to let the dough over-rise (overproof), as this can lead to buns that collapse, lose their shape, or become crumbly instead of soft and fluffy after baking. Begin checking the dough after 20 minutes.
- Preheat your oven to 350°F (177°C) while the buns are completing their rise.
- Once the buns have risen adequately, use the remaining 2 tablespoons of melted butter to lightly brush the tops and sides of each bun. This will contribute to a beautiful golden crust and extra flavor.
- Place the baking sheet with the brushed buns into the preheated oven. Bake for 20-22 minutes, or until the tops are just starting to turn a light golden brown. To confirm doneness, the internal temperature of each bun should reach at least 190°F (88°C) when checked with an instant-read thermometer.
- Remove the buns from the oven and let them cool completely on the baking sheet before serving. Cooling allows the internal structure to set, preventing them from becoming gummy.
Essential Tips and Suggestions for Gluten-Free Baking
Baking gluten-free can sometimes present unique challenges, but with these expert tips, you’ll achieve perfect hot dog buns every time. Understanding the nuances of gluten-free dough is key to success.
- Accurate Flour Measurement is Crucial: When working with gluten-free flours, precision is paramount. Always use the “spoon-and-level” method: lightly spoon your flour into a measuring cup until it’s overflowing, then use a straight edge (like the back of a knife) to level off the excess. Never scoop directly from the bag, as this compacts the flour and can add up to 25% more flour than needed. Too much flour will result in a dry, dense dough that struggles to come together, leading to crumbly or cracked buns. Conversely, too little flour will leave your dough overly sticky and difficult to handle.
- Instant Quick Rise Yeast vs. Active Dry Yeast: It’s imperative to use quick rise instant yeast for this recipe. This type of yeast has finer granules and doesn’t require prior activation in liquid, allowing it to be mixed directly with dry ingredients and significantly speeding up the rising process. Active dry yeast, on the other hand, needs to be “proofed” in warm liquid first and typically requires longer rise times. Using the wrong type can lead to poor rise and an altered texture.
- Temperature Control for Milk: Yeast is sensitive to temperature. The milk in your recipe must be warm enough to activate the yeast (100-110°F or 43-46°C) but not so hot that it kills it. If the milk is too cold, the yeast will remain dormant, and your buns won’t rise. If it’s too hot, the yeast organisms will die, leading to the same flat results. Use a kitchen thermometer for accuracy.
- Avoid Excessive Flour on Your Work Surface: While tempting to dust your surface with flour to prevent sticking, resist the urge. Adding extra flour during kneading or shaping can alter the precise flour-to-liquid ratio of the dough. This can make the dough too dry, hindering its ability to form a cohesive structure and causing the baked buns to crack or become stiff. Instead, opt for a lightly oiled surface or lightly oiled hands.
- Dealing with Sticky Dough: Gluten-free dough can often be stickier than its wheat counterpart due to the absence of gluten structure. If your dough is sticking to your hands, spray them very lightly with a non-stick cooking spray or apply a minimal amount of olive oil. The key is “very lightly”—adding too much oil can make the dough greasy and affect its texture.
- Choosing the Right Gluten-Free Flour Blend: As mentioned, flour blends vary. While this recipe recommends Pillsbury or Better Batter for their reliable performance in yeast baking, if you’re exploring alternatives, some bakers have reported success with gfJules All-Purpose Flour for bun recipes. Always remember that different blends may require slight adjustments to liquid content or rise times.
- Optimal Rising Environment: The proofing process is delicate. Avoid letting your buns rise in excessively hot locations or in direct sunlight. Extreme heat can either kill the yeast (stopping the rise) or lead to over-proofing, where the yeast overproduces gas too quickly, causing the dough to collapse in the oven or result in a coarse, crumbly texture. A warm, draft-free spot at room temperature is ideal.
- Monitoring Rise Time: The duration required for your buns to rise can fluctuate significantly based on your home’s ambient temperature and humidity. Warmer environments (like during summer months) will accelerate the rising process. Begin checking your buns for readiness around the 20-minute mark. You’re looking for a noticeable but not excessive rise—the buns should appear about 50% larger than their initial size. Over-proofing is a common mistake; if the dough rises too much, the internal structure becomes too stretched, and the buns may not hold their shape during baking or bake up with the desired fluffy texture.
Frequently Asked Questions About Gluten-Free Hot Dog Buns
Why Make Your Own Gluten-Free Hot Dog Buns?
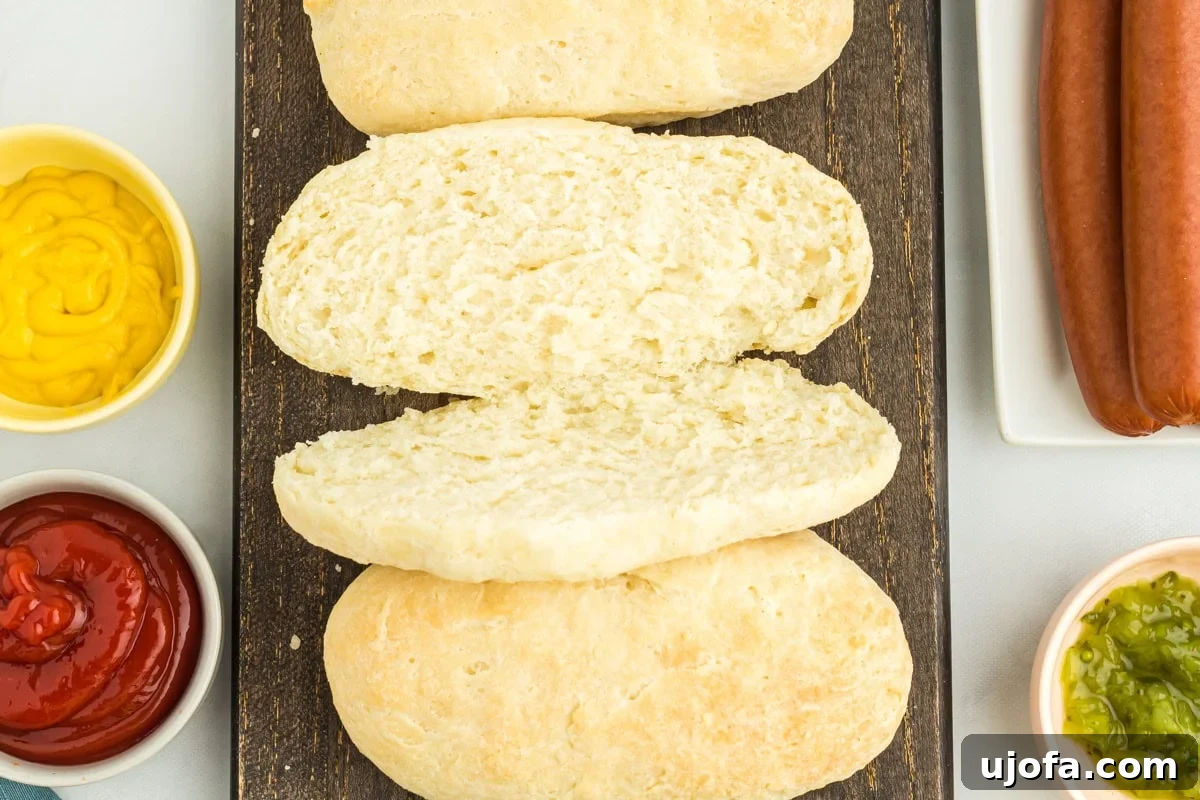
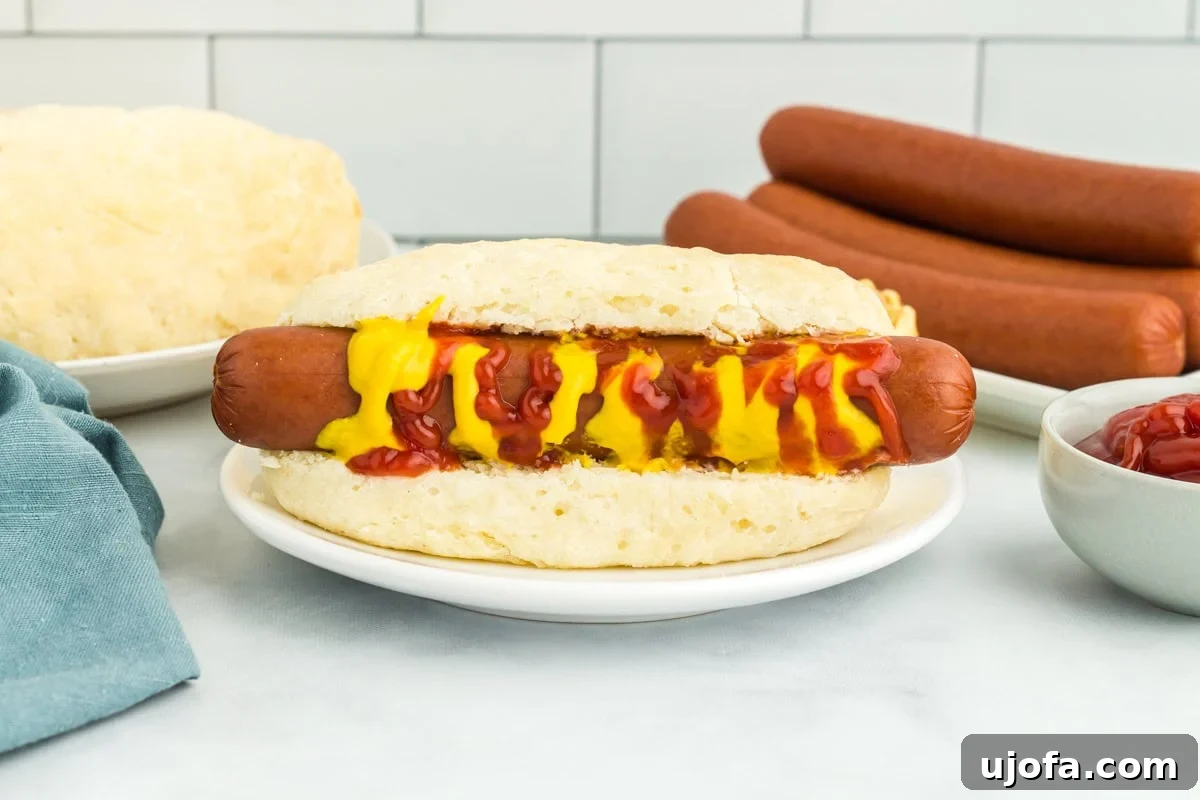
There are numerous compelling reasons to bake your own gluten-free hot dog buns instead of buying them from the store. Firstly, homemade buns offer unparalleled freshness and flavor that store-bought options simply can’t match. You control the ingredients, avoiding unwanted preservatives or additives. Secondly, many commercial gluten-free buns can be dry, dense, or crumbly, often leading to disappointment. This recipe delivers a wonderfully soft, fluffy, and resilient bun that truly enhances your hot dog experience. Lastly, it can be more cost-effective in the long run, especially if you enjoy hot dogs frequently.
Can I Make These Gluten-Free Hot Dog Buns Dairy-Free?
Absolutely! This recipe is incredibly versatile and can easily be adapted to be dairy-free. Simply substitute conventional dairy milk with your favorite unsweetened dairy-free milk alternative, such as almond milk, soy milk, or oat milk. For the butter, use a good quality dairy-free butter substitute. Ensure these alternatives are at the correct temperature as specified in the recipe for optimal yeast activity.
What Can I Use Instead of Tapioca Flour?
If tapioca flour is unavailable, the best alternative would be superfine sweet rice flour, sometimes labeled as glutinous rice flour (despite the name, it is gluten-free). Sweet rice flour shares many similar qualities with tapioca flour, including its ability to provide chewiness and structure to gluten-free baked goods. However, keep in mind that while it’s a good substitute, the final texture and browning results may not be identical to using tapioca flour.
Can I Use Active Dry Yeast Instead?
Yes, you can use active dry yeast, but you’ll need to make a couple of adjustments to the recipe. First, you will need to increase the amount of yeast by 25%. So, instead of 1 tablespoon of quick rise instant yeast, you would use 1¼ tablespoons of active dry yeast. Second, active dry yeast requires activation. You’ll need to “proof” it by dissolving it in the warm milk (along with a pinch of the sugar from the recipe) for about 5-10 minutes, until it becomes foamy, before adding it to the dry ingredients. Additionally, the dough will likely require a longer rise time, potentially closer to an hour or even more, to double in size.
Storage Instructions for Maximum Freshness
To keep your homemade gluten-free hot dog buns fresh and delicious, proper storage is essential. Like most homemade bread products, these buns are best enjoyed on the day they are baked, but they can be stored effectively for a few days or even frozen for longer periods.
- Room Temperature Storage: Store any leftover gluten-free hot dog buns in an airtight container or a sealed food-safe bag at room temperature for up to 3 days. This prevents them from drying out and helps maintain their soft texture.
- Freezing for Longer Shelf Life: For longer storage, you can easily freeze these buns. Once they have completely cooled, individually wrap each bun tightly in plastic wrap, then place the wrapped buns into a large freezer-safe zippered bag or an airtight container. They can be stored in the freezer for up to 3 months. When you’re ready to enjoy them, simply let them thaw overnight in the refrigerator or briefly at room temperature. You can then gently warm them in an oven or microwave for that fresh-baked feel.
More Delicious Gluten-Free Bread Recipes to Try!
If you’ve enjoyed baking these fantastic hot dog buns, you’ll love exploring other gluten-free bread creations. Expanding your gluten-free baking repertoire means never having to miss out on your favorite comfort foods. Here are some more incredible gluten-free bread recipes that are sure to impress:
- Easy Gluten-Free Bread: A perfect starting point for everyday gluten-free loaves.
- Gluten-Free Bread Machine Bread: For effortless, hands-off bread baking.
- Gluten-Free Sourdough Bread: Tangy and flavorful, for the more adventurous baker.
- Gluten-Free Naan Bread: Soft, pillowy flatbread perfect for curries and dips.
- Gluten-Free Dinner Rolls: Fluffy rolls ideal for any meal or holiday spread.
- Gluten-Free Focaccia: An aromatic Italian flatbread, wonderful with olive oil.
Nutrition
Serving:
1bun
Calories:
356kcal
Carbohydrates:
51g
Protein:
8g
Fat:
15g
Saturated Fat:
8g
Polyunsaturated Fat:
1g
Monounsaturated Fat:
4g
Trans Fat:
0.5g
Cholesterol:
66mg
Sodium:
237mg
Potassium:
85mg
Fiber:
6g
Sugar:
8g
Vitamin A:
461IU
Vitamin C:
0.002mg
Calcium:
95mg
Iron:
2mg
Nutrition information is automatically calculated, so should only be used as an approximation.
Additional Info
Baking
American
How to Make Gluten-Free Hot Dog Buns: A Step-by-Step Visual Guide
To help you visualize each stage of the baking process, here’s a step-by-step guide with accompanying images. Follow along to ensure your homemade gluten-free hot dog buns turn out perfectly!
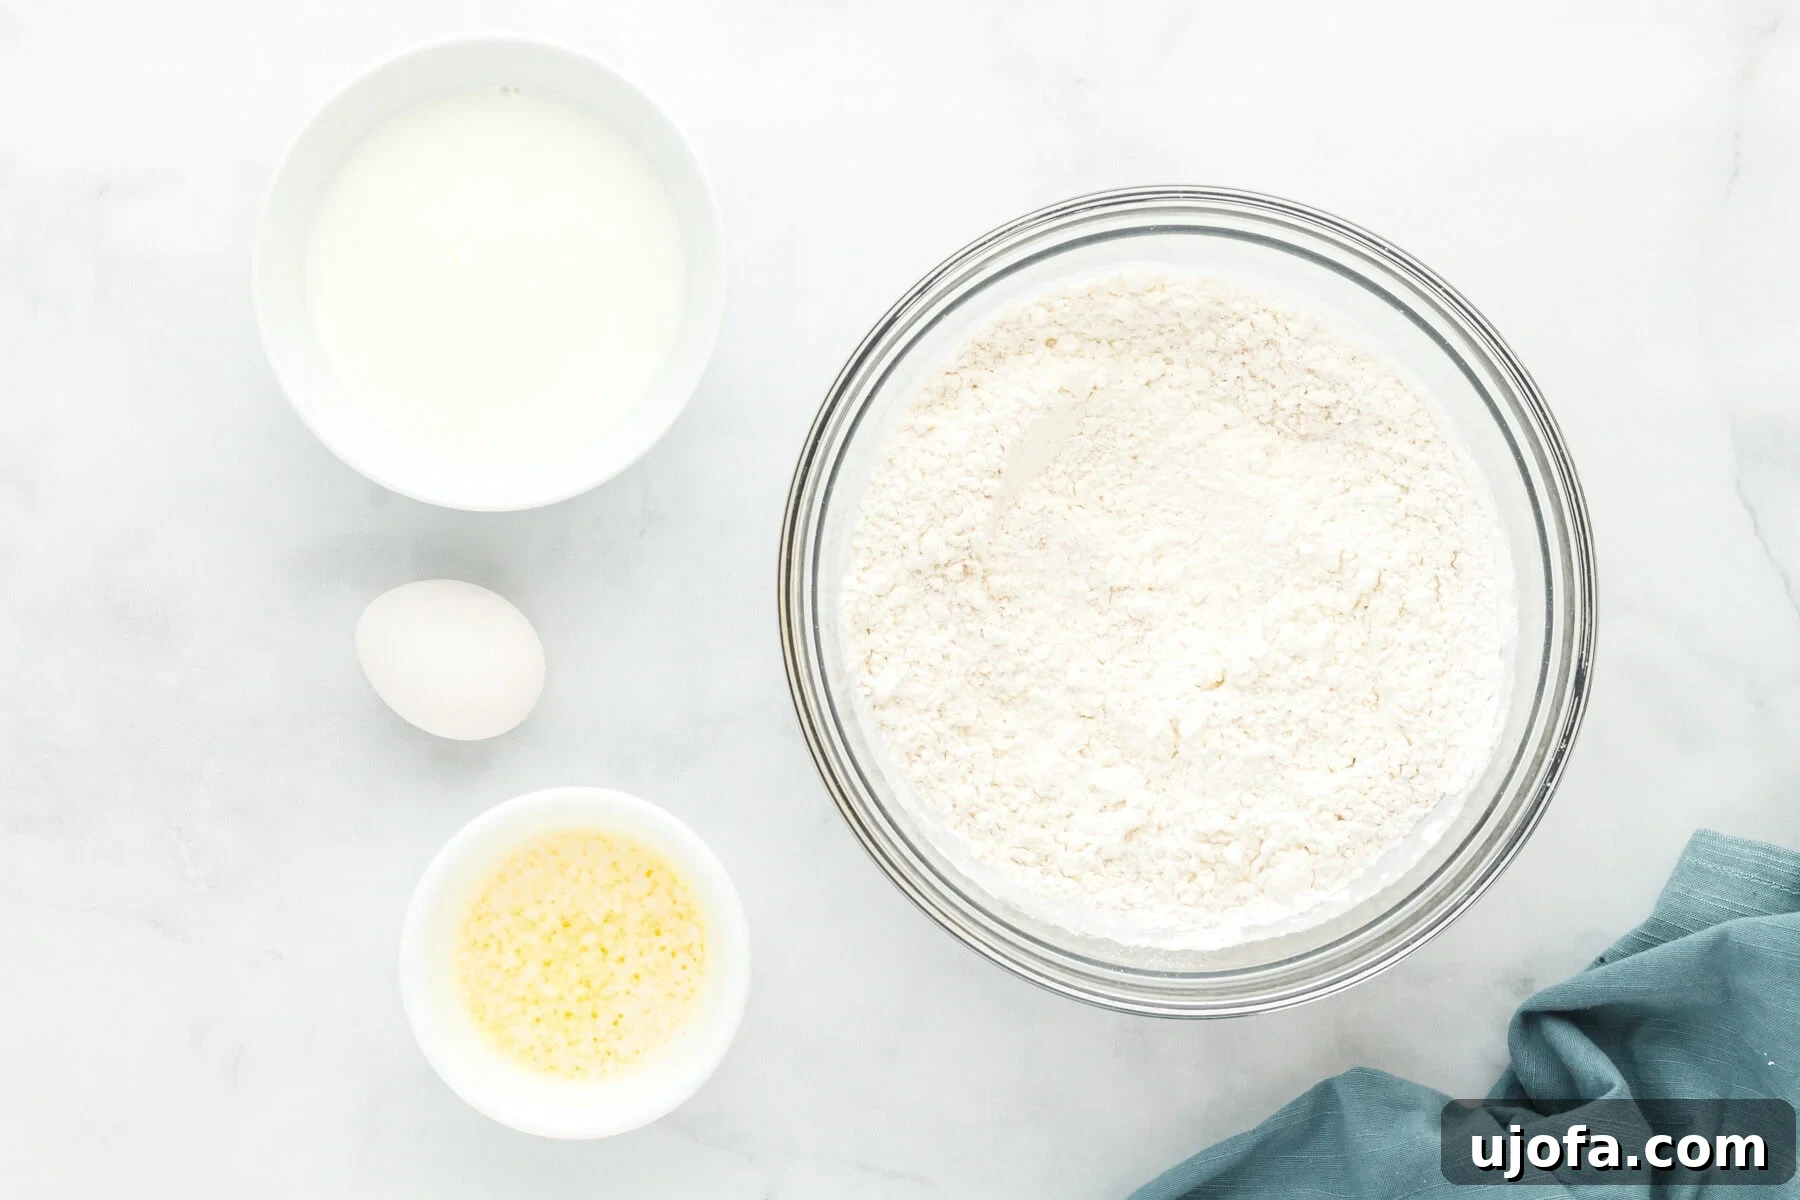
Step 1 & 2: Prepare Dry Ingredients. Line a baking sheet with parchment paper. In a medium bowl, thoroughly whisk together the gluten-free flour, tapioca flour, granulated sugar, quick rise instant yeast, and salt. This ensures all dry components are evenly distributed before liquid is added.
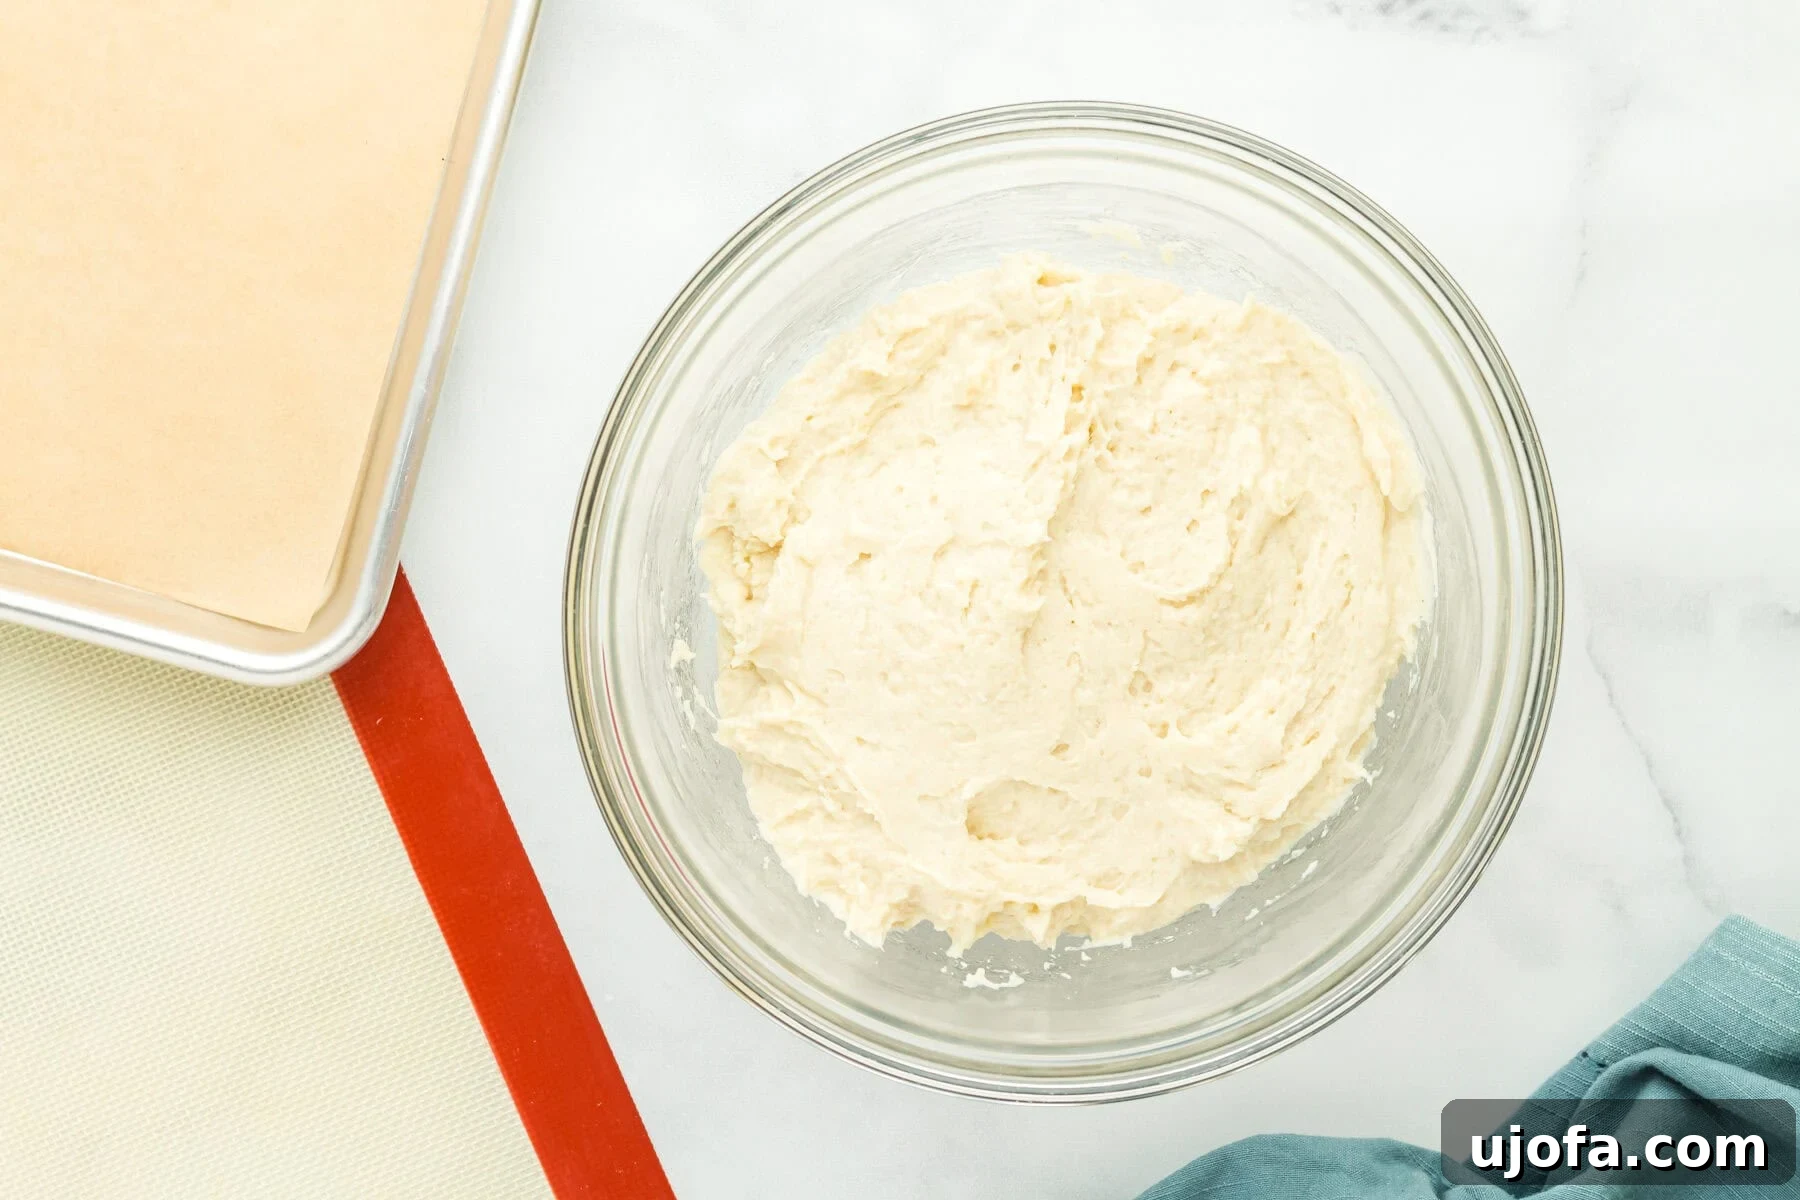
Step 3 & 4: Combine Wet and Dry Ingredients. Add the warm milk, ¼ cup of melted butter (remember to reserve the rest), and the room temperature egg to your dry mixture. Using an electric mixer with a dough hook, mix on low speed until the ingredients are just combined and a cohesive dough forms. Avoid overmixing, and use a spatula to scrape down the sides, ensuring no dry pockets remain.
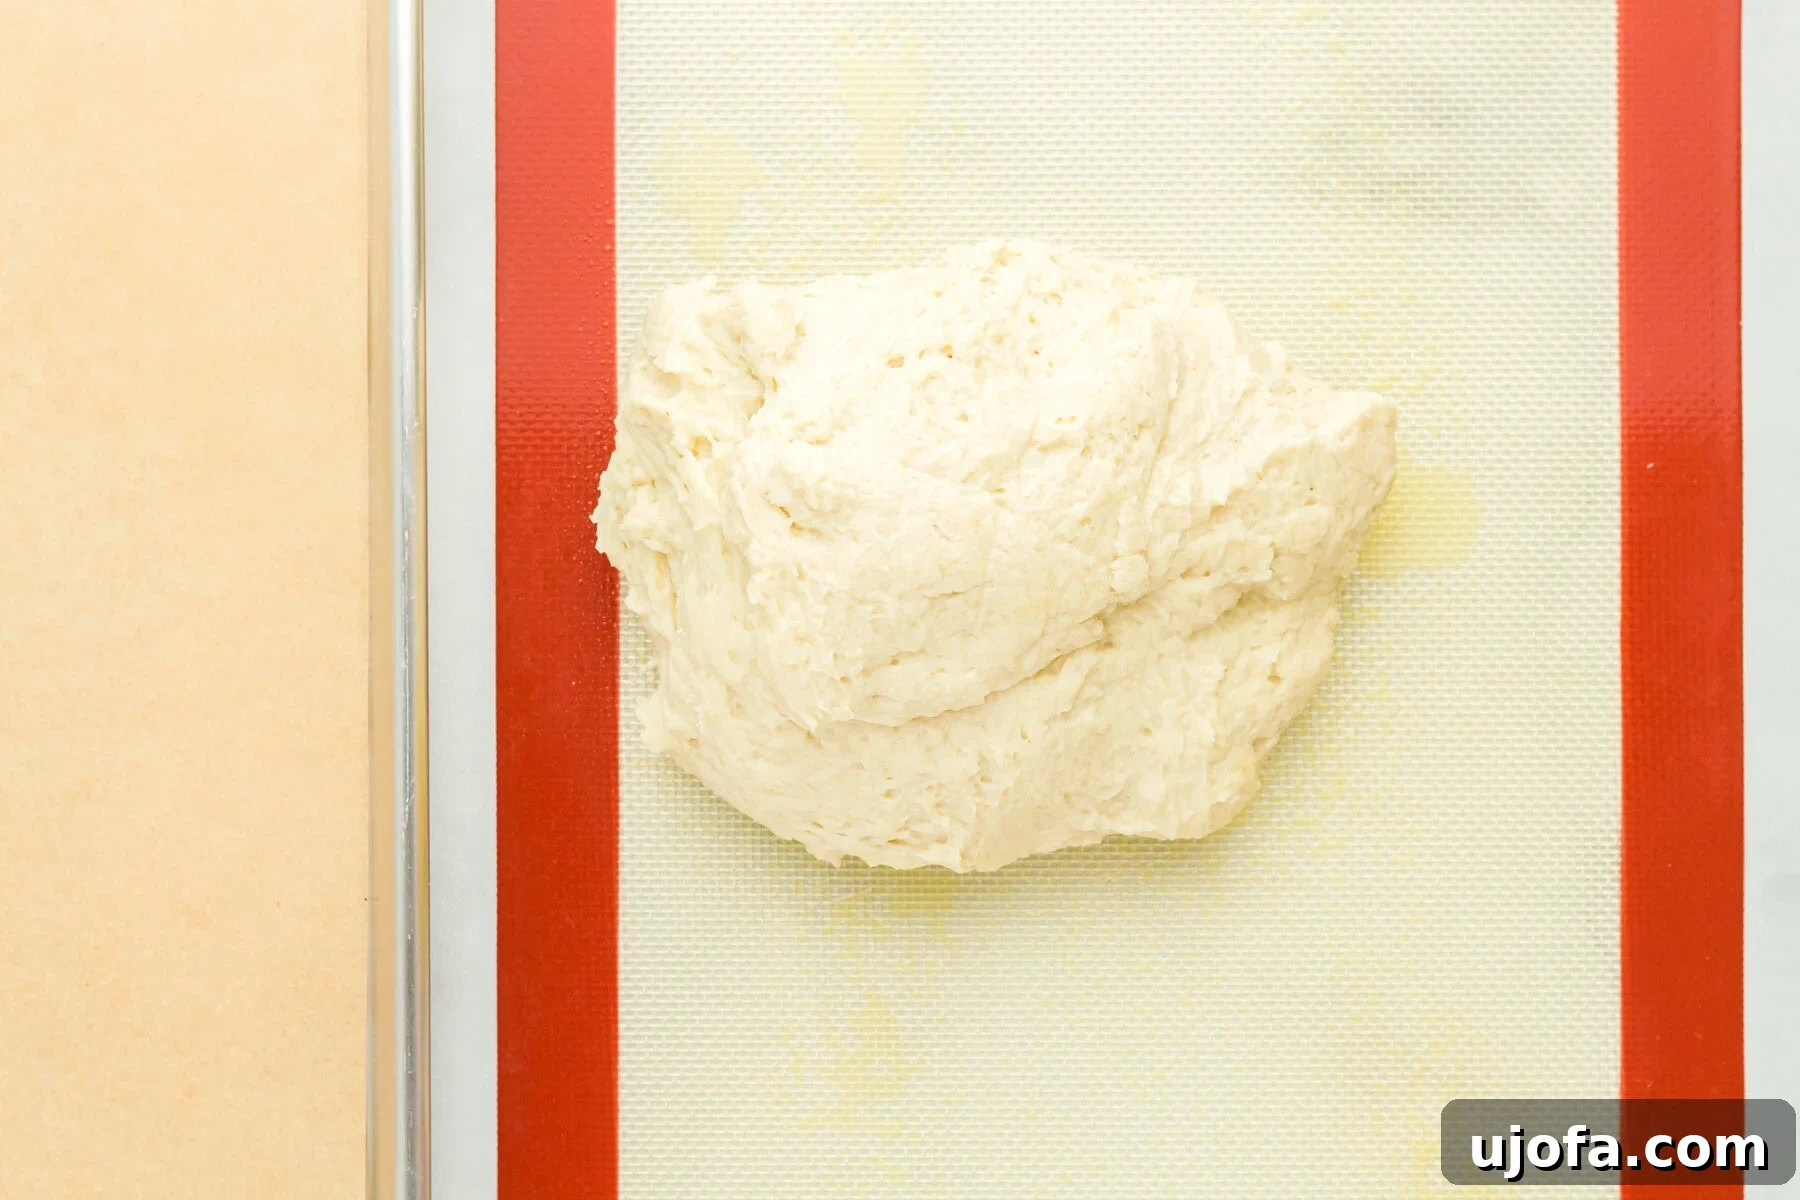
Step 5: Transfer the Dough. Lightly oil your work surface (like a clean table or a silicone baking mat) and transfer the freshly mixed dough onto it. This prepares the surface for easy handling and shaping.
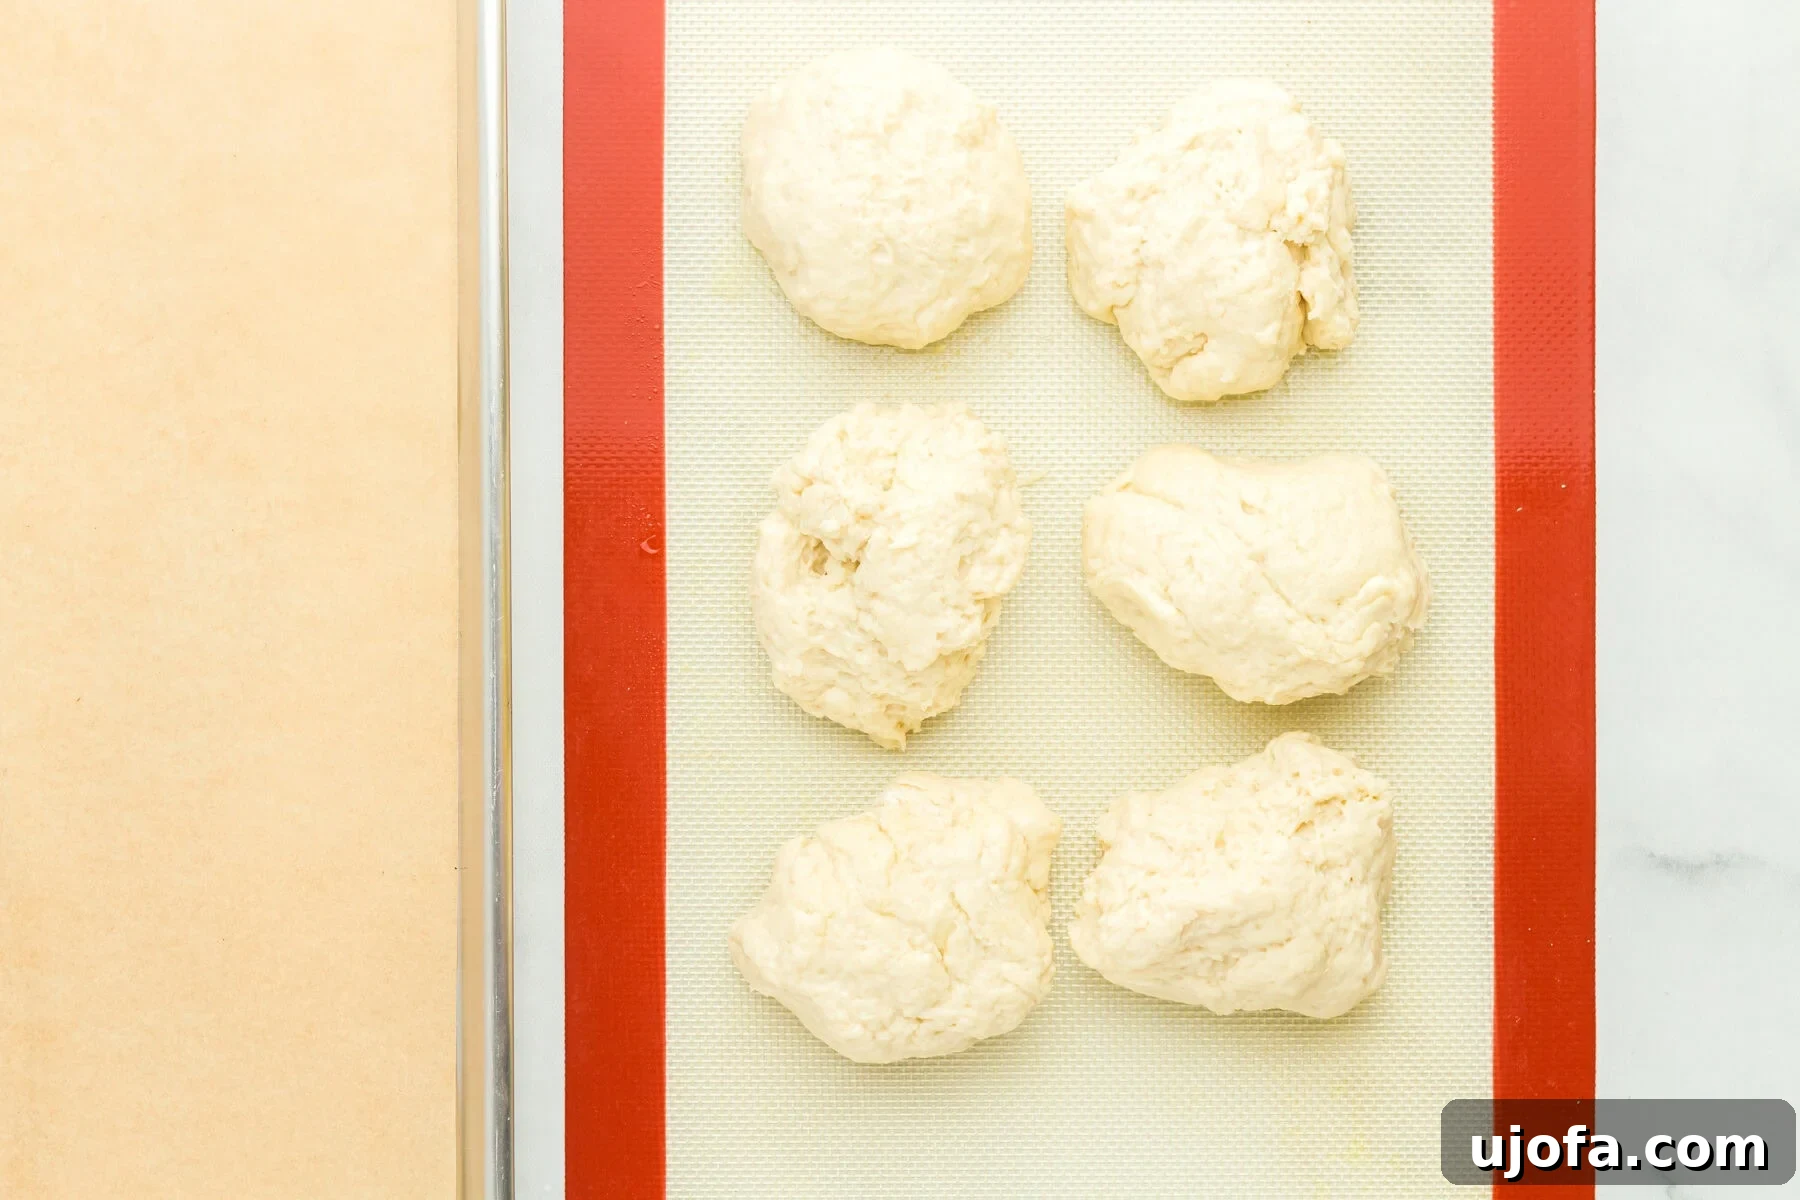
Step 6: Divide the Dough. Separate the dough into 6 equal portions. For best results and consistent bun size, aim for approximately 136 grams per bun. This ensures uniform baking.
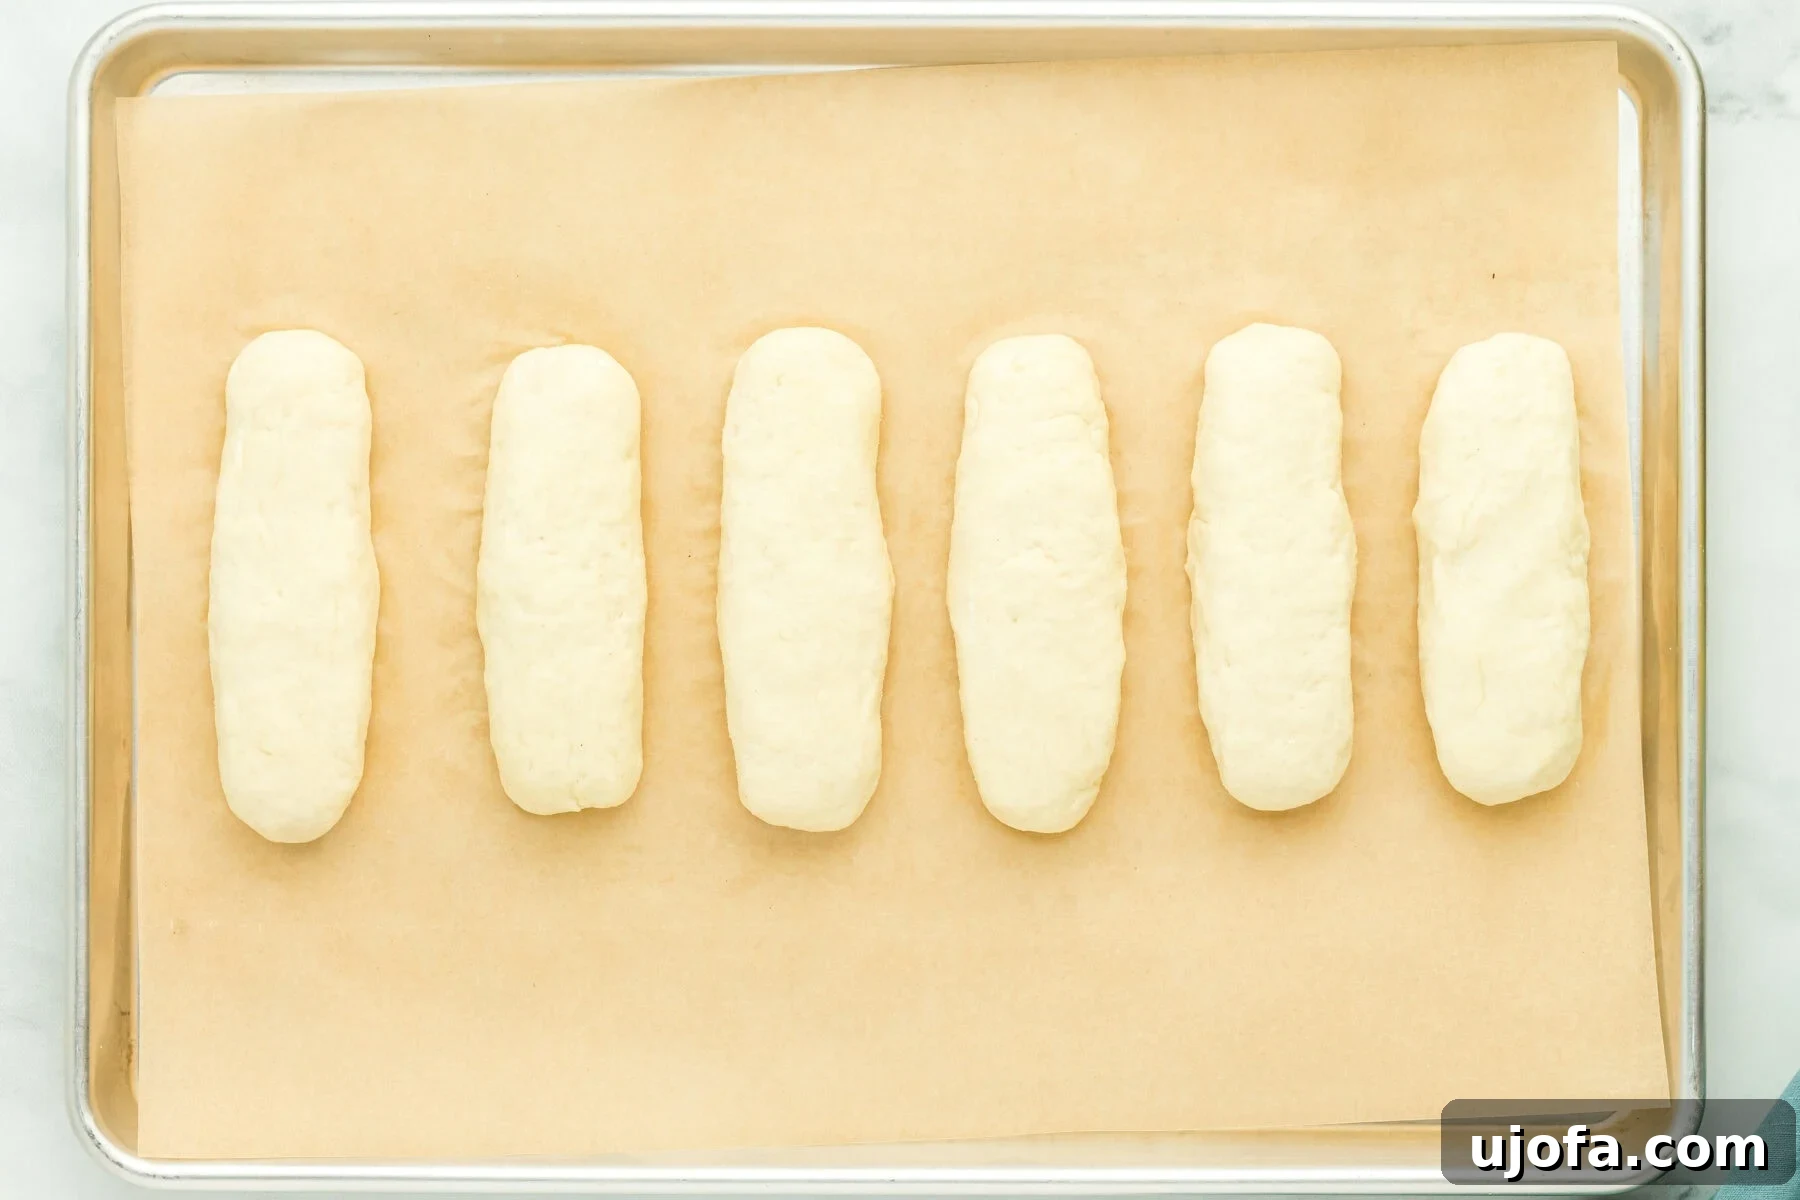
Step 7 & 8: Shape and Arrange Buns. With lightly oiled hands, gently knead each dough portion and shape it into a cylinder, mimicking the classic hot dog bun shape (about 5 inches long). Pinch any seams closed and roll smooth. Place these shaped buns onto the prepared baking sheet, ensuring adequate space between each for rising. Cover loosely with plastic wrap.
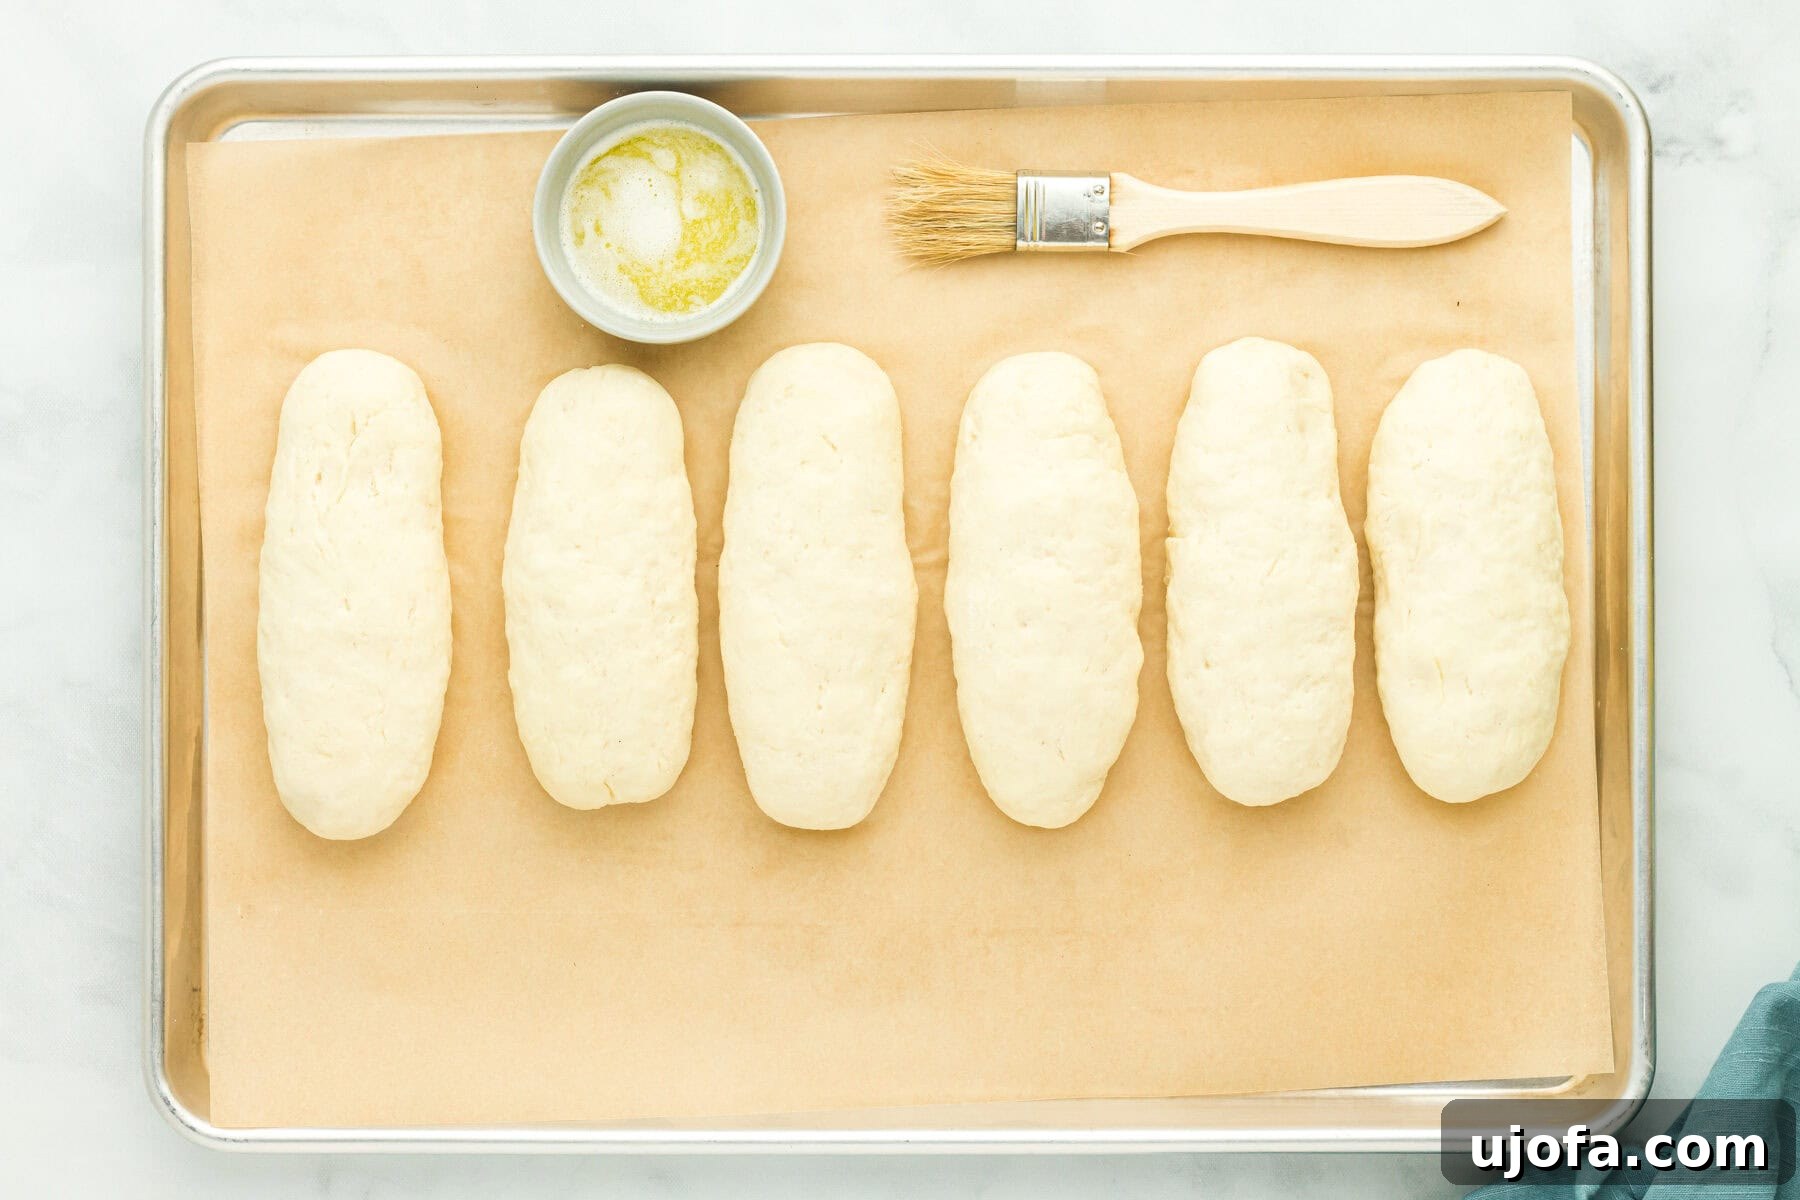
Step 9: Allow to Rise. Let the covered buns rise at room temperature for 20 to 60 minutes. They are ready when they are approximately 50% larger than their initial size. Monitor closely to avoid over-proofing, which can compromise texture.
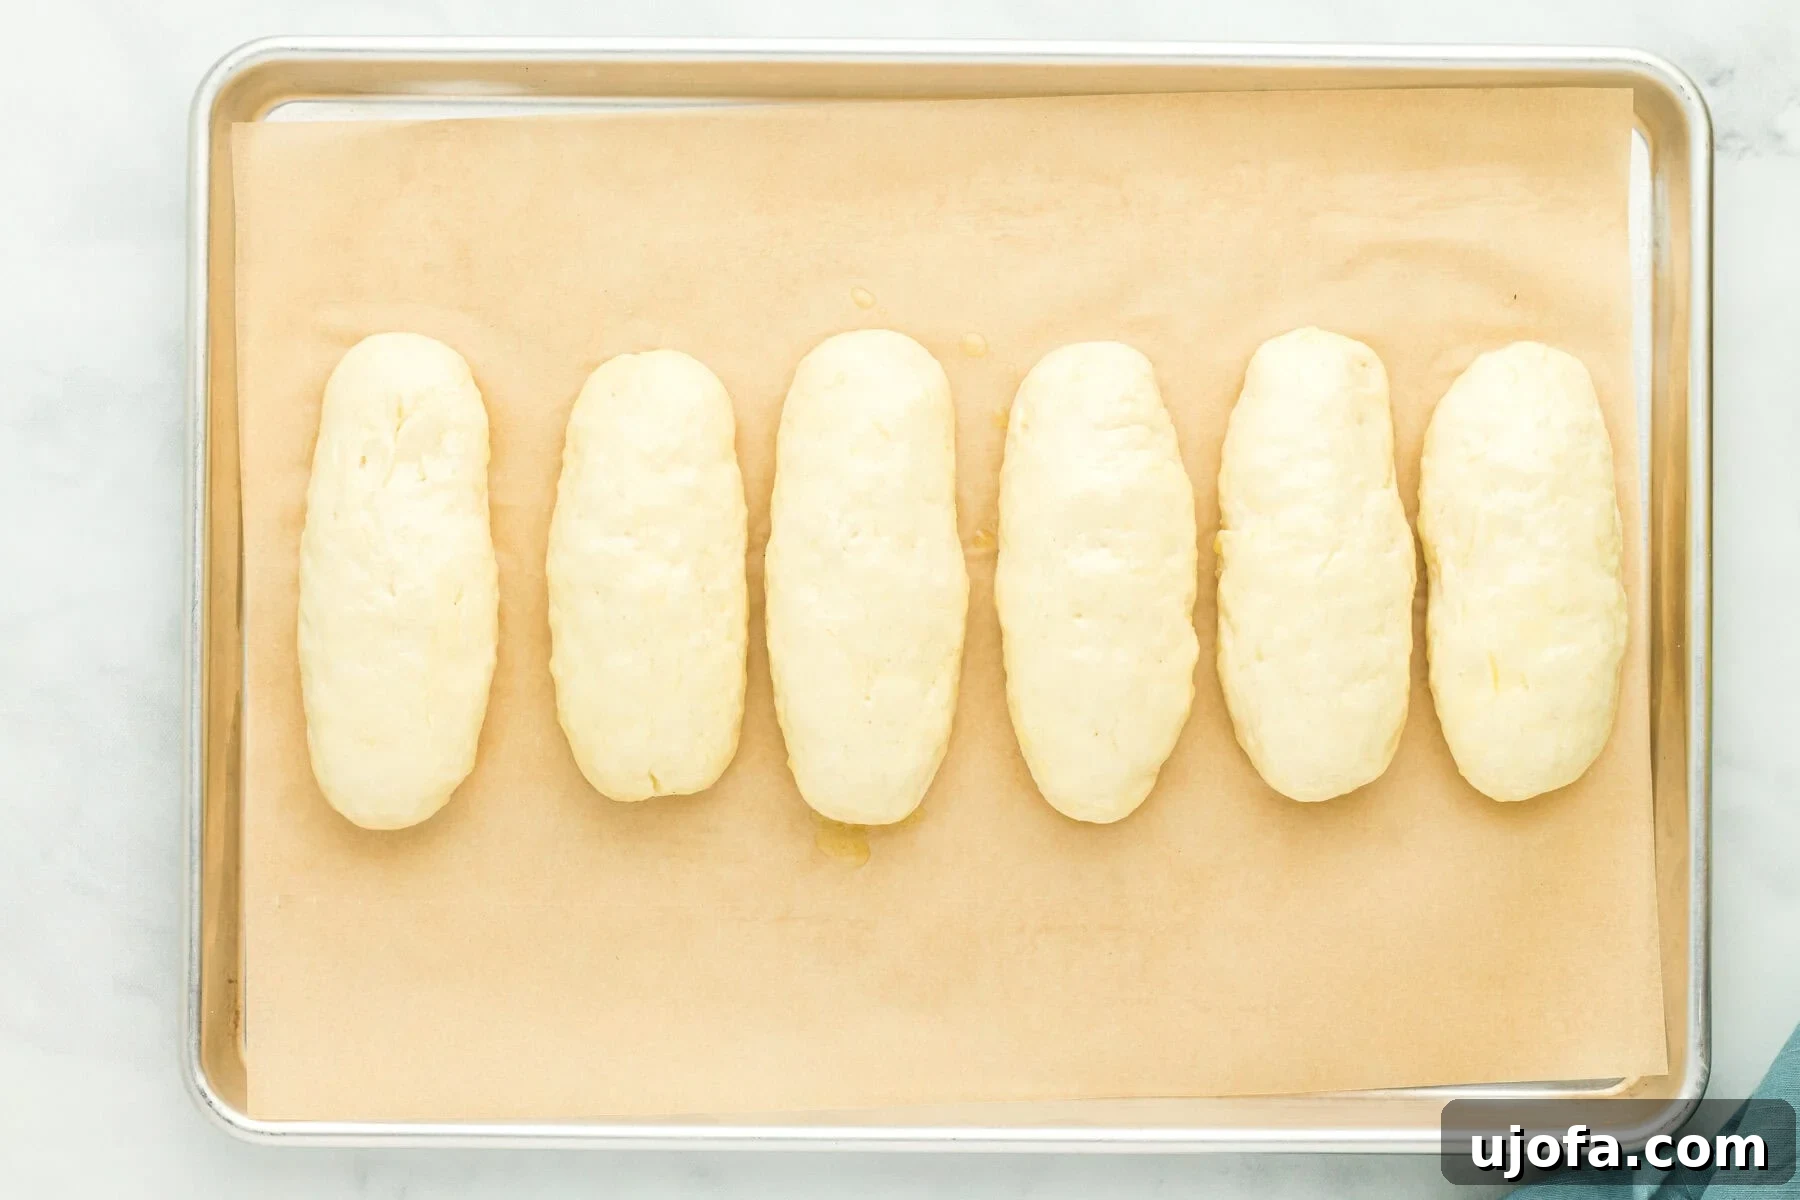
Step 10 & 11: Preheat and Brush. Preheat your oven to 350°F (177°C). Once the buns have risen sufficiently, take the remaining 2 tablespoons of melted butter and lightly brush it evenly over the top of each bun. This will help create a golden, flavorful crust.
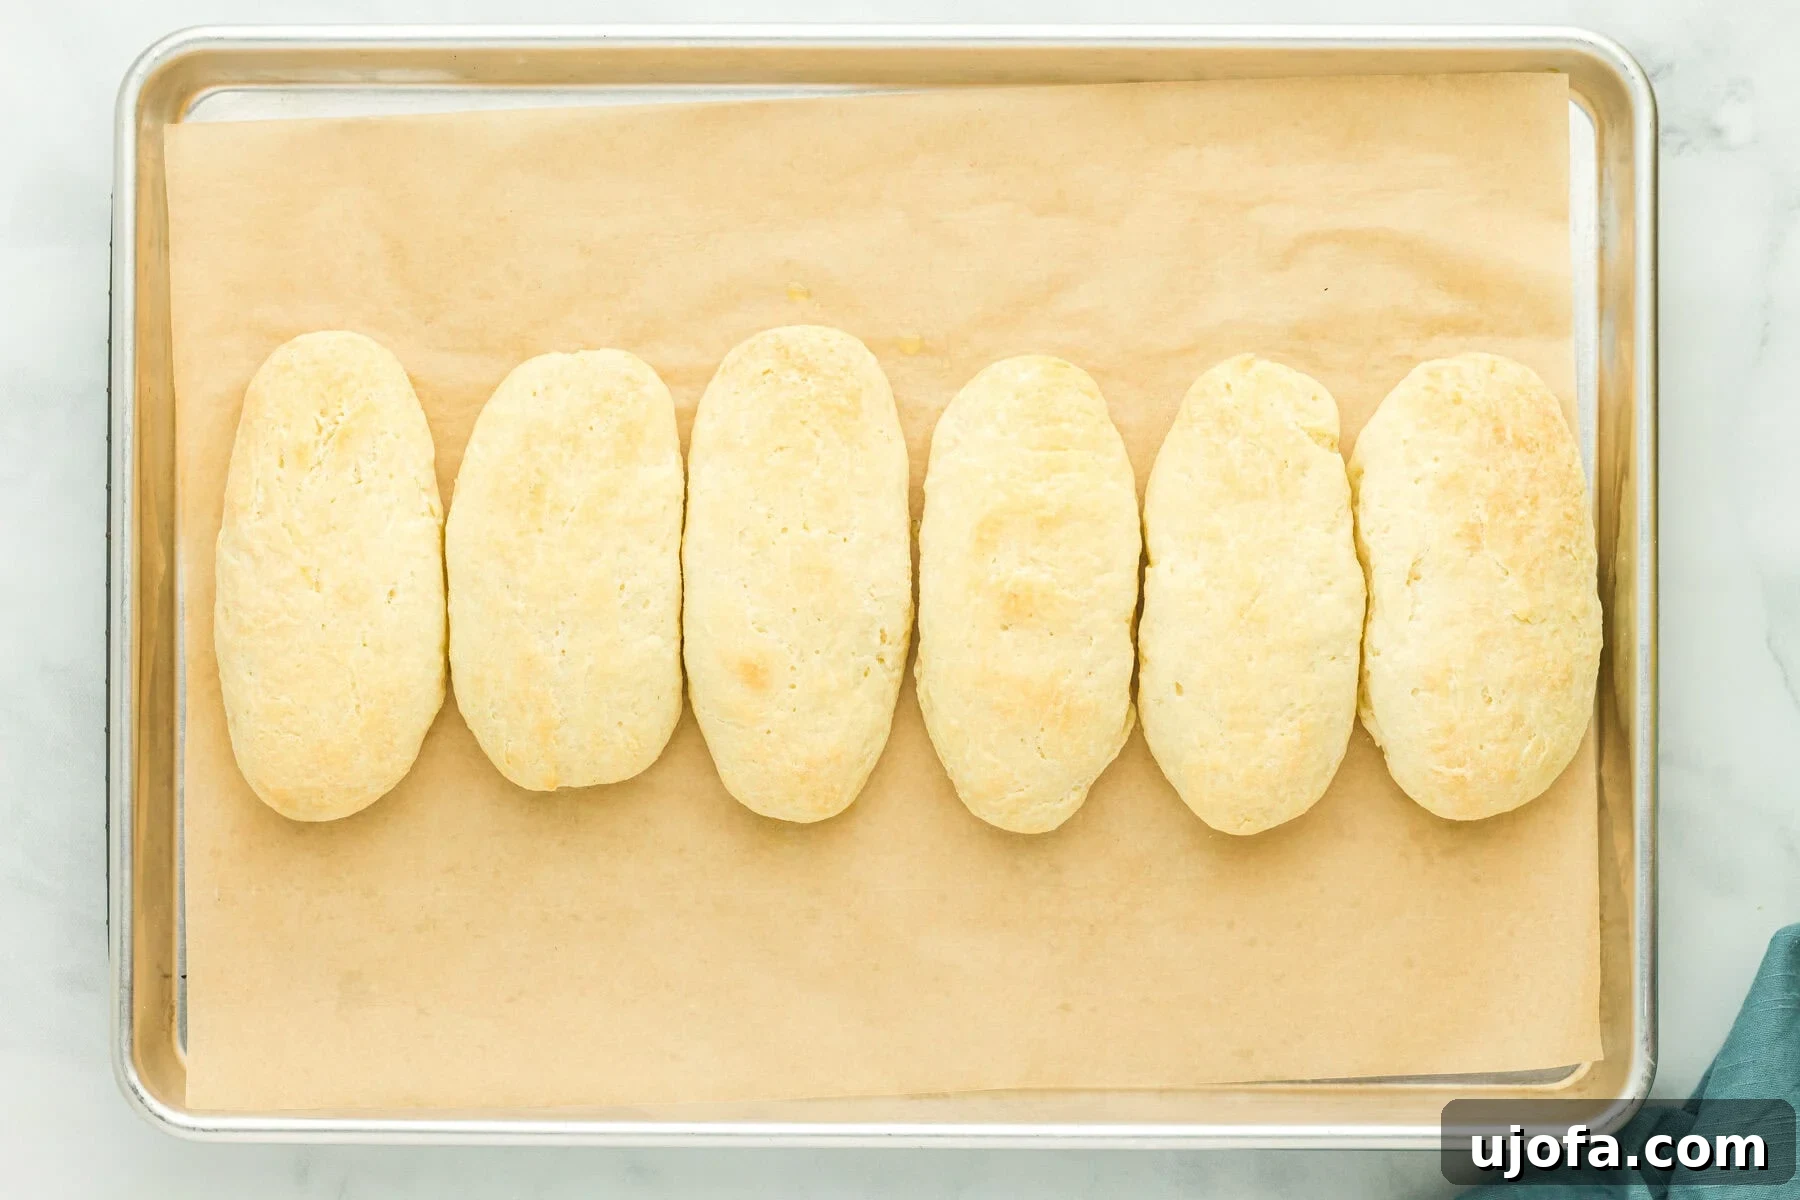
Step 12 & 13: Bake and Cool. Place the baking tray into the preheated oven and bake for 20-22 minutes. The buns are done when they’re lightly golden on top and reach an internal temperature of at least 190°F (88°C). Allow them to cool completely on the baking sheet before serving to ensure the perfect texture.