
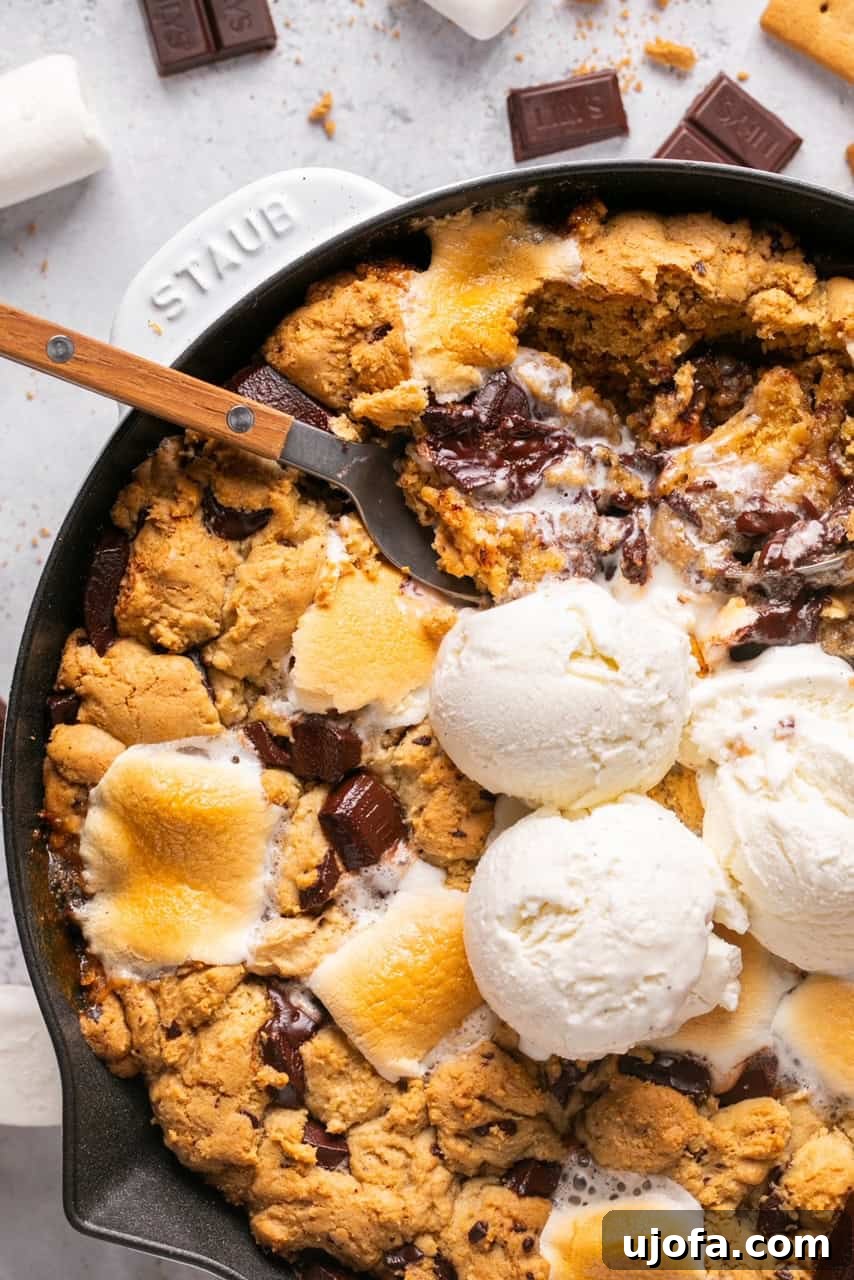
Ultimate Gluten-Free S’mores Cookie Skillet: A Campfire-Free Delight
Dive into the irresistible world of gooey chocolate, toasted marshmallows, and crunchy graham crackers with this incredibly easy and utterly delicious **S’mores Cookie Skillet**. Often affectionately known as a chocolate and marshmallow cookie skillet, this dessert brings all the magic of a classic campfire treat right into your kitchen, no open flames required! Perfect for any occasion, it’s a giant, shareable cookie that promises a warm, comforting, and unforgettable experience. Plus, with simple adjustments, it’s a fantastic gluten-free option everyone can enjoy.
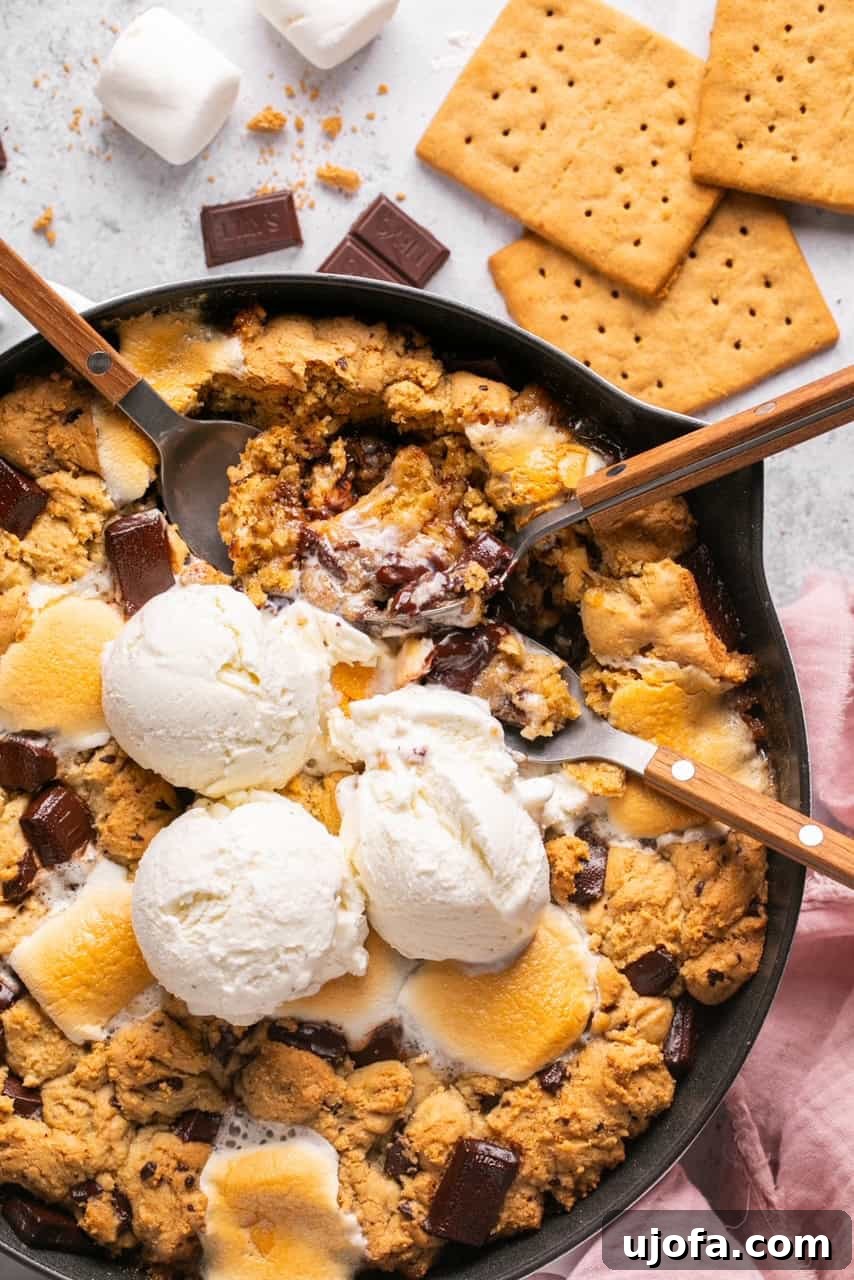
Why This S’mores Skillet Cookie Recipe Will Become Your New Favorite
As a huge enthusiast of that timeless s’mores flavor, crafting a skillet cookie recipe that perfectly captures its essence while accommodating dietary needs was a personal mission. This recipe is a triumph, combining pantry staples into a show-stopping dessert in just under 40 minutes from start to finish. Imagine the aroma filling your home – that’s the promise of this giant skillet cookie, a truly divine creation!
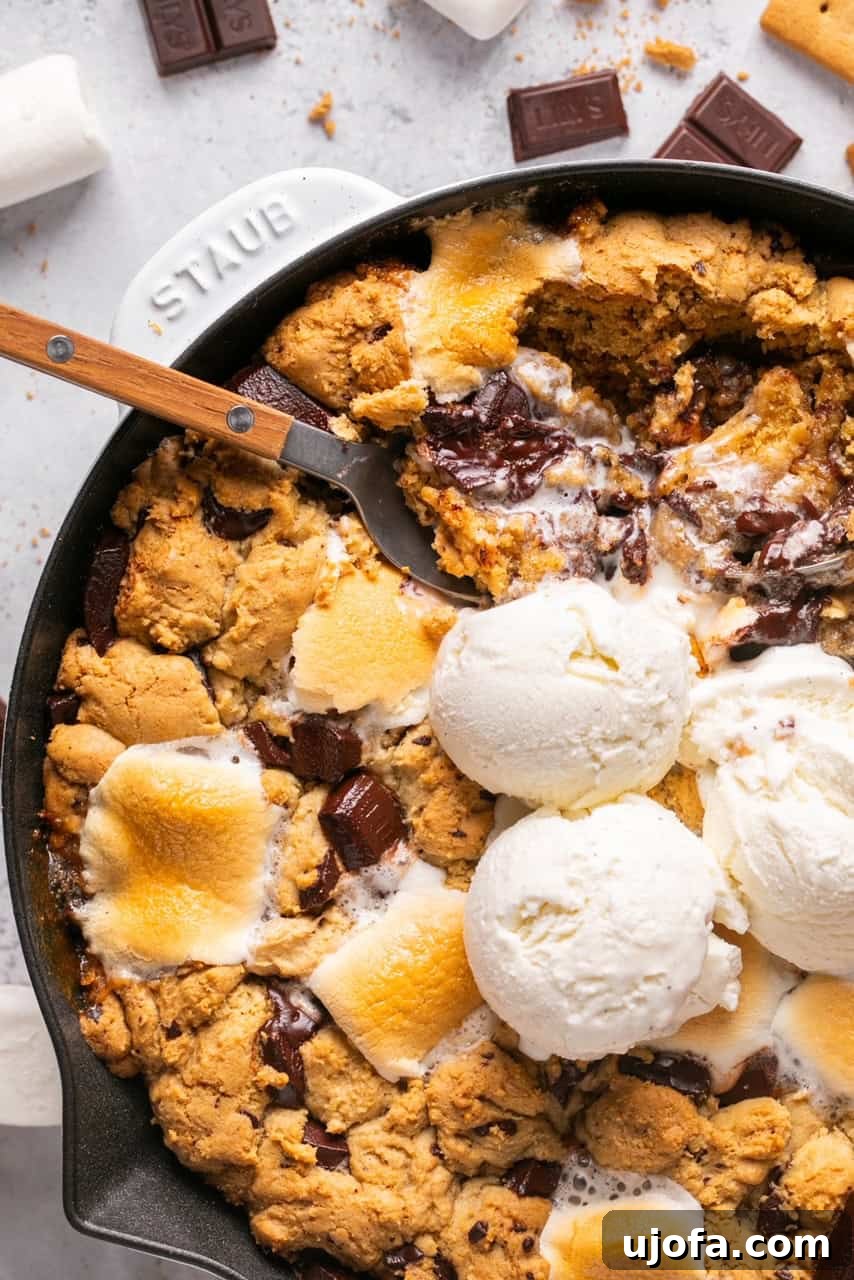
This oversized cookie is a delightful twist on the beloved chocolate chip cookie, elevated with a generous layer of melted, gooey marshmallows and the satisfying crunch of graham crackers. It’s designed to be a crowd-pleaser, making it the ideal dessert for family gatherings, potlucks, or a cozy night in. Serve it warm, family-style directly from the skillet, topped with a luscious scoop of vanilla ice cream, or portion it out for individual servings. The sheer joy of scooping into that warm, soft, and melty center is an experience in itself.
In our home, a delicious, comforting dessert is always welcome. If you adore this skillet cookie, you might also fall for my Peach Berry Crisp Skillet, explore the rich, sweet depths of my Caramelized Apples, or indulge in the decadent perfection of my Gluten-Free Molten Chocolate Lava Cakes. Each recipe is crafted to satisfy your sweetest cravings and bring warmth to your table.
Essential Ingredients for Your Perfect S’mores Skillet
Crafting the ultimate s’mores cookie skillet begins with a selection of high-quality ingredients. Here’s a breakdown of what you’ll need and why each component is crucial to achieving that perfect balance of textures and flavors:
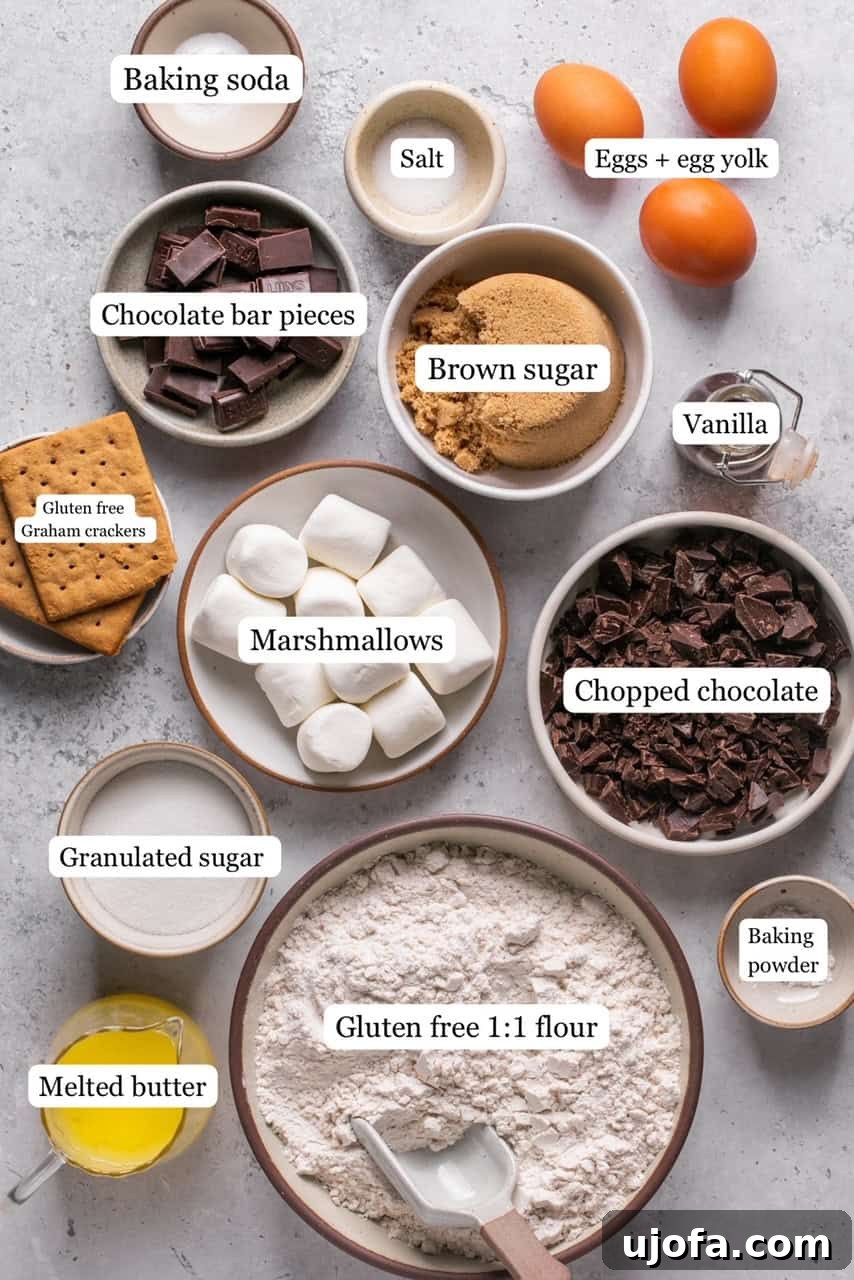
- Butter: Whether you choose salted or unsalted butter, this forms the rich, flavorful base of your cookie dough. Melted butter ensures a chewy, soft texture and helps distribute flavors evenly.
- Brown Sugar: Adds a deep, molasses-rich flavor and contributes significantly to the cookie’s signature chewiness, moistness, and a lovely golden hue.
- Granulated Sugar: Provides essential sweetness and helps create a delicately crisp edge on the cookie, balancing the chewiness from the brown sugar.
- Vanilla Extract: A crucial flavor enhancer that elevates the sweetness and brings warmth and depth to the overall profile, harmonizing with the chocolate and marshmallow notes.
- Eggs: Act as essential binders, adding structure and much-needed moisture to the cookie dough, ensuring it holds together beautifully and bakes evenly.
- Egg Yolk: The secret to an extra chewy, tender, and incredibly rich cookie. It adds additional fat without extra liquid, significantly enhancing the gooey factor and mouthfeel.
- Gluten-Free 1:1 Flour: For a superb gluten-free experience, a high-quality 1:1 gluten-free baking flour blend is essential. Brands like King Arthur Baking Company offer excellent results, mimicking traditional flour. If gluten isn’t a dietary concern, regular all-purpose flour works perfectly as well. This flour blend provides the necessary structure without compromising on the desired tender texture.
- Baking Soda: A powerful leavening agent that helps the cookie spread and achieve a beautiful golden brown color, contributing to its signature soft interior.
- Baking Powder: Another vital leavening agent that works in conjunction with baking soda to add lift and create a slightly lighter, airy texture within the cookie.
- Salt: Essential for balancing the sweetness and expertly enhancing all the other flavors, making the chocolate taste even richer and more complex.
- Chocolate Bars: For an authentic s’mores experience, use good quality chocolate that melts smoothly. I love Lily’s Milk Chocolate Style Bars for a smooth, sweet, and lower-sugar option, but feel free to use your favorite milk, semi-sweet, or dark chocolate. Roughly chop two bars for mixing into the dough and break one into rectangle pieces for topping. Chocolate chips or chunks are also great alternatives. If you have celiac disease, always check for a gluten-free label to ensure safety.
- Marshmallows: The star of the s’mores! Regular or mini marshmallows both work wonderfully, providing that irresistible molten, toasted, and slightly caramelized top. Most brands are naturally gluten-free, but a quick check of the label is always a good idea.
- Gluten-Free Graham Crackers: Crucial for the classic s’mores crunch and a subtle honey-like flavor. Break them into small pieces to sprinkle throughout and on top. If you’re not following a gluten-free diet, regular graham crackers are perfectly fine. These add a delightful textural contrast and a subtly spiced flavor that truly completes the s’mores profile.
A full list of exact ingredient amounts can be found in the detailed recipe card below.
Step-by-Step Guide: Crafting Your S’mores Cookie Skillet
Follow these straightforward steps to create a show-stopping s’mores cookie skillet that will impress everyone with its ease and deliciousness.
Preparing the Dough Base
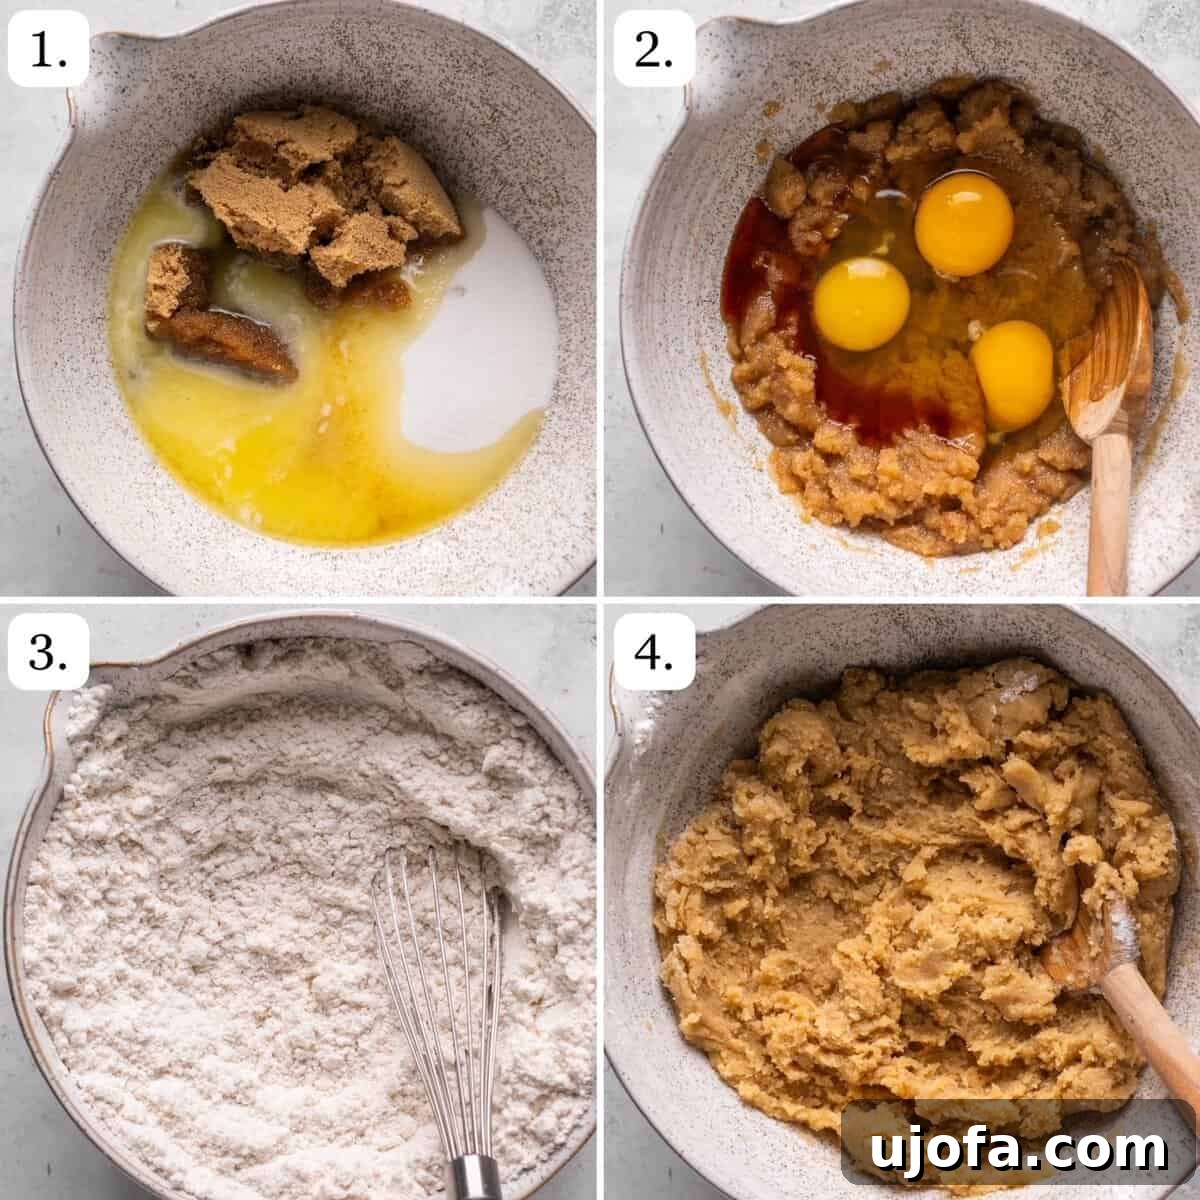
- Step 1: Preheat the oven. Begin by setting your oven to 350°F (175°C). This ensures your skillet cookie bakes evenly and perfectly from the moment it enters the oven, preventing an undercooked center or burnt edges.
- Step 2: Cream wet ingredients. In a large mixing bowl, combine the freshly melted butter, rich brown sugar, and sparkling white granulated sugar. Mix these ingredients thoroughly using a whisk or electric mixer until the mixture is smooth, creamy, and well-combined. This forms the sweet, foundational blend for your cookie.
- Step 3: Add eggs and vanilla. Next, incorporate the vanilla extract, whole eggs, and the extra egg yolk into your butter-sugar mixture. Continue mixing until the wet ingredients are fully integrated and the batter achieves a silky, uniform consistency. Ensure there are no lumps for the best texture.
- Step 4: Combine dry ingredients. In a separate, medium-sized bowl, whisk together all your dry ingredients: the gluten-free flour, baking soda, baking powder, and a pinch of salt. Ensure they are thoroughly well-combined to evenly distribute the leavening agents throughout the flour mixture.
Assembling Your Skillet Masterpiece
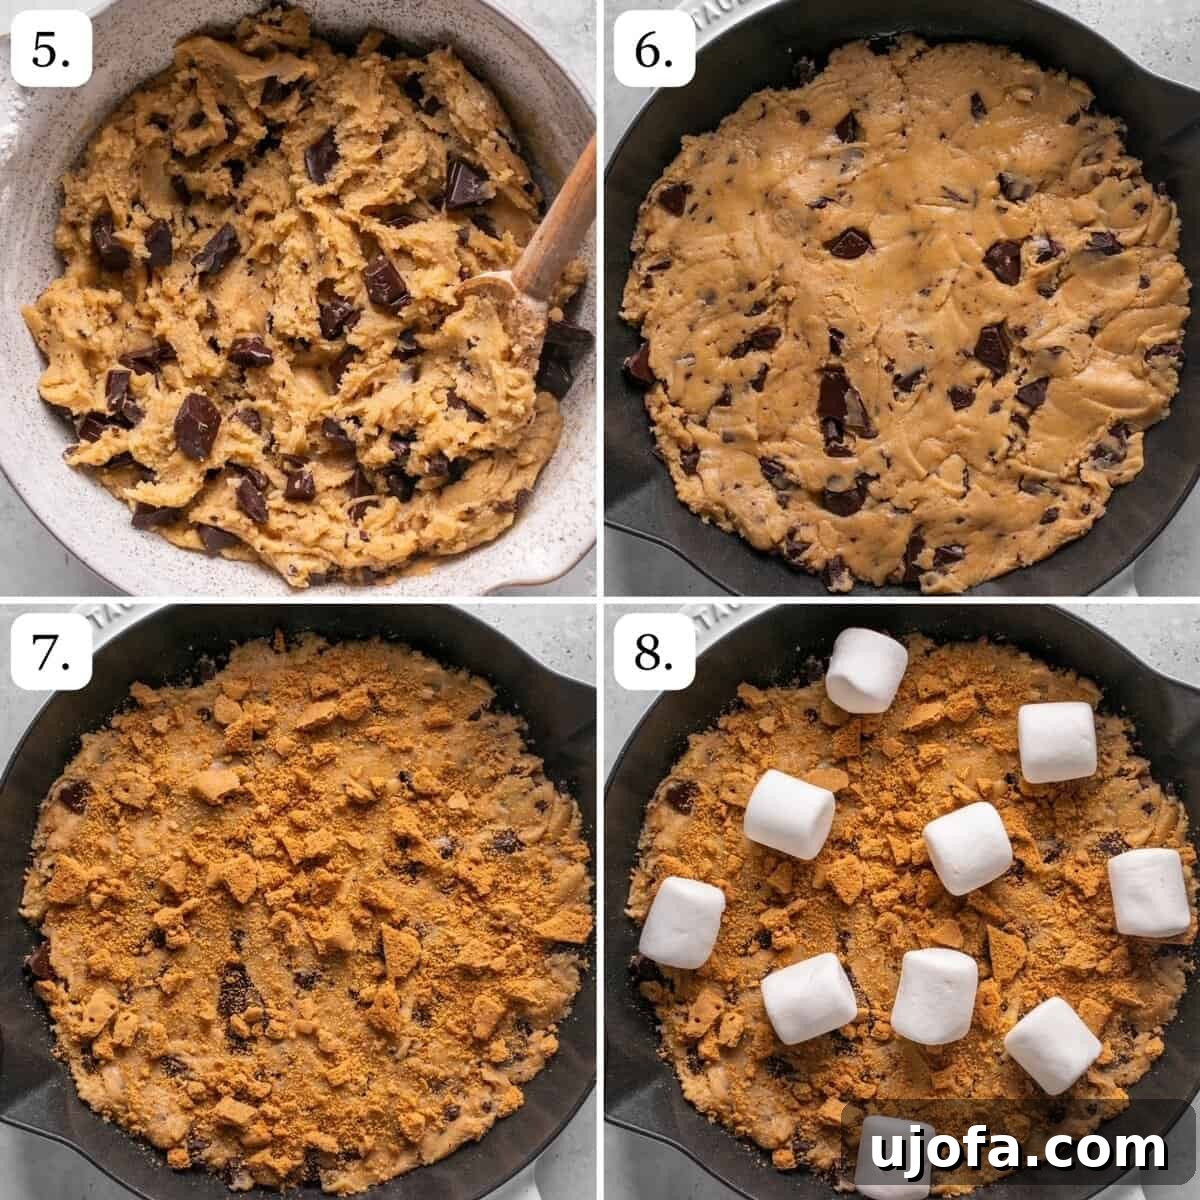
- Step 5: Form the dough. Gradually add the dry ingredient mixture to the wet ingredients, stirring gently with a spatula or spoon until a soft, cohesive cookie dough begins to form. Be careful not to overmix, as this can lead to a tougher cookie. Once the dough is mostly combined, fold in two of the roughly chopped chocolate bars, ensuring the chocolate pieces are well distributed throughout the dough for chocolate in every bite.
- Step 6: Prepare the skillet base. Lightly spray a 10-inch cast iron skillet (or any other oven-safe skillet or baking dish of similar size) with cooking spray. This crucial step prevents sticking and ensures easy serving. Take about half of your prepared cookie dough and press it evenly into the bottom of the skillet, forming a delicious, sturdy base for your s’mores.
- Step 7: Create the s’mores layer. Generously sprinkle the broken graham cracker pieces, a handful of marshmallows, and half of the remaining chocolate bar pieces (such as Lily’s) over the cookie dough base. This creates the signature s’mores layers that will melt and toast beautifully.
- Step 8: Top with remaining dough and chocolate. Dollop the remaining half of the cookie dough in globs over the marshmallow and cracker layer. It’s perfectly fine if the dough doesn’t entirely cover the surface; this allows the marshmallows and chocolate to bubble up beautifully, creating a rustic, inviting look. Finish by scattering the remaining chocolate pieces on top for extra indulgence.
Baking and Serving for Ultimate Enjoyment
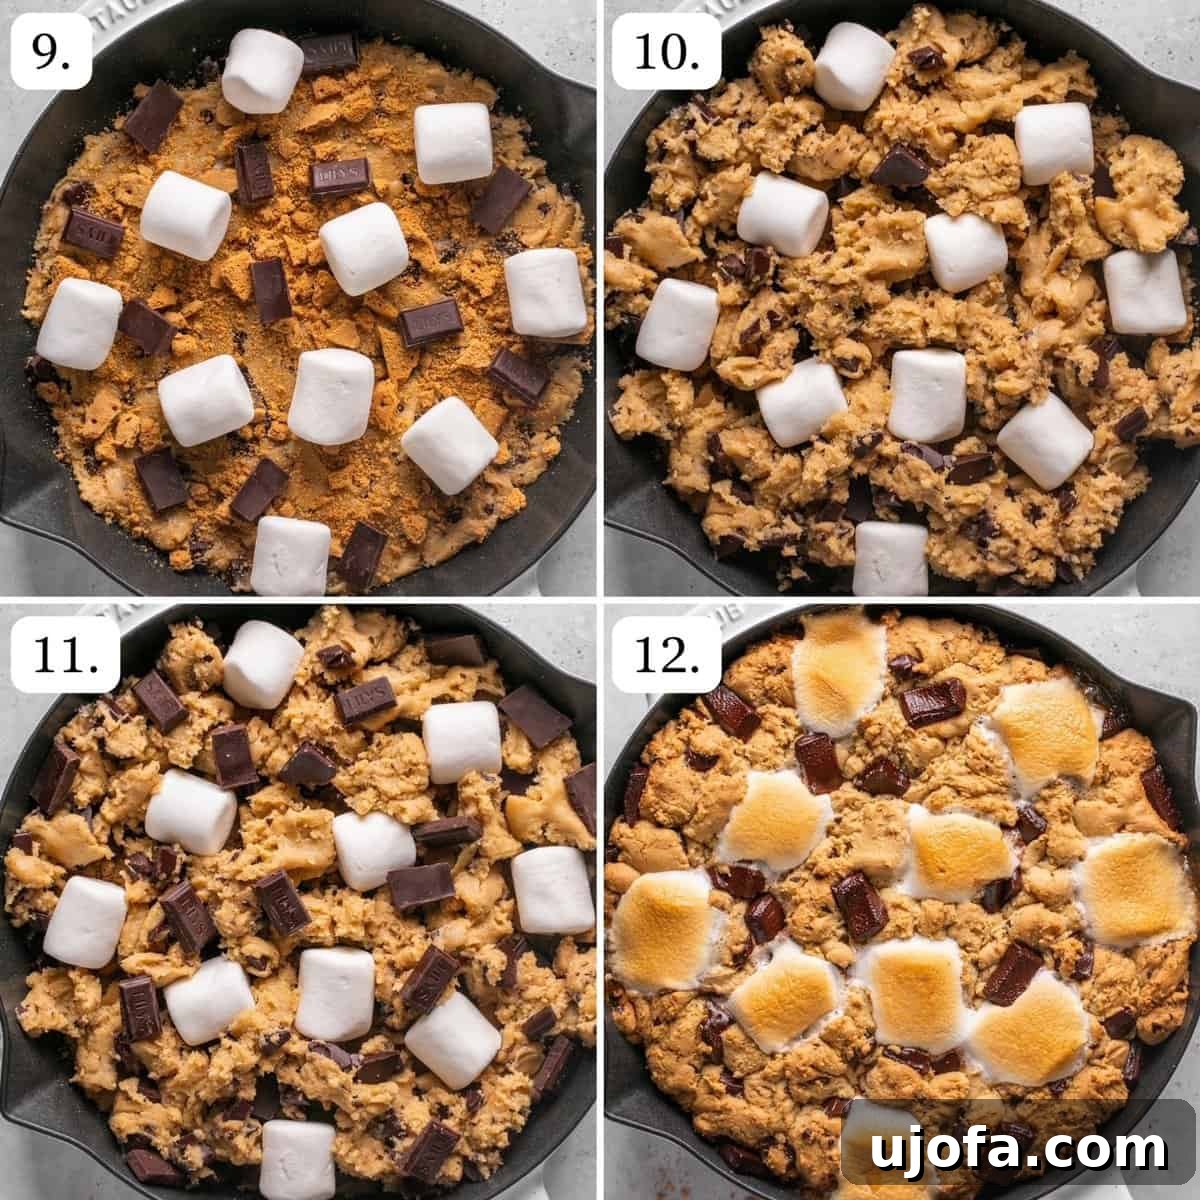
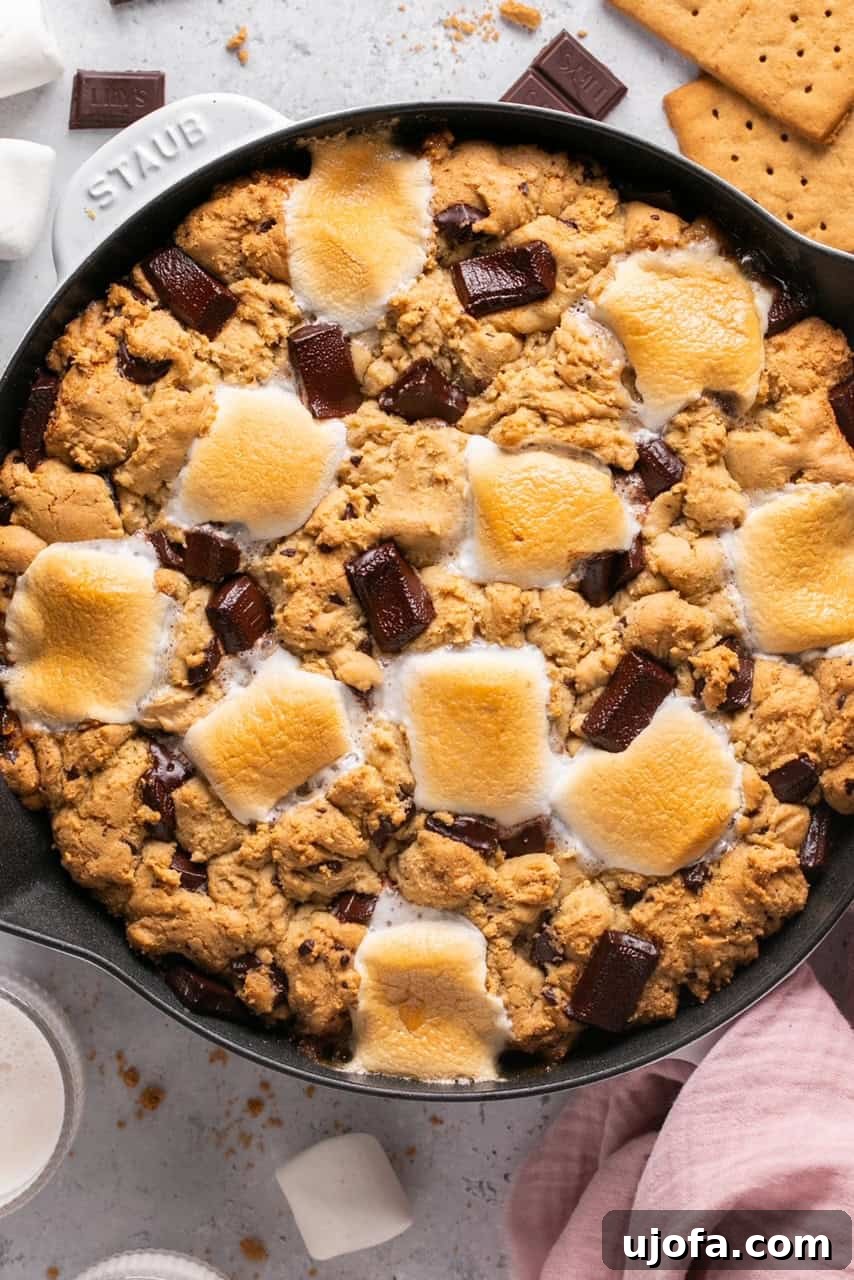
- Step 9: Bake to perfection. Place the skillet into your preheated oven and bake for approximately 27-29 minutes, or until the edges are golden brown, the center is set but still wonderfully gooey, and the marshmallows on top are beautifully toasted and slightly caramelized.
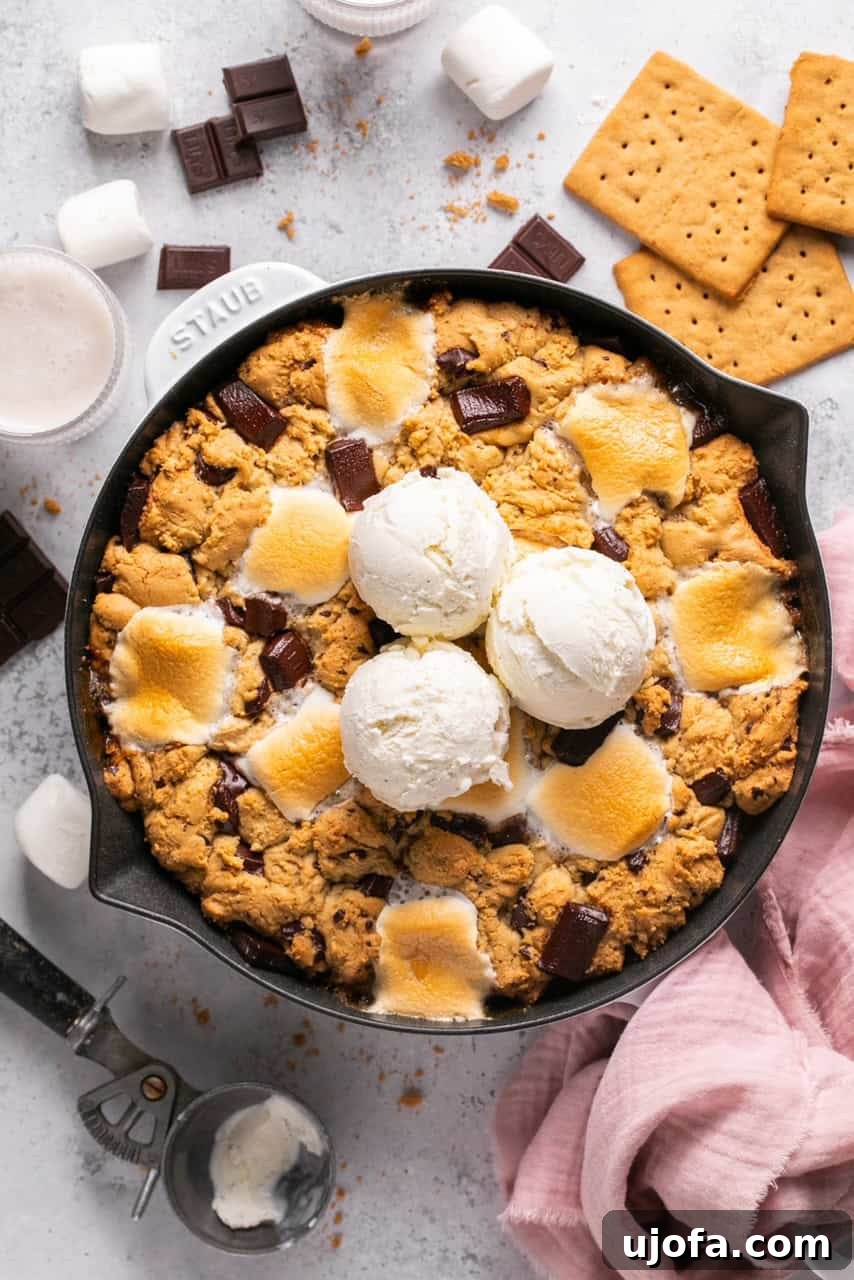
- Step 10: Serve warm. Once baked, carefully remove the skillet from the oven. This sensational dessert is best served warm, ideally with a generous scoop of cold vanilla ice cream melting gloriously over the top. The contrast of hot and cold, gooey and creamy, is simply divine. Grab spoons and dig in immediately for the ultimate s’mores experience!
Expert Tips for the Best S’mores Cookie Skillet
Elevate your baking and ensure every batch of this s’mores cookie skillet is nothing short of perfection with these expert insights and tricks:
- Enhance with Flaky Sea Salt: For an extra layer of gourmet flavor, finish your warm skillet cookie with a sprinkle of flaky sea salt just before serving. The salt beautifully contrasts the sweetness of the chocolate and marshmallows, awakening your taste buds and adding a sophisticated touch. A drizzle of caramel sauce or a sprinkle of mini chocolate chips before serving can also add a luxurious touch.
- Choose Your Skillet Wisely: I personally recommend using a 10-inch Lodge Cast Iron Skillet for this recipe. Cast iron provides incredible heat retention and even heat distribution, resulting in an evenly baked cookie with perfectly crisp edges and a wonderfully soft, gooey center. It’s a versatile kitchen workhorse and surprisingly budget-friendly! While any oven-safe skillet or baking dish of similar size will work, cast iron truly shines here for that authentic skillet cookie experience.
- Achieve Perfect Baking Time: My sweet spot for this cookie skillet is exactly 28 minutes. This duration consistently yields that perfect gooey and soft texture that makes this dessert so irresistible. If you prefer your cookies with a bit more crunch around the edges, simply extend the baking time by an additional 1 to 2 minutes. Remember, cast iron skillets retain heat long after they’re removed from the oven, so the cookie will continue to cook slightly as it rests and cools.
- Room Temperature Ingredients are Key: Ensure your eggs and butter are at room temperature before you begin mixing. This allows them to cream together more effectively, creating a smoother, more emulsified dough. A well-emulsified dough leads to a more consistent and tender texture in the final cookie.
- Avoid Overmixing the Dough: When combining your wet and dry ingredients, mix just until they are barely combined and no streaks of flour remain. Overmixing can develop the gluten in the flour (even in gluten-free blends), leading to a tougher, denser cookie. A tender cookie is absolutely key to achieving that delightful gooey, melt-in-your-mouth experience.
- Marshmallow Browning Control: If you find your marshmallows are browning too quickly before the cookie itself is fully baked, simply cover the skillet loosely with aluminum foil for the last 5-10 minutes of baking. This shields the marshmallows from direct heat while allowing the cookie to finish baking through. Alternatively, you can add the marshmallows during the last 10 minutes of the baking process.
Serving Suggestions & Storage Tips
Make the most of your s’mores cookie skillet with these serving and storage recommendations, ensuring every bite is as enjoyable as the first.
Delightful Serving Tips
The beauty of this s’mores cookie skillet lies in its incredible versatility and communal appeal. For the ultimate experience, serve it warm straight from the oven. The quintessential topping is a generous scoop of your favorite vanilla ice cream, which will gracefully melt into a luscious sauce, creating a wonderful hot-and-cold contrast. For added indulgence, consider a sprinkle of flaky sea salt (as mentioned above), a dollop of freshly whipped cream, or a decadent drizzle of chocolate syrup or caramel sauce. You can either cut it into individual slices for a more formal presentation or, for a truly communal and fun experience, simply place it in the center of the table with a few spoons and let everyone dig in family-style. It’s a dessert designed for sharing and creating joyful memories, making it perfect for parties, movie nights, or any cozy gathering.
Practical Storage Tips
While this s’mores cookie skillet is undoubtedly at its peak when served warm and fresh, any leftovers can be stored and enjoyed later with minimal loss of quality. To keep it fresh, store it in an airtight container or tightly wrapped in plastic wrap at room temperature for up to 4 days. Avoid refrigeration, as it can cause the cookie to dry out. When you’re ready to revive its gooey goodness, simply pop a portion into the microwave for 15-second intervals until it reaches your desired warmth. This quick reheating method ensures every bite remains as delightful and melty as the first, making future indulgence just a quick reheat away.
Common Questions About Your S’mores Cookie Skillet (FAQs)
- Do I have to use a cast iron skillet?
- While a cast iron skillet is highly recommended for its superior heat retention and ability to create beautifully crisp edges and a gooey center, it is not strictly mandatory. Any 10-inch oven-safe dish or pie plate made from ceramic, glass, or oven-safe metal can be used as a substitute. The cooking time might vary slightly depending on the material and thickness of your dish, so keep an eye on it for desired doneness.
- Can I use a different type of chocolate or add other mix-ins?
- Absolutely! This recipe is incredibly versatile and encourages customization. Feel free to experiment with your favorite type of chocolate – semi-sweet, dark, milk chocolate chips, or even chopped candy bars like Snickers or Kit Kats. For extra flavor and texture, get creative with mix-ins such as chopped nuts (pecans, walnuts, almonds), a swirl of caramel sauce layered into the dough, a sprinkle of toffee bits, or even mini peanut butter cups. Just ensure any additions are oven-safe and can withstand baking temperatures.
- Can I make this recipe vegan?
- Yes, with a few thoughtful substitutions, you can adapt this recipe to be vegan-friendly. For the butter, swap it for a high-quality vegan butter stick. For the chocolate, use dairy-free chocolate chips or chopped vegan chocolate bars. Opt for vegan marshmallows (brands like Dandies are excellent). For the eggs, you can try flax eggs (1 tablespoon ground flaxseed meal + 3 tablespoons water per egg, let sit for 5 minutes) or a commercial egg replacer, adjusting according to package directions. While I haven’t personally tested the vegan version, these substitutions generally work well in similar cookie recipes. Please let us know how your vegan s’mores skillet turns out!
- What if my marshmallows burn too quickly?
- If you notice your marshmallows browning or charring too fast before the cookie is fully baked, don’t worry! You can easily remedy this by covering the skillet loosely with aluminum foil for the last 5-10 minutes of baking. This shields the marshmallows from direct heat while allowing the cookie to finish baking through. Alternatively, for even more control, you can add the marshmallows during the last 10 minutes of the total baking time.
- Can I prepare the dough in advance?
- Yes! This recipe is fantastic for making ahead. You can prepare the cookie dough up to 2-3 days in advance. Store it tightly covered in an airtight container or plastic wrap in the refrigerator. When you’re ready to bake, let the dough come to room temperature for about 20-30 minutes. This will make it much easier to spread evenly into the skillet. This makes it a fantastic make-ahead dessert option for busy weekdays or entertaining.
More Irresistible Cookie Recipes You’ll Love
Easy Gluten Free Peanut Butter Blossoms Recipe
Mary’s Famous Gluten Free Peanut Butter Cookies
Gluten Free Monster Cookies (Dairy Free Option)
The BEST Soft Baked Pumpkin Cheesecake Cookies
Love this recipe? Please leave a 5-star rating in the recipe card below & a review in the comment section. Or, follow me on Facebook, Pinterest or Instagram today!
S’Mores Chocolate and Marshmallow Cookie Skillet Recipe
By: Mary Smith
Cook Time: 28 mins
Total Time: 38 mins
Yield: 10 servings
This chocolate and marshmallow cookie skillet, also known as a s’mores cookie skillet, is a delightful and easy-to-make treat using simple ingredients. It’s naturally gluten-free and boasts a perfect gooey center, capturing the classic s’mores flavor without the need for a campfire, making it ideal for any home.
Equipment
- 10-inch cast iron skillet
- Large mixing bowls
- Whisk or electric mixer
- Measuring cups and spoons
- Spatula or wooden spoon
Ingredients
- 1 cup butter, melted (salted or unsalted)
- 1 cup packed brown sugar
- ½ cup granulated sugar
- 2 tsp vanilla extract
- 2 large eggs
- 1 large egg yolk
- 2.5 cups gluten-free 1:1 flour (such as King Arthur Baking brand, or all-purpose flour if not gluten-free)
- 1 tsp baking soda
- ½ tsp baking powder
- ½ tsp salt
- 3 chocolate bars (e.g., Lily’s Milk Chocolate Style Bars – 2 roughly chopped, 1 broken into rectangle pieces; or use 1.5 cups chocolate chips/chunks of choice)
- 10 large marshmallows (or about 2 cups mini marshmallows)
- 2 gluten-free graham crackers, broken into small pieces (or regular graham crackers)
Instructions
- Preheat your oven to 350°F (175°C).
- In a large bowl, combine the melted butter, brown sugar, and granulated sugar. Mix well until smooth and creamy.
- Stir in the vanilla extract, eggs, and the extra egg yolk. Continue mixing until the mixture is completely smooth and well-incorporated.
- In a separate medium bowl, whisk together the gluten-free flour, baking soda, baking powder, and salt until evenly combined.
- Gradually add the dry ingredients to the wet ingredients, stirring until a cohesive cookie dough forms. Fold in the 2 roughly chopped chocolate bars.
- Lightly spray a 10-inch cast iron skillet or oven-safe dish with cooking spray. Press half of the cookie dough evenly into the bottom of the skillet to form the base layer.
- Sprinkle the broken graham cracker pieces, marshmallows, and half of the remaining chocolate bar pieces over the dough layer.
- Dollop the remaining cookie dough in spoonfuls over the marshmallow and cracker layer. It’s okay if it doesn’t cover entirely. Scatter the rest of the chocolate pieces on top.
- Bake for 27-29 minutes, or until the edges are golden brown and the marshmallows are toasted and gooey.
- Remove from oven and serve warm, topped with vanilla ice cream. Enjoy immediately!
Notes
- Nutrition information provided is an estimate for 1/10th of the total chocolate marshmallow cookie skillet. Individual results may vary based on ingredients used.
- For an elevated flavor, sprinkle flaky sea salt over the warm cookie skillet just before serving.
- Baking for precisely 28 minutes generally yields a perfect gooey and soft texture. Adjust by 1-2 minutes for a crispier cookie, remembering that cast iron retains heat and continues to cook after removal from the oven.
- This s’mores cookie skillet is best served warm. Store any leftovers in an airtight container at room temperature for up to 4 days.
- To reheat leftovers and restore their optimal gooeyness, simply place a portion in the microwave and warm in 15-second intervals until desired temperature is reached.
Nutrition Facts (Estimated per serving – 1/10th of skillet)
- Calories: 494 kcal
- Carbohydrates: 65g
- Protein: 6g
- Fat: 25g
- Saturated Fat: 15g
- Polyunsaturated Fat: 1g
- Monounsaturated Fat: 7g
- Trans Fat: 1g
- Cholesterol: 103mg
- Sodium: 431mg
- Potassium: 111mg
- Fiber: 4g
- Sugar: 39g
- Vitamin A: 644 IU
- Calcium: 71mg
- Iron: 3mg
All nutrition facts are an estimate and automatically calculated. While I fact-check them using My Fitness Pal, please note that they may not always be 100% accurate and depend on the specific ingredients and brands used. For the most accurate grams per serving size, it is recommended to weigh your total prepared skillet and divide by the number of servings.
Did you make this? Rate & comment below, and tag me on Instagram @maryswholelife