
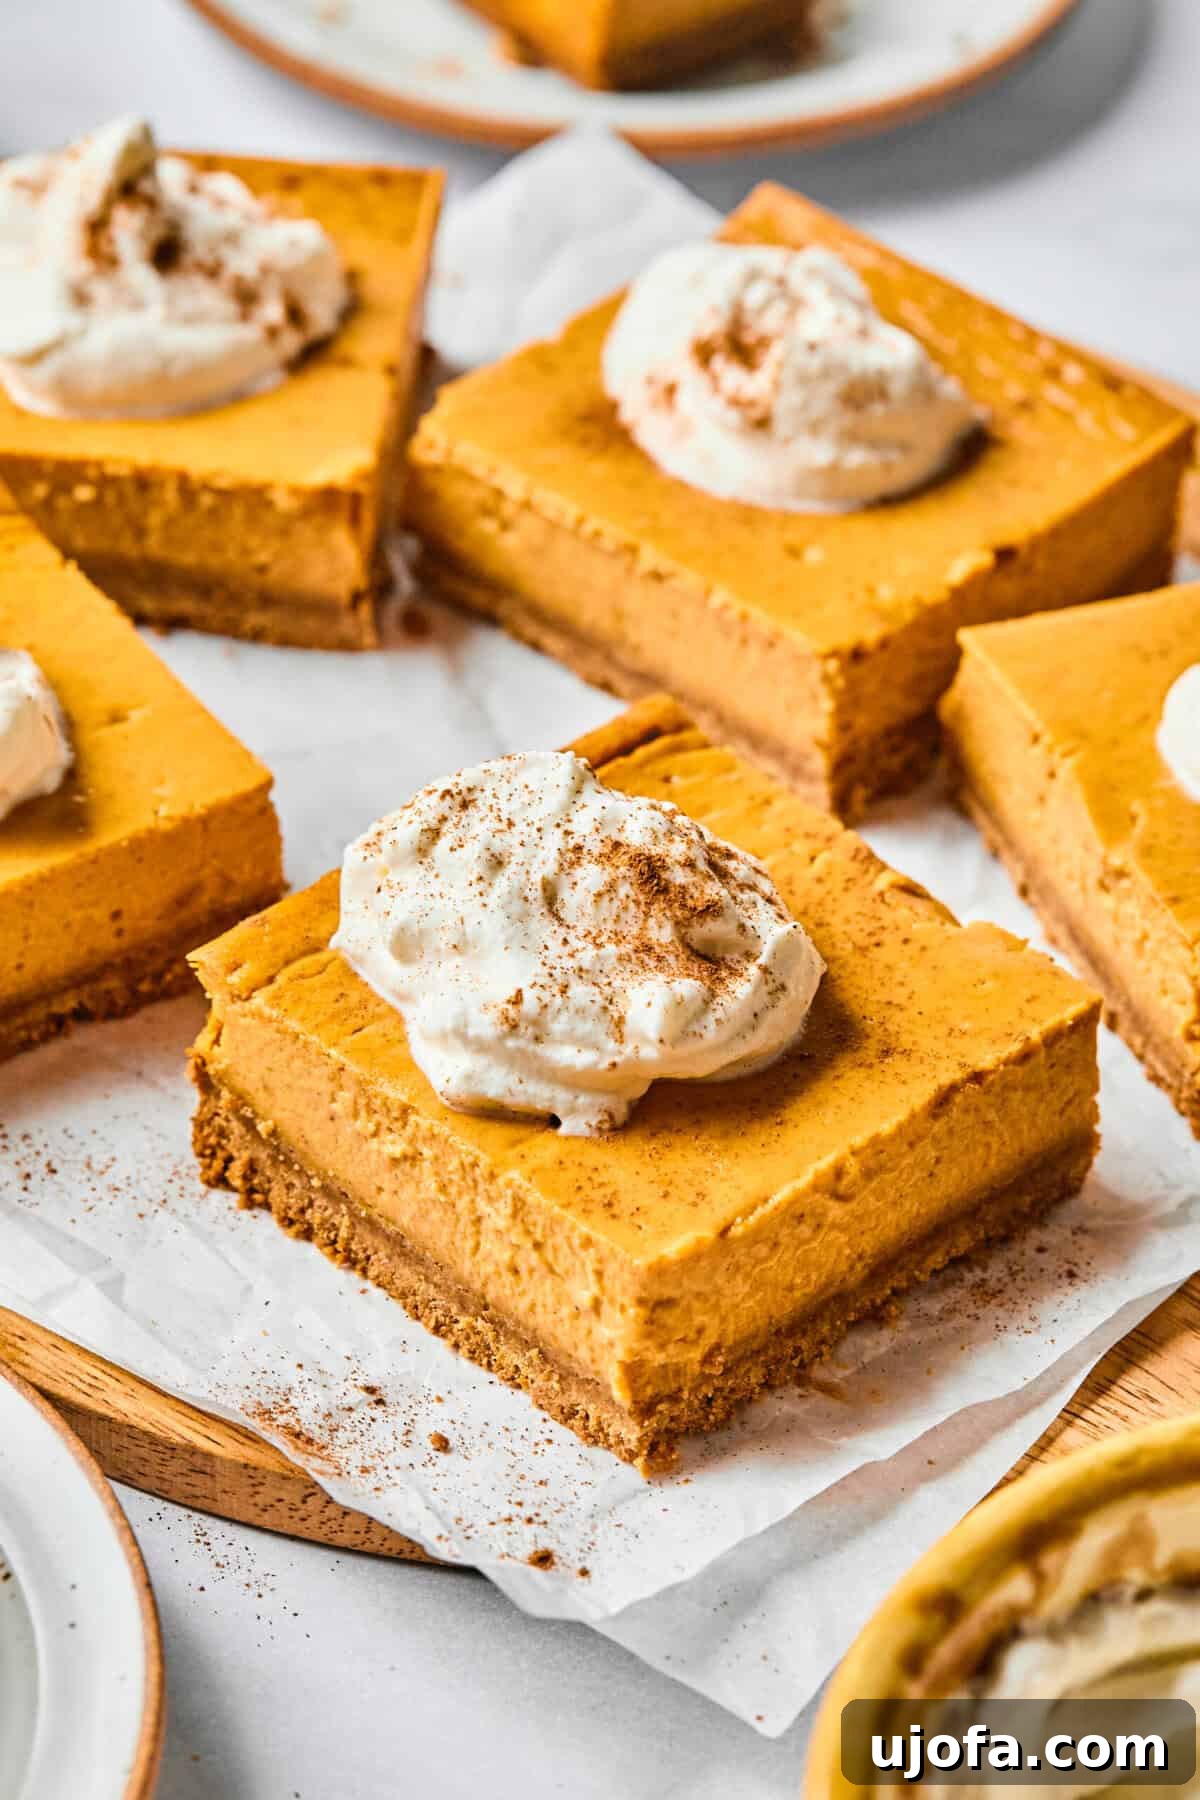
Irresistibly Creamy & Protein-Packed Pumpkin Cheesecake Bars (Gluten-Free!)
Step into the cozy flavors of autumn with these exquisite **pumpkin cheesecake bars**. This recipe delivers a harmonious blend of creamy indulgence, warm spices, and a satisfyingly crisp gluten-free graham cracker crust, making it the quintessential fall dessert. Crafted with a clever, protein-rich filling from cottage cheese and pure pumpkin puree, infused with aromatic pumpkin pie spices, these easy-to-make dessert bars are not just delicious but also a healthier twist on a classic. They are perfectly suited for all your fall baking endeavors, a delightful addition to Thanksgiving gatherings, or a fantastic make-ahead treat for any holiday occasion.
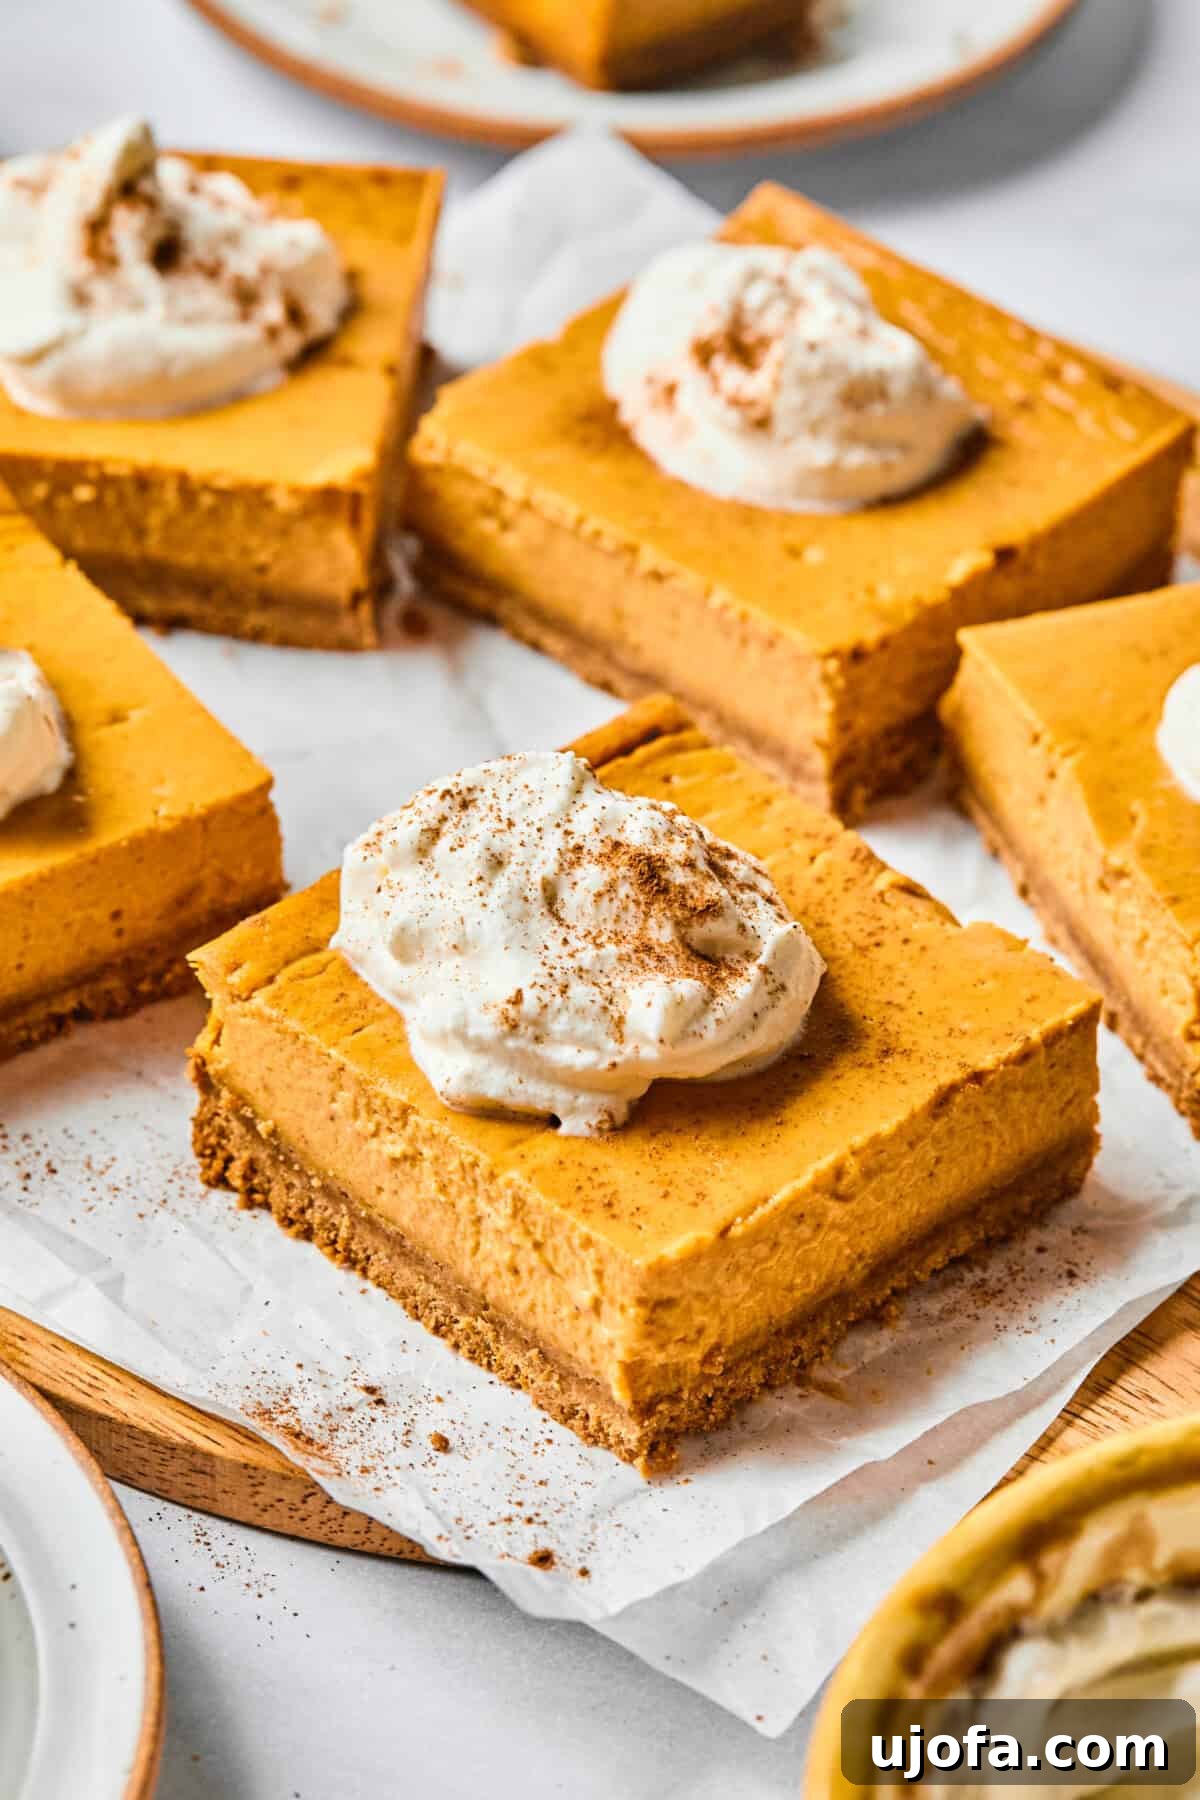
Why These Easy Pumpkin Dessert Bars Will Become Your Fall Favorite
These pumpkin cheesecake bars are more than just a dessert; they’re a celebration of fall’s finest flavors, striking a perfect balance between the rich decadence of classic cheesecake and the comforting warmth of a pumpkin pie. What sets this recipe apart is its lighter, gluten-free, and protein-packed twist, making it a guilt-free indulgence that doesn’t compromise on taste or texture. Whether you’re a seasoned baker looking for new fall recipes or simply seeking a crowd-pleasing dessert that’s both nourishing and simple to prepare, these bars tick every box. As an ardent lover of all things pumpkin, from delightful Pumpkin Cheesecake Cookies to traditional pumpkin pies, I can confidently say these bars belong at the top of your fall baking list!
Every bite delivers the creamy, spiced pumpkin flavor you crave, but with an intelligent, protein-packed upgrade. The base features a sturdy yet tender crust, easily made with gluten-free graham crackers (or for an extra kick, gingersnaps) and a secret ingredient: a touch of vanilla protein powder for an added nutritional boost. The star of the show, the luscious filling, achieves its velvety texture and rich flavor by blending creamy cottage cheese, authentic pumpkin purée, and pure maple syrup. This thoughtful combination not only enhances the flavor but also makes these bars a more wholesome choice. Another incredible benefit? They are remarkably make-ahead friendly. You can effortlessly bake and chill them the day before serving, freeing up your time to enjoy your gatherings without last-minute stress. They’re ideal for a casual weeknight treat or a show-stopping holiday centerpiece.
Essential Ingredients for Perfect Pumpkin Cheesecake Bars
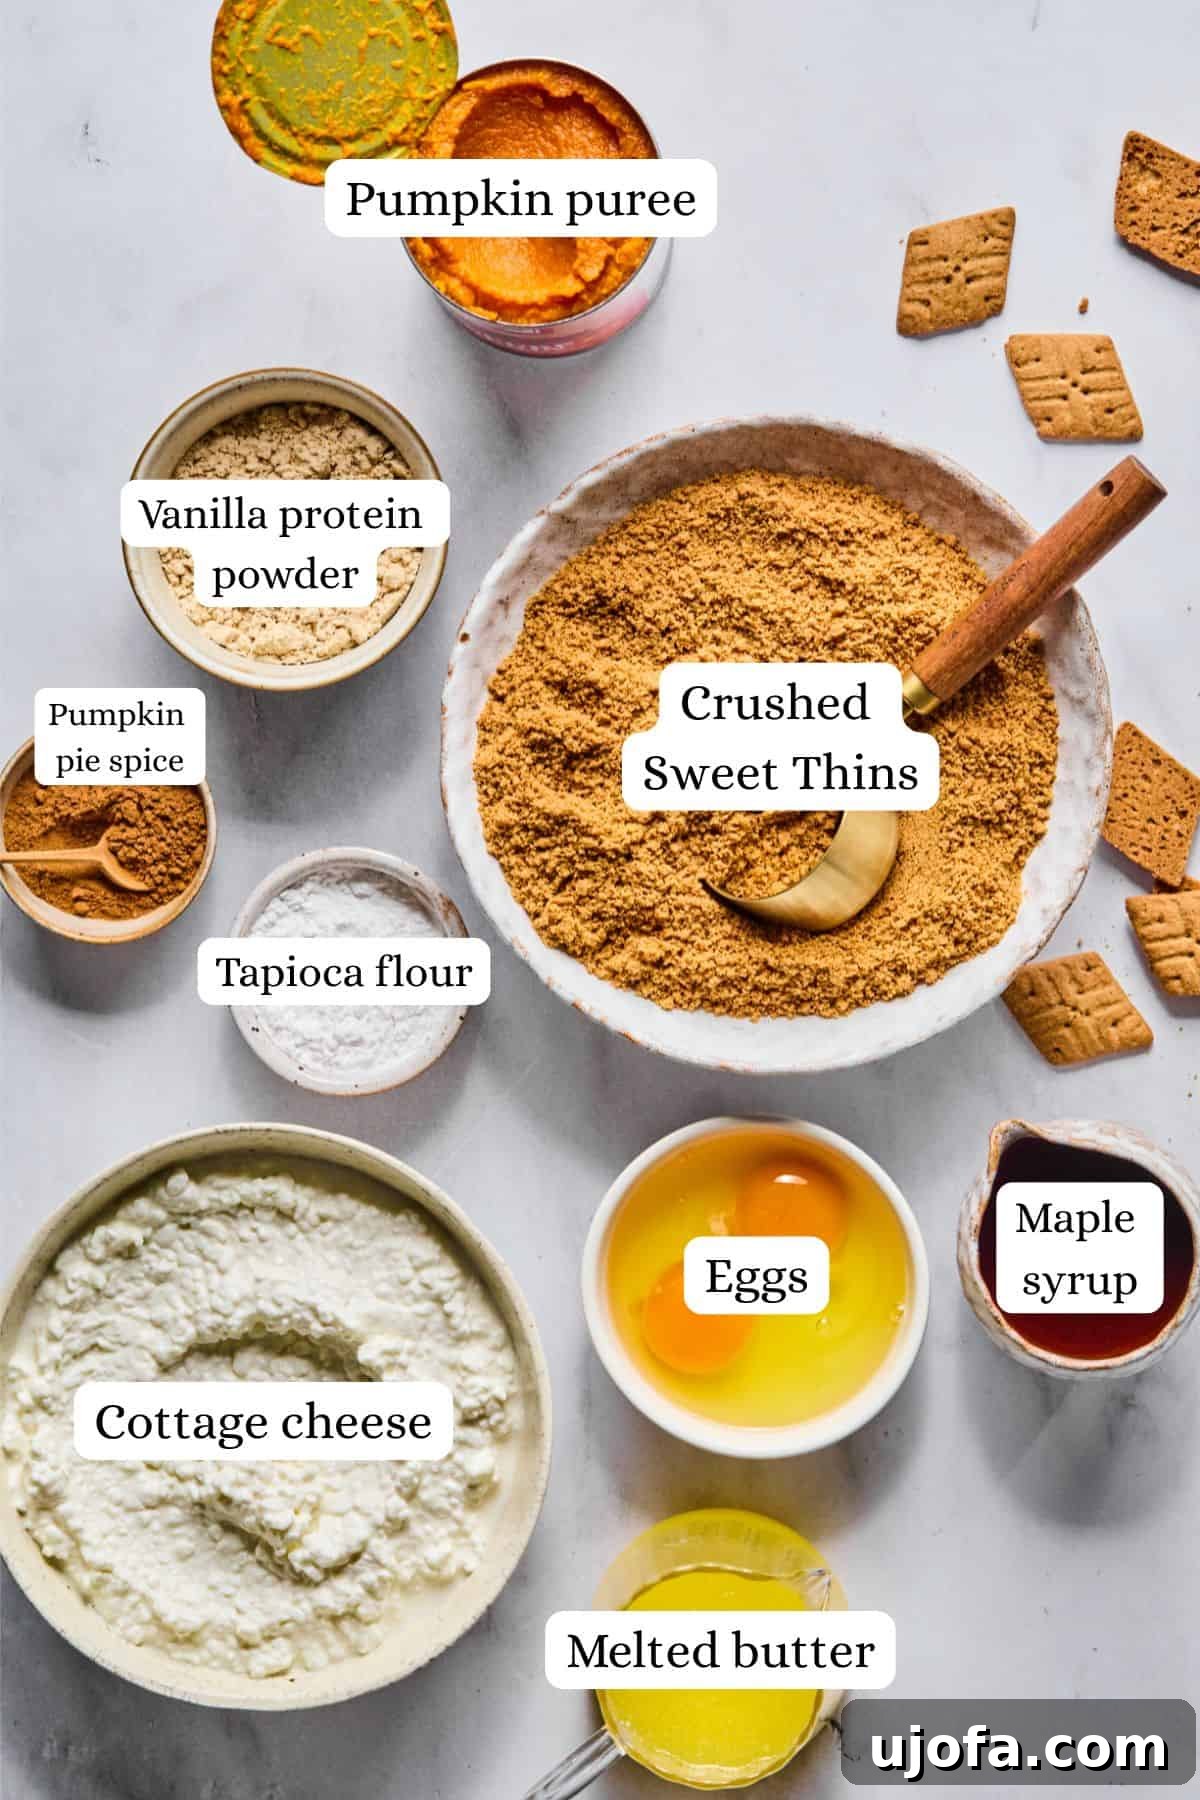
Crafting these delectable pumpkin cheesecake bars starts with selecting the right ingredients. Each component plays a vital role in achieving their irresistible flavor and perfect texture. Here’s a detailed look at what you’ll need and why:
- Gluten-Free Graham Crackers: These form the foundational layer of your crust, offering a delightful toasted, slightly sweet flavor. For an intriguing autumnal twist and added spice, consider using crushed gingersnaps instead. Ensure they are certified gluten-free for dietary needs.
- Butter: Essential for binding the crust ingredients together, butter provides a rich, buttery foundation that complements the delicate flavors of the filling. Melted butter ensures an even distribution and a firm crust.
- Vanilla Protein Powder: This ingenious addition not only imparts a subtle hint of vanilla but also significantly boosts the protein content of the crust. We recommend a high-quality vanilla protein powder for the best flavor and texture (use code MARY10 for a discount!).
- Cottage Cheese: The secret to our creamy, light, and protein-rich filling! Cottage cheese provides a wonderfully smooth texture when blended, making these bars lighter than traditional cream cheese-based cheesecakes. We love Good Culture cottage cheese, but feel free to use your preferred brand. For a richer, more classic cheesecake bar, you can substitute half or all of the cottage cheese with cream cheese.
- Canned Pumpkin Puree: This is where the quintessential pumpkin flavor comes from. It adds moisture, color, and that unmistakable taste of fall. Always double-check your can to ensure you’re using pure pumpkin puree, NOT pumpkin pie filling, which contains added sugars and spices.
- Eggs: Acting as a crucial binder, eggs help the pumpkin cheesecake filling set beautifully and provide structural integrity to the bars, ensuring they slice cleanly without crumbling.
- Maple Syrup: A natural sweetener that pairs exquisitely with pumpkin and autumn spices. Maple syrup provides a nuanced sweetness that is less overpowering than granulated sugar, enhancing the overall flavor profile. Adjust the amount to your preferred level of sweetness.
- Tapioca Flour (or Starch): This is key for achieving a silky-smooth filling and preventing any watery separation. Tapioca flour acts as a gentle thickener, ensuring your cheesecake bars hold their shape and maintain a delightful consistency.
- Pumpkin Pie Spice: The heart of fall flavors! This warm blend typically includes cinnamon, nutmeg, ginger, and cloves, delivering that comforting aroma and taste. Feel free to add an extra teaspoon for a more pronounced spice kick.
- Whipped Topping: For a dreamy, creamy finish, a dollop of Truwhip or freshly homemade whipped cream is the perfect accompaniment. It adds a lovely contrast in texture and a touch of sweetness.
- Pecans (optional): A whole pecan placed atop each bar offers an elegant presentation and a delightful nutty crunch, complementing the soft texture of the cheesecake.
If you’re as enamored with the pumpkin and cream cheese combination as we are, you must also try our luscious Healthy Pumpkin Cream Cheese Dip – another protein-packed favorite!
Pro Tips for Ingredients
- Room Temperature Matters: For the smoothest filling, ensure your cottage cheese and eggs are at room temperature before blending. This helps them combine more uniformly.
- Pure Pumpkin Power: Always read labels carefully! Canned pure pumpkin is just pumpkin, while pumpkin pie filling has added sugar and spices that can alter the flavor and sweetness of this recipe.
- Spice it Up: Store-bought pumpkin pie spice is convenient, but you can also make your own blend using cinnamon, nutmeg, ginger, and a pinch of cloves for a truly fresh and vibrant flavor.
Step-by-Step Guide: How to Make Irresistible Pumpkin Cheesecake Bars
Making these protein-packed pumpkin cheesecake bars is a straightforward process that yields incredibly impressive results. Follow these simple steps for a perfect fall dessert every time:
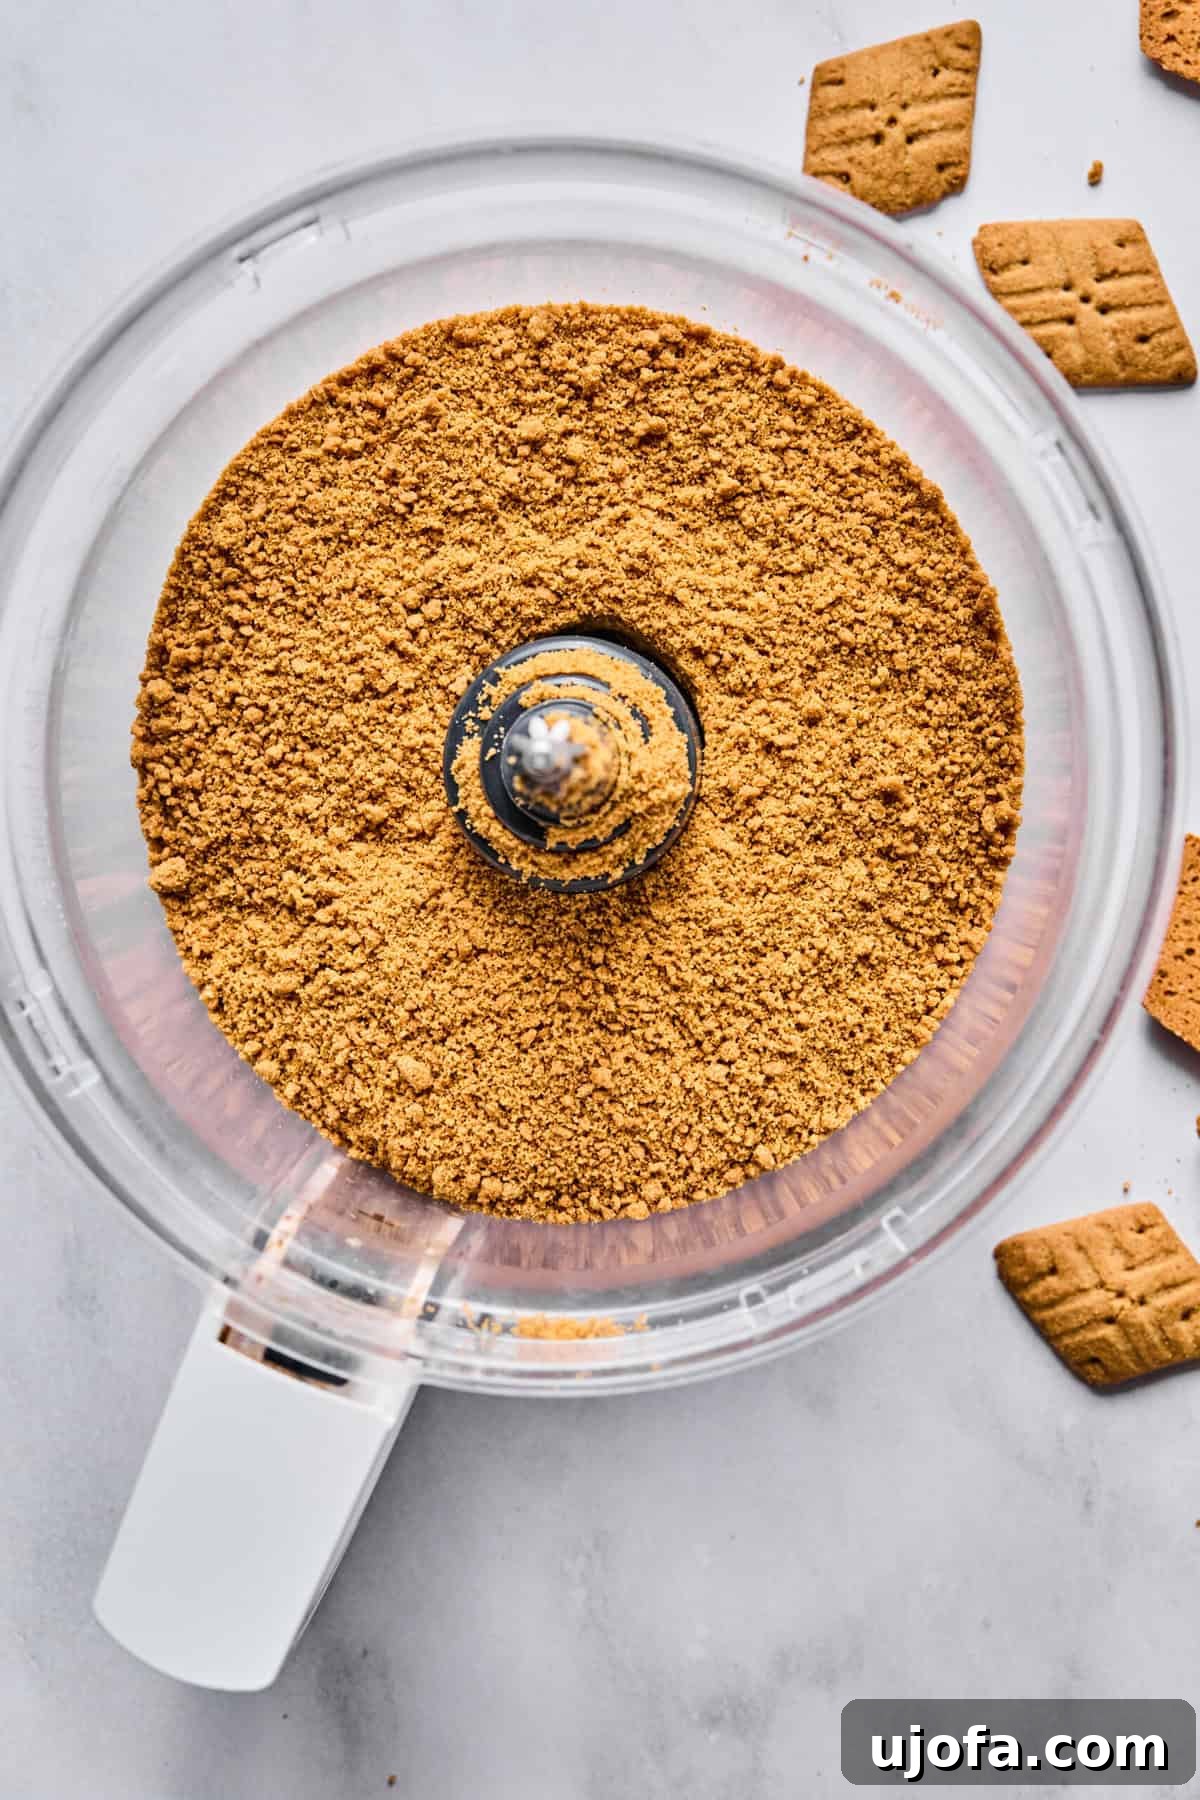
Step 1: Prepare the Oven & Crust Base. Begin by preheating your oven to 350°F (175°C). In a food processor, pulse the gluten-free graham crackers until they are finely ground and resemble coarse sand. This fine texture is crucial for a cohesive crust. Ensure there are no large chunks remaining.
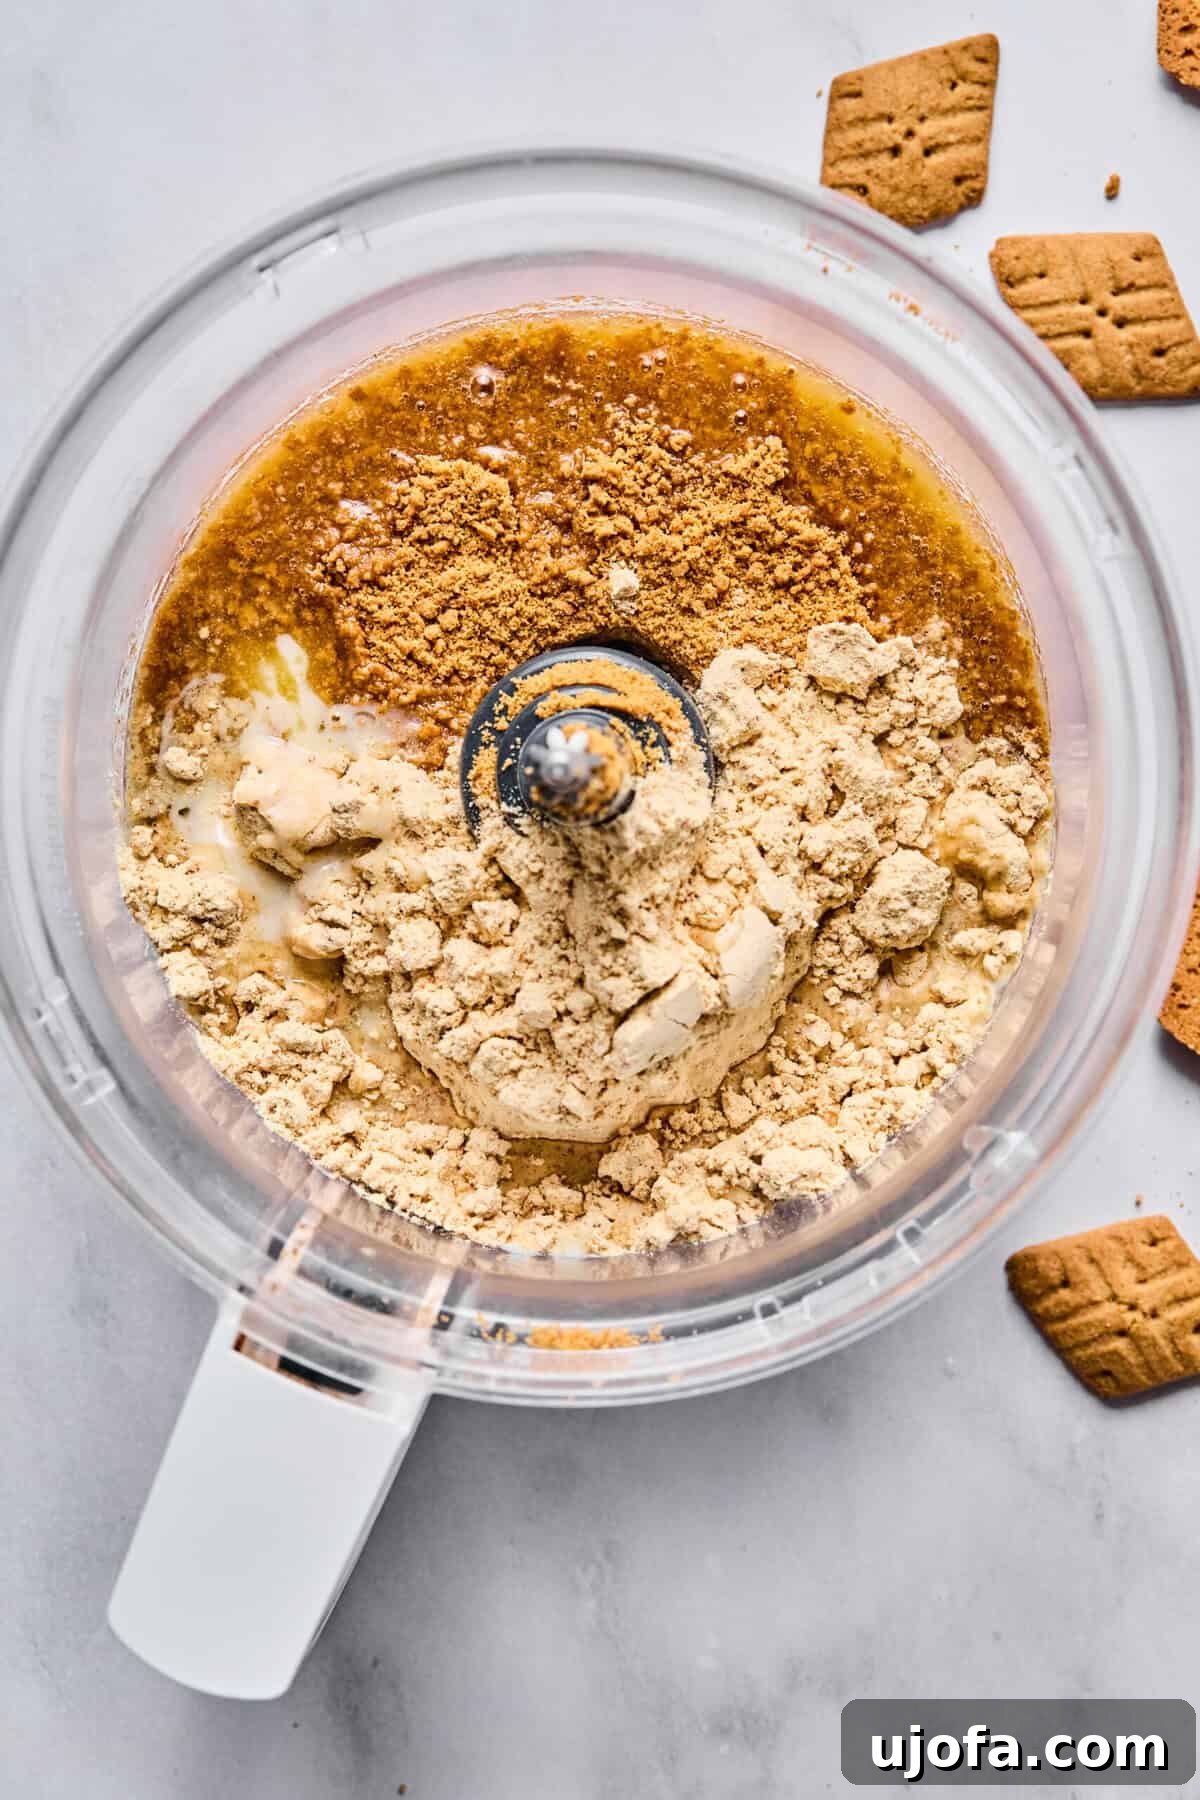
Step 2: Combine Crust Ingredients. Add the vanilla protein powder and melted butter to the finely ground graham crackers in the food processor. Pulse a few more times until all ingredients are thoroughly combined and the mixture is moist and crumbly. Stop and scrape down the sides of the bowl as needed to ensure everything is incorporated.
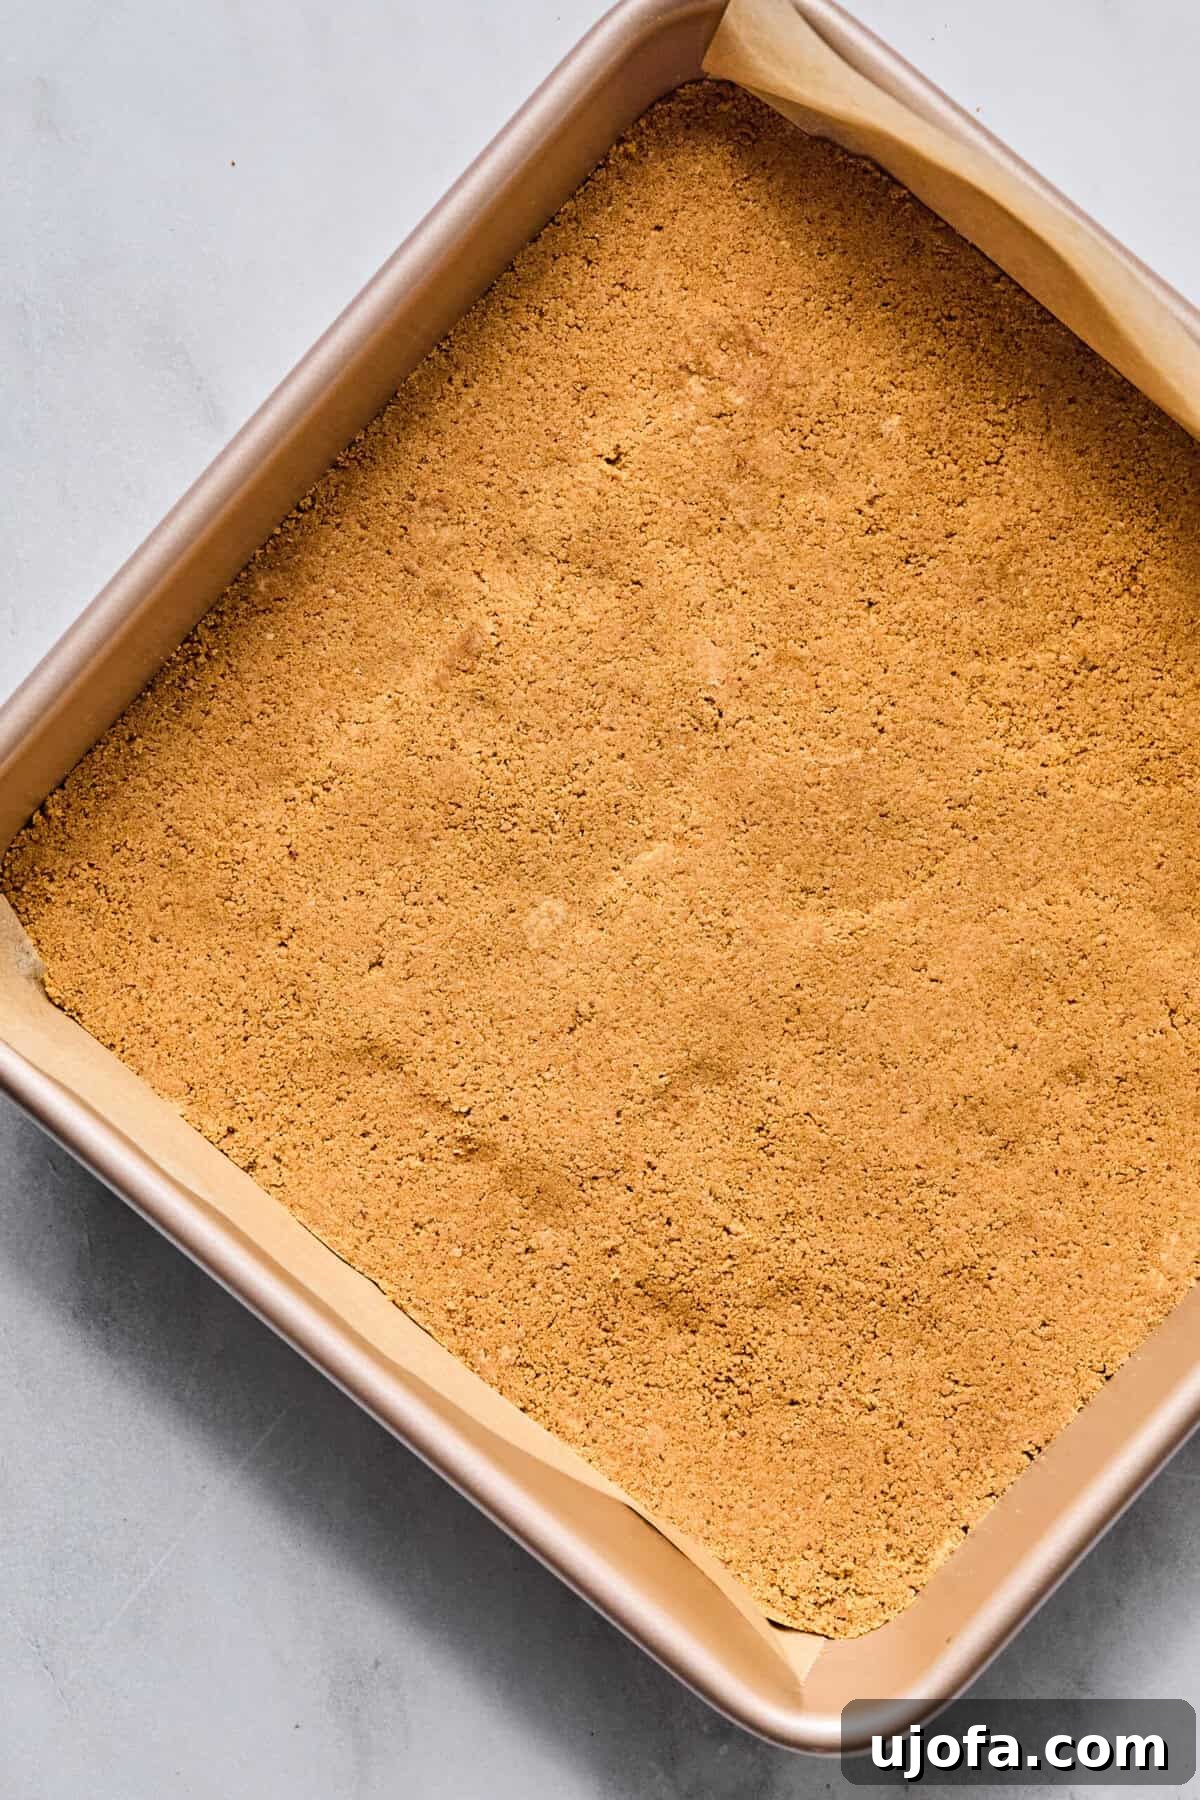
Step 3: Press and Pre-Bake the Crust. Lightly grease a 9×9 inch (23×23 cm) square baking pan. Pour the crumb mixture into the prepared pan. Using your hands or the flat bottom of a drinking glass, firmly press the mixture down to form an even and compact layer. The tighter you pack it, the sturdier your crust will be. Bake the crust for 10 minutes to set it and give it a golden hue.
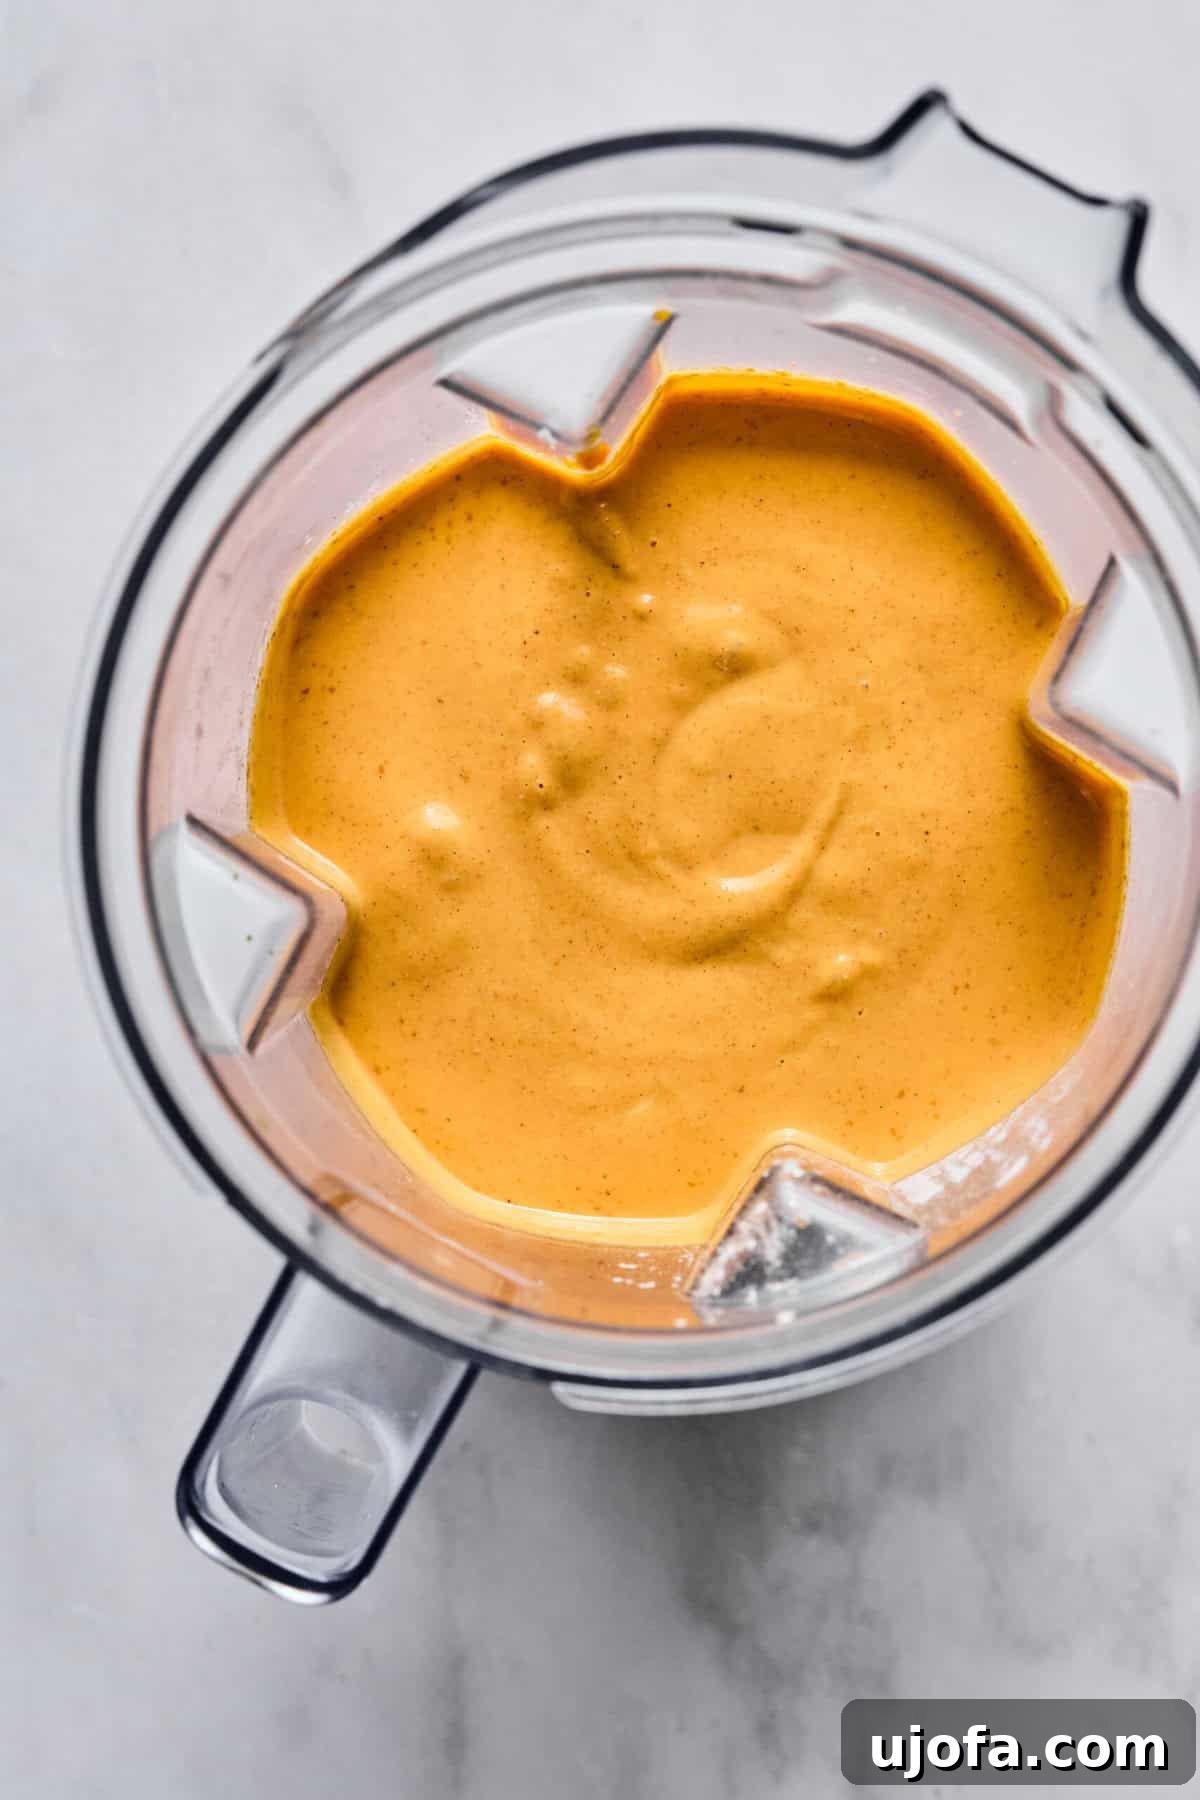
Step 4: Prepare the Creamy Pumpkin Filling. While the crust is baking, prepare the filling. In a high-speed blender (or a clean food processor), combine the cottage cheese, pumpkin puree, eggs, maple syrup, tapioca flour, and pumpkin pie spice. Blend on high for 2 minutes, or until the mixture is exceptionally smooth and creamy with no lumps. You want a uniform, velvety consistency.
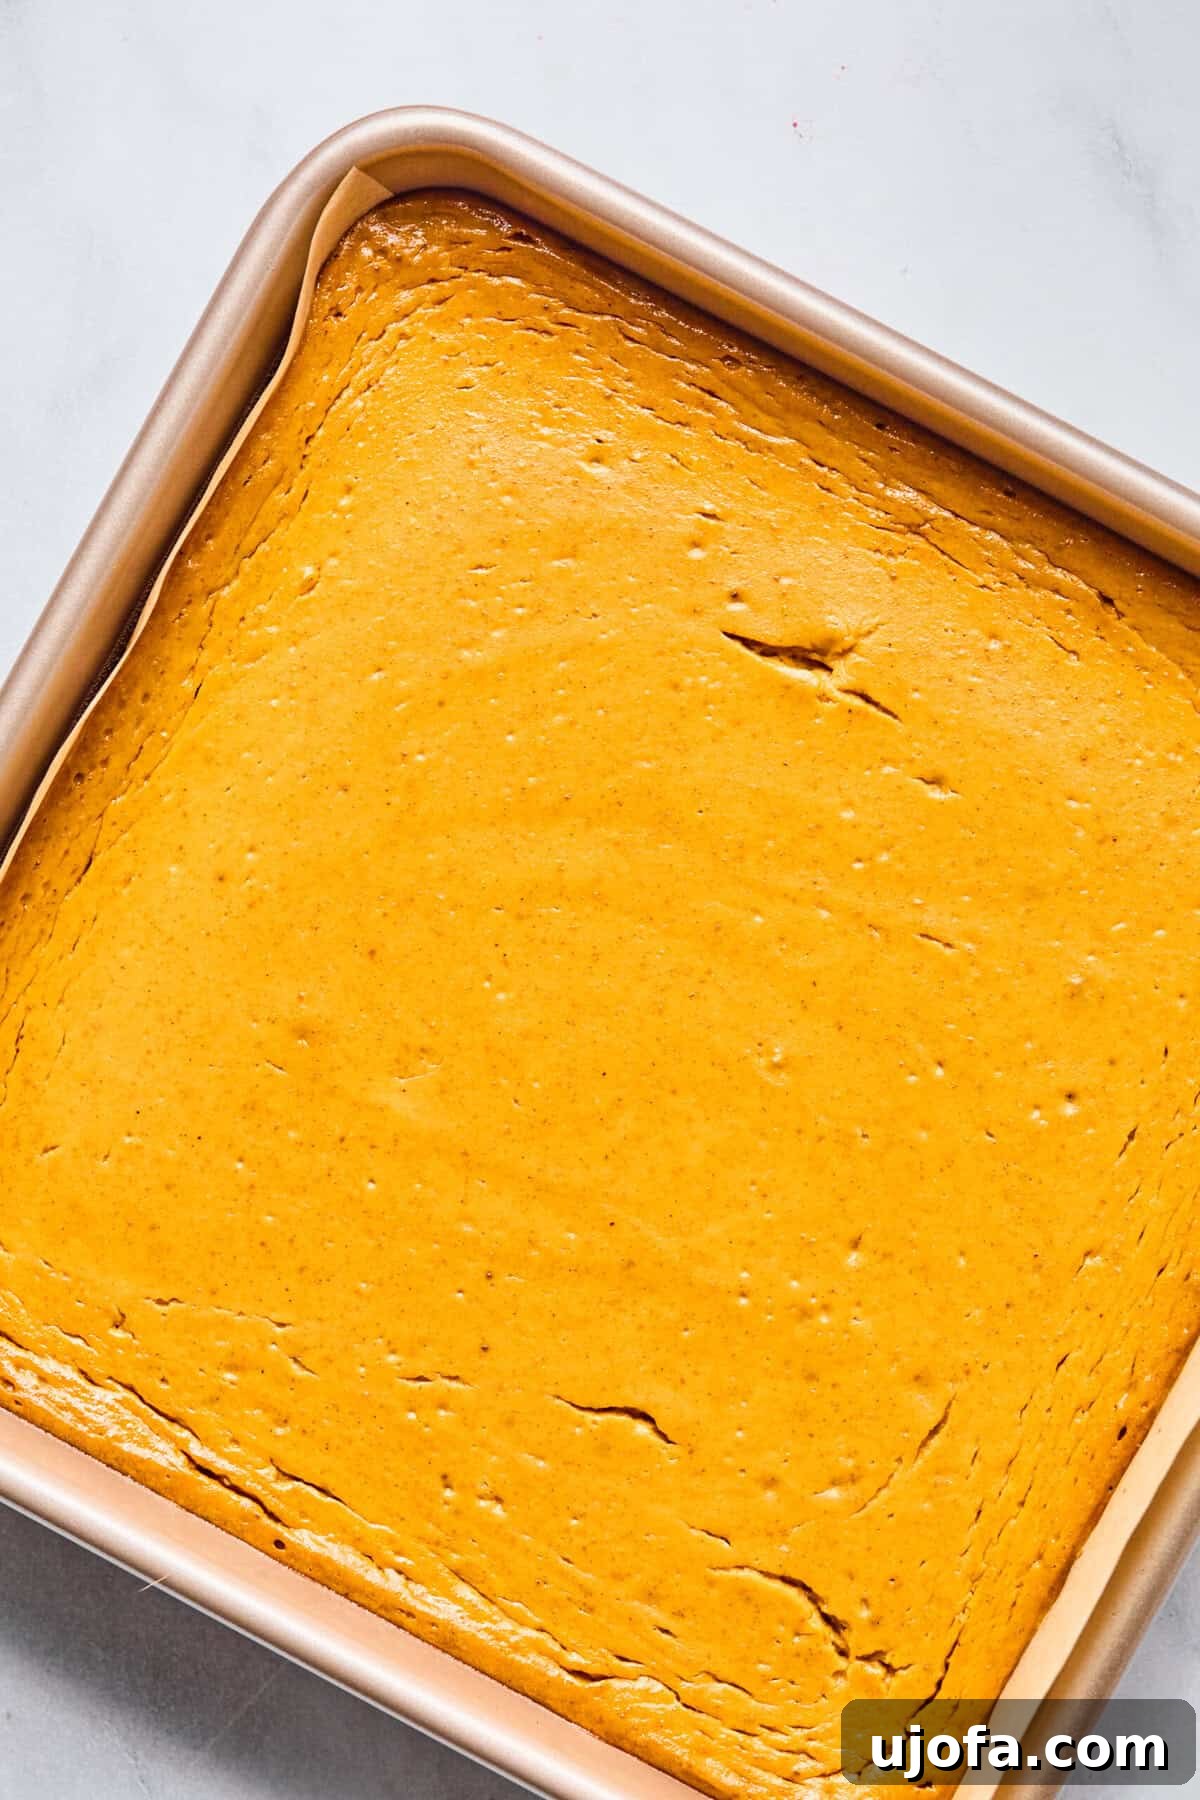
Step 5: Bake the Cheesecake Bars. Carefully remove the pre-baked crust from the oven. Pour the perfectly smooth pumpkin cheesecake filling evenly over the warm crust. Return the pan to the oven and bake for 35-40 minutes, or until the center of the pumpkin bars appears firm and only slightly jiggly. Avoid overbaking to maintain creaminess.
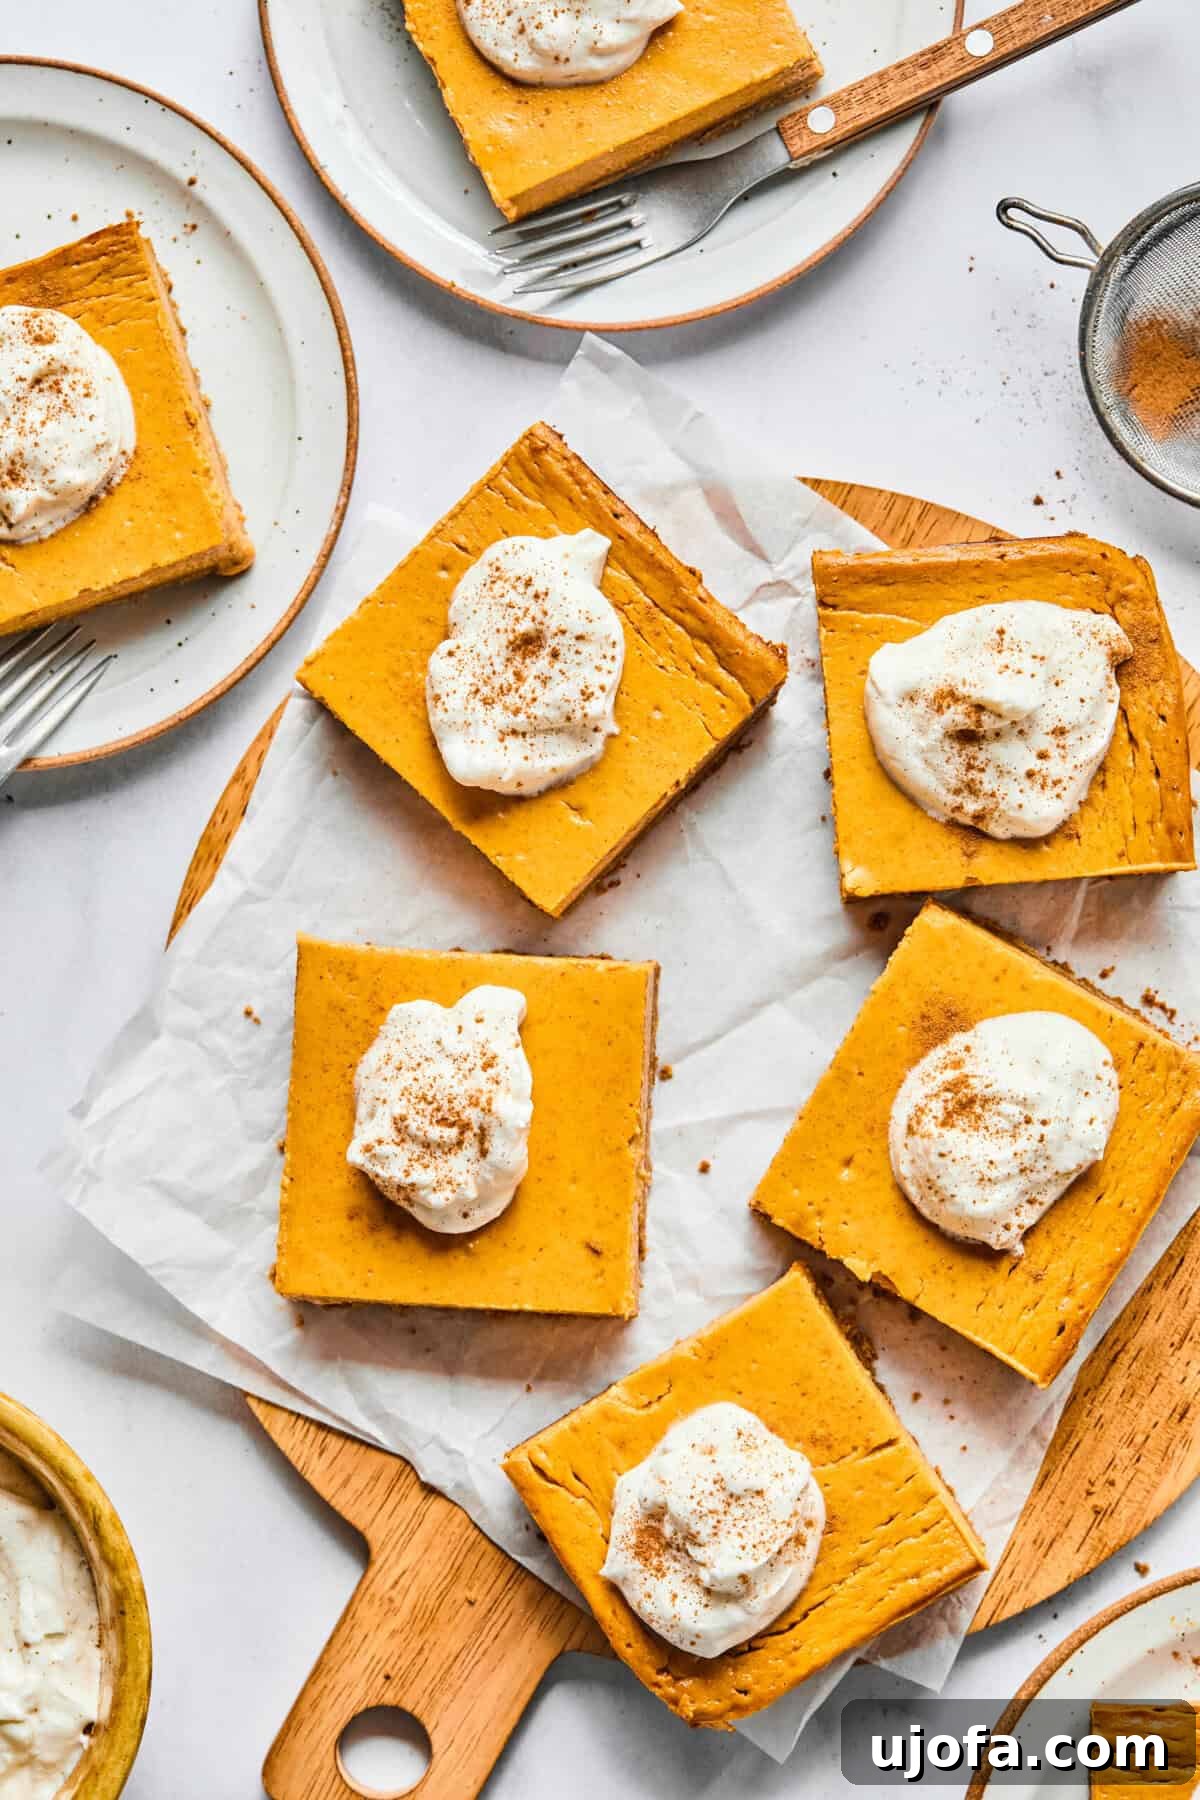
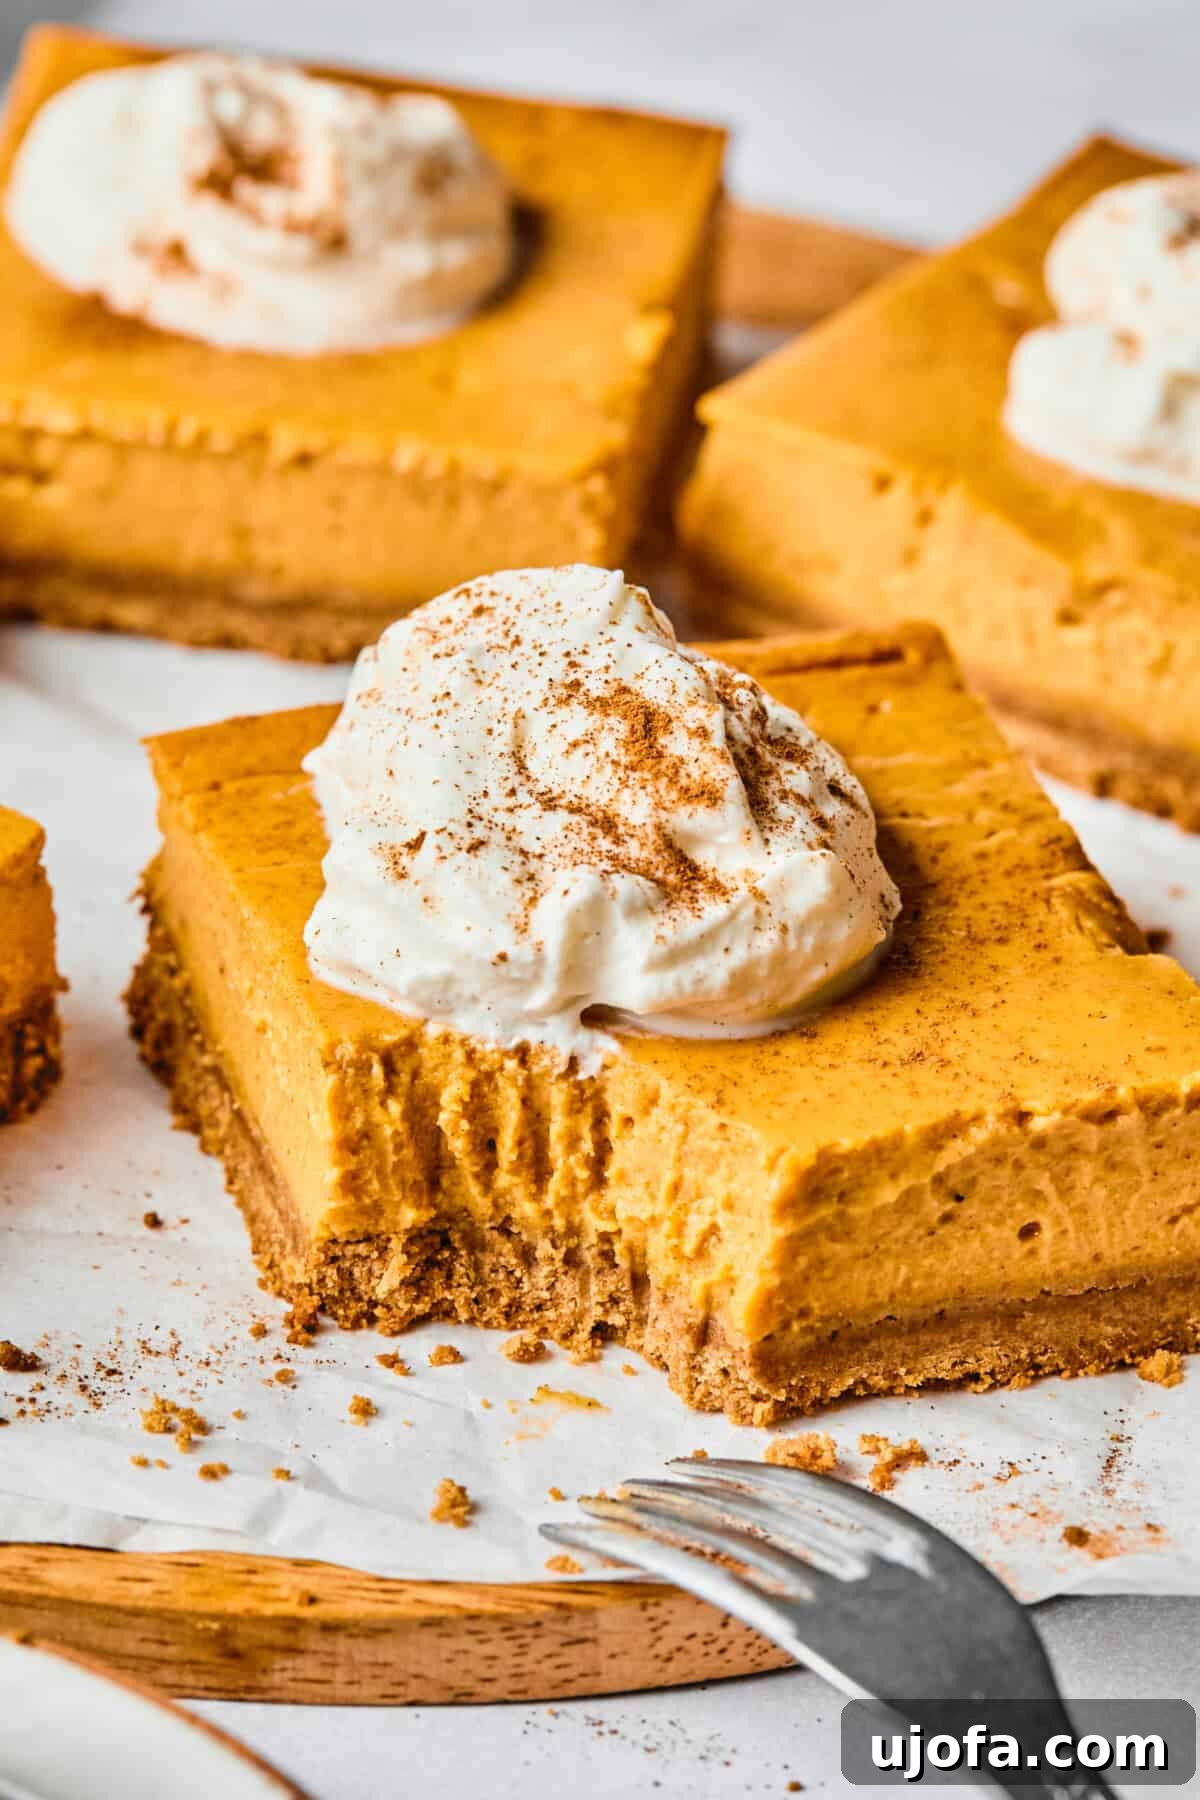
Step 6: Cool, Chill, and Serve. Once baked, remove the bars from the oven and let them cool at room temperature for at least 30 minutes. This gradual cooling helps prevent cracks. After cooling, transfer the pan to the refrigerator and chill for a minimum of 1-2 hours, or preferably longer, until completely set. This chilling step is crucial for perfect texture and easy slicing. Once thoroughly chilled, slice the bars into 9 equal squares. Top each with a generous dollop of whipped cream and an optional pecan for an elegant finish. Enjoy your homemade, protein-packed pumpkin cheesecake bars!
Pro Tip for Clean Cuts: For impeccably neat slices, use a sharp knife that has been run under hot water and wiped clean between each cut. This simple trick prevents the cheesecake from sticking and ensures every bar looks perfect.
Baking Success Tips
- Don’t Overmix the Filling: While you want a smooth filling, avoid overmixing once the eggs are added, as this can incorporate too much air, leading to cracks in the final product.
- Water Bath (Optional): For an extra layer of crack prevention, you can bake these bars in a water bath. Simply place your 9×9 inch pan inside a larger baking pan, and fill the larger pan with about an inch of hot water. This creates a moist environment for baking.
- Cooling is Key: Resist the urge to cut into the bars too soon! Proper cooling and chilling time allows the cheesecake to fully set and develop its creamy texture.
Storage & Make-Ahead Tips for Convenience
These pumpkin cheesecake bars are not only delicious but also incredibly convenient, as they can be prepared in advance. To store, place the chilled bars in an airtight container and refrigerate for up to 4 days. This makes them an ideal dessert for meal prepping or preparing for holiday gatherings ahead of time.
For longer storage, these bars freeze beautifully. Simply wrap individual bars tightly in plastic wrap, then place them in an airtight freezer-safe container or bag. They can be frozen for up to 2 months. When you’re ready to enjoy them, thaw the frozen bars overnight in the refrigerator. This method ensures they retain their creamy texture and spiced flavor, ready to be topped and served whenever a craving strikes.
Looking for another delightful make-ahead option that captures the essence of fall? Try our popular Pumpkin Muffins with Dairy-Free Cream Cheese Frosting.
Creative Recipe Variations to Explore
While these pumpkin cheesecake bars are perfect as is, they also lend themselves beautifully to creative twists and variations. Don’t hesitate to experiment and customize them to your liking:
- Elegant Pumpkin Swirl: For a visually stunning dessert, reserve about ¼ cup of the plain cottage cheese base (before adding pumpkin). After pouring the pumpkin filling over the crust, dollop small spoonfuls of the plain base onto the pumpkin layer. Use a toothpick or skewer to gently swirl the plain mixture into the pumpkin for a beautiful marbled effect before baking.
- Spiced Gingersnap Crust: Elevate the spice factor by swapping the gluten-free graham crackers for crushed gluten-free gingersnap cookies in the crust. This adds a deeper, more assertive ginger and molasses flavor that perfectly complements the pumpkin filling.
- Classic Cream Cheese Indulgence: If you adore the traditional richness of cheesecake, you can opt for a hybrid filling. Use half cottage cheese and half full-fat cream cheese for a denser, more decadent texture while still benefiting from some of the protein boost. Ensure both are at room temperature for smooth blending.
- Nut-Free Adaptation: If you need a nut-free option, simply omit the pecan topping. For the crust, ensure your gluten-free graham crackers are nut-free, or consider a crust made from crushed gluten-free vanilla wafers or rice crispy cereal blended with butter.
- Mini Cheesecake Bites: For bite-sized treats perfect for parties, bake the mixture in a mini muffin tin lined with paper liners. Reduce the baking time significantly (check at 15-20 minutes) until the centers are set.
If you’re craving a non-pumpkin version but still love the protein-packed, cheesecake bar concept, be sure to check out our delicious High Protein Cheesecake Bars for another fantastic dessert!
Frequently Asked Questions About Pumpkin Cheesecake Bars
We’ve gathered some common questions to help you master these delightful pumpkin cheesecake bars:
Absolutely! These bars are ideal for making ahead. You can bake and chill them a day or even two nights before serving. Just add your whipped topping and optional pecans right before you plan to serve them for the freshest presentation.
Yes, refrigeration is essential for these pumpkin cheesecake bars. The filling, which contains eggs and dairy (cottage cheese), requires chilling to set properly and maintain its creamy texture and freshness. Store any leftovers in an airtight container in the fridge.
Yes, these bars freeze beautifully! Once completely cooled and chilled, wrap individual bars tightly in plastic wrap, then place them in a freezer-safe container or bag. They can be frozen for up to 2 months. To thaw, simply transfer them to the refrigerator overnight.
Tapioca flour is excellent for a smooth, glossy finish. If you don’t have it, you can substitute cornstarch. Use the same amount (2 tablespoons) of cornstarch. Arrowroot powder is another viable gluten-free alternative, also in equal measure.
Several factors contribute to cracking. Ensure your eggs and cottage cheese are at room temperature. Avoid over-baking; the center should still have a slight jiggle. Finally, allow the bars to cool gradually at room temperature before chilling them in the refrigerator. A gentle water bath during baking can also help.
As written, this recipe is not dairy-free due to the butter and cottage cheese. However, you can adapt it! Use a dairy-free butter alternative for the crust and a high-quality dairy-free cream cheese (or a specific dairy-free cottage cheese alternative if available and suitable for blending) for the filling. Ensure your protein powder is also dairy-free.
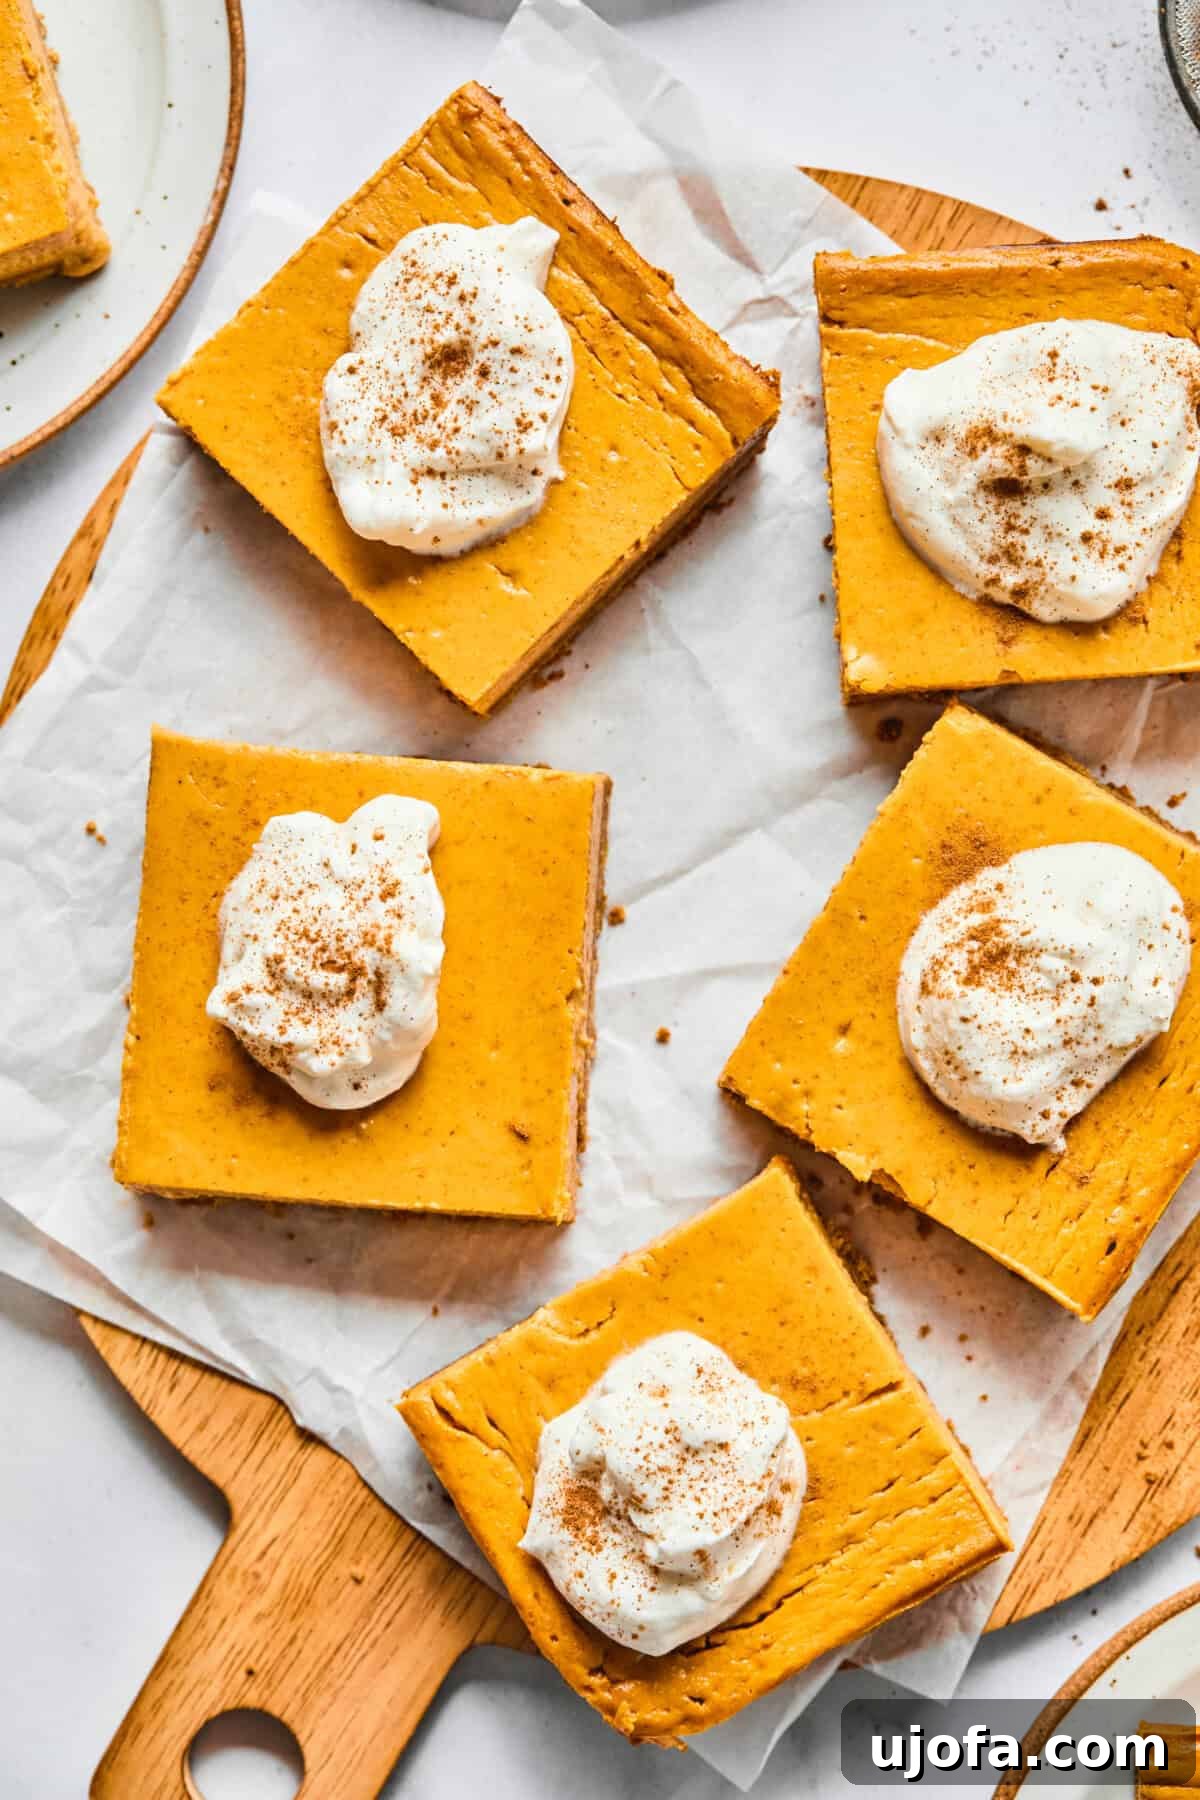
These incredibly creamy, warmly spiced, and protein-packed pumpkin cheesecake bars are more than just a recipe; they are a delightful fall tradition you’ll eagerly anticipate making year after year. Lighter than their traditional counterparts but every bit as satisfying and flavorful, they offer a wholesome indulgence that everyone will adore. My family, in particular, cherishes them as a fantastic and healthier alternative to classic pumpkin pie, especially during festive gatherings. Whether you’re presenting them at a cozy family dinner, a lively holiday party, or as a special Thanksgiving dessert, these bars are remarkably simple to prepare, beautifully festive, and consistently a huge hit with their perfectly balanced taste and texture. Get ready to impress and delight with this autumn essential!
More Delicious Fall Desserts You’ll Love
No-Bake Pumpkin Pie Bliss Balls Recipe (Vegan)
Grain Free Pumpkin Cheesecake Bars {Gluten Free, Lactose Free}
Healthy Apple Crumble
Easy Pumpkin Muffins with Dairy Free Cream Cheese Frosting
Enjoyed these delicious pumpkin cheesecake bars? We’d love to hear from you! Please consider leaving a 5-star 🌟🌟🌟🌟🌟 rating in the recipe card below and sharing your thoughts in the comment section. You can also connect with us on Facebook, Pinterest, or Instagram for more healthy and delicious recipes!
Print Recipe
Easy Pumpkin Cheesecake Bars (Protein-Packed)
Equipment
-
Food Processor
-
Blender
-
9×9 Square Baking Pan
Ingredients
Crust
- 8 oz gluten free graham crackers, Simple Mills Sweet Thins or Pamela’s are both great
- 6 oz melted butter
- ½ cup vanilla protein powder, I use Clean Simple Eats brand – code MARY10 for a discount
Filling
- 2 cups Good Culture cottage cheese
- 15 oz canned pumpkin, look for pure pumpkin, NOT pumpkin pie filling!
- 2 eggs
- ½ cup maple syrup, add ¼ cup more if you like it very sweet
- 2 tbsp tapioca flour
- 1 tbsp pumpkin pie spice, + 1 tsp for extra pumpkin flavor
Topping
- Truwhip or homemade whipped cream
Instructions
-
Preheat oven to 350°F (175°C). Add the gluten-free graham crackers to a food processor and pulse until they are finely ground, resembling fine sand.
-
Add in the vanilla protein powder and melted butter; pulse again a few times until all ingredients are well combined and the mixture is moist. Scrape down the sides of the bowl as needed.
-
Lightly spray a 9×9 inch (23×23 cm) baking pan with avocado oil or your preferred non-stick spray.
-
Pour the crumb mixture into the prepared pan. Press down firmly and evenly using your hands or the bottom of a round cup to form a compact crust layer. Bake for 10 minutes.
-
In a high-speed blender (or a cleaned food processor), add the cottage cheese, pumpkin puree, eggs, maple syrup, tapioca flour, and pumpkin pie spice.
-
Blend on high for 2 minutes, or until the mixture is very smooth and creamy with no visible lumps. Remove the crust from the oven and carefully pour the pumpkin filling over the warm crust.
-
Bake for 35-40 minutes, or until the edges of the pumpkin bars are set and the center appears firm with a slight jiggle. Let it cool at room temperature for 30 minutes, then transfer to the refrigerator and chill for 1-2 hours (or longer) until completely set.
-
Once thoroughly chilled, slice into 9 squares. Top with your whipped topping of choice and enjoy!
Notes
- Nutrition facts are an estimate for 1 bar (assuming 9 pieces) and do not include whipped topping.
- Refrigerate bars in an airtight container for up to 4 days, or freeze for up to 2 months. Thaw in the fridge before serving.
- For super clean cuts, use a sharp knife that has been run under hot water and wipe the blade clean between each slice!
Nutrition Information (Estimated Per Serving)
All nutrition facts are an estimate and automatically calculated. While I fact check them using My Fitness Pal, please note that they may not always be 100% accurate and depend on ingredients used. For the most accurate grams per serving size, weigh your total and divide by the number of servings.