
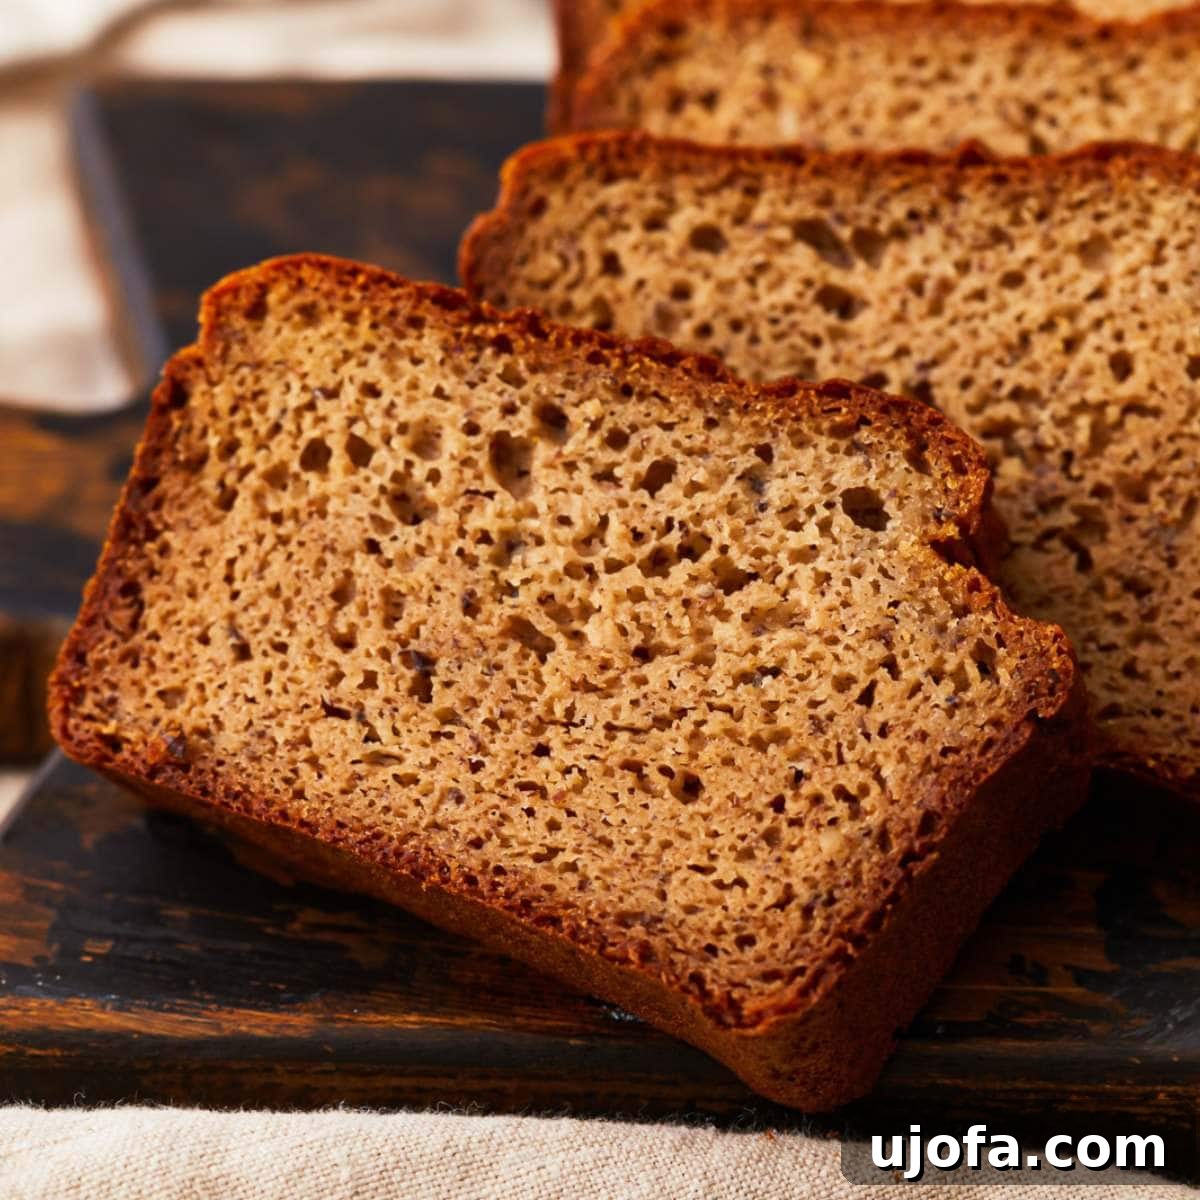
Discover the ultimate Almond Flour Bread recipe – a delightfully moist, tender, and incredibly flavorful loaf that’s perfect for any time of day. This wholesome bread is not only rich in protein and lower in carbohydrates but also naturally gluten-free, grain-free, and dairy-free, making it an excellent choice for a variety of dietary preferences. We’ve simplified the baking process, requiring only a few common pantry ingredients and basic kitchen tools – just two bowls and a loaf pan are all you need to create this culinary masterpiece. While it’s absolutely delicious on its own, a generous spread of butter or your favorite topping elevates the experience even further. Get ready to bake a healthy, satisfying bread that will quickly become a staple in your home!
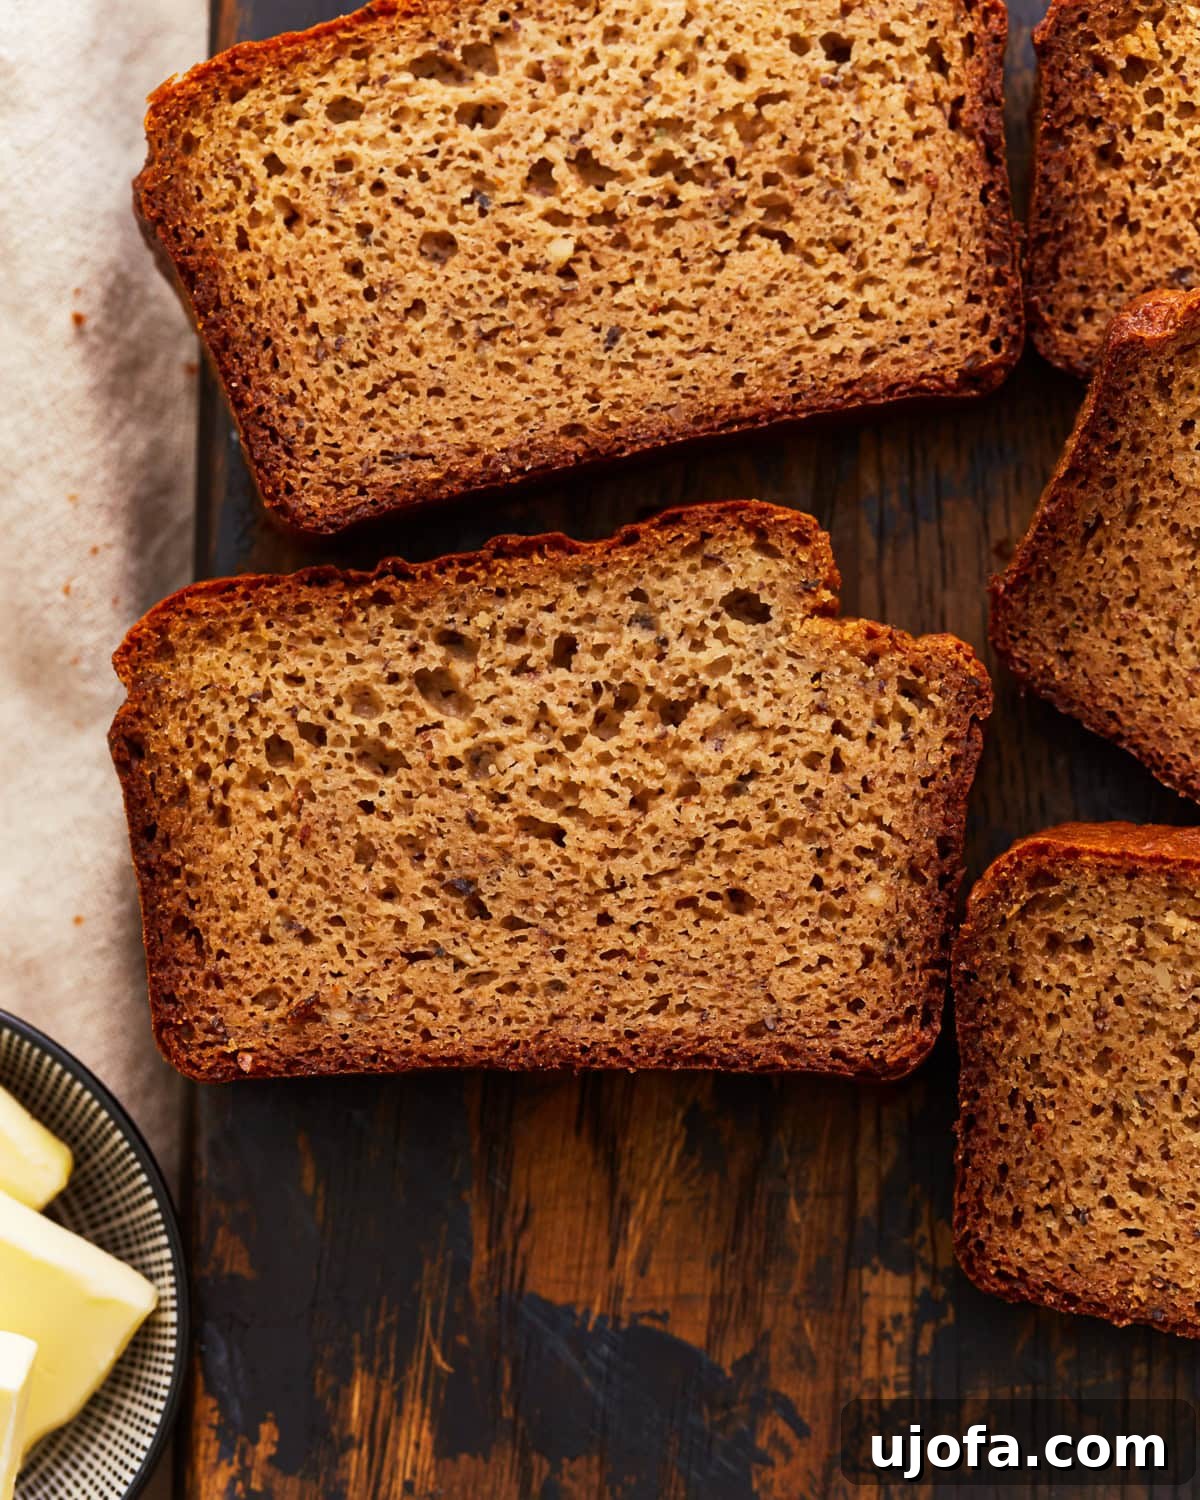
The Essential Almond Flour Bread Recipe
Unlike traditional wheat-based breads, our almond flour bread offers a unique flavor profile and a wonderfully dense, yet tender texture. This recipe stands out by utilizing a thoughtfully selected blend of blanched almond flour, tapioca flour, and flaxseed meal, complemented by the natural sweetness of applesauce and a touch of honey. The almond flour provides a distinct nutty aroma and a satisfyingly rich crumb, while the other ingredients work in harmony to ensure a loaf that is both exceptionally flavorful and incredibly nutritious. This innovative approach to bread making results in a wholesome, hearty, and utterly delicious bread that caters to modern dietary needs without compromising on taste or texture.
Wholesome Almond Flour Bread
Sabine Venier
10 slices
15 mins
1 hr
1 hr 15 mins
Share by Email
Print Recipe
Want to save this recipe? Just enter your email and get it sent to your inbox! Plus you’ll get new recipes from us every week!
Ingredients
- 2 cups blanched almond flour
- ¾ cup tapioca flour
- 2 tbsp flaxseed meal
- ¾ tsp baking soda
- ¾ tsp aluminum-free baking powder
- ½ tsp kosher salt
- 3 large eggs, whisked
- ¼ cup unsweetened applesauce
- ¼ cup olive oil
- ¼ cup water
- 1 tbsp honey
- ½ tbsp apple cider vinegar
Instructions
- Preheat your oven to 350°F (177°C). Prepare an 8×4-inch loaf pan by lightly greasing it, then lining it with parchment paper to ensure easy removal after baking. This step is crucial for preventing sticking and achieving a perfectly shaped loaf.
- In a large mixing bowl, combine all the dry ingredients: almond flour, tapioca flour, flaxseed meal, baking soda, baking powder, and kosher salt. Whisk them thoroughly to ensure they are evenly distributed, which helps with consistent leavening and flavor throughout the bread.
- In a separate medium-sized bowl, whisk together the wet ingredients: whisked eggs, unsweetened applesauce, olive oil, water, honey, and apple cider vinegar. Ensure these ingredients are well combined to create a smooth, homogenous mixture.
- Gradually add the dry ingredient mixture to the wet ingredients. Stir gently until just combined. Be careful not to overmix the batter, as this can lead to a tougher texture in gluten-free baking. A few lumps are perfectly fine.
- Pour the prepared batter evenly into the lined loaf pan. Use a spatula to smooth the top if necessary. Bake for 50-60 minutes, or until a wooden toothpick inserted into the center comes out clean or with only a few moist crumbs attached.
- Once baked, remove the bread from the oven and let it cool in the loaf pan for 10 minutes. This allows the bread to set and firm up before attempting to transfer it. After 10 minutes, carefully lift the bread out of the pan using the parchment paper and transfer it to a wire rack to cool completely before slicing and serving.
Notes on Customization & Best Practices
- For a slight flavor variation, unsweetened pumpkin puree or mashed banana can be used as substitutes for applesauce. Be aware that these will impart their distinct flavors to the bread, offering a different, yet equally delicious, experience.
- Enhance the flavor and texture of your bread by adding 1 cup of chopped nuts (like walnuts or pecans), seeds (such as sunflower or pumpkin seeds), dried fruits (cranberries or raisins), or even a few tablespoons of fresh or dried herbs to the batter before baking.
- It’s essential to always check the labels of your ingredients to ensure they meet your specific dietary requirements, especially for gluten-free and dairy-free options.
- Achieving a perfect rise is key! Ensure your baking soda and baking powder are fresh. Old leavening agents can result in a dense, flat loaf.
- For an even richer flavor, you can toast the almond flour lightly before mixing it with other dry ingredients. Allow it to cool completely before use.
Nutrition Information
Serving: 1 slice | Calories: 242kcal | Carbohydrates: 16g | Protein: 7g | Fat: 19g | Saturated Fat: 2g | Polyunsaturated Fat: 1g | Monounsaturated Fat: 5g | Trans Fat: 0.01g | Cholesterol: 56mg | Sodium: 244mg | Potassium: 40mg | Fiber: 3g | Sugar: 3g | Vitamin A: 83IU | Vitamin C: 0.1mg | Calcium: 82mg | Iron: 1mg
Nutrition information is automatically calculated, so should only be used as an approximation.
Additional Info
Breakfast, Side Dish
American
Tried this recipe?
Mention @mamaknowsglutenfree or tag #mamaknowsglutenfree!
How to Make Almond Flour Bread: A Step-by-Step Guide
Creating this delicious almond flour bread is a simple and rewarding process. Follow these detailed steps to ensure a perfect loaf every time, from gathering your ingredients to savoring the final slice.
Step 1: Prepare Your Workspace and Oven: Begin by gathering all your required ingredients on your countertop. Preheat your oven to a steady 350°F (177°C). Take an 8×4-inch loaf pan and lightly grease it, then line it meticulously with parchment paper. This preparation ensures that your beautifully baked bread will effortlessly release from the pan, making cleanup a breeze.
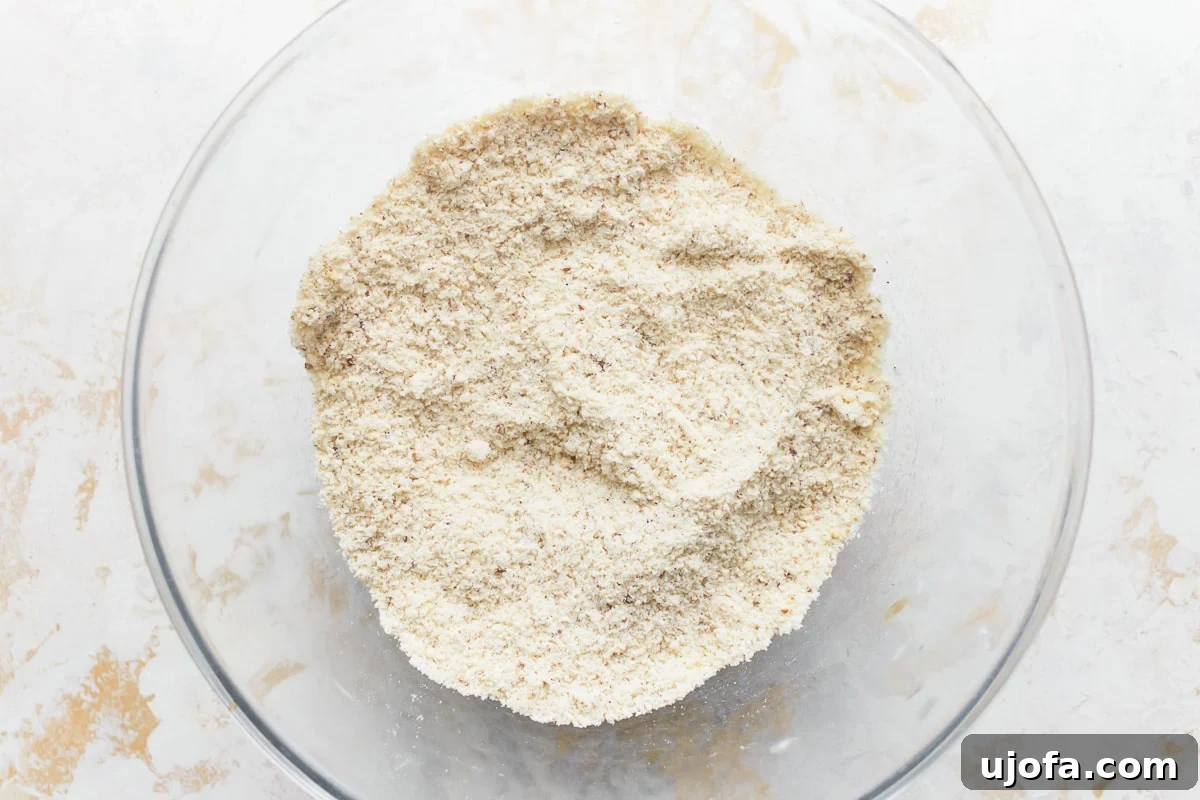
Step 2: Combine the Dry Ingredients: In a spacious mixing bowl, accurately measure and combine 2 cups of blanched almond flour, ¾ cup of tapioca flour, 2 tablespoons of flaxseed meal, ¾ teaspoon of baking soda, ¾ teaspoon of aluminum-free baking powder, and ½ teaspoon of kosher salt. Use a whisk to thoroughly blend these ingredients until they are uniformly distributed. Proper mixing here is essential for an even rise and consistent texture in your finished bread.

Step 3: Combine the Wet Ingredients: In a separate, equally sized bowl, carefully whisk together 3 large whisked eggs, ¼ cup of unsweetened applesauce, ¼ cup of high-quality olive oil, ¼ cup of water, 1 tablespoon of honey, and ½ tablespoon of apple cider vinegar. Whisk vigorously until the mixture is smooth and fully emulsified. These wet ingredients provide the essential moisture and binding for your gluten-free loaf.
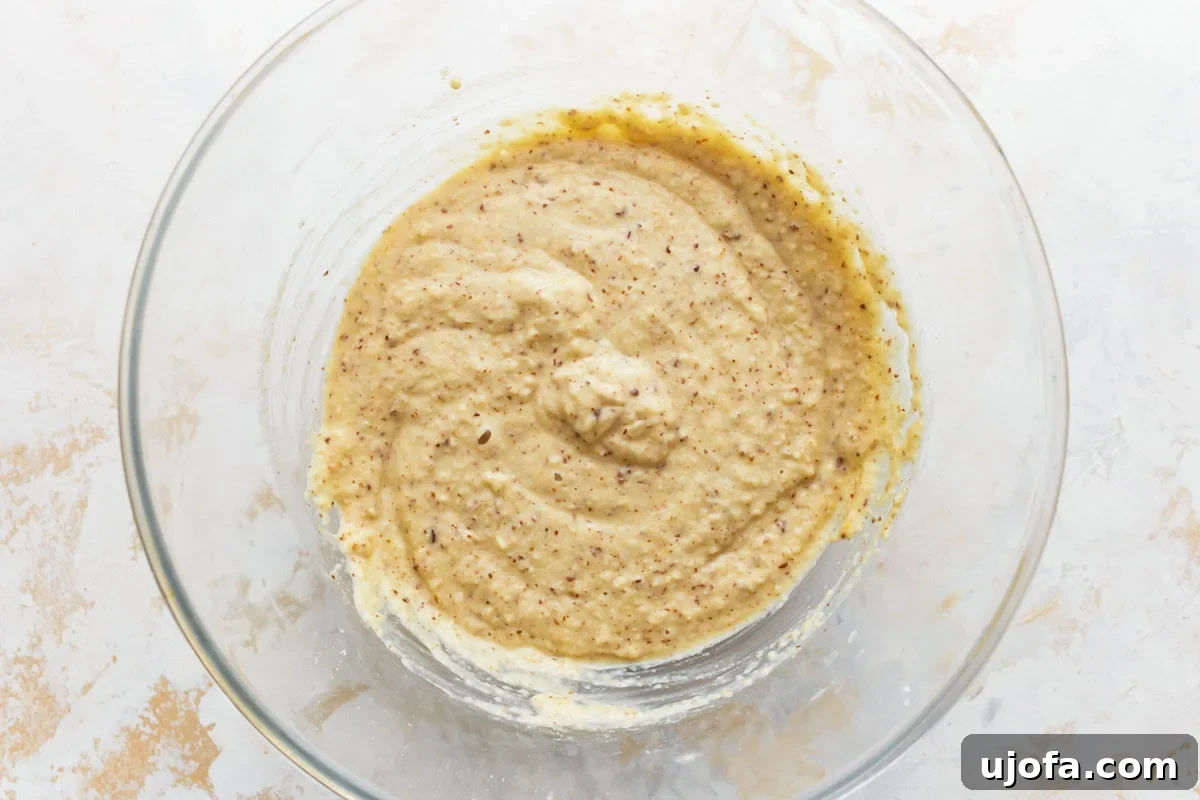
Step 4: Gently Mix Wet and Dry Ingredients: With the dry ingredients ready in one bowl and the wet in another, it’s time to combine them. Gradually add the dry mixture into the wet ingredients, stirring continuously with a spatula or wooden spoon until they are just incorporated. The key is to mix until no streaks of dry flour remain, but avoid overmixing. Overworking gluten-free batters can often lead to a denser texture.
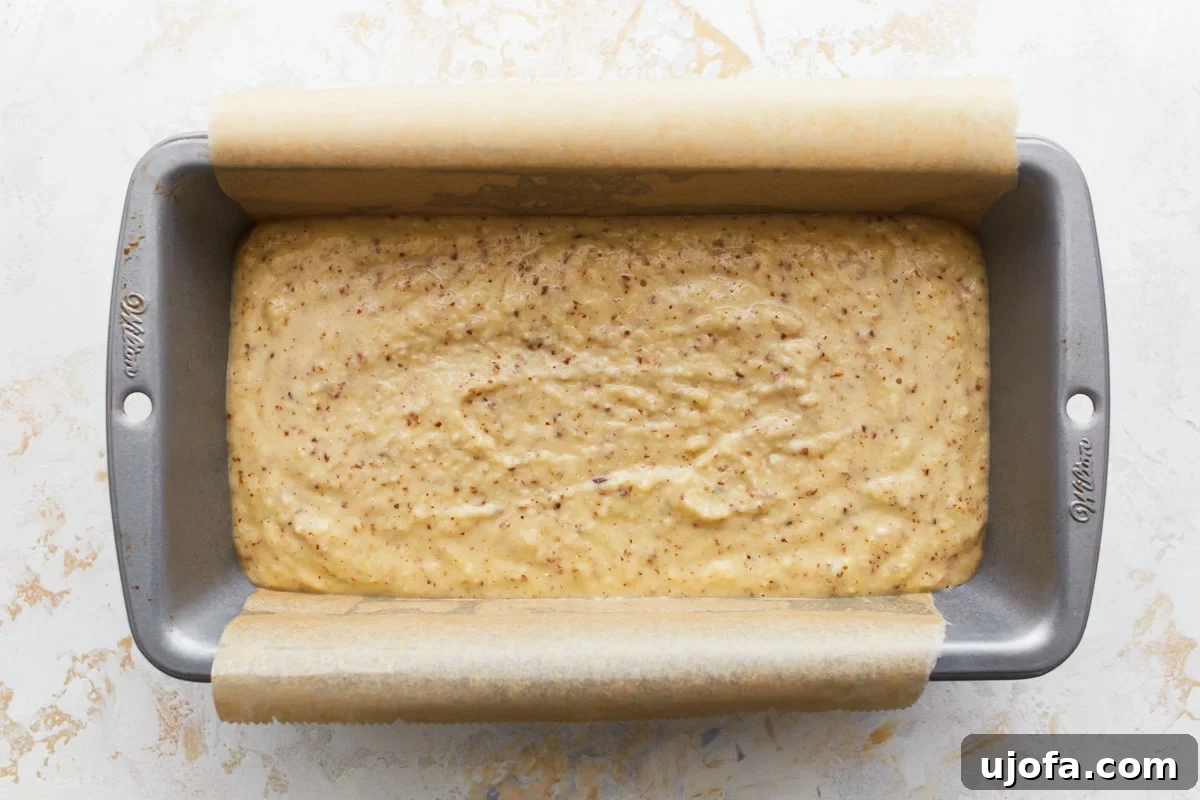
Step 5: Fill the Loaf Pan: Once the batter is perfectly combined, carefully pour it into your previously prepared 8×4-inch loaf pan. Gently spread the batter evenly across the pan using your spatula to ensure a uniform loaf that bakes evenly. This step is crucial for achieving a visually appealing and consistently cooked final product.
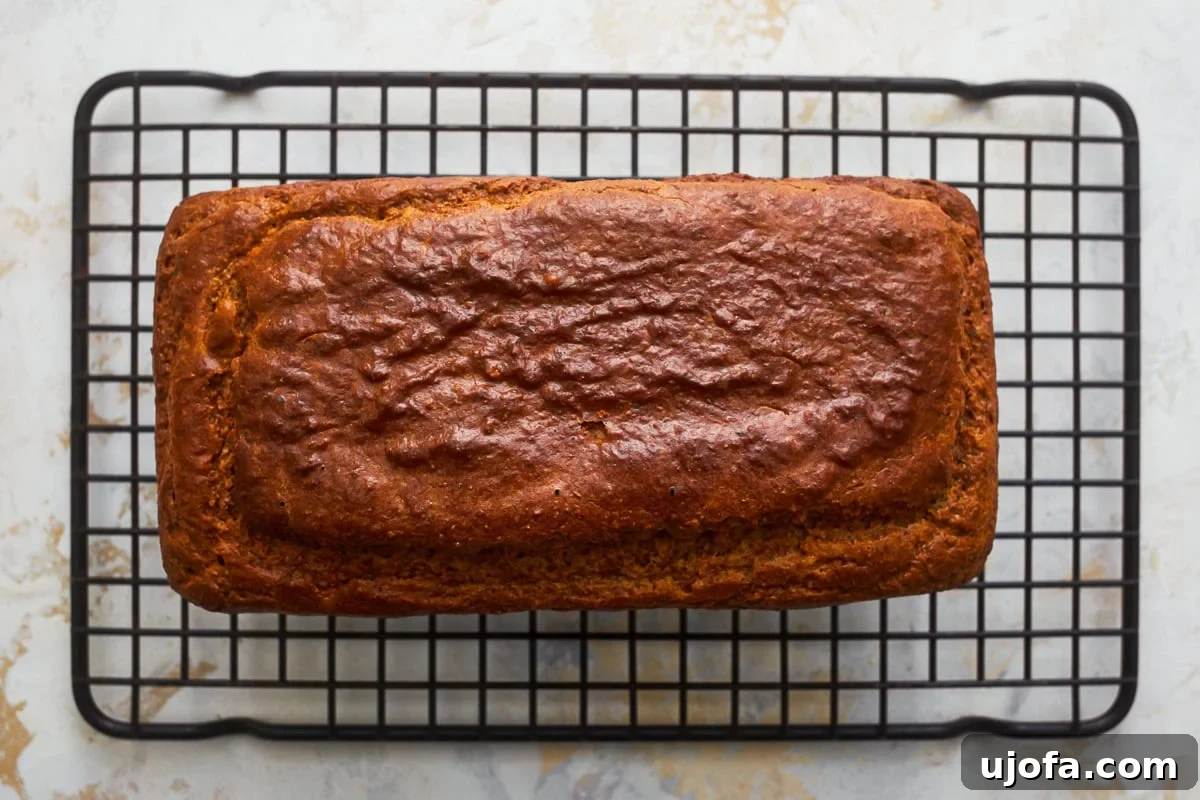
Step 6: Bake and Cool to Perfection: Place the loaf pan into your preheated oven and bake for approximately 50-60 minutes. The bread is fully cooked when a toothpick inserted into the center comes out clean, possibly with a few moist crumbs attached. Once baked, let the bread rest in the pan for about 10 minutes before carefully transferring it to a wire rack to cool completely. Allowing it to cool fully is vital for the bread’s structure and makes for easier slicing.
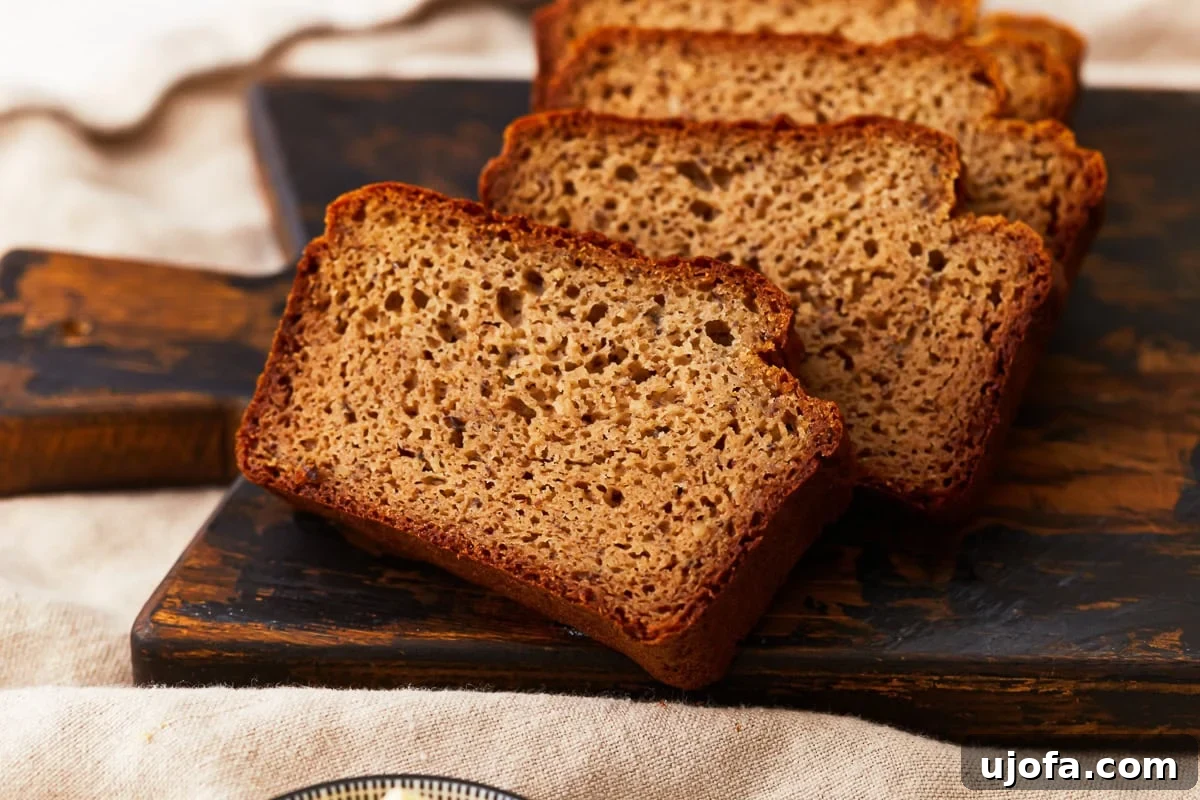
Step 7: Slice, Serve, and Savor: Once your almond flour bread has cooled completely, it’s ready to be sliced and served. This versatile bread is ideal for crafting delicious sandwiches, making wholesome toast, or simply enjoying on its own. Experience the rich flavor and tender texture that makes this gluten-free, grain-free, and dairy-free bread an absolute delight!
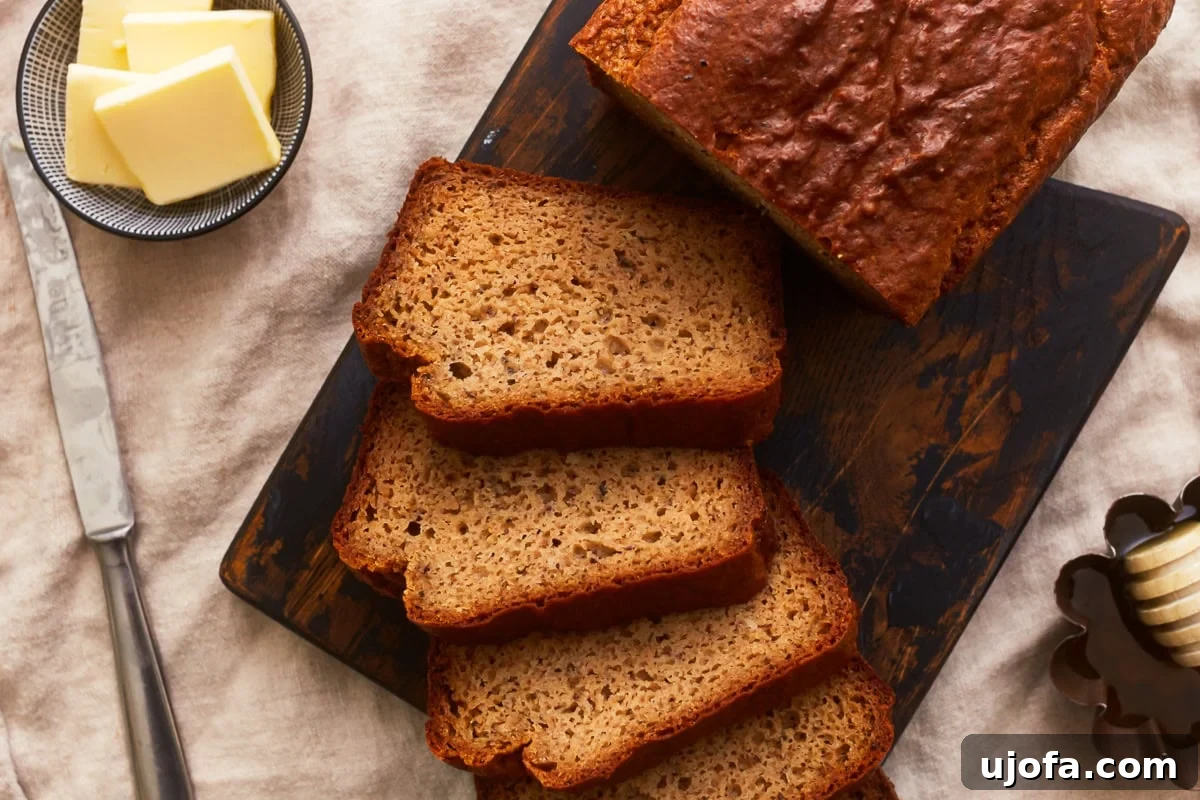
Delightful Serving Suggestions for Your Almond Flour Bread
This versatile almond flour bread is a fantastic canvas for a myriad of flavors, perfect for any meal or snack. My personal favorite way to enjoy it is toasted, with a generous pat of creamy butter melting into its tender crumb, or a sweet drizzle of golden honey. For a quick yet satisfying breakfast or an energizing afternoon snack, spread a dollop of your favorite nut butter – almond, peanut, or cashew – on a slice. Beyond that, consider transforming it into a hearty base for a vibrant avocado toast, topped with everything bagel seasoning or red pepper flakes. When a more substantial meal is desired, it makes an excellent foundation for open-faced sandwiches or traditional sandwich creations. Explore sweet options like a smear of fruit jam or savory delights such as a slice of turkey and a crisp lettuce leaf. The possibilities are truly endless with this adaptable gluten-free loaf.
Expert Tips and Baking Insights for Perfect Almond Flour Bread
- Cooling is Crucial: After baking, resist the urge to immediately remove the bread from the pan. Allow it to cool in the pan for at least 10 minutes. This essential step helps the bread to firm up and set its structure, making it much easier to transfer to a wire rack without breaking or crumbling.
- Separate Mixing for Success: Always combine your dry ingredients thoroughly in one bowl and your wet ingredients in a separate bowl before mixing them together. This technique ensures that all leavening agents and flavors are evenly distributed, preventing overmixing when the wet and dry components finally meet.
- Understanding the Rise: Keep in mind that almond flour bread will not achieve the same significant rise as traditional wheat bread due to the absence of gluten. The eggs and leavening agents in this recipe provide some lift, but a slightly flatter, denser loaf is entirely normal and expected for gluten-free and grain-free breads.
- The Role of Eggs: Eggs are a vital component in this recipe, serving as both a binder and a structural element that contributes to the bread’s texture and integrity. While some might consider chia or flax eggs as substitutes, be aware that these alternatives will result in a noticeably different texture and crumb.
- Dietary Considerations for Keto: While almond flour itself is very keto-friendly, this particular recipe includes tapioca flour and honey, which contain carbohydrates and natural sugars. If you are following a strict ketogenic diet, you may need to adjust or substitute these ingredients to align with your specific macronutrient goals. Always double-check ingredient lists based on your dietary needs.
- Achieving the Perfect Golden Crust: For an extra golden and slightly crisp crust, you can brush the top of the loaf with a little olive oil or a beaten egg wash just before baking. This helps in achieving that beautiful, appetizing finish.
- Ingredient Temperature Matters: Ensure your eggs and other wet ingredients are at room temperature. This helps them incorporate more smoothly into the batter, leading to a more consistent and well-textured bread.
- Storage for Freshness: Proper storage is key to extending the life of your almond flour bread. Follow our storage instructions below to keep your loaf fresh and delicious for as long as possible.
Optimal Storage Instructions for Your Almond Flour Bread
To maintain the freshness and deliciousness of your homemade almond flour bread, proper storage is essential. Once the bread has completely cooled to room temperature, you can store it in an airtight container for up to 4 days on your kitchen counter. If you wish to extend its shelf life, transfer the airtight container to the refrigerator, where it will remain fresh for up to a week. For longer-term storage, this bread freezes beautifully. Simply slice the cooled loaf and place the slices in a freezer-safe bag or container, separating them with parchment paper to prevent sticking. It can be frozen for up to 3 months. When you’re ready to enjoy a slice, simply take it out of the freezer and toast it directly for a quick, delicious treat!
Explore More Delicious Almond Flour Recipes!
If you’ve enjoyed this wholesome almond flour bread, you’re in for a treat! Almond flour is an incredibly versatile ingredient, perfect for a wide range of gluten-free and grain-free baking. Dive into more of our favorite almond flour creations to expand your repertoire of healthy and delicious recipes:
- Almond Flour Banana Bread: A wonderfully moist and naturally sweet twist on a classic comfort food.
- Almond Flour Cake: A light, tender, and incredibly flavorful cake that’s perfect for any celebration.
- Almond Flour Pizza Crust: Create crispy, satisfying homemade pizzas with this easy gluten-free crust.
- Almond Flour Pumpkin Bread: A seasonal favorite, bursting with warm spices and pumpkin flavor.
- Almond Flour Brownies: Rich, fudgy, and intensely chocolatey brownies that are surprisingly healthy.