
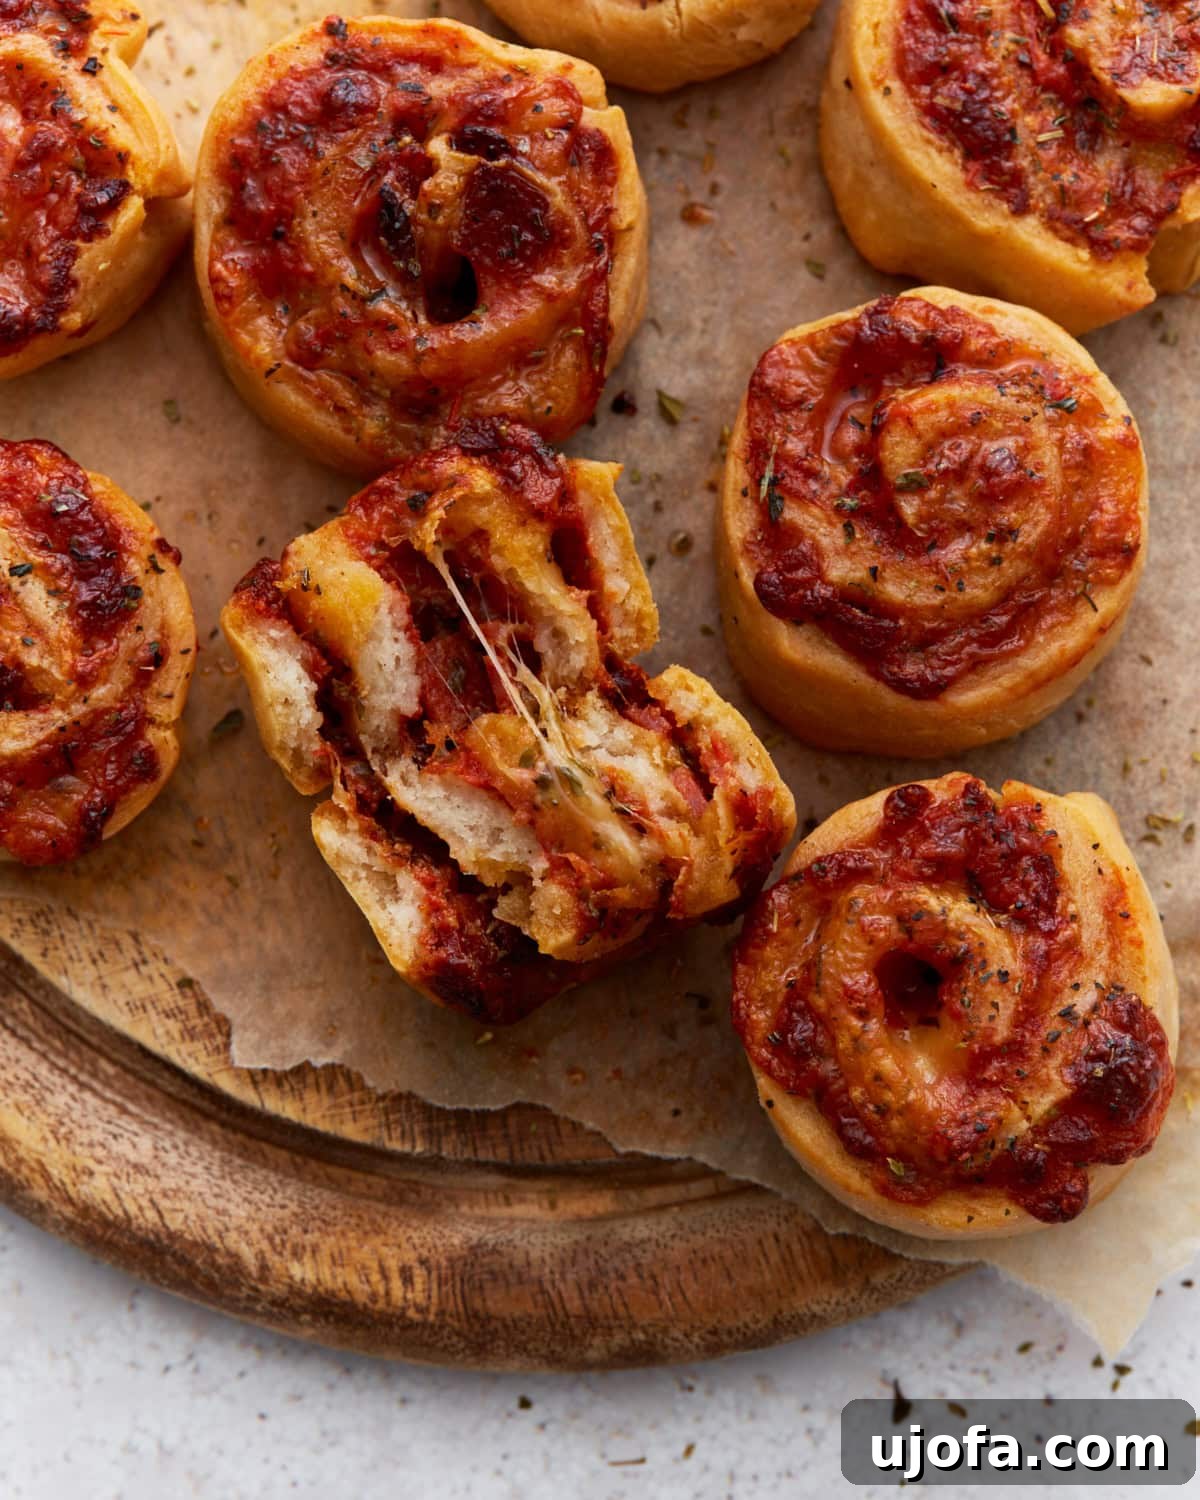
Craving those classic, gooey, cheesy pizza rolls but following a gluten-free diet? Look no further! This recipe delivers the ultimate homemade Gluten-Free Pizza Rolls that are incredibly soft, wonderfully cheesy, and brimming with your favorite pizza toppings. Forget store-bought alternatives; our easy-to-make gluten-free dough uses simple pantry staples, promising that satisfying pull of melted mozzarella and rich tomato sauce in every bite. Whether you’re whipping up a batch for a lively game day crowd, searching for a fun and kid-friendly snack, or simply need a quick weeknight treat, these freezer-friendly pizza rolls are an absolute game-changer. Get ready to rediscover a beloved classic, made perfectly gluten-free!
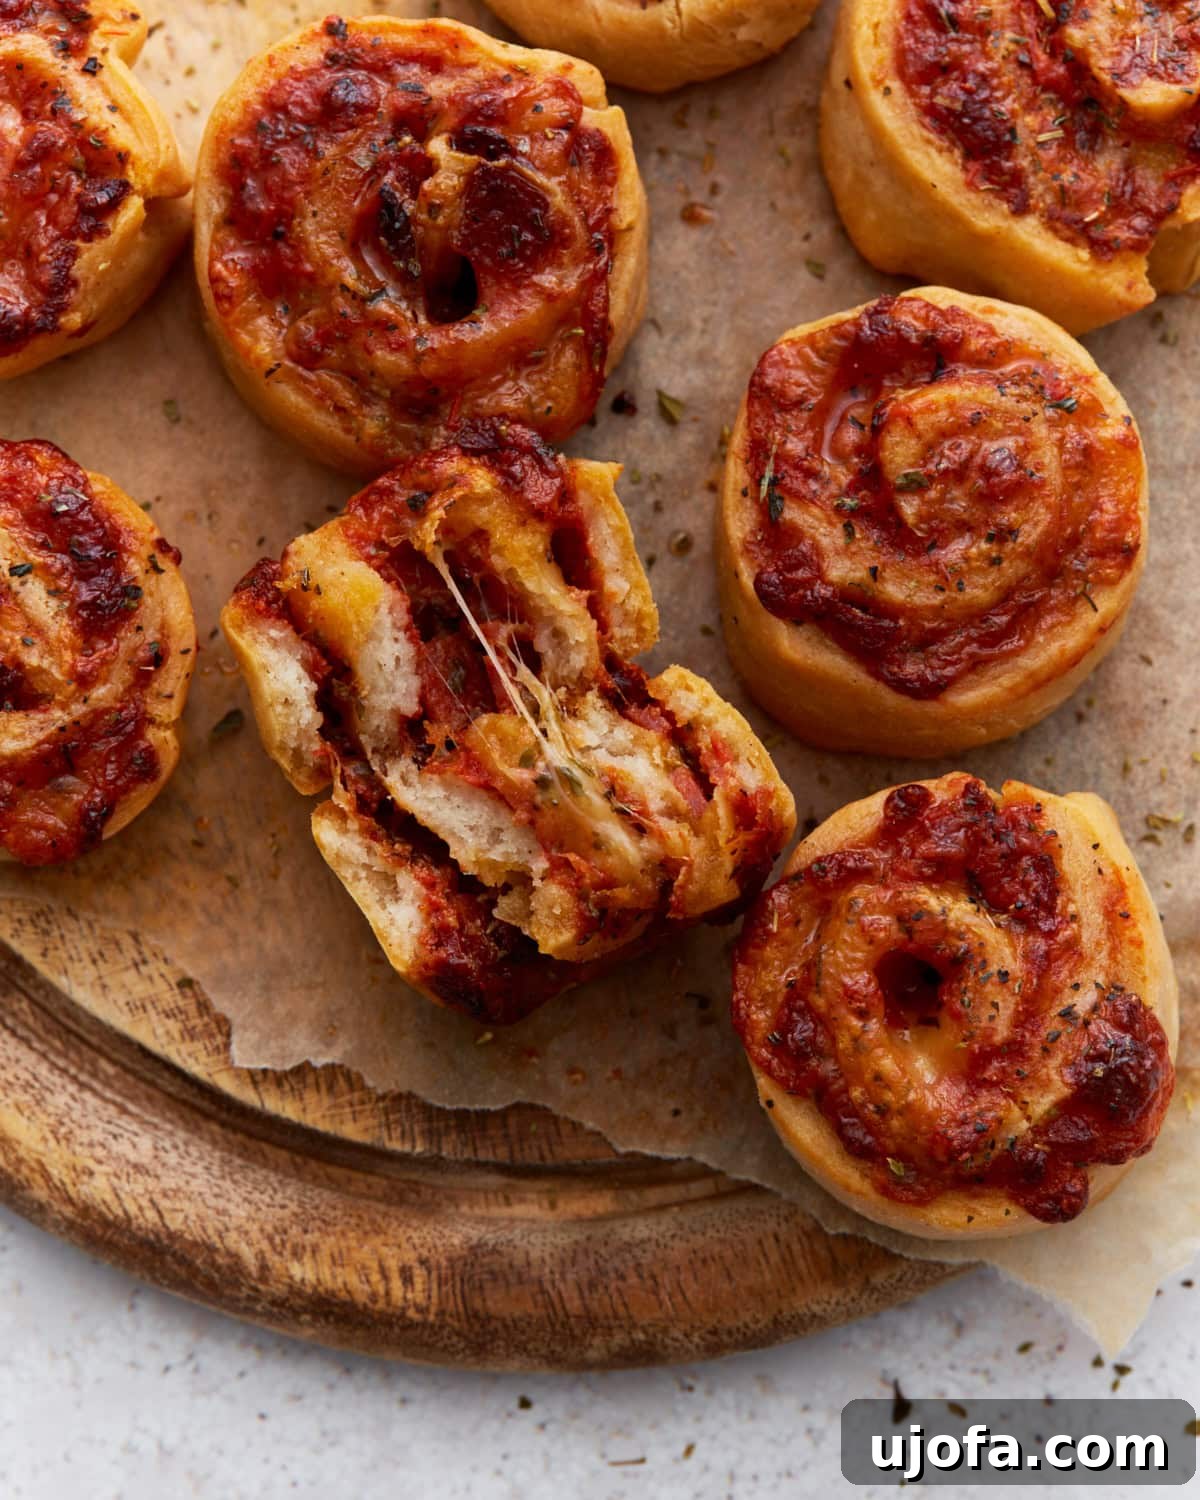
There’s something uniquely comforting about a warm, savory pizza roll, and this recipe has quickly become a go-to in my kitchen. It’s not just a dish; it’s a delightful experience that brings joy to snack time. What sets these homemade gluten-free pizza rolls apart is their remarkable texture – soft, chewy, and distinctly different from traditional puffy pizza crusts. The dough is designed for easy rolling and baking, making it accessible even for novice bakers. You can stick with the timeless combination of pepperoni and mozzarella, or let your culinary imagination run wild with additions like cooked sausage, sautéed veggies, or a vibrant swirl of pesto. These rolls are fantastic for gatherings, holiday parties, or simply as a convenient after-school snack. Plus, they freeze beautifully, allowing you to always have a delicious, ready-to-bake stash for those impromptu cravings or unexpected guests.
Why Choose Homemade Gluten-Free Pizza Rolls?
Making your own gluten-free pizza rolls offers several advantages over store-bought options. First, you have complete control over the ingredients, ensuring they are fresh, high-quality, and free from any hidden gluten or unwanted additives. This is especially crucial for those with celiac disease or gluten sensitivities, as cross-contamination can often be an issue with commercial products. Secondly, the customization possibilities are endless. From selecting your favorite cheeses and meats to experimenting with various vegetables and sauces, homemade allows for a personalized touch that caters to every palate.
Beyond dietary control, there’s an undeniable satisfaction that comes from creating a beloved snack from scratch. The aroma of baking pizza rolls filling your kitchen is an experience in itself! These rolls aren’t just a snack; they are a versatile appetizer, a fun lunch idea, or even a light dinner when paired with a fresh salad. Their appeal extends to all ages, making them a fantastic addition to any family meal plan or party spread. Plus, the convenience of having a batch ready in your freezer means you’re always prepared for a quick, wholesome bite without compromising on taste or quality.
Rating: ★★★☆☆ (2.50 from 2 votes)
Gluten-Free Pizza Rolls
Sabine Venier
8 rolls
30 mins
25 mins
55 mins
Email Share |
Print Recipe

These homemade gluten-free pizza rolls are a fantastic snack, combining soft dough with a flavorful, cheesy filling. They’re perfect for any occasion and surprisingly easy to make from scratch!
Ingredients
Dough
- 1 1/2 cups gluten-free all-purpose flour
- 1 teaspoon xanthan gum, omit if your flour blend contains it
- 1 teaspoon baking powder
- 1/2 teaspoon salt
- 1/2 cup warm water
- 2 tablespoons olive oil
- 1 teaspoon apple cider vinegar
Filling
- 1/3 cup pizza sauce
- 3/4 cup shredded mozzarella cheese
- 1/4 cup chopped pepperoni, or any topping of choice
- 1 teaspoon dried basil
- 1/4 teaspoon garlic powder
For Brushing
- 1 tablespoon olive oil
- 1/2 teaspoon dried oregano
Instructions
-
Prepare for Baking: Preheat your oven to 375°F (190°C). Line a baking sheet with parchment paper to prevent sticking and ensure easy cleanup. This step is crucial for perfect, evenly baked gluten-free pizza rolls.
-
Combine Dry Ingredients: In a medium-sized mixing bowl, thoroughly whisk together the gluten-free all-purpose flour, xanthan gum (if your particular blend doesn’t already contain it), baking powder, and salt. Ensure these dry ingredients are well combined for an even dough structure.
-
Form the Dough: Add the warm water, olive oil, and apple cider vinegar to the dry mixture. Mix everything until a soft, cohesive dough forms. It might be slightly sticky, which is normal for gluten-free doughs.
-
Roll Out the Dough: Place the dough between two sheets of parchment paper. Using a rolling pin, roll the dough into an approximate 10×12-inch rectangle. This technique helps prevent the dough from sticking and makes it easier to handle.
-
Apply Pizza Sauce: Carefully remove the top sheet of parchment paper. Spread the pizza sauce evenly over the rolled-out dough, making sure to leave about a 1/2-inch border around the edges. This border will help seal the rolls when you slice them.
-
Add Toppings: Generously sprinkle the shredded mozzarella cheese, chopped pepperoni (or your chosen filling), dried basil, and garlic powder over the pizza sauce layer. Distribute them evenly to ensure flavor in every bite of your homemade pizza rolls.
-
Roll the Dough: Starting from one of the longer edges, carefully roll the dough into a tight log, similar to how you would roll cinnamon rolls. Use the bottom sheet of parchment paper to assist in lifting and guiding the dough as you roll, helping to keep it compact and prevent tearing.
-
Slice the Rolls: Using a sharp knife, slice the dough log into 8 equal-sized rolls. Place these individual pizza rolls onto the prepared baking sheet, ensuring they are spaced slightly apart.
-
Prepare for Baking: Lightly brush the tops of each roll with the remaining 1 tablespoon of olive oil. Then, sprinkle the 1/2 teaspoon of dried oregano evenly over the rolls. This adds extra flavor and helps achieve a beautiful golden crust.
-
Bake to Perfection: Transfer the baking sheet to your preheated oven. Bake for 20–25 minutes, or until the gluten-free pizza rolls are golden brown and the cheese is bubbly and melted.
-
Cool and Serve: Allow the pizza rolls to cool slightly on the baking sheet before serving. They will be very hot! Serving them warm with extra pizza sauce for dipping is highly recommended for an enhanced flavor experience.
Notes
- Delicate Dough Handling: Gluten-free dough can be more delicate than traditional wheat dough. Always roll it between two sheets of parchment paper. If you notice any cracks or tears while rolling, gently pinch the dough back together. Don’t be afraid to work with it; it’s quite forgiving!
- Custom Dough Option: If you already have a favorite gluten-free pizza dough recipe that you love, feel free to use it! Simply prepare your preferred dough, roll it out according to the dimensions in this recipe, and then follow the same filling and baking steps outlined here.
- Optimal Filling: To ensure your pizza rolls hold their shape and bake properly, avoid overfilling the dough. When spreading the sauce and toppings, make sure to leave a clean 1/2-inch border around the edges. Roll the dough tightly but gently to prevent the filling from squeezing out during baking.
- Xanthan Gum Importance: If your gluten-free flour blend does not already contain xanthan gum, it’s essential to add it as directed. Xanthan gum acts as a binder, providing elasticity and structure to gluten-free baked goods, which is crucial for a dough that can be rolled and maintain its shape.
Nutrition
Serving: 1 roll
Calories: 176 kcal
Carbohydrates: 18 g
Protein: 5 g
Fat: 10 g
Saturated Fat: 3 g
Polyunsaturated Fat: 1 g
Monounsaturated Fat: 5 g
Trans Fat: 0.1 g
Cholesterol: 12 mg
Sodium: 380 mg
Potassium: 56 mg
Fiber: 3 g
Sugar: 1 g
Vitamin A: 118 IU
Vitamin C: 1 mg
Calcium: 105 mg
Iron: 1 mg
Nutrition information is automatically calculated, so should only be used as an approximation.
Additional Info
Appetizer, Snack
American
Tried this recipe? Mention @mamaknowsglutenfree or tag #mamaknowsglutenfree!
How to Make Gluten-Free Pizza Rolls Step by Step
Creating these delightful gluten-free pizza rolls is a fun and straightforward process. Follow these detailed steps to ensure perfectly baked, golden-brown snacks every time. Each stage is accompanied by helpful visual guides to assist you.
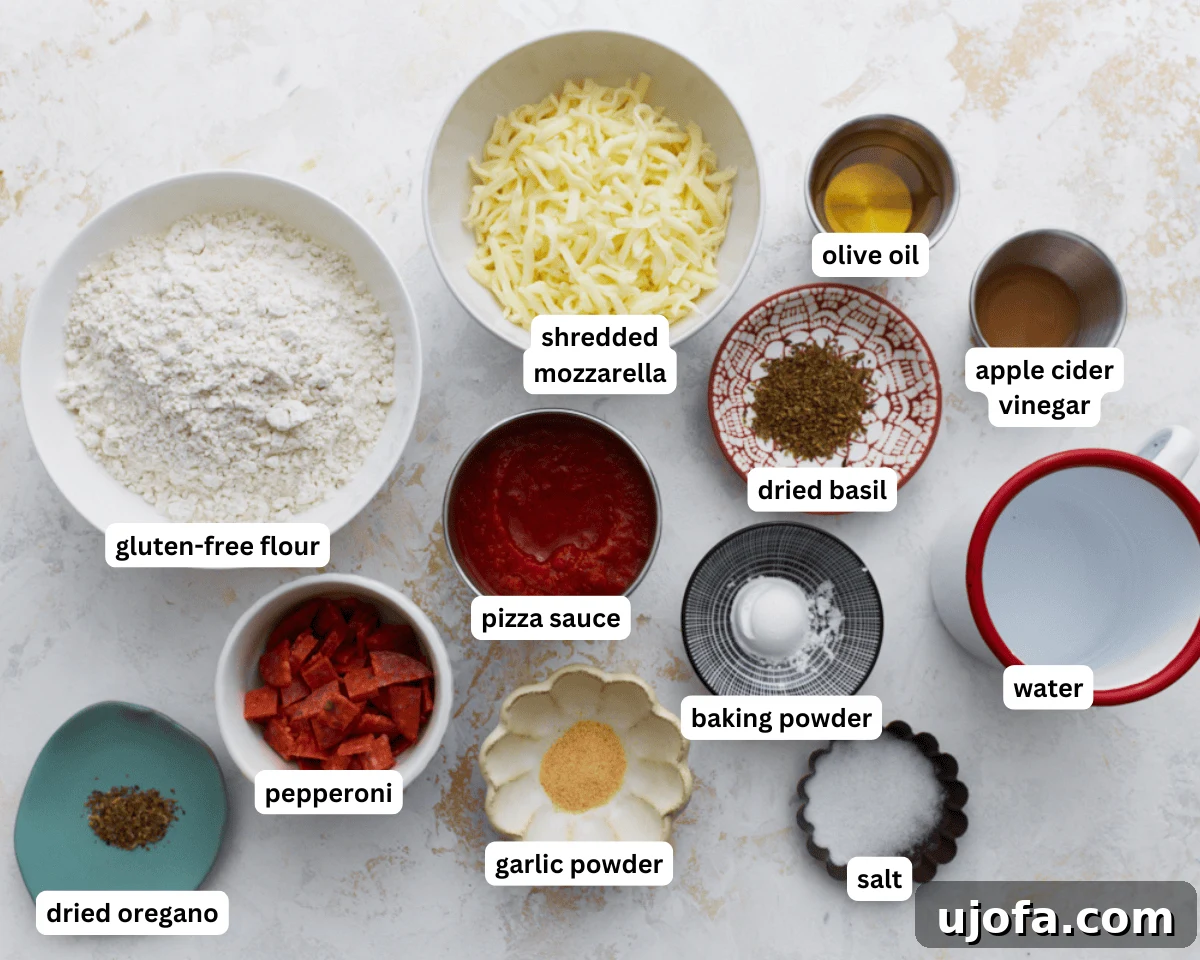
Step 1: Gather the Ingredients & Preheat Oven: Before you begin, make sure all your ingredients are measured out and ready. This mise en place technique makes the cooking process much smoother. Preheat your oven to a precise 375°F (190°C) and prepare a baking sheet by lining it with parchment paper. This parchment paper is key for preventing sticking and for assisting in the rolling process later on.
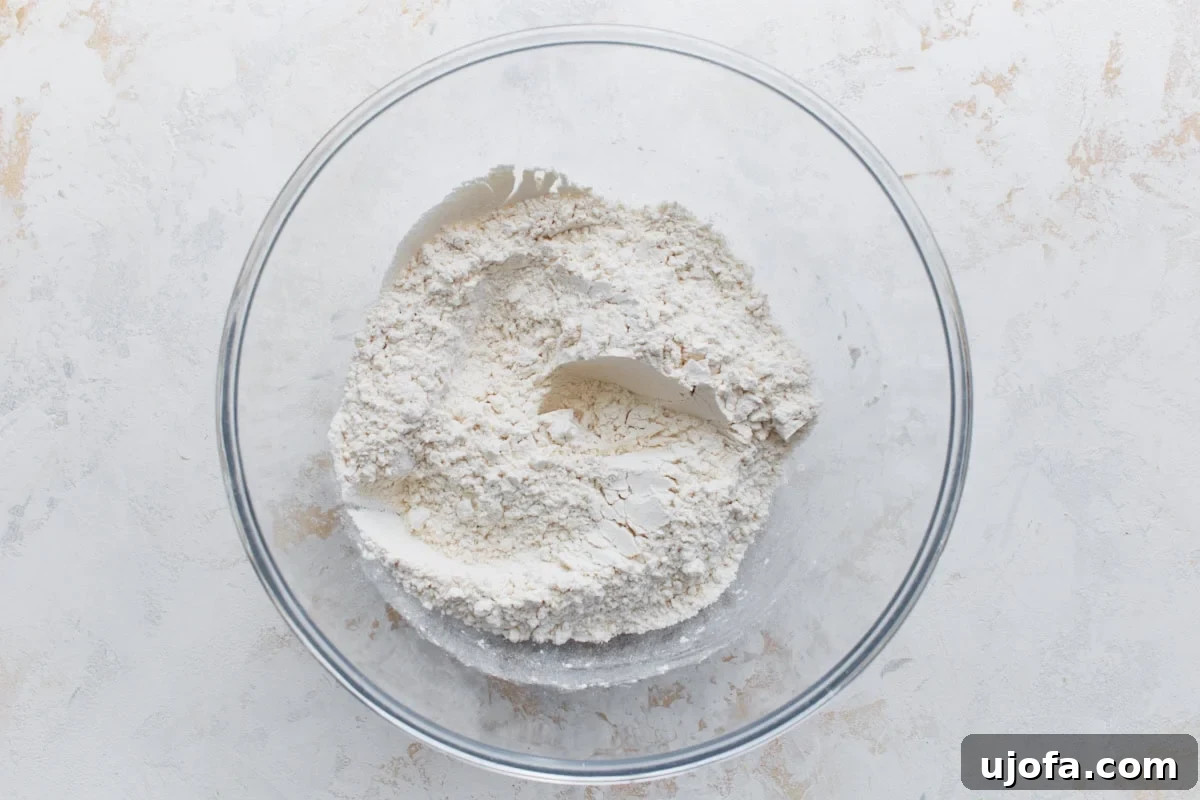
Step 2: Mix the Dry Ingredients: In a spacious mixing bowl, combine 1 ½ cups of your chosen gluten-free all-purpose flour, 1 teaspoon of xanthan gum (remember to omit this if your specific flour blend already contains it), 1 teaspoon of baking powder, and ½ teaspoon of salt. Whisk these ingredients thoroughly. This ensures an even distribution of leavening agents and binders, which is critical for the texture of gluten-free dough.
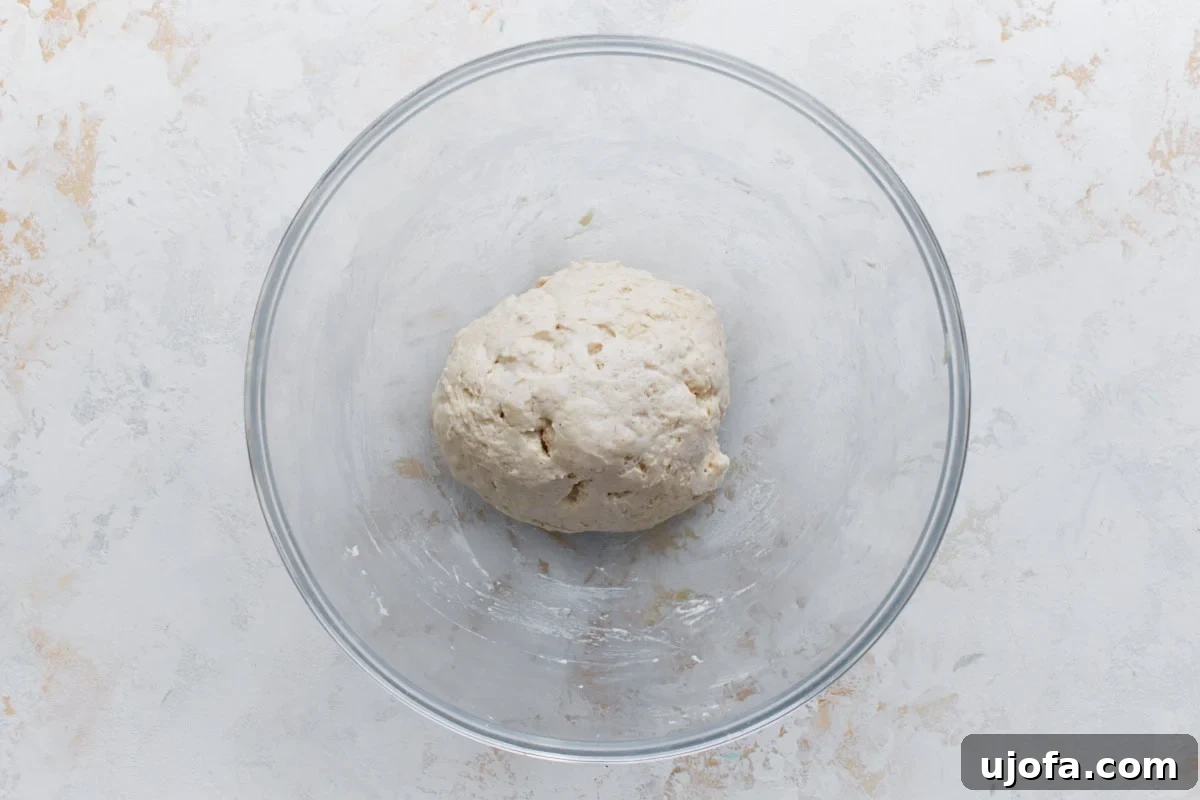
Step 3: Form the Dough: Pour ½ cup of warm water, 2 tablespoons of olive oil, and 1 teaspoon of apple cider vinegar into the dry ingredient mixture. Mix vigorously until a soft, pliable dough forms. It’s okay if it’s a bit sticky – gluten-free dough often has a different consistency than traditional dough. The apple cider vinegar helps with tenderizing the dough and activating the baking powder.
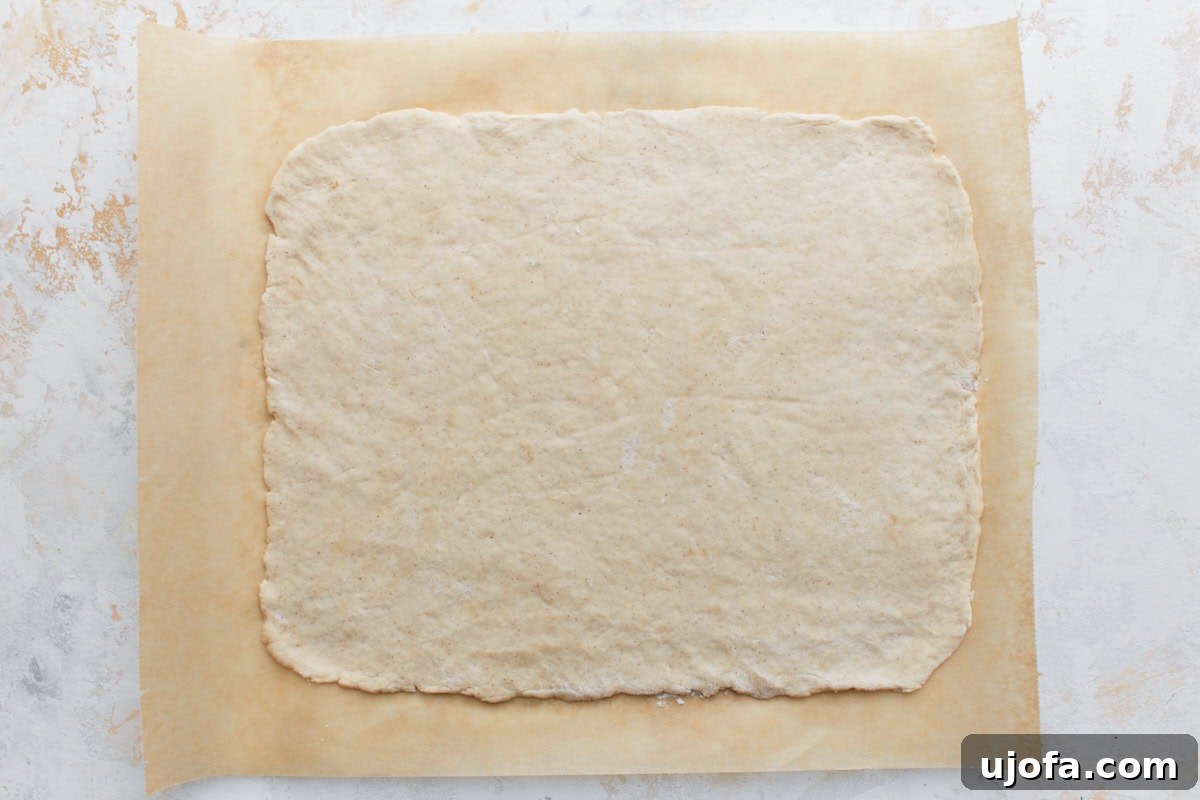
Step 4: Roll Out the Dough: This is a key step for homemade pizza rolls. Place the freshly mixed dough ball between two sheets of parchment paper. Using a rolling pin, gently roll the dough out into a uniform 10×12-inch rectangle. Rolling between parchment paper prevents sticking to your work surface and the rolling pin, making the process much easier for gluten-free dough, which can be less elastic.
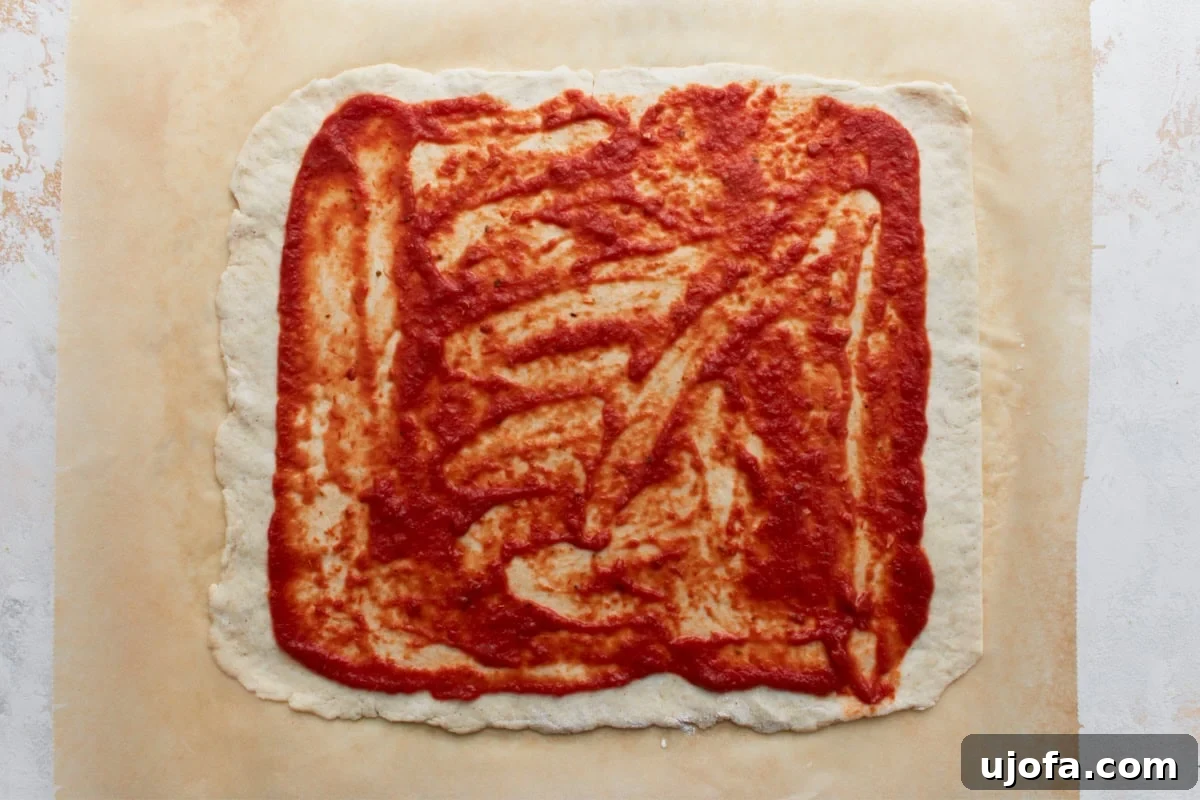
Step 5: Make the Pizza Base: Carefully peel off the top sheet of parchment paper. Spread ⅓ cup of your favorite pizza sauce evenly across the rolled-out dough. Be sure to leave a consistent ½-inch border clear around all the edges. This border is essential for properly sealing the dough when you roll it, preventing any delicious filling from escaping during baking.
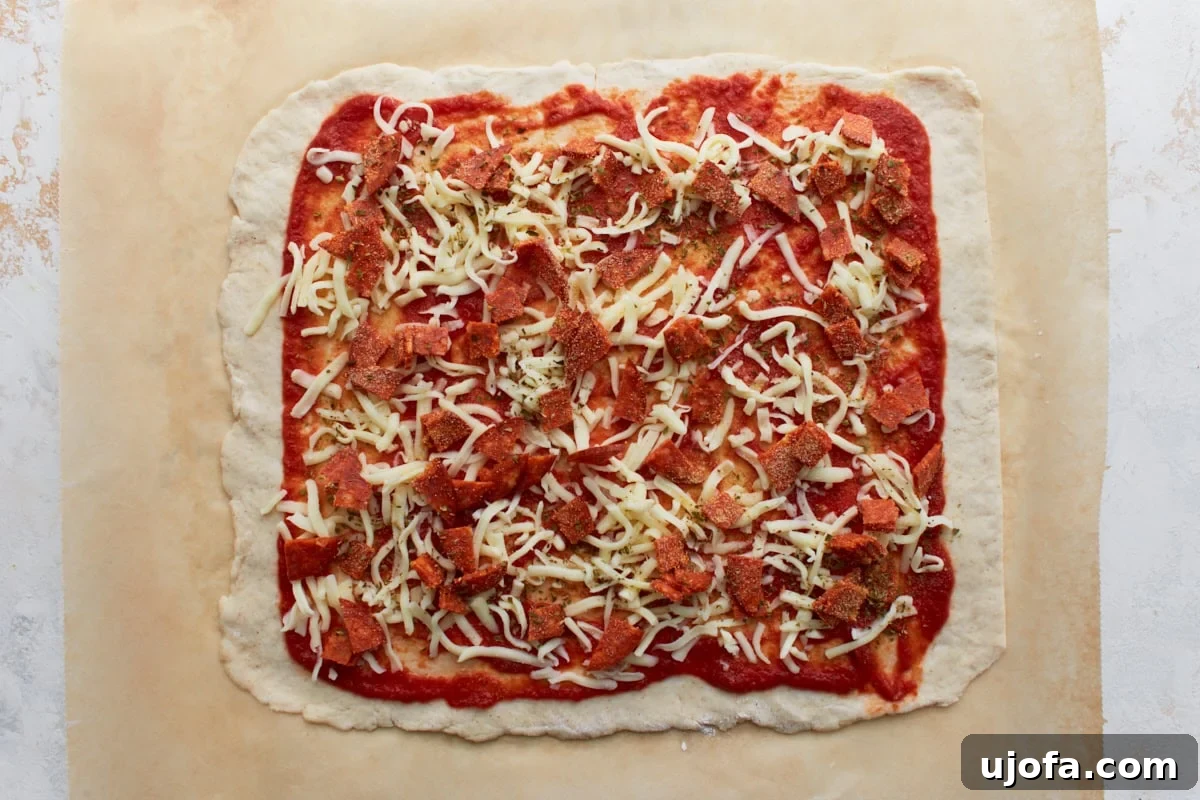
Step 6: Add the Toppings: Now for the fun part! Evenly sprinkle ¾ cup of shredded mozzarella cheese, ¼ cup of chopped pepperoni, 1 teaspoon of dried basil, and ¼ teaspoon of garlic powder over the pizza sauce layer. Feel free to adjust these quantities or add other favorite toppings. Distributing them uniformly ensures that every single pizza roll gets a burst of flavor.
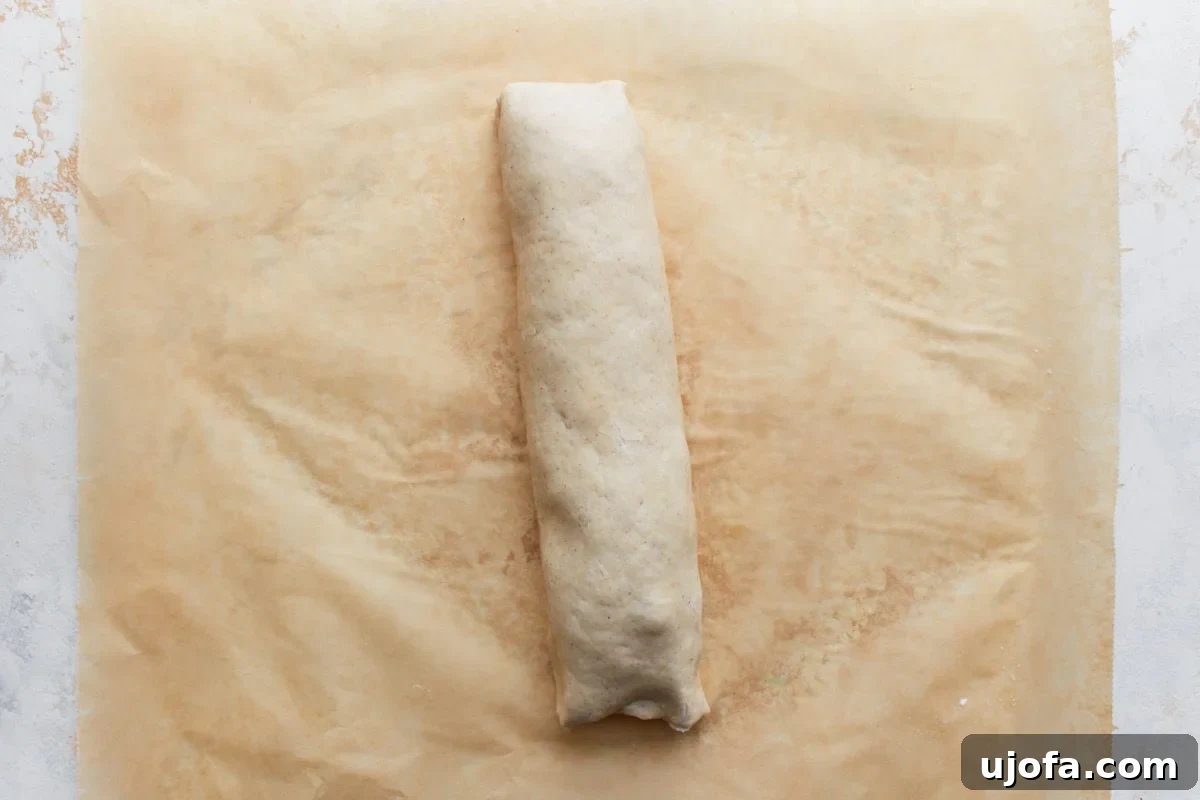
Step 7: Roll it Up: Starting from one of the long edges, very carefully and tightly roll the dough into a log shape. Use the parchment paper underneath to help you lift and guide the dough as you roll, similar to the technique used for making cinnamon rolls. The goal is a firm, compact log that holds its shape, securing all the delicious filling inside.
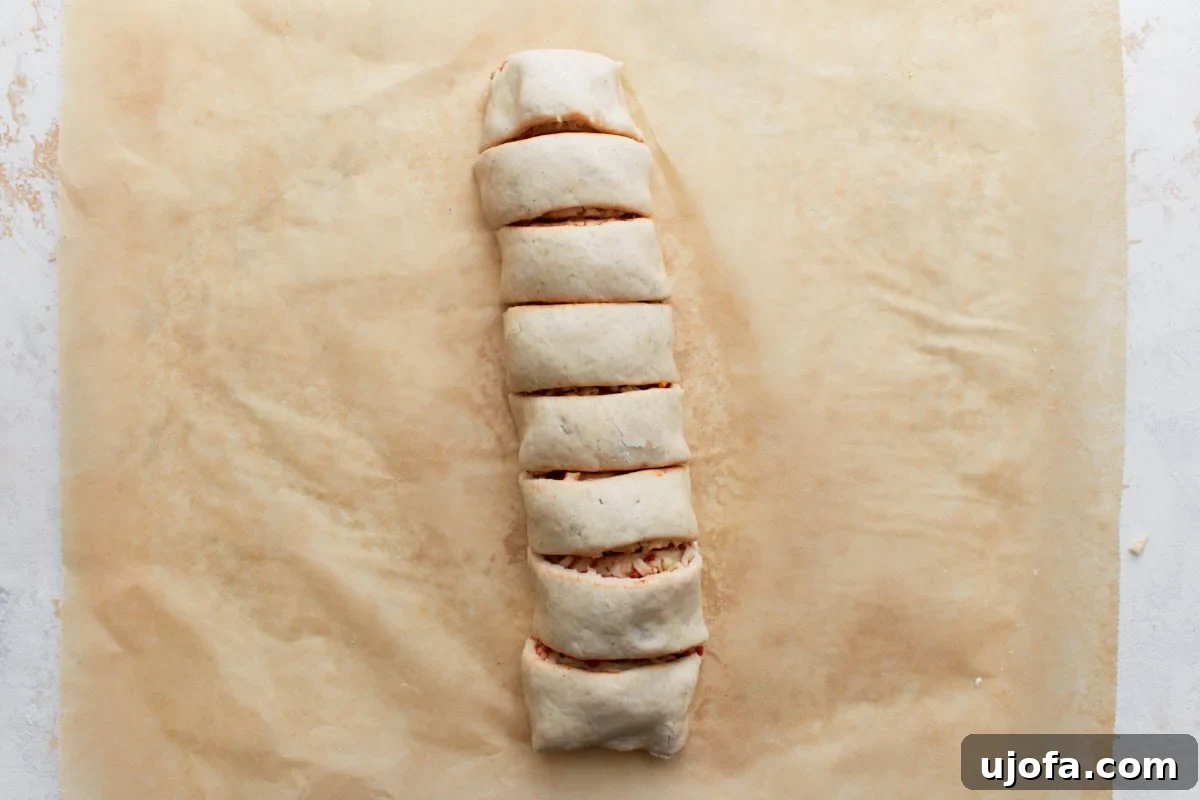
Step 8: Slice the Log: Once you have a nicely rolled log, use a sharp knife to slice it into 8 equal rolls. Try to make the slices as even as possible to ensure uniform baking. Place each individual pizza roll onto the parchment-lined baking sheet, leaving a little space between each one to allow for even cooking and expansion.
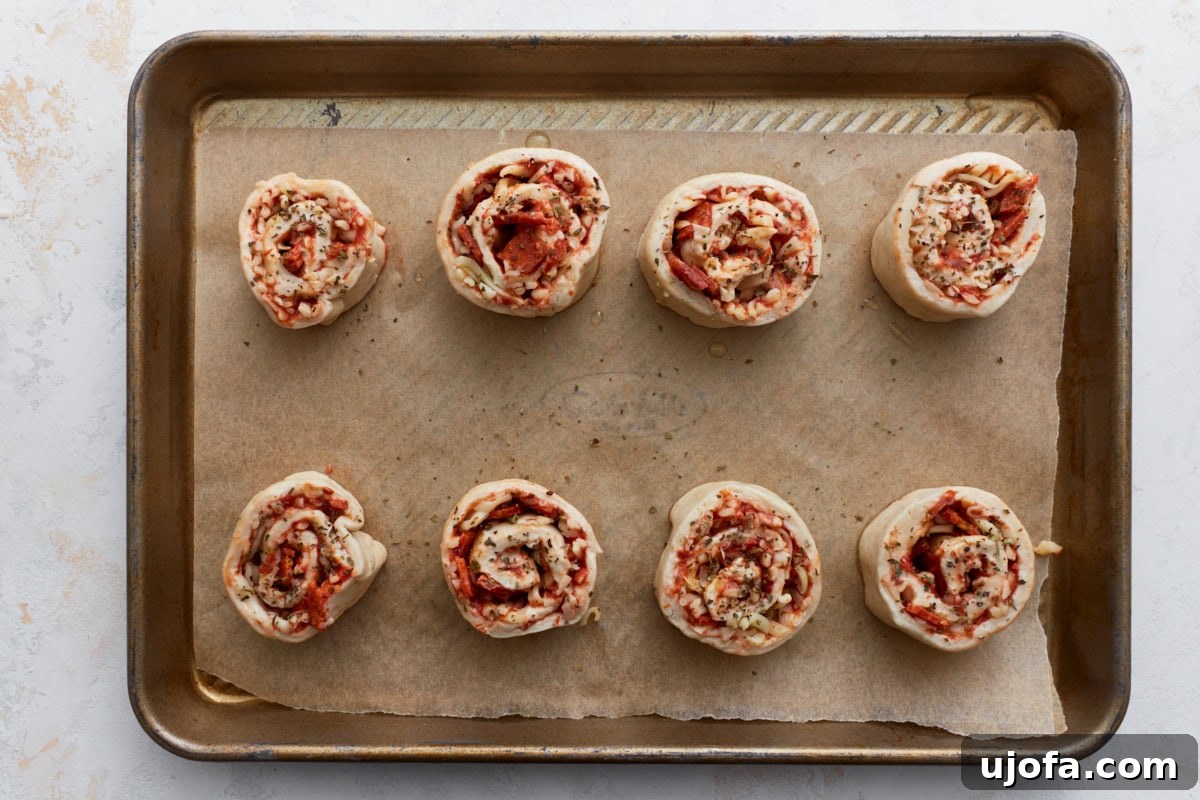
Step 9: Bake the Rolls: Brush the tops of all 8 rolls with the remaining 1 tablespoon of olive oil. This not only adds flavor but also helps the rolls achieve a beautiful golden-brown color and a slightly crisp exterior. Then, sprinkle ½ teaspoon of dried oregano evenly over each roll for an aromatic finish. Place the baking sheet into your preheated oven and bake for 20-25 minutes, or until the rolls are gloriously golden and the cheese inside is visibly bubbly.
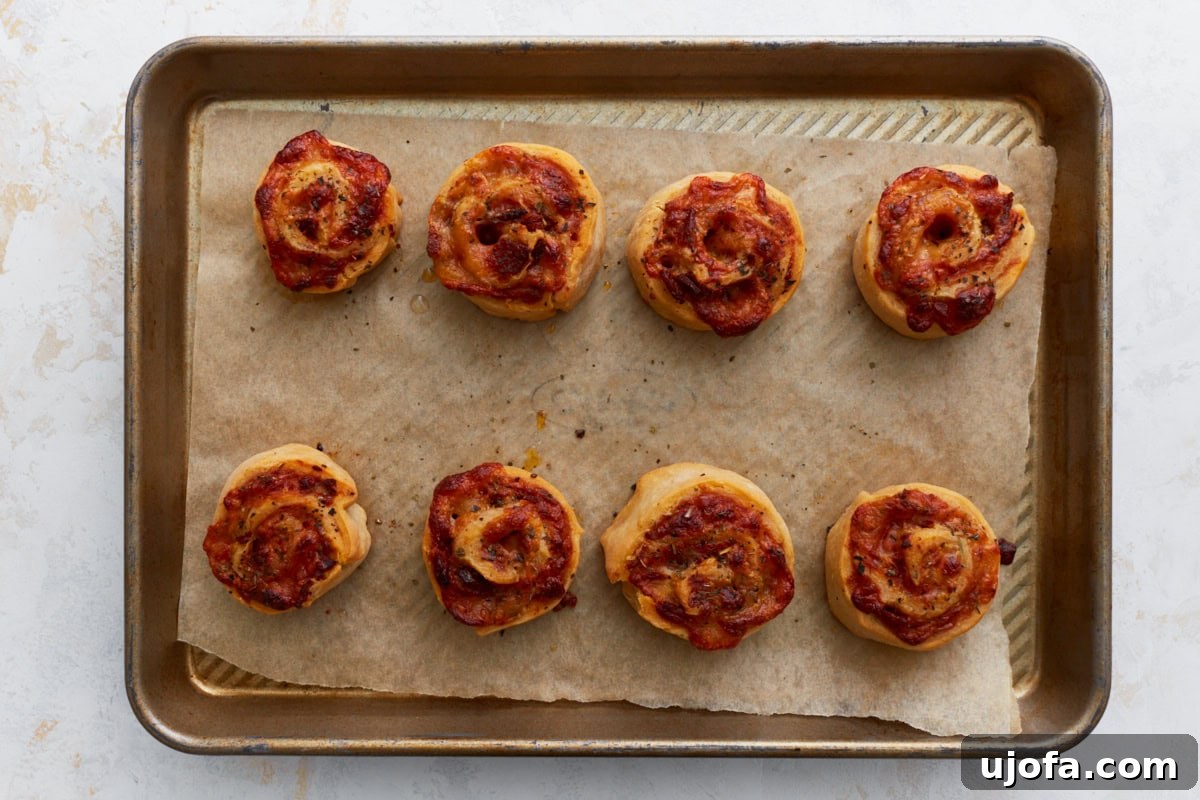
Step 10: Serve and Enjoy: Once baked, remove the homemade pizza rolls from the oven. Let them cool slightly on the baking sheet for a few minutes before transferring them to a serving plate. Resist the urge to bite into them immediately – we’ve all learned that lesson! Cooling them slightly allows the cheese to set and prevents burnt mouths. Serve these warm, cheesy delights with a side of extra pizza sauce for dipping, and prepare for rave reviews!
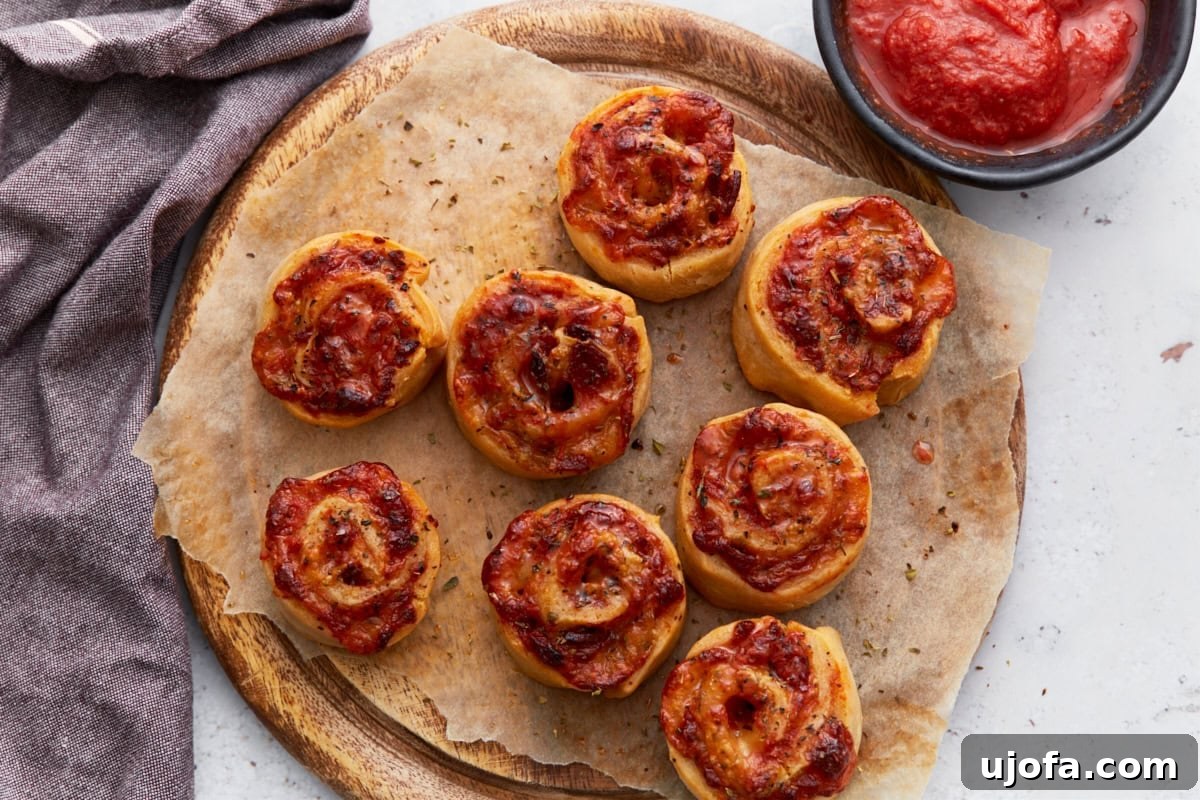
Tips for Perfect Gluten-Free Pizza Rolls
Achieving perfectly tender and flavorful gluten-free pizza rolls is easier than you think with a few helpful tips:
- Measure Flour Accurately: Gluten-free baking is precise. Always scoop your flour into the measuring cup and level it off with a straight edge rather than scooping directly from the bag. This prevents over-measuring, which can lead to dry, crumbly dough.
- Warm Water Temperature: Ensure your water is warm, not hot. Too hot water can compromise the integrity of the gluten-free flour and make the dough difficult to work with. Aim for around 105-115°F (40-46°C).
- Don’t Overwork the Dough: Unlike wheat dough, gluten-free dough doesn’t benefit from extensive kneading. Mix until just combined. Overworking can make it tough.
- Parchment Paper is Your Best Friend: Seriously, use two sheets. It’s the easiest way to roll out gluten-free dough without it sticking to your counter or rolling pin. You can even refrigerate the rolled-out dough for 10-15 minutes if it becomes too sticky or difficult to handle.
- Tight Rolling is Key: When rolling the dough into a log, aim for a tight roll. This helps keep the filling secure and creates those beautiful spirals you expect from a pizza roll.
- Sharp Knife for Slicing: Use a very sharp knife to slice the log into individual rolls. A dull knife can squish the dough and filling. You can also lightly flour your knife blade to prevent sticking.
- Even Baking: Ensure your oven is fully preheated and consider rotating your baking sheet halfway through baking for even browning.
Customizing Your Pizza Rolls: Endless Possibilities
One of the best aspects of making homemade pizza rolls is the freedom to customize them to your liking. Here are some ideas to inspire your next batch:
- Vegetarian Options: For a meat-free version, replace pepperoni with finely diced bell peppers, mushrooms, black olives, spinach (sautéed and squeezed dry), or even sun-dried tomatoes.
- Cheese Varieties: While mozzarella is classic, consider blending it with a bit of provolone, cheddar, or even a sprinkle of parmesan for added depth of flavor. For a dairy-free option, use your favorite shredded dairy-free mozzarella alternative.
- Protein Power-Ups: Beyond pepperoni, crumbled cooked sausage, finely diced cooked ham, or even shredded cooked chicken can be excellent additions. Ensure any meat is fully cooked and drained of excess grease before adding.
- Herb & Spice Boost: Experiment with different herbs like dried oregano, Italian seasoning, a pinch of red pepper flakes for heat, or fresh basil (added after baking for best flavor).
- Sauce Swaps: Not just pizza sauce! Try a pesto spread for a fresh, herbaceous flavor, or a BBQ sauce base for a unique twist.
- Sweet Treat (Dessert Rolls!): While not pizza rolls, you could adapt this dough for sweet fillings like cinnamon sugar, fruit compote, or chocolate chips for a dessert roll variation.
Serving Suggestions
These versatile gluten-free pizza rolls are incredibly delicious on their own, but pairing them with the right accompaniments elevates the experience. I personally love serving them with warm marinara sauce or a creamy dairy-free ranch dressing for dipping—that’s half the fun of eating them! They make an excellent appetizer for parties and gatherings, a convenient and exciting treat for lunchboxes, or an essential snack to have ready for game day festivities.
If you’re looking to transform them into a more substantial meal, consider adding a simple side salad with a light vinaigrette or a serving of roasted vegetables. The fresh greens or earthy notes of roasted broccoli or zucchini provide a wonderful contrast to the rich, cheesy rolls. Don’t hesitate to get creative with your dipping sauces either; garlic parmesan dipping sauce, a spicy arrabbiata, or even a simple balsamic glaze can offer exciting flavor variations. Whether enjoyed hot from the oven or reheated from the freezer, these rolls are always a crowd-pleaser.
Storage Instructions
These homemade gluten-free pizza rolls are fantastic for meal prepping or simply having on hand for quick snacks. Here’s how to store them effectively:
- Refrigeration (Cooked): If you happen to have any leftovers after baking, allow them to cool completely to room temperature. Then, transfer them to an airtight container and store them in the refrigerator for up to 3-4 days. To reheat, place them in the oven at 350°F (175°C) for about 10 minutes, or until warmed through and the crust has re-crisped slightly. A toaster oven also works wonderfully for reheating individual rolls.
- Freezing (Unbaked): For a freezer stash, I highly recommend freezing the rolls unbaked. After slicing the log into individual rolls (Step 8), place them in a single layer on a parchment-lined baking sheet. Freeze them for about 1-2 hours, or until solid. Once frozen, transfer the solid rolls to a freezer-safe bag or airtight container. They will stay good in the freezer for 2-3 months. When ready to bake, preheat your oven as directed and bake the frozen rolls, adding an extra 5-10 minutes to the cooking time. There’s no need to thaw them first!
- Freezing (Baked): You can also freeze baked pizza rolls. Allow them to cool completely, then freeze them on a tray until solid before transferring to a freezer bag. Reheat in the oven at 350°F (175°C) for 15-20 minutes, or until hot.
Frequently Asked Questions (FAQ)
Here are some common questions about making gluten-free pizza rolls:
- Can I make these dairy-free? Yes, absolutely! Simply substitute the mozzarella cheese with your favorite brand of shredded dairy-free mozzarella. Many brands melt beautifully and provide a similar cheesy experience.
- What kind of gluten-free flour should I use? I recommend using a good quality gluten-free all-purpose flour blend that is designed for baking. Look for blends that typically contain a mix of rice flour, potato starch, tapioca starch, and sometimes millet or sorghum flour. If your blend doesn’t include xanthan gum, remember to add it as specified in the recipe.
- Can I prepare the dough ahead of time? You can prepare the dough and refrigerate it for up to 24 hours. Just make sure it’s tightly wrapped in plastic wrap to prevent it from drying out. When ready to use, let it sit at room temperature for about 15-20 minutes to make it easier to roll.
More Delicious Gluten-Free Snacks You’ll Love
If you enjoyed these gluten-free pizza rolls, be sure to explore more fantastic gluten-free snack recipes to keep your pantry stocked with delicious options:
- Gluten-Free Baked Donuts
- Banana Oatmeal Bars
- Gluten-Free Soft Pretzels
- Jalapeño Poppers