
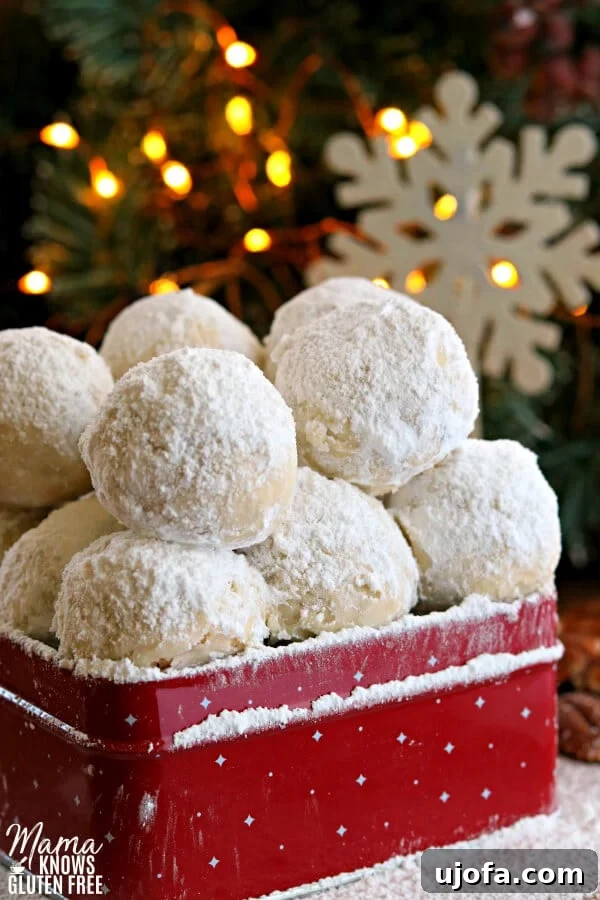
Welcome to the ultimate guide for creating exquisite **Gluten-Free Snowball Cookies**! These delightful treats, known by many cherished names like Mexican Wedding Cookies, Russian Teacakes, or even Italian Wedding Cookies, are a holiday staple beloved for their tender, buttery texture and melt-in-your-mouth goodness. Dusted generously with powdered sugar, they truly resemble little snowballs, bringing a touch of winter wonderland magic to any festive spread. For anyone navigating a gluten-free lifestyle, the joy of indulging in traditional holiday treats can sometimes feel out of reach, but this recipe ensures that everyone can partake in the joy of these classic shortbread cookies, reimagined for modern dietary needs.
Crafted with a blend of fine gluten-free flours and bursting with the rich flavor of finely chopped nuts, these cookies are not just a gluten-free alternative; they are a superior cookie experience in their own right. Their simplicity in preparation makes them a perfect baking project for busy holiday seasons, promising a batch of irresistible cookies with minimal fuss. Whether you’re a seasoned gluten-free baker or just starting your journey, this detailed recipe, complete with essential tips and customizable options, will help you bake a batch of perfect snowball cookies that will impress family and friends alike.
The Enchanting History of Snowball Cookies
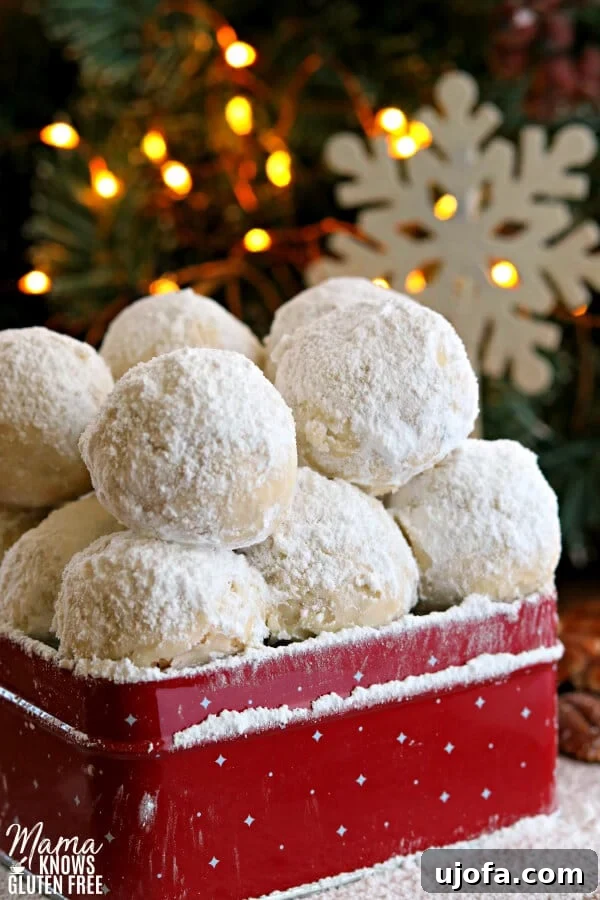
Snowball cookies boast a fascinating global heritage, with variations found in numerous cultures, each claiming a unique origin story. In Mexico, they are known as *Bizcochitos* or Mexican Wedding Cookies, often flavored with cinnamon. Across Eastern Europe, especially Russia, they take on the name Russian Tea Cakes, frequently enjoyed with a cup of hot tea. In Italy, they might be called Italian Wedding Cookies, while in Spain, *Polvorones* offer a similar crumbly texture. Despite their diverse names and subtle regional differences in spices or nuts, the core essence remains the same: a delicate, buttery shortbread cookie coated in a cloud of powdered sugar.
These cookies gained widespread popularity in American kitchens during the mid-20th century, particularly becoming synonymous with Christmas and other festive occasions. Their simple ingredients and straightforward preparation made them an accessible and beloved treat. The allure of their pristine white coating, reminiscent of freshly fallen snow, makes them an iconic symbol of winter holidays. For those seeking gluten-free options, adapting this classic recipe is a wonderful way to ensure that this cherished tradition continues, offering the same nostalgic taste and texture without compromise.
Crafting the Perfect Gluten-Free Snowball Cookies
Making gluten-free snowball cookies is surprisingly simple and incredibly rewarding. This recipe is designed to be straightforward, requiring only a few basic ingredients and minimal hands-on time, making it an ideal choice for bakers of all skill levels. The magic lies in the perfect balance of buttery richness, subtle vanilla notes, and the satisfying crunch of finely chopped nuts, all enveloped in a sweet, powdery embrace.
These cookies are an essential addition to your gluten-free Christmas cookie line-up or any festive gathering. Their charm extends beyond their appearance; their irresistible flavor and texture make them a guaranteed crowd-pleaser. Plus, their versatility allows for easy customization:
- Nut Selection: While pecans are a classic choice, feel free to experiment with your favorite nuts. Almonds offer a delicate, slightly sweet flavor; walnuts contribute a robust, earthy note; and even hazelnuts could add a unique twist. Ensure nuts are finely chopped for the best texture.
- Flavor Enhancements: A touch of almond extract can complement pecan or almond varieties beautifully, while a hint of orange zest could brighten the flavor profile.
- Dairy-Free & Vegan Options: With simple substitutions, these cookies can easily accommodate dairy-free and even vegan diets, ensuring everyone can enjoy them.
Follow these steps closely, and you’ll soon be enjoying a batch of the best gluten-free snowball cookies you’ve ever tasted!
Gluten-Free Snowball Cookies: A Detailed Baking Guide
Achieving perfect gluten-free snowball cookies involves careful attention to each step, from mixing the dough to the final powdery coating. Here’s a more in-depth look at the process:
- Preheat Oven to 400°F (200°C): Proper oven temperature is crucial for even baking. Make sure your oven is fully preheated before placing cookies inside.
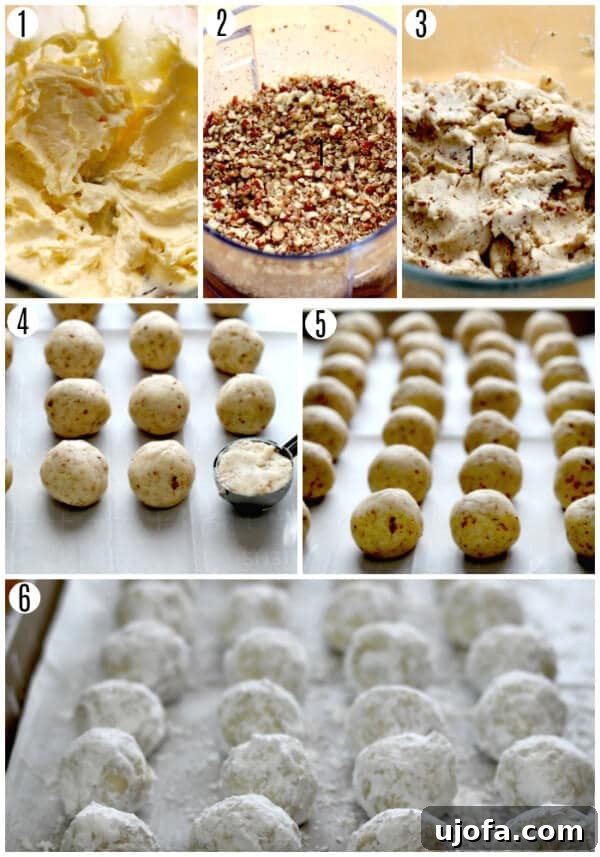
- Creaming the Foundation: In a large mixing bowl, combine softened butter, pure vanilla extract, and powdered sugar. Cream these ingredients together until the mixture is light, fluffy, and pale in color. This step incorporates air, contributing to the cookie’s delicate texture. Ensure your butter is at room temperature for optimal creaming.
- Incorporating Dry Ingredients and Nuts: Gradually add your chosen all-purpose gluten-free flour blend, xanthan gum (only if your blend doesn’t already contain it), salt, and finely chopped nuts. Mix until just combined. The dough should start to come together and hold its shape. Overmixing can lead to tougher cookies. For truly fine nuts, a food processor is highly recommended – this ensures the nuts integrate seamlessly into the dough and don’t create large, uneven chunks that could cause the cookies to crumble.
- Shaping the Snowballs: Using a 1-tablespoon cookie scoop or simply rolling with your hands, form the dough into uniform 1-inch balls. Consistency in size is key for even baking. As the recipe emphasizes, *it’s important not to make these cookies too big*, as larger cookies may not bake through properly and could spread excessively. Place them about 1 inch apart on a parchment-lined cookie sheet. Parchment paper prevents sticking and aids in easy cleanup.
- The Essential Chill: Place the cookie sheet with the shaped dough balls in the freezer for 5 minutes. This brief chilling period is a game-changer for gluten-free cookies, helping them maintain their shape and preventing excessive spreading during baking.
- Baking to Perfection: Bake for 10-12 minutes. The goal is for the cookies to be set but *not* to turn brown. They should remain light-colored to maintain their “snowball” appearance and tender crumb. Keep a close eye on your oven, as baking times can vary significantly between different models.
- Double Dusting for Maximum Charm: Allow the cookies to cool on the baking sheet for 3-5 minutes immediately after baking. While still warm (but not hot enough to melt all the sugar), gently roll them in a bowl filled with powdered sugar. The warmth helps the sugar adhere better. After this first coating, let the cookies cool completely for another 3-5 minutes. Then, roll them a second time in powdered sugar. This double-dusting technique ensures a thick, even coating, creating that iconic snowy finish.
- Storage: Store your cooled gluten-free snowball cookies in an airtight container at room temperature for up to a week, or freeze them for longer storage.
Mastering Gluten-Free Flour Blends
The foundation of successful gluten-free baking lies in understanding your flour blend. These gluten-free snowball cookies are specifically designed for a “cup-for-cup” or “all-purpose” gluten-free flour blend, which typically already includes xanthan gum. Xanthan gum is a crucial ingredient in gluten-free baking; it acts as a binder, mimicking the elasticity and structure that gluten provides in traditional wheat flour.
However, it’s vital to check the ingredient list of your chosen gluten-free flour. If your blend *already contains xanthan gum*, do not add extra to this recipe. Adding too much xanthan gum can result in an undesirable gummy or chewy texture, far from the tender crumb we’re aiming for in a snowball cookie. Brands like Pillsbury gluten-free flour are excellent choices, often performing consistently well in recipes like this one.
It’s important to acknowledge that *not all gluten-free flours are created equal*. Different blends use varying ratios of rice flour, potato starch, tapioca starch, and other flours, which can significantly impact the final texture and moisture content of your baked goods. For best results, sticking to a recommended, high-quality cup-for-cup blend is advisable. If you use a different brand, be prepared for potential minor adjustments to liquid or flour quantities based on your blend’s absorption properties.
The Precision of Measuring Gluten-Free Flour
Measuring gluten-free flour accurately is paramount for consistent baking results, as it behaves differently than traditional wheat flour. The “spoon and level” method is highly recommended for this reason:
- Gently spoon the gluten-free flour from its bag or container into your measuring cup until it’s overflowing.
- Using the straight edge of a knife or a flat spatula, level off the excess flour from the top of the measuring cup.
Crucially, *do not scoop the flour directly out of the bag with your measuring cup*. This practice compacts the flour into the cup, leading to an over-measurement. Too much flour can make your cookies dry, dense, and crumbly, ruining the delicate texture that makes snowball cookies so appealing.
Dairy-Free and Vegan Snowball Cookies: Inclusivity in Every Bite
For those with dairy allergies, intolerances, or who follow a vegan diet, this recipe offers straightforward modifications to ensure everyone can enjoy these delightful cookies. My own family, including my husband and youngest son, often requires dairy-free options, and I’ve successfully adapted this recipe to be equally delicious without traditional butter.
To make these cookies dairy-free, simply substitute regular butter with your favorite dairy-free butter alternative. Brands like Smart Balance or Earth Balance (the vegan stick version) work wonderfully and maintain the buttery flavor and texture essential for snowball cookies. The beauty of this recipe is that it is already egg-free, meaning if you opt for a reliable vegan butter, you’ll have a batch of truly vegan snowball cookies ready to enjoy!
Rest assured, the dairy-free version of these cookies is just as tender, flavorful, and irresistibly coated in powdered sugar as the original. You won’t compromise on taste or texture. Other excellent dairy-free alternatives I frequently use in baking include almond, cashew, or coconut milk in recipes requiring liquid, and coconut oil for certain fat requirements. For these snowball cookies, however, a solid dairy-free butter stick is the best choice for achieving that classic shortbread consistency.
Pro Tips for Gluten-Free Baking Success
Even seasoned bakers can benefit from a few clever tricks, especially when venturing into gluten-free territory. Here are some invaluable tips to ensure your gluten-free snowball cookies turn out perfectly every time:
- Invest in a Cookie Scoop: A 1-tablespoon cookie scoop is a game-changer. It ensures all your cookies are uniformly sized, which is crucial for even baking. No more guessing or uneven batches; every snowball will be perfectly round and consistent. This simple tool truly makes the baking process smoother and more efficient.
- Baking Sheet Liners: For the ultimate convenience and perfect non-stick results, consider using Reynolds Kitchens Cookie Baking Sheets. These pre-cut parchment sheets often feature a smart grid pattern, making it incredibly easy to space out your cookies perfectly on the baking sheet. This prevents crowding and helps air circulate evenly around each cookie, promoting consistent baking. You can often find these at major retailers like Walmart.
- Finely Chopped Nuts are Best: For a smoother texture that melts in your mouth, ensure your nuts are very finely chopped. Using a food processor, like a Ninja Food Processor, allows you to achieve the perfect fine consistency quickly and easily. Large nut pieces can disrupt the delicate cookie structure.
- Monitor Your Oven Closely: All ovens have their quirks. Some run hotter, some colder. It’s essential to know your oven and watch the cookies closely during the last few minutes of baking. You want them set but still light in color, not browned.
- Double Roll in Powdered Sugar: Don’t skip the second roll in powdered sugar! The first roll, while warm, gives an initial coating, and the second roll, after cooling slightly, ensures a thick, beautiful “snowball” finish that lasts.
Serving and Storing Your Snowball Cookies
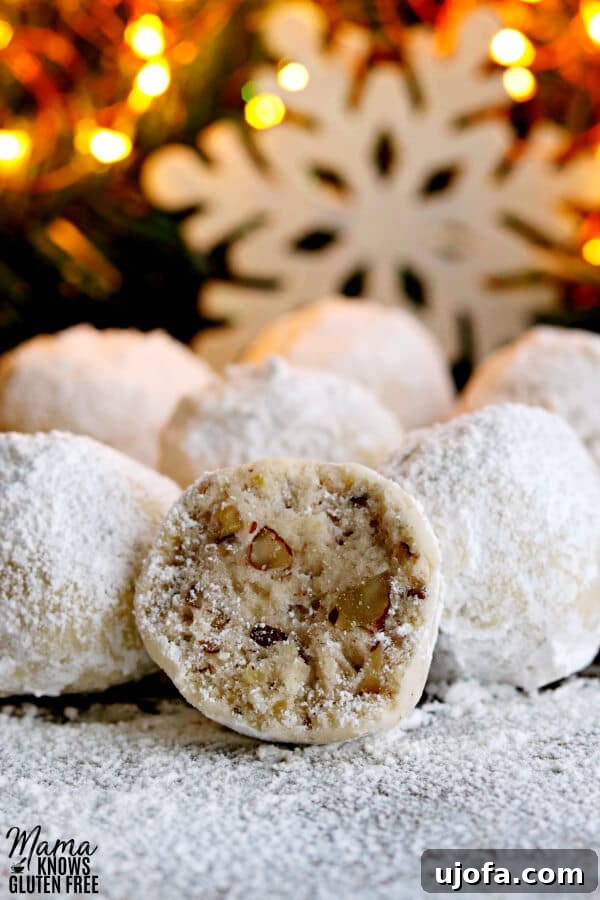
These delightful gluten-free snowball cookies are now poised to become a cherished favorite in your family’s holiday traditions. Their exquisite taste and charming appearance make them the perfect addition to any Christmas cookie tray, holiday potluck, or a simple afternoon tea. The pristine white coating truly makes them look like adorable miniature snowballs, adding a festive touch to any setting.
Serving Suggestions:
- Arrange them beautifully on a platter with other colorful Christmas cookies for a stunning display.
- Package them in decorative tins or bags to give as thoughtful homemade gifts to friends, neighbors, and teachers.
- Enjoy them with a warm cup of coffee, tea, or hot cocoa for a cozy winter treat.
- They are also fantastic as a simple, elegant dessert after a holiday meal.
Storage Tips:
- Once completely cooled and double-dusted, store the cookies in an airtight container at room temperature. They will remain fresh and delicious for up to one week.
- For longer storage, these cookies freeze beautifully. Place them in a single layer in an airtight freezer-safe container, separating layers with parchment paper to prevent sticking. They can be frozen for up to 2-3 months. Thaw at room temperature before serving. If desired, you can re-dust them with powdered sugar after thawing for a fresh look.
With these tips, you can ensure your gluten-free snowball cookies are enjoyed at their peak freshness, whether you’re serving them immediately or savoring them over the holiday season.
More Gluten-Free Christmas Cookies For You To Try!
If you’ve enjoyed making these delightful snowball cookies, you’re in for a treat! The world of gluten-free holiday baking is vast and delicious. Expand your festive baking repertoire with these other fantastic gluten-free Christmas cookie recipes:
- Almond Spritz Cookies {Gluten-Free, Dairy-Free}: Delicate and buttery, perfect for pressing into festive shapes.
- Gluten-Free Kiss Cookies: Classic peanut butter cookies topped with a chocolate kiss – a nostalgic favorite!
- Gluten-Free Gingerbread Cookies: Perfectly spiced and wonderfully chewy, ideal for decorating.
- Gluten-Free Sugar Cookies: The quintessential holiday cookie, perfect for cutting out fun shapes and decorating.
Each of these recipes brings its own unique flavor and texture to your holiday table, ensuring that your gluten-free cookie collection is as diverse and exciting as any traditional assortment.
This recipe was lovingly adapted from the classic Russian Teacakes recipe found in Betty Crocker’s 40th Anniversary Cookbook, bringing a timeless favorite into the gluten-free era.
Gluten-Free Snowball Cookies {Dairy-Free Option}
Gluten-Free Snowball Cookies are a buttery shortbread cookie filled with nuts and rolled in powdered sugar. They are also known as Mexican Wedding Cookies and Russian Teacakes. They are an easy holiday dessert!
Yields: 36 cookies
Prep time: 10 mins
Cook time: 10-12 mins
Total time: Approximately 20-22 mins (plus cooling)
Ingredients
- 1 cup unsalted butter (for dairy-free, use Smart Balance butter or Earth Balance Vegan butter)
- 1/2 cup powdered sugar
- 1 teaspoon pure vanilla extract
- 2 1/4 cups all-purpose gluten-free flour blend (ensure it’s a cup-for-cup blend; I recommend Pillsbury gluten-free flour for consistent results. Note: Not all gluten-free flours are created equal, so baking results may vary.)
- 1/2 teaspoon xanthan gum (omit if your gluten-free flour blend already contains it)
- 3/4 cup finely chopped nuts (pecans are traditional, but almonds or walnuts also work well. I finely chop mine in a food processor.)
- 1/4 teaspoon salt
- Extra powdered sugar for rolling (about 1 cup)
Instructions
- Preheat your oven to 400°F (200°C). Prepare a large baking sheet by lining it with parchment paper.
- In a spacious mixing bowl, cream together the softened butter, 1/2 cup powdered sugar, and pure vanilla extract until the mixture is light, fluffy, and well combined.
- Gradually add the gluten-free flour blend, xanthan gum (if needed), salt, and the finely chopped nuts. Mix on low speed until the ingredients are fully incorporated and the dough begins to come together. The dough should be firm enough to handle.
- Using a 1-tablespoon cookie scoop or by hand, roll the dough into uniform 1-inch balls. It is crucial not to make the cookies too large, as this can affect baking consistency. Place the shaped dough balls about 1 inch apart on your prepared parchment-lined cookie sheet.
- For best results in maintaining shape, place the cookie sheet with the dough balls in the freezer for 5 minutes. This quick chill helps prevent the cookies from spreading too much during baking.
- Bake for 10-12 minutes, or until the cookies are set and firm but have not started to brown. They should remain light in color to retain their “snowball” appearance. Keep a close watch on them, as oven temperatures can vary.
- Remove the cookies from the oven and let them cool on the baking sheet for 3-5 minutes. While still warm, gently roll each cookie in a shallow bowl filled with powdered sugar until fully coated. The warmth helps the sugar adhere.
- Allow the cookies to cool completely at room temperature, about another 10-15 minutes. Once cooled, roll them a second time in powdered sugar. This double coating ensures a generous and lasting “snowy” finish. Enjoy your freshly baked gluten-free snowball cookies!
- Store any leftover cookies in an airtight container at room temperature for up to one week to maintain freshness.
Notes
- A 1-tablespoon cookie scoop is highly recommended for consistent cookie size and shape.
- For dairy-free cookies, use Smart Balance butter or a similar high-quality dairy-free butter alternative.
- For vegan cookies, ensure you use a vegan butter like Earth Balance Vegan Butter, as the recipe is naturally egg-free.
- Finely chopping the nuts (e.g., pecans, almonds, walnuts) in a food processor yields the best texture.
- Using pre-cut parchment paper sheets (like Reynolds Kitchens Cookie Baking Sheets) can simplify cleanup and help with uniform cookie placement.
- Always store cookies in an airtight container to keep them fresh.
Nutrition Information (Approximate per cookie)
(Based on 36 servings)
- Serving Size: 1 cookie
- Calories: 95 kcal
- Carbohydrates: 8g
- Protein: 1g
- Fat: 6g
- Saturated Fat: 3g
- Cholesterol: 13mg
- Sodium: 62mg
- Potassium: 12mg
- Fiber: 1g
- Sugar: 1g
- Vitamin A: 160 IU
- Calcium: 9mg
- Iron: 0.4mg
Nutrition information is automatically calculated and should only be used as an approximation. Actual values may vary based on ingredients and preparation methods.
Additional Info
- Course: Dessert
- Cuisine: American