
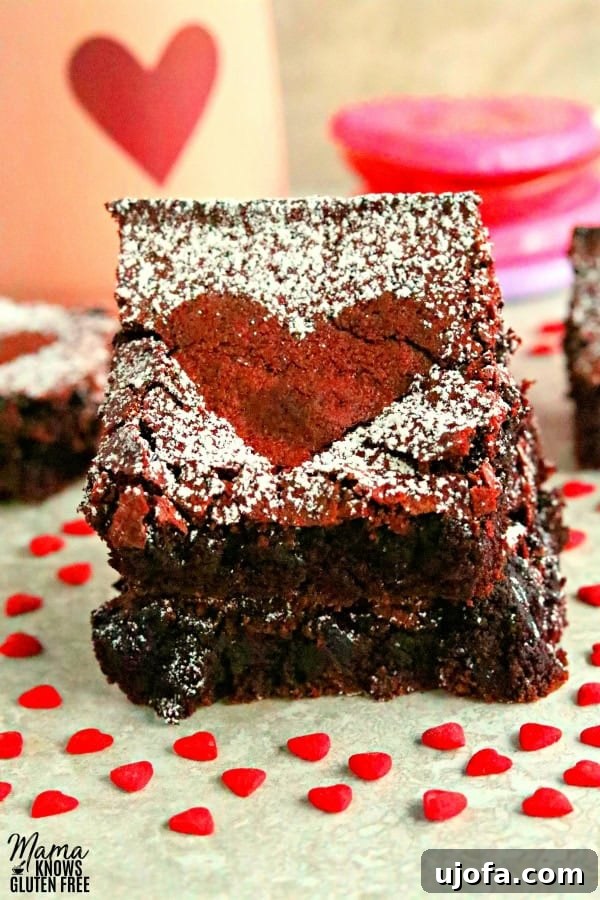
Indulge in Decadence: The Ultimate Gluten-Free Red Velvet Brownies (with Dairy-Free Option)
Prepare yourself for the best homemade Gluten-Free Red Velvet Brownies you’ll ever taste! These decadent treats are thick, intensely chocolatey, and delightfully chewy, delivering that signature red velvet tang in every bite. Whether you’re celebrating Valentine’s Day, a birthday, or simply craving a rich dessert, this recipe offers a foolproof way to create a memorable sweet experience. Plus, with a readily available dairy-free option, everyone can enjoy these irresistible brownies.
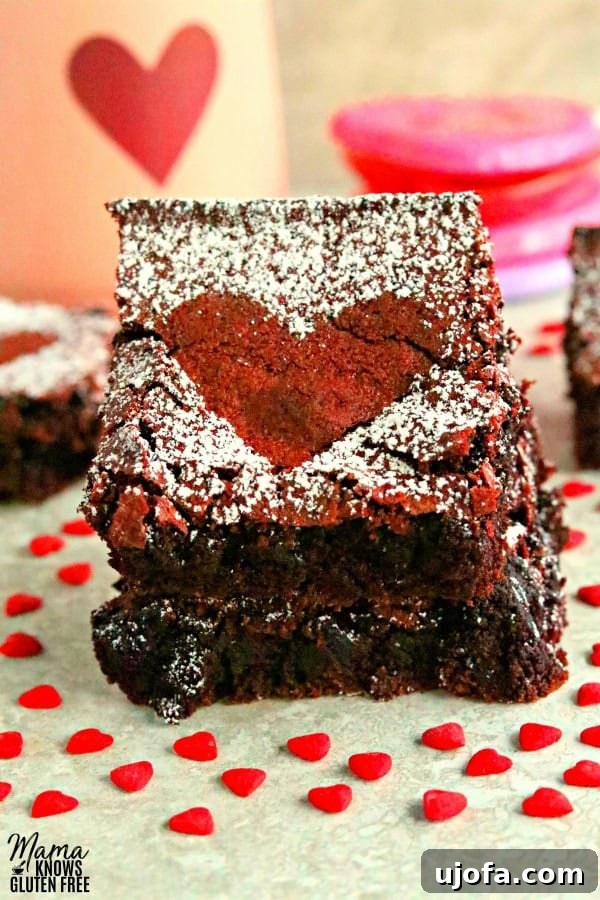
The Allure of Gluten-Free Red Velvet Brownies
There’s something undeniably magical about red velvet. It’s more than just a color; it’s a flavor profile that combines a subtle cocoa taste with a hint of tang, creating a unique and sophisticated sweetness. When transformed into brownies, this classic dessert becomes an even more irresistible treat. Imagine sinking your teeth into a rich, fudgy square that boasts a vibrant red hue, perfectly complemented by a delicate chocolate flavor. These gluten-free red velvet brownies capture all that charm, making them a showstopper for any occasion.
Beyond their stunning appearance and exquisite taste, these brownies offer the comfort of a homemade classic, tailored for those with gluten sensitivities. We’ve meticulously crafted this recipe to ensure that going gluten-free doesn’t mean sacrificing texture or flavor. In fact, these are so good, even those who don’t follow a gluten-free diet will be reaching for seconds. They’re a fancier, more festive twist on traditional brownies, elevating a simple dessert into something truly special.
Why This Recipe Stands Out
What makes these red velvet brownies truly exceptional? It starts with the perfect balance of ingredients that create a dense, fudgy interior and slightly crispy edges – the hallmark of a great brownie. The hint of cocoa powder gives it depth without overwhelming the distinct red velvet flavor. Moreover, the addition of a quality red food coloring ensures that vibrant, festive look that makes red velvet so iconic. We’ve also focused on simplicity, ensuring that even novice bakers can achieve spectacular results with minimal fuss.
Our commitment to inclusivity means this recipe isn’t just gluten-free; it also includes a straightforward dairy-free option. This thoughtful consideration ensures that more people can gather around the table and enjoy a delicious dessert without worry. By providing clear instructions for both versions, we empower you to bake confidently, knowing that your brownies will turn out perfectly, regardless of dietary preferences.
Essential Ingredients for Perfect Gluten-Free Red Velvet Brownies
Creating these delightful gluten-free red velvet brownies relies on a few key ingredients, each playing a crucial role in achieving the ideal taste and texture. Below is a detailed list of what you’ll need, along with important considerations for each:
- 1/2 cup melted butter (or dairy-free alternative): Butter provides richness and moisture. If making dairy-free, Smart Balance or Earth Balance butter alternatives work wonderfully.
- 3/4 cup granulated sugar: For sweetness and to contribute to that desirable chewy texture.
- 1/2 cup packed brown sugar: Adds moisture and a deeper, molasses-like flavor that complements the chocolate.
- 2 eggs, at room temperature: Eggs bind the ingredients, add structure, and contribute to the fudgy texture. Room temperature eggs emulsify better with other ingredients.
- 1 tablespoon pure vanilla extract: A must for enhancing all the flavors in the brownies, especially the cocoa.
- 3/4 cup all-purpose gluten-free flour: This is the foundation of our gluten-free recipe. As discussed below, the choice of flour blend matters significantly.
- 1/4 teaspoon xanthan gum (omit if your flour blend already contains it): Xanthan gum is vital for providing elasticity and structure in gluten-free baking, mimicking the role of gluten. Check your flour blend’s ingredients to avoid over-gummimg.
- 1/2 cup cocoa powder: Provides the chocolate flavor that underlies the red velvet profile. Use unsweetened cocoa powder for the best results.
- 1/2 teaspoon baking soda: A leavening agent that reacts with the acidic cocoa to give a slight lift, ensuring the brownies aren’t too dense.
- 1/2 teaspoon salt: Crucial for balancing sweetness and enhancing all other flavors. Don’t skip it!
- 1 tablespoon gluten-free red food coloring (such as Red Velvet Bakery Emulsion): This gives the brownies their iconic vibrant red hue. A high-quality gel or emulsion food coloring will provide the best color saturation without adding excess liquid.
Step-by-Step Guide: How to Bake These Irresistible Brownies
Baking these gluten-free red velvet brownies is surprisingly simple. Follow these steps for perfect results every time:
- Prepare Your Oven and Pan: Preheat your oven to 350º F (175º C). For an 8×8-inch square baking pan, either spray it thoroughly with gluten-free non-stick cooking spray or line it with parchment paper, allowing an overhang on two sides to create “handles.” If using parchment paper, spray the paper and the exposed sides of the pan with non-stick spray or grease with butter/dairy-free butter. This prevents sticking and makes lifting the cooled brownies out incredibly easy.
- Combine Wet Ingredients: In a large mixing bowl, combine the melted butter (or dairy-free butter alternative), pure vanilla extract, granulated sugar, and brown sugar. Whisk these ingredients together until they are fully combined and smooth. This step ensures an even distribution of sweetness and moisture throughout the batter.
- Incorporate Eggs: Add the eggs one at a time to the wet mixture, mixing well after each addition. Continue to mix until the eggs are fully incorporated and the mixture is smooth and slightly thickened. Using room temperature eggs helps them blend more seamlessly into the batter.
- Whisk Dry Ingredients: In a separate, medium-sized bowl, combine the gluten-free flour, xanthan gum (if not already in your flour blend), cocoa powder, baking soda, and salt. Whisk these dry ingredients together thoroughly. This step is crucial for distributing the leavening and flavor evenly, preventing pockets of unmixed ingredients.
- Combine Wet and Dry: Gradually add the whisked gluten-free flour mixture to the wet ingredients. Mix slowly until just combined and smooth. Be careful not to overmix, as this can lead to tougher brownies. A few lumps are acceptable; overmixing develops the starches too much.
- Add Red Food Coloring: Stir in the tablespoon of gluten-free red food coloring. Continue mixing until the vibrant red color is evenly distributed throughout the brownie batter. For a deeper color, you may add a tiny bit more, but a tablespoon is usually sufficient for a striking red.
- Pour and Bake: Pour the finished brownie batter into your prepared 8×8-inch baking pan, spreading it evenly with a spatula. Bake for 30-35 minutes. To check for doneness, insert a toothpick into the center of the brownies. It should come out with moist crumbs, not wet batter. If it comes out completely clean, the brownies might be overbaked. The edges will also start to pull away from the sides of the pan when they are ready. Remember that oven temperatures can vary, so keep a close eye on your brownies, especially during the last few minutes.
- Cool Completely: This is a critical step for perfect brownies! Allow the brownies to cool completely in the pan on a wire rack before attempting to cut them. Cutting them while warm can result in crumbling and a less fudgy texture. Patience here will be rewarded with neat, chewy squares.
- Enjoy and Store: Once cooled and cut, savor your delicious gluten-free red velvet brownies! Store any leftovers in an airtight container at room temperature for up to 3-4 days, or in the refrigerator for up to a week.
Mastering Gluten-Free Flour: Tips for Success
The world of gluten-free baking has expanded significantly, offering fantastic flour blends that make delicious results more accessible than ever. However, it’s important to understand that not all gluten-free flours are created equal. The composition of gluten-free flour blends can vary widely, with some containing a mix of rice flour, potato starch, tapioca flour, and often xanthan gum, while others might be single-grain flours. For this particular brownie recipe, an all-purpose gluten-free flour blend is recommended. Many bakers find success with brands like Pillsbury gluten-free flour, which provides a reliable base for baked goods.
Why do these blends differ so much? Gluten-free baking requires a delicate balance to mimic the elasticity and structure that gluten provides in traditional flour. Different starches and flours contribute various properties – some for tenderness, some for structure, some for moisture absorption. Therefore, if your preferred blend already contains xanthan gum, remember to omit the extra 1/4 teaspoon specified in the recipe. Adding too much xanthan gum can lead to a gummy or unpleasant texture. Always read your flour blend’s ingredient list carefully!
Pro Tip For Measuring Gluten-Free Flour
One of the most common pitfalls in baking, especially with gluten-free flours, is incorrect measurement. Flour can easily become compacted in its bag or container, leading you to inadvertently use more than the recipe calls for if you simply scoop it directly with your measuring cup. This excess flour can result in dry, dense, or crumbly brownies.
The absolute best way to measure gluten-free flour is the “spoon & level” method:
- Using a spoon, gently scoop the flour from its bag or container into your measuring cup. Don’t pack it down.
- Once the measuring cup is overflowing, use the back of a straight edge, like a knife or a bench scraper, to level off the top. This removes any excess flour and ensures an accurate measurement.
Friends, please do not scoop the flour directly out of the bag with your measuring cup! This seemingly small detail makes a huge difference in the outcome of your baked goods, ensuring your gluten-free red velvet brownies are perfectly moist and tender every time.
Catering to Dietary Needs: Dairy-Free Options
In today’s diverse culinary landscape, accommodating various dietary needs is more important than ever. Whether due to allergies, sensitivities, or personal dietary choices, many individuals choose to avoid dairy. This recipe for gluten-free red velvet brownies is designed with this in mind, offering a seamless dairy-free option so that everyone can enjoy these delectable treats. My family, including my husband and youngest son, often opts for dairy-free alternatives, and this recipe has been thoroughly tested to ensure it meets those needs without compromising on flavor or texture.
For the dairy-free version of this recipe, the primary substitution is butter. I highly recommend using a high-quality dairy-free butter alternative. Brands like Smart Balance or Earth Balance are excellent choices, as they mimic the consistency and baking properties of regular butter very well. They melt similarly and contribute to the rich, moist texture characteristic of classic brownies.
Beyond butter, the beauty of modern dairy-free alternatives extends to various other ingredients often found in baking. While this particular recipe doesn’t call for milk, for other dessert creations, you might consider alternatives like almond milk, cashew milk, or coconut milk. Coconut oil is another fantastic dairy-free fat that can often be used in baking, adding a subtle flavor of its own. By choosing suitable substitutes, you can adapt a wide range of recipes to be dairy-free, ensuring that dietary restrictions never stand in the way of enjoying delicious homemade desserts.
More Gluten-Free Dessert Inspiration for Special Occasions
If you’re looking to expand your repertoire of delicious gluten-free treats, especially for holidays like Valentine’s Day or any festive gathering, we have plenty of other recipes that are sure to delight. From rich chocolate layers to light and airy cookies, there’s something for every sweet craving:
- Chocolate Lasagna {Gluten-Free}
- Almond Flour Brownies
- Gluten-Free Red Velvet Chocolate Chip Cookies
- Easy Gluten-Free Chocolate Cake
- Gluten-Free Chocolate Kiss Cookies
- See all my Gluten-Free Valentine’s Day Desserts
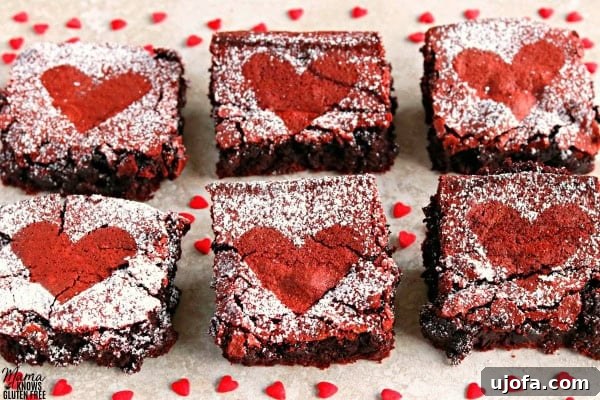
Connect with Us
We love to see your baking creations! Don’t forget to share your photos and experiences with these amazing gluten-free red velvet brownies. Join our community and let’s connect!
Let’s Connect! You can FOLLOW ME on Facebook, Instagram, or Pinterest!
★Did you make this recipe? Please give it a star rating below in the comments!★
Gluten-Free Red Velvet Brownies Recipe
These thick, chocolatey, and chewy gluten-free red velvet brownies are a delightful treat for any occasion, with an easy dairy-free option.
By: Audrey from Mama Knows Gluten Free
Servings: 9 brownies
Prep Time: 10 mins
Total Time: 40 mins
Ingredients
- 1/2 cup butter, melted (for dairy-free, use Smart Balance Butter)
- 3/4 cup granulated sugar
- 1/2 cup brown sugar, packed
- 2 eggs, room temperature
- 1 tablespoon pure vanilla extract
- 3/4 cup all-purpose gluten-free flour (Pillsbury gluten-free is recommended. Note that baking results may vary with different flour blends.)
- 1/4 teaspoon xanthan gum (omit if your flour blend already contains it)
- 1/2 cup cocoa powder
- 1/2 teaspoon baking soda
- 1/2 teaspoon salt
- 1 tablespoon gluten-free red food coloring (Red Velvet Bakery Emulsion works great)
Instructions
- Preheat oven to 350º F.
- Prepare an 8×8-inch square baking pan by spraying it with gluten-free non-stick cooking spray, or lining it with parchment paper and then coating the paper and exposed sides with spray or butter.
- In a large bowl, combine melted butter, pure vanilla extract, granulated sugar, and brown sugar. Mix until fully combined.
- Add eggs one at a time, mixing thoroughly after each addition until fully combined.
- In a medium-sized bowl, whisk together gluten-free flour, xanthan gum (if using), cocoa powder, baking soda, and salt.
- Slowly add the dry gluten-free flour mixture to the wet ingredients and mix until fully combined and smooth. Avoid overmixing.
- Add the tablespoon of red food coloring and mix until the color is evenly distributed throughout the batter.
- Pour the brownie batter into the prepared 8×8-inch baking pan and spread evenly.
- Bake for 30-35 minutes, or until a toothpick inserted into the center comes out with moist crumbs. The edges of the brownies will begin to pull away from the pan. Baking times may vary by oven.
- Allow the brownies to cool completely in the pan before cutting and serving.
- Store any leftover brownies in an airtight container to maintain freshness.
Notes
- For best results, use a reliable all-purpose gluten-free flour blend. Pillsbury gluten-free flour is a good choice. Always remember that gluten-free flour blends are not interchangeable, and results may vary.
- Measure gluten-free flour using the “spoon & level” method: spoon flour into the measuring cup, then level off the top with the back of a knife. Do not scoop directly from the bag.
- For the dairy-free version, use a dairy-free butter alternative like Smart Balance butter.
- Store leftover brownies in an airtight container to keep them fresh and moist.
- Mama says, “Always check all your labels for gluten-free certification and allergen information!”
Nutrition
Serving: 1 brownie
Calories: 264 kcal
Carbohydrates: 38g
Protein: 3g
Fat: 12g
Saturated Fat: 7g
Cholesterol: 63mg
Sodium: 301mg
Potassium: 102mg
Fiber: 2g
Sugar: 29g
Vitamin A: 370IU
Calcium: 31mg
Iron: 1.3mg
Nutrition information is automatically calculated and should be used as an approximation only.
Additional Info
Course: Dessert
Cuisine: American